
In previous article Build a Google BigQuery Resource, we saw how to build a BigQuery resource, and then build a Google OAuth refresh token. In Part Two here, we’ll build an Azure SQL data resource, and then build, configure, and test the Azure Data Factory that will link the cloud resources we built.
Set up an Azure SQL resource
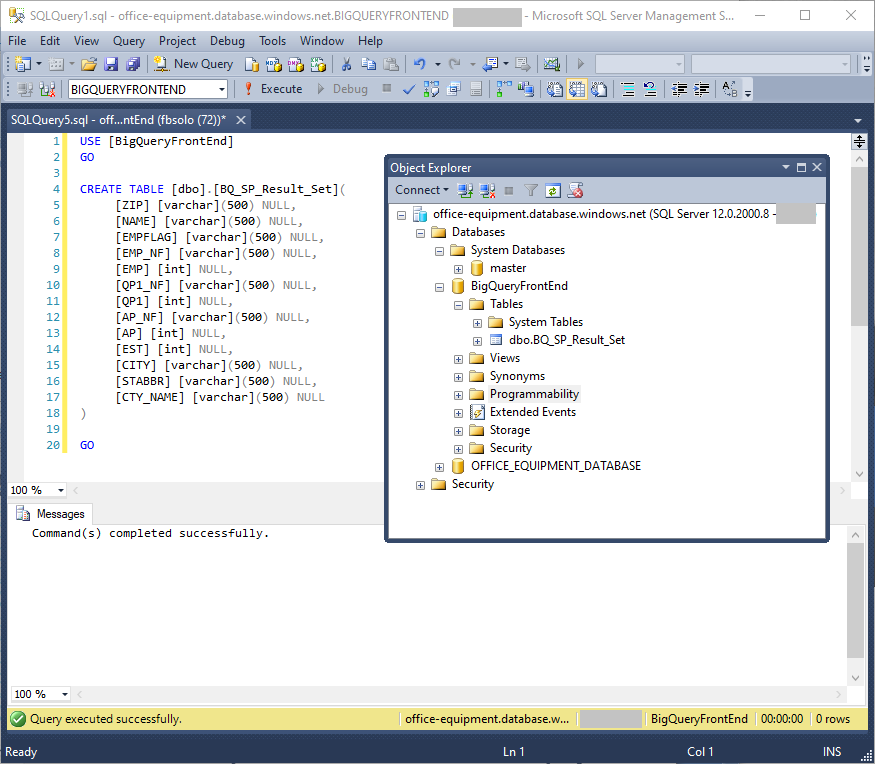
In the SQL Shack article, Create an Azure SQL Database with built-in sample data, one of my fellow authors, showed how to set up an Azure SQL database. Build a new Azure SQL database named BigQueryFrontEnd, and in that database, build a table called BQ_SP_Result_Set with this script:
|
1 2 3 4 5 6 7 8 9 10 11 12 13 14 15 16 17 18 19 20 |
USE [BigQueryFrontEnd] GO CREATE TABLE [dbo].[BQ_SP_Result_Set]( [ZIP] [varchar](500) NULL, [NAME] [varchar](500) NULL, [EMPFLAG] [varchar](500) NULL, [EMP_NF] [varchar](500) NULL, [EMP] [int] NULL, [QP1_NF] [varchar](500) NULL, [QP1] [int] NULL, [AP_NF] [varchar](500) NULL, [AP] [int] NULL, [EST] [int] NULL, [CITY] [varchar](500) NULL, [STABBR] [varchar](500) NULL, [CTY_NAME] [varchar](500) NULL ) GO |
The screenshot shows the script in SQL Server Management Studio:
Build an Azure Data Factory
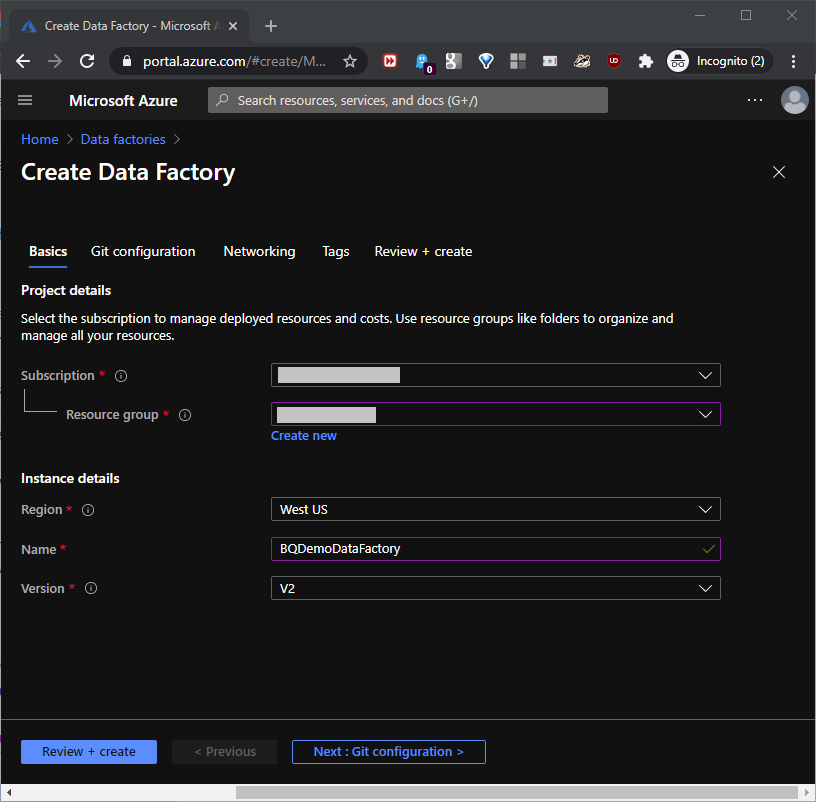
First, we’ll set up an Azure account. Then, we’ll create an Azure Data Factory named BQDemoDataFactory as shown in this section. This Data Factory will connect the Azure SQL and BigQuery resources. To do this, at portal.azure.com/#home, click Data factories to open the Data factories blade. At the Basics tab, we’ll pick the subscription and resource group values, and set the Instance details, as shown in this screenshot:
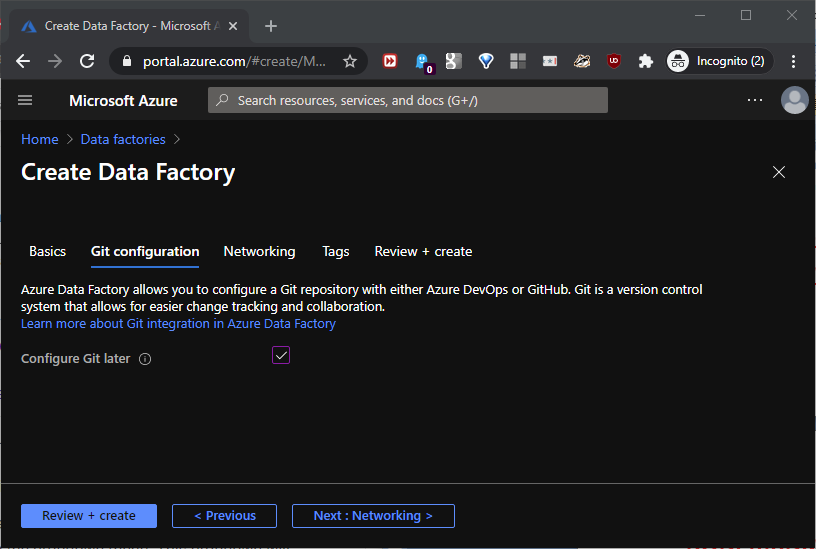
Configure Git later, as shown in this screenshot:
Disable Managed Virtual Network, and click the Public endpoint Connectivity method as shown in this screenshot:
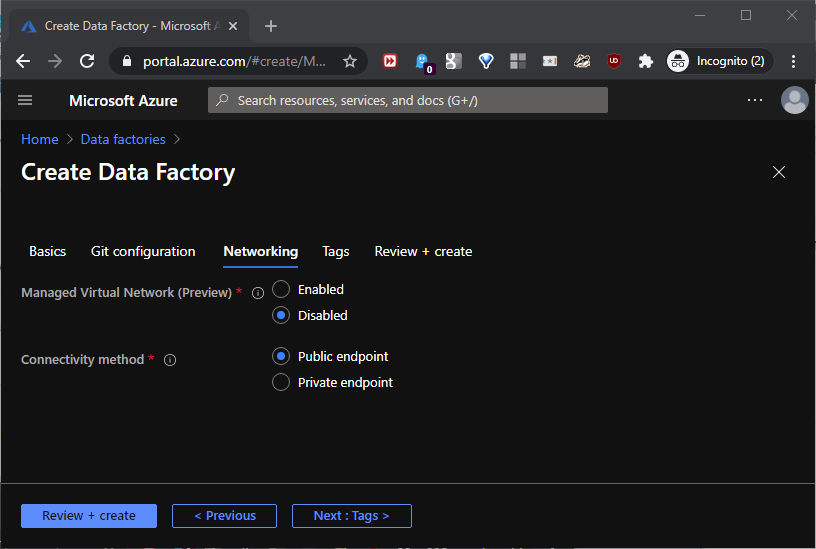
This pick at the Networking tab might need a SQL Server configuration that we’ll see later. Also, a private endpoint for a production data factory could offer “better” security, but for this demo, “public” is probably easier. Click through the Tags tab, as shown in this screenshot:
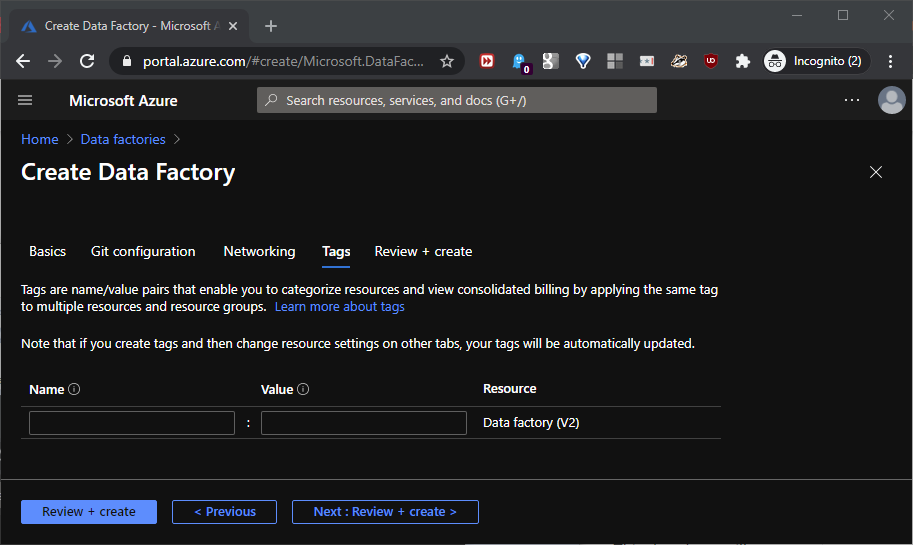
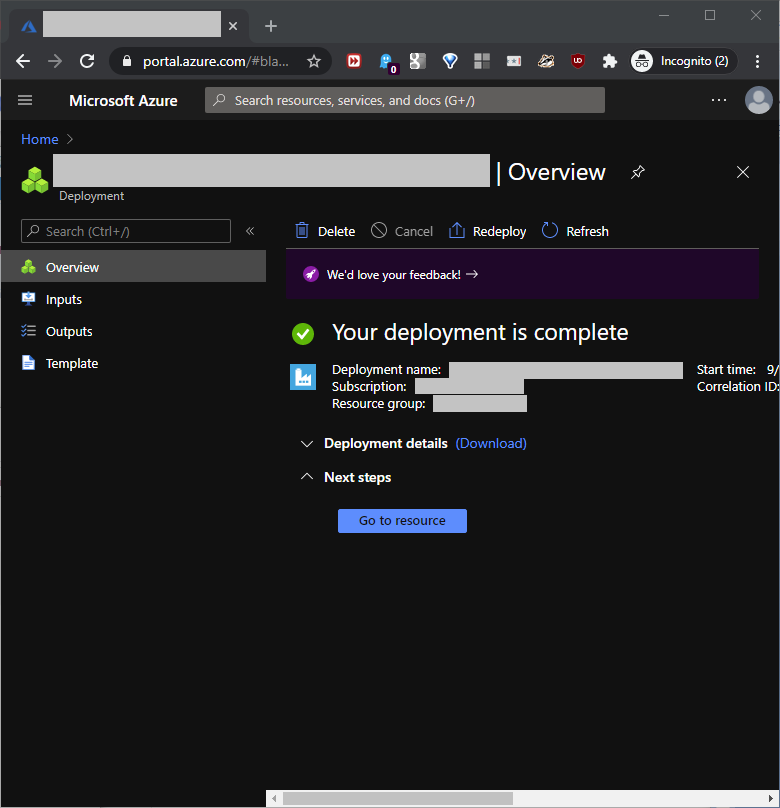
Click “Create” at the last tab, as shown in this screenshot:

This screen shows that the data factory completed successfully:
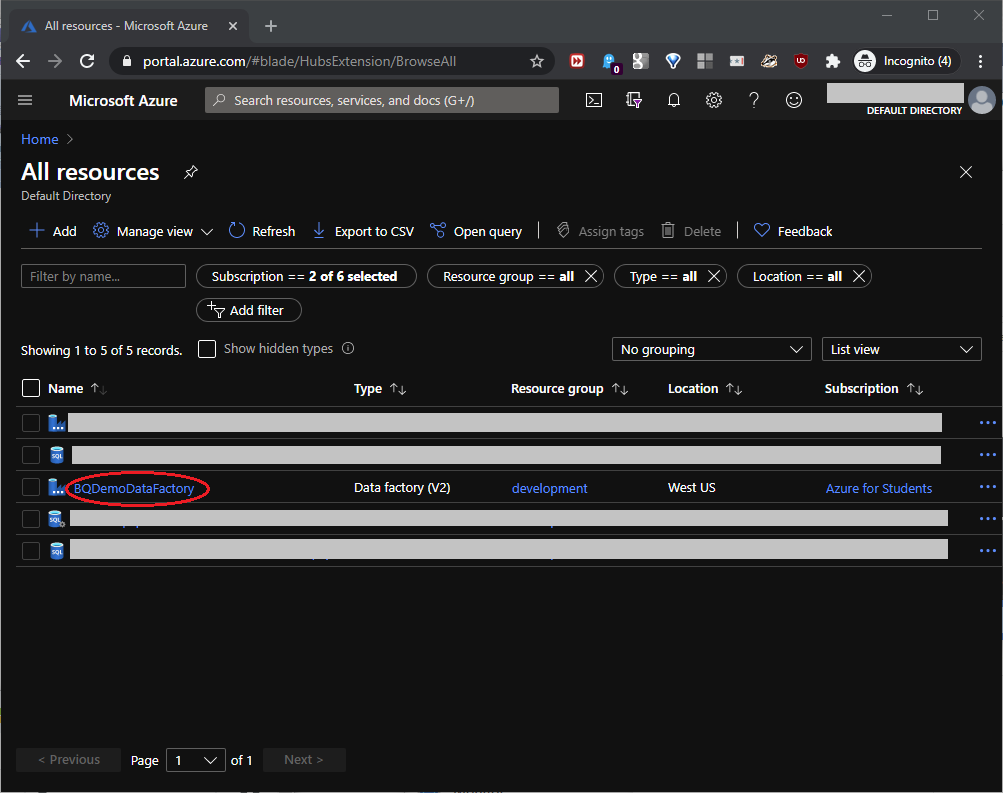
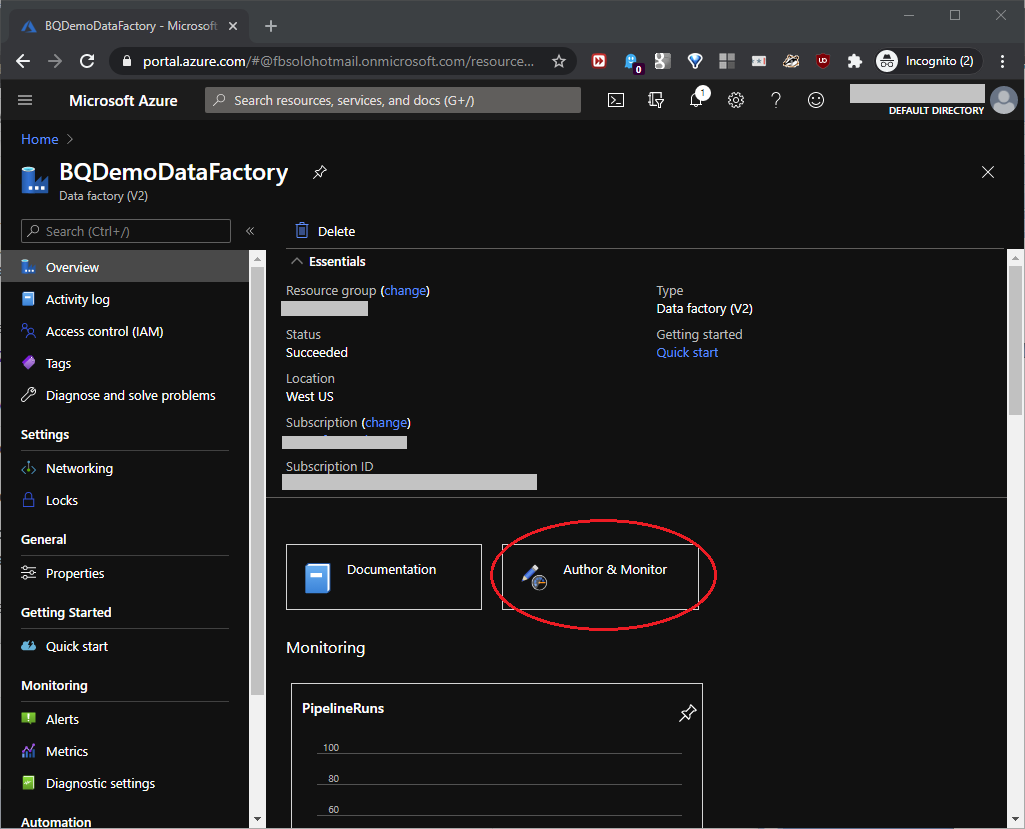
At All Resources, click BQDemoDataFactory as shown in this screenshot:
Configure the Azure Data Factory
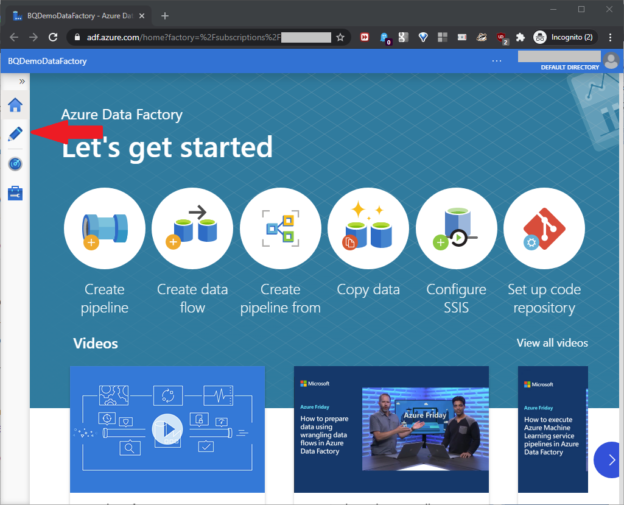
Now, click “Author & Monitor” as shown in this screenshot:
On the next screen, click the pencil icon as shown in this screenshot:

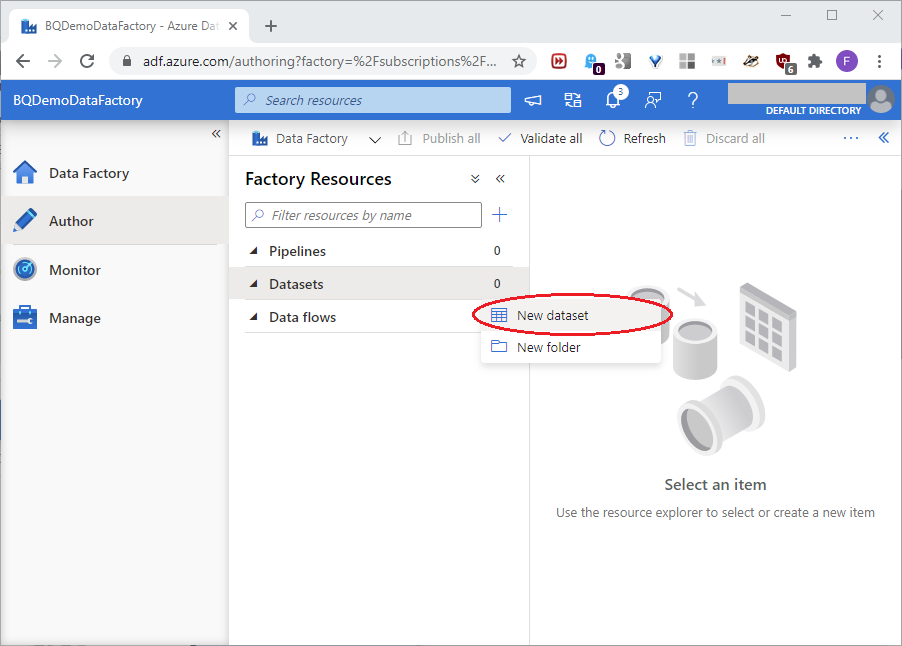
The Data Factory definition page will open. As a basic definition, we can say that an Azure data factory connects two or more resources that must somehow exchange and/or manipulate data between them. Here, we want to connect the BigQuery and Azure SQL resources we built, so we’ll use an Azure data factory. Microsoft defines a dataset as “a named view of data that simply points or references the data you want to use in your activities as inputs and outputs.” Since a data factory has dataset components, we’ll first build one dataset for the BigQuery resource, and one for the Azure SQL resource. Drill down to New dataset, as shown in this screenshot:
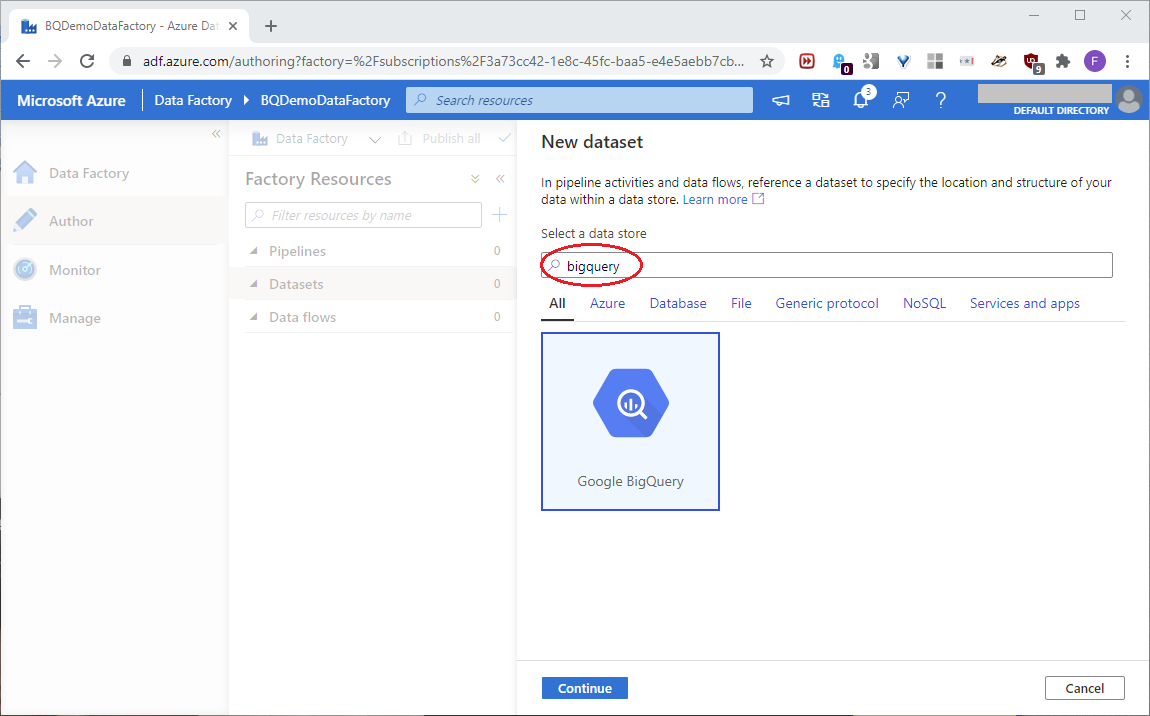
On the next page, search for and click bigquery and click Continue, as shown in this screenshot:
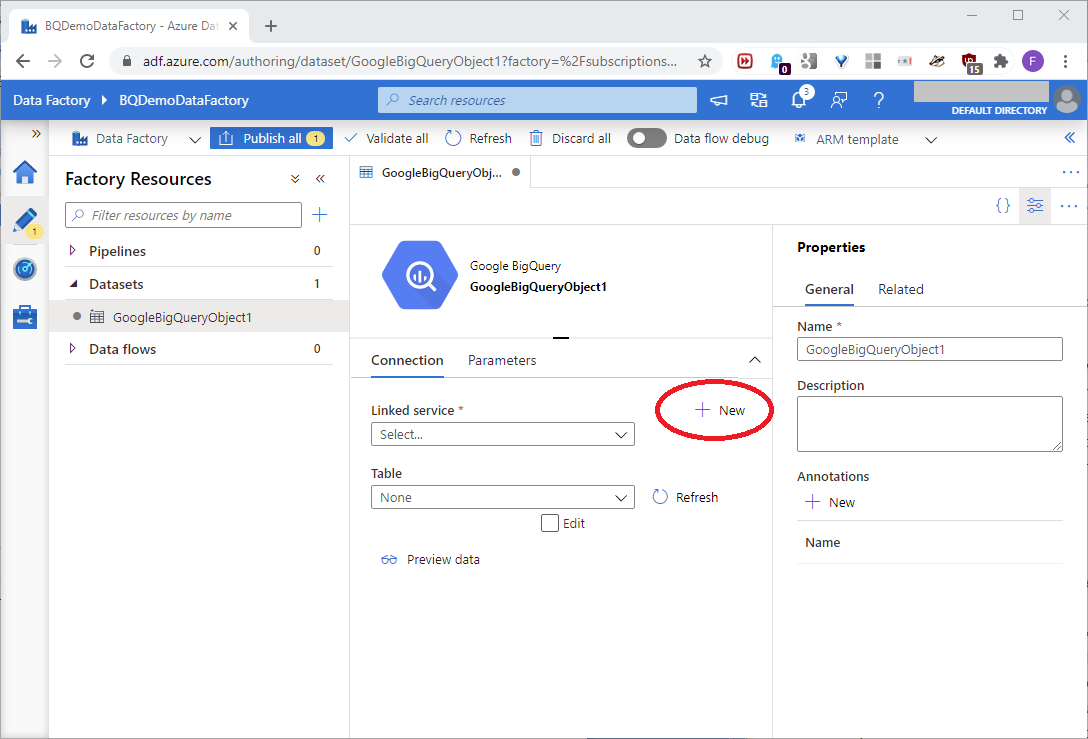
We’ll first build a linked service for the dataset. A linked service works like a classic connection string. It tells the dataset how to connect to a specific data resource. On the next page, click New, as shown in this screenshot:
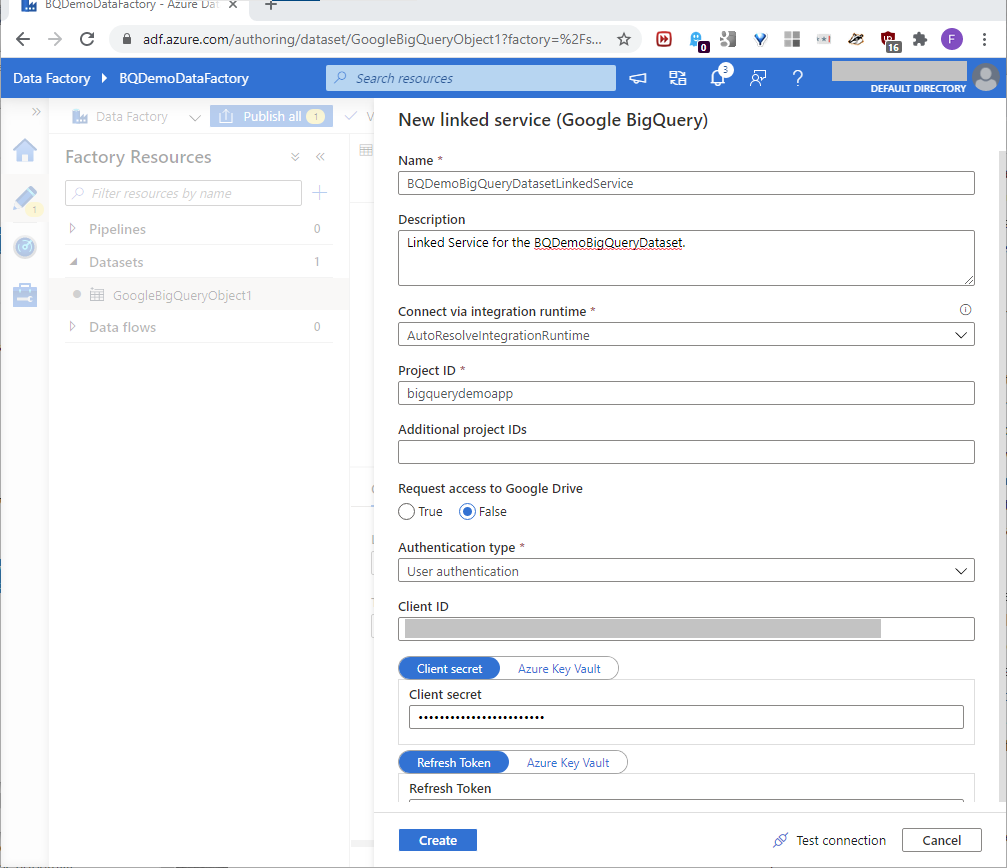
The New linked service page will open. On this page, use the Project name value defined in the earlier Set Up A BigQuery Resource section of Part One for the Project ID value. Then, use the below values defined in the earlier Build a Google OAuth Refresh Token section of Part One for the similarly-named values. These values will build the linked service, as shown in this screenshot:
- Client ID
- Client Secret
- Refresh Token
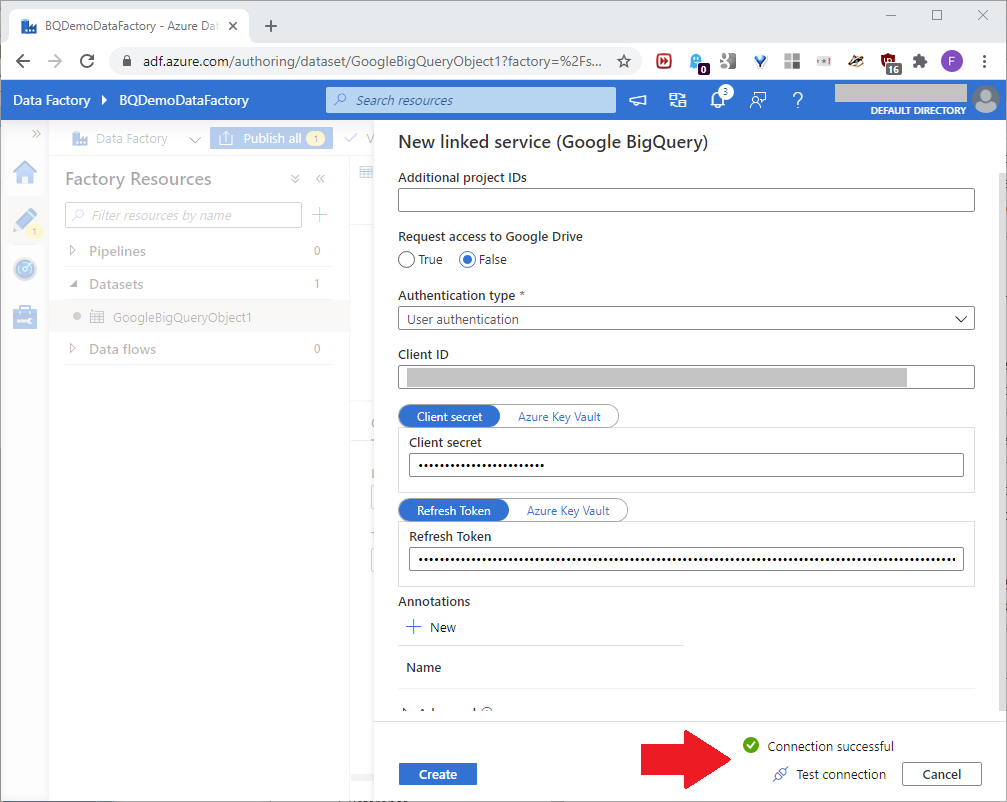
Scrolling down, and in the lowest text box, add the Refresh Token value created in Part One. Click Test connection. If the test returned Connection successful, click Create, as shown in this screenshot:
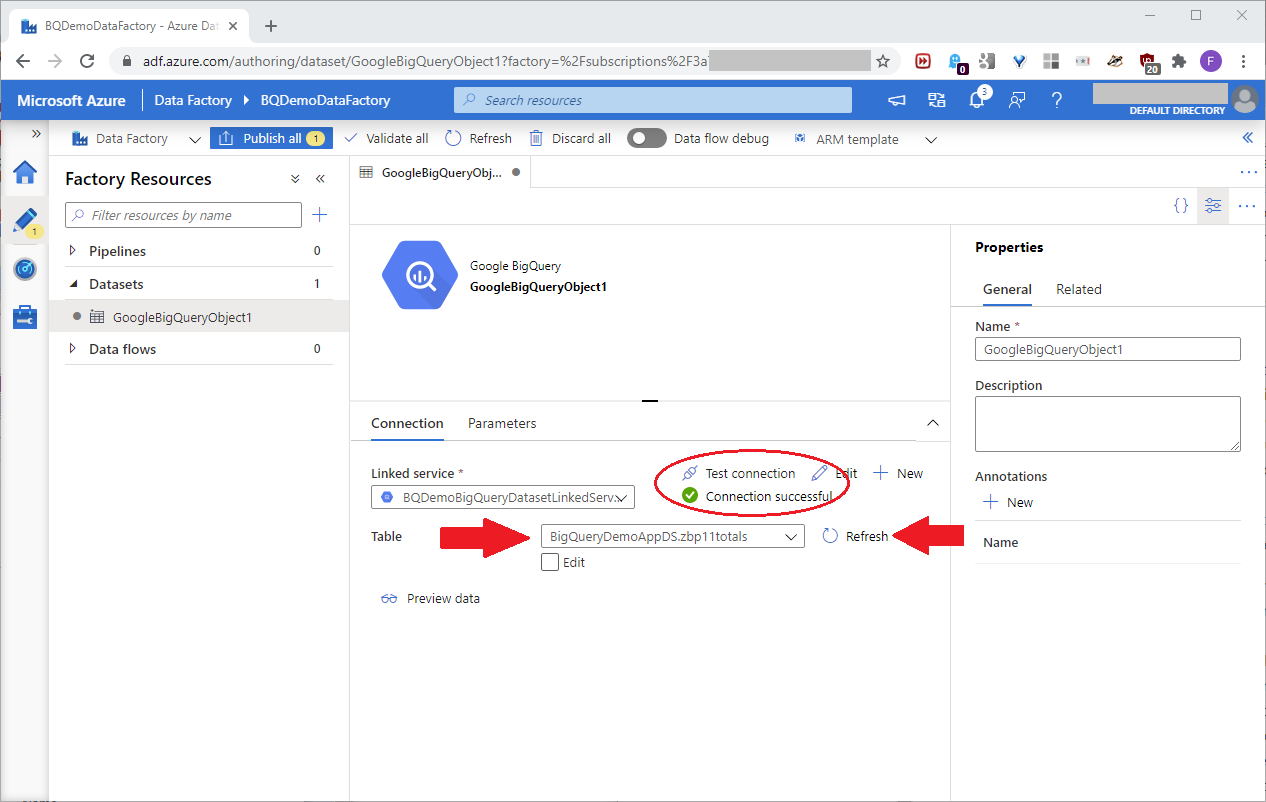
Back at the dataset page, test the connection, refresh the table dropdown, and pick the BigQueryDemoAppDS.zbp11totals table, as shown in this screenshot:
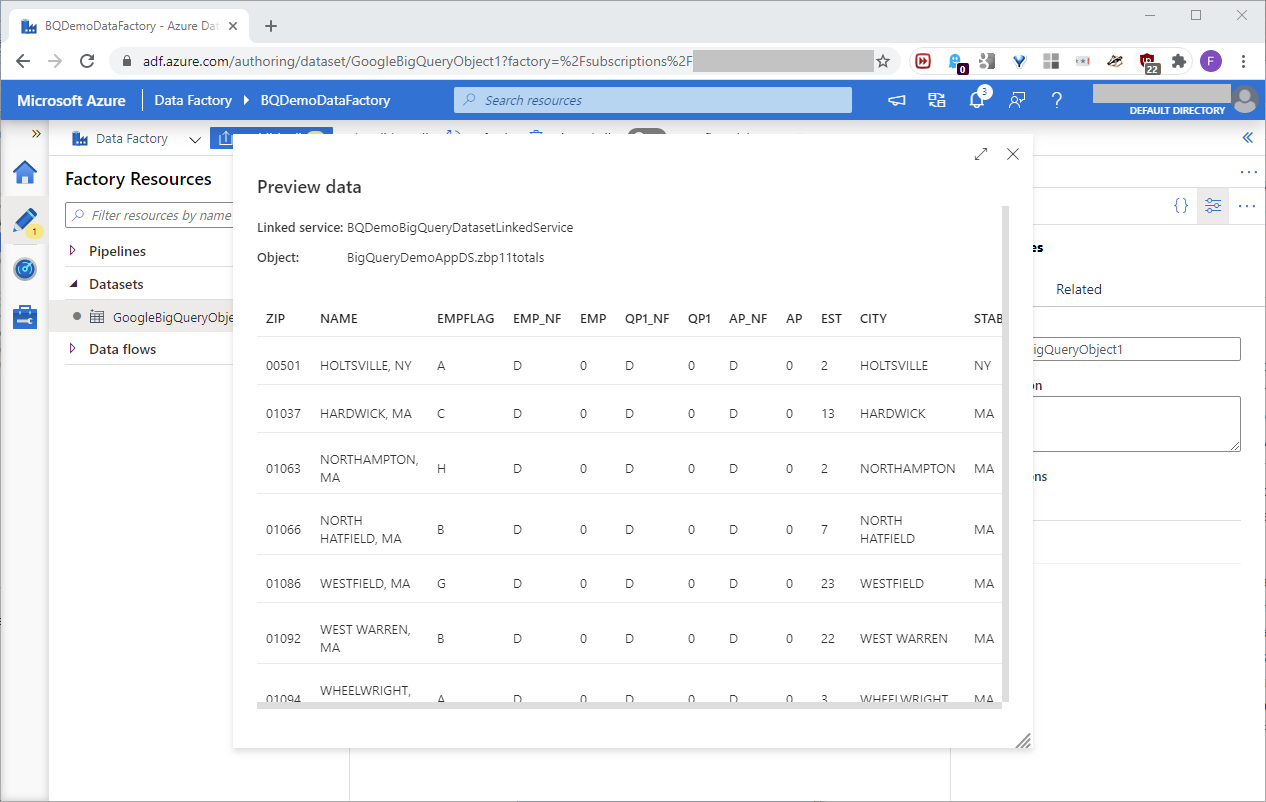
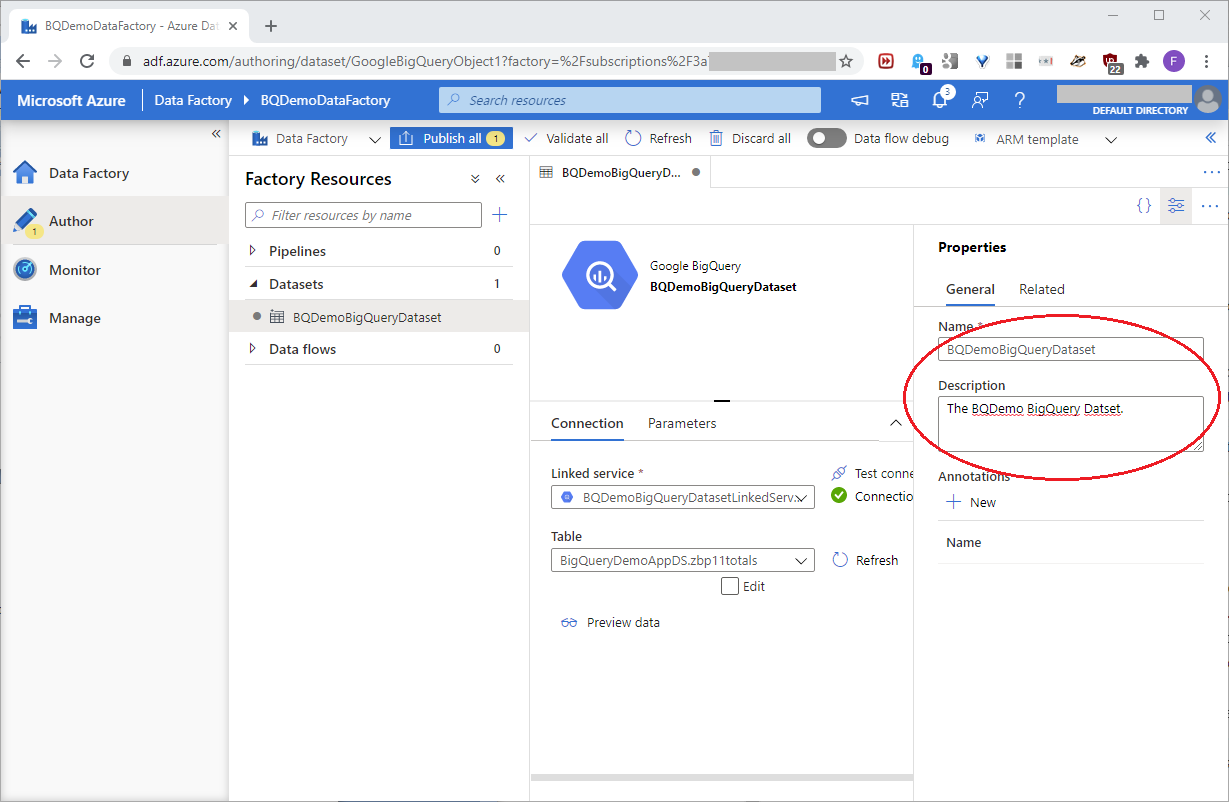
Click Preview data to see a sample of the BigQuery resource data, as seen in this screenshot:
In the Properties pane, name the dataset BQDemoBigQueryDataset, and add a description as shown in this screenshot:
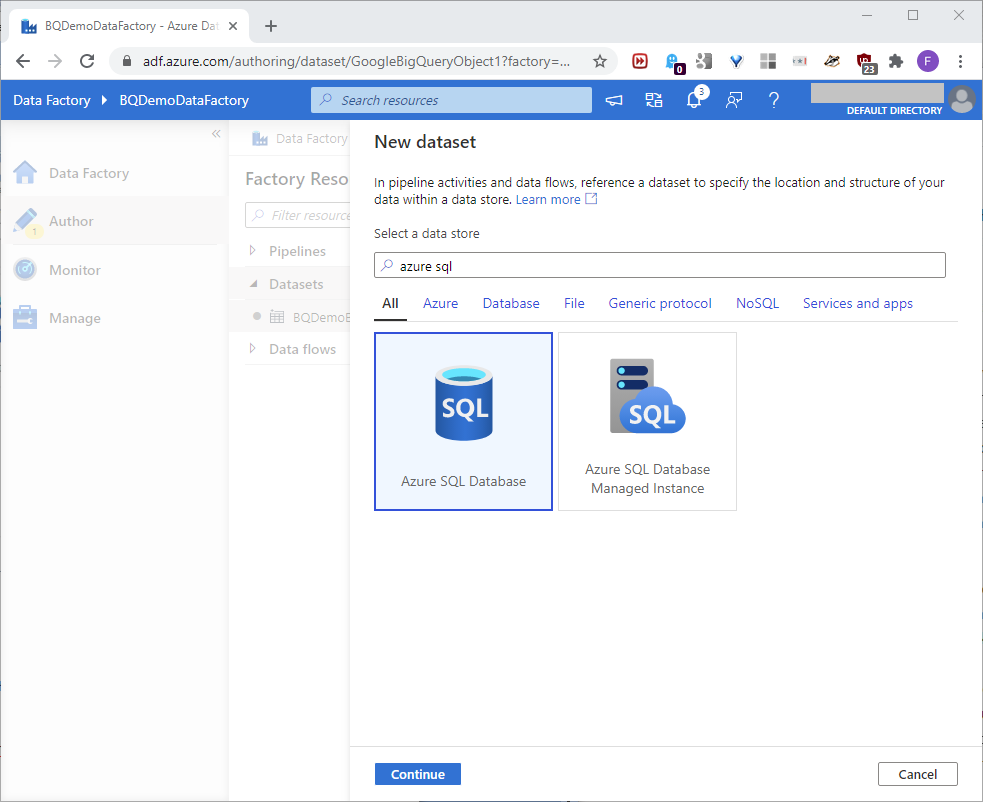
We also need a dataset for the target Azure SQL resource. Build a new Azure SQL dataset, as shown in this screenshot:
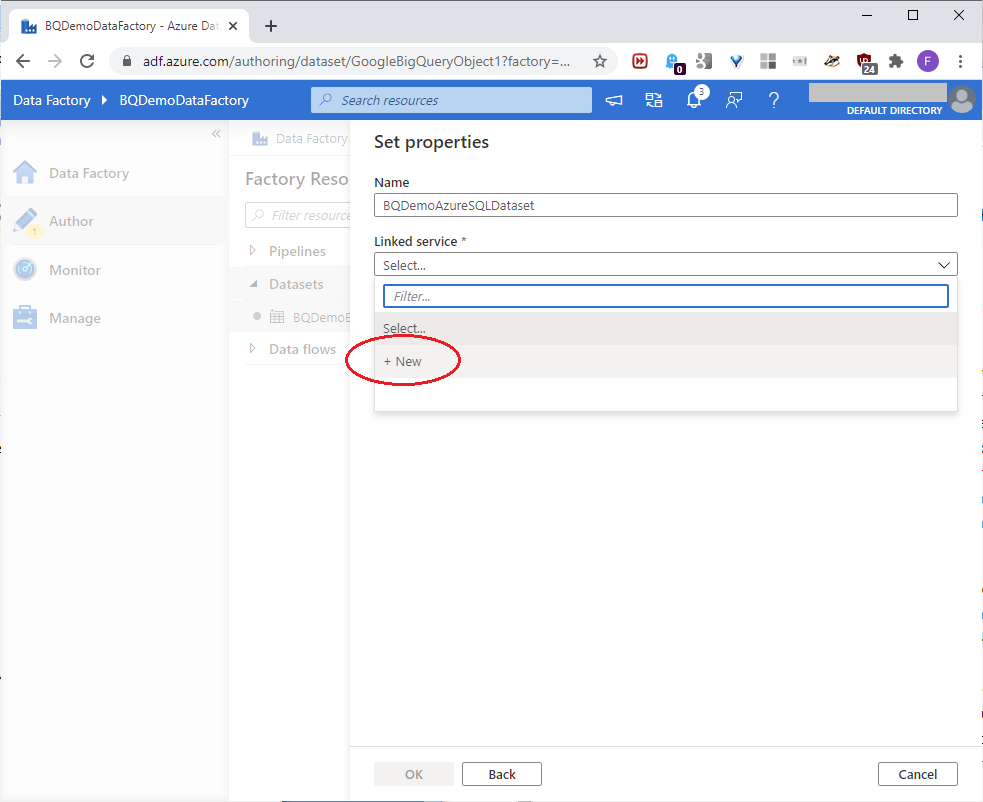
On the next page, name the dataset BQDemoAzureSQLDataset, and click New to start building its linked service, as shown in this screenshot:
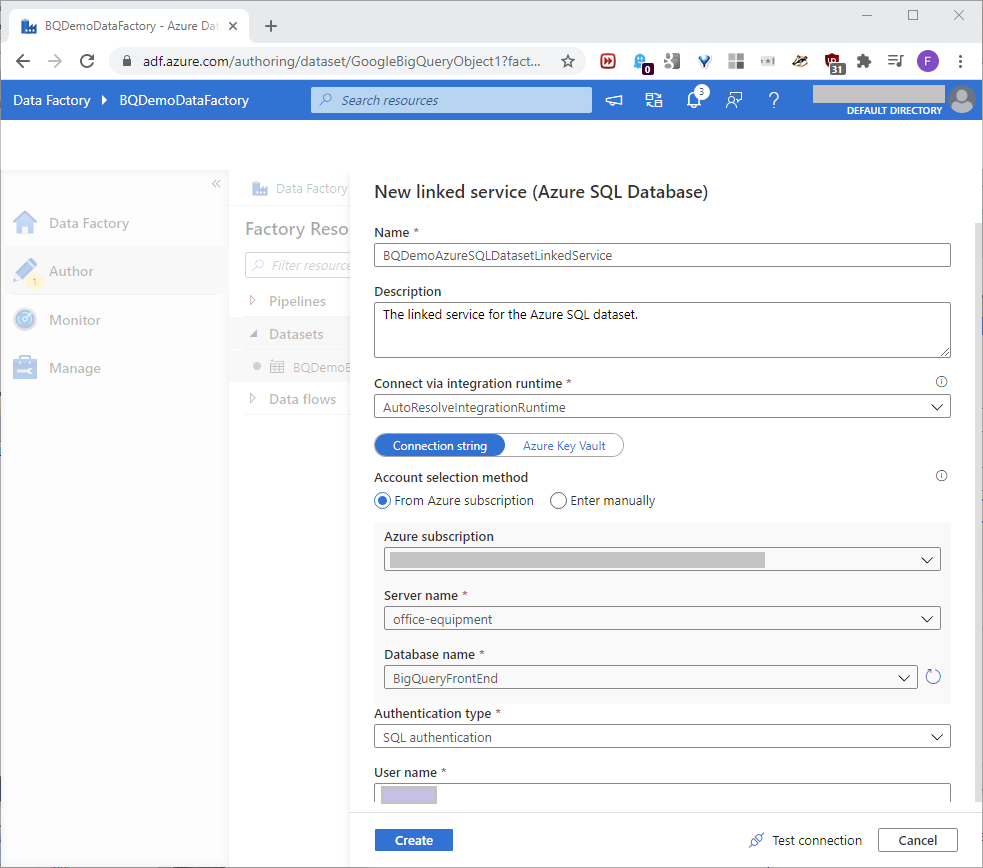
The New linked service page will open. Using the Azure subscription value defined in the earlier Build An Azure Data Factory section of this article, and the below values defined in the earlier Set-Up An Azure SQL Resource section of this article, build the linked service with the values shown in this screenshot:
- Server name
- Database name
- User name
Scroll down, and add the Azure SQL Server password. Test the connection, and if it worked, click Create as seen in this screenshot:

Back at Set properties for the linked service, pick the dbo.BQ_SP_Result_Set table, and click OK, as shown in this screenshot:
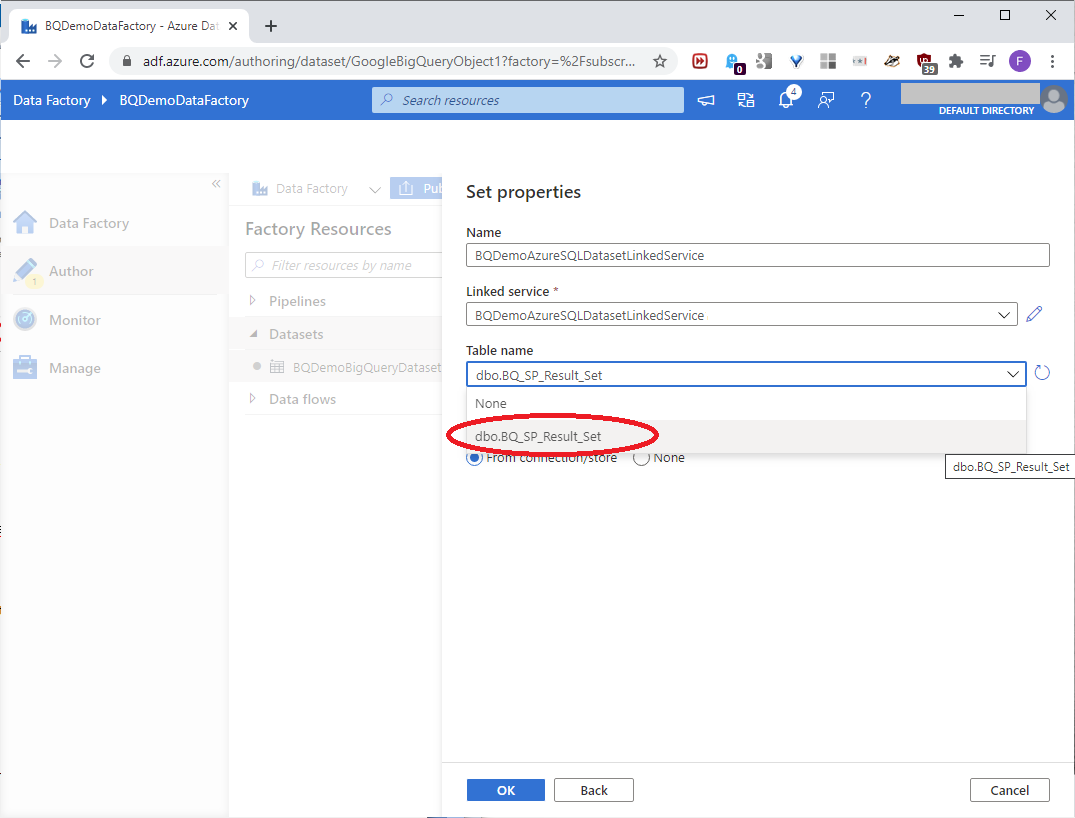
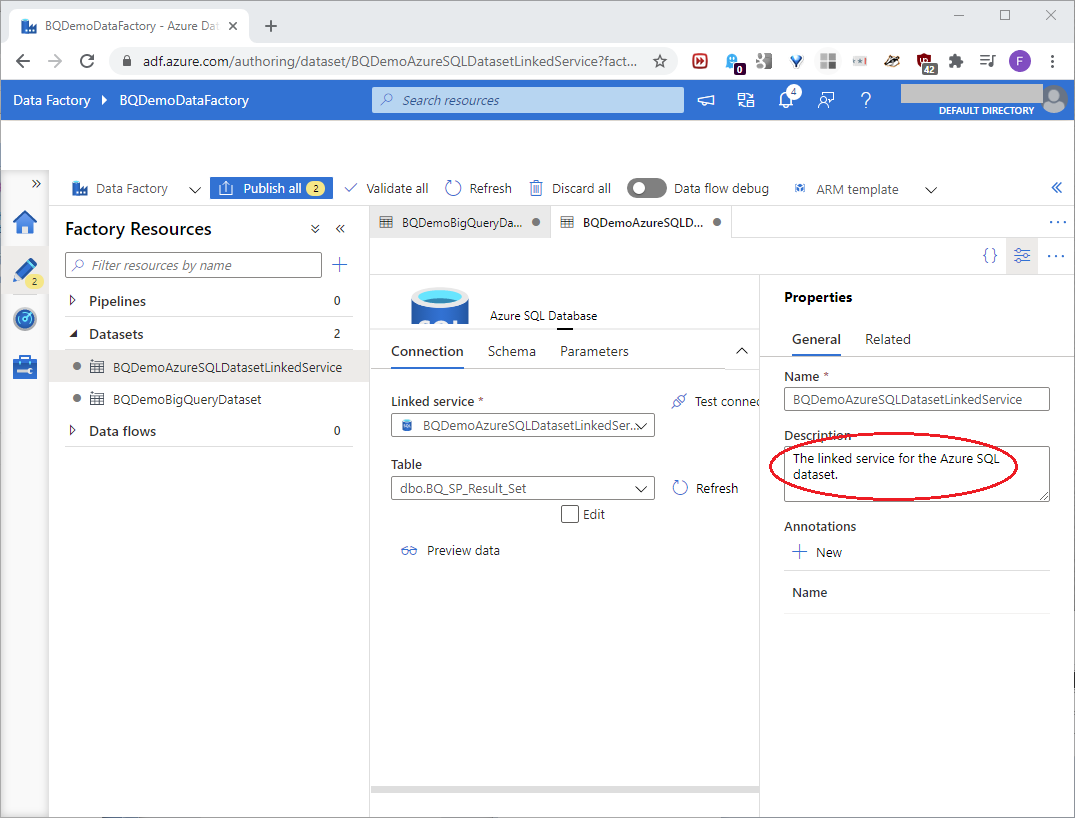
These settings will point the dataset to the dbo.BQ_SP_Result_Set table in the Azure SQL resource. In the Properties pane, set the Description as shown in this screenshot:
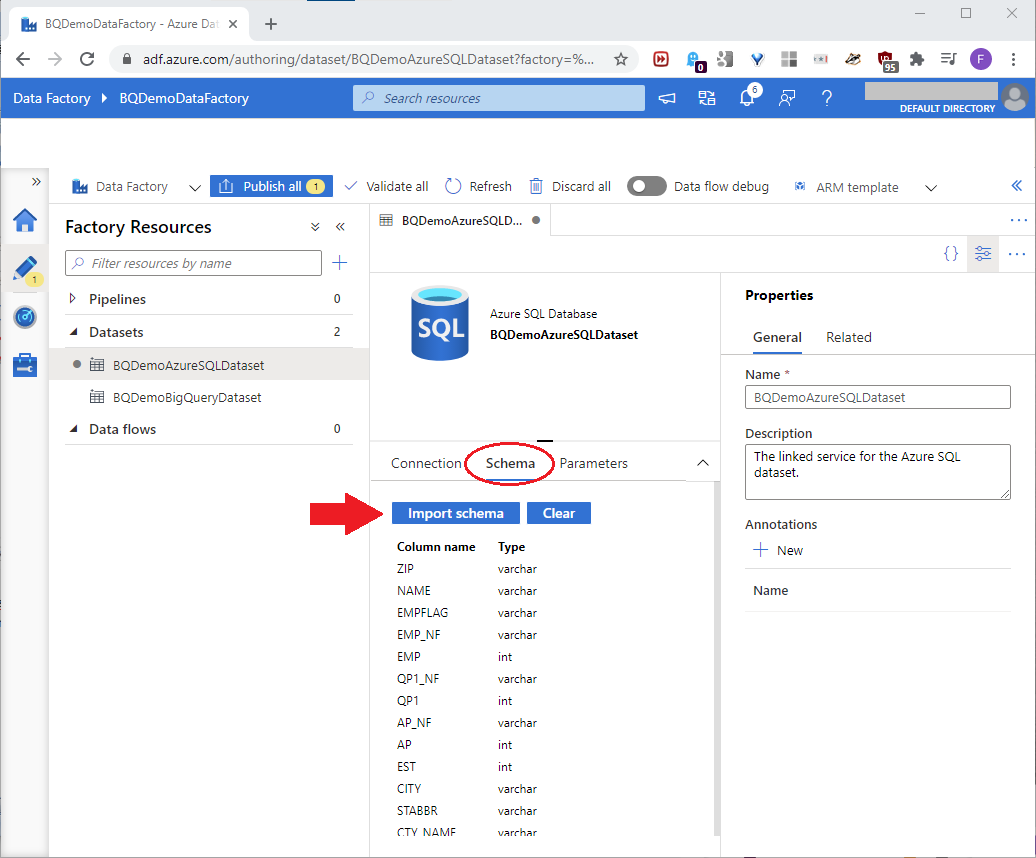
On the Schema tab, click Import schema as shown in this screenshot:
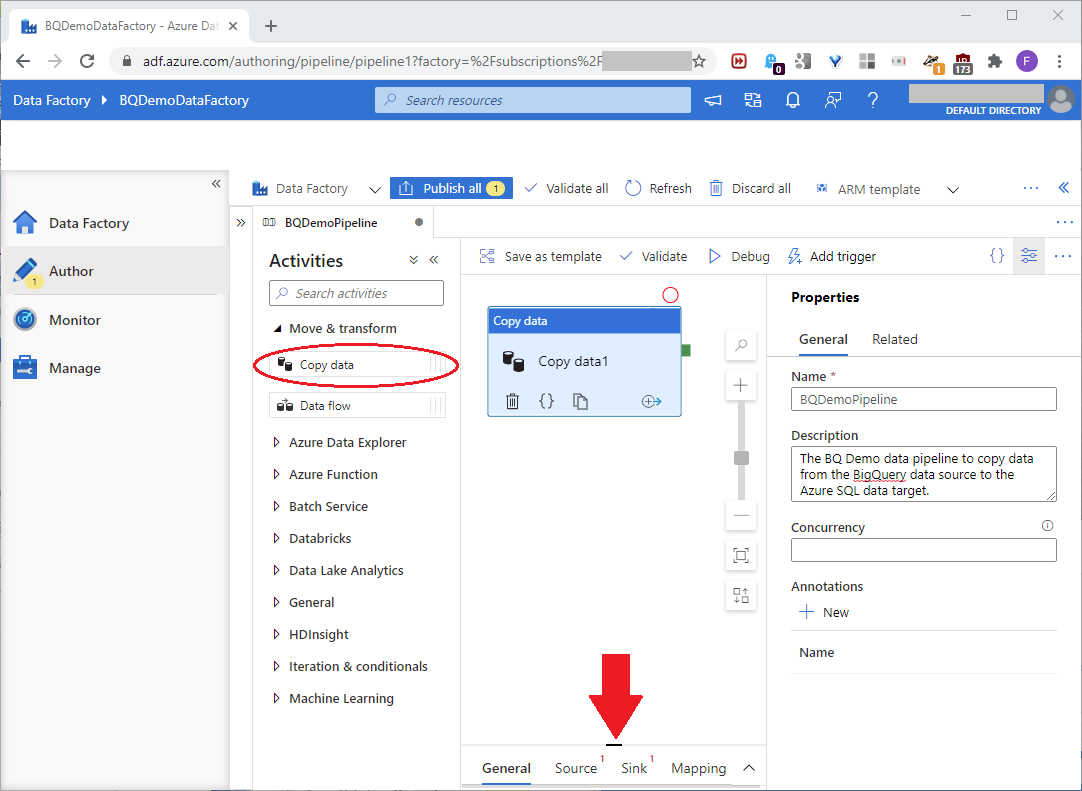
Now we can build the Azure pipeline that will move the data. Back at the Factory Resources page, drill down to New pipeline as shown in this screenshot:

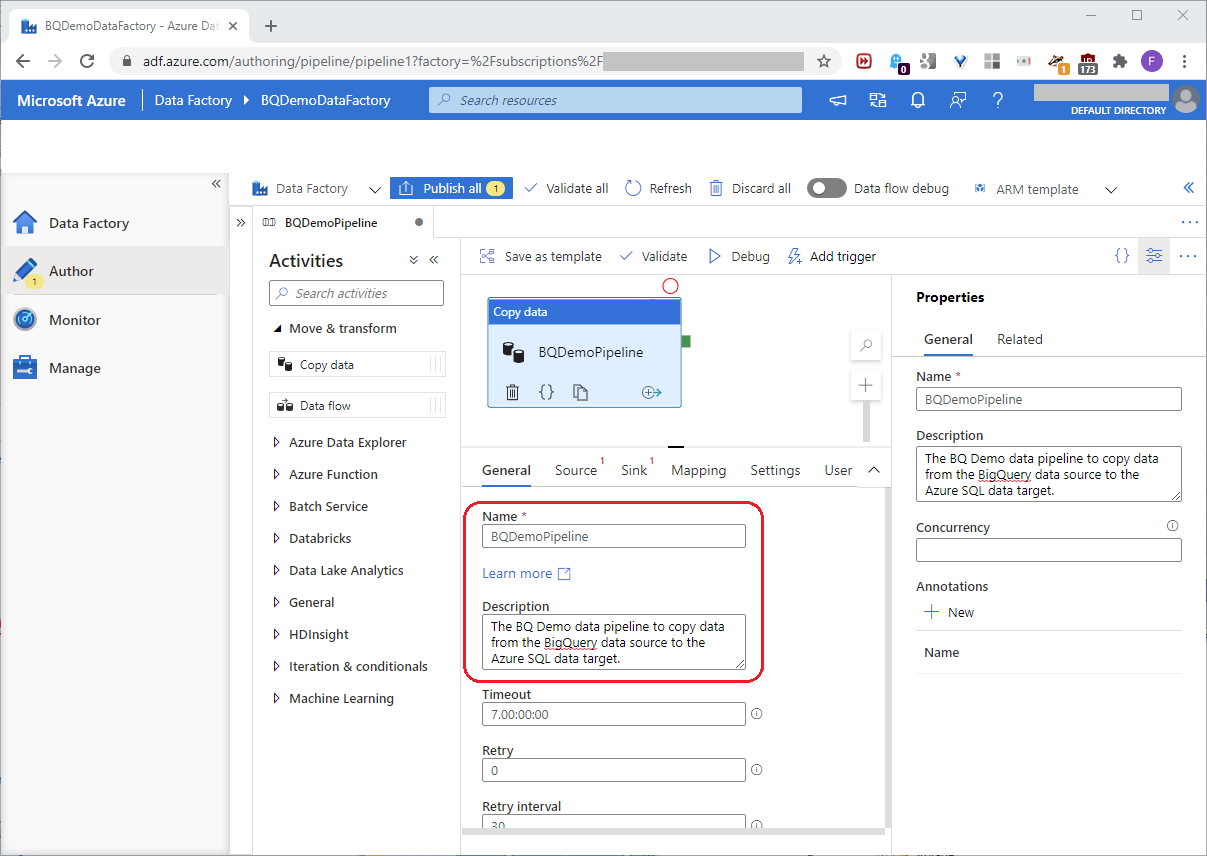
In the Activities pane, click and drag Copy data to the next pane. Set the name and description as shown in this screenshot:
To expand the space we’ll need, pull up the General tab separator at the bottom. In the General tab, set the Name and Description boxes, and ignore the default values in the other boxes, as shown in this screenshot:
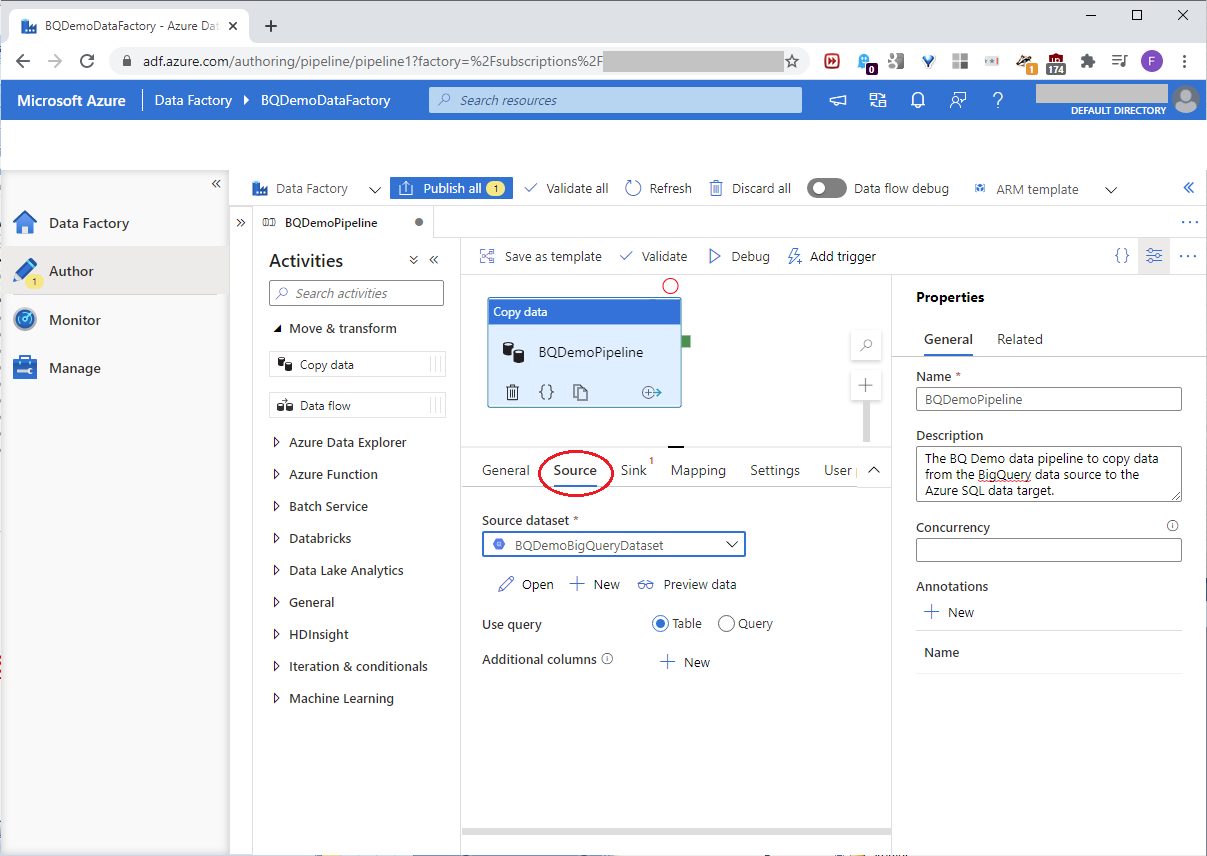
Click the Source tab. At the Source dataset dropdown, pick and preview the BQDemoBigQueryDataset defined earlier; for Use query, click Table as shown in this screenshot:
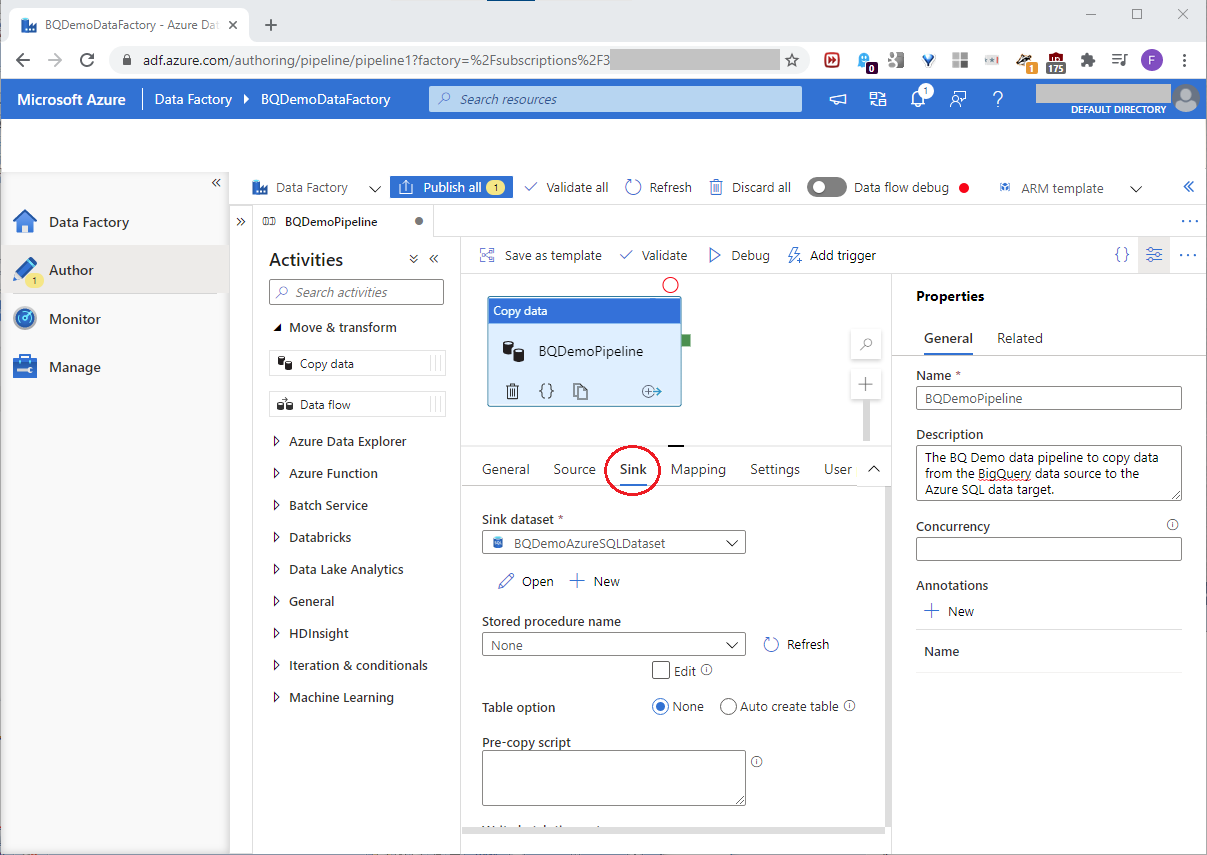
For the Sink tab, pick the BQDemoAzureSQLDataset in the Sink dataset dropdown, and pick None in the Stored procedure name dropdown, as shown in this screenshot:
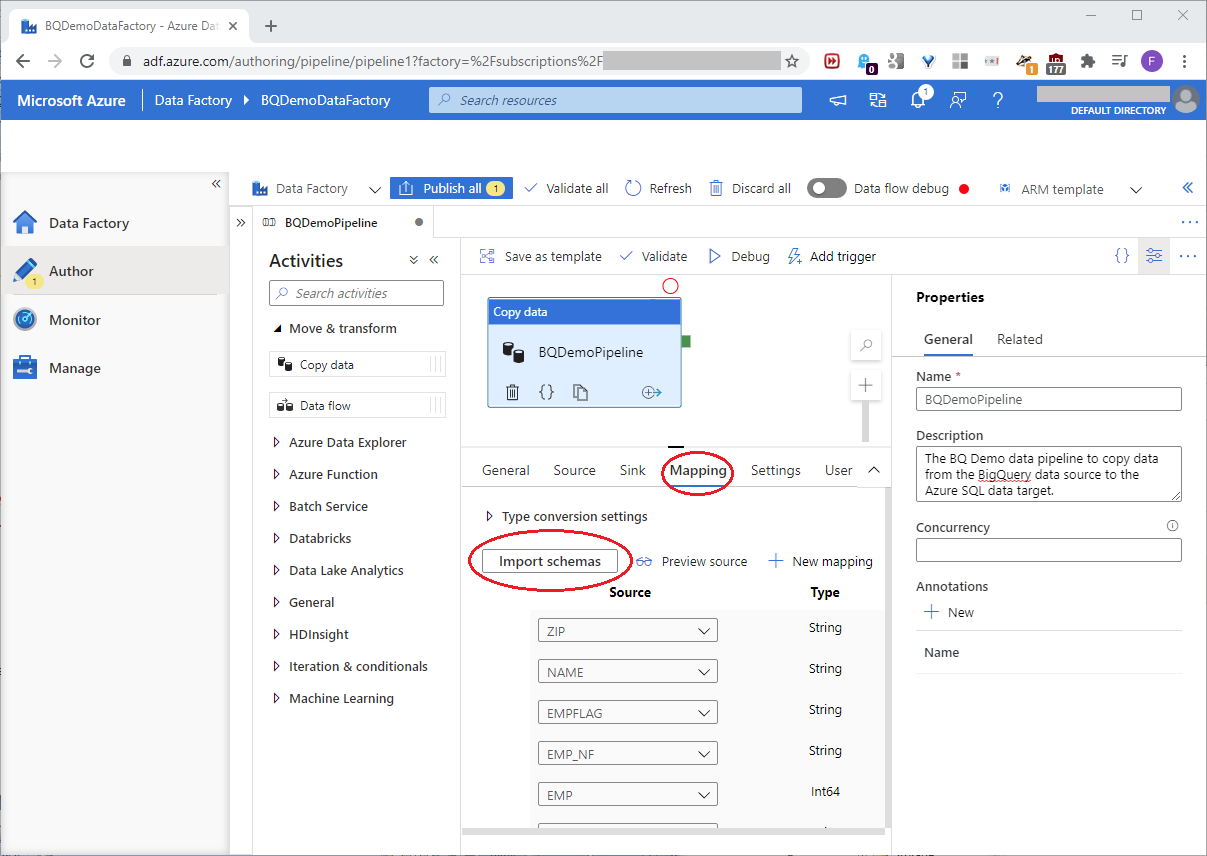
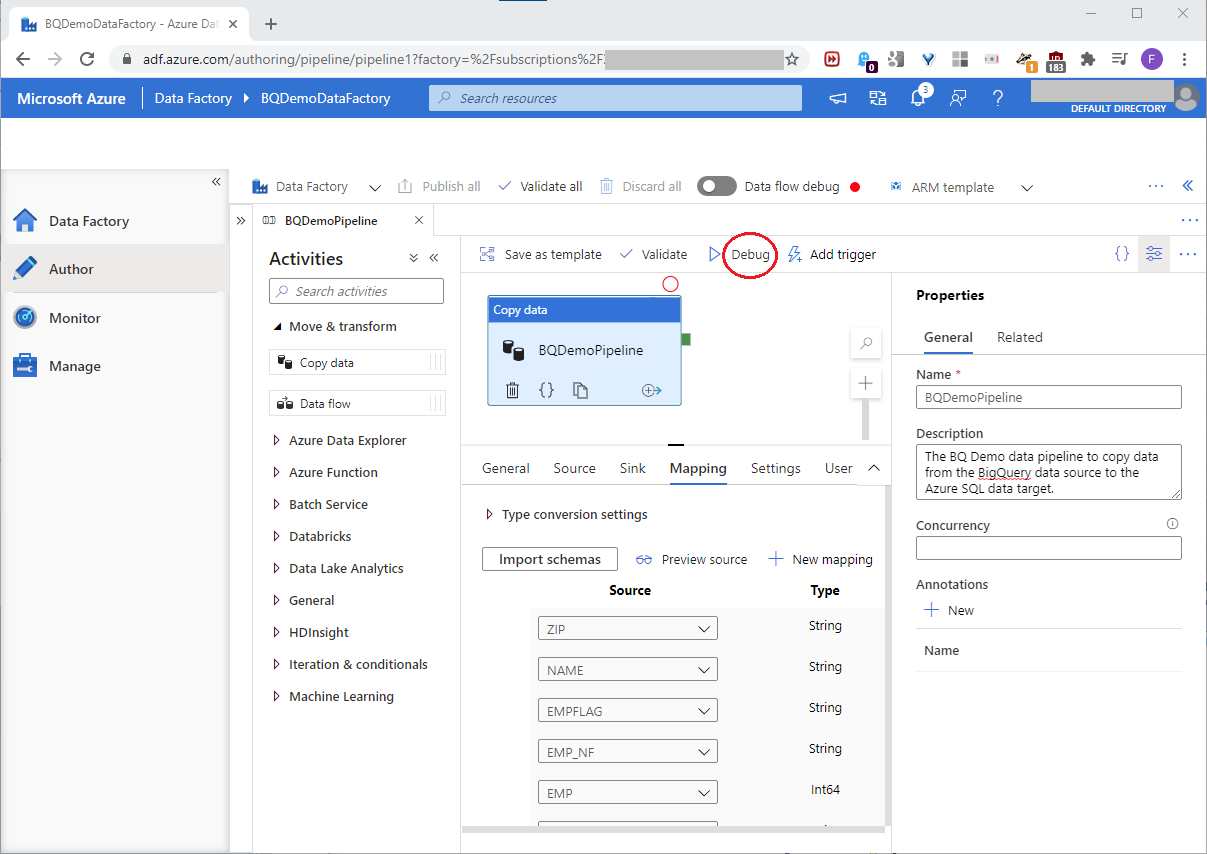
At the Mapping tab, click Import schemas, and then Preview source as shown in this screenshot:
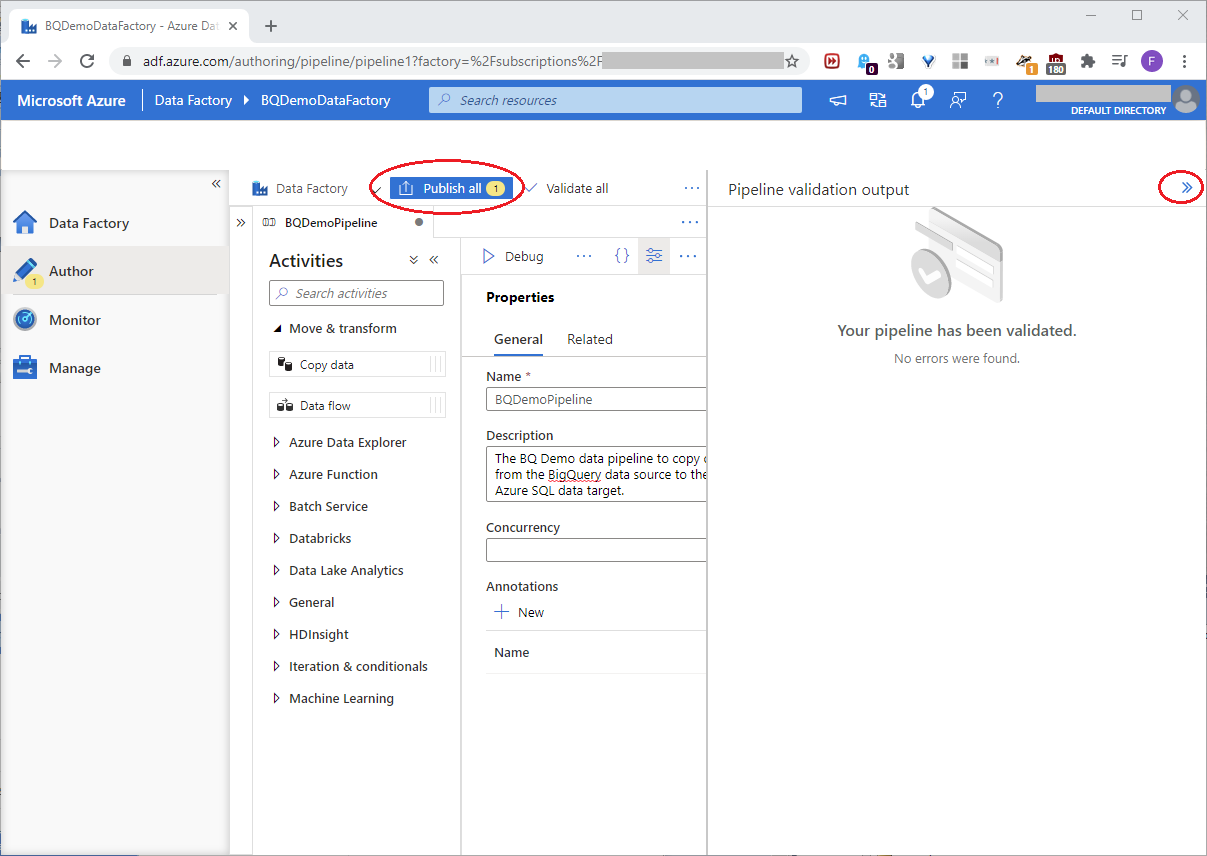
To validate the pipeline, click Validate as shown in this screenshot:

To save the data factory resources that we build, we need to publish them. Click the upper-right control to close the validation pane, and then click Publish all to save the pipeline, as shown in this screenshot:
At this point, we set up the Azure data factory. Click Debug to launch it, as shown in this screenshot:
When we run the pipeline, we might see a failed status, as shown in this screenshot:
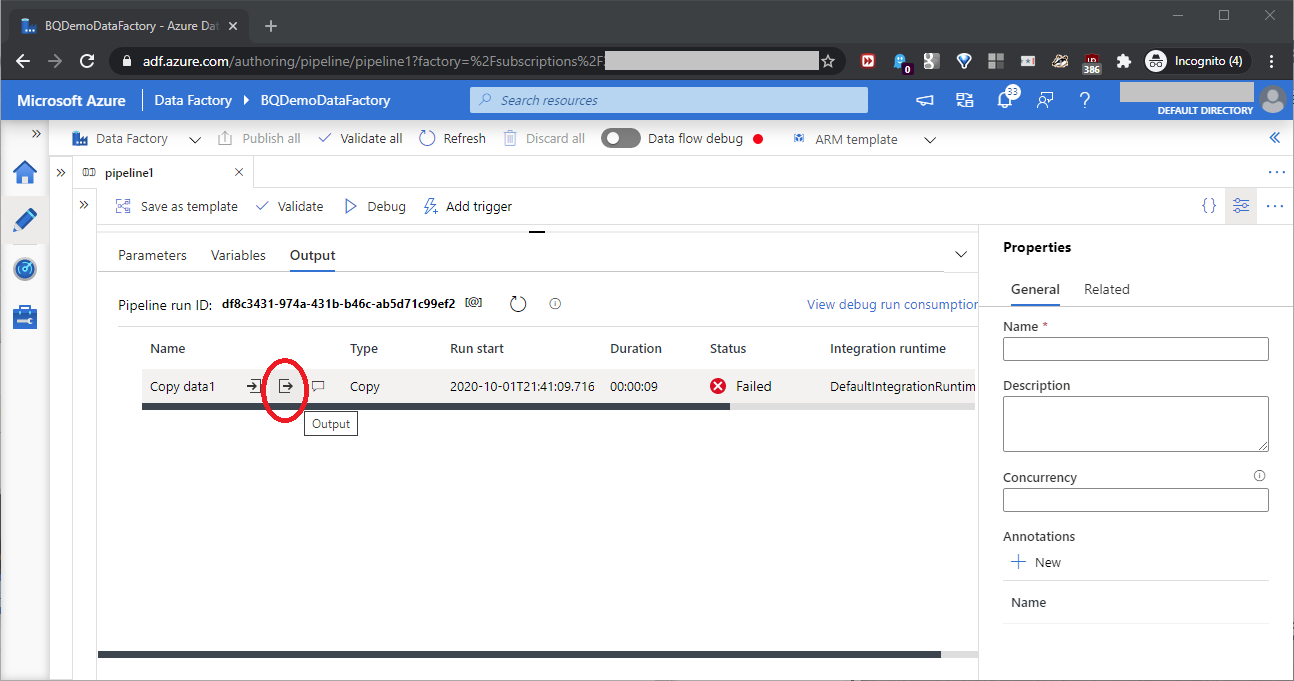
This can happen if we clicked “Public endpoint” when we created the data factory earlier. Click the circled icon shown above to open the error message box, as shown in this screenshot:
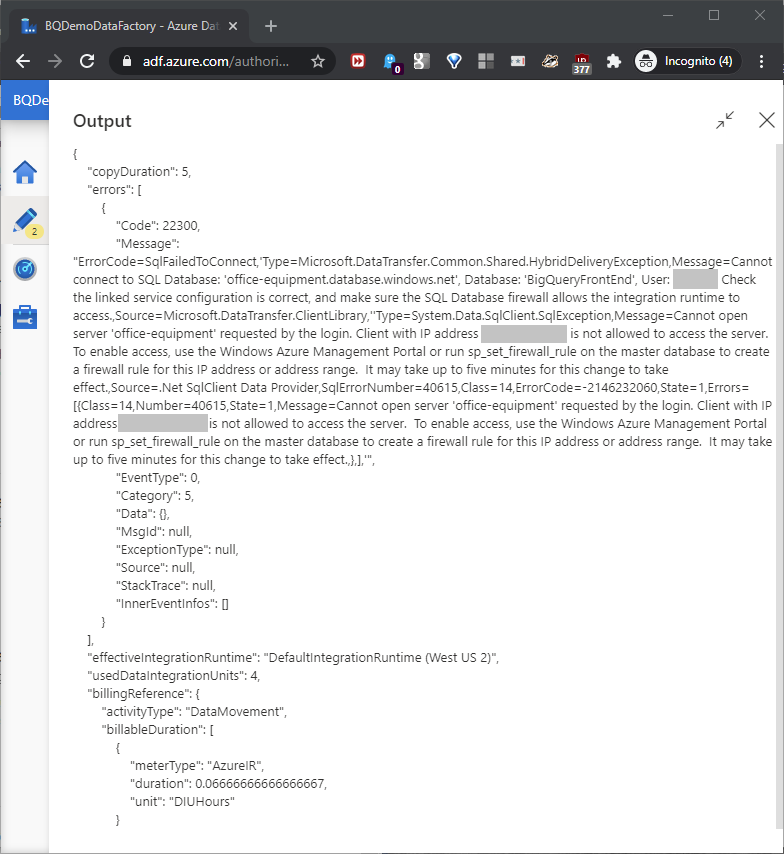
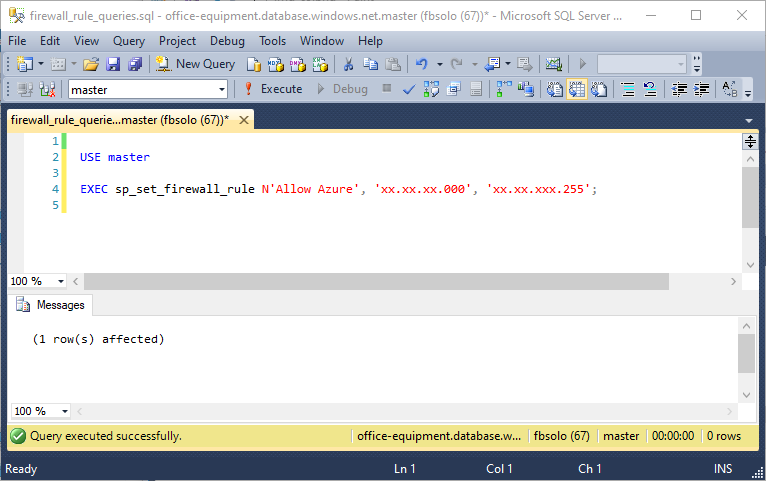
To solve the problem, run stored procedure sp_set_firewall_rule on the master database in the Azure SQL Server resource. Use IP address ‘xxx.xxx.xxx.xxx’, as seen in the message (masked here), to build this SQL Server command:
|
1 |
EXEC sp_set_firewall_rule N'Allow Azure', 'xxx.xxx.xxx.000', 'xxx.xxx.xxx.255'; |
In the Azure resource, run the command on the master database, as shown in this screenshot:
Finally, if we click Debug again, we should see that the pipeline worked:

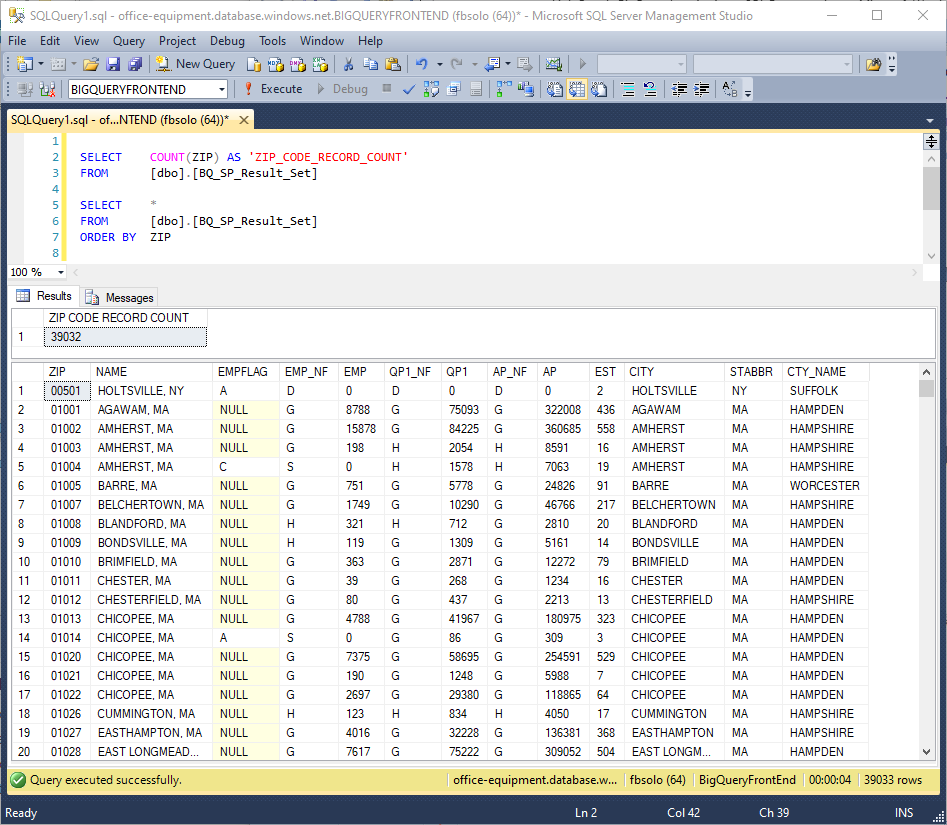
We can test the data in the target database with these queries:
|
1 2 3 4 5 6 |
SELECT COUNT(ZIP) AS 'ZIP_CODE_RECORD_COUNT' FROM [dbo].[BQ_SP_Result_Set] SELECT * FROM [dbo].[BQ_SP_Result_Set] ORDER BY ZIP |
This screenshot shows the results of those queries:
Conclusion
Organizations often host different sets of data across different data products. To extract useful insights across those datasets, developers must somehow link the host products together. This article series showed how to link a Google BigQuery resource with an Azure SQL resource. Unfortunately, while BigQuery offers stored procedures, we can’t yet call a BigQuery stored procedure from an Azure SQL resource. If we could, we’d get a huge time and money savings, because a BigQuery stored procedure call would return a filtered result set, instead of the entire table as shown here. However, Microsoft and Google improve and enhance their products all the time, and we can expect that soon enough, Azure and BigQuery product enhancements will make these calls possible. Still, this article showed how to set up BigQuery and Azure SQL resources, and how to connect them. These techniques will certainly solve existing problems, and prepare us to solve the other problems that expected product enhancements will cover.
Table of contents
| Build a Google BigQuery Resource |
| Link Google BigQuery resources into an Azure SQL resource |
| Build a Google BigQuery report with Google Data Studio |

See more about Frank at LinkedIn.
Remove the non-standard characters from this address: fb} <s.author@gmail.com to reach him by email.
- Lever the TSQL MAX/MIN/IIF functions for Pinpoint Row Pivots - May 16, 2022
- Use Kusto Query Language to solve a data problem - July 5, 2021
- Azure Data Explorer and the Kusto Query Language - June 21, 2021