
In this article, we will explain step by step how to connect remotely to a SQL Server Express instance. Remote access is the ability to get access to a SQL Server from a remote distance in order to manipulate data which are located on that SQL Server.
There are two types of adjustments which must be set before connecting to the remote SQL Server. These settings are important because without them the connection to the remote SQL Server will not be able to be successfully created
Configuration settings:
- The SQL Server instance to allow the protocol being requested
- Allow access through the Window Firewall
In order to allow access to SQL Server instance, we have to enable TCP/IP protocol which is not enabled by default. TCP/IP (Transmission Control Protocol/Internet Protocol) is a set of protocols developed to allow networked computers to share resources over the network. It was developed by DARPA under the ARPANET in the early 1970s.
In order to establish a successful remote connection is to set up appropriate ports through the Window Firewall. In SQL Server there are two types of instances. First is a default instance and the second is a named instance. To connect to the default instance of Database Engine, or named instance that is the only instance installed on the machine, the TCP port 1433 is the only port that you need to specify.
But if you have multiple name instances installed on your machine, to connect with one of them, we must provide a port number which corresponding to appropriate instance name. By default named instance used dynamic port, which means that every time when the Database Engine starts new port number is assigned. Because of that it is difficult to configure Windows Firewall to enable access.
In order to resolve this problem, there is a SQL Browser service, which provide the TCP port number that corresponds to the named instances. The SQL Browser services use UDP port 1434. Now we met with the basic matters relating to remote connection, let’s continue with the setup procedure.
Enabling TCP/IP protocol
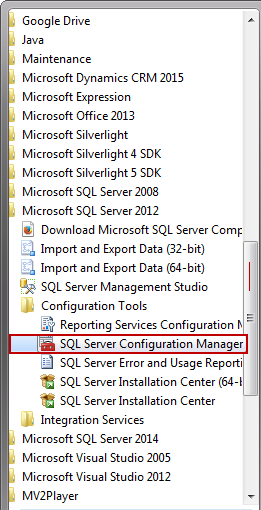
The first step is to enable TCP/IP protocol on the SQL Server service. Open the SQL Server Configuration Manager in the Configuration Tools folder under the Microsoft SQL Server folder:
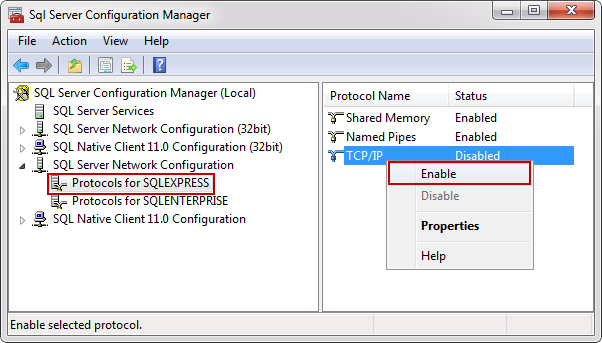
From the SQL Server Network Configuration node, select the Protocols item for the appropriate SQL Server. In the details pane, right click the TCP/IP item and select the Enable option:
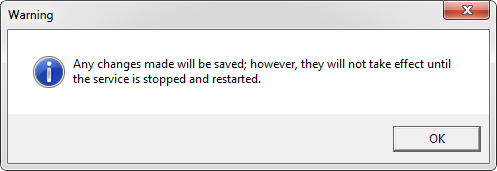
After this step the Warning box pop up in which informs us that changes that are made won’t take effect until the next time service is started.
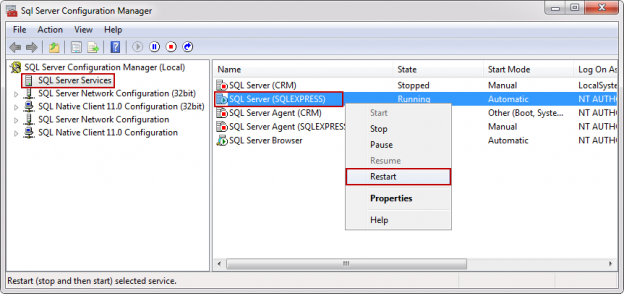
In order for the changes take effect, from console pane, select the SQL Server Services and from the details pane, right click the SQL Server (SQLEXPRESS) database engine instance and click the Restart option:

Now the service started with TCP/IP enabled, but still can’t connect remotely until we configure the Windows Firewall.
Configuring Windows Firewall
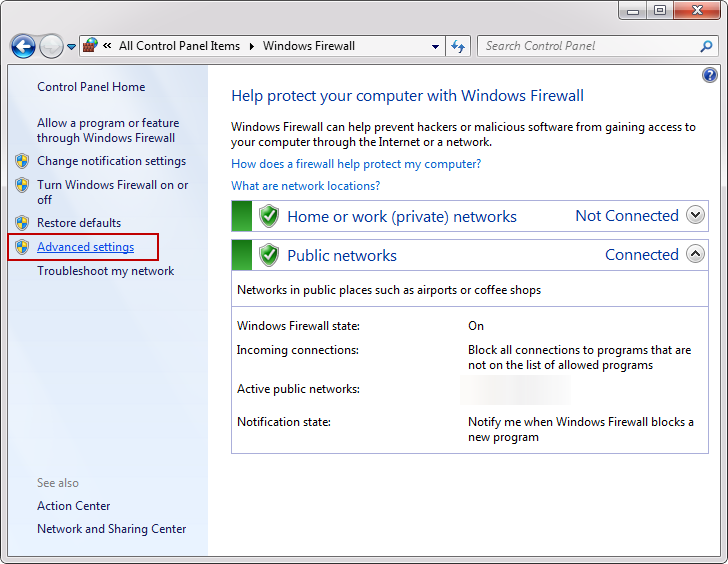
From the Control Panel choose Windows Firewall and click the Advanced settings or just type wf.msc in Search program and files from the Start menu:
- Inbound Rules: You can allow or block traffic attempts to access the computer that matches certain criteria in the rule. By default inbound traffic is blocked, to allow traffic to access computer, you need to create inbound rule.
- Outbound Rules: You can allow or block traffic originating from specifying computer creating rules. By default outbound traffic is allowed, so you need to create the rule that block outbound traffic.
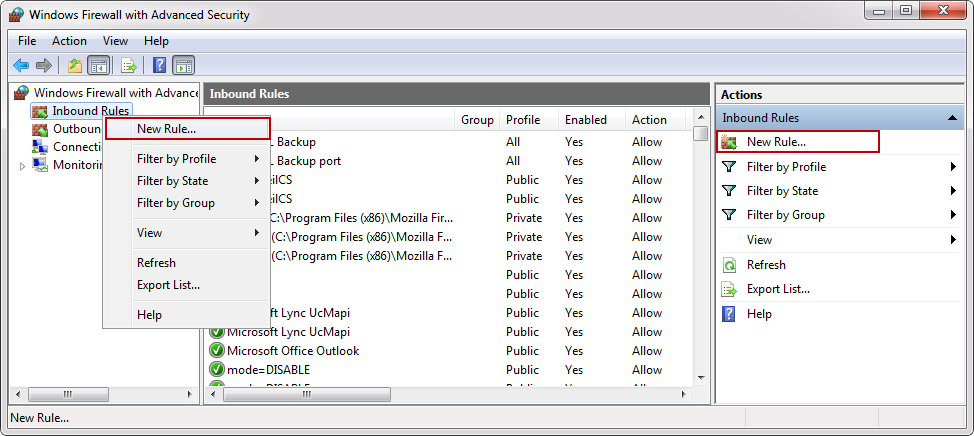
In the Windows Firewall with Advanced Security, click the Inbound Rules from the left pane, right click Inbound Rules and select the New Rule or from the Actions pane click the New Rule:
On which you will click, it’s up to you. In both case the New Inbound Rule Wizard will appear. Under the Rule Type choose Port and click the Next button:
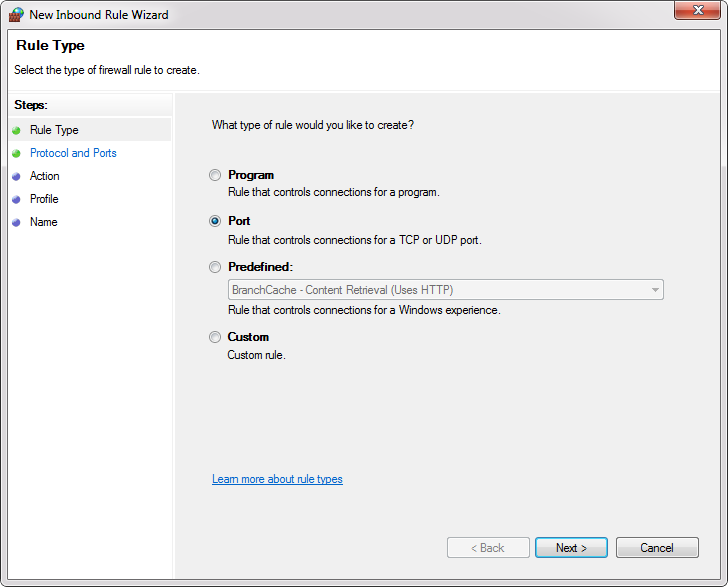
From this link you can more informed of all rule types which are shown in the image above.
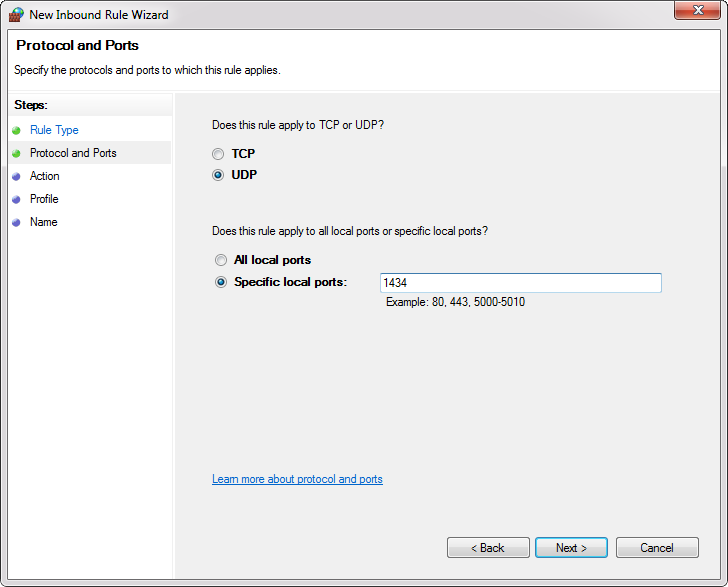
In the Protocols and Ports there are a several options that you can choose, depending on which type of protocols you select.
If you are wondering what is the difference between the TCP and UDP protocols you can find from this link.
As we mentioned at the beginning of the article TCP is used for the default instance and named instance if is the only instance installed on the machine and default port is 1433.
- All local ports: Rule applies on all ports from the selected protocol.
- Specific local ports: In the text box you specify a port or set of ports to which the rule applies.
For this example, select the UDP protocol and in the Specific local ports enter port number 1434. To proceed with the settings SQL Browser services, click the Next button:
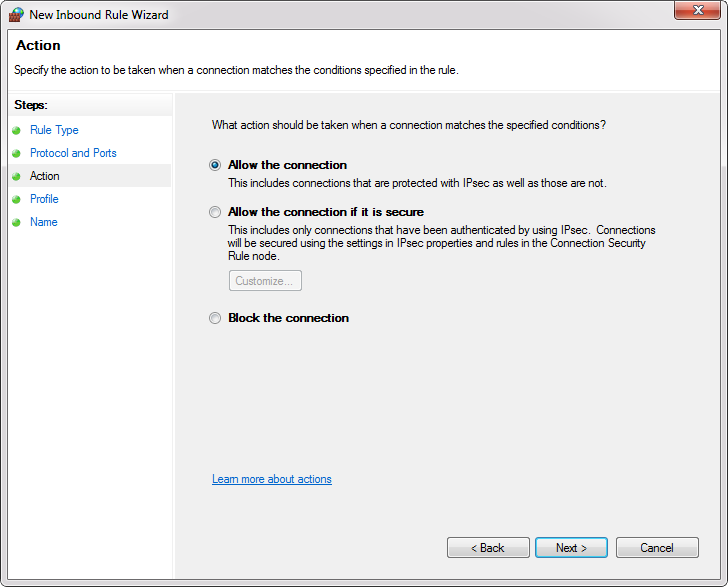
- Allow the connection: Includes all connections secure and insecure.
- Allow the connection if it is secure: Includes only connection if it is made through a secure channel.
- Block the connection: Blocks all connections secure and insecure.
In the Action dialog choose Allow the connection and click the Next button:
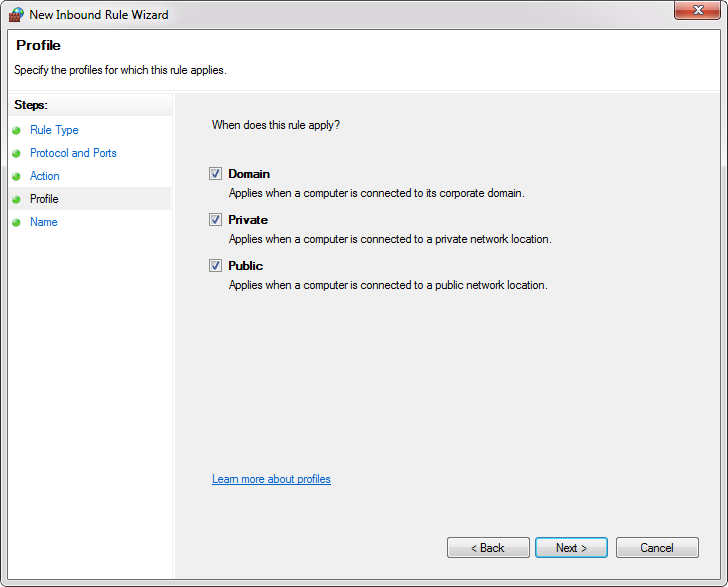
- Domain: The setting is applied only when a computer is connected to a domain.
- Private: The setting is applied when a computer is connected to a network that is identified as a private network.
- Public: The setting is applied when a computer is connected to untrusted public network.
In the Profile dialog choose all three profiles and click the Next:
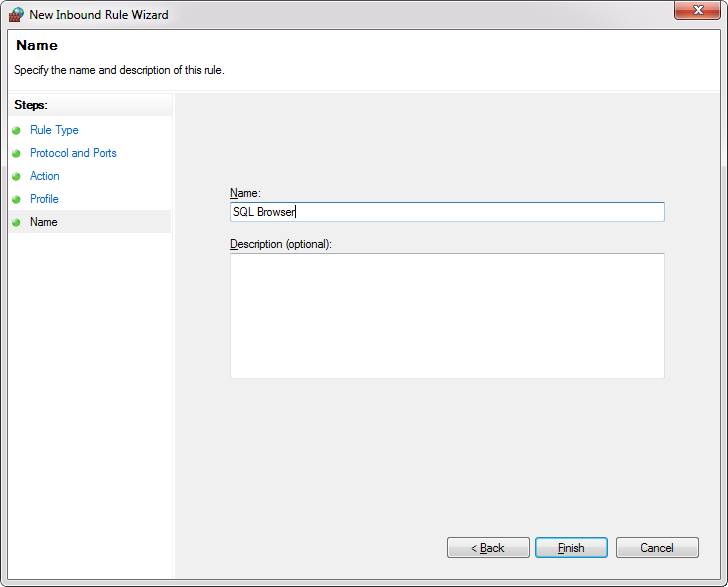
On this step give the rule a name and click the Finish.
Note: When we give the name of the rule, please write some descriptive name that you can understand later, when you need to find them or edit in the Inbound Rules list.
Now create an allow rule for the database engine instance.
Go to the New Rule and from the Rule Type select the Custom rule:

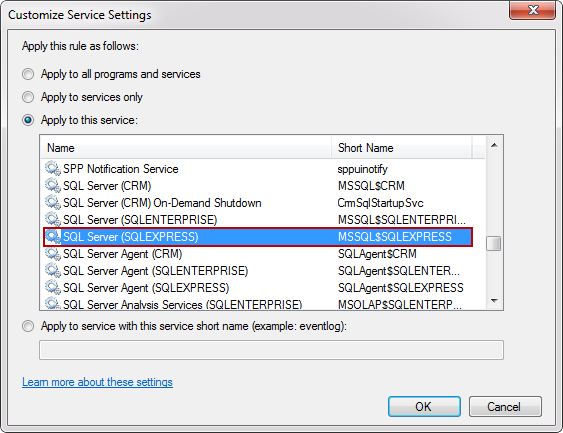
In the Program under the Services click the Customize button:
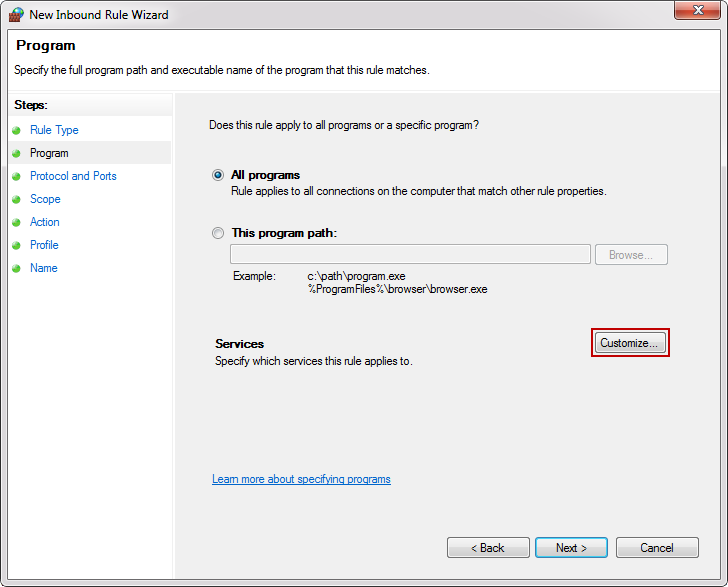
From the Customize Service Settings under Apply to this service select database engine instance service and click the OK button:
Then click the Next all the way to the Name dialog, give rule a name and click the Finish:

Now when all rules are set up, you are ready to connect to remote SQL Server.
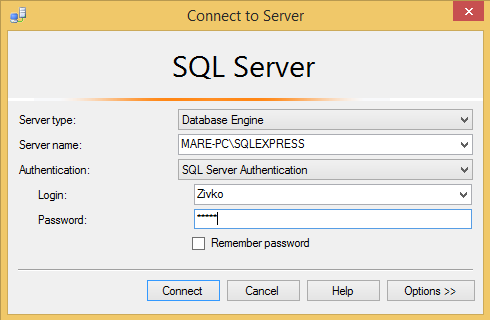
Start the SQL Server, in the dialog window for the Server name enters the name of the instance that you want to connect with. From the Authentication drop down box, select the SQL Server Authentication and for the field Login and the Password enter your credentials then click the Connect button.
See more
To boost SQL coding productivity, check out these free add-ins for SSMS and Visual Studio including T-SQL formatting, refactoring, auto-complete, text and data search, snippets and auto-replacements, sql code and object comparison, multi-db script comparison, object decryption and more.
Related posts
- How to install SQL Server Management Studio 2008
- Best practices after installing Microsoft SQL Server
- SQL Server 2014 – Install a clustered instance – step-by-step (1/3)
- How to run a local SQL Report from an Azure VM Database

He is a prolific author of authoritative content related to SQL Server including a number of “platinum” articles (top 1% in terms of popularity and engagement). His writing covers a range of topics on MySQL and SQL Server including remote/linked servers, import/export, LocalDB, SSMS, and more.
In his part-time, Zivko likes basketball, foosball (table-soccer), and rock music.
See more about Marko at LinkedIn
View all posts by Marko Zivkovic
- How to connect to a remote MySQL server using SSL on Ubuntu - April 28, 2020
- How to install MySQL on Ubuntu - March 10, 2020
- Using SSH keys to connect to a remote MySQL Server - November 28, 2019