

Visual Studio is an application that is used by many developers and it has different kinds of features that can facilitate the developer’s work. Among these features, Visual Studio offers users the feature to compare two SQL databases via its Schema compare feature.
Besides comparing SQL Server database locally or on the network, Visual Studio can connect and compare Azure SQL Database as well. This is a neat feature, as it facilitates work for developers who are working on database development and need a quick way to synchronize the latest changes with the QA database, on which additional testing should be done before moving to production.
Schema Compare feature in Visual Studio
To compare two SQL databases with Visual Studio’s Schema Compare feature, follow these steps:
-
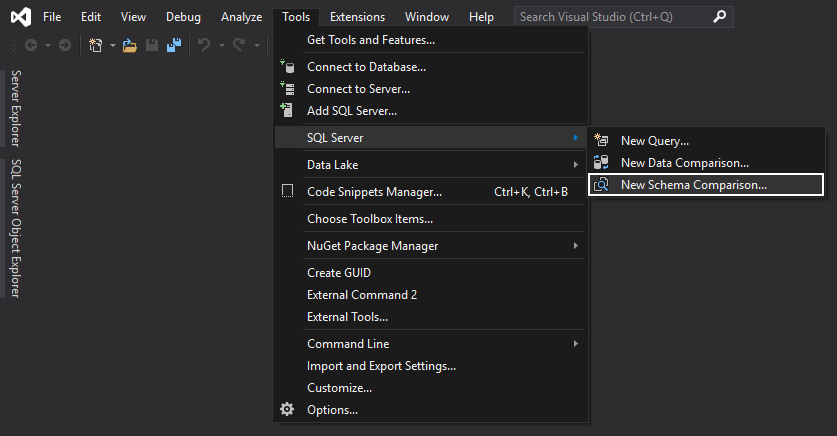
From the main menu, go to the Tools -> SQL Server sub-menu -> New Schema Comparison:

-
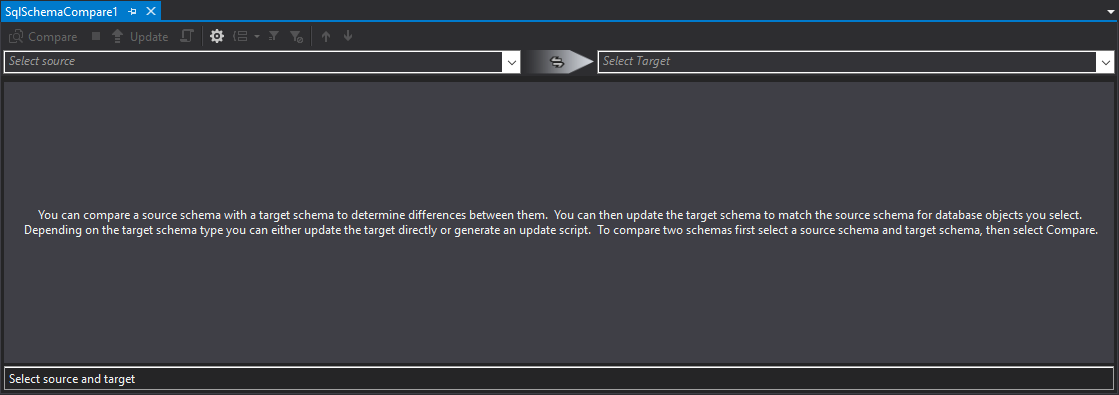
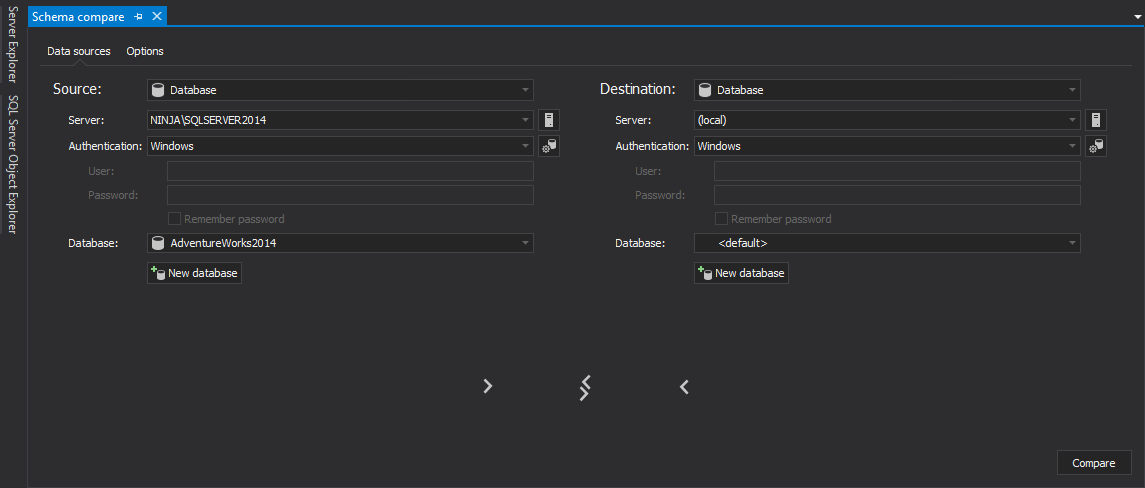
This will load the SqlSchemaCompare query window and the first thing that needs to be done is to select source and target from their corresponding drop-down lists:
-
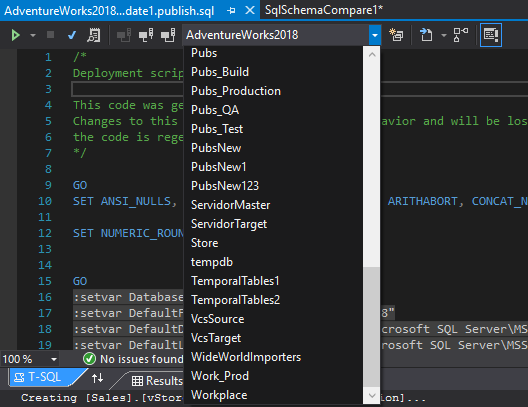
In the upper left corner of the SqlSchemaCompare query window, locate the Select source drop-down list and click on the Select Source item:
Note: If there were some previous SQL Server database schema comparisons, data sources will be shown in this list
-
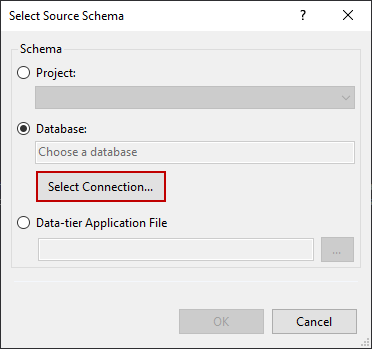
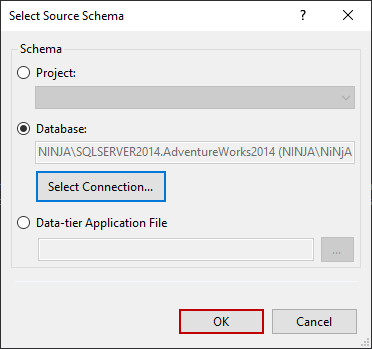
The Select Source Schema dialog will be shown and in it, by default, the Database option is selected and under it, click the Select Connection button:
-
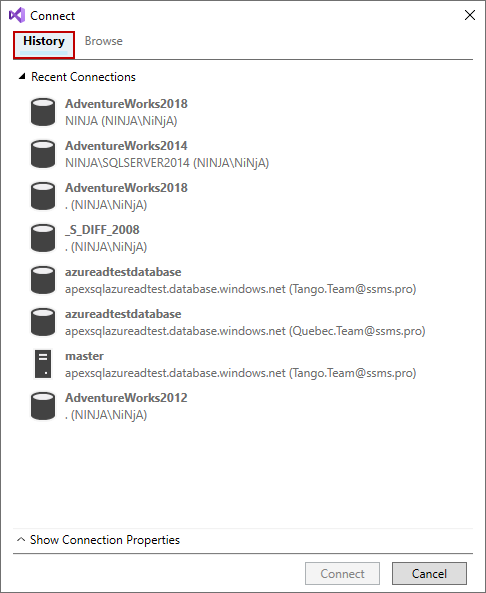
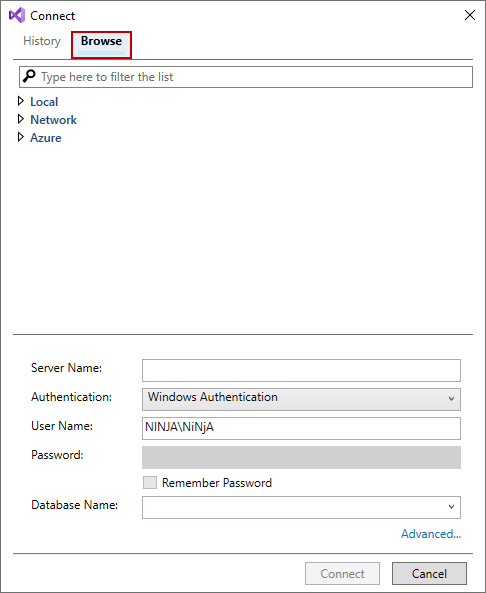
This will bring the new Connect dialog in which there are two tabs:
History – in which all previous connections can be seen and selected:
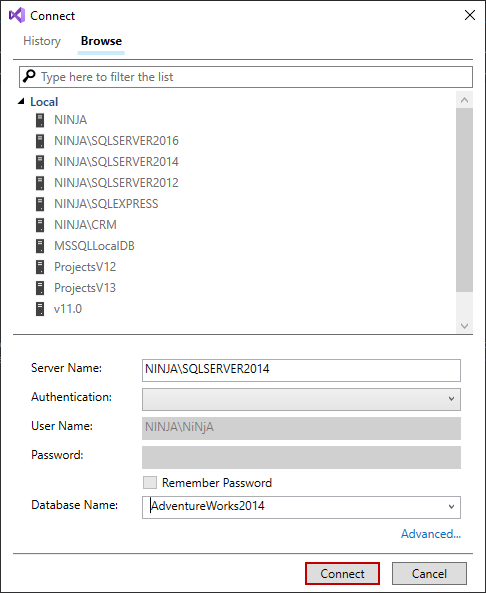
Browse – in which a new connection can be set via Local, Network or Azure list of sources that might already exist, or by directly providing Server Name, Authentication type, and Database name:
-
After all information for SQL Server and database are entered, click the Connect button:
-
Once all information is loaded, the Select Source Schema dialog will be shown again and here the OK button should be clicked in order to load the source data source:
-
Now, the same process from the step 3) to step 7) needs to be repeated for the Target side in order to set everything to compare two SQL databases
-
Once both sides are loaded, data sources will be shown in the SqlSchemaCompare query window and before initiating the comparison process, there are options that can be set with a click on the Options button:
Schema Compare Options window will be opened and under the General tab, various comparisons and synchronization options can be selected to personalize it. In this example, default settings will be used:
-
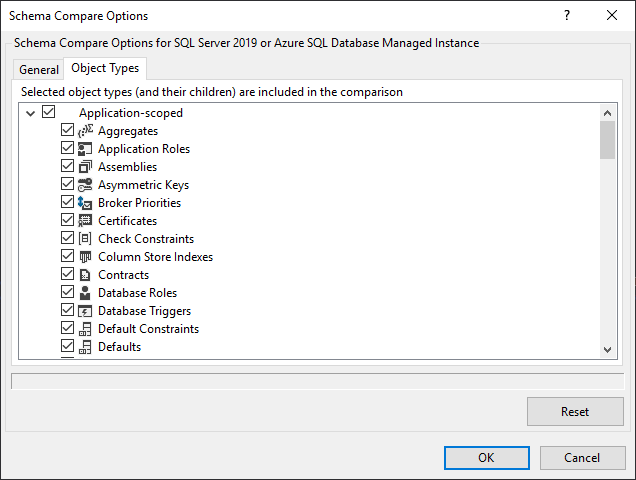
Under the Object Types tab, users can select specific object types and their children to compare two SQL databases. Default selection will be used in this example:
-
Once the above-mentioned options are set and the OK button is clicked, the SqlSchemaCompare query window is brought up again and now the Compare button can be clicked to compare two SQL databases:
-
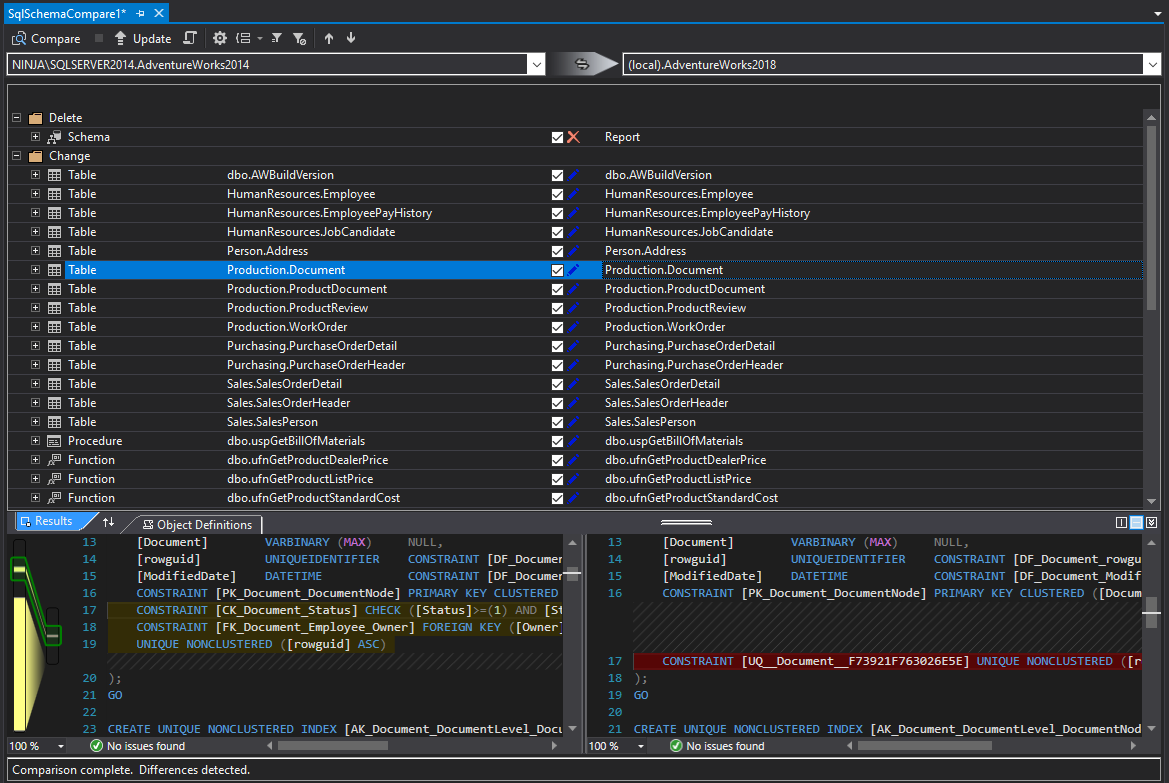
Once the process of comparison is finished, the comparison results will be presented and there are two panels shown:
The Results panel that contains all compared objects sorted by action for the update process
The Object Definitions panel that shows the SQL scripts of compared objects from source and target SQL databases
-
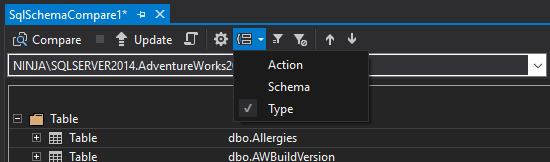
In the upper Results panel, objects are grouped by action, which can be changed under the Group results button to show results by action, schema or type:
After setting this up, based on the user’s preference, desired objects should be checked before initiating the update target process
-
There are two ways to push changes to a target SQL database:
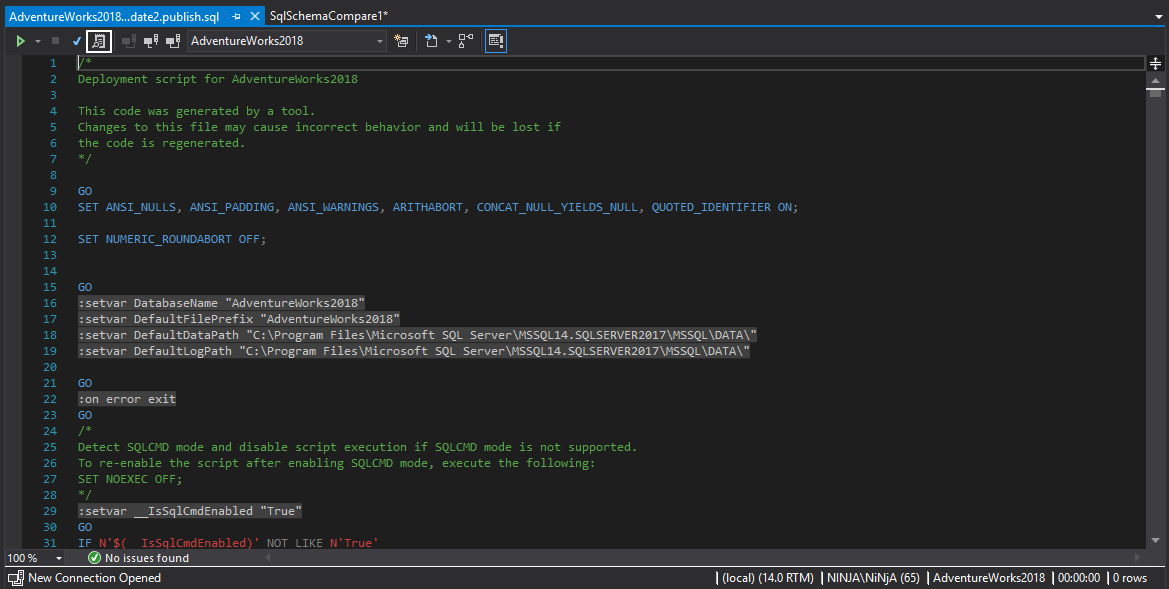
Generate Script – with a click on the Generate script button, a script is generated and shown under the newly opened panel which named is based on the target database name:
In this case, the query window name is AdventureWorks2018_Update2.publish.sql:
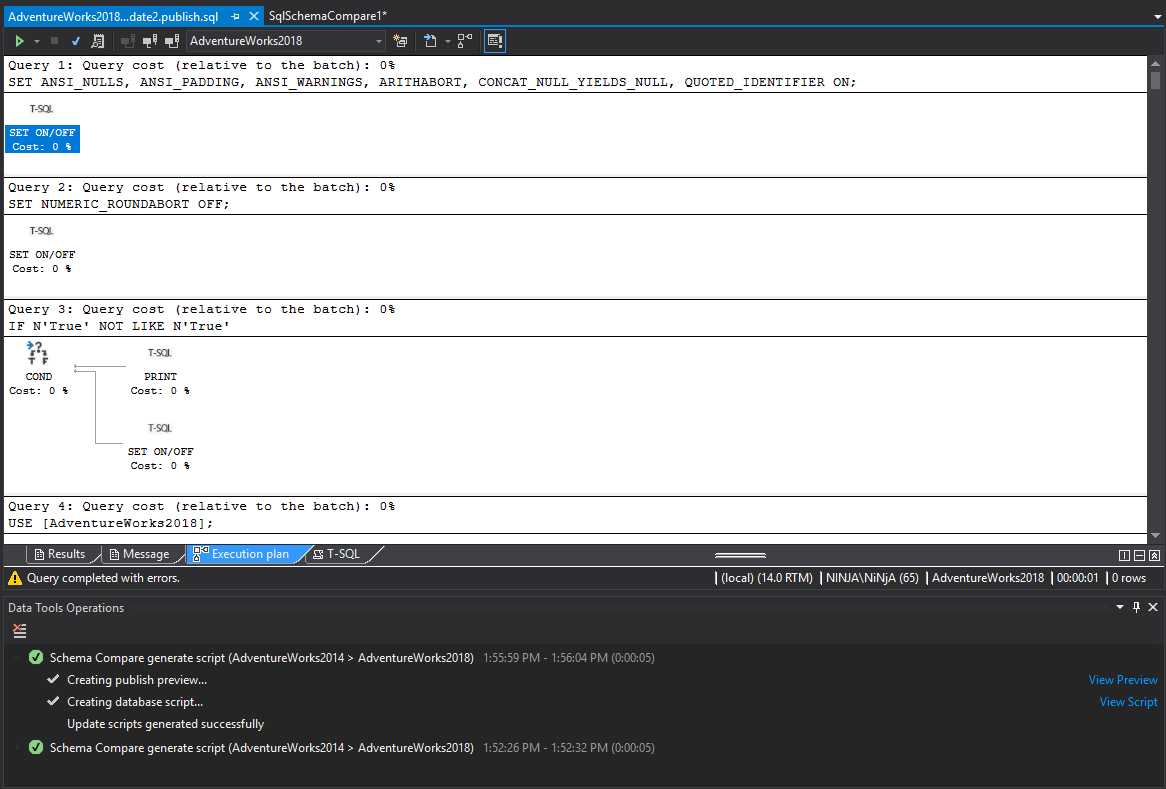
If needed, the execution plan can be reviewed before updating a target SQL database, with a click on the Display Estimated Execution Plan button in the top-right corner of the newly opened panel, and it will show the Execution plan panel:
Here, as it can be seen, the complete execution plan is shown, along with query cost values
Once everything is set and reviewed, click the Execute button to run the generated SQL script on a target SQL database
The results of the execution can be reviewed under the Messages panel, to see whether it was successful or not:
Additionally, results can be exported with a click on the Results as button, in the top of the generated script query window, and user can choose between Results as Grid, Text, or File:
If the same SQL script needs to be executed on a different local SQL database, just select one from the drop-down list:
SQL Server, which has the same QA database, it can be done with a click on the Change Connection button and the same Connect window in which desired SQL Server can be selected, along with a SQL database that needs to be updated:
Update – with a click on the Update button, the previously generated SQL script will be executed directly on a target SQL database:
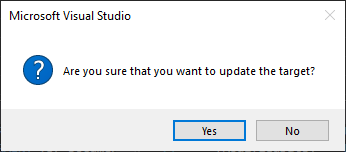
Before the execution of generated SQL script for updating a target SQL database is run the confirmation dialog will be shown in which the Yes button needs to be clicked in order to proceed:
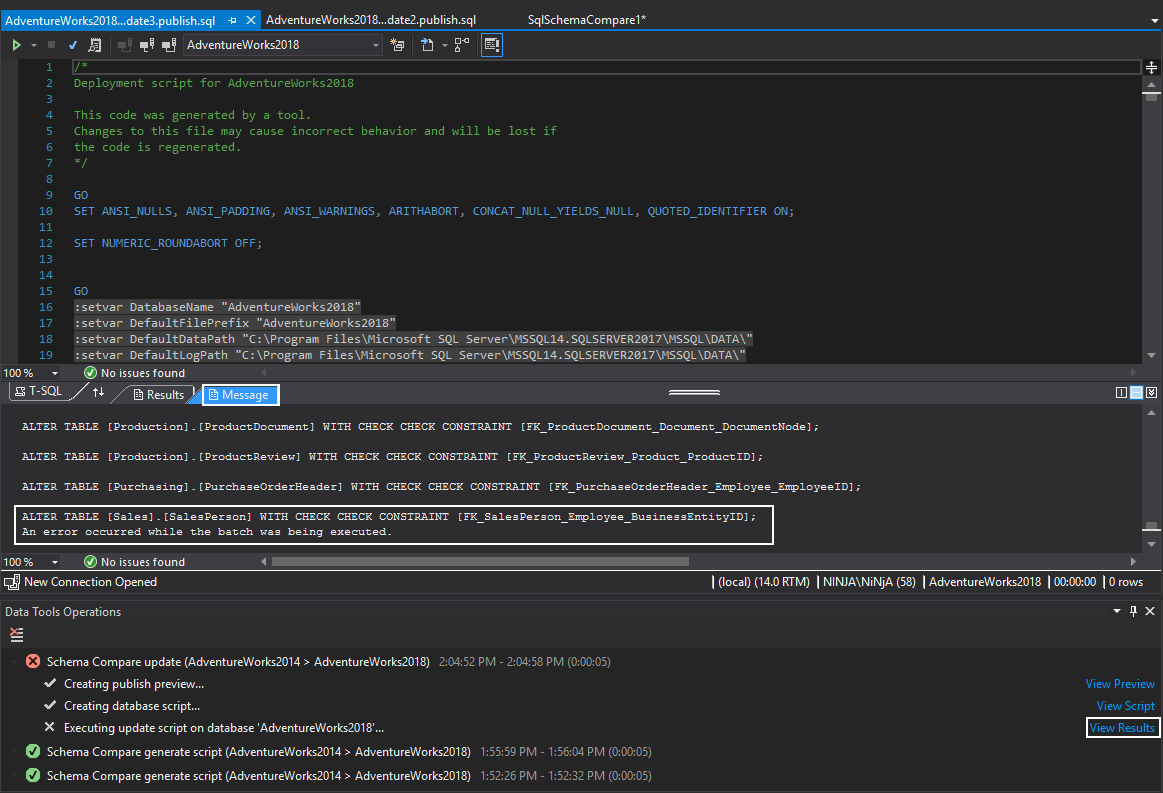
After the update process is finished, as it can be seen in the screen shot below, the execution results can be reviewed under the Data Tools Operations panel, and above it, under the Messages panel, there are details whether the execution was successful or not:


Third-party software solution
Another tool that can be used to compare two SQL databases is ApexSQL Diff. Even though it’s a standalone tool, it can integrate into Visual Studio and SQL Server Management Studio (SSMS). In addition, it can also compare other data sources, such as: source control projects, script folders, backups, and ApexSQL snapshots. It can also export comparison results into different output types: HTML simple report, HTML report, Excel report, and XML schema difference export.
The last, but not the least, it can automate and schedule the comparison and synchronization process, by creating the automation script as a batch file or a PowerShell script, in order to compare two SQL databases with a click. In this way, the developer saves time, by not going through the same steps repeatedly, rather than just executing the created automation script.
In order to compare two SQL databases from Visual Studio with ApexSQL Diff, follow these steps:
-
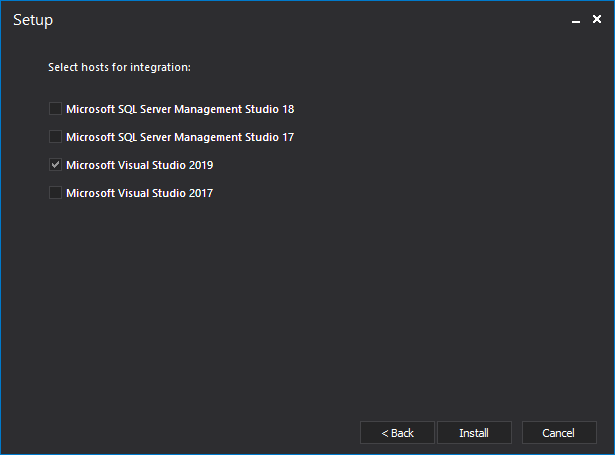
During the installation of ApexSQL Diff, under the Select hosts for integration step, only installed versions of SSMS and Visual Studio will be shown, so check the one that will be used:
-
Once the installation is finished, run Visual Studio version into which ApexSQL Diff was integrated
-
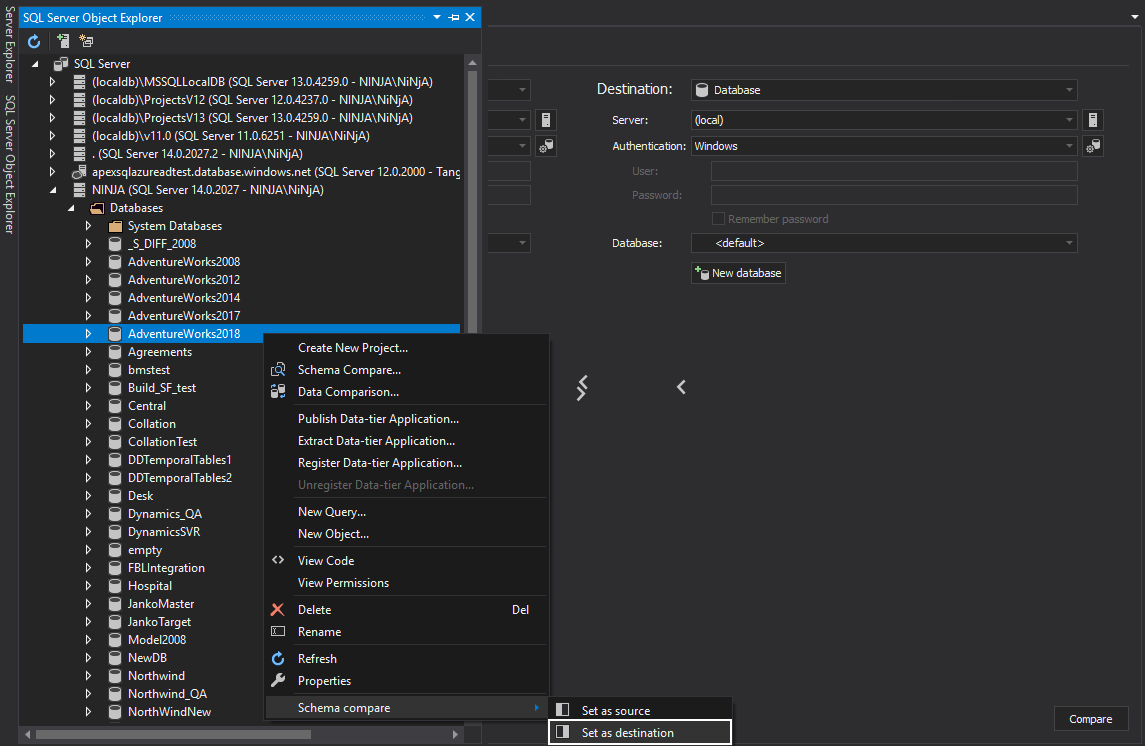
Schema compare sub-menu will be shown in the right-click context menu of SQL Server Object Explorer or Server Explorer panel, under the Set as source or Set as destination commands can be selected:
-
When any of these two commands is clicked, the Schema compare query window will be shown with loaded information for a selected SQL database:
-
The other side, the destination side in this case, can be either loaded as the first one (the source side) with the command from the right-click context menu (Set as destination command in this case), or simply by directly entering the information in the Schema compare query window:
-
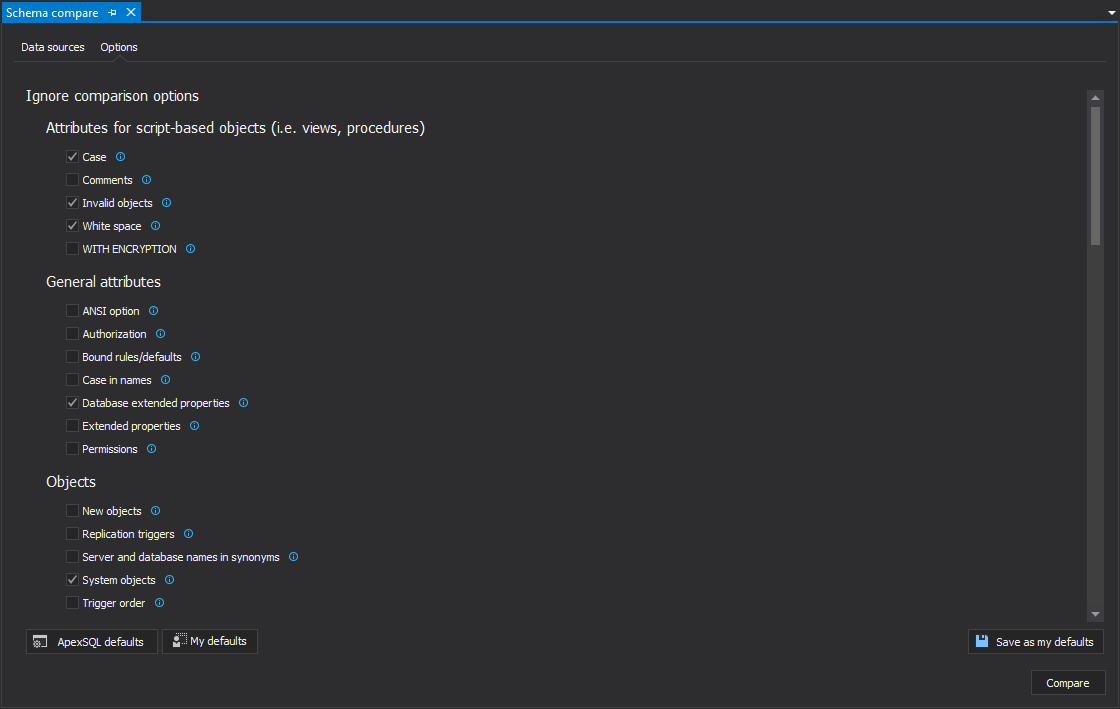
Additional, comparison and synchronization options can be set, if the Options tab is clicked in the Schema compare query window, before the compare of two SQL databases is started:
-
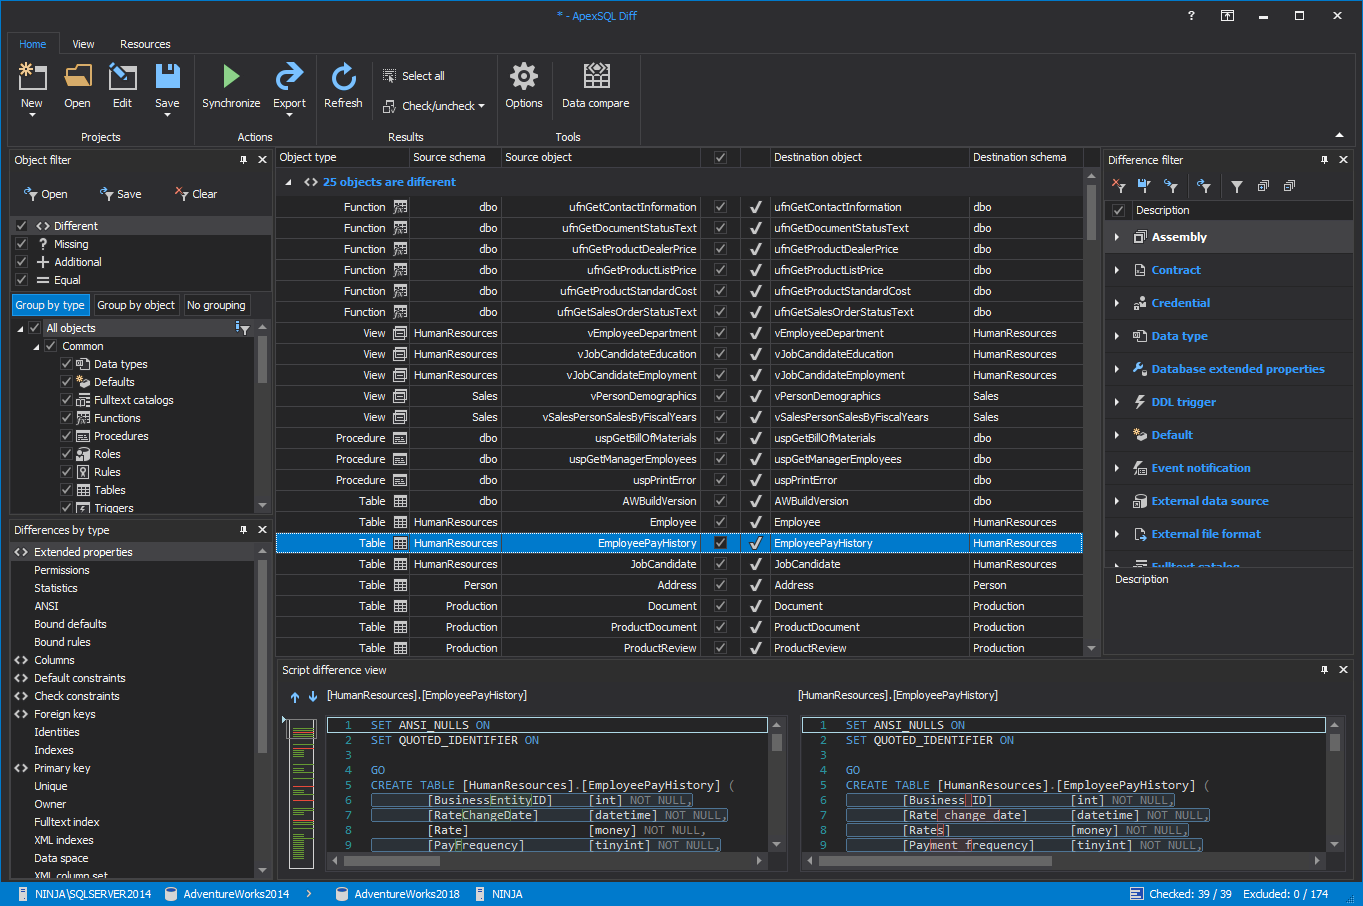
To start the compare of two SQL databases, click the Compare button in the bottom-right corner of the Schema compare query window, which will start the standalone tool and show the results in the main application window:
-
Under the Results grid, select each object if needed to review changes and check the ones that need to synchronize on the destination side. Learn more on how to narrow schema comparison and synchronization to affected objects only
-
To initiate the synchronization process, click the Synchronize button in the Home tab:
-
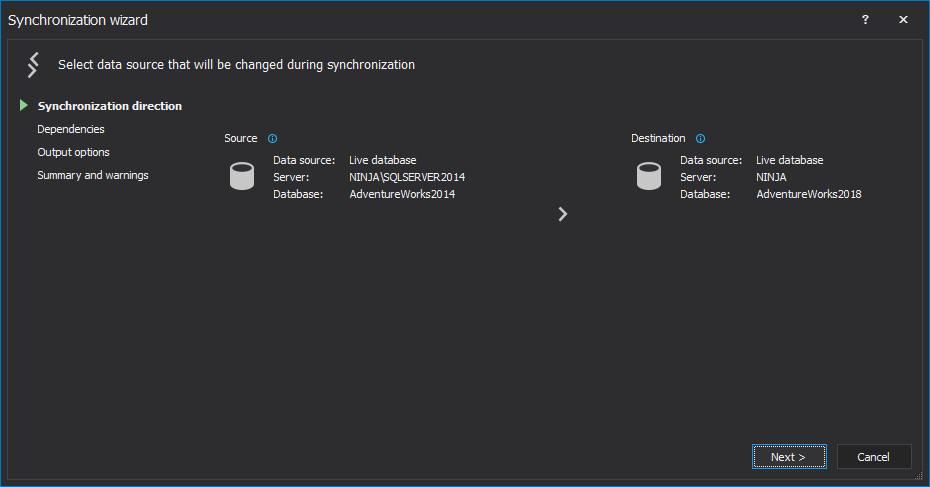
The Synchronization wizard is started and under the Synchronization direction step, the direction of the synchronization process is shown along with the data source information:
-
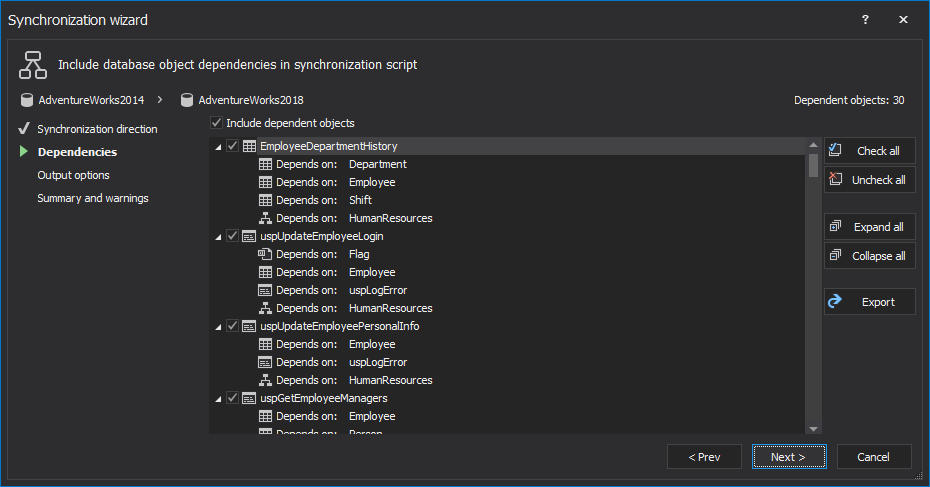
All dependent objects will be shown and included by default in the synchronization process under the Dependencies step:
-
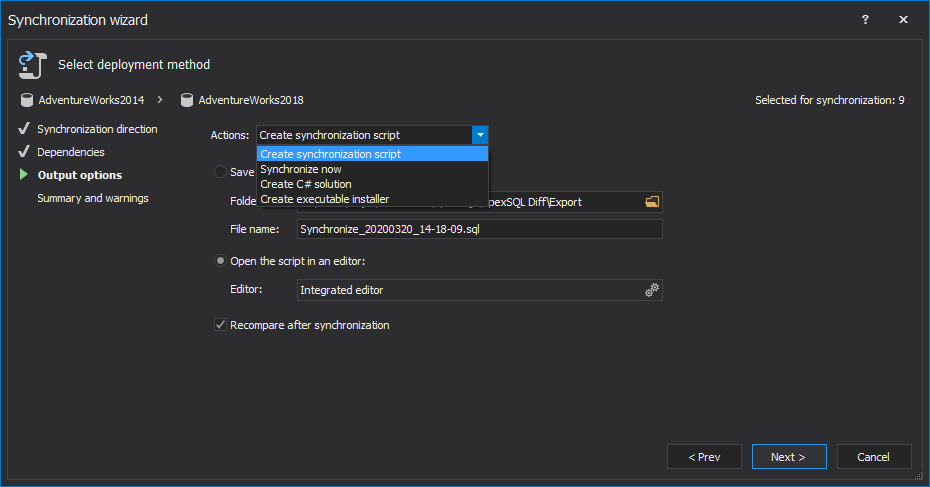
Four different actions can be chosen, under the Output actions step:
Create synchronization script
Synchronize now
Create C# solution
Create executable installer
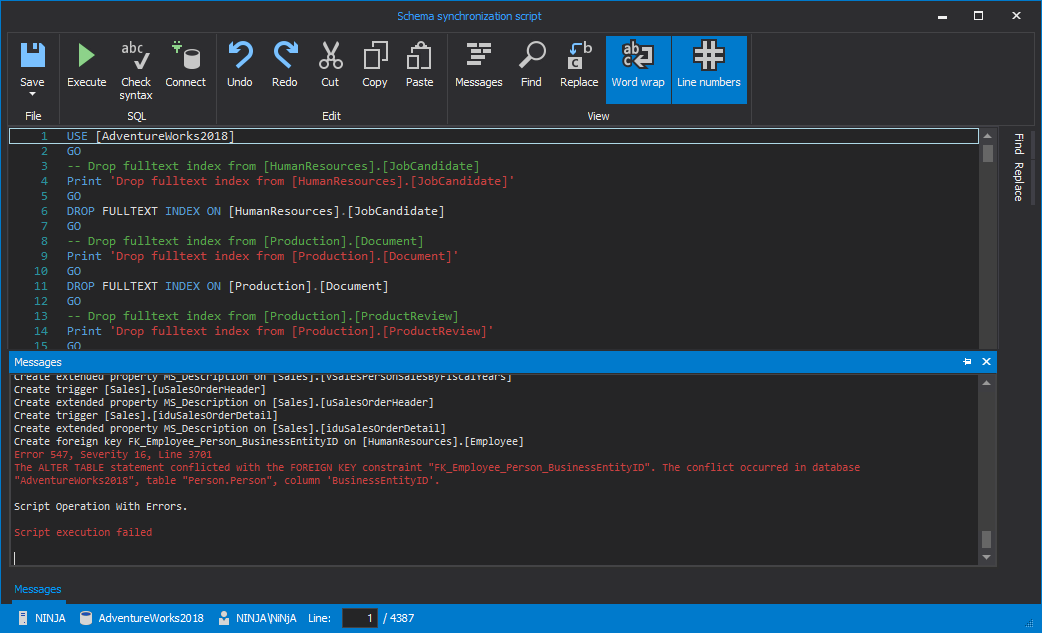
As it can be seen on the screenshot above, the Create synchronization script action can either Save script to a file on a default or any other desired location, or to open the created synchronization script in Integrated editor, or any other editor which can be set with a click on the Settings button in the Editor text box. If the second option is selected, at the end of the Synchronization wizard, the generated synchronization script will be shown and from there it can be reviewed, edited and executed:
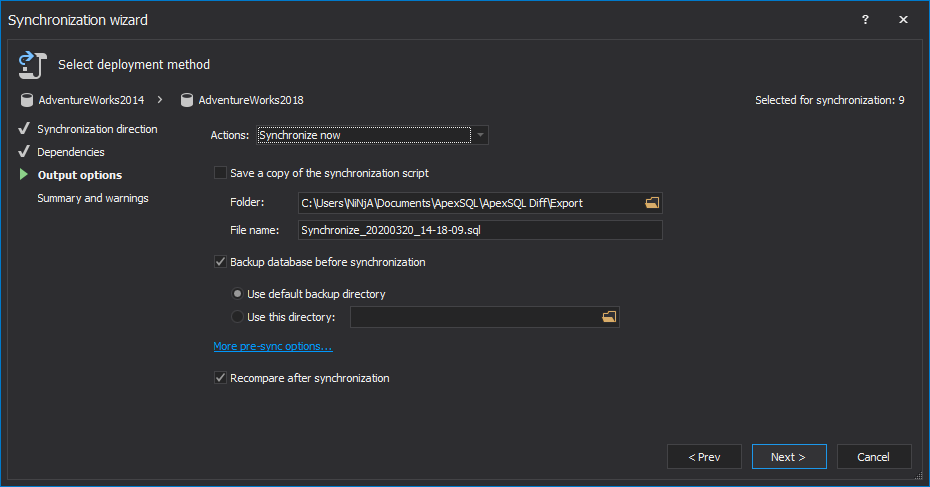
In this example, the Synchronize now action will be selected and the Backup database before synchronization option is checked to create a backup of a destination database on default SQL Server location:
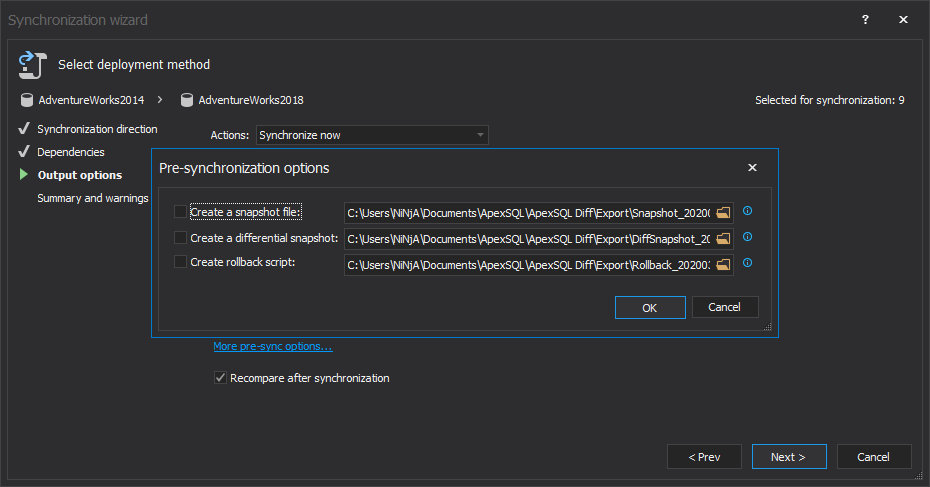
With a click on the More pre-sync actions link, additional three options are shown that can come in handy if a synchronized destination SQL database needs to be reverted to a previous state:
-
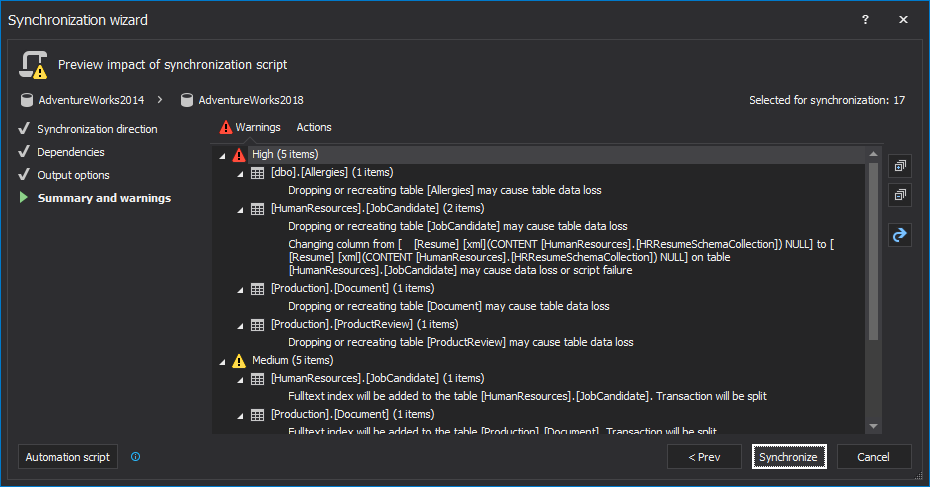
The last step is to review a list of Warnings and actions that will be done during the synchronization process:
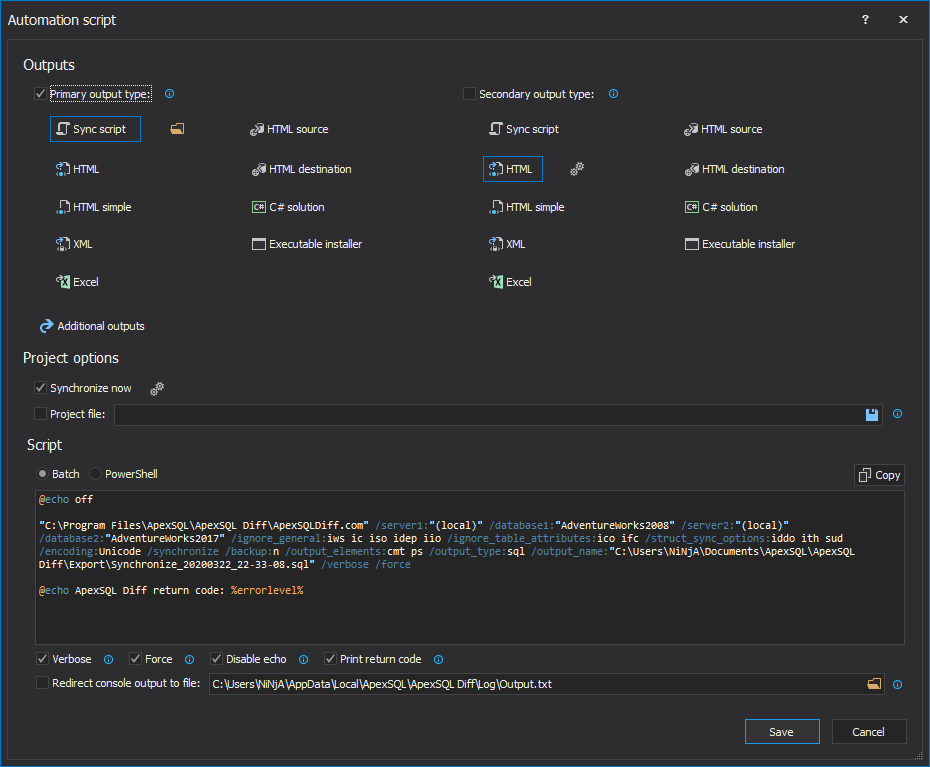
Additionally, a developer can create the automation script with a click on the Automation script button in the bottom-left corner of the Synchronization wizard and save it as a PowerShell script, or as a batch file, depending on preference:
Once the automation script is saved, the last step of the Synchronization wizard will be shown again
-
With a click on the Synchronize button, the synchronization process of a destination database begins:
-
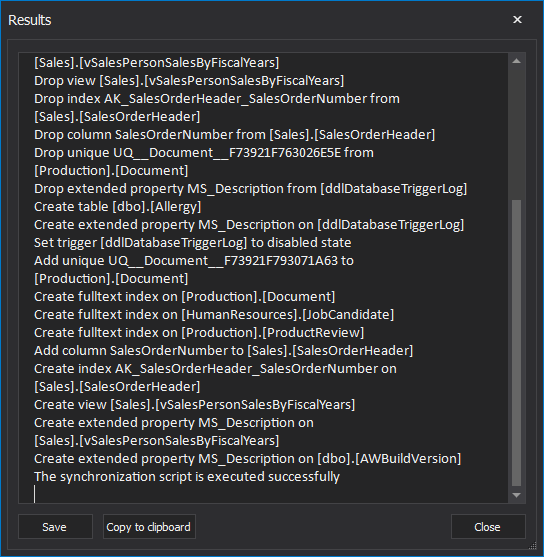
Once the synchronization process is finished, the Results dialog will be shown:


Conclusion
Both, Visual Studio Schema Compare and ApexSQL Diff have good solutions to compare two SQL databases from Visual Studio, with a few differences and some advantages, such as:
- Visual Studio Schema Compare can filter object types (but not individual objects) before the comparison, while ApexSQL Diff doesn’t have that option through the Schema compare query window that’s opened in Visual Studio, while it can edit the project afterwards and perform some further narrowing of objects and more detailed filtering
- Both tools have a lot of comparison and synchronization options with a bit more in Visual Studio Schema Compare
- Visual Studio Schema Compare lacks an option to backup a destination database before the synchronization process, while ApexSQL Diff has more than one
- Support for various export types of comparison results in ApexSQL Diff
- ApexSQL Diff informs and includes dependent database objects
- In addition to compare two SQL databases, ApexSQL Diff can compare other data sources
- Last, but not the least, the automation of the whole process is quite useful feature in ApexSQL Diff

He uses his spare time on tuning and styling of his car, playing video games, and fishing.
Nemanja is currently working for ApexSQL LLC as a Software sales engineer. He’s specialized in SQL database schema and data comparison and synchronization, and he helps customers with technical issues, providing DEMO presentations, and does the quality assurance for ApexSQL Data Diff and ApexSQL Diff.
View all posts by Nemanja Popovic