
In this article, it will be shown how to install MySQL 5.7 and 8.0.19 versions on an Ubuntu 18.04 machine.
MySQL is one of the most popular open-source relational database management systems and can be run on almost all platforms such as MS Windows, Linux, UNIX.
Prerequisite
To follow this article, Linux Ubuntu 18.04 must be installed on the machine.
By default, the latest MySQL version is included in the APT package repository. At the time of writing this article, it is MySQL 5.7 version. To install MySQL 8 version, you must manually add MySQL’s repository.
Install MySQL 5.7 server
The first command that needs to be executed via the terminal is:
|
1 |
sudo apt update |

This command will update the local repository index.
To install MySQL from the APT repository, run the following command:
|
1 |
sudo apt install MySQL-server |

During the process of the installation, the [Y/n] question to continue with the installation may appear, press the Y key from the keyboard, and hit Enter. This will install MySQL on the system.
To verify the version of installed MySQL, execute the following command:
|
1 |
mysql --version |

After the installation, the MySQL server should start automatically. To check if it’s running, execute the following command:
|
1 |
systemctl status mysql.service |
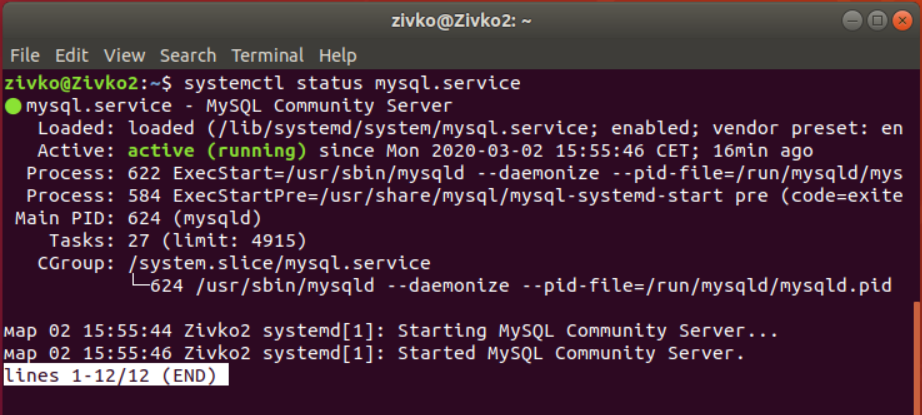
If, for some reasons, MySQL server is not running, execute the following command to start the MySQL server:
|
1 |
sudo systemctl start mysql |
Configure MySQL server
To improve the security of MySQL installation, use the mysql_secure_installation command:
|
1 |
sudo mysql_secure_installation |
After you press the Enter key, the first thing that will appear is the VALIDATE PASSWORD plugin prompt window:
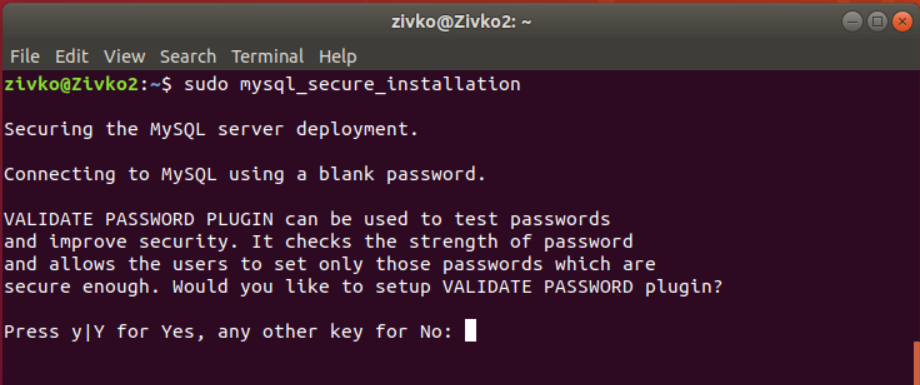
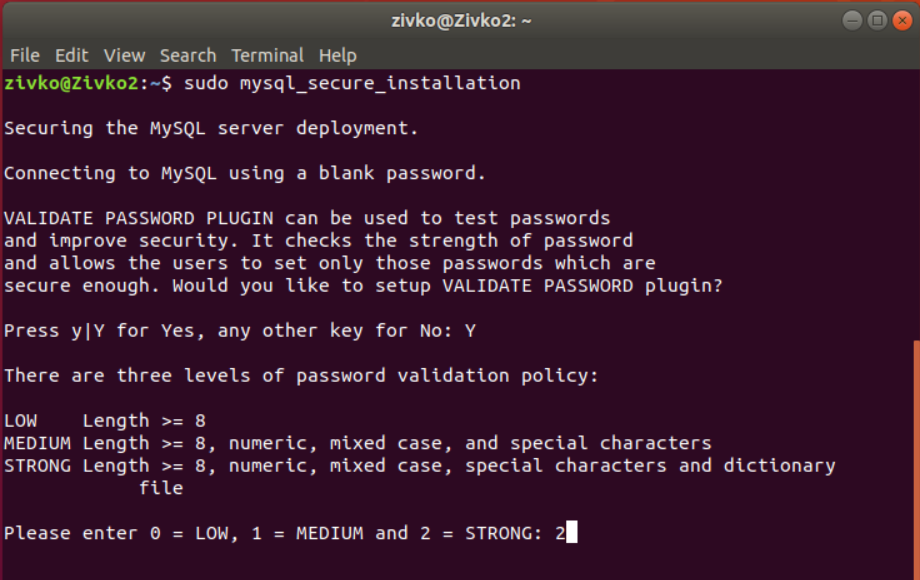
This step is to set up a secure password for the root user, depending on which type of password is chosen. Type the Y and press Enter. Enter the number for the password strength and press the Enter key:
On the next screen, enter and re-enter the password:
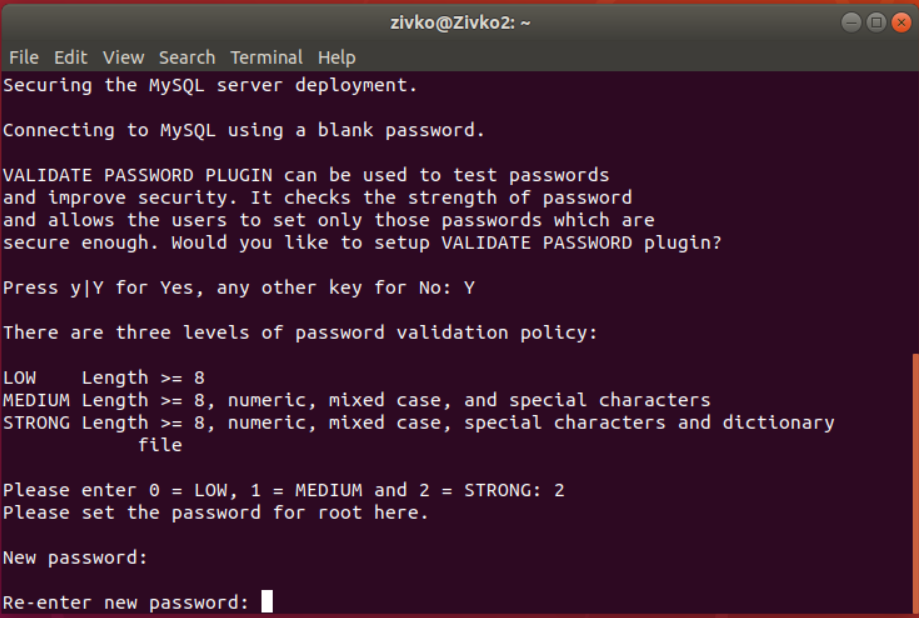
On the next step, the strength of the entered password will be shown and also will be prompted with the question to continue with the provided password. Chose Y and press the Enter key:

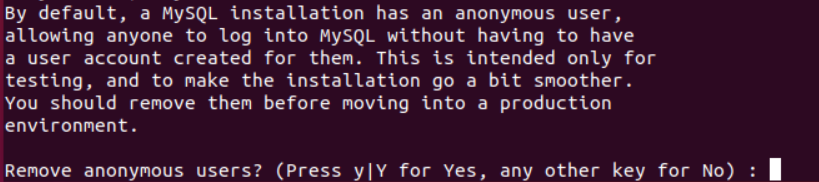
In the next couple of steps, you will be prompted with the questions and, depending on the answers you provide, the security on your system will be set.
The first question is about removing anonymous test users. Press Y and hit the Enter key:
The next question is about forbidding root login from remote systems. It is recommended for a root user to allow the connection from the local system and deny it from the remote connections. Chose Y and hit the Enter key:

The next question will be to remove the ‘test’ database. If you want to remove it, press Y and hit the Enter key:

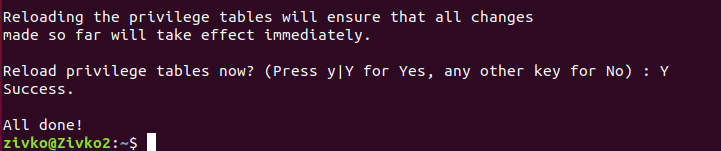
In the last step, you will be asked to reload privilege tables in order for the above-mentioned changes to take effect. Press Y and hit Enter and all security settings will be committed:

After the privilege tables are reloaded, the “All done!” message should appear:
Now, when all is set, let’s login to MySQL with the root user. In the terminal, type the following command:
|
1 |
mysql -u root -p |
Insert a password for the root user and hit Enter. Instead of login to the MySQL instance, you will get the following message:
zivko@Zivko2:~$ mysql -u root -p
Enter password:
ERROR 1698 (28000): Access denied for user ‘root’@’localhost’
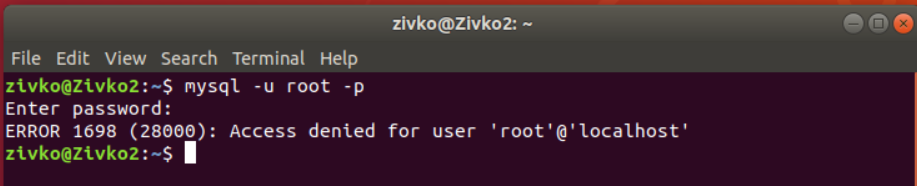
By default, the root user is to use the auth_socket plugin authentication method rather than the password. To set the root user to use a password to connect to MySQL instance, the authentication method needs to be changed from the auth_socket to the mysql_native_password method.
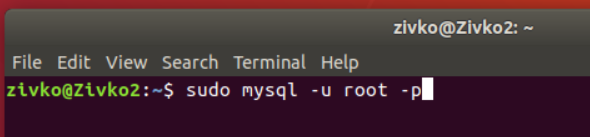
To do this, firstly, connect to the MySQL instance using the sudo command in front of the MySQL user:
|
1 |
sudo mysql -u root -p |
To check which authentication method each MySQL user uses, type the following command:
|
1 |
SELECT user,authentication_string,plugin,host FROM mysql.user; |
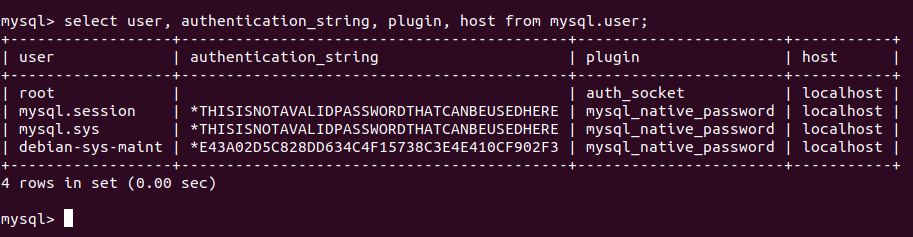
As can be seen from the image above, the root user uses the auth_socket plugin. To set to root user authenticate with a password, execute the following command:
|
1 |
ALTER USER 'root'@'localhost' IDENTIFIED WITH mysql_native_password BY '<set password>'; |
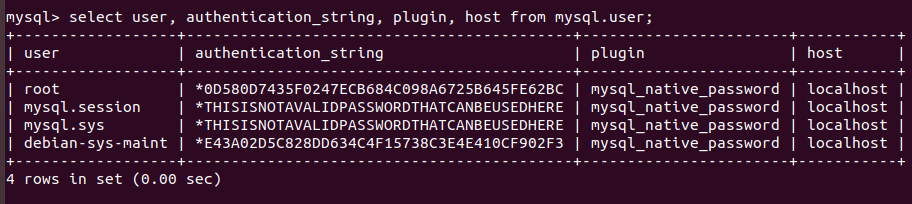
After executing the ALTER USER command, run the following command:
|
1 |
FLUSH PRIVILEGES; |
This command will reload the grant tables and make the changes take effect. When checking which authentication method is used by the root user, you’ll get this:
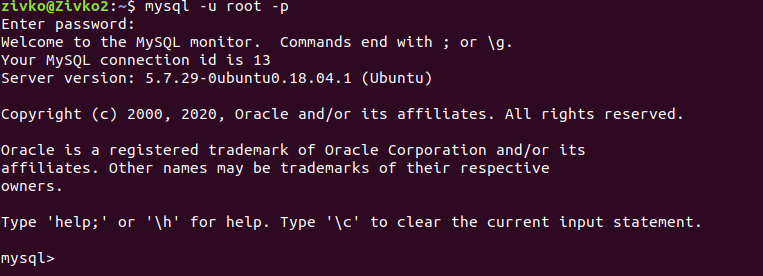
Now, when trying to login to MySQL using the root user, you’ll be logged without any problems:
Install MySQL 8 server
If you want to install the latest MySQL version, in this case, MySQL 8 version, the first thing that needs to be done is to download the latest release package using the wget command from the MySQL APT Repository:
|
1 |
wget -c https://dev.mysql.com/get/mysql-apt-config_0.8.15-1_all.deb |
To install MySQL package, execute the command below:
|
1 |
sudo dpkg -i mysql-apt-config_0.8.15-1_all.deb |
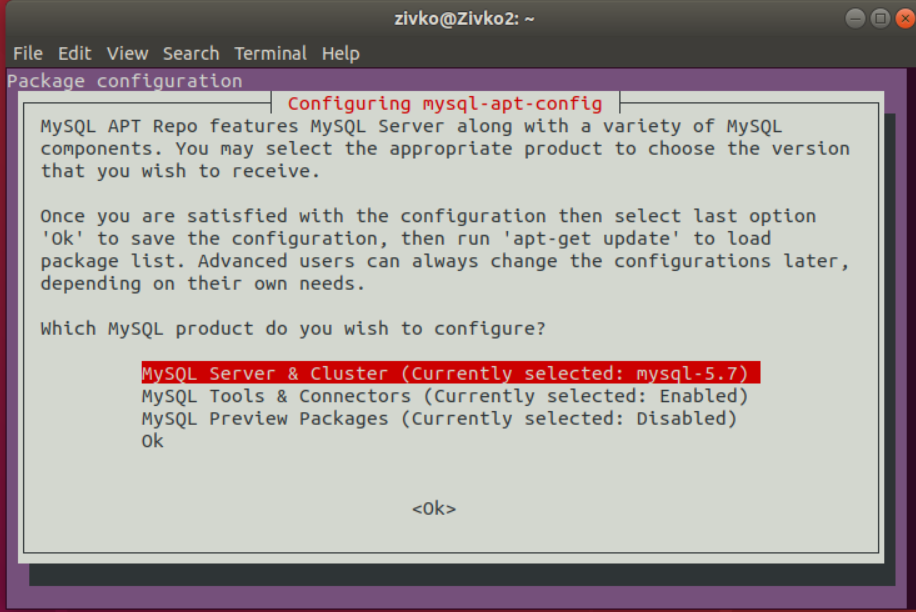
In the first window that will be shown, select the first line and hit the Enter key:
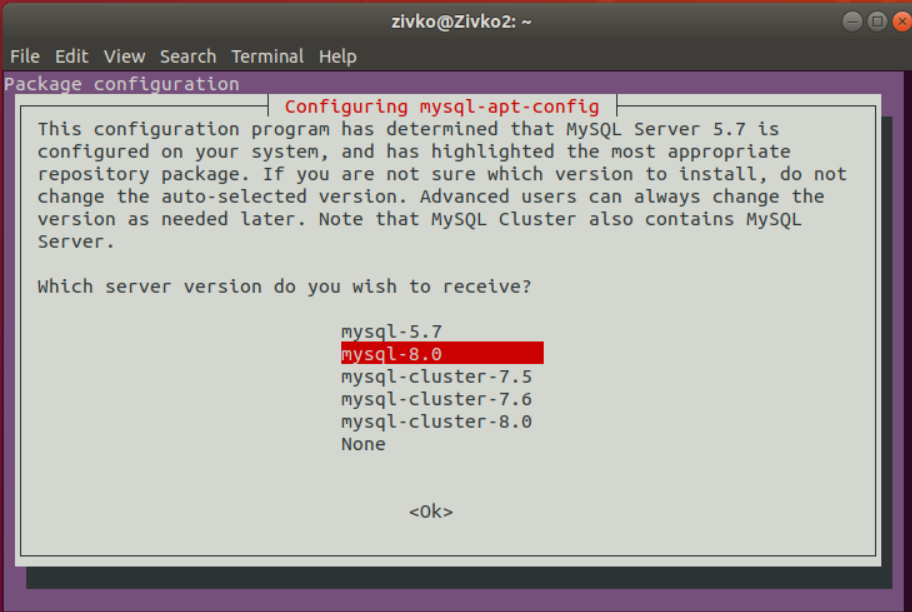
In the second window, the MySQL version can be selected. Here, you can choose between MySQL 8.0 or 5.7 version. Choose MySQL 8.0 version and press the Enter key to proceed:
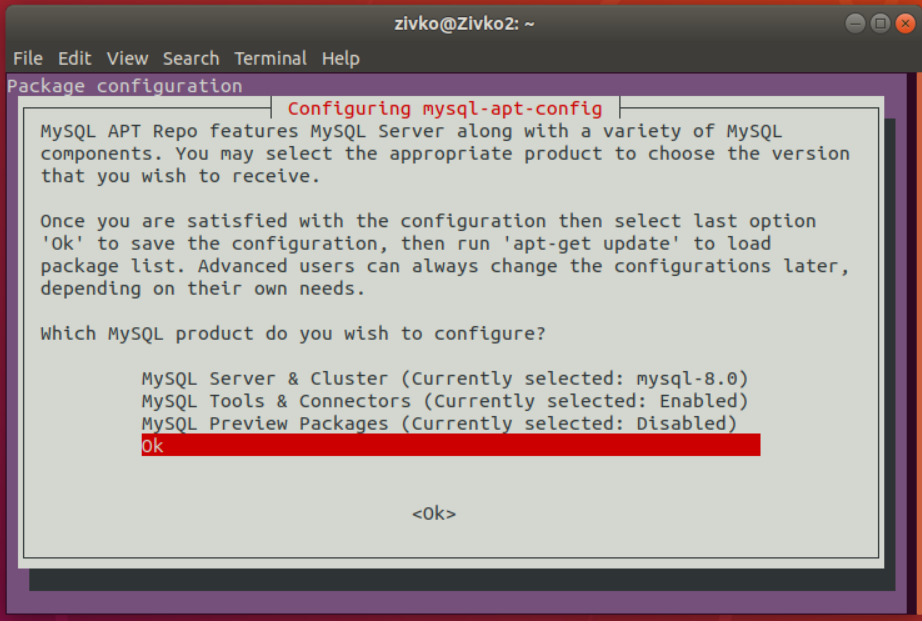
Now, select the last line with the Ok text and press the Enter key to continue:
Now, in terminal to download the latest package information from all repositories including the recently added MySQL repository, execute the following command:
|
1 |
sudo apt update |
To install MySQL 8, execute again the command that we used to install MySQL 5.7 version:
|
1 |
sudo apt install MySQL-server |
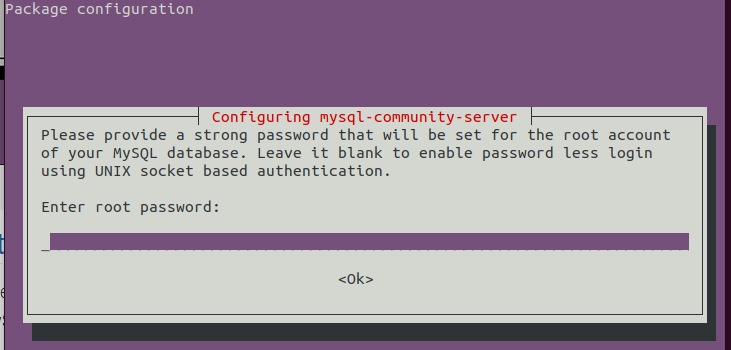
In the beginning, it will be prompted to insert a password for the root user. Enter the password and press Enter:
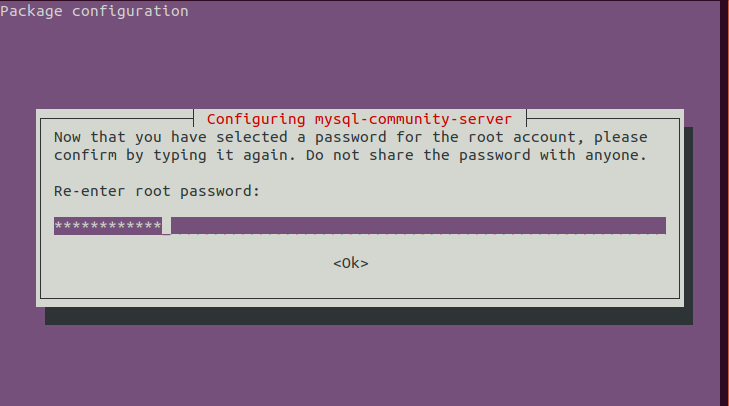
In the next window, insert the password again for the root user and hit Enter:
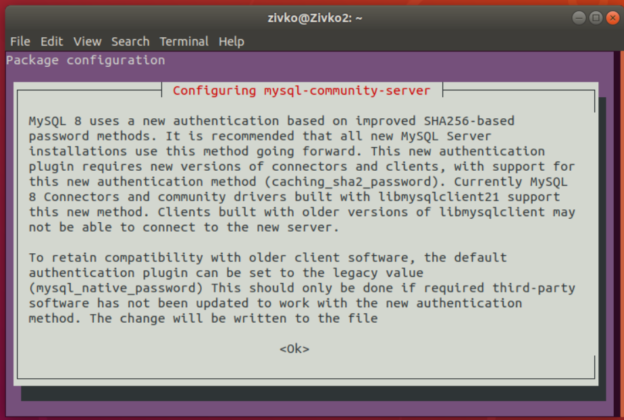
Next, some information about the new authentication system based on SHA256-based password methods will be shown, use the right arrow to select the Ok button and hit Enter to proceed:

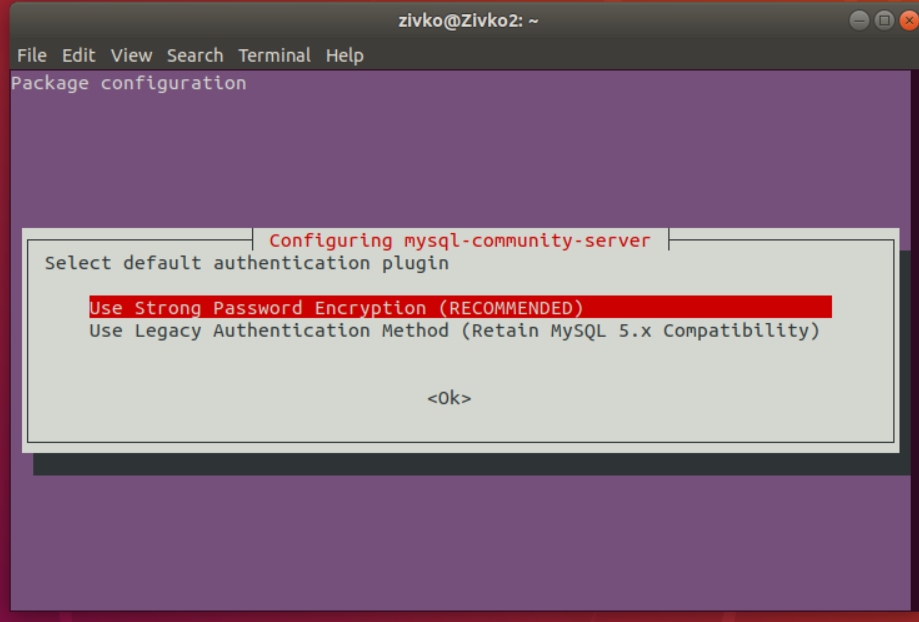
In the next window, you will be asked to choose the authentication plugin, select the first one, and hit Enter:
After this step, the installation of MySQL 8 will proceed, and the server will be installed in your system. To check the installed MySQL version, use the following command:
|
1 |
mysql -V |

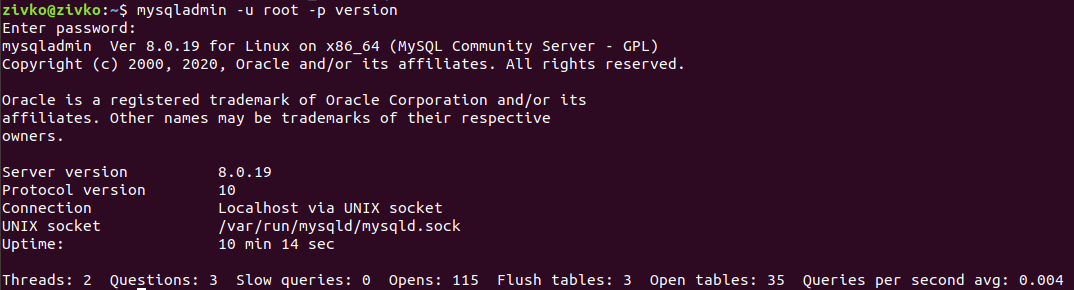
To see more information about MySQL server, execute the following command:
|
1 |
mysqladmin -u root -p version |
Uninstall MySQL server
To remove MySQL from Ubuntu 18.04, firstly, MySQL server needs to be stopped from services by executing the command below:
|
1 |
sudo service mysql stop |
Then, use the purge command to uninstall:
|
1 |
sudo apt-get purge mysql-server mysql-client |
In the prompted window, select the Yes button and press Enter:
Then type and execute these two commands:
|
1 |
sudo apt-get autoremove |
|
1 |
sudo apt-get autoclean |

He is a prolific author of authoritative content related to SQL Server including a number of “platinum” articles (top 1% in terms of popularity and engagement). His writing covers a range of topics on MySQL and SQL Server including remote/linked servers, import/export, LocalDB, SSMS, and more.
In his part-time, Zivko likes basketball, foosball (table-soccer), and rock music.
See more about Marko at LinkedIn
View all posts by Marko Zivkovic
- How to connect to a remote MySQL server using SSL on Ubuntu - April 28, 2020
- How to install MySQL on Ubuntu - March 10, 2020
- Using SSH keys to connect to a remote MySQL Server - November 28, 2019