

This article will explain how to set up a connection from a Windows host OS using a PuTTY client to a remote MySQL server on Linux Ubuntu 18.04.
Before we start, you must have already:
- Installed Windows 10 OS on a local machine
- Installed Linux Ubuntu 18.04 on a remote machine
MySQL installation on Linux Ubuntu 18.4
First, you must install MySQL on the remote Linux machine.
On Linux Ubuntu 18.4, open the Terminal, type the sudo apt-get update command and press the Enter key:

Next, in the Terminal, type the sudo apt-get install mysql-server command to start installing MySQL:
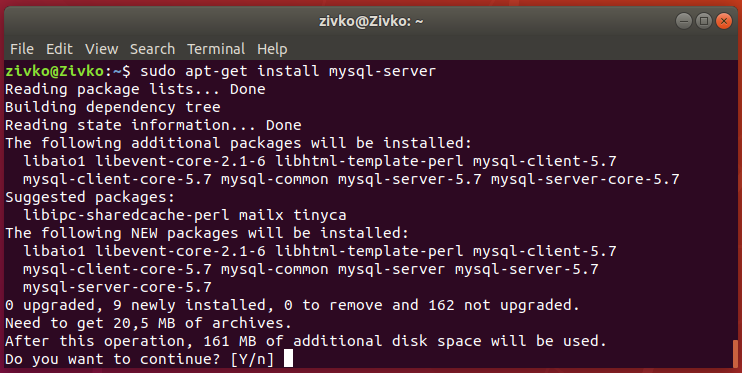
Type Y to proceed with the installation.
To see which version is installed on the machine, type and run the mysql –version command:

For detailed information on how to install and configure MySQL, please visit the How To Install MySQL on Ubuntu 18.04 page.
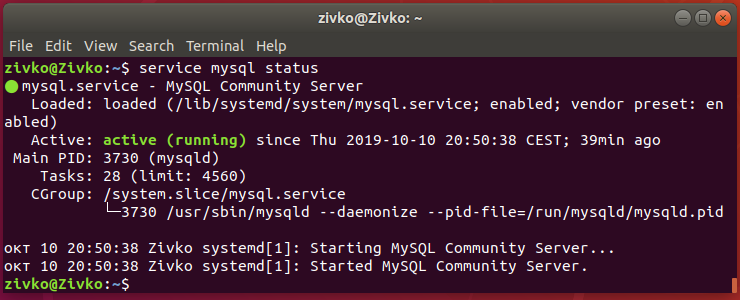
After setting up MySQL, make sure it is active and running. To see the status of MySQL, type and run the service mysql status command:
If MySQL is not running (inactive),
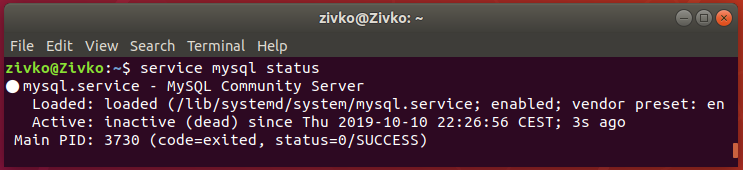
Execute the sudo service mysql start command:

Install SSH server on Linux Ubuntu 18.4
To install Secure Shell (SSH) on Linux Ubuntu 18.4, from the Terminal type the sudo apt install openssh-server command. Press the Enter key and type user password when prompted. Then press Y and Enter to continue with the installation:

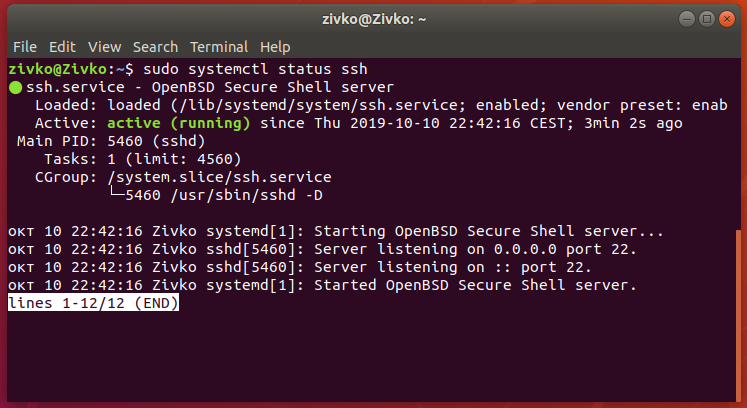
To verify that the installation was successful and the SSH service is running, type and run the sudo systemctl status ssh command:
If the SSH server is not running, type and execute the sudo systemctl start ssh command.
Installing SSH client on Windows OS
There are many SSH clients for Windows OS. For the purpose of this article, we’ll use the 64-bit PuTTY client to connect to the remote MySQL server.
Double click on the putty-64bit-<version>-installer.msi installer. The Welcome window will appear. Click the Next button to continue:

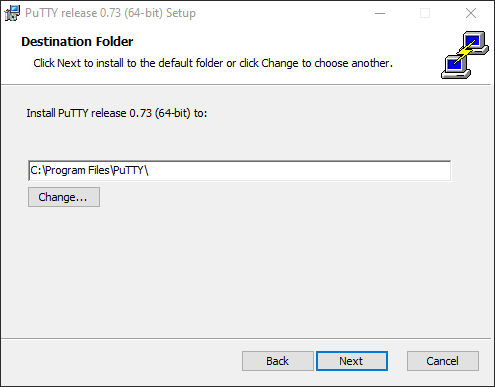
During the Destination Folder step, choose where the PuTTY client will be installed:
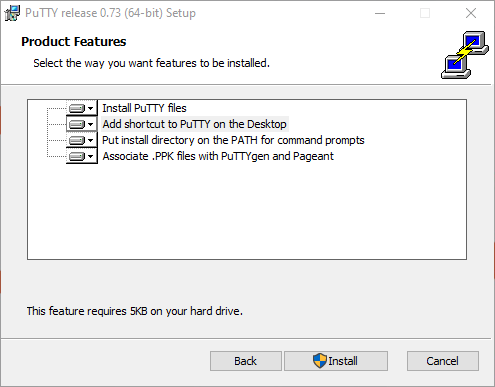
In the Product Features step, select the way you want the features installed. If you plan to use PuTTY frequently, add a PuTTY shortcut to the Desktop. Click the Install button:
After the successful installation, click the Finish button to close the PuTTY installer:

Connect to a remote MySQL server
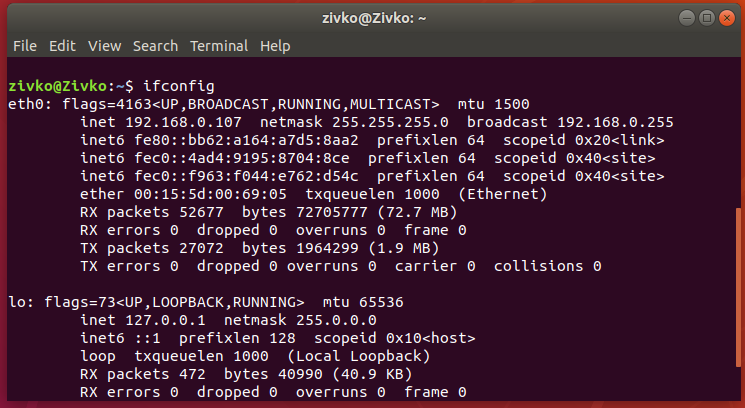
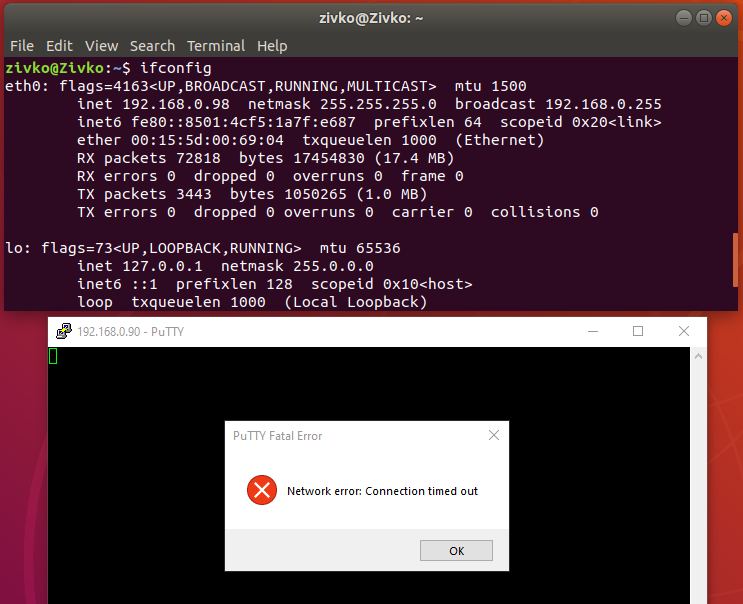
To connect to a remote MySQL server, you’ll need its IP address. Go to Linux Ubuntu 18.04 and in the Terminal, type ifconfig or the IP address command and see information under inet:
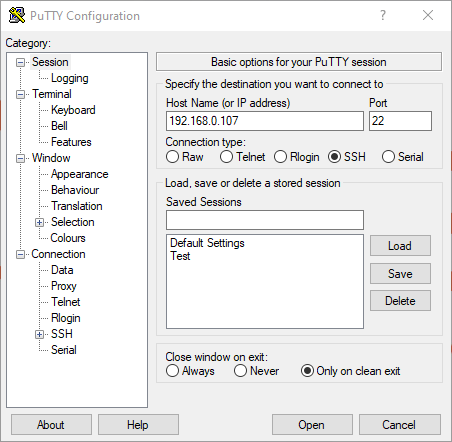
Now, go to the local Windows machine and launch PuTTY. In the Host Name (or IP address) box, under the Session tab, enter the IP address of the remote machine and click the Open button:
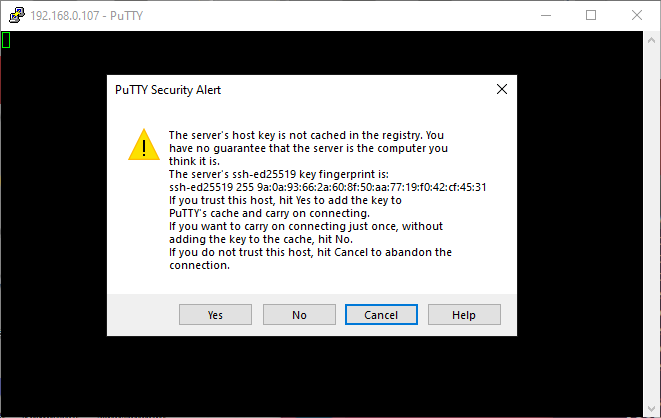
The PuTTY Security Alert warning dialog appears the first time you connect. Click the Yes button to continue:
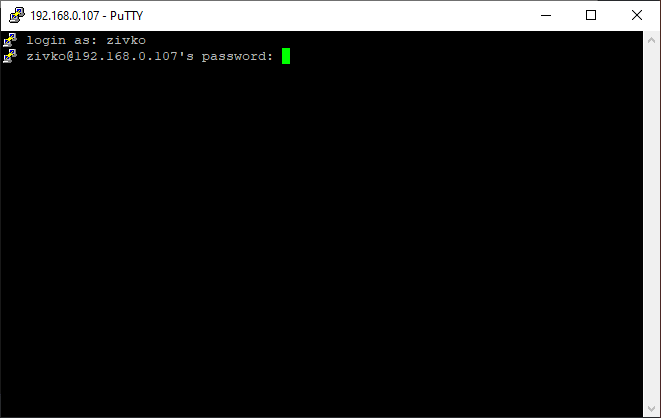
In the login as, type the username that will be used to connect to the remote machine. Press Enter and type a password for that user:
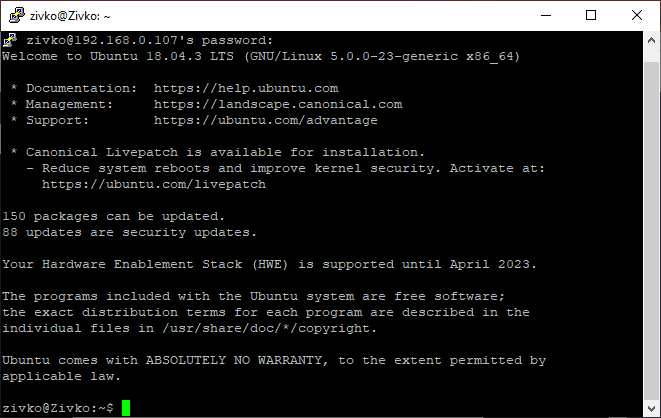
When logged in, the terminal should look like this:
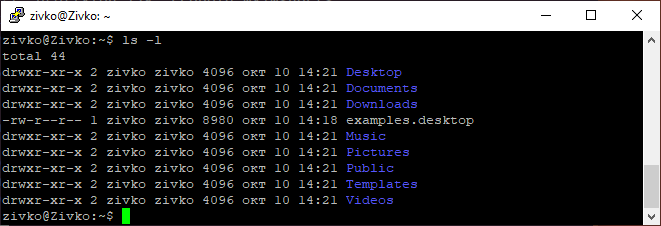
To check the connection, execute some commands, for example, ls -l:
Now, type and run the mysql -u root -p command for a root user or for a user who has permission to connect to a remote MySQL server:
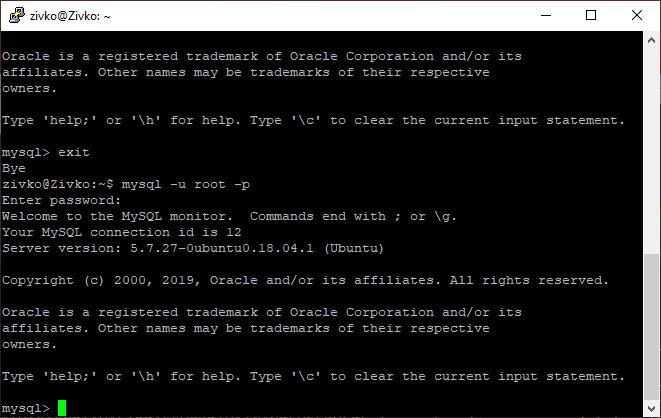
If the ERROR 1698 (28000): Access denied for user ‘root’@’localhost’ appears when trying to connect to the remote MySQL server when using the root user, the authentication method from auth_socket to mysql_native_password needs to be changed. To change this, open the MySQL prompt from a terminal:
sudo mysql
Now, check the authentication methods of MySQL user accounts and type the following code:
|
1 |
SELECT user, authentication_string, plugin, host FROM mysql.user; |
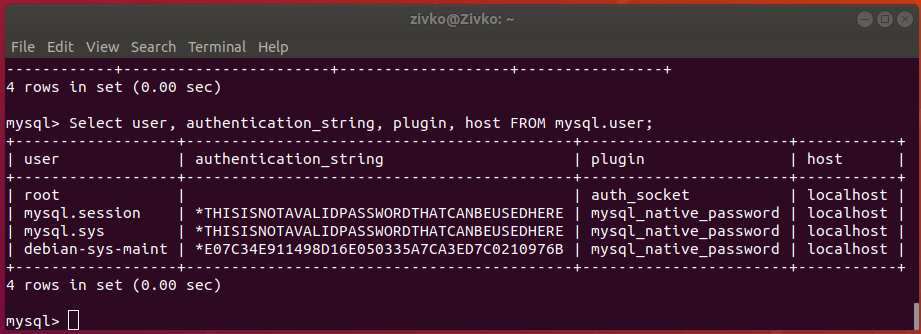
As shown in the example, the root user uses the auth_socket authentication method (plugin).
To configure the root user, use the mysql_native_password authentication method. Execute the following code:
|
1 |
ALTER USER 'root'@'localhost' IDENTIFIED WITH mysql_native_password BY 'password'; |
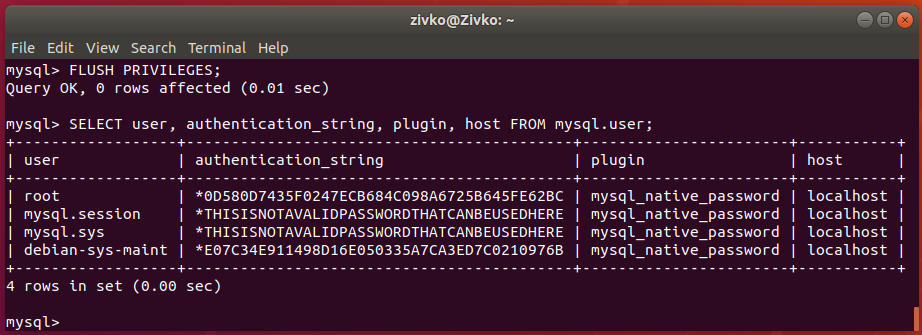
Then, execute the FLUSH PRIVILEGES code which tells the server to reload the grant tables and put your new changes into effect:
|
1 |
FLUSH PRIVILEGES; |
Now, when checking the authentication methods for the MySQL users, it can be seen that the authentication method for the root user is changed from auth_socket to mysql_native_password:
|
1 |
SELECT user, authentication_string, plugin, host FROM mysql.user; |
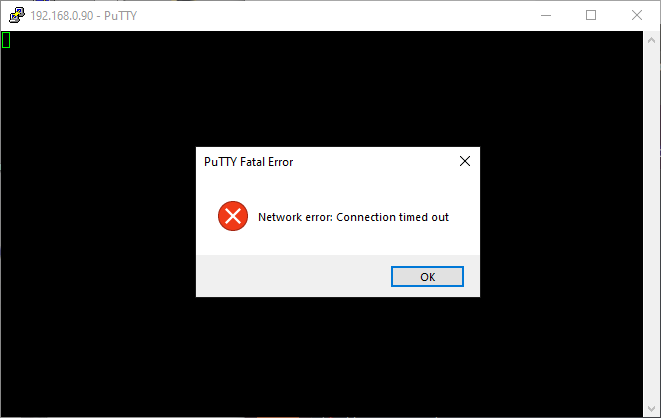
Another common problem that can occur when trying to connect to a remote MySQL server is when Uncomplicated Firewall (UFW) is active, and traffic on port 22 is not allowed. In a situation like this, the error Network error: Connection timed out may appear:
To resolve this, make sure that the firewall is either down, or the rules are correct to allow you to connect to the remote MySQL server.
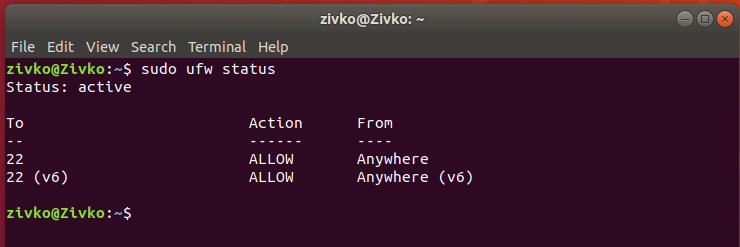
Check the status of the firewall by using the following command:
sudo ufw status

As shown above, the firewall is active. To disable it, type and execute the following command:
sudo ufw disable

To allow traffic over port 22 without disabling the firewall, type and run the following command:
sudo ufw allow 22

Now, when checking ufw status, it can be seen that port 22 is set/enabled in the firewall:
Also, in ufw, you can set a rule to allow ssh service traffic instead of a port, by typing the following command:
sudo ufw allow ssh
The same Network error: Connection timed out error message may appear if, in the Host Name box of the PuTTY Configuration dialog, you type a wrong IP address:
If you are using SQL Server Management Studio and want to connect to a MySQL server and query data, you can look at articles that show how to configure and use MySQL linked servers:
- How to create and configure a linked server to connect to MySQL in SQL Server Management Studio
- MySQL Query (T-SQL) Tutorial for SQL Server

He is a prolific author of authoritative content related to SQL Server including a number of “platinum” articles (top 1% in terms of popularity and engagement). His writing covers a range of topics on MySQL and SQL Server including remote/linked servers, import/export, LocalDB, SSMS, and more.
In his part-time, Zivko likes basketball, foosball (table-soccer), and rock music.
See more about Marko at LinkedIn
View all posts by Marko Zivkovic
- How to connect to a remote MySQL server using SSL on Ubuntu - April 28, 2020
- How to install MySQL on Ubuntu - March 10, 2020
- Using SSH keys to connect to a remote MySQL Server - November 28, 2019