
In this article, we will review how to configure SAN less SQL Server cluster in AWS EC2 instances using SIOS DataKeeper.
SQL Server clustering is a high availability feature which failover the SQL Server resources to the secondary node in case of a failure in the primary node. The data is stored in the shared drive and will be accessible to the active node in the cluster. In case of failover, we do not need to transfer jobs, logins, linked server or server scoped triggers, etc. to the other node as the instance is the same.
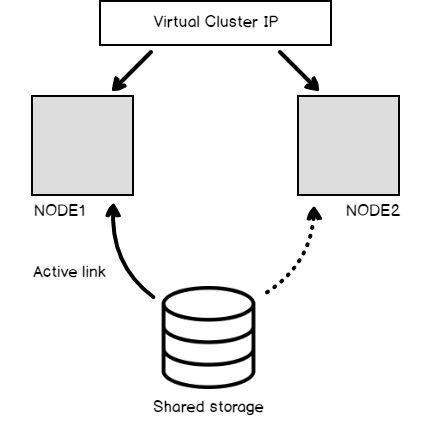
Please refer to the below image which shows the traditional SQL Server failover cluster using shared disks. The shared disks are active on the NODE1 which is active, and the SQL server services are running on NODE1. The users connect to the instance using a virtual SQL Server cluster name or IP address which routes the request to the active node in the cluster.
SQL Server clustering using SIOS DataKeeper
SIOS DataKeeper allows us to build the SQL Server cluster on cloud environments without the need for shared storage.
The data in the disk on the primary node is mirrored to the secondary node. Please refer to the below image for SAN less SQL Server cluster using SIOS DataKeeper.
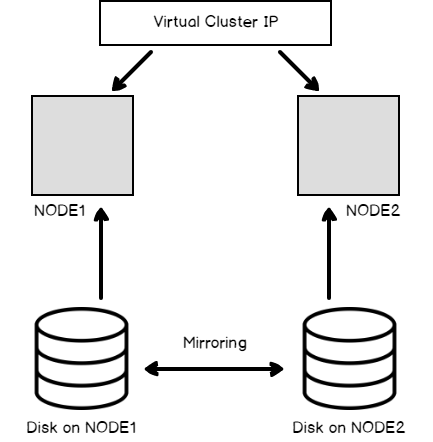
NODE1 will have its disk and NODE2 will have its disk. SIOS DataKeeper will replicate the data to the other node synchronously or asynchronously based on the option we choose.
The following are the steps involved in configuring the SAN less SQL Server cluster in AWS EC2 instances.
- Launch two instances and add them to one domain
- Configure windows failover cluster
- Attach a volume to both instances
- Configure SIOS jobs to replicate the data
- Install the SQL Server failover cluster
Let go over these steps one by one.
For demo purpose, I am launching a Windows server 2016 base from AWS console to installing active directory services and make it as a domain controller. For production servers please configure domain controller with all the security and firewall rules you need.
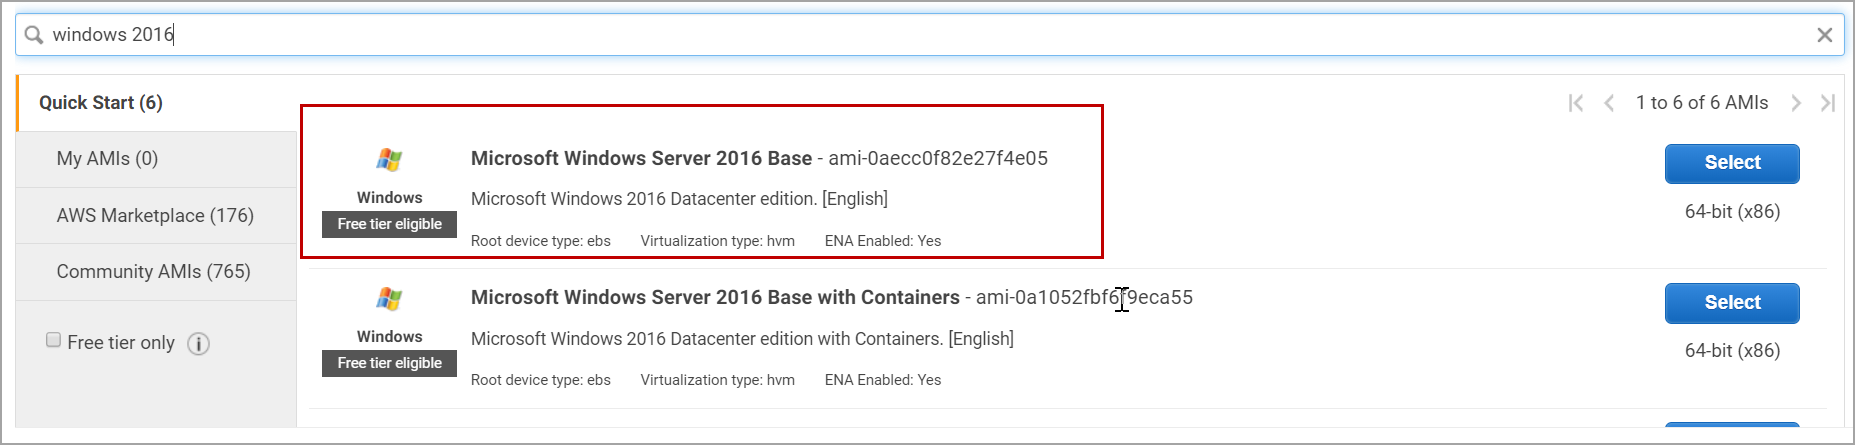
Log in to the AWS and navigate to the EC2 console. Click on Launch an instance and search for Windows Server 2016 base image. Select the image as shown in the below image.
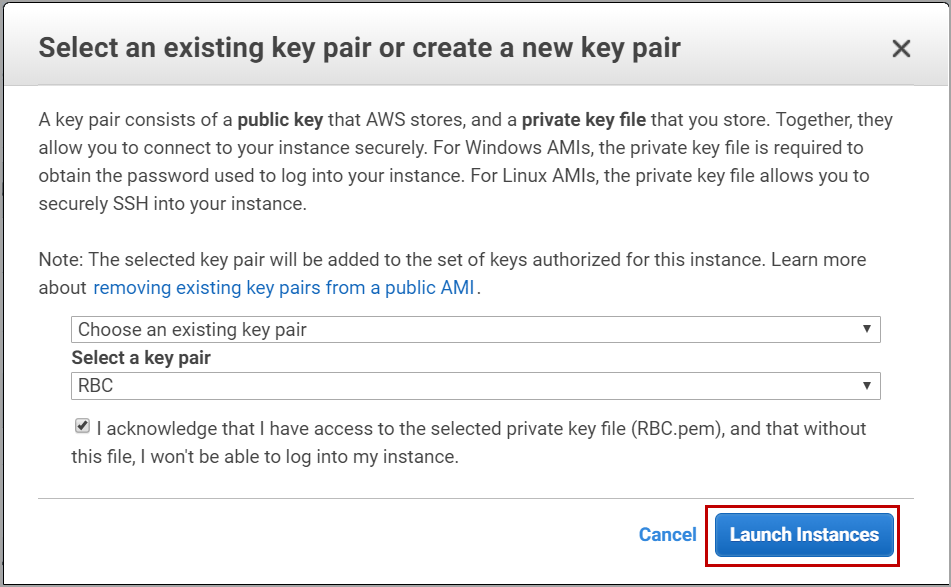
Choose the Instance type. In this case, I choose t2.medium Configure the instance details and add the storage. Choose the security group if you already have one or create a new one. While launching the instance choose the key pair and make sure you have the key pair which will be used to connect the instance later.
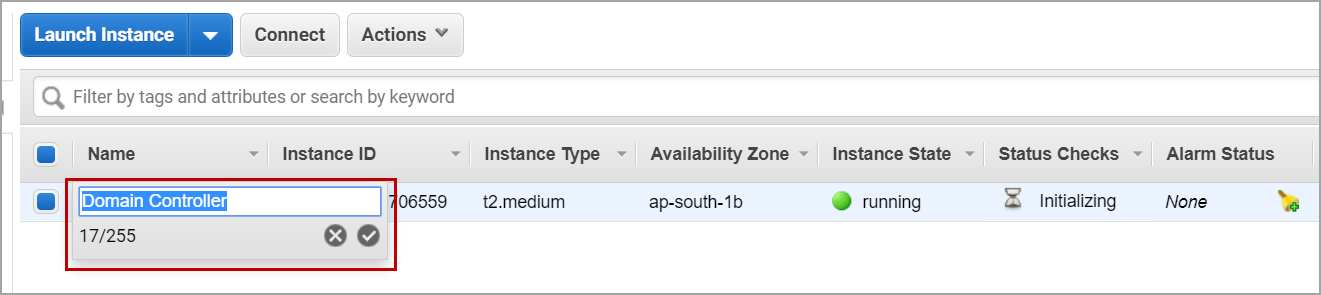
After four or five minutes the instance will be available for use. For identification purposes, I am naming it as “Domain Controller”.
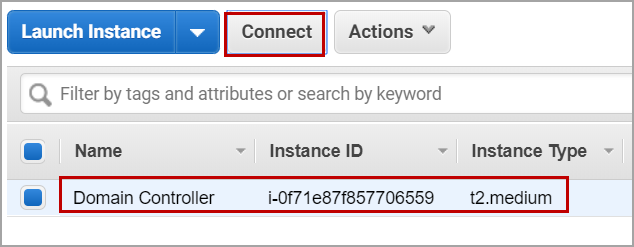
Now select the instance and click on Connect.
Click on Get Password. upload the .pem which was used to launch the instance. Click on decrypt the password.
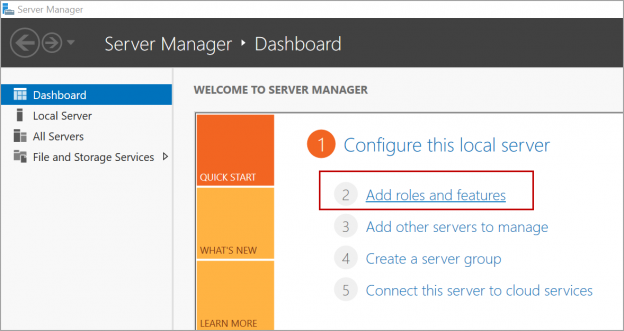
RDP the instance using the public IP and the password of the instance. Launch Server Manager and click on Add roles and features.

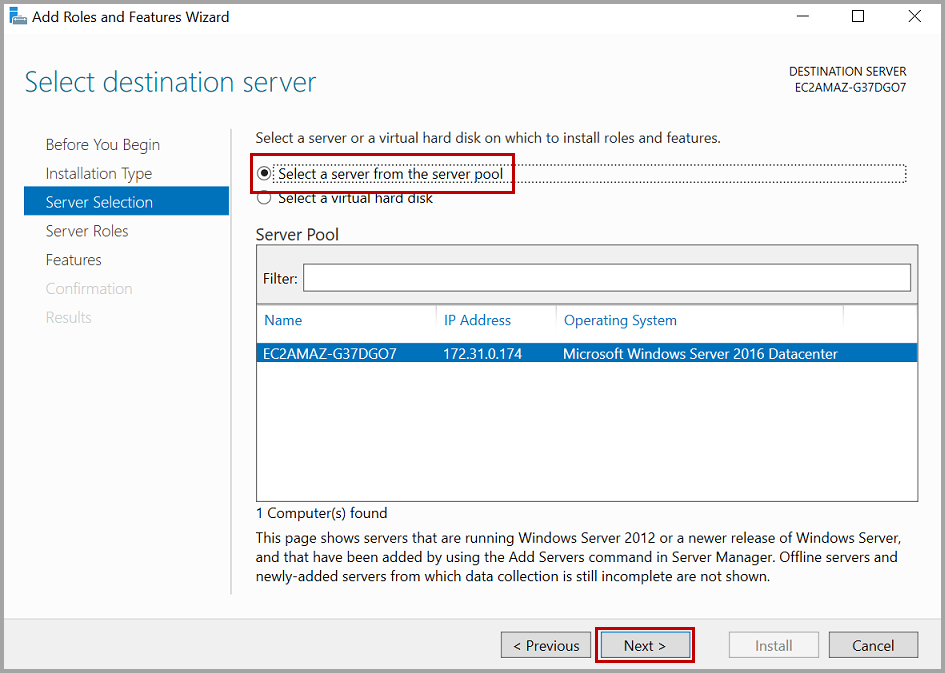
Click Next and select roles based or feature-based installation and click Next. Select a server from the pool and click Next.
Select Active Directory domain services and click Next, Next and Install.
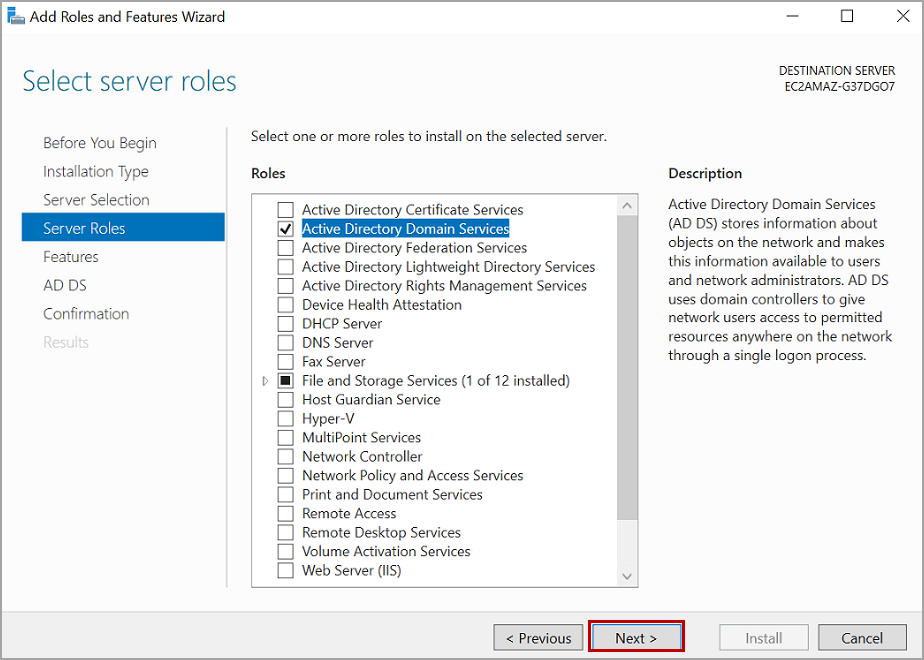
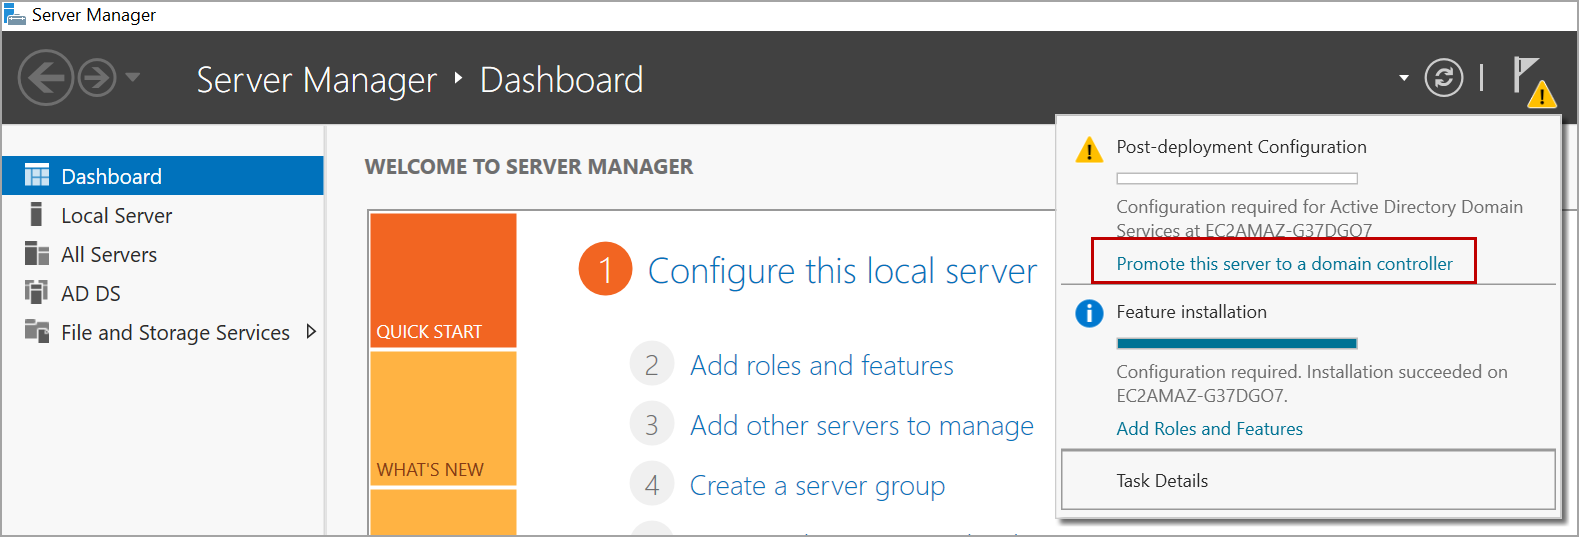
Once the installation is completed, close the window and click on Promote this server as a domain controller.
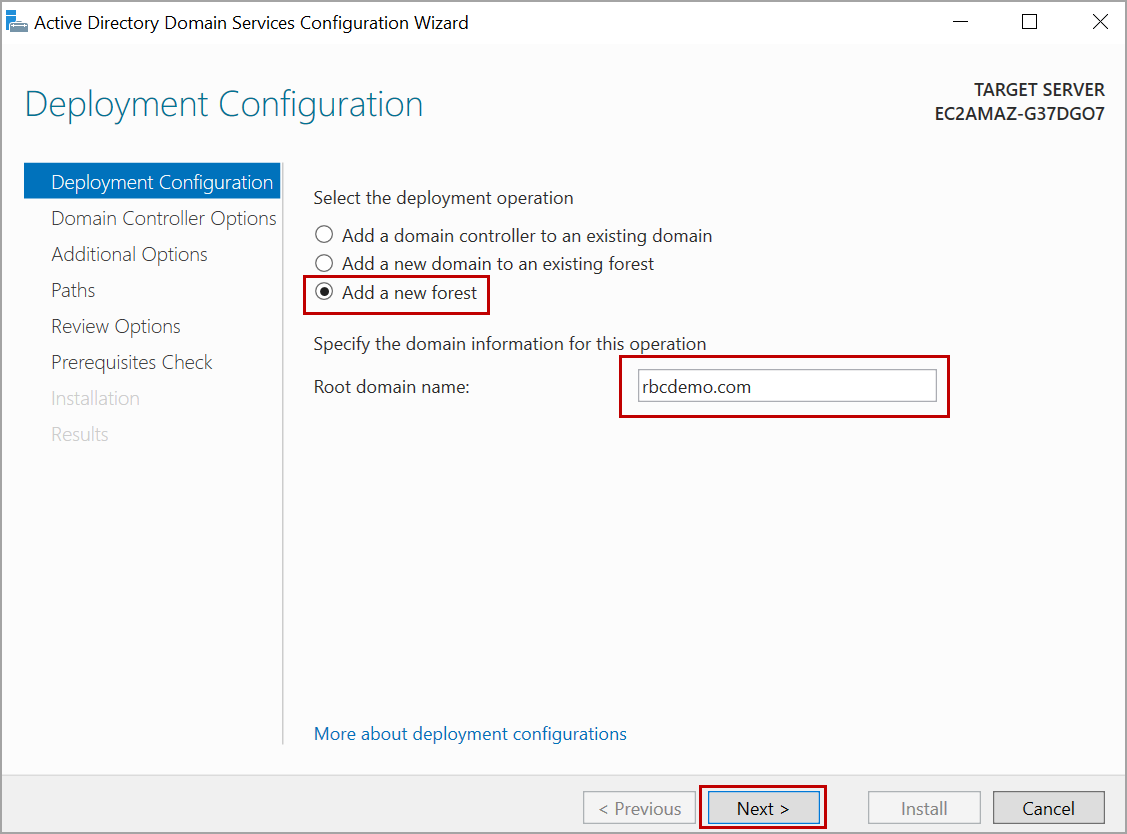
Select Add a new forest and enter the domain name. Click Next.
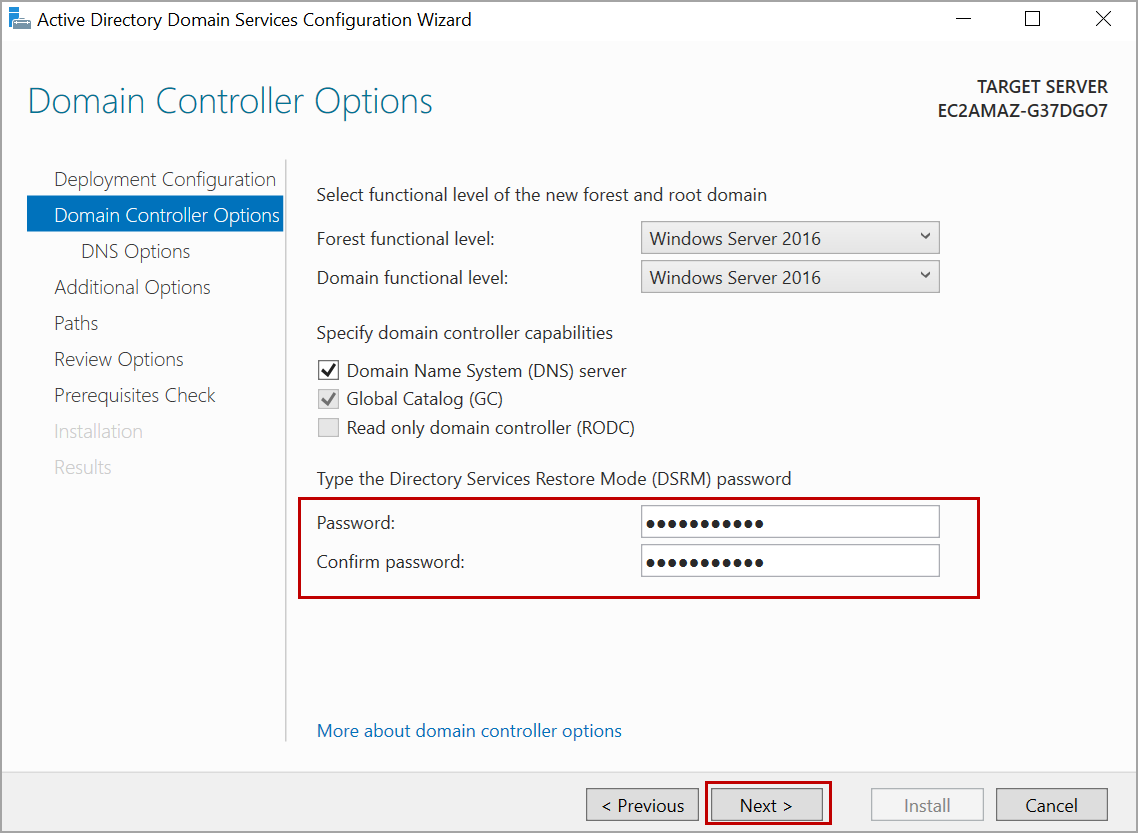
Enter the password and click Next.
Click Next. Enter the NetBIOS name and click Next. Specify the paths for the AD database and logs.

Once the prerequisites check is successful, click on Install. Once the installation completes the server will reboot.
After reboot, RDP to the server again. Launch Active Directory Users and Computers. Create a new user and add it Administrators and Domain Controllers, Domain Computers, Domain Administrators group.
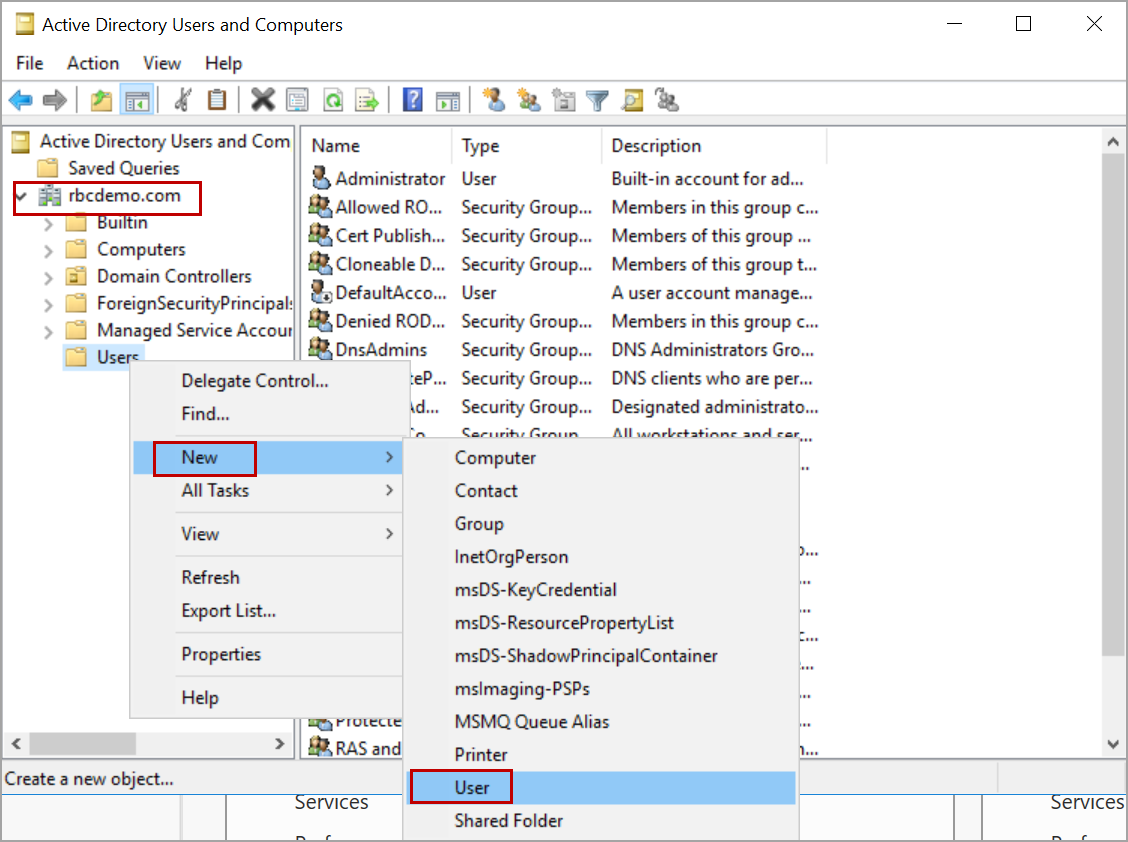
Launch two instances and add them to one domain
In this demo, I am setting up a two-node SQL Server cluster. So, I am launching two new nodes and join them to the domain we created above. These two nodes will be part of the cluster.
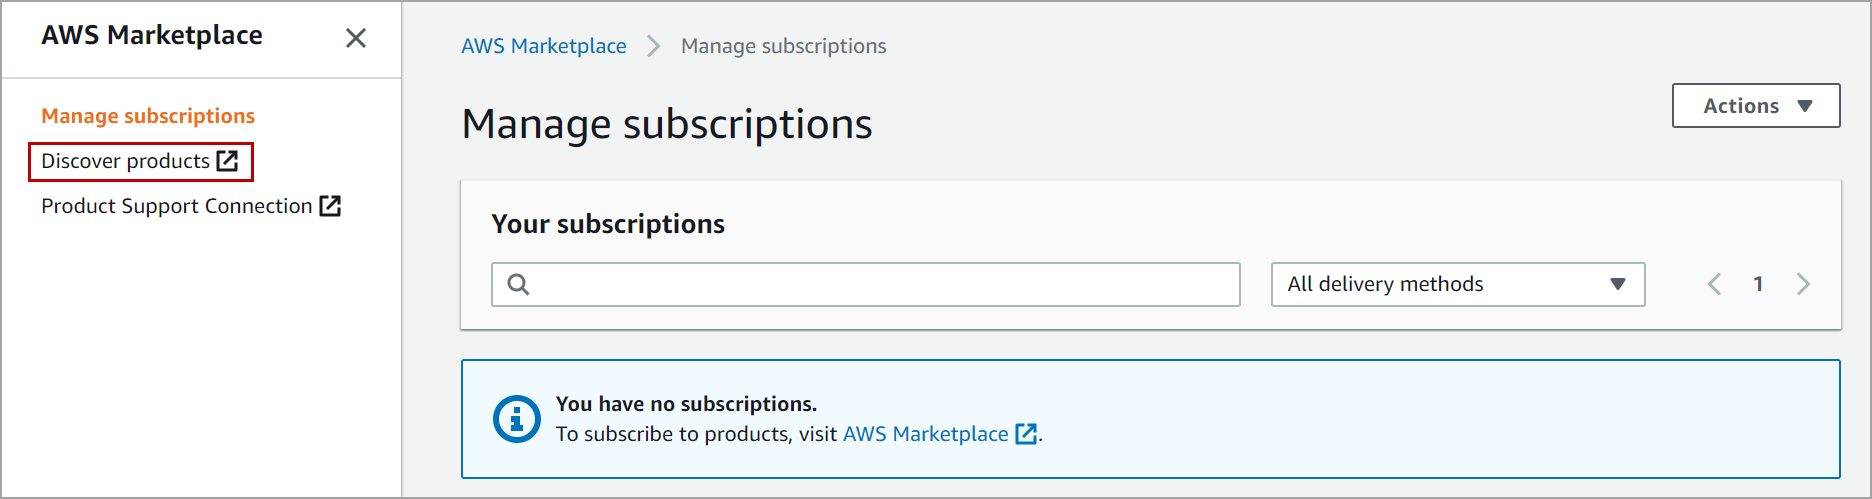
There are two ways to launch the instances. One is launching the instances using EC2 console and install SIOS DataKeeper with your license. The other way is subscribing to SIOS DataKeeper in the AWS Market place and launch the instance from there. This way EC2 instance comes with SIOS pre-installed.
In this demo, we will use a subscription model.
To subscribe for SIOS data keeper, Navigate to AWS Market Place subscriptions. Click on Discover products.
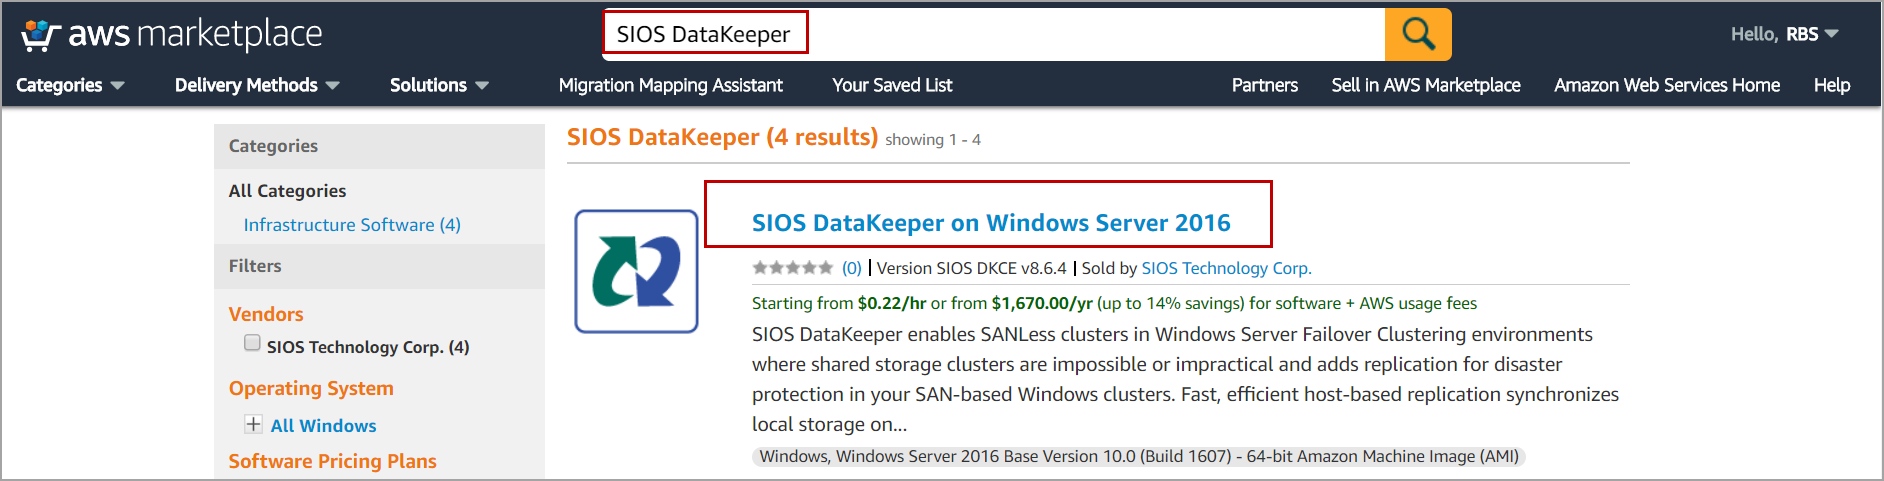
Search for SIOS DataKeeper and click on SIOS DataKeeper on Windows Server 2016.
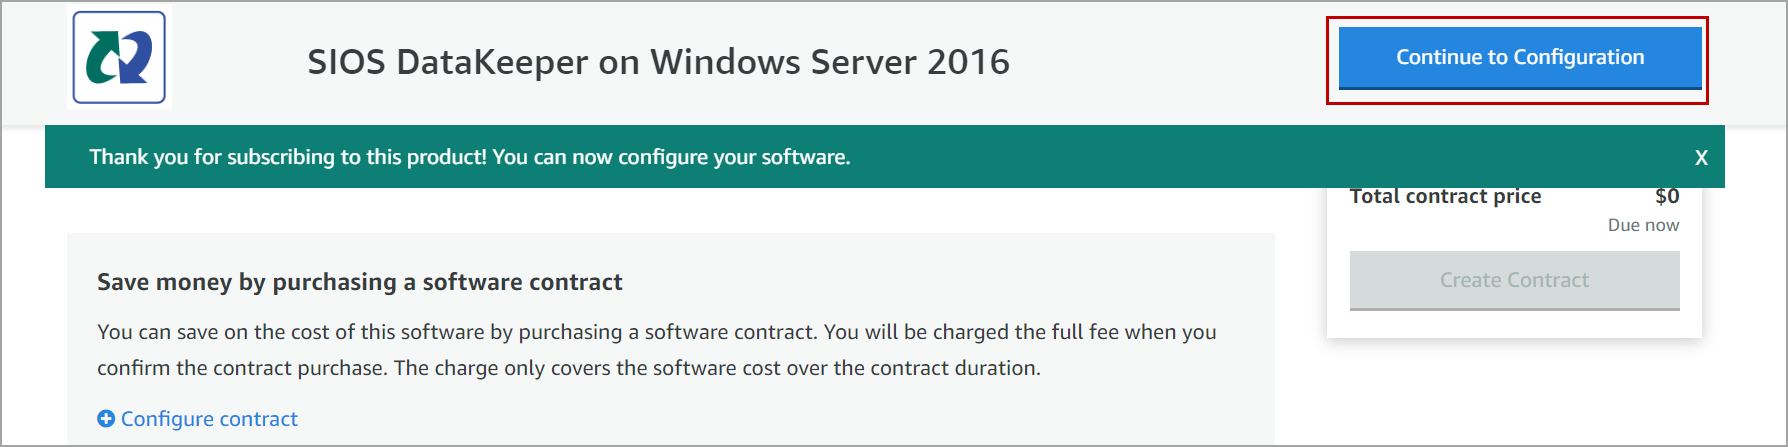
Click on Continue to Subscribe and Accept Terms.
Once the subscription is successful, click on Continue to Configuration.
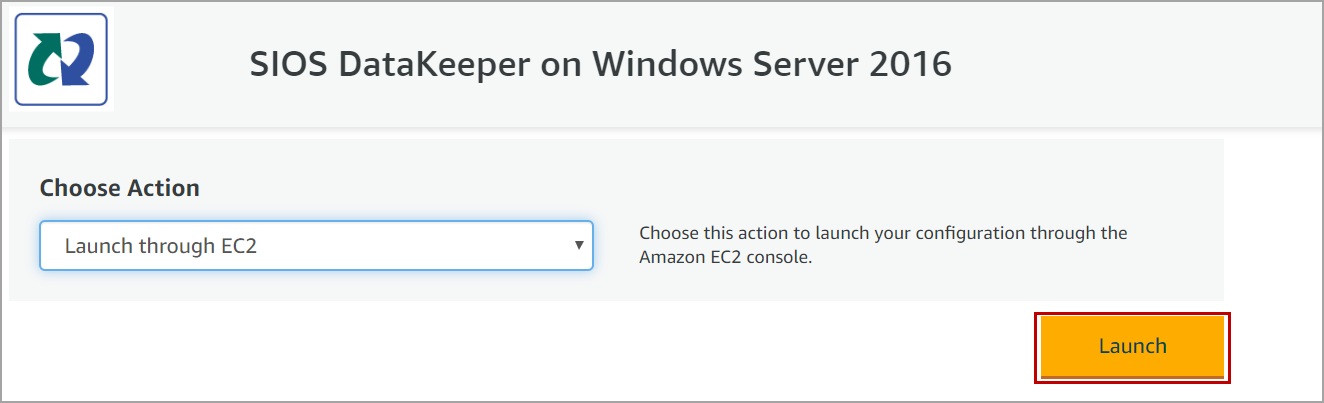
Select the region, software version and click on Continue to Launch.
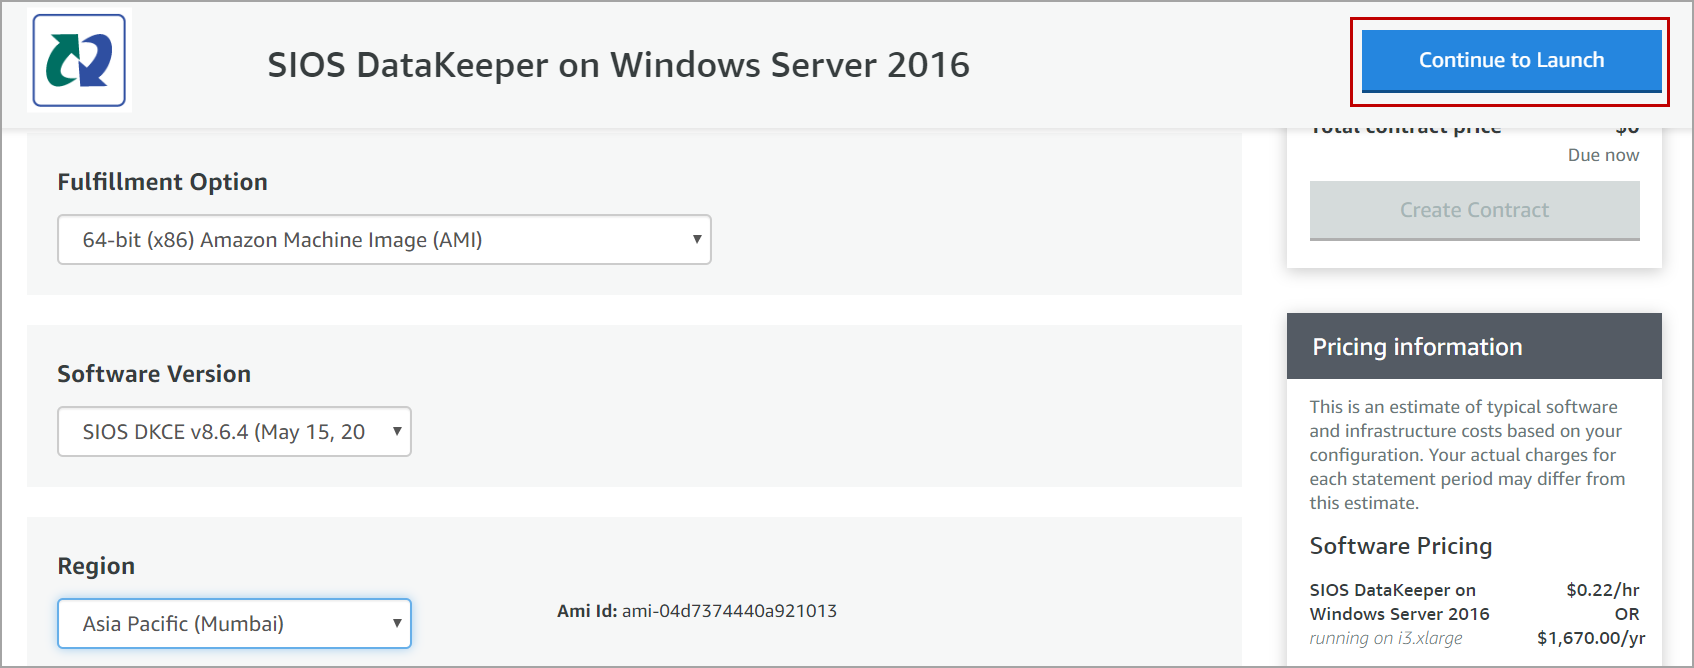
Choose Launch through EC2 and click on Launch.
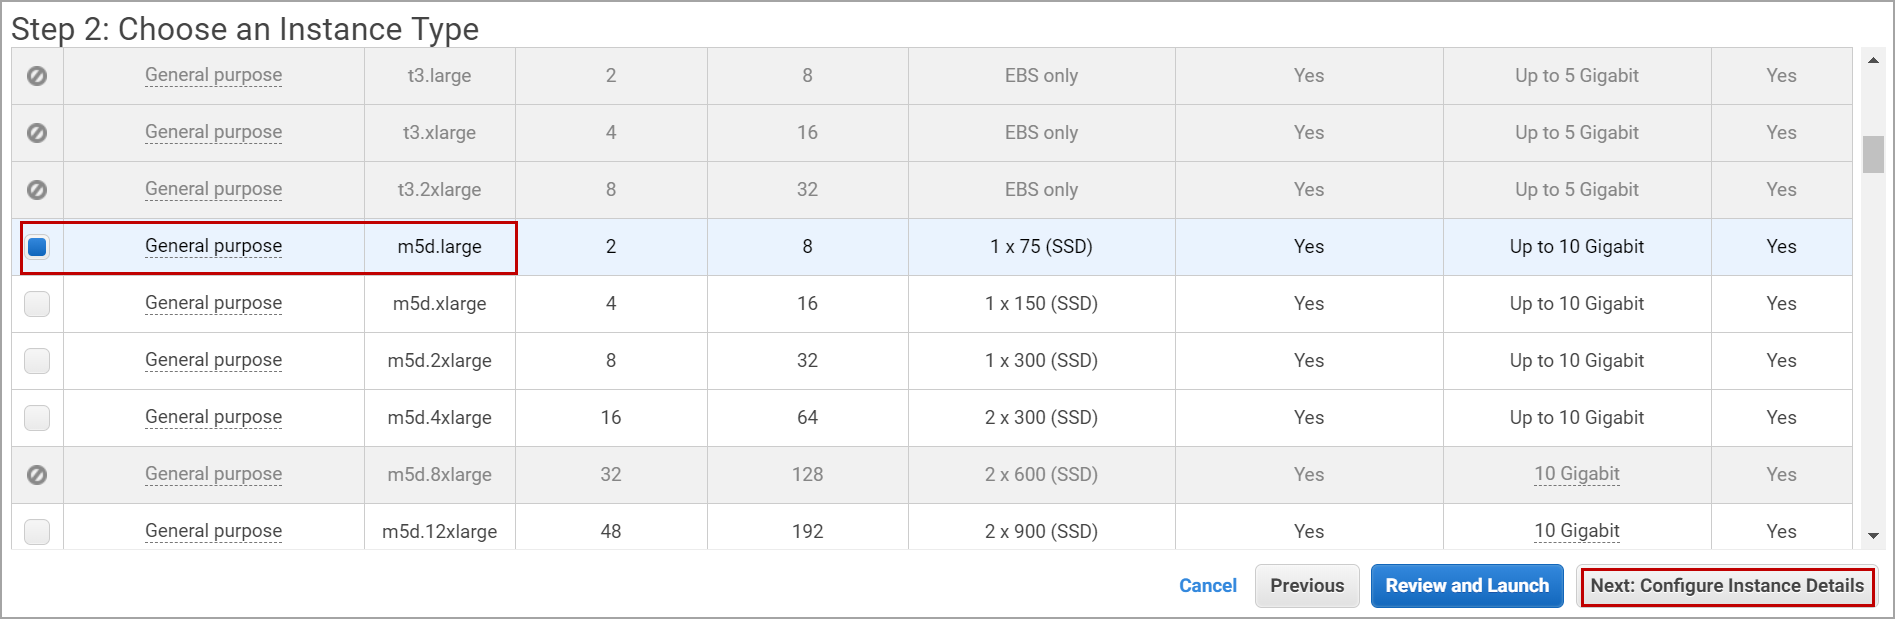
Select the instance type. In this case, I choose m5d.large and click on Configure Instance Details.
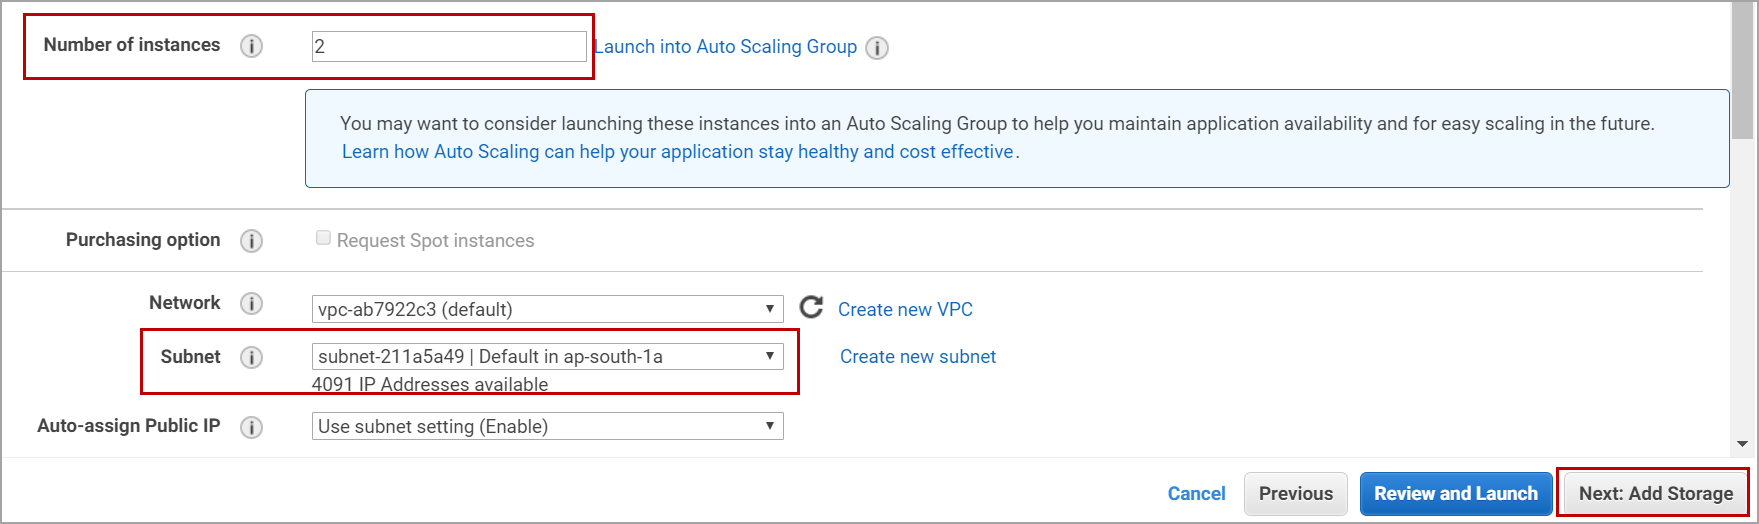
Enter the number of instances as 2, select the subnet and click on Add Storage. You can also launch instances individually in multiple availability zones.
Add storage, tags, select the security groups and launch the instances.
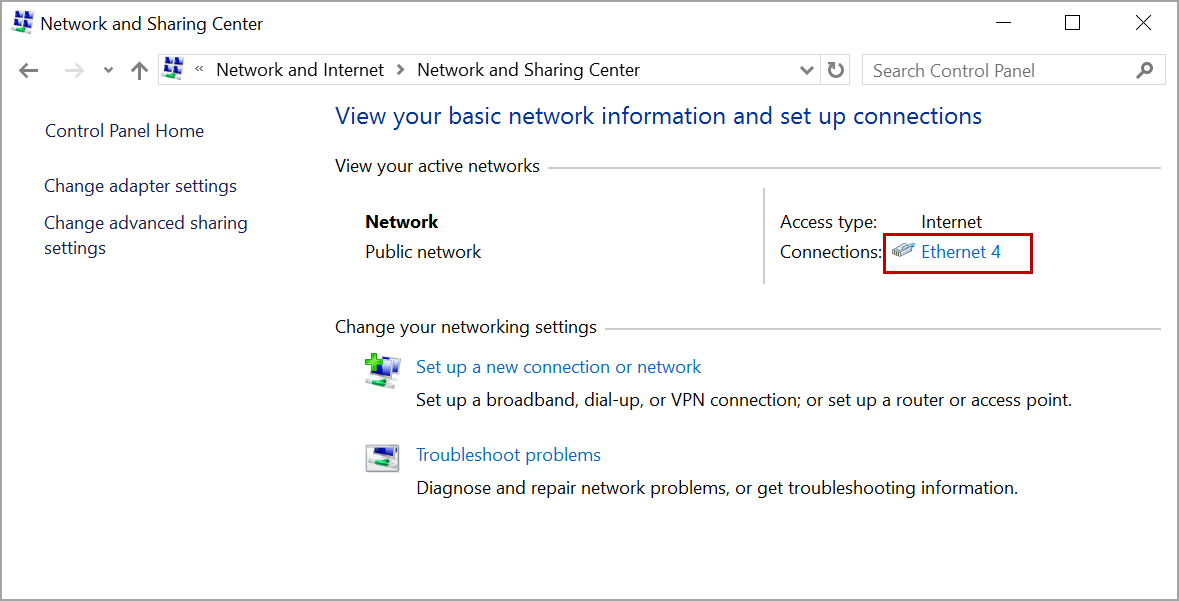
RDP to the instances we launched, Navigate to Control Panel -> Network and Internet -> Network and sharing center.
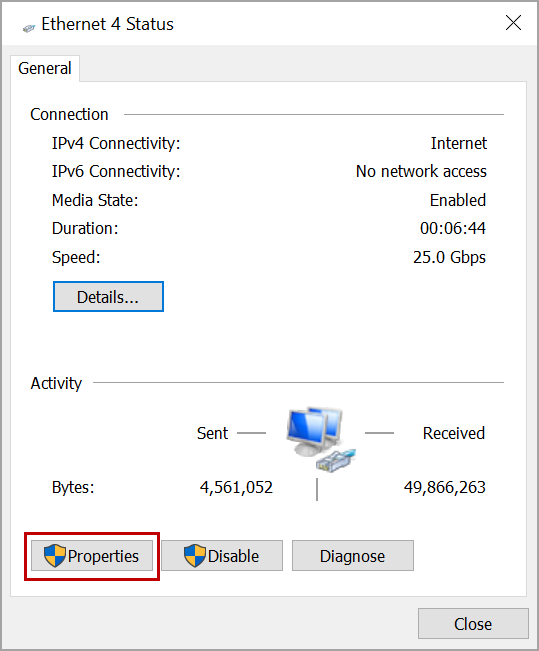
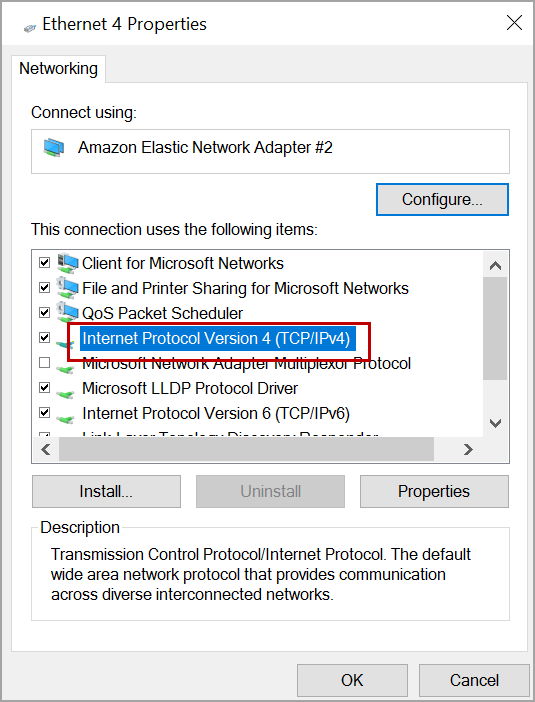
Click on the network adaptor -> Properties -> double click on Internet Protocol Version 4.
Open the command prompt and enter ipconfig to know the IP address of the node and modify the ipv4 properties as shown in the below image. Select use the following IP address and enter the same IP address, subnet mask, default gateway of the node. Enter the private IP of the domain controller in the Preferred DNS server.
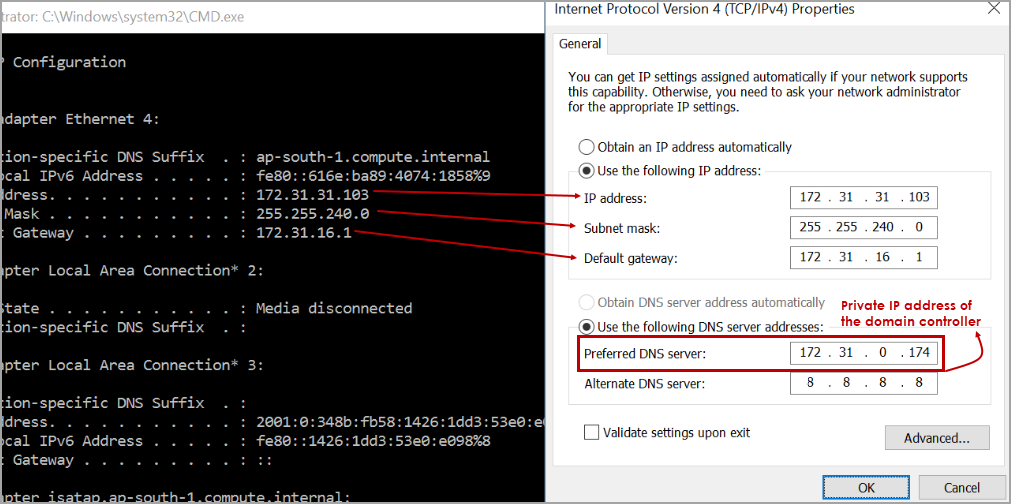
Click ok and apply the changes. Now join the node to the domain.
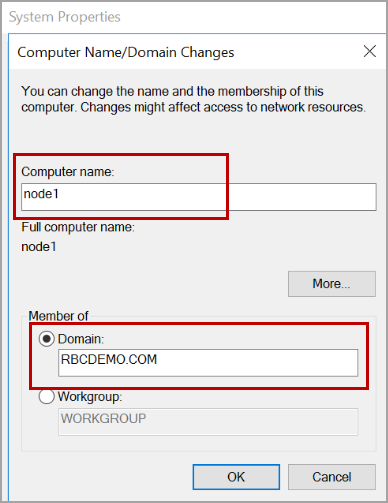
Similarly, on node2 change the IP address, subnet mask, default gateway, and the preferred DNS server.
Join the node2 to the domain. After joining the node, it restarts.
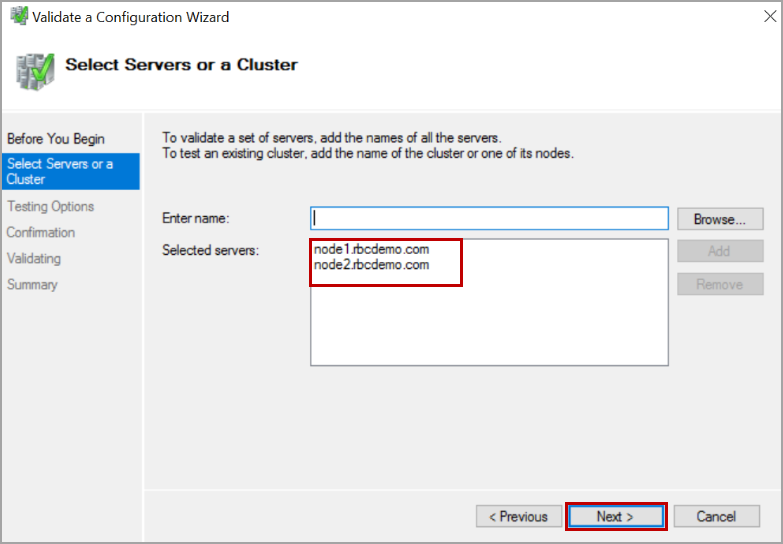
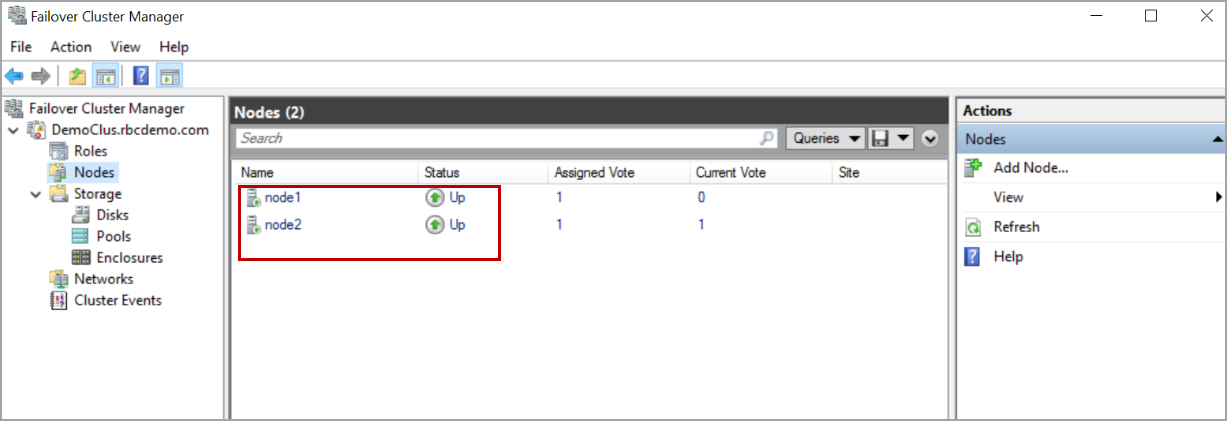
RDP to node1 and launch failover cluster manager. Add both nodes which will be part of the cluster and click Next.
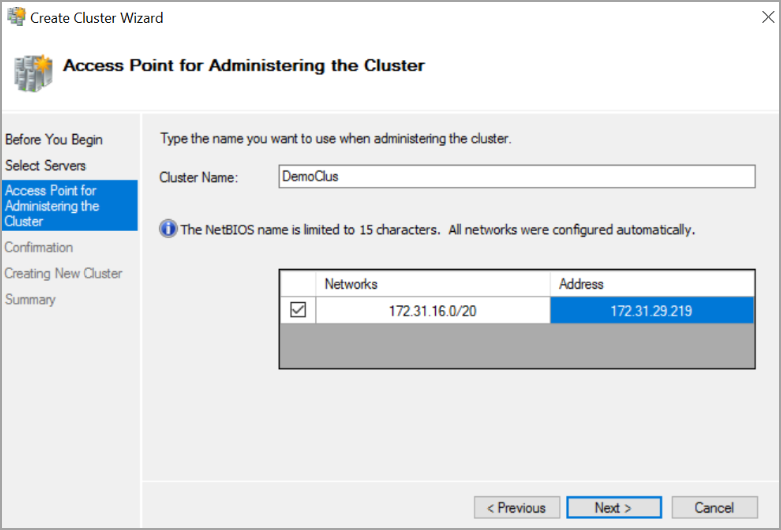
Enter the name of the cluster and give it an IP address.
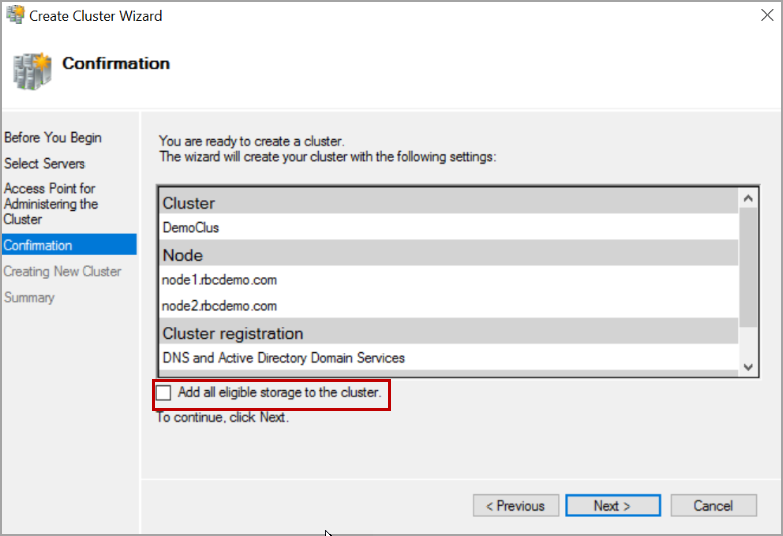
Uncheck the Add all the eligible storage to the cluster and click Next. We can add storage later using SIOS DataKeeper.
Once the cluster setup is done you would see both nodes in the failover cluster manager.
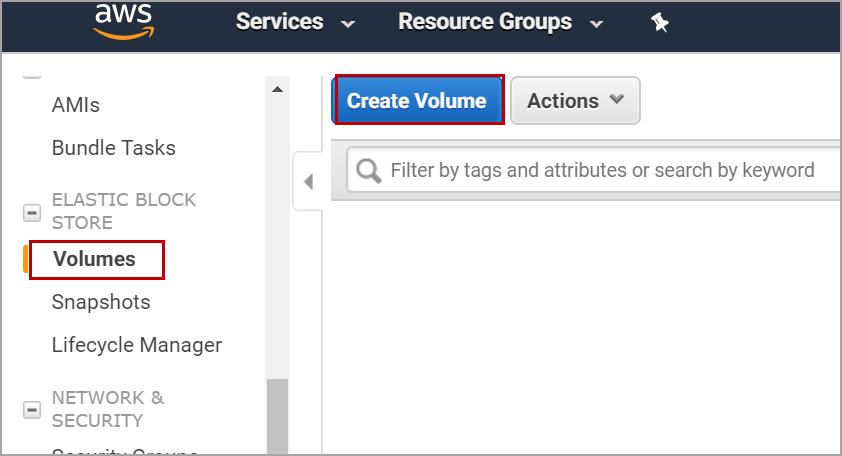
Attach a volume to both the instances
We need to create two volumes and associate one to each node. Navigate to AWS EC2 console. Click on volumes and Create Volume.
Select the created volume and click on Actions dropdown. Click on attach volume and associate it to node1.

Similarly, create another volume and attach it to the node2 which will be used in the SQL Server cluster.
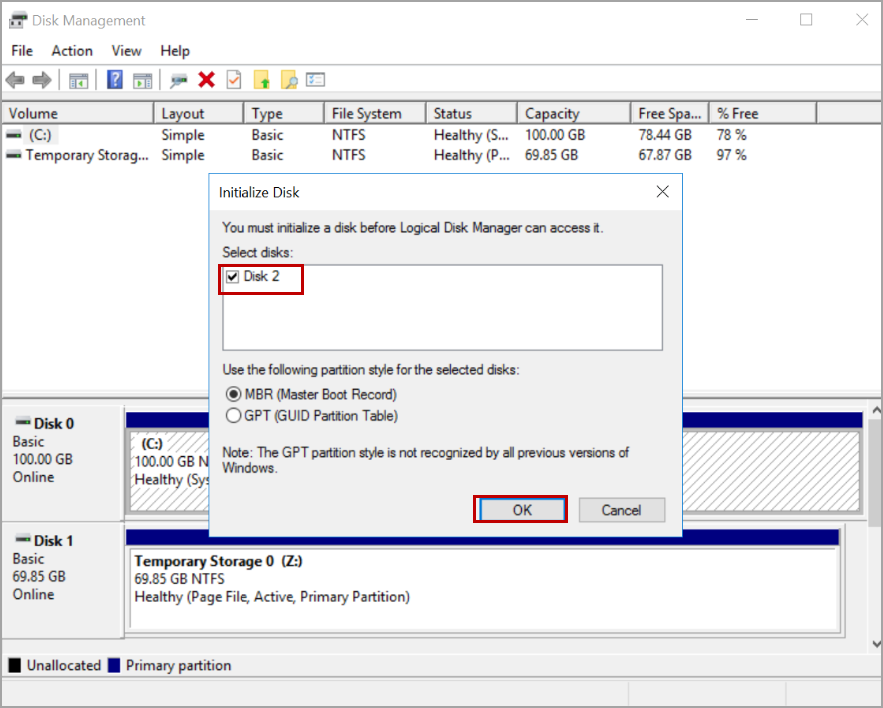
RDP to node1 and open disk management. The newly attached volume shows up as below. Click ok.
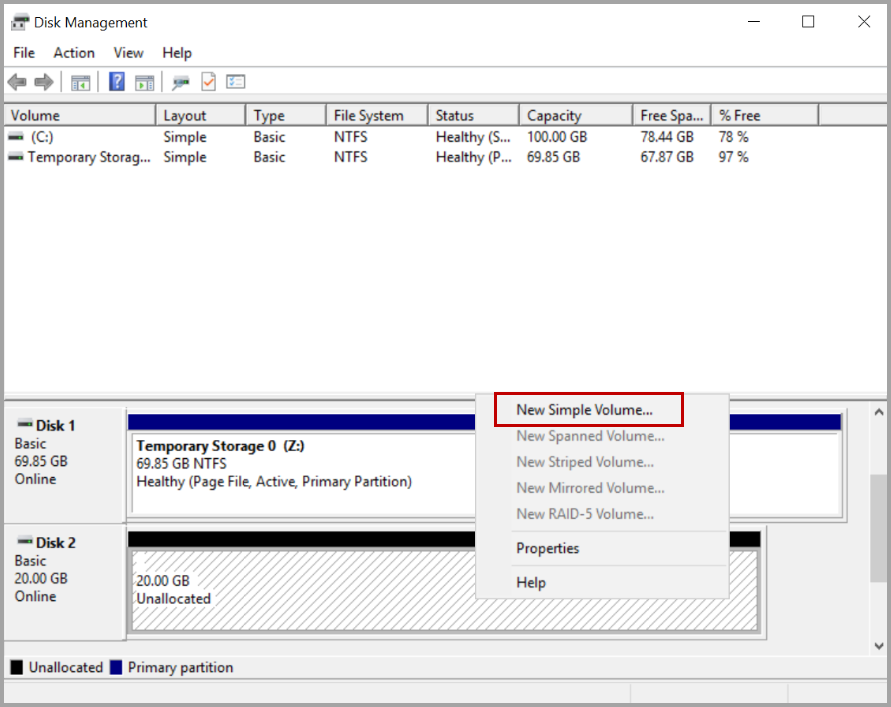
Right-click on the disk and click on New Simple Volume.
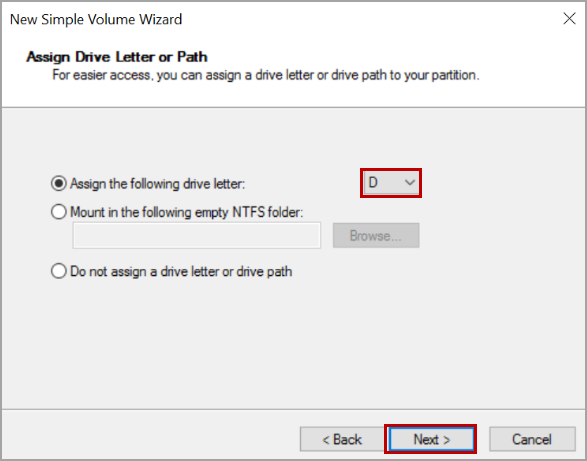
Assign the letter to drive and Click Next.
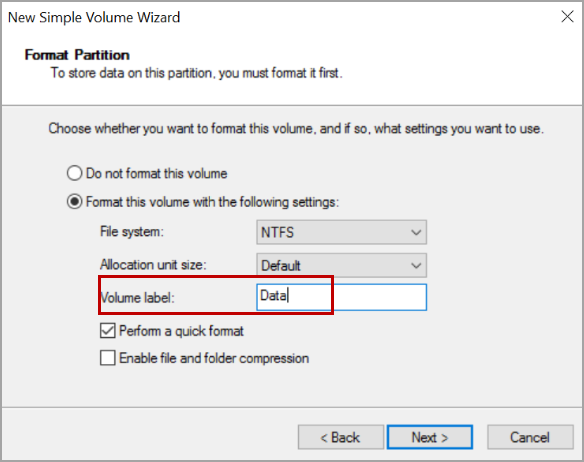
Format and assign the label. Click Next.
Similarly, on node2 make a volume and give the same label and drive letter.
Configure SIOS DataKeeper jobs to replicate the data
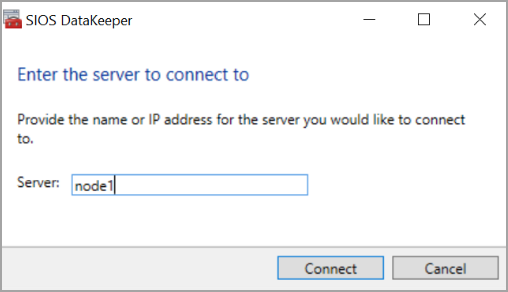
On node1 launch the SIOS DataKeeper. Click on Connect to server.

Enter node1 and click on Connect.
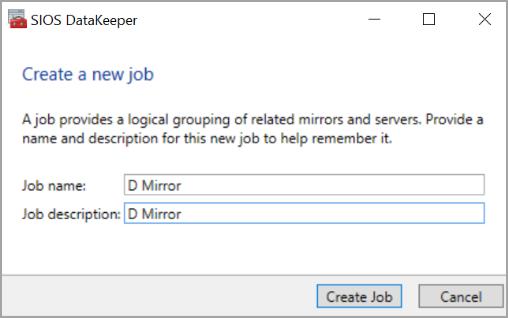
Similarly, Connect to node2. Once both nodes are connected, click on create the job. Enter the job name and the description.
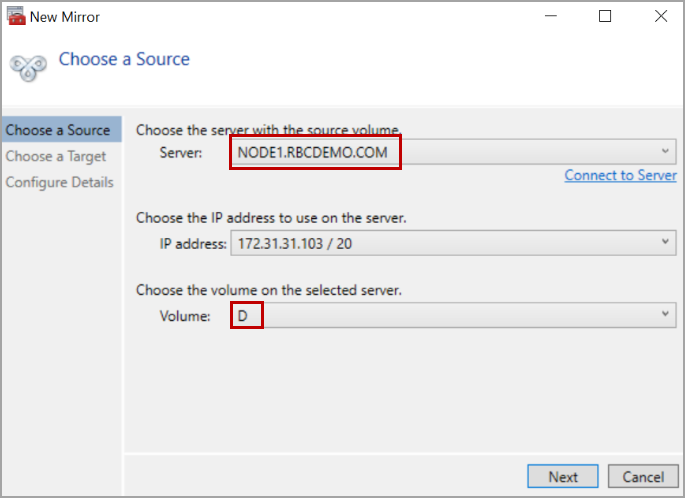
Choose the source and the drive you want to mirror. Click Next.
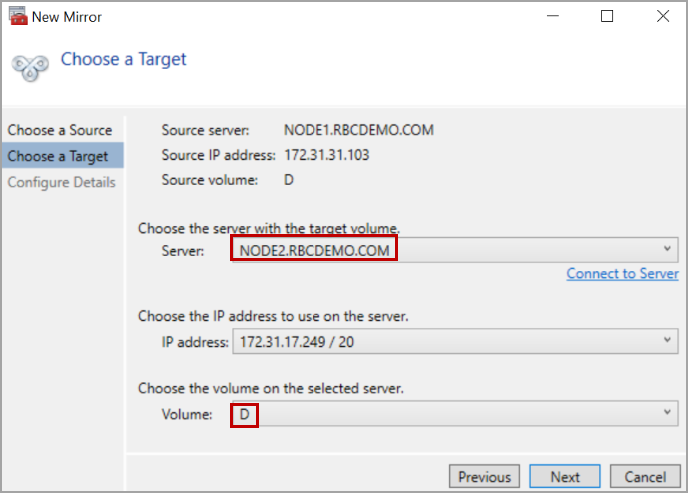
Choose the target server and the drive. Click Next.
Choose the synchronization mode and click on Done.

Once the mirroring is created, it asks if you want to add the volume to the failover cluster. Click Yes.

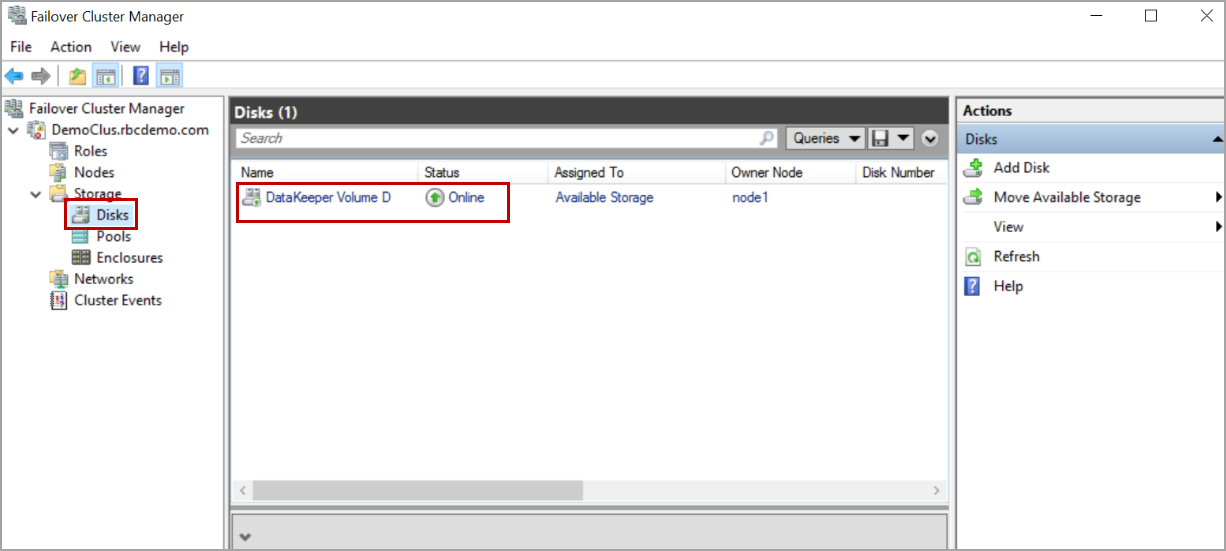
Now the disk will be shown in the failover cluster manager. We can see node1 is the owner node of the disk.
If you want to add more disks you need to create jobs for them and add the volume to the failover cluster.
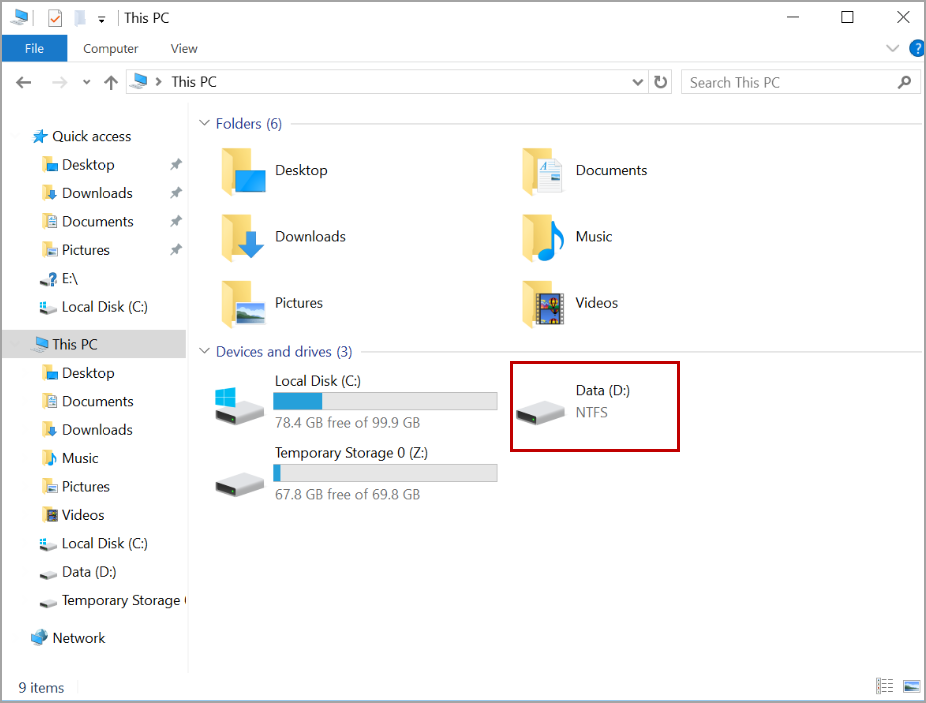
On node2, the disk is locked.
Now we have windows failover cluster and the cluster storage needed so that we can proceed and install the SQL Server cluster instance.
Install SQL Server failover cluster instance
Login to the node1 and locate the setup files to install the SQL Server failover cluster.
Please refer to the below articles for step by step installation of the SQL Server failover cluster.
SQL Server 2014 – Install a clustered instance – step-by-step (1/3)
SQL Server 2014 – Install a clustered instance – step-by-step (2/3)
SQL Server 2014 – Install a clustered instance – step-by-step (3/3)
Conclusion
In this article, we explored to launch instances with SIOS subscription and created mirrored drives using SIOS which will be used as a clustered storage. In case you have any questions, please feel free to ask in the comment section below.

- Geo Replication on Transparent Data Encryption (TDE) enabled Azure SQL databases - October 24, 2019
- Overview of the Collate SQL command - October 22, 2019
- Recover a lost SA password - September 20, 2019