
In this article, we will review how to create a Kubernetes cluster in AWS using KOPS, provision Elastic Block Store (EBS) as persistent volume to store the database files and deploy SQL Server in the K8s cluster.
Here is step by step to configure the K8s cluster in AWS using KOPS.
Creating a K8s cluster in AWS using KOPS
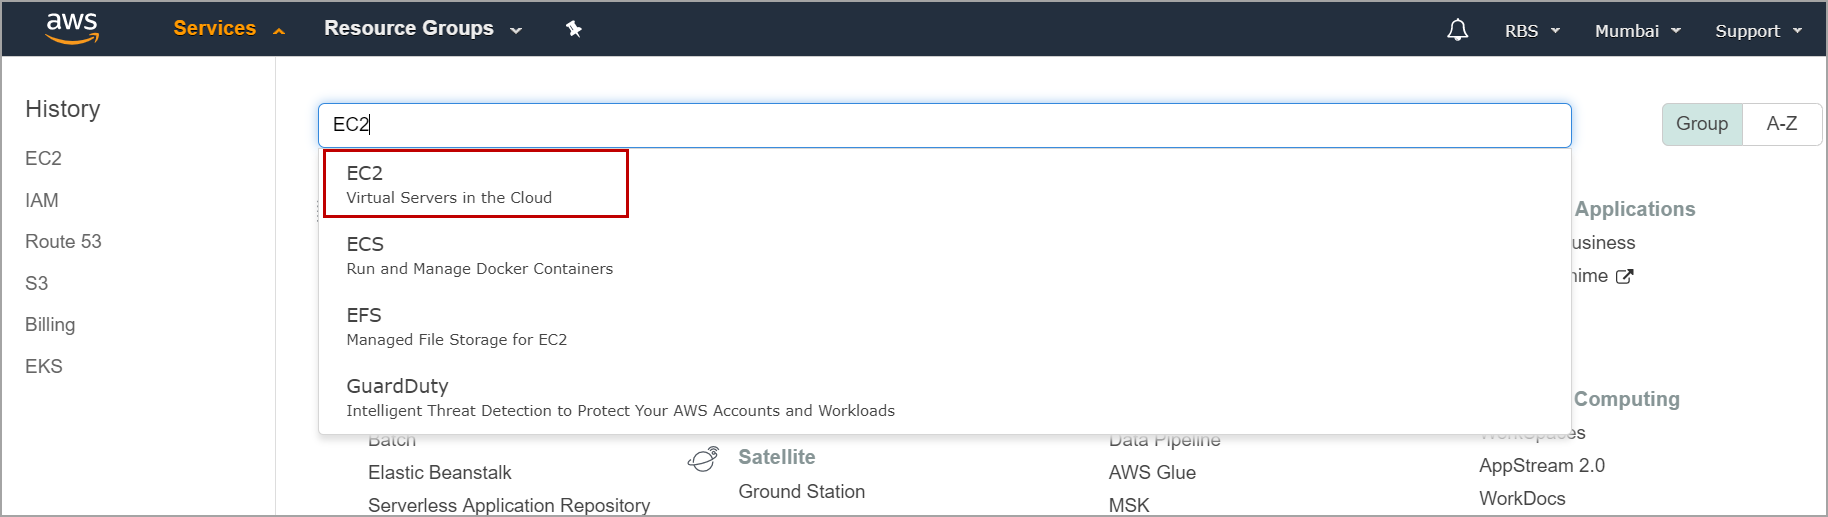
Log in to the AWS console, Click on Services and search for EC2. Click on EC2(Virtual Servers in the Cloud).
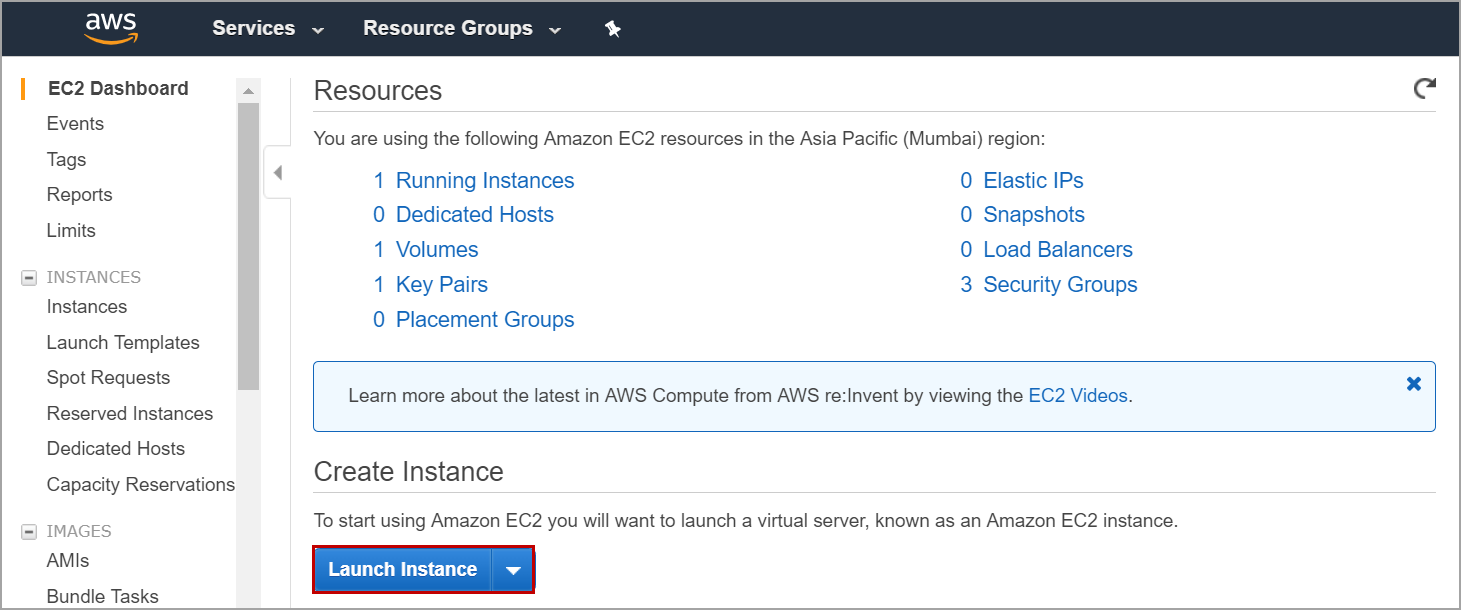
In the EC2 Dashboard, Click on Launch Instance and select Ubuntu server with t2.micro size.
Configure instance details, storage, and security groups and launch the instance using a new key pair or use the existing key pair if already have one.
Create an IAM role with below policies and assign the role to Ubuntu instance you created above.This role is used to create Kubernetes cluster resouces.
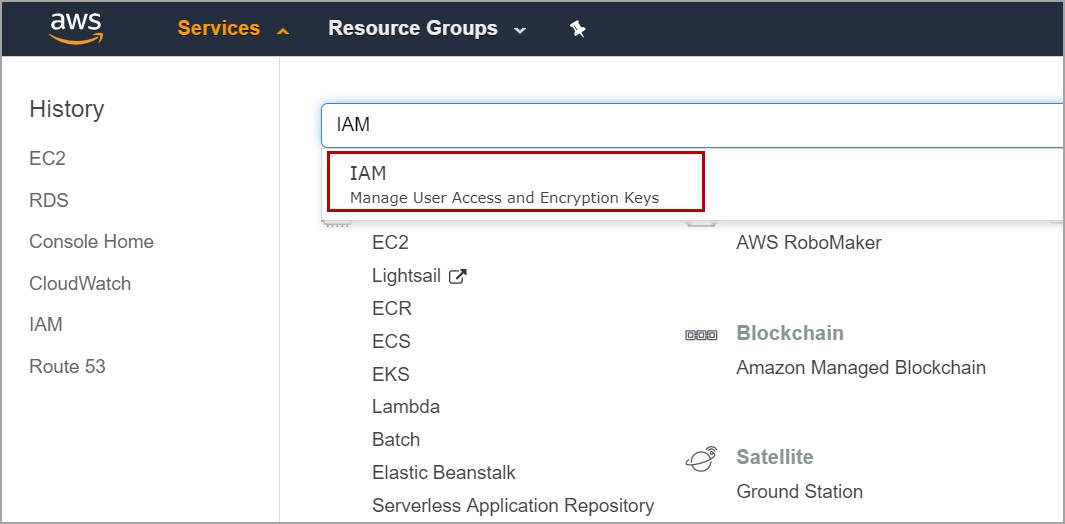
To create an IAM role, click on Services and search for IAM. Click on IAM (Manage User Access and Encrypted Keys)
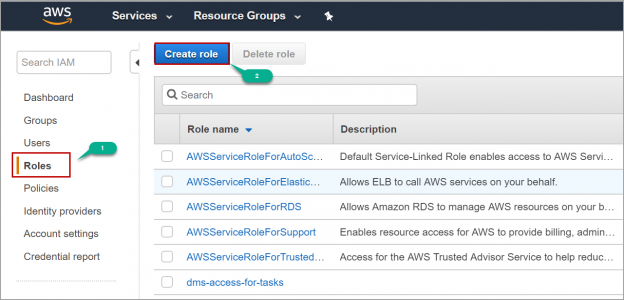
In IAM console, Click on Roles (1). Click on Create Role (2).

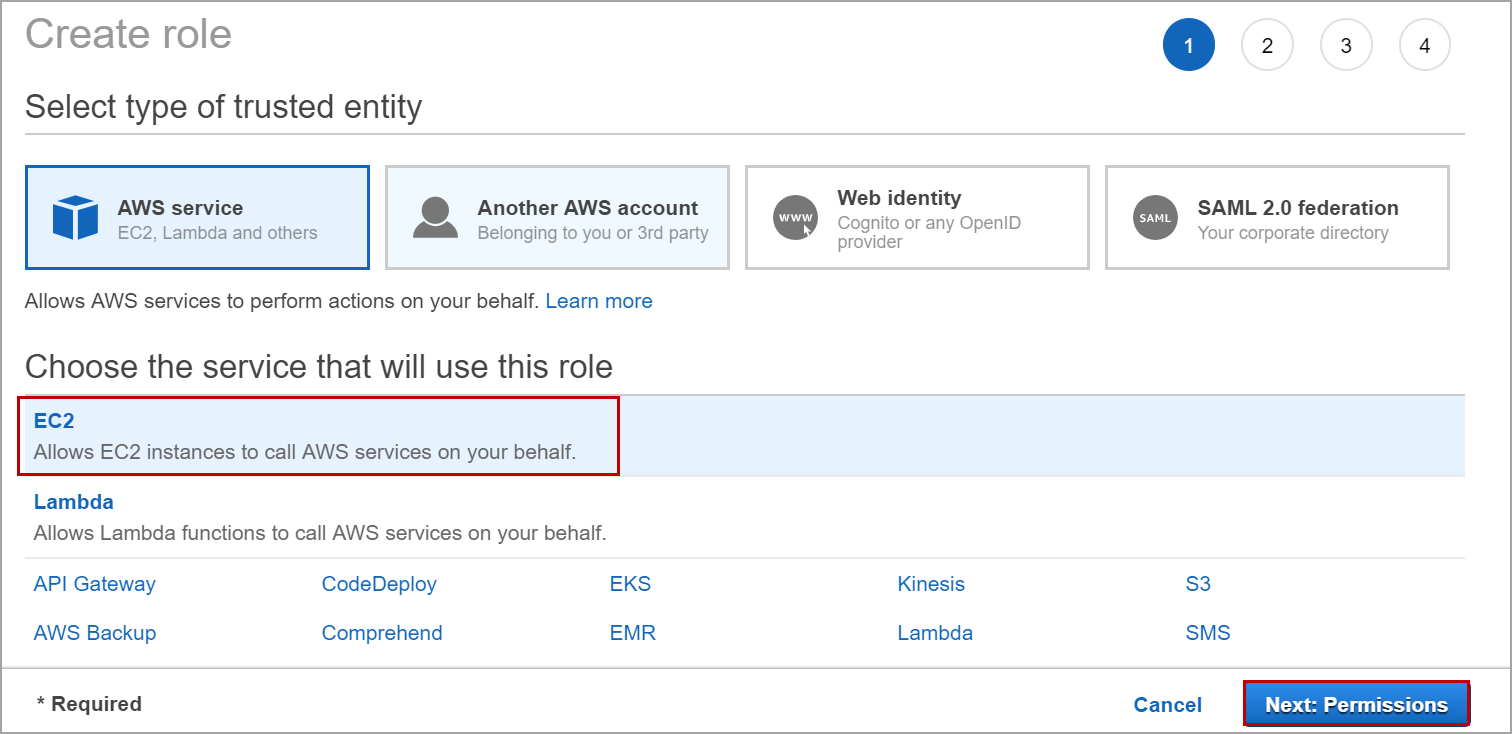
Select EC2 in “Choose the service that will use the role” and click on Next: Permissions.
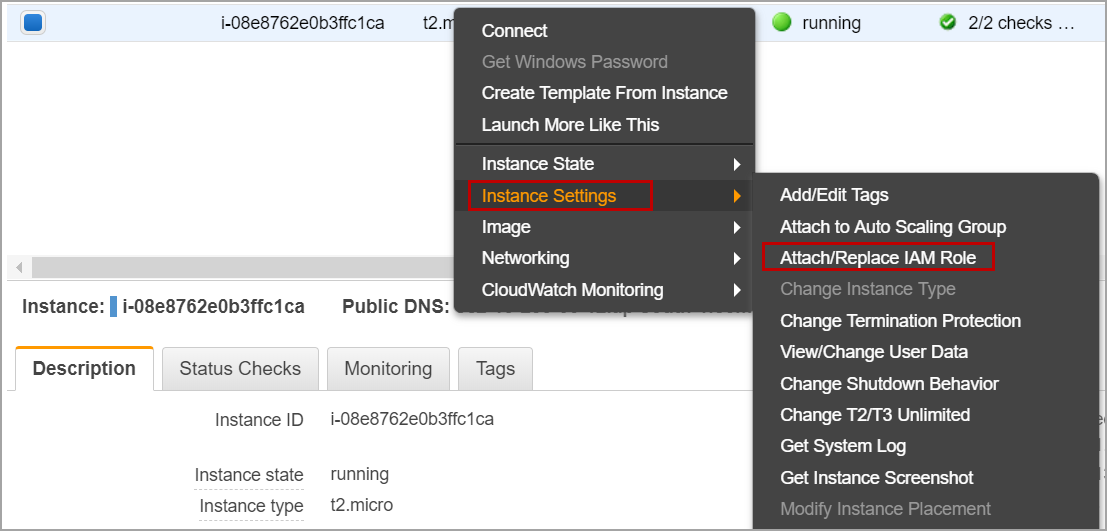
Select the above-mentioned policies. Click on Next and Review. Enter the role name and click on Create Role. Now navigate to the EC2 Dashboard and select the Ubuntu instance you created above, Right-click -> Instance Settings -> Attach/Replace IAM Role. Select the IAM role you created above and click on Apply.
To connect to the Ubuntu instance, we must download PuTTy from putty.org and install it. After installing PuTTy, open PuTTygen and click on load,
select the .pem file (key pair) which was used to launch the Ubuntu instance and click on Save private key.
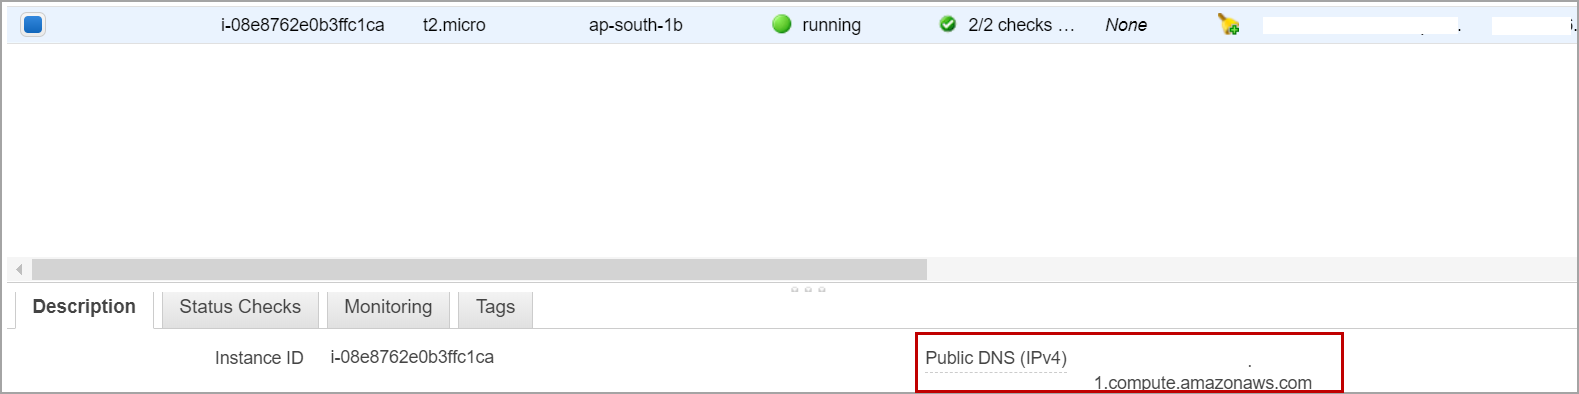
Now open putty and enter the hostname. To know the hostname of the Ubuntu instance, navigate to the EC2 dashboard, select the instance and copy the public DNS as shown in the below image.
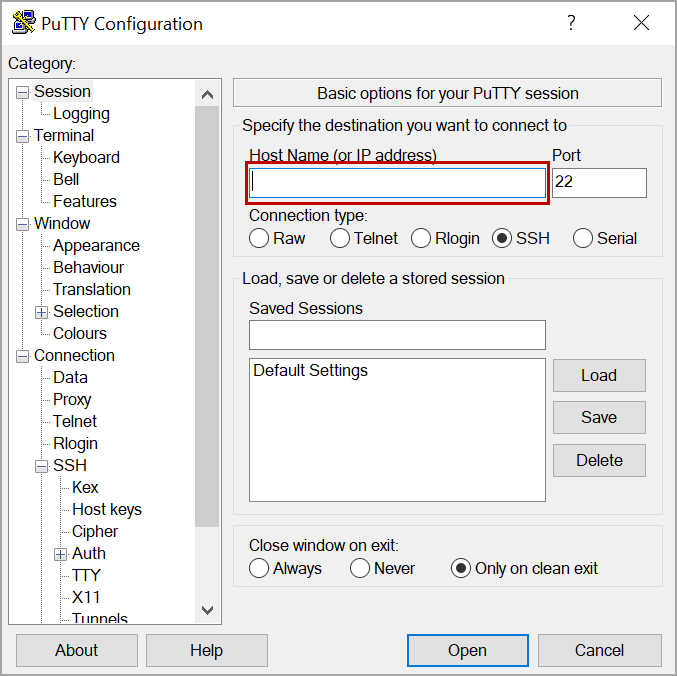
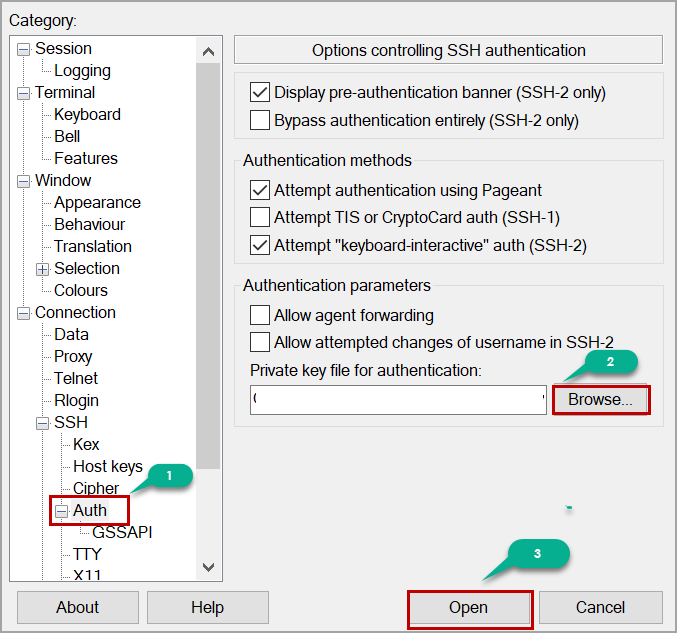
Click on Auth (1). Browse the private key you created in the above step (2). Click on Open (3).
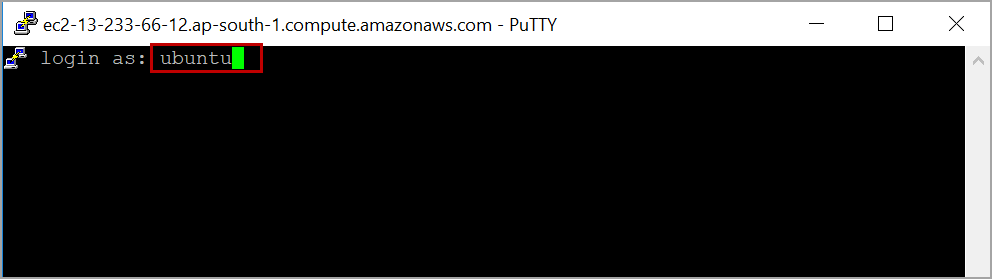
Login with Ubuntu user.
Log in as a superuser using below command.
|
1 |
sudo su - |
Install AWS CLI using below commands. AWS Command Line Interface is a tool to configure, manage AWS services from the command line.
|
1 2 3 4 5 6 7 8 9 |
curl https://s3.amazonaws.com/aws-cli/awscli-bundle.zip -o awscli-bundle.zip apt install unzip unzip awscli-bundle.zip apt install unzip python ./awscli-bundle/install -i /usr/local/aws -b /usr/local/bin/aws |
Once we install AWS CLI, we need to install the Kubernetes command-line tool (kubectl) on Ubuntu instance which is used to run commands against K8s cluster. Use below commands to download the latest version and install kubectl.
|
1 2 3 4 5 |
curl -LO https://storage.googleapis.com/kubernetes-release/release/$(curl -s https://storage.googleapis.com/kubernetes-release/release/stable.txt)/bin/linux/amd64/kubectl chmod +x ./kubectl sudo mv ./kubectl /usr/local/bin/kubectl |
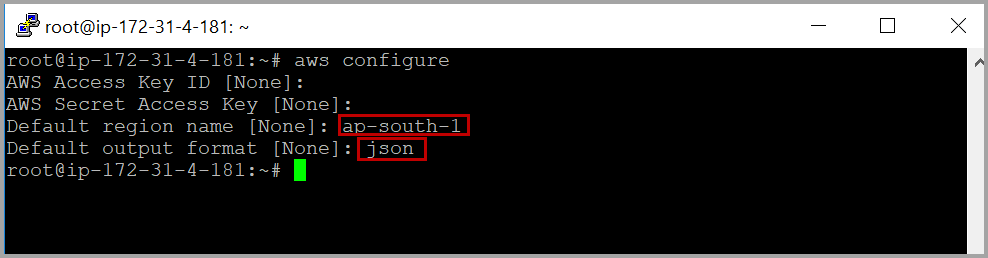
Configure AWS CLI using below command. Leave the access key id and secret key blank as we are using the IAM role that is attached to the Ubuntu EC2 instance. Input the default region of your choice and output format like JSON.
|
1 |
aws configure |
We need to download and install KOPS on EC2 Ubuntu instance. KOPS is used to create a Kubernetes cluster on Amazon Web Services. Use below commands to download and install KOPS.
|
1 2 3 4 5 |
curl -LO https://github.com/kubernetes/kops/releases/download/$(curl -s https://api.github.com/repos/kubernetes/kops/releases/latest | grep tag_name | cut -d '"' -f 4)/kops-linux-amd64 chmod +x kops-linux-amd64 sudo mv kops-linux-amd64 /usr/local/bin/kops |
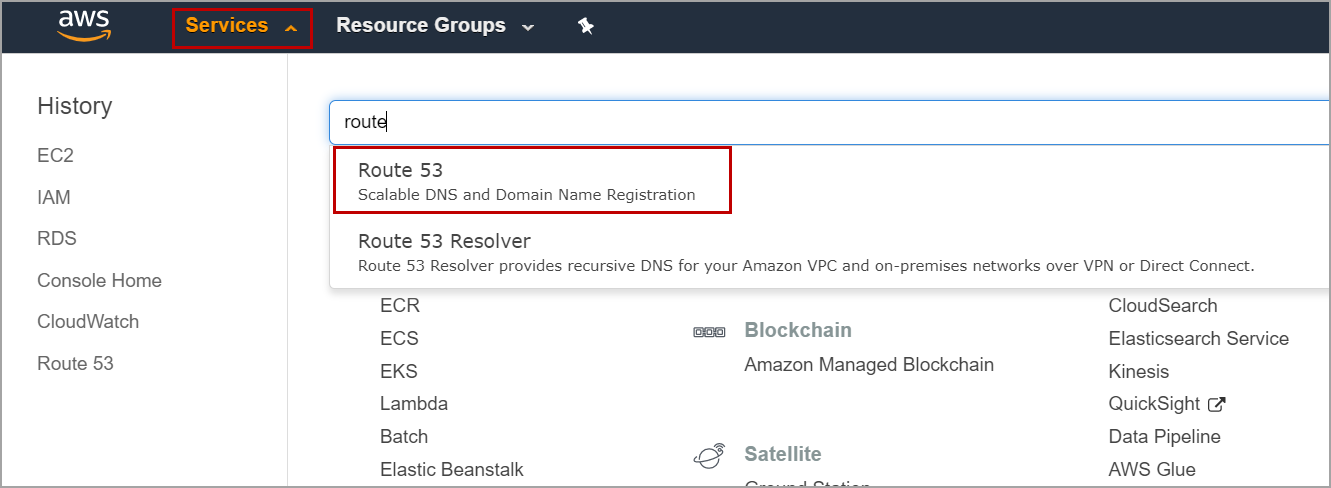
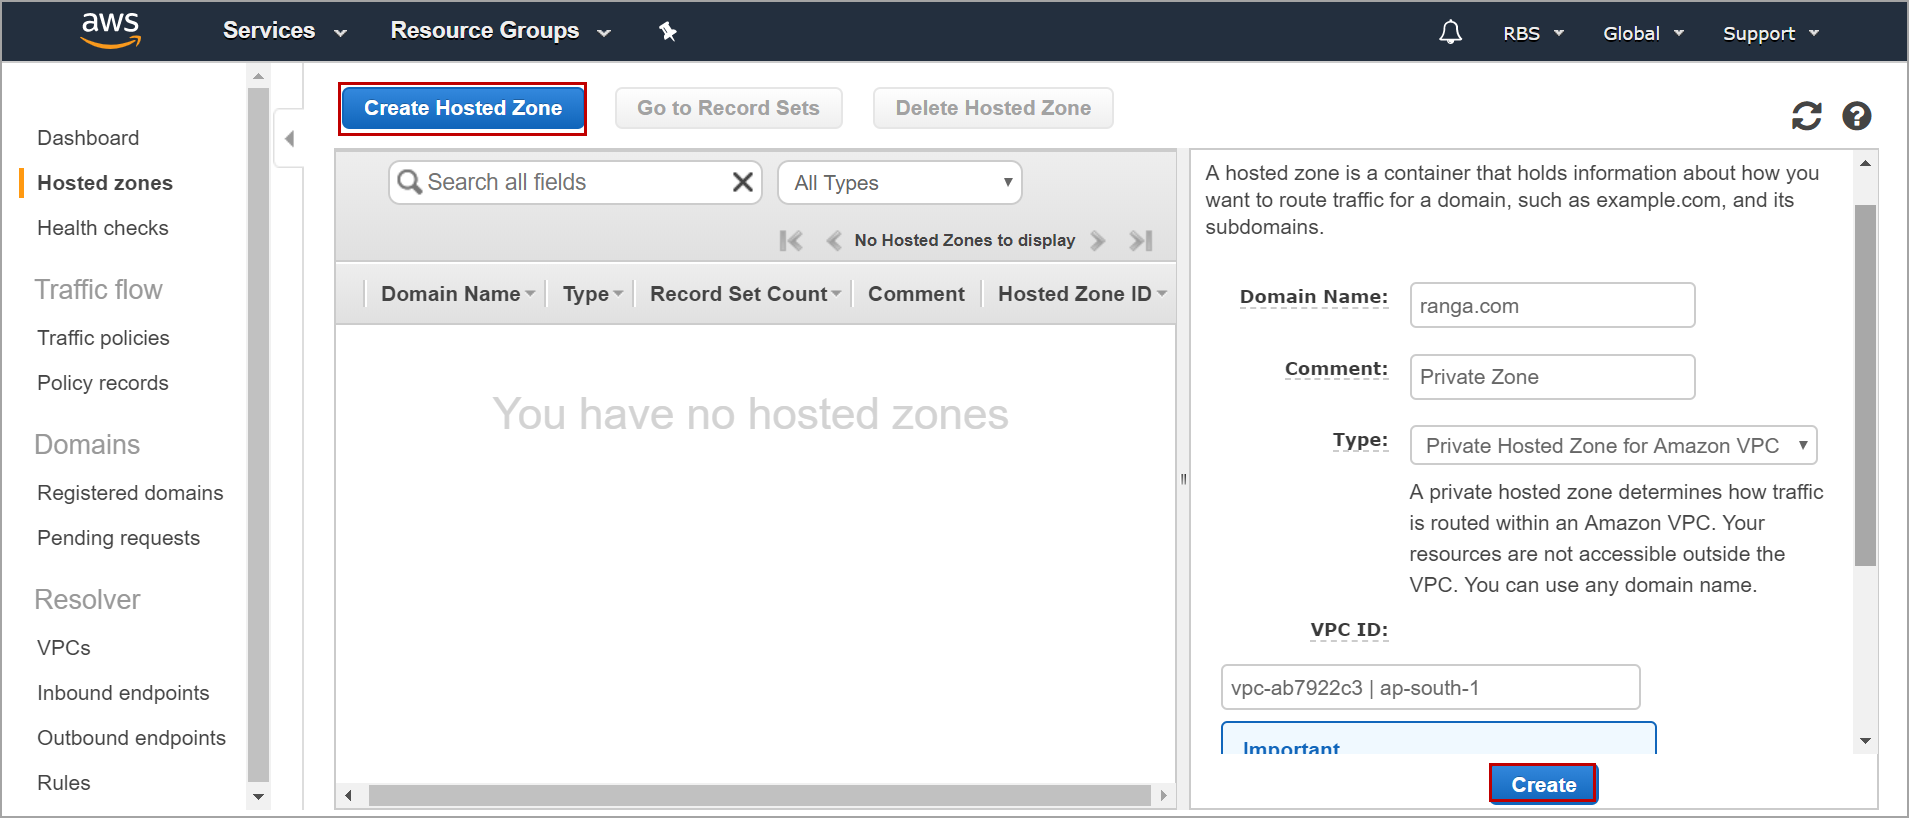
Now, create a private hosted zone in Route53. To create a hosted zone, click on Services and search for Route 53. Select Route 53 (scalable DNS and Domain Registration)
Click on Create Hosted Zone. enter the domain name and select Private Hosted Zone for Amazon VPC as type.
Select the VPC ID and click on Create.
Now we need to create an S3 bucket. This S3 bucket will hold the K8s cluster configuration. To create an S3 bucket and set environment variable, execute the below command in the console.
|
1 2 3 |
aws s3 mb s3://kubeclus01 export KOPS_STATE_STORE=s3://kubeclus01 |
Create SSH key using below command.
|
1 |
ssh-keygen |
Execute below commands to create Kubernetes cluster configuration which will be stored in the S3 bucket created above. This will only create the cluster configuration and not the cluster.
|
1 |
kops create cluster --cloud=aws --zones=ap-south-1b --name=ranga.com --dns-zone=ranga.com --dns private |
Create the cluster by executing below command. This will create the cluster in the zone “ap-south-1b” with cluster name as “ranga.com”.
|
1 |
kops update cluster --name ranga.com --yes |
Once you execute the above command, it will create all the necessary resources required for the cluster. Now execute validate command to validate the cluster.
|
1 |
kops validate cluster |
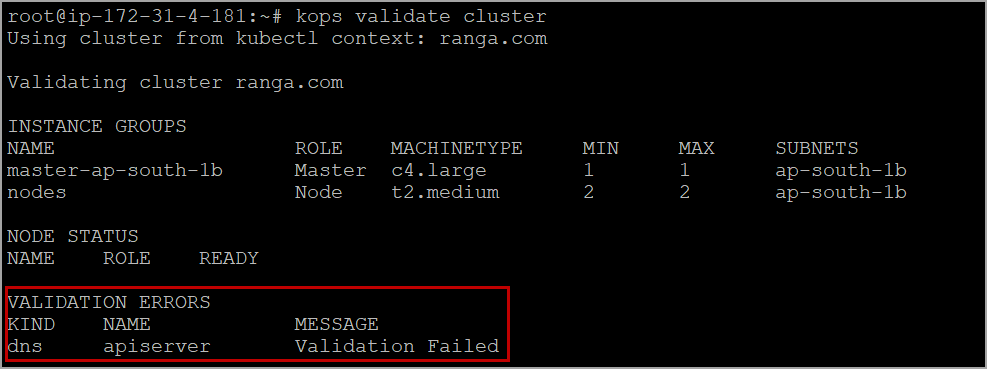
It takes some time to create all the cluster resources. Execute the same command after a few minutes. Once validation is a success and you see “your cluster is ready”. Then list the nodes using below command.
|
1 |
kubectl get nodes |
Creating Persistent Volume Claim
Once your Kubernetes cluster setup and ready, we need to create a persistent volume and volume claim to store the database files. As we created the K8s cluster on Amazon Web Services, we will create a persistent volume using AWS EBS.
Use below code to create a manifest file directly on the Ubuntu server for creating persistent volume and volume claim.
|
1 2 3 4 5 6 7 8 9 10 11 12 13 |
kind: PersistentVolumeClaim apiVersion: v1 metadata: name: dbvolumeclaim labels: type: amazonEBS spec: accessModes: - ReadWriteOnce storageClassName: gp2 resources: requests: storage: 10Gi |
If you have any parsing errors due to special characters when you create the .yaml file directly on the Ubuntu server, Open the notepad in your local machine, paste the above code and save it as dbvclaim.yaml file and upload the dbvclaim.yaml file to S3 bucket using S3 console. Now on Ubuntu instance execute below command to download the same file from S3 bucket to the Ubuntu server.
|
1 |
aws s3 cp s3://kubeclus01/dbvclaim.yaml /root |
Now apply the manifest file using kubectl to create persistent volume and volume claim on Kubernetes cluster.
|
1 |
kubectl apply -f dbvclaim.yaml |
After executing the above command, it creates a persistent volume with a random name and volume claim with name “dbvolumecliam”
Deploying SQL Server container in K8s cluster in AWS
Before deploying the SQL Server in K8s cluster created in AWS using KOPS, we need to give permissions to create a load balancer for the role which is attached to the master node in the cluster. Navigate to IAM console and click on the role associated with the master node. In my case it is masters.ranga.com. Click on Attach policies.
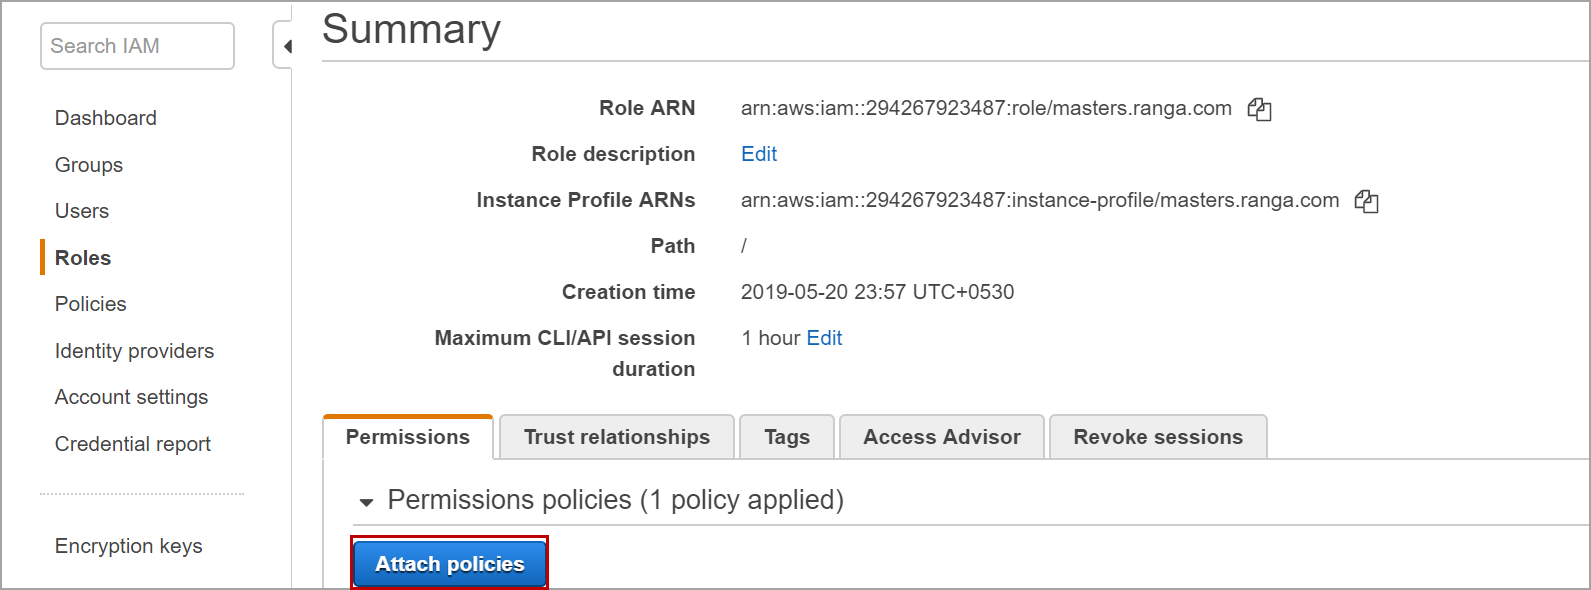
Select ElasticLoadBalancingFullAccess and click on Attach policies. This policy allows the master node to create load balancer and assign public IP to the service.
Create SA password in Kubernetes cluster which will be used in the SQL Server deployment. Your password should meet password policy requirements else your deployment fails and the pod show “CrashLoopBackOff” status.
|
1 |
kubectl create secret generic mssql --from-literal=SA_PASSWORD="yourpassword" |
Create a manifest file which will be used for deploying the SQL Server container image. Replace claimName value with the name of your persistent volume claim. You can create the .yaml file directly on the server or upload it s3 from your local machine and download back to Ubuntu server.
|
1 2 3 4 5 6 7 8 9 10 11 12 13 14 15 16 17 18 19 20 21 22 23 24 25 26 27 28 29 30 31 32 33 34 35 36 37 38 39 40 41 42 43 44 45 46 47 |
apiVersion: apps/v1beta1 kind: Deployment metadata: name: mssql-deployment spec: replicas: 1 template: metadata: labels: app: mssql spec: terminationGracePeriodSeconds: 10 containers: - name: mssql image: mcr.microsoft.com/mssql/server:2017-latest ports: - containerPort: 1433 env: - name: MSSQL_PID value: "Developer" - name: ACCEPT_EULA value: "Y" - name: MSSQL_SA_PASSWORD valueFrom: secretKeyRef: name: mssql key: SA_PASSWORD volumeMounts: - name: mssqldb mountPath: /var/opt/mssql volumes: - name: mssqldb persistentVolumeClaim: claimName: dbvolumeclaim --- apiVersion: v1 kind: Service metadata: name: mssql-deployment spec: selector: app: mssql ports: - protocol: TCP port: 1433 targetPort: 1433 type: LoadBalancer |
Apply the manifest file using kubectl to create a deployment in the K8s cluster.
|
1 |
kubectl apply -f sqldep.yaml |
Once you execute the above command, it will create a deployment with name mssql-deployment in Kubernetes cluster. Now a pod is created with SQL Server running in it. Execute the below command to get the status of the pod.
|
1 |
kubectl get pods |

Once the container is created the status of the pod is changed to running. To know the details of the pod, execute below command by replacing the name of the pod.
|
1 |
kubectl describe pod mssql-deployment-5469897589-j79xg |
In case of any errors during deploying, use below command and replace the pod name with the name of your pod to get the logs.
|
1 |
kubectl logs -p mssql-deployment-98f6fc85c-v59xs |
To know the public IP of the SQL Server, execute below command. This command will list all the available services in the Kubernetes cluster with the service name, internal IP and external IP.
|
1 |
kubectl get svc |

To connect to the SQL Server, Open SQL Server management studio. input the copied external IP and password of SA which you created.
Deleting the Cluster using KOPS
Execute below command to delete the K8s cluster using KOPS. Replace ranga.com with the name of your K8s cluster. This will delete all the resources created by KOPS. Before executing this command you need to remove the policy “ElasticLoadBalancingFullAccess” that you attached manually to the role associated with the master node.
|
1 |
kops delete cluster ranga.com --yes |
Once you execute above commad, It takes few minutes to delete the Kubernetes cluster and displays a message “Deleted cluster: cluster name” at the end.


- Geo Replication on Transparent Data Encryption (TDE) enabled Azure SQL databases - October 24, 2019
- Overview of the Collate SQL command - October 22, 2019
- Recover a lost SA password - September 20, 2019