
In this article, we will review how to set up multi-subnet Always On Availability groups using AWS EC2 instances and AWS FSx as file share witness.
The following are the steps involved in creating a multi-subnet Always On Availability groups in AWS EC2 instances:
- Prepare EC2 instances
- Create AWS FSx for file share witness
- Create Windows Server Failover cluster
- Create Always On Availability Groups
Let’s go over these steps one by one.
Preparing EC2 instances
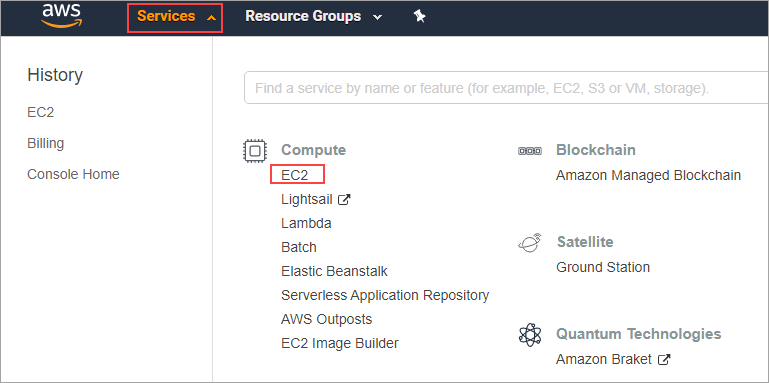
Log in to the AWS management console, click on Services, and navigate to the EC2 console.
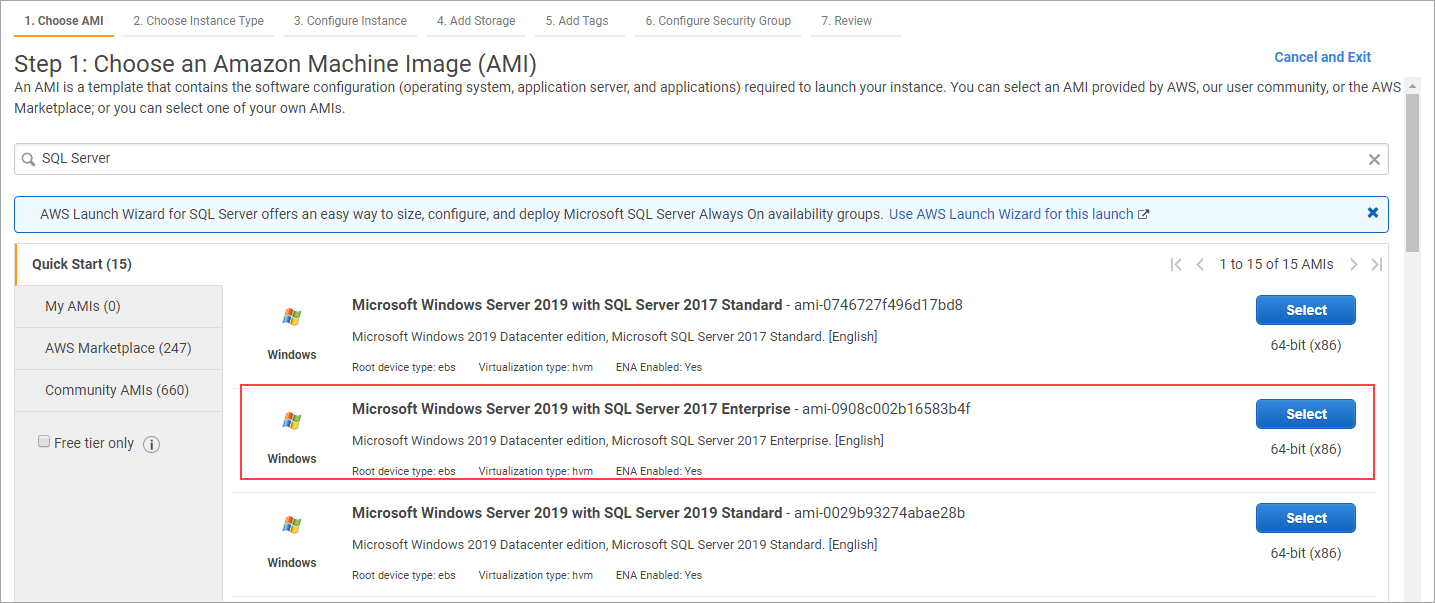
Click on the Launch Instance button and choose the instance of your choice. For demo purposes, I used Windows Server 2019 with SQL Server 2017 Enterprise edition image. You can also launch windows server image and install SQL Server by bringing your own license method (BYOL).
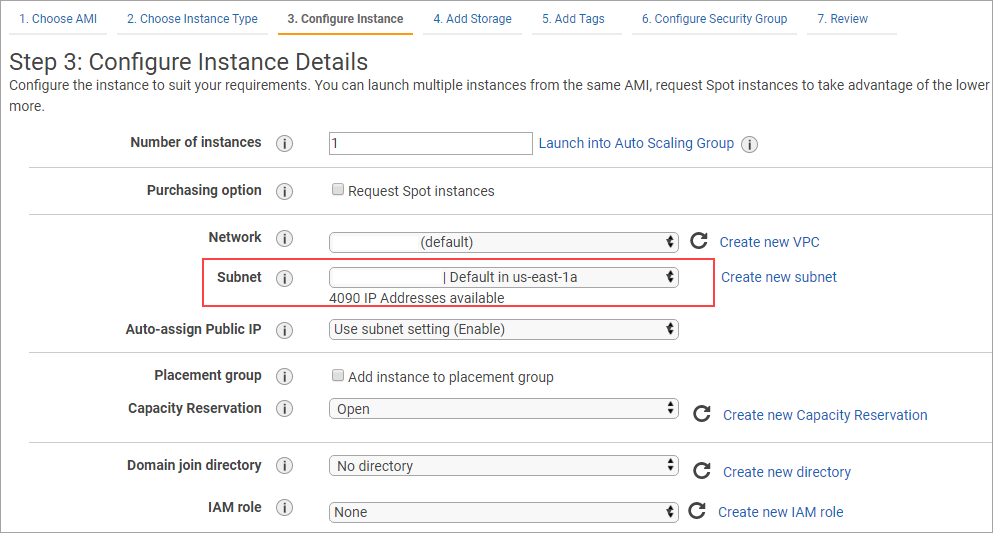
Choose the instance type of your choice and configure the instance details like virtual private cloud network (VPC), subnet, etc. In this case, I am launching node 1 in the us-east-1a availability zone.
Add the storage and tag the instances. Configure the security group and launch the instance. Similarly, launch node 2 in the same virtual private cloud network (VPC) but a different availability zone i.e., us-east-1b. So, we have both the nodes up and running in the respective availability zones.

Add two secondary IPs for each node. One is used for Windows Server Failover Clustering, and the other will be used for Always On Availability group listener.
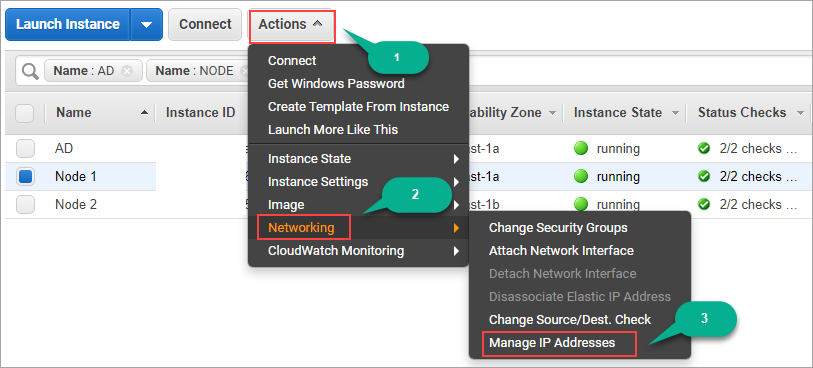
To add the secondary IPs, select the node, and click on Actions (1). Click on Networking (2) and finally select Manage IP Addresses (3).
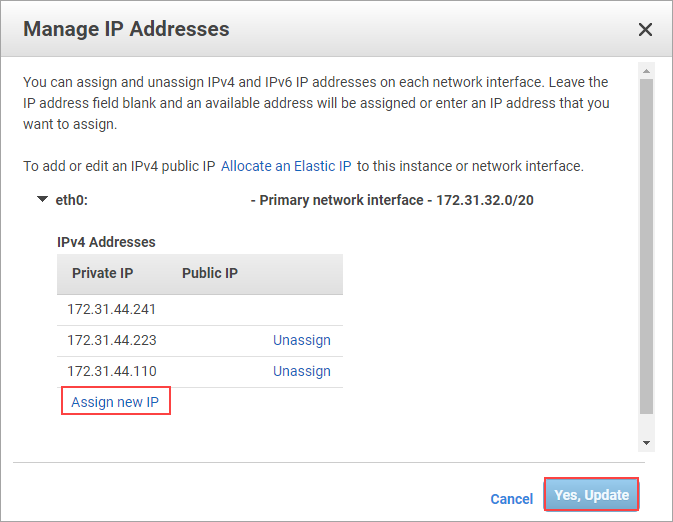
In Manage IP Addresses pop up, Click on Assign new IP two times and then click on Yes, Update as shown in the below image. You can input the custom IP addresses that are available or use the auto-assign option, which assigns a random IP address automatically.
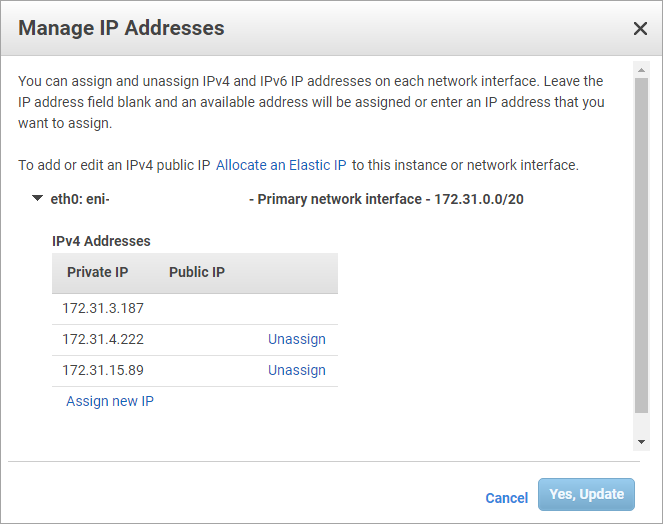
Similarly, assign two secondary IP addresses on node-2 as well.
Node 1 IP addresses:
|
Windows OS |
172.31.44.241 |
|
Windows Failover cluster |
172.31.44.223 |
|
Always On Availability groups Listener |
172.31.44.110 |
Node 2 IP addresses:
|
Windows OS |
172.31.3.187 |
|
Windows Failover cluster |
172.31.4.222 |
|
Always On Availability groups Listener |
172.31.15.89 |
Now we need to add both the nodes to a domain. For detailed steps of adding the nodes to the domain, you can refer to the following SQL Shack articles:
- How to configure SAN less SQL Server clusters in AWS EC2 using SIOS DataKeeper
- Domain Controller and Domain Client Node setup for AlwaysON High Availability

After adding nodes to the window’s active directory domain, restart both the nodes.
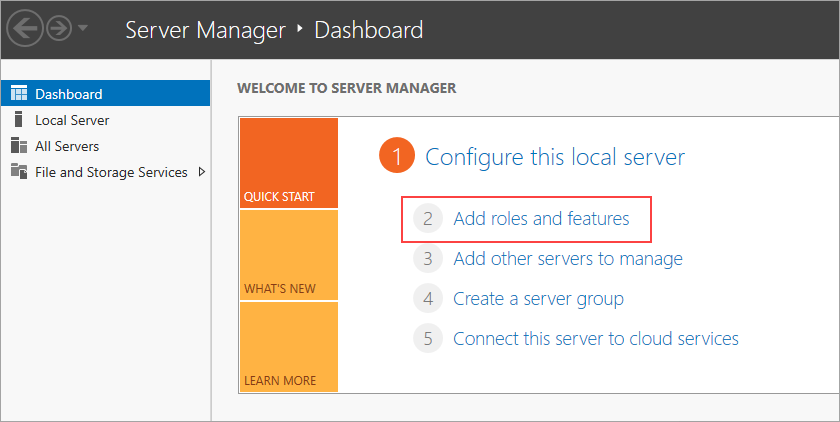
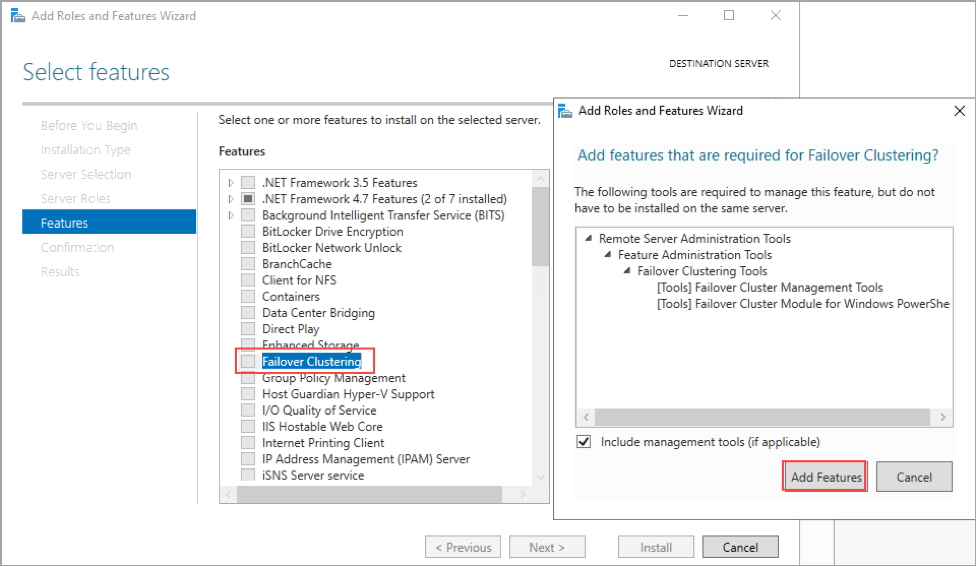
Log in to each node using the remote desktop protocol (RDP) and start installing the Failover Cluster feature. To install the Failover Cluster feature, Open Server Manager, and click on Add roles and features.
Click on the Next button and select Roles-based or feature-based installation. Select the server and click on the Next button. On Features pane, select the Failover clustering feature and click on the Add Features button.
Click Next and select restart the destination server if required. Click on the Install button. Similarly, install the failover cluster feature on node-2 as well.
Creating AWS FSx for file share witness
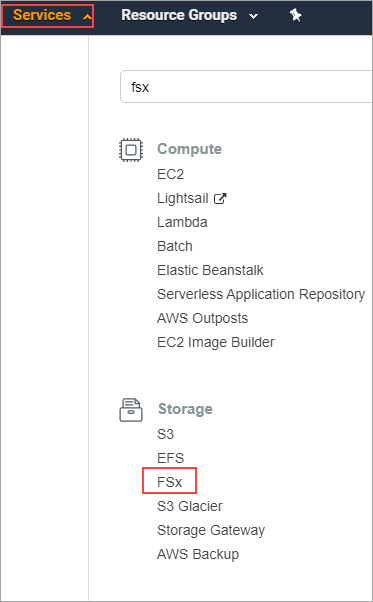
Log in to the AWS management console, click on Services and navigate to FSx console, as shown in the below image.
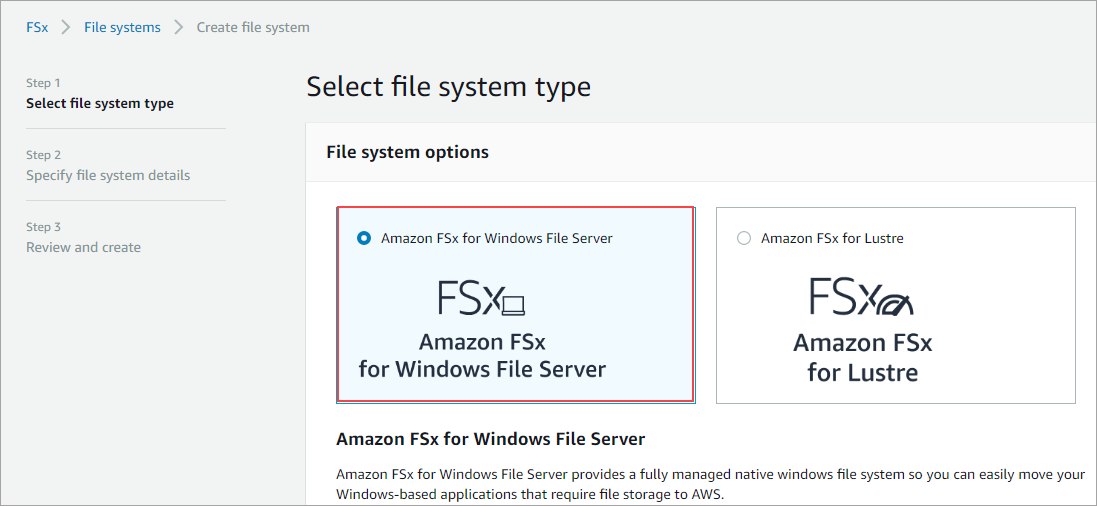
Click on Create file system and select Amazon FSx for Windows File Server. Click on the Next button.
Enter the file system name, select the configuration options like virtual private cloud (VPC) network, subnet, and security groups. Select self-managed Microsoft Active Directory and enter the domain name and the IP address of the domain controller. Enter the user name and password, which has the right permissions to create AWS FSx objects in Microsoft Active Directory. Click on the Next button and click on Create file system.
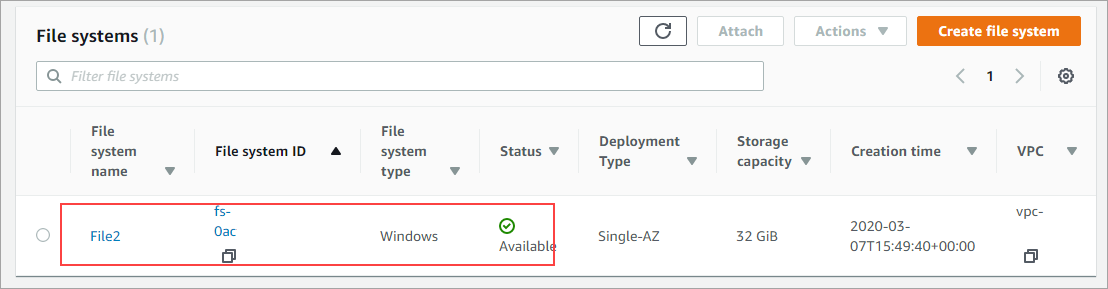
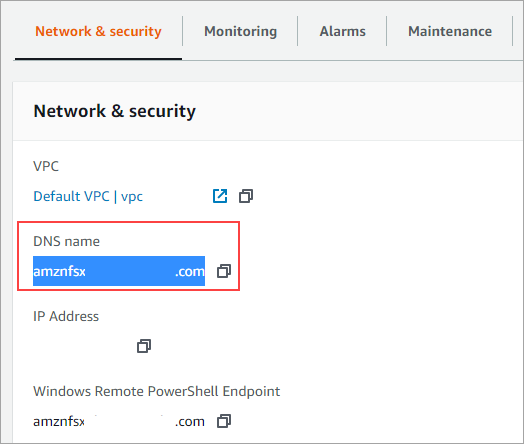
Once the file system is created successfully and available, click on the file system name to navigate to the file system details page where you can see the DNS name of the file system. You can access the file system using the DNS name. For example, if DNS name is amznfsxnhgf0abc.domain.com then you can access file share using amznfsxnhgf0abc.domain.com\share and the same will be used as file share witness in Always On Availability groups cluster
Make sure you have the connectivity to file system from both the nodes by adding rules in the Fsx security group to allow inbound connections from both the nodes.
Creating Windows Server Failover cluster
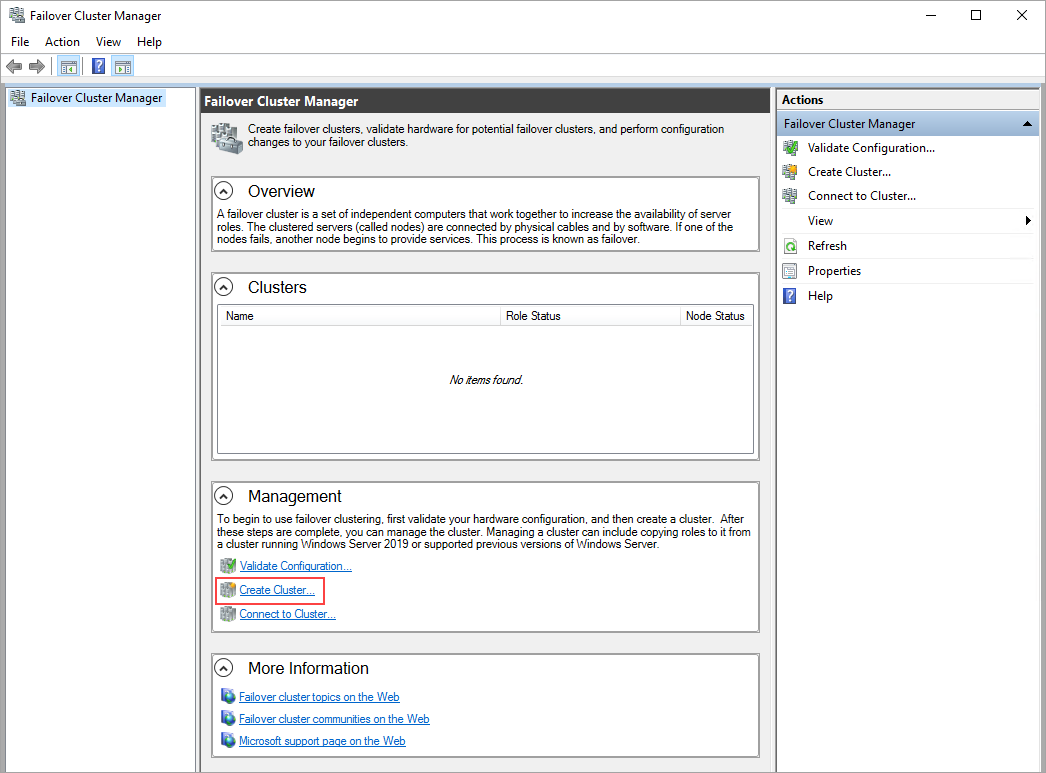
Log in to node 1 using the remote desktop protocol (RDP) and launch failover cluster manager. Click on Create Cluster, as shown in the below image.
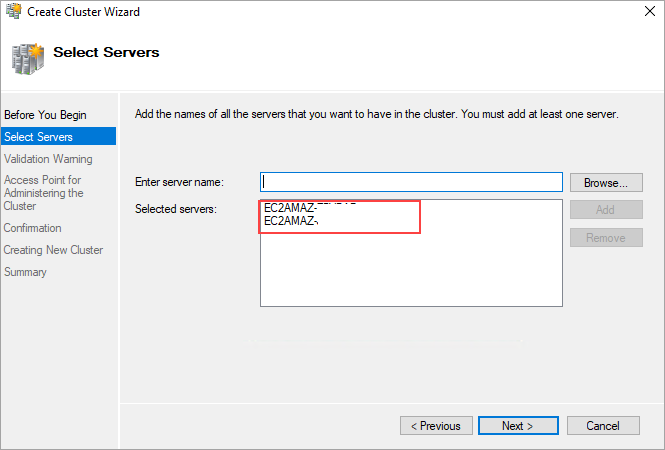
Click on the Next button. Add both the nodes and click the Next button.
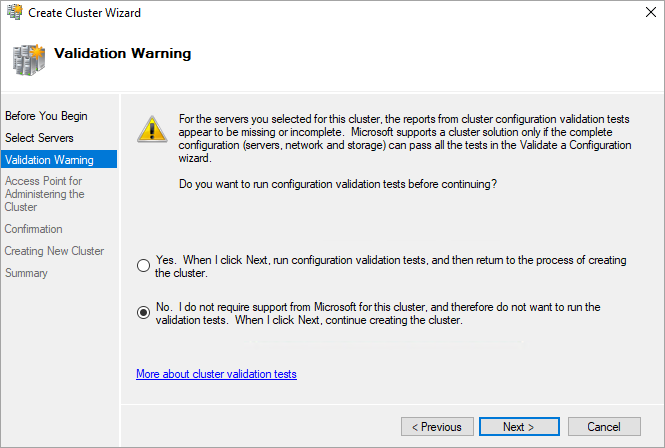
Select Yes to run the validation tests and access the validation report. In this case, I am ignoring the validation test. Click Next.
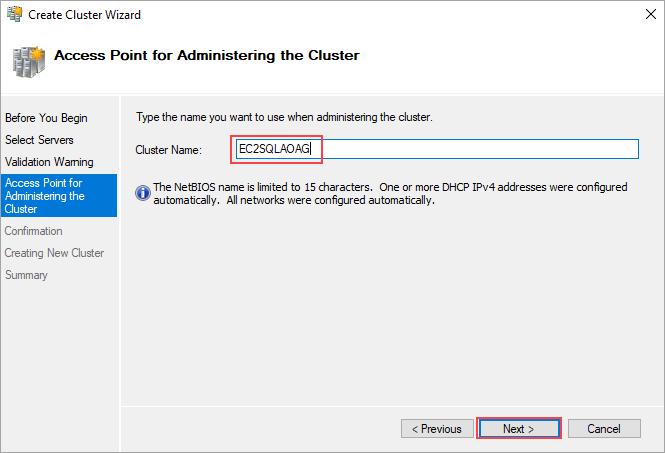
Enter the name of the failover cluster and click on the Next button to create a Windows failover cluster which manages the Always On Availability groups failover.
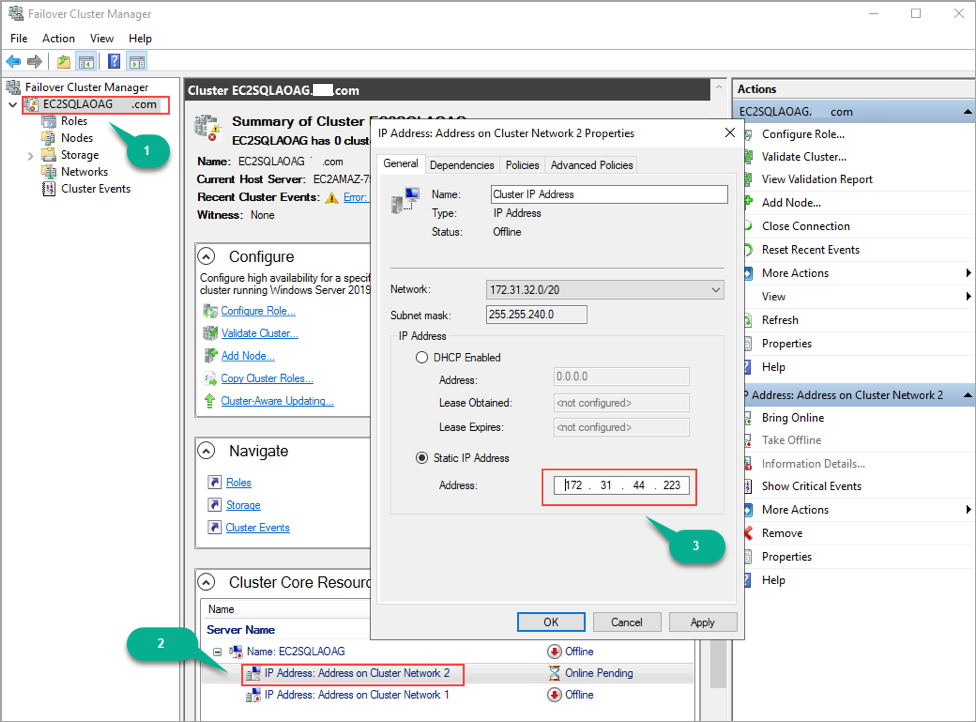
Once the cluster creation is successful, open the failover cluster manager. Click on the cluster you created (1). Right-click on the IP address under cluster core resources and click on Properties (2). Select the Static IP address and input one of the secondary IP address from the node, which is in 172.31.32.0/20 subnet.
Similarly, right-click on the cluster network 1 IP address and click on Properties. Select the static IP address and input one of the secondary IP addresses from another node.
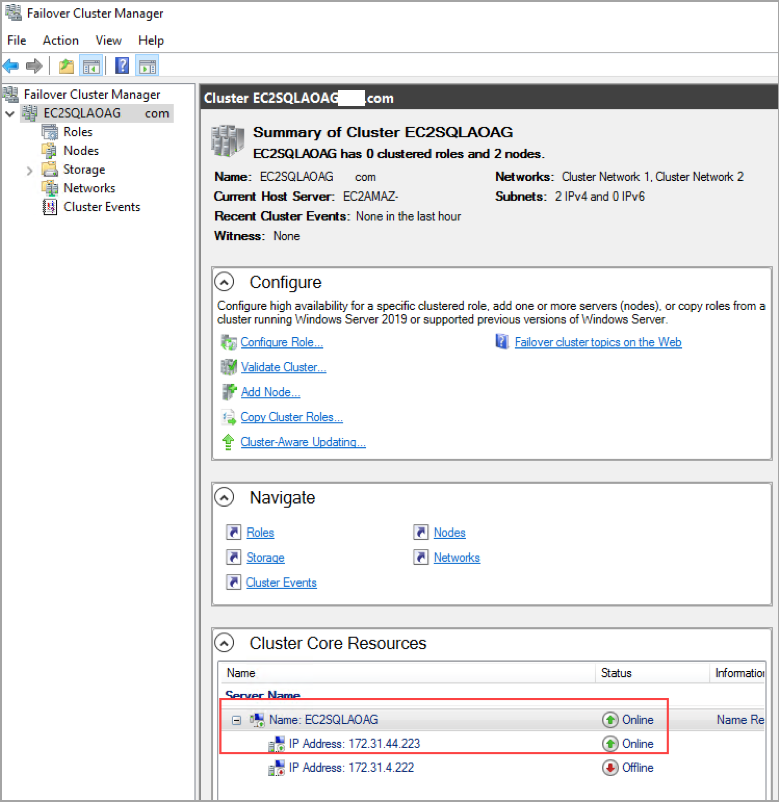
Now bring the cluster resource online.
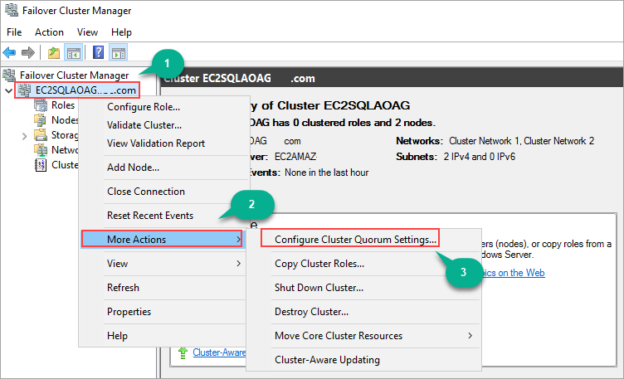
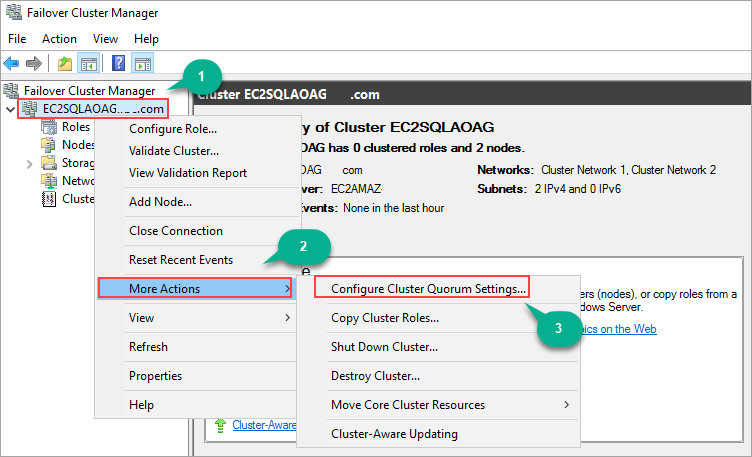
Now let us configure the file share witness. Right-click on the cluster (1) and select More Actions (2). Finally, click on Configure Cluster Quorum Settings… (3).
Click on the Next button. Select the Quorum witness and click Next. Select configure a file share as witness and click Next. Input the file share path and click Next.
Creating Always on Availability Group
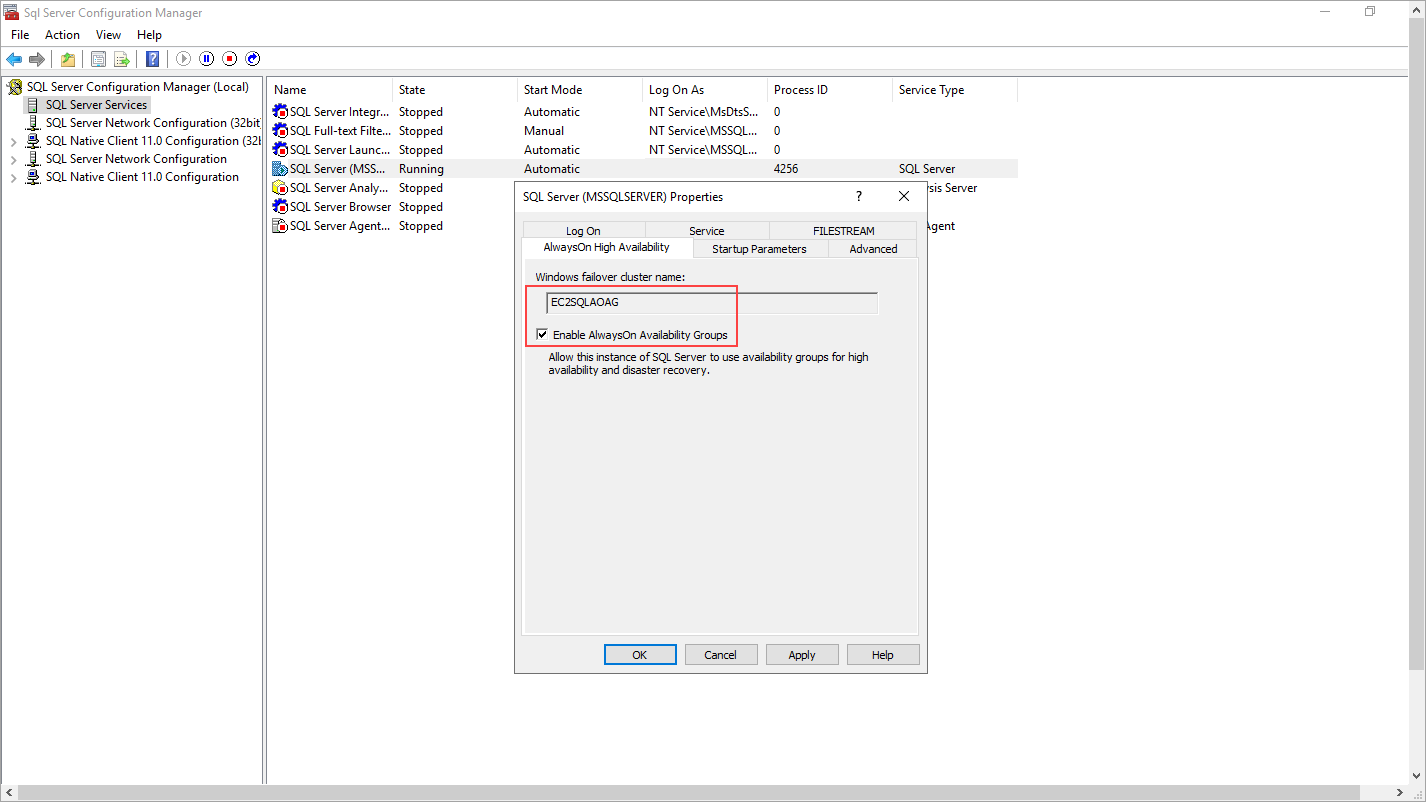
Log in to the node 1 using the remote desktop protocol (RDP) and open SQL Server configuration manager. Click on SQL Server Services and right-click on SQL Server service. Click on Properties. Navigate to AlwaysOn High Availability tab and Enable AlwaysOn Availability groups and restart the SQL Server services. Repeat the same steps on node 2 to enable AlwaysOn Availability Groups.
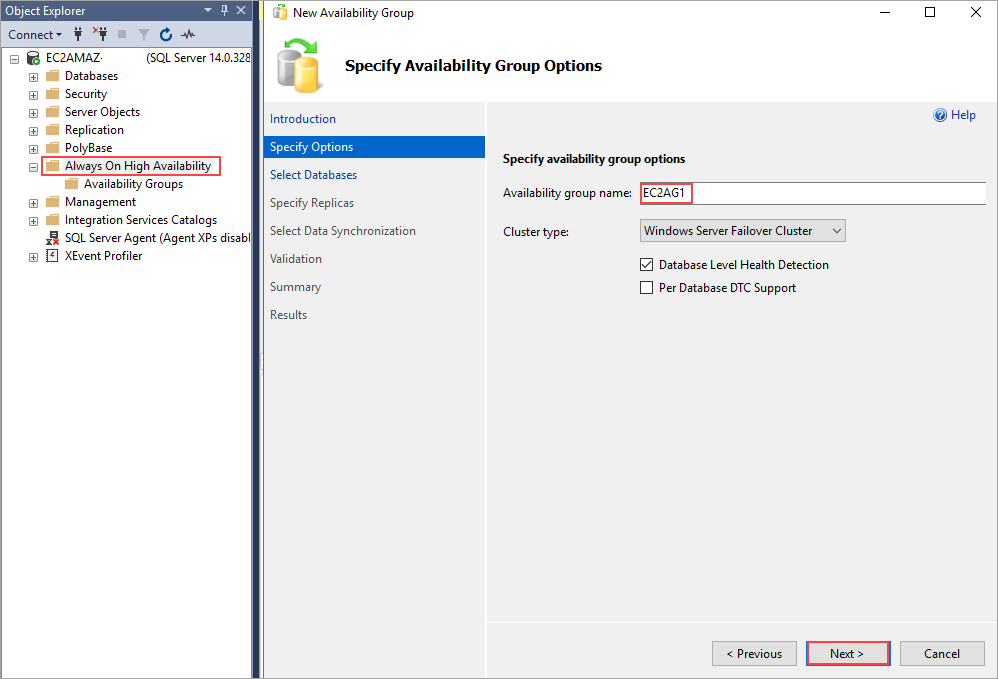
Open SQL Server management studio (SSMS) on node-1 and log in to the SQL server. Navigate to Always On High Availability and right-click on it and select New Availability Group Wizard. Click on the Next button.
Enter the Always On Availability group’s name and click on the Next button.
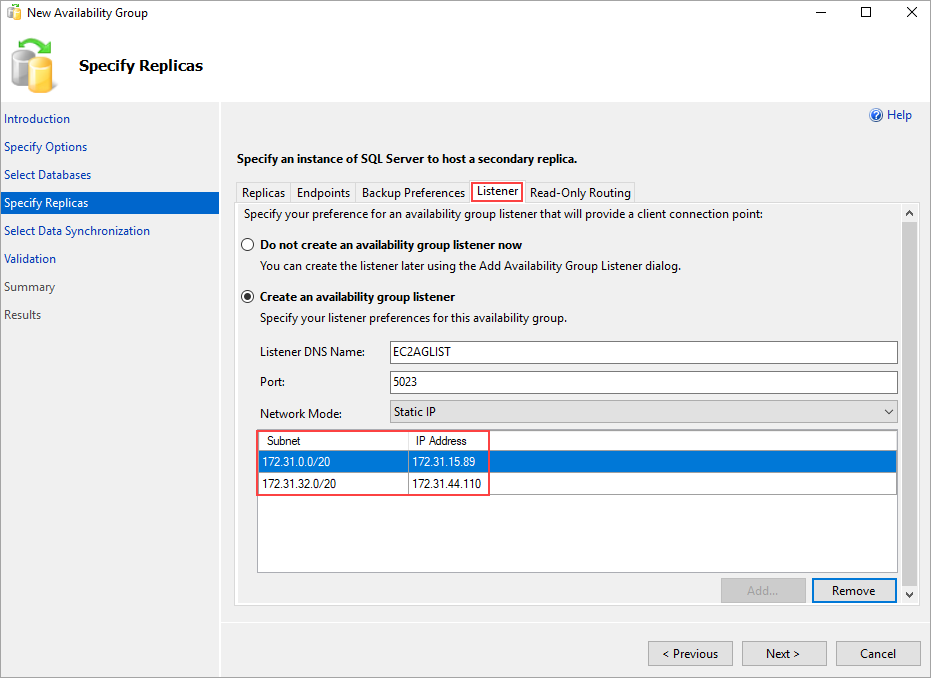
Select the databases that need to be added to the availability group and Add the secondary node as Replica. In the listener tab, enter the listener name and add the secondary IP from both nodes which are not used. Click Next.
Select the type of data synchronization as per your choice. In this case, I used a full database backup and log backup. Click Next and Finish.
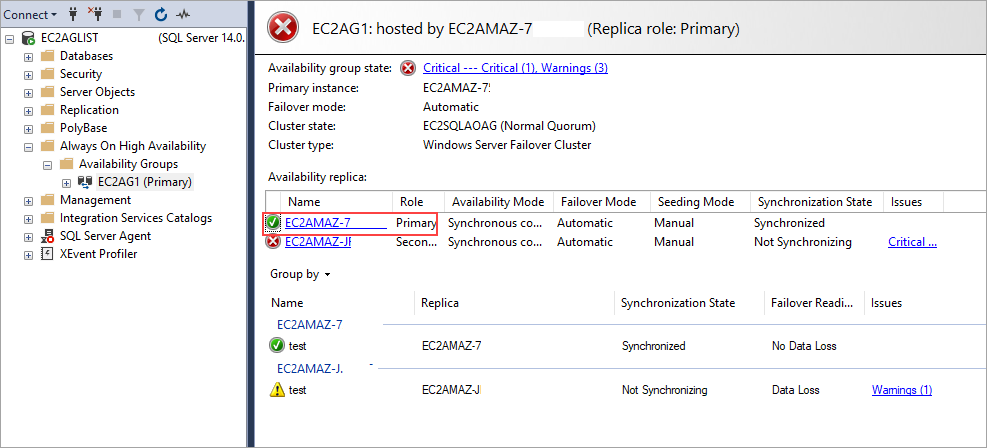
After successful creation of Always on Availability group, navigate to the availability group in SQL Server management studio (SSMS). Right-click on the availability group and click on Show Dashboard to see the health of Always on Availability groups. Please refer to the below image for the dashboard.
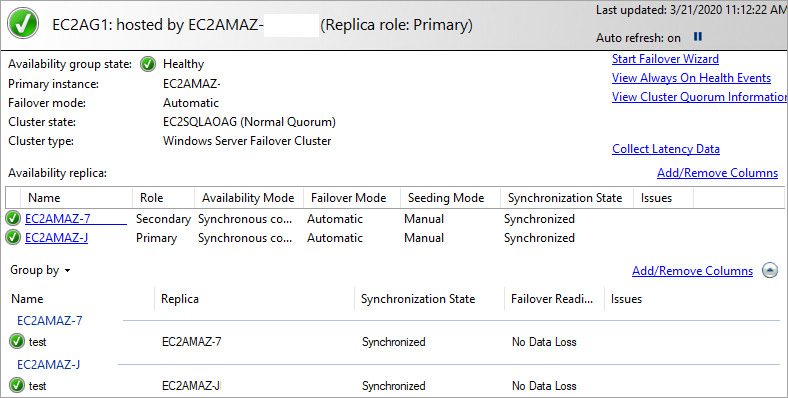
To test the failover, I shutdown the current primary node and connected using Always On listener name from SQL Server management studio (SSMS). Please refer to the below image for the Always-On dashboard after automatic failover. We can see that the previous primary node is shut down, and the previous secondary node became the primary node after automatic failover. The listener will serve requests from the listener IP address of the currently active node.
Conclusion
In this article, we explored how to set up multi-subnet Always On Availability Groups using AWS EC2 instances. In case you have any questions, please feel free to ask in the comment section below. To continue you learning about Always On Availability Groups, Please refer to the AlwaysOn Availability Groups category.

View all posts by Jignesh Raiyani
- Page Life Expectancy (PLE) in SQL Server - July 17, 2020
- How to automate Table Partitioning in SQL Server - July 7, 2020
- Configuring SQL Server Always On Availability Groups on AWS EC2 - July 6, 2020