
In this article, I am going to explain how we can export the data of the on-premise MySQL database to Azure SQL database. This task can be performed in two phases.
- Export the data of MySQL table in CSV files using MySQL Workbench
- Import the CSV file in Azure SQL database using SQL Server Import/Export wizard
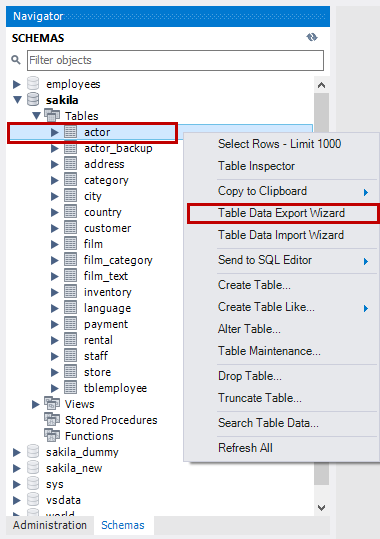
First, let us import data from the MySQL Table to the CSV files. To do that, open MySQL Workbench Connect to the MySQL Server From the left pan, expand the sakila database Expand Tables Right-click on any Table click on Table Data Export Wizard.
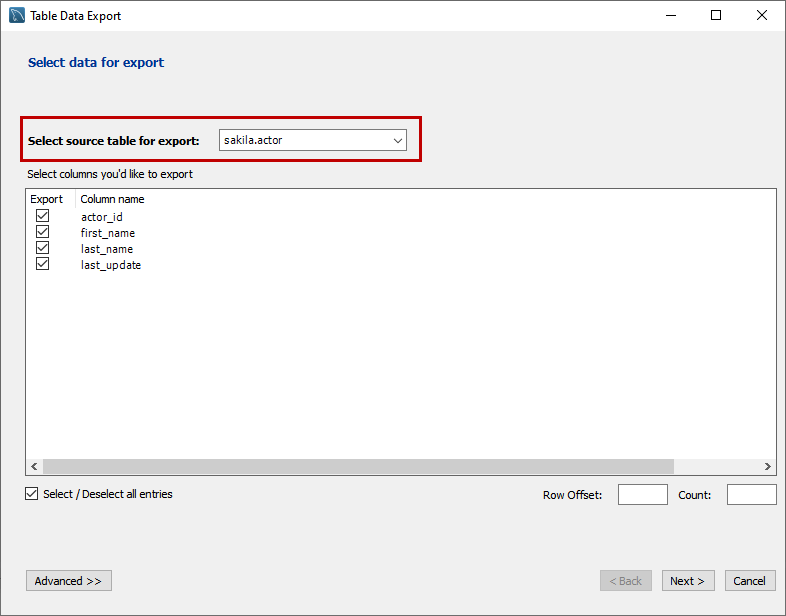
A Table Data Export wizard opens, on the “Select data for export” screen, choose the desired table from the Select source table for export drop-down table. Click on Next.
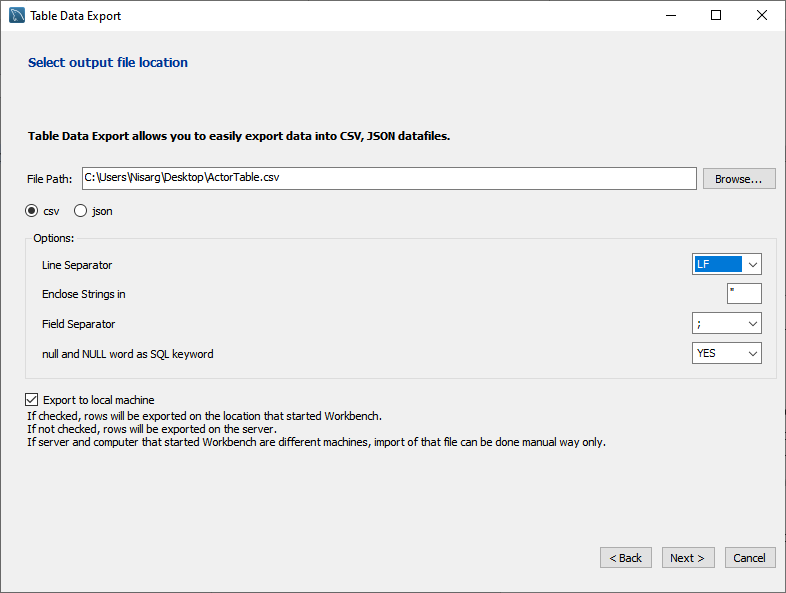
On select output location screen, provide the location of the file in the text box. You can export table data in JSON or CSV files. We will export data in CSV format, hence select CSV. You can specify the format of CSV files. Details are the following:
- Line separator: The valid options are LF (Line feed), CR (Carriage return), and CR LF (both)
- Enclose strings in: You can specify the character in which you want to enclose the string
- Field separator: You can specify the field separator character from the drop-down box
- NULL or NULL word as a SQL Keyword: If you want to use the value of a NULL or NULL keyword, then specify Yes from the drop-down box
Change the options according to the requirement and click on Next.
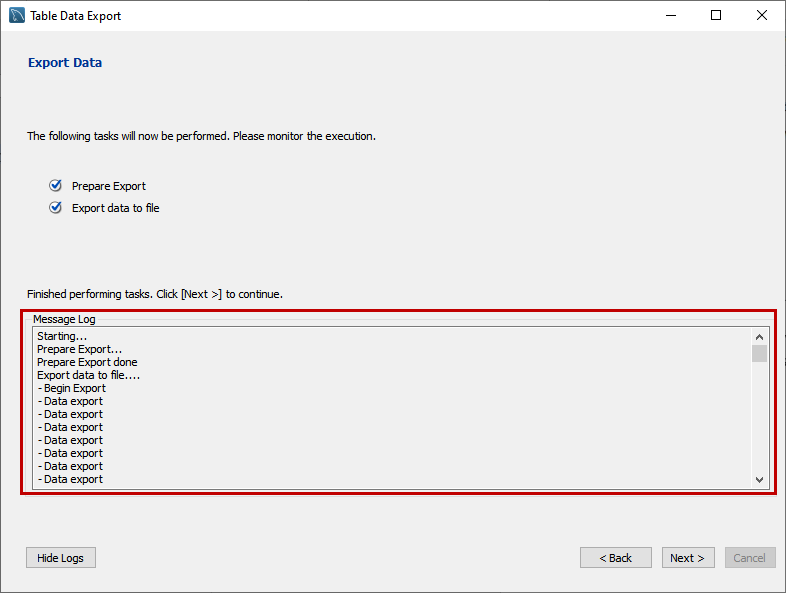
On the export data screen, you can view the list of tasks to be performed. Click on Next to perform the export. You can see the status of the task in the message box.
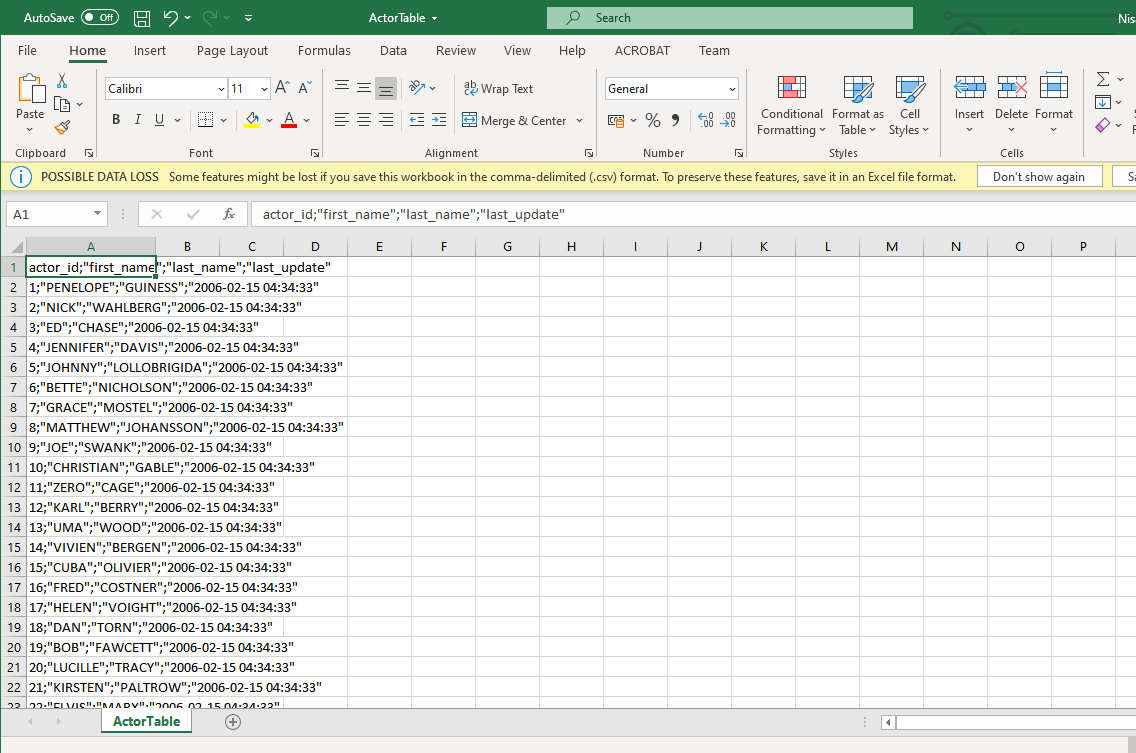
The exported CSV file looks like the following image:
Import the CSV file in Azure SQL database using SQL Server Import/Export wizard
Now, let us import the ActorTable.csv file to the Actor table of the sakila database. To do that, we are going to use the SQL Server Import and Export wizard (64 bit). Launch SQL Server Import and Export Wizard.
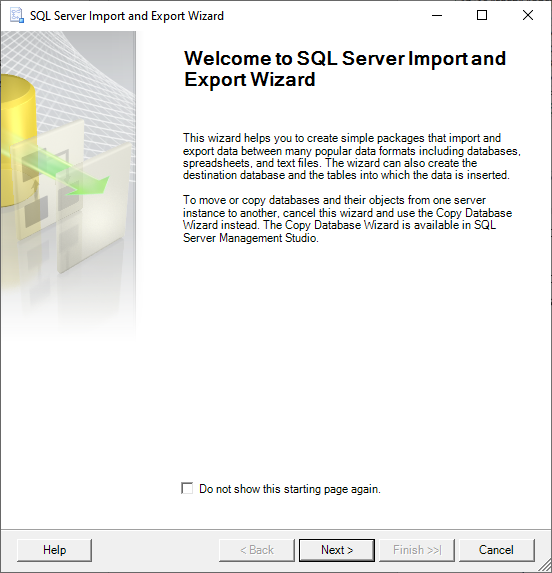
On the first screen, just like all other wizards, you can see the details of the wizard. You can review it and click on Next. Below is the screenshot:
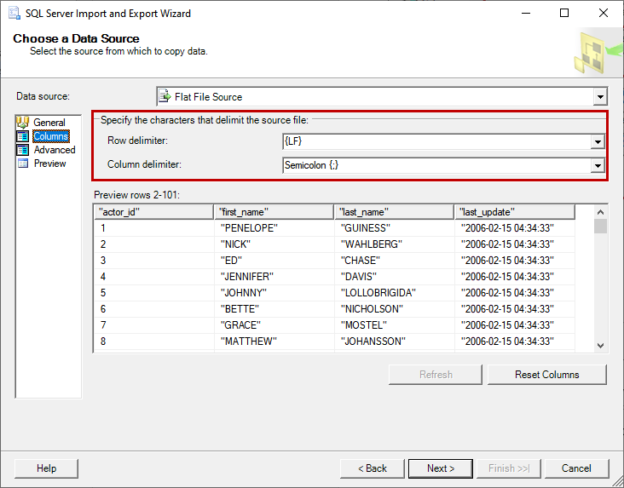
On the Choose a Data Source screen, you can choose the data source from which you can copy the data. We are going to copy the data from the CSV files, hence choose the Flat File Source from the Data Source drop-down box. You must specify the location of the CSV file. To do that, click on Browse. Locate and select the file and click OK. Once the file is loaded, the format options will be set up automatically.
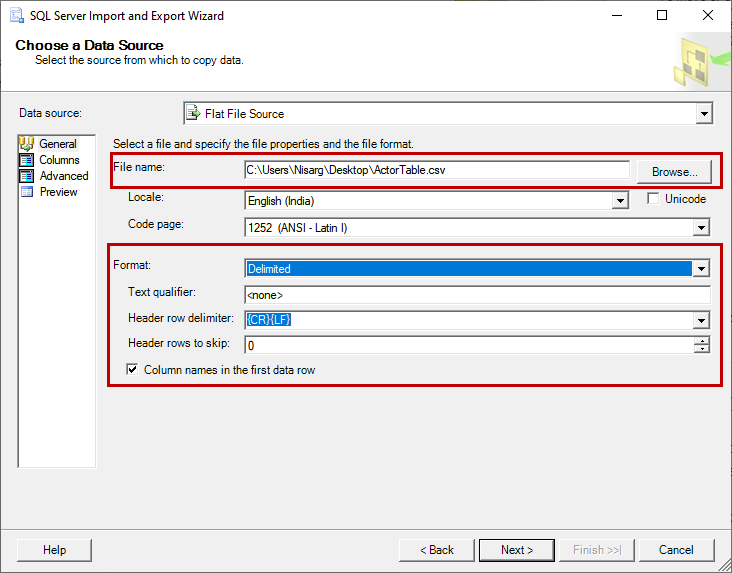
Click on columns from the left pan to view the list of the column and data. Suppose, while exporting the data, the row delimiter and column delimiter is different than the default values. You can change it from row delimiter and column delimiter drop-down box.
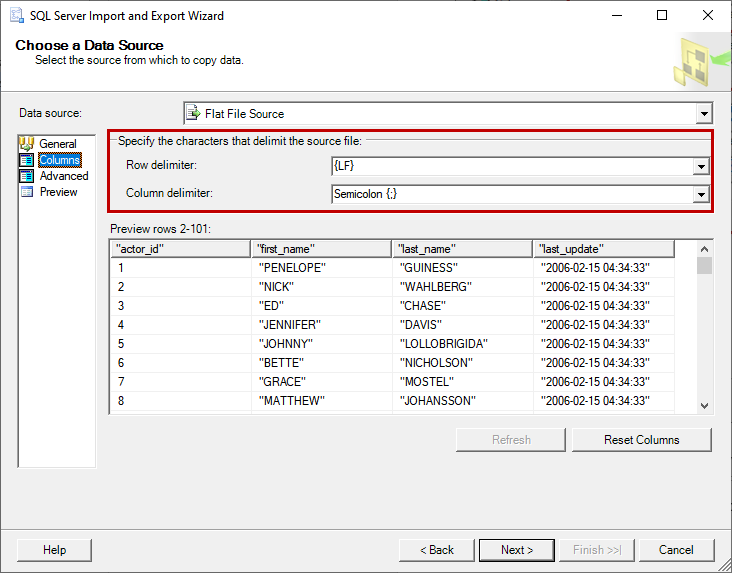
On the preview tab, you can view the data. If the table structure and data are correct, then click Next.

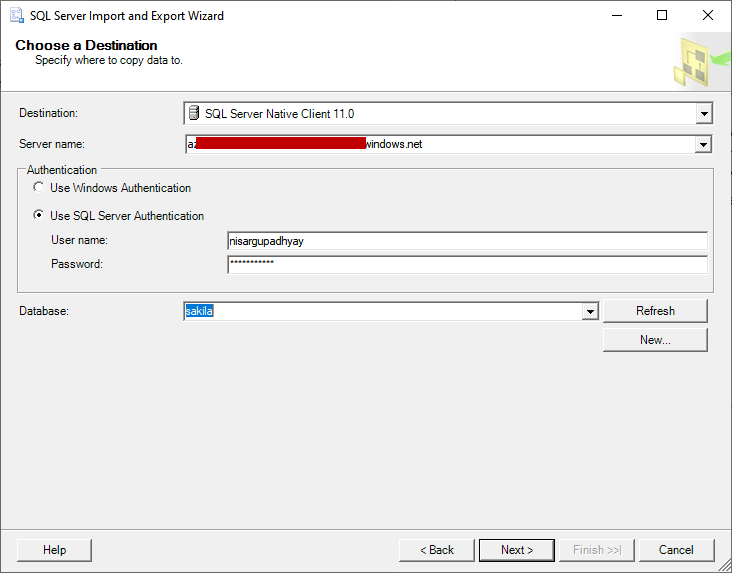
On the Choose a Destination screen, you must specify the destination where you want to copy the data. We want to copy the data to the Azure SQL database, hence choose SQL Native Client 11.0 from the destination drop-down box. Specify the destination server name in Server Name drop-down box. We are copying data to the Azure SQL database; hence we must use SQL Server authentication; therefore, select SQL Server authentication. Provide an appropriate user name and password to connect to the Azure SQL database. Choose the name of the destination database from the database drop-down box. Click Next.
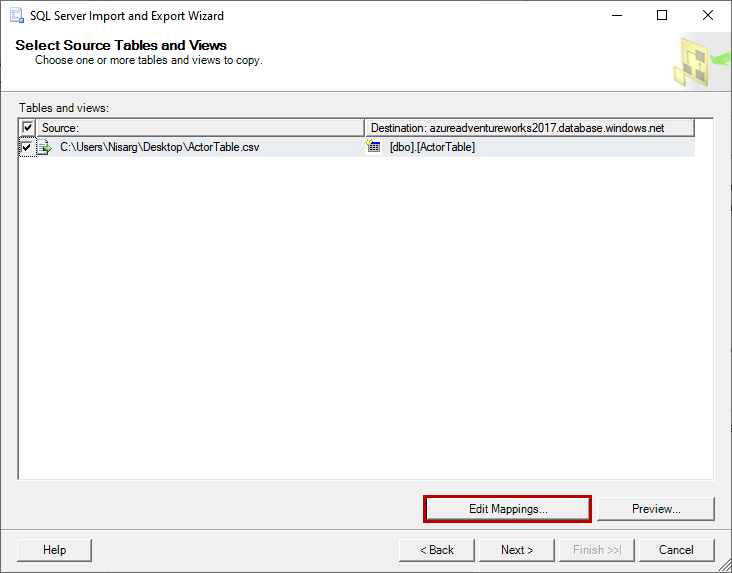
On the Select Source Tables and Views screen, we can perform mappings between columns of source and destination. To edit the mappings, click on the Edit Mappings button.
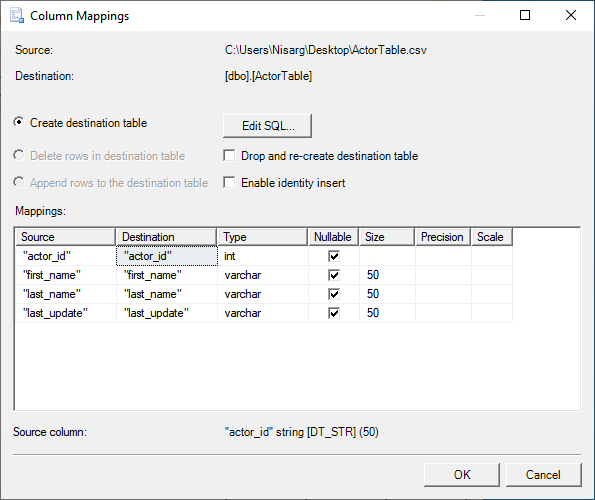
A dialog box, column mapping opens. On this dialog box, you can do the following changes:
- Create a table in the destination database that has the same column structure as the source table. Also, you can recreate the same table
- Enable Identity insert
- Change the data type of the destination table or change the attributes of the tables
- You can perform mappings of the column of the source table to the destination table
The following is the screenshot:
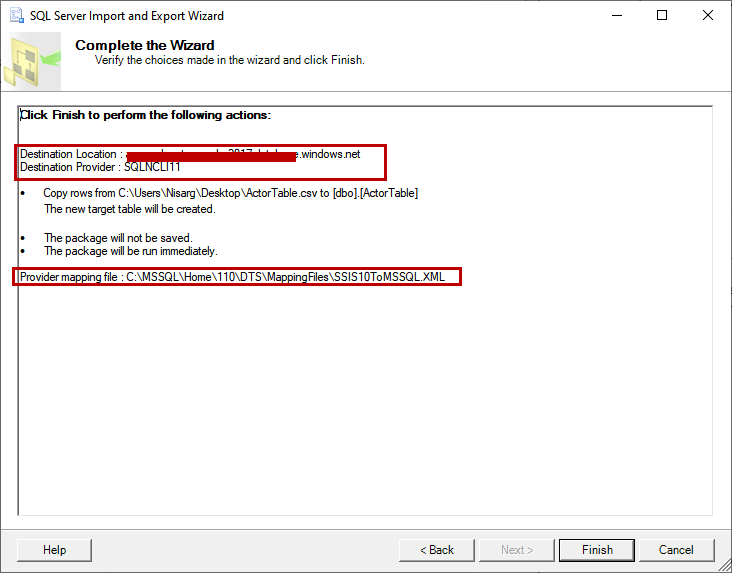
Click on Next. On the Run Package screen, enable the option “Run the package now” and click on Finish. On the Complete the Wizard screen, review the list of activities to be performed by it and click on Finish. See the following image:
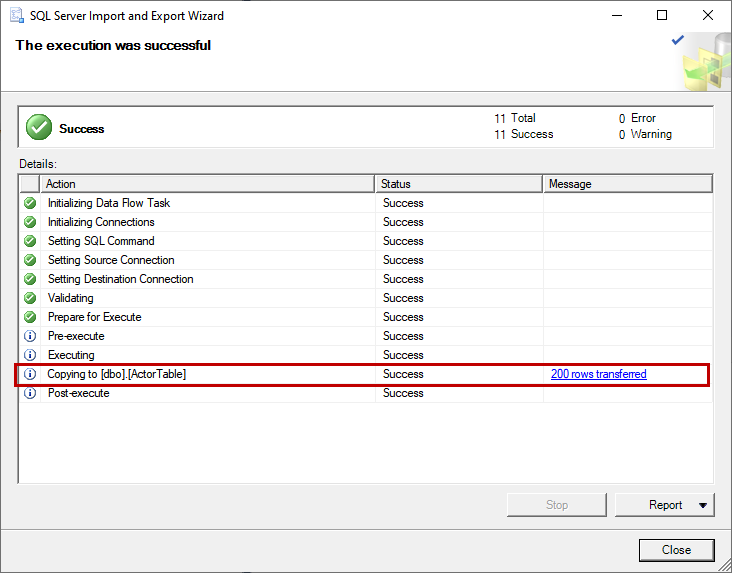
If the wizard completes without error, you can view the number of the rows that have been transferred to the destination. Click OK to close the window.
To verify that the data has been exported without error, connect to the SQL Server management studio Connect to the Azure SQL Server Run the following query on the sakila database.
|
1 |
select * from [actortable] |
The following is the output:
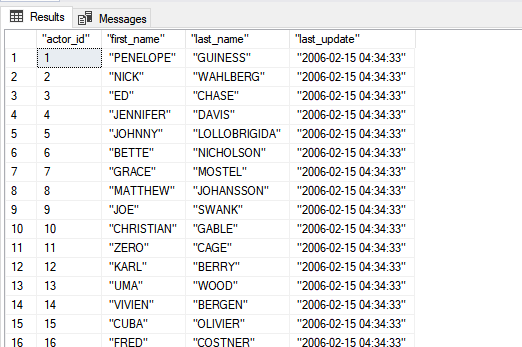
As you can see that all rows of the actor table have been copied to Azure SQL database.
Summary
In this article, I have explained how we can export the data of the MySQL database to a CSV file and from the CSV file to Azure SQL database using SQL Server import-export wizard.

He has expertise in database design, performance tuning, backup and recovery, HA and DR setup, database migrations and upgrades. He has completed the B.Tech from Ganpat University. He can be reached on nisargupadhyay87@outlook.com
- Different ways to identify and change compatibility levels in SQL Server - July 22, 2024
- Copy SQL Databases between Windows 10 and CentOS using SQL Server data tools - October 19, 2022
- Changing the location of FILESTREAM data files in SQL Database - October 14, 2022