
In this article, I am going to explain the step by step process to create an Azure Database for MySQL Server. Azure Database for MySQL is a fully-managed database as a service that uses MySQL community edition. It can manage the mission-critical workload with dynamic scalability. We can use it to develop various applications that leverage open-source tools and cross-platform applications. Let me explain these steps of a deployment process of MySQL Server on Azure.
How to create an Azure Database for MySQL Server
First, log in to the Azure portal using appropriate credentials. On the home screen, click on “More services.”

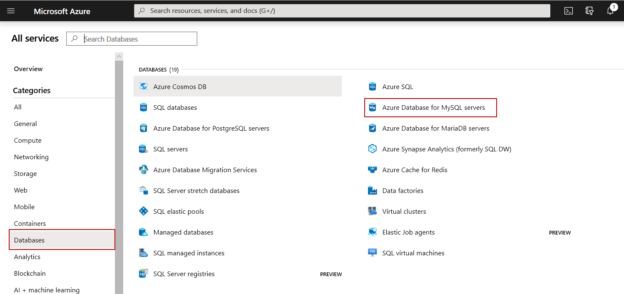
On All services screen, from the right pan, click on Databases. The list of database services offered by Azure will be displayed on the left pane. Choose Azure Database for MySQL servers. See the following image:

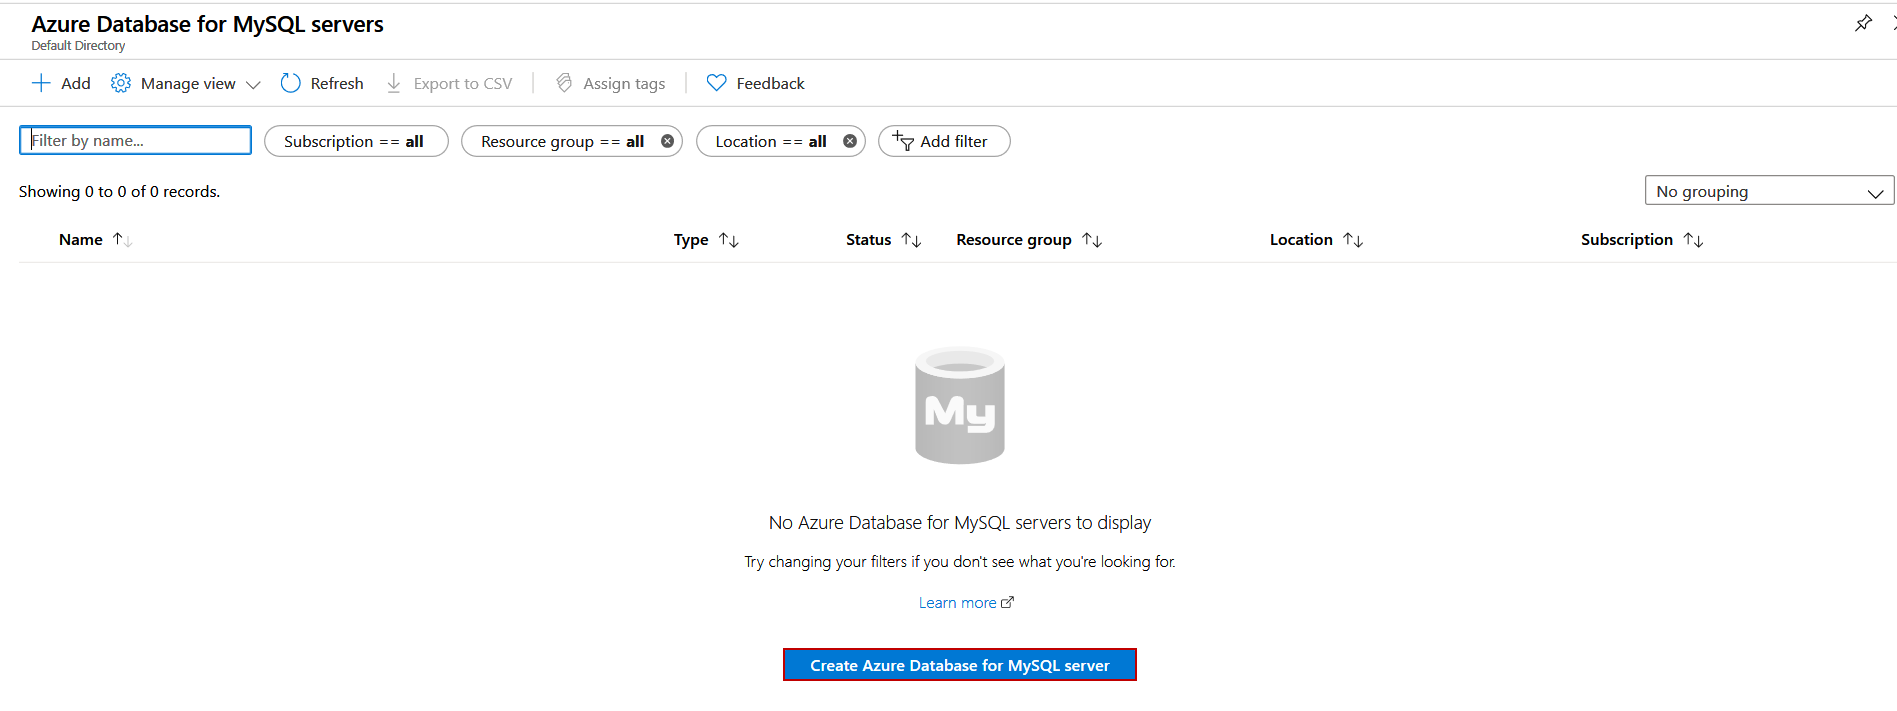
On Azure Database for MySQL servers screen, click on “Create Azure Database for MySQL Server.” See the following image:
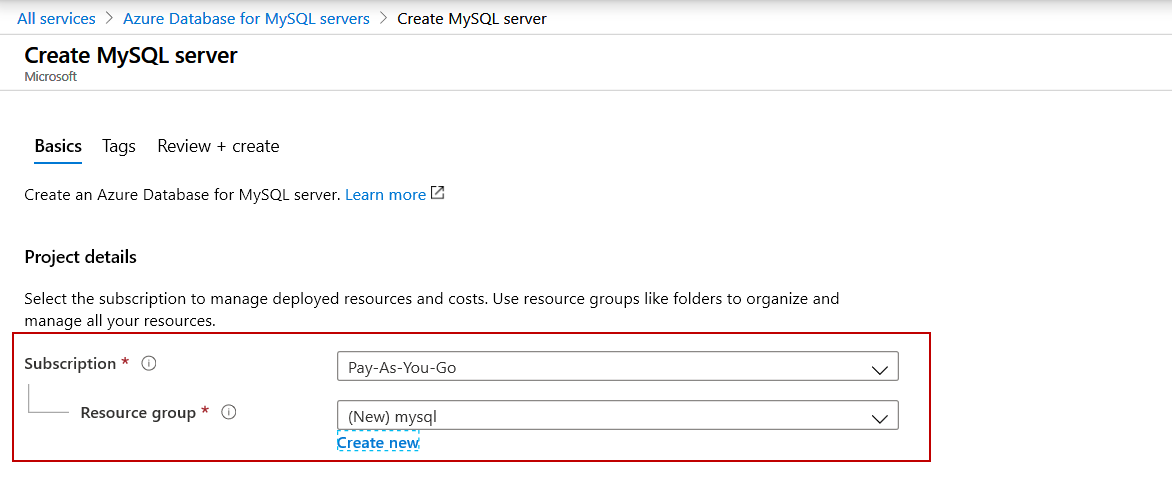
On “Create MySQL Server,” choose the appropriate subscription from the “Subscription” drop-down box and choose the appropriate resource group from the “Resource group” drop-down box. If you haven’t created any resource group for MySQL, then you can create it by clicking on the “Create new” link. See the following image.
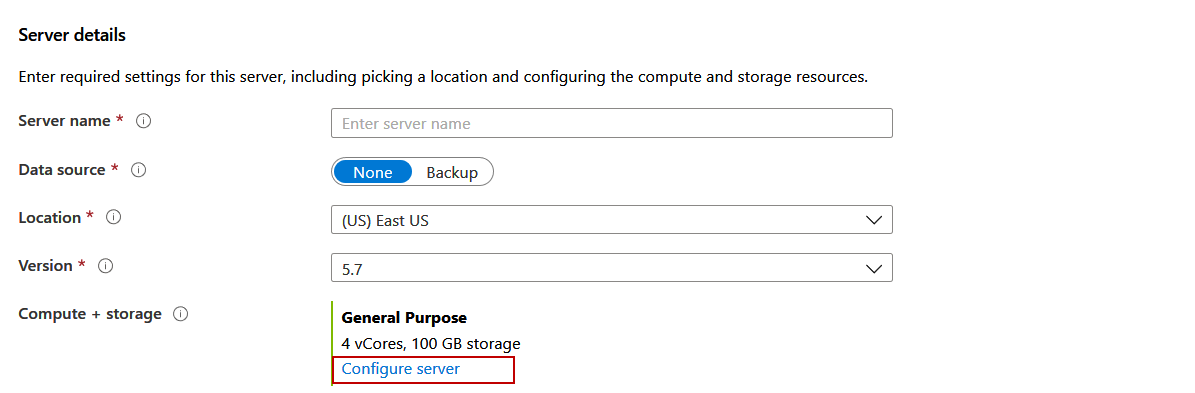
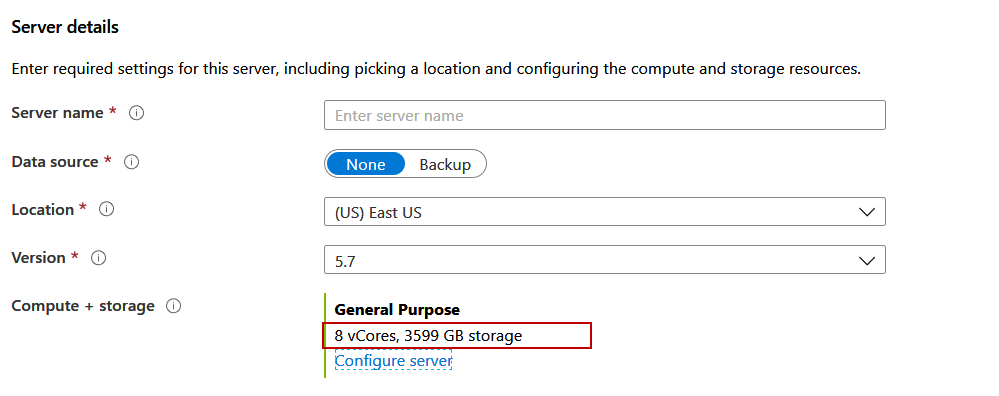
Under the “Server Details” section, provide the following information:
- Server Name: Provide the desired server name. The server name must be unique, does not contain any special characters
- Location: You can choose the nearest location from your users or application server from the “Location” drop-down box
- Version: Choose the desired version of MySQL Server from the “Version” dialog box. Azure offers three versions of MySQL. The versions are 5.0,5.7 and 8.0
Compute + storage: You can configure the number of virtual cores and the amount of storage that can be used to configure the MySQL. Default values are “4 vCores and 100GB storage” To change the configuration, click on “Configure server.” See the following image:

On the pricing tier screen, you can increase or decrease the server resources according to your requirements. You can review the pricing details of the MySQL Server here. Following is the image of the Pricing tier screen.
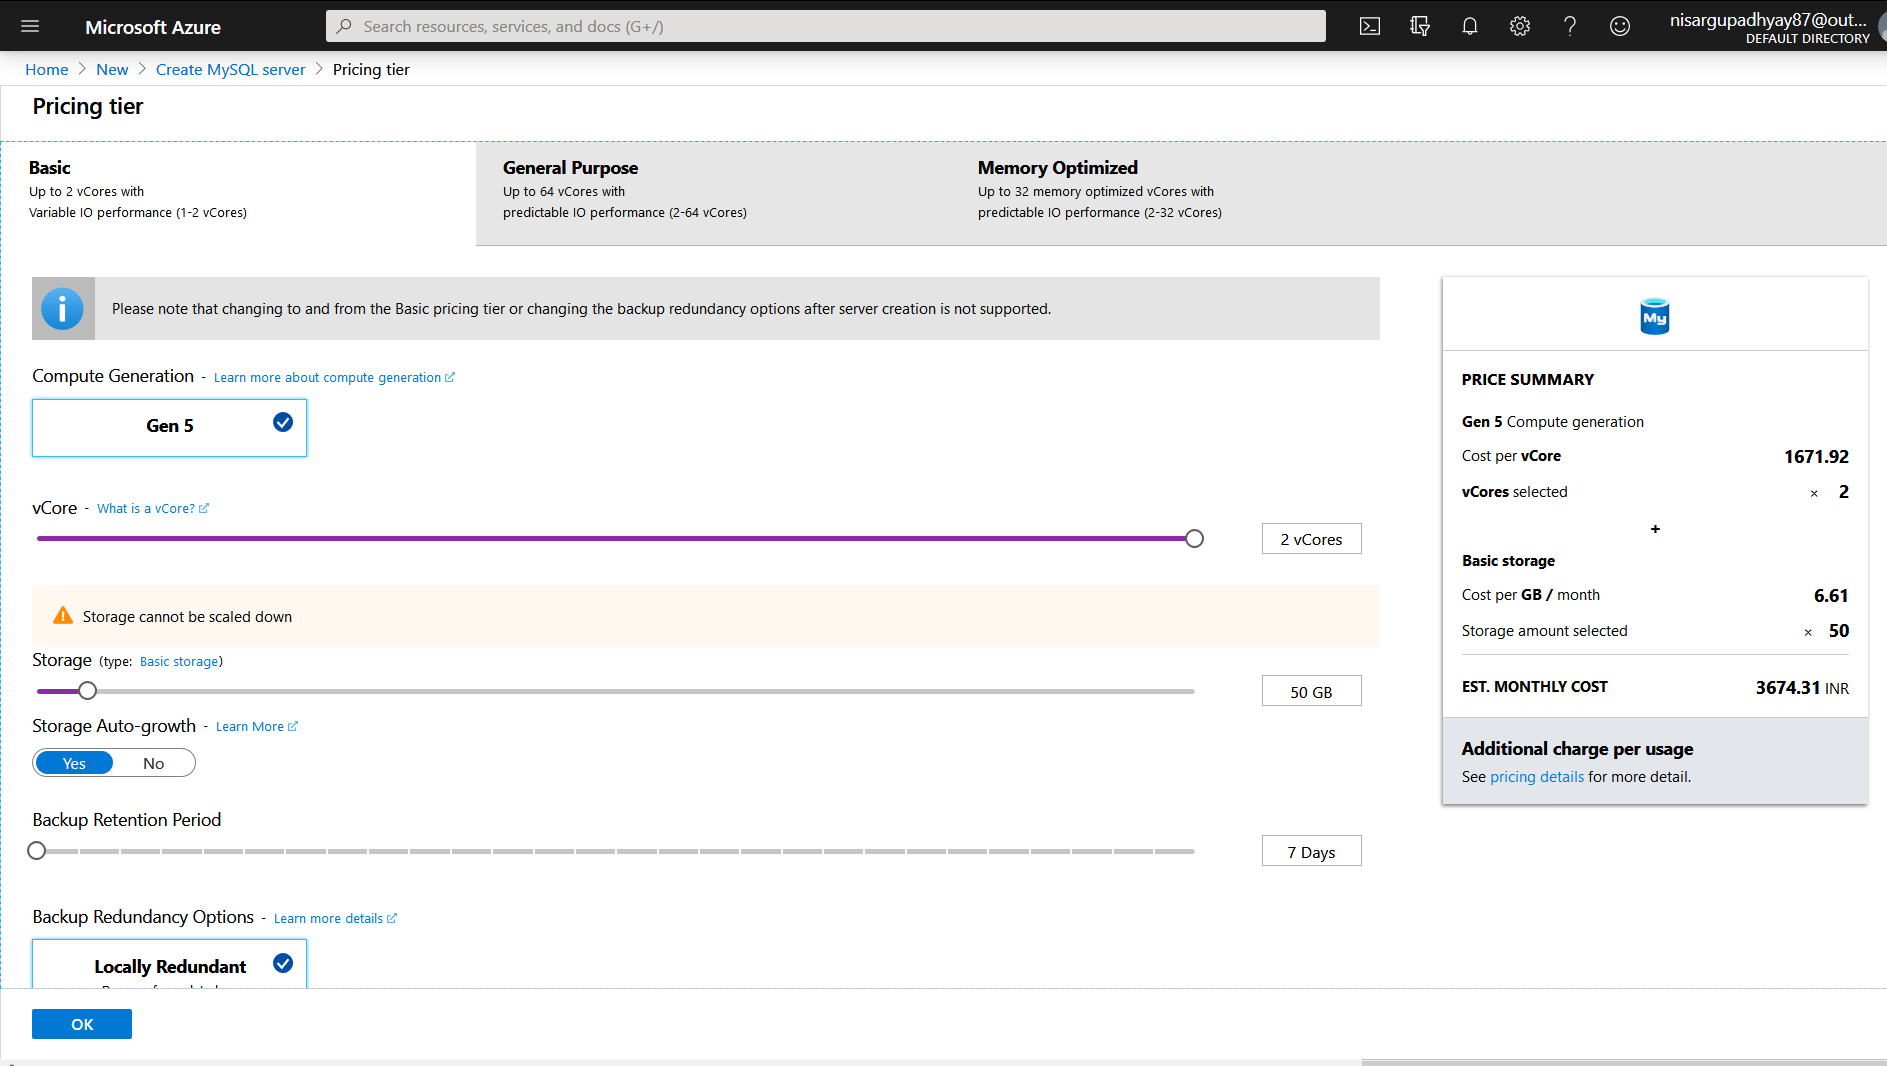
Change the server configuration parameters according to your requirement and click OK.
When you make the changes in the server configuration, changes reflect in compute + storage. Following is the image of the server details section:
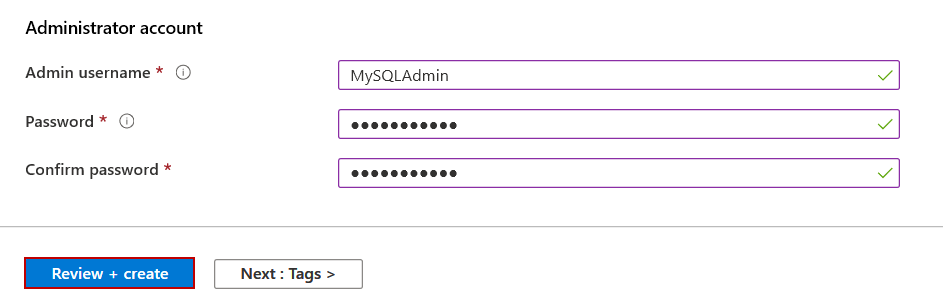
In the Administrator account section, provide the name of the administrator account and appropriate password to connect to that MySQL Server. Click on Review + Create.
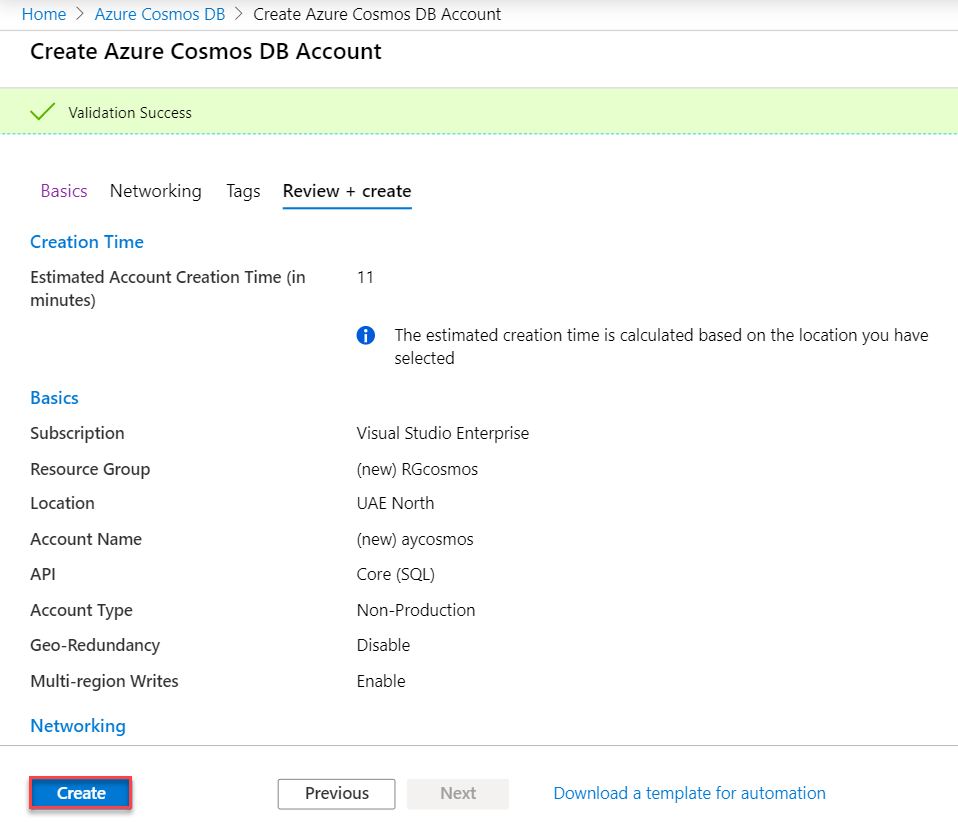
On Review + create the screen, verify the configuration and settings, and click on “Create.”
The deployment process of the MySQL Server will be started. The process might take a few minutes to complete. Once configuration completes. You can see “Your deployment is complete” screen. Click on the “Go to resource” button to view the configuration of MySQL Server.
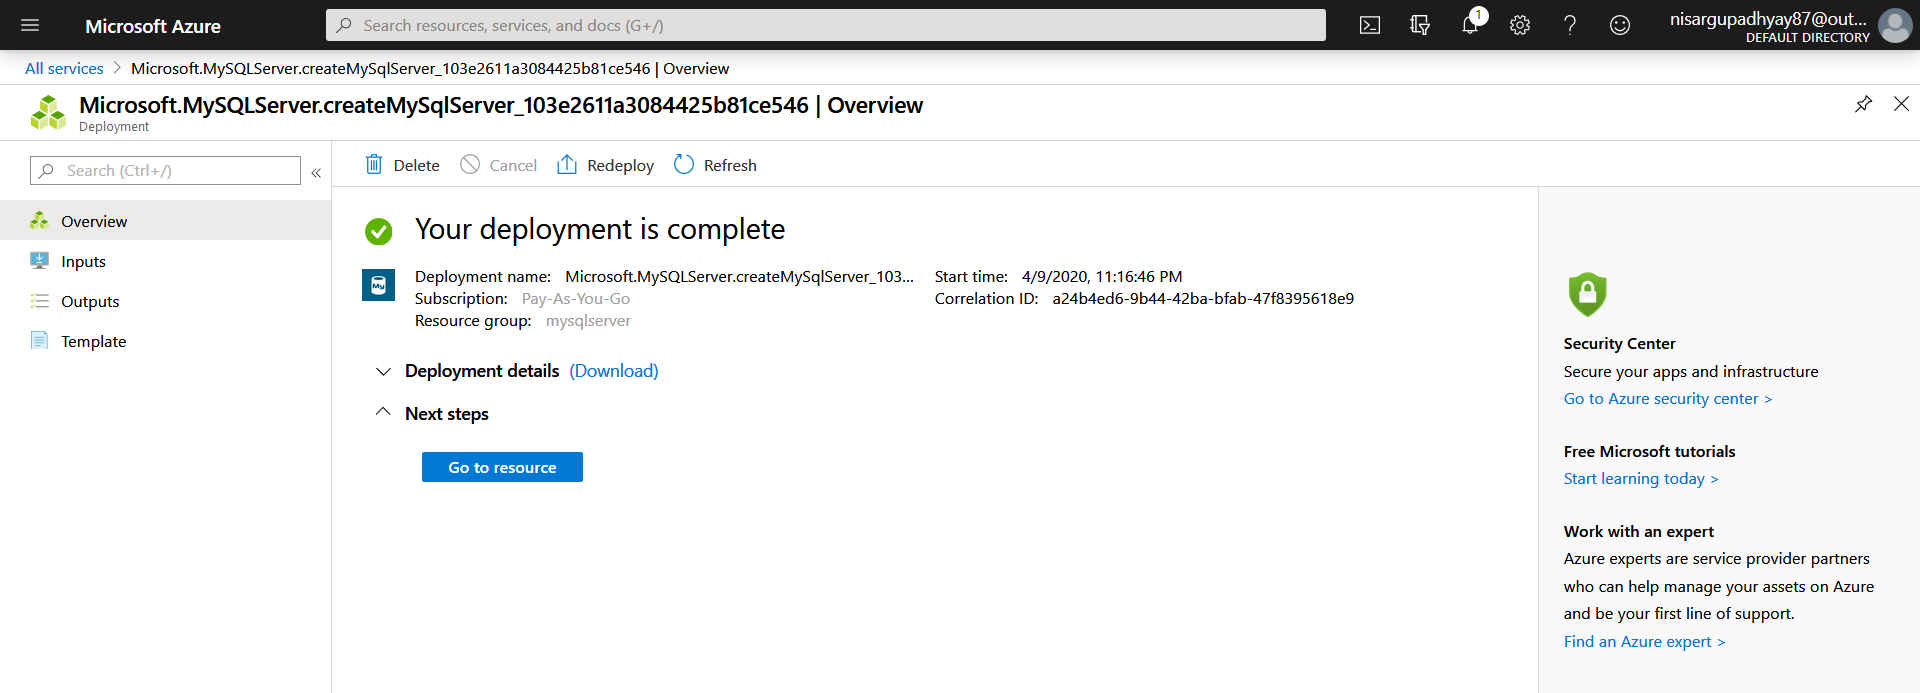
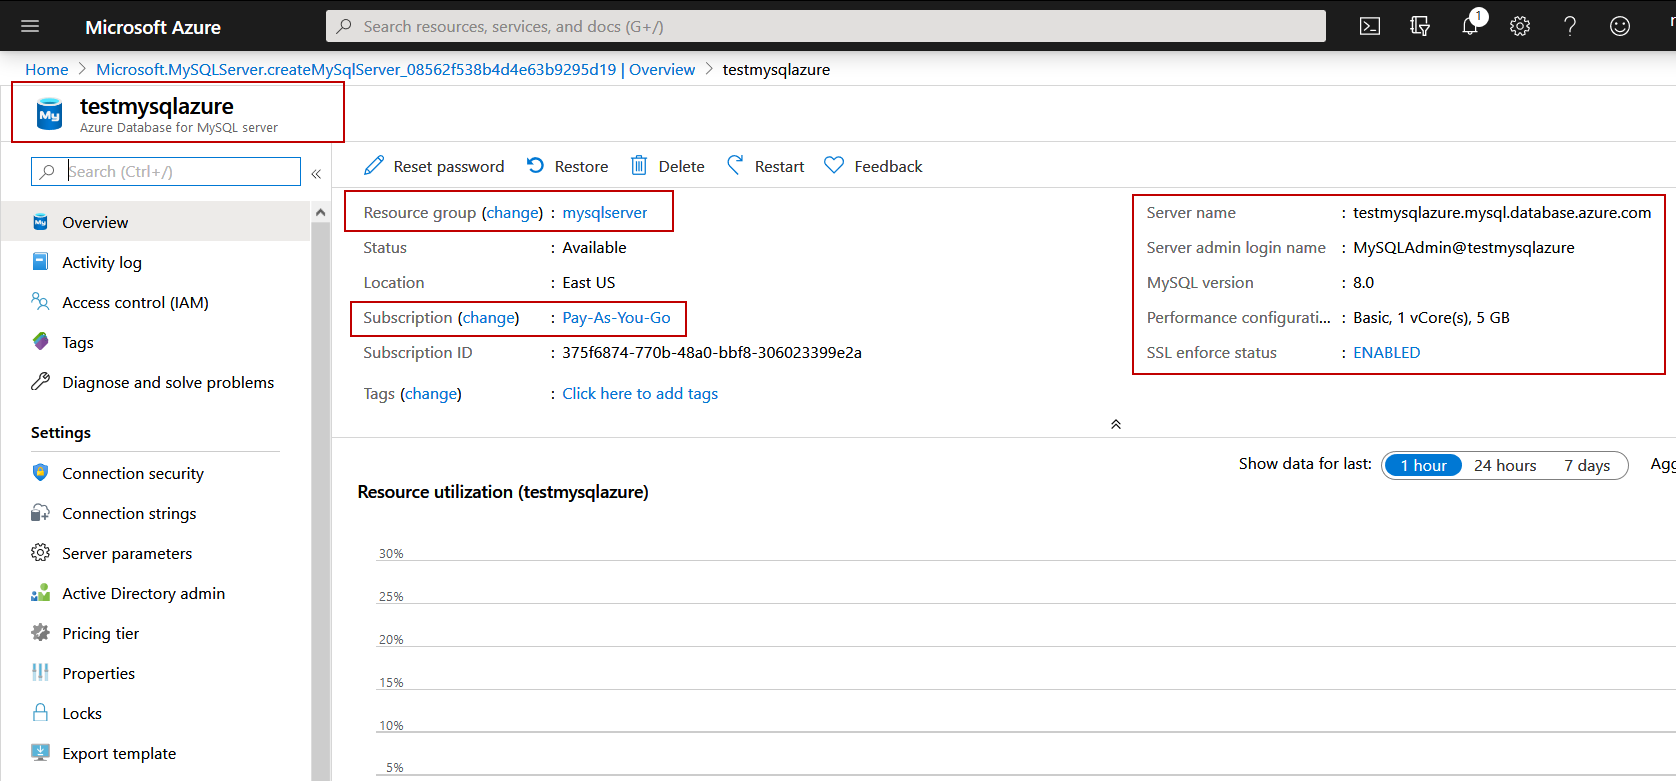
On the resource page, you can view the details of the MySQL Server. See the following image:
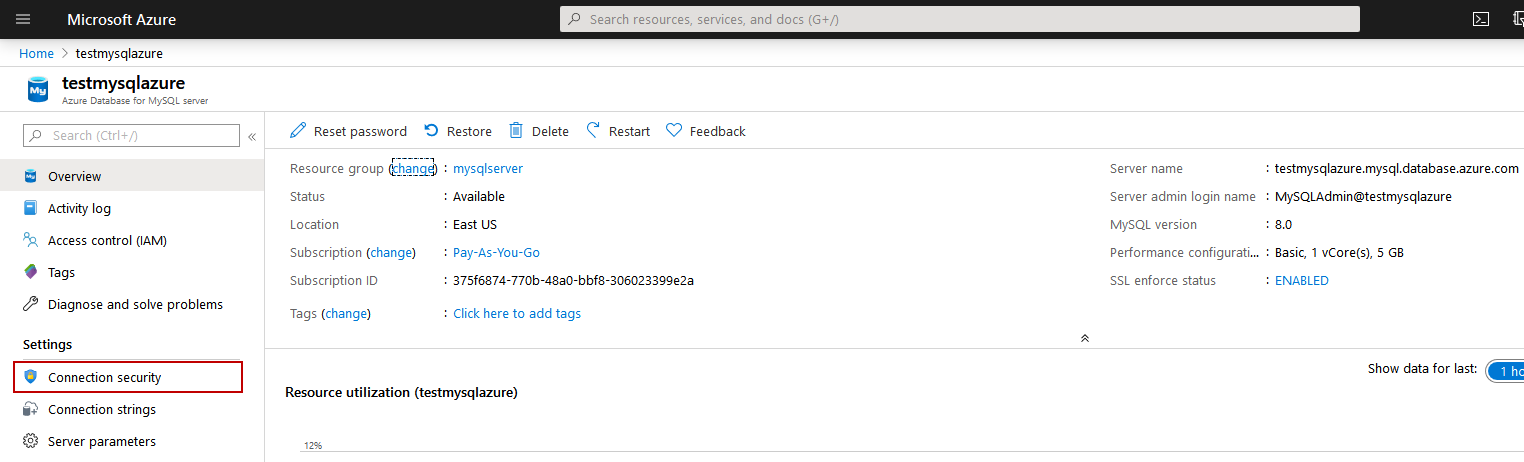
Configure Firewall rules in Azure
Once MySQL Server deployed successfully, we must configure the firewall to allow the incoming connection to the database server. To do that, click on “Connection security” on the Azure Database for MySQL Server page. See the following image:
On the “Connection security” page, you can add the specific IP Address or the range of IP Addresses of the computers that are allowed to connect to the Azure Database for MySQL Server. To add the IP Address of the computer that you are using to connect to MySQL Server, click on “Add current client IP Address” See the following image:

Click on the Save button to save the firewall rule.
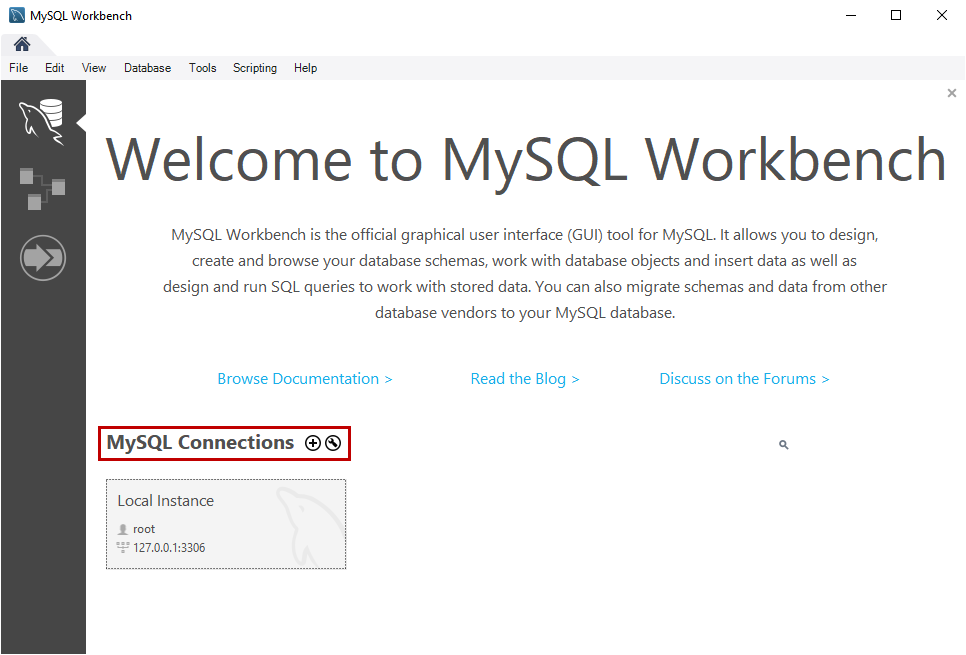
Connect to MySQL Server using MySQL workbench
Once the deployment completes, let us connect to the server. Open MySQL Workbench -> Click on MySQL connections -> Click on (+) sign. See the following image:
On setup new connection dialog box, enter the desired name in Connection Name dialog box, choose appropriate connection method from connection method dialog box. Provide hostname, port number, and username to connect to the MySQL Server. Click on Test Connection. See the following image:
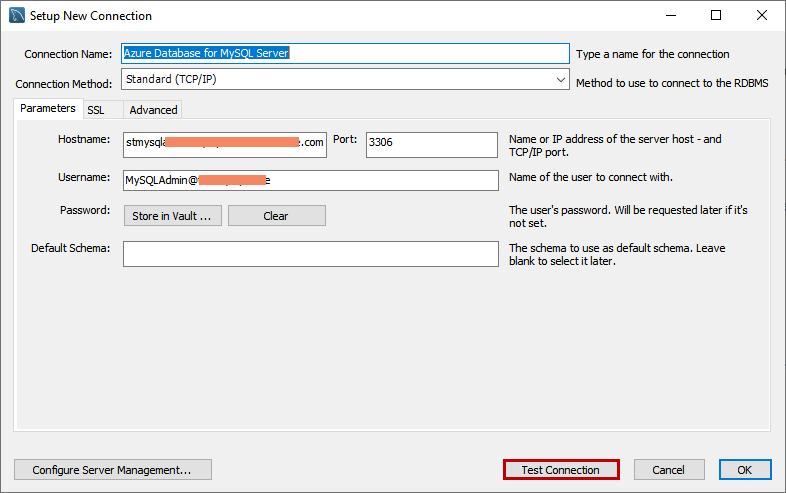
When you click on the “Test connection” button, a prompt to enter the password opens. Enter the password and click OK.

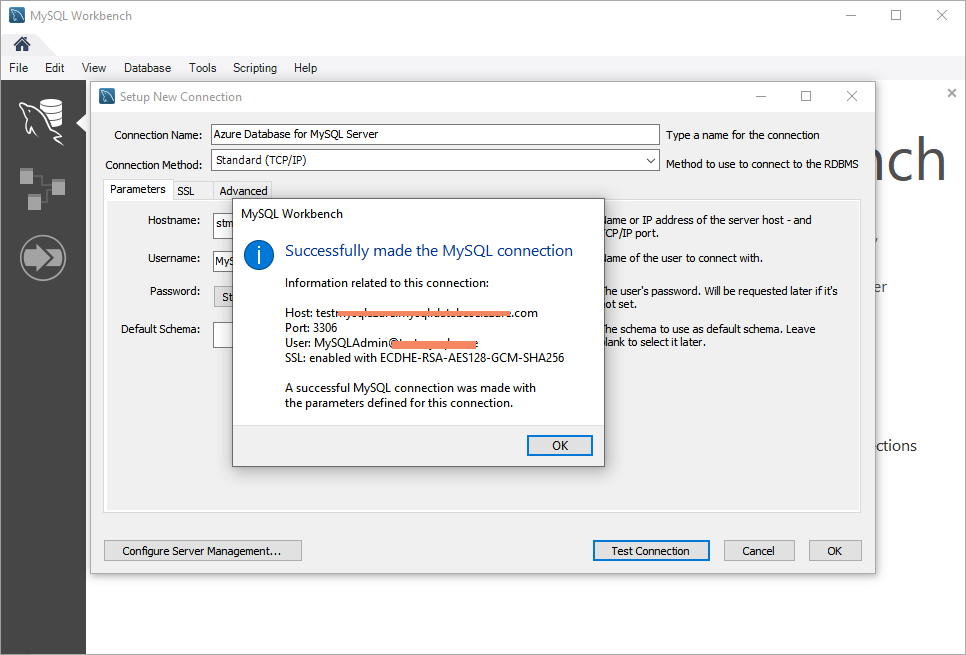
The connection has been established successfully.
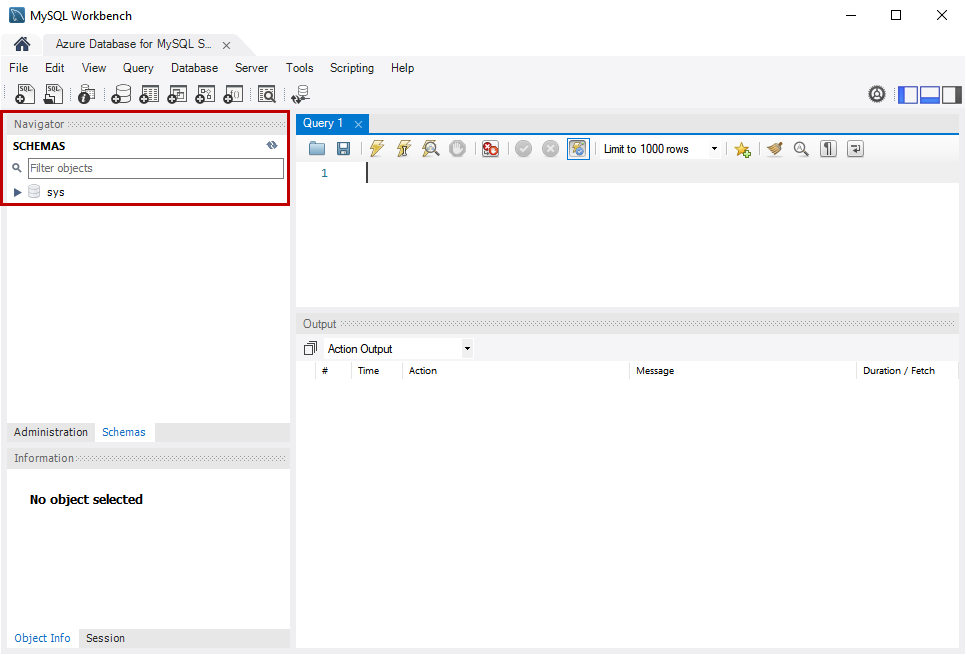
Once you are connected to the MySQL, in the schema menu of the MySQL workbench, you can see the list of databases created on the server.
Connect to MySQL Server using the command-line tool
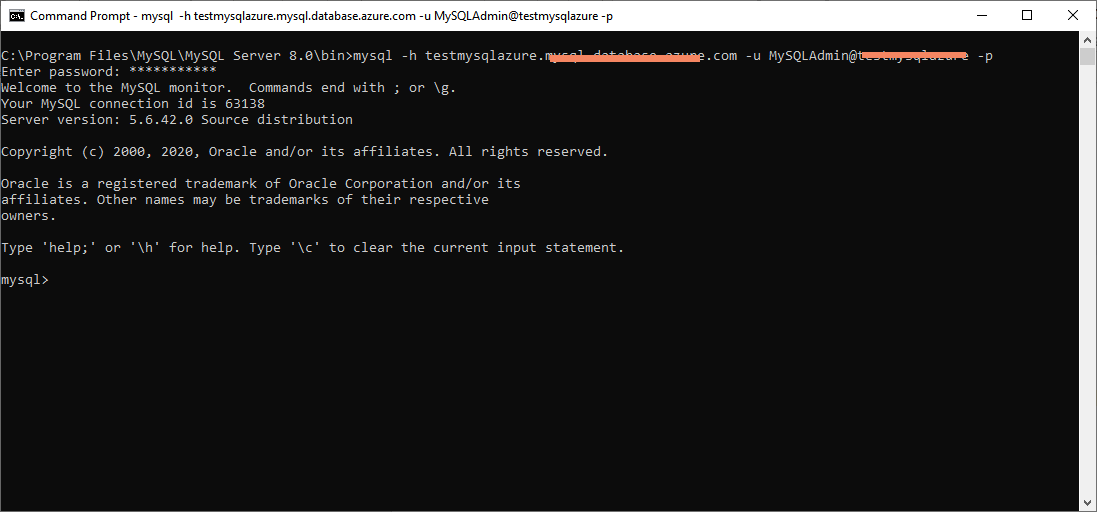
To connect the MySQL Server using the command line, first, you must download the MySQL command-line tool from here. Once you install the command-line tool, execute the following command to connect.
|
1 |
mysql -h testmysqlazure.****.*****.****.com -u MySQLAdmin@********* -p |
See the following image:
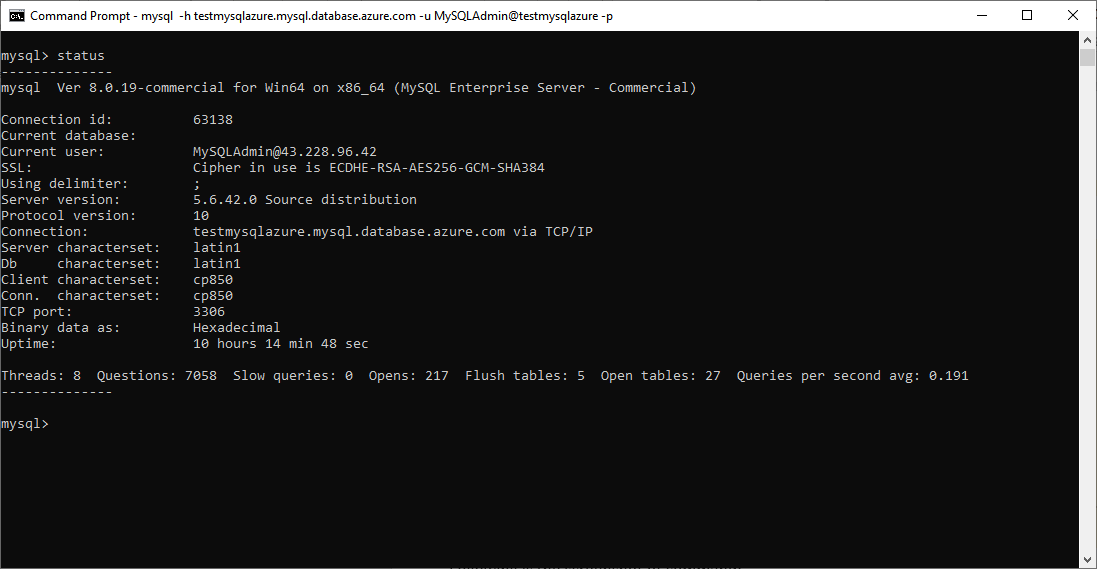
Once connected, execute the following command to view the details of the MySQL Server.
|
1 |
mysql> status |
Following is the output:
|
1 2 3 4 5 6 7 8 9 10 11 12 13 14 15 16 17 18 |
mysql Ver 8.0.19-commercial for Win64 on x86_64 (MySQL Enterprise Server - Commercial) Connection id: 63138 Current database: Current user: MySQLAdmin@43.228.96.42 SSL: Cipher in use is ECDHE-RSA-AES256-GCM-SHA384 Using delimiter: ; Server version: 5.6.42.0 Source distribution Protocol version: 10 Connection: testmysqlazure.mysql.database.azure.com via TCP/IP Server characterset: latin1 Db characterset: latin1 Client characterset: cp850 Conn. characterset: cp850 TCP port: 3306 Binary data as: Hexadecimal Uptime: 10 hours 14 min 48 sec Threads: 8 Questions: 7058 Slow queries: 0 Opens: 217 Flush tables: 5 Open tables: 27 Queries per second avg: 0.191 -------------- |
Following is the screenshot of command:
Restore a database to Azure MySQL Server from the local computer
Now, let us add a database by restoring the backup of a database. I have generated a backup of the “sakila” database on my workstation. You can generate the backup using the mysqldump command. Execute the following command:
|
1 |
mysqldump --user root -p --databases sakila > E:\Backup\"MySQL Backups"\sakila.sql |
Following is the image:

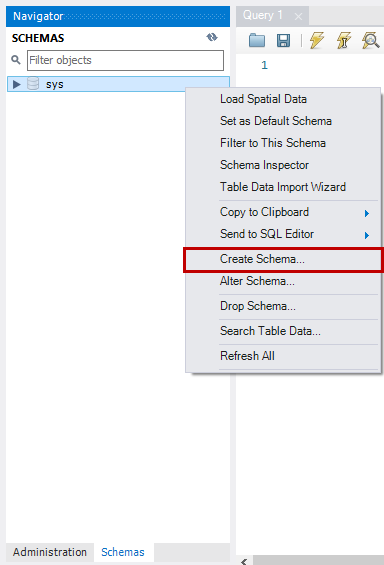
To restore the database on Azure Database for MySQL Server, create a database on MySQL Server. To do that, connect to the Azure Database for MySQL using MySQL workbench. Right-click on the schema menu and select on “Create Schema.”
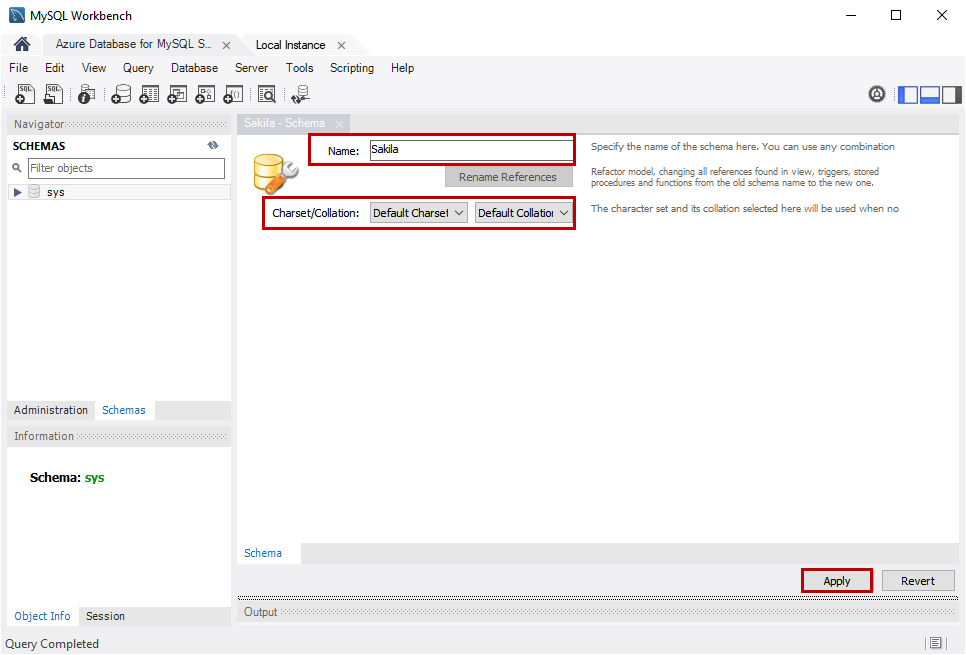
In the new_schema tab, enter the name of the schema, choose desired character set and collation from the “Charset/Collation” drop-down box and click on Apply. See the following image:
Alternatively, you can execute the following command to create a new schema.
Once the schema is created, execute the following command to import a backup from the local workstation.
|
1 |
mysql -h testmysqlazure.mysql.database.azure.com --user MySQLAdmin@testmysqlazure -p --databases sakila < E:\Backup\"MySQL Backups"\sakila.sql |
When you restore the database using mysqldump, you might see the following error:
ERROR 1227 (42000): Access denied; you need (at least one of) the SUPER privilege(s) for this operation.
See the following image:
This error occurs when you are trying to import a file that contains “definers,” and it can be created or modified by superusers only. Azure Database for MySQL Server is a managed PaaS solution; therefore, SUPERUSER privileges are restricted; hence you cannot change the permissions.
To solve the error, perform the following step.
Replace the definers with the name of the user that is running the import process. For example, values of the definers,
Before:
DELIMITER ;;
/*!50003 CREATE*/ /*!50017 DEFINER=root@localhost*/ /*!50003…..*/;;
DELIMITER;;
After:
DELIMITER ;;
/*!50003 CREATE*/ /*!50017 DEFINER=MySQLAdmin@testmysqlazure*/ /*!50003…..*/;;
DELIMITER;;
After updating all the values in the import file, rerun the import process. The process should be completed successfully. Once the backup has been imported to a new database, you can view the schema, tables, and stored procedures in the “Schema navigator” menu.

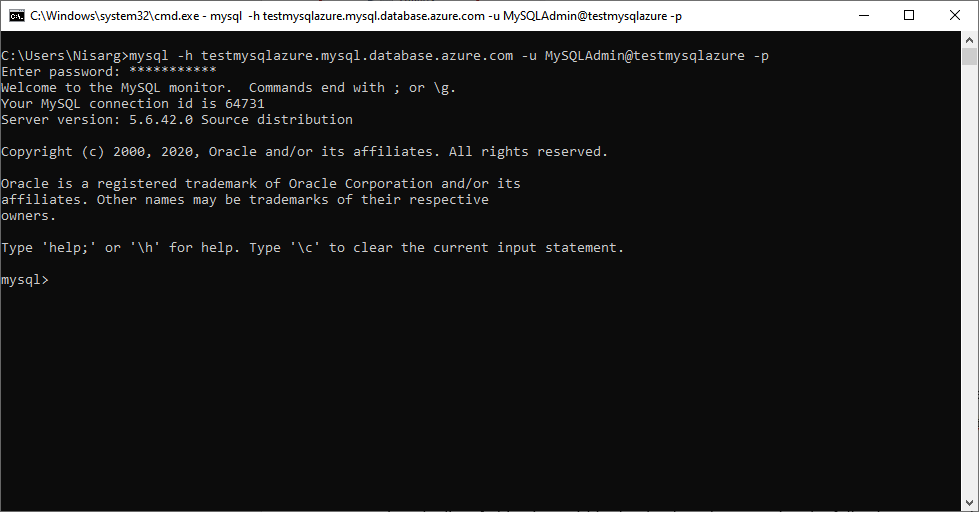
Alternatively, you can see the list of databases by executing the following command from the MySQL command line.
|
1 |
C:\Users\Nisarg>mysql -h testmysqlazure.mysql.database.azure.com -u MySQLAdmin@testmysqlazure -p |
See the following:
You can view the list of tables within the database by executing the following command.
|
1 |
mysql> show tables; |
See the following:

Summary
In this article, we covered:
- The step by step process of the deployment process of the Azure Database for MySQL Server
- The step by step process to restore the backup of the database from the local workstation to the Azure Database for MySQL Server

He has expertise in database design, performance tuning, backup and recovery, HA and DR setup, database migrations and upgrades. He has completed the B.Tech from Ganpat University. He can be reached on nisargupadhyay87@outlook.com
- Different ways to identify and change compatibility levels in SQL Server - July 22, 2024
- Copy SQL Databases between Windows 10 and CentOS using SQL Server data tools - October 19, 2022
- Changing the location of FILESTREAM data files in SQL Database - October 14, 2022