
DBA may import, export regularly within a different environment. You might receive data in a specified format for importing it into database tables.
The source data can be in various formats such as JSON, CSV, ORC, TXT, EXCEL, Parquet. Azure SQL Database is a popular choice for storing structured data in the cloud. You might store these excel or other format files into the Azure blob storage. You might also get data from the third party regularly for importing into the Azure database regularly.
There are different ways for data importing into the Azure database. In the article, Azure Automation: Use Azure Logic Apps to import data into Azure SQL Database from Azure Blob Storage, we explored data importing using logic apps.
This article will use the Azure Data Factory for populating (export) data from Azure SQL Database to the Azure blob storage.
Pre-requisites
- Destination data file in the Azure Data Storage: You should have a storage account and blob container for storing data from the Azure database
- Storage account: sourcedataimport
- Blob container: sourcedata

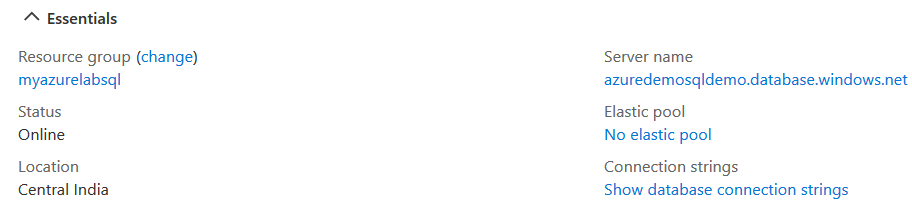
- Source Azure SQL Database: You require an active Azure database to import data from the source file
- Server name: azuredemosqldemo.database.windows.net
- Database: azuredemodatabase
Azure Data Factory
We require an Azure Data Factory instance for populating data. For this purpose, navigate to Data Factories in Azure services.
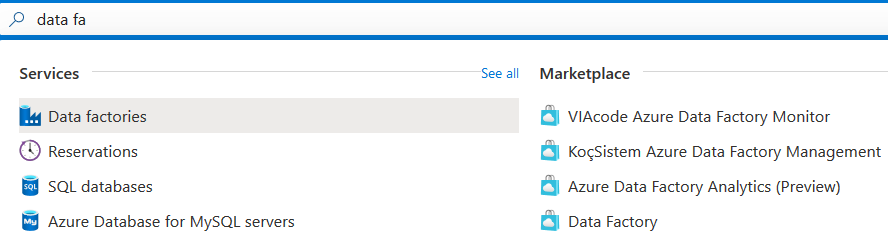
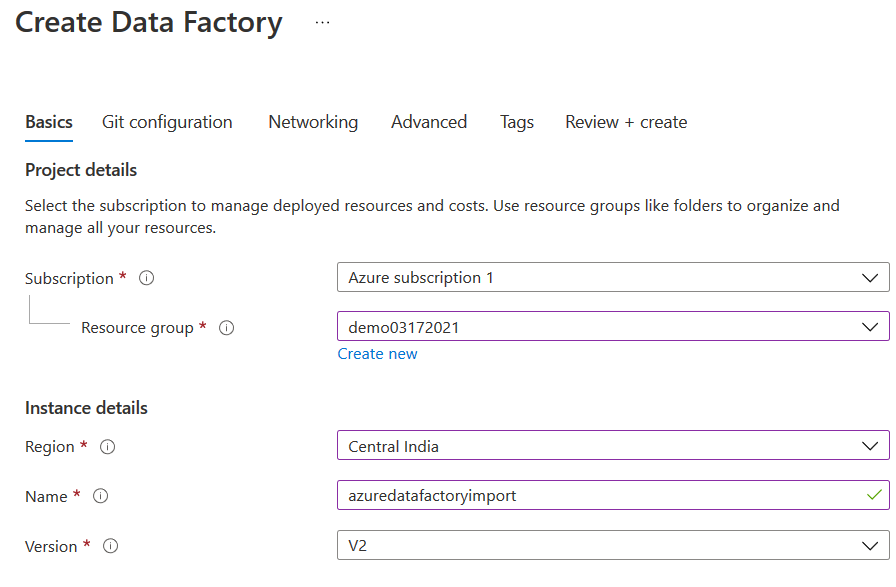
If you have an existing data factory instance, you can use it. Otherwise, click on Create. Enter the resource group, region, name, and version.
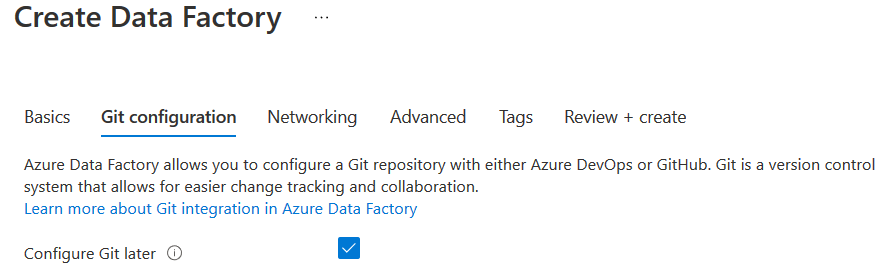
On the next page, Git configuration, select option – Configure Git later. This option skips the Git repository configuration with either Azure DevOps or GitHub.
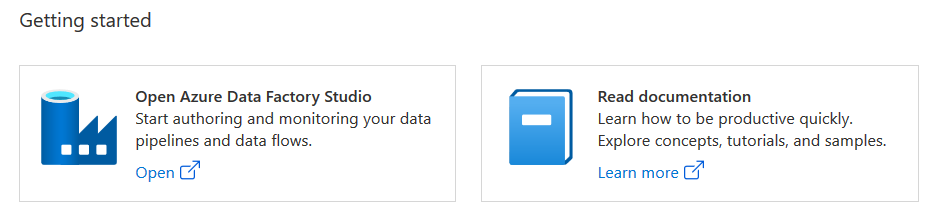
Deploy the Azure Data Factory instance, and you get the following overview page.

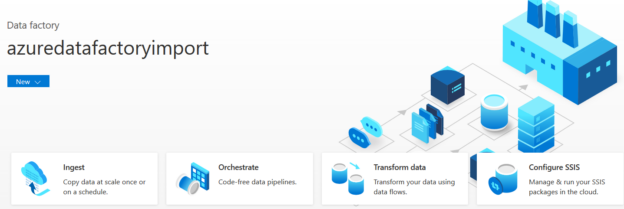
Scroll down and click on the Open Azure Data Factory studio.
It opens another browser tab and gives the following page.

The Copy data tool in the Azure data factory can perform a data import from over 90+ data sources optimally.
- It simplifies the data import process where you do not understand linked services, pipelines, data sets, triggers
- The copy data tool automatically creates data factory resources for copying databases across selected destination or sink data store
- You can validate data at the time of authoring. It helps to avoid any potential error at the beginning
- It also gives the flexibility to edit the data factory resources for customization and implementing complex business logics
Click on the Ingest tile to launch the copy data tool. You get two options:
- Built-in copy task: The built-in copy task has pre-configured copy tasks, and it does not require much customization
- Metadata-driven copy task (Preview): The metadata drive task allows you to configure the parametrized pipelines, external control table for managing data copy at a large scale
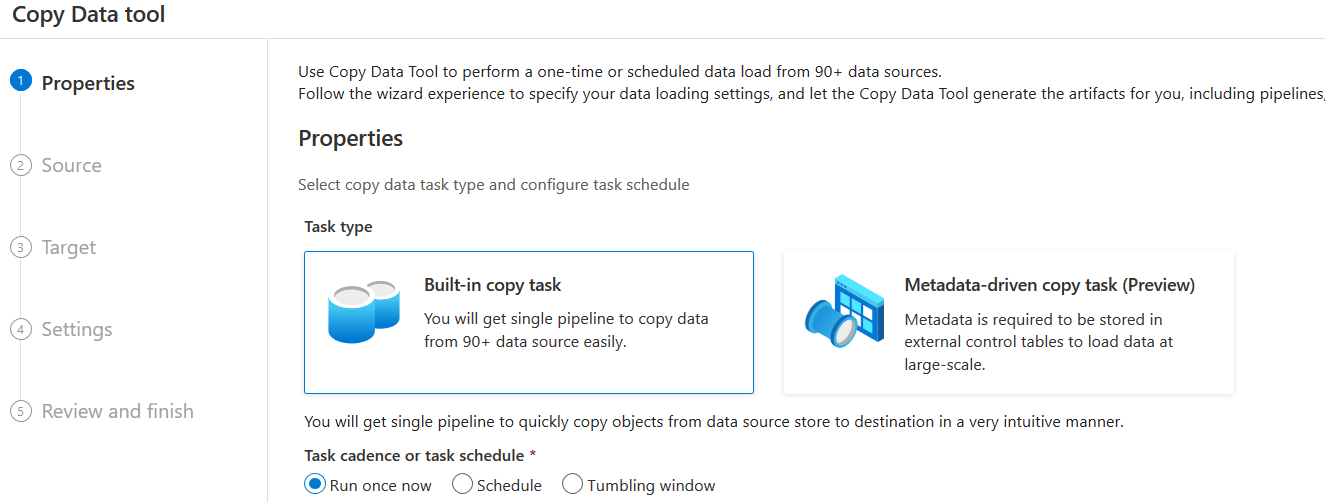
Select the Built-in copy task and click Next.
Here, we need to create the connection of both source and destination datastore.
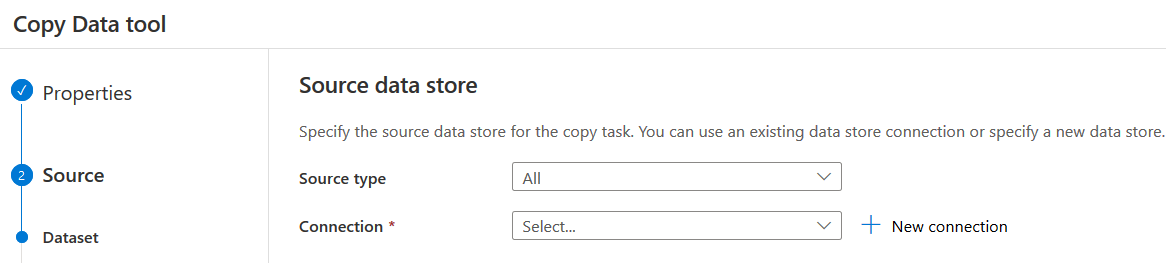
Source datastore
- Source type: Select Azure SQL Database from the drop-down options
-
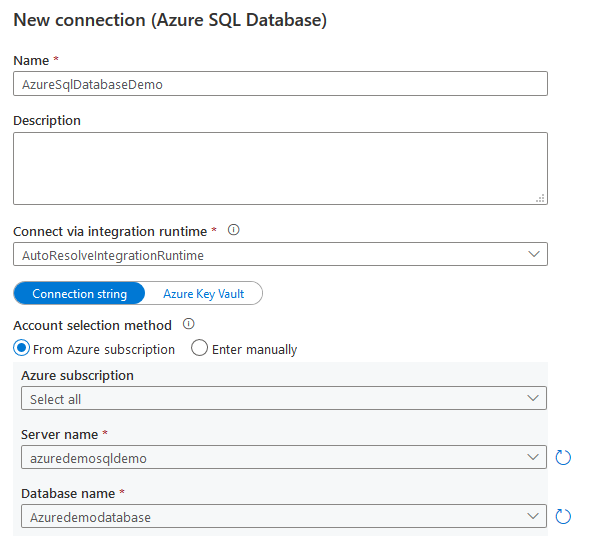
Connection: Click on +New connection and specify a connection name
-
Here, we select Azure subscription, logical SQL Server instance and Azure database name
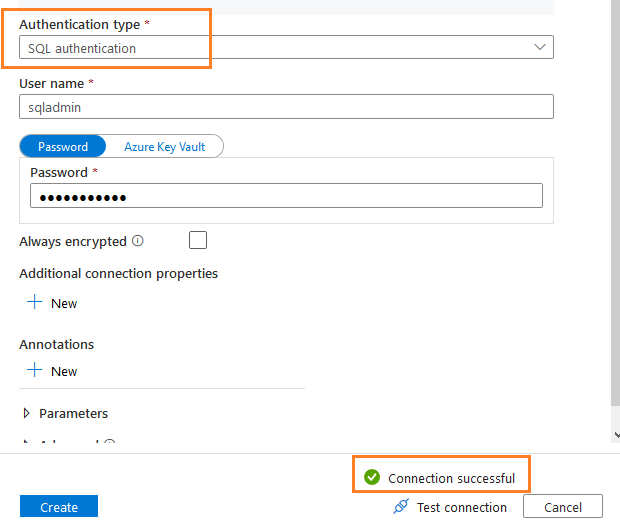
- Select SQL authentication and enter the username, password for connecting to the Azure database
- Click on Test connection to validate that the connection to the Azure database is successful
-
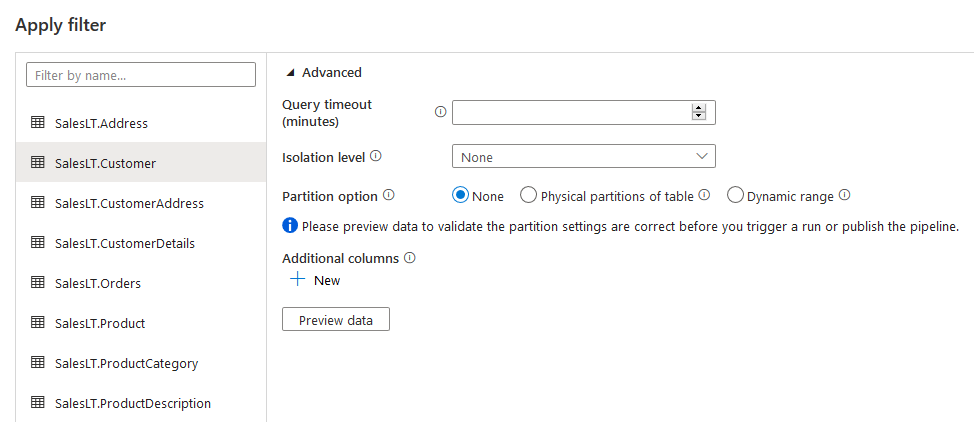
Click on Create. On the next page, it lists out the existing database tables. You can select the table’s data source. For example, I selected the following tables in the SalesLT schema.
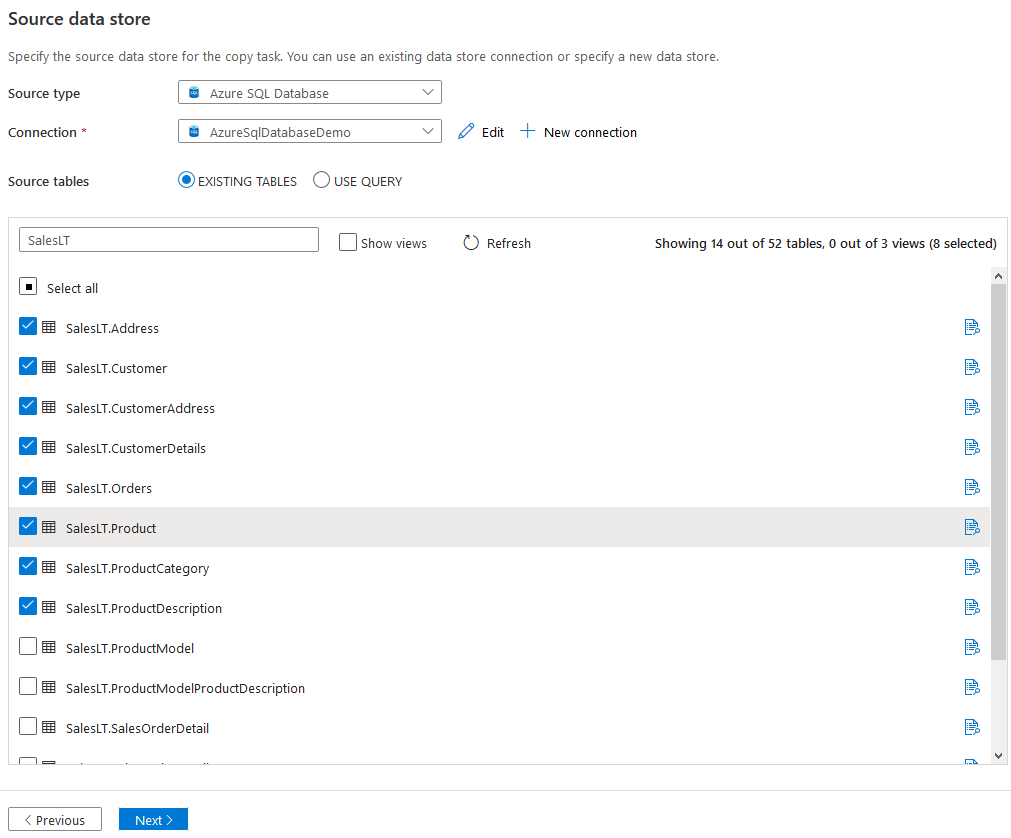
You can also use a query to export data from a table or join multiple tables.
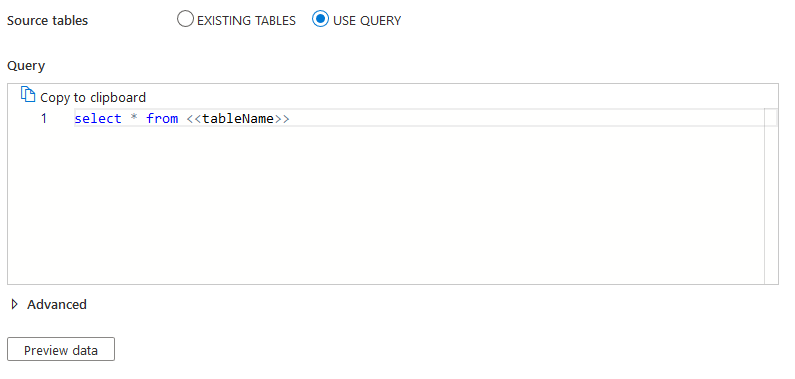
Click on Next. If you wish to filter data or specify properties such as Query timeout, Isolation level, partition option, specify in the advanced page.
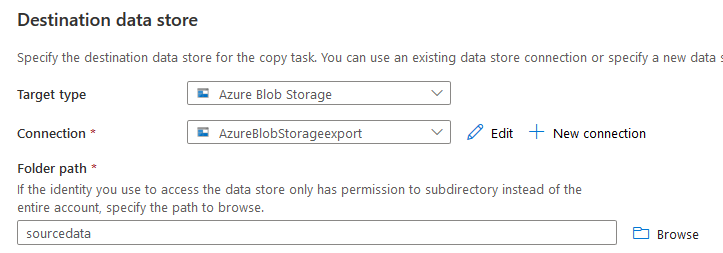
Destination datastore
We need to select Azure blob storage for exporting these tables in the CSV format in the destination datastore.
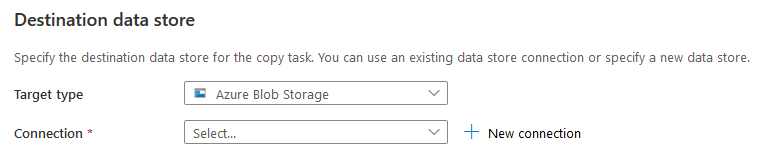
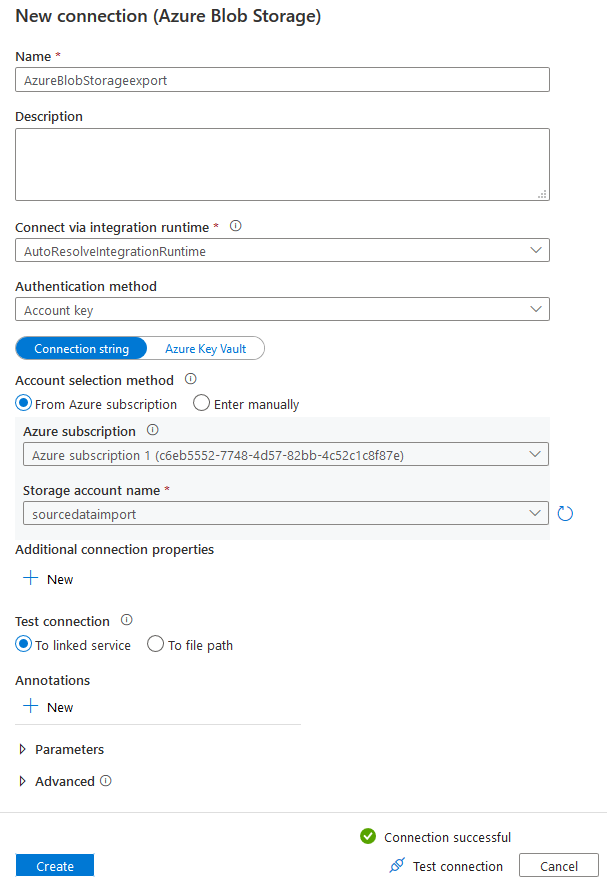
Add a new connection and enter connection name, Azure subscription, Storage account name. You can test the connection to validate that the copy data tool can connect to the destination Azure Blob Storage.
Click on Create, and it takes you back to the destination datastore page. Here, you can see the target type and connection that we configured. In the folder path, browse to the blob container in which we want to export tables in CSV format.
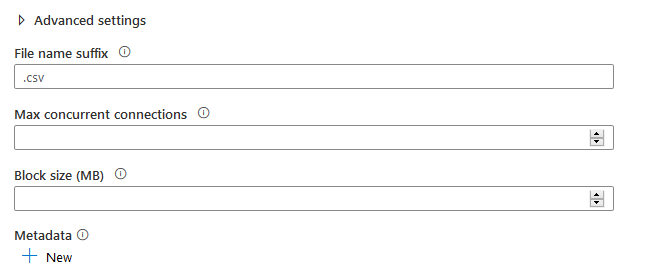
By default, it uses file name suffix as .txt. As per our requirement, I changed it to CSV.
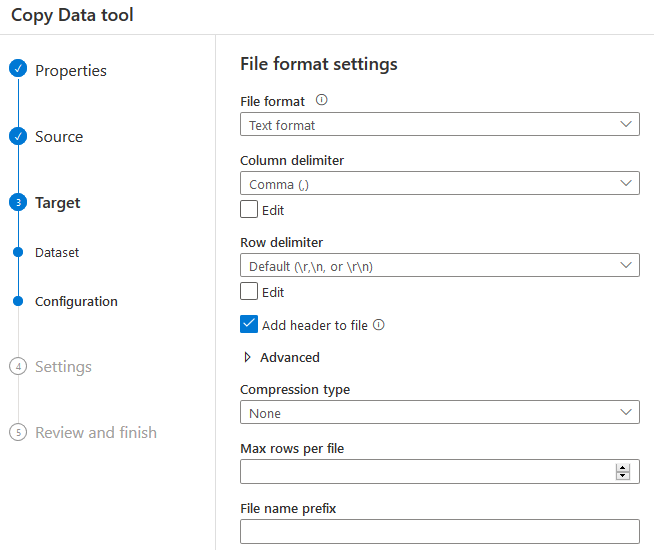
On the next page, you can configure the file format settings. The available options are as below:
- File format ( Text format, AVRO format, JSON, ORC and Parquet)
- Column delimiter ( default – Comma (,))
- Row delimiter
- Add header to file: To use the first row as column headers
- Compression type
- Encoding
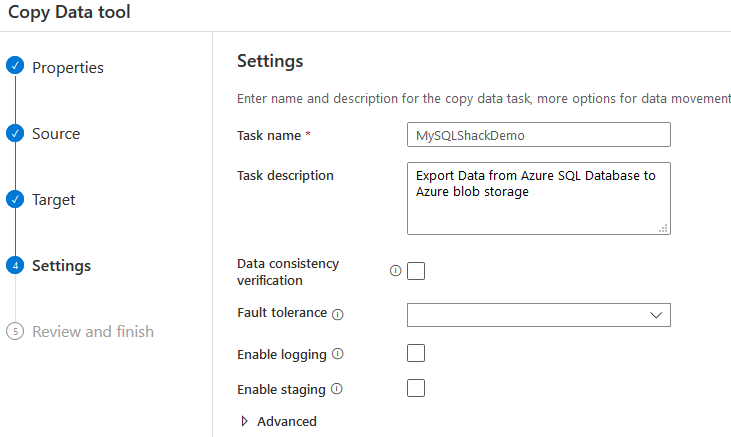
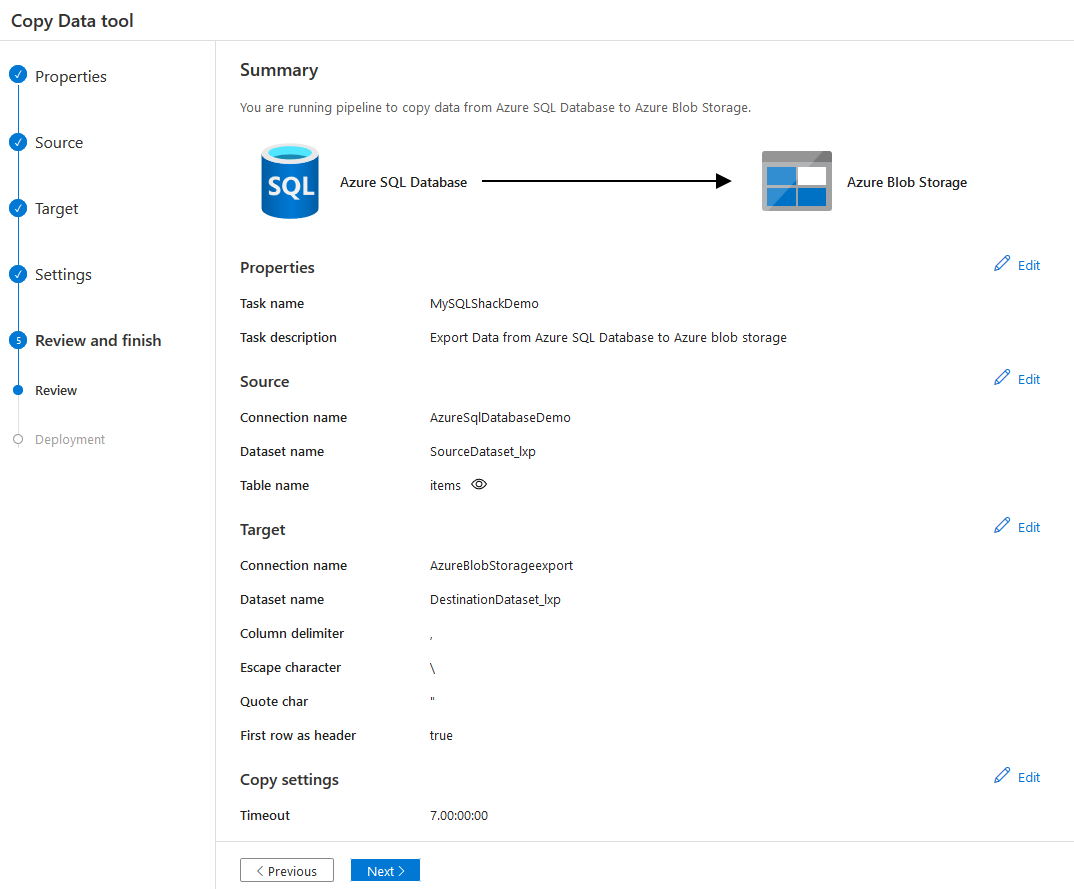
On the setting page, enter the task name, description. You can configure consistency check, logging from this page. We will skip these options for the demonstration.
On the last page, review the data flow and the configuration completed so far in the copy data tool of Azure Data Factory v2.
Click Next, and it deploys the workflow. In the initial step, you create a dataset, pipelines, and their validations.
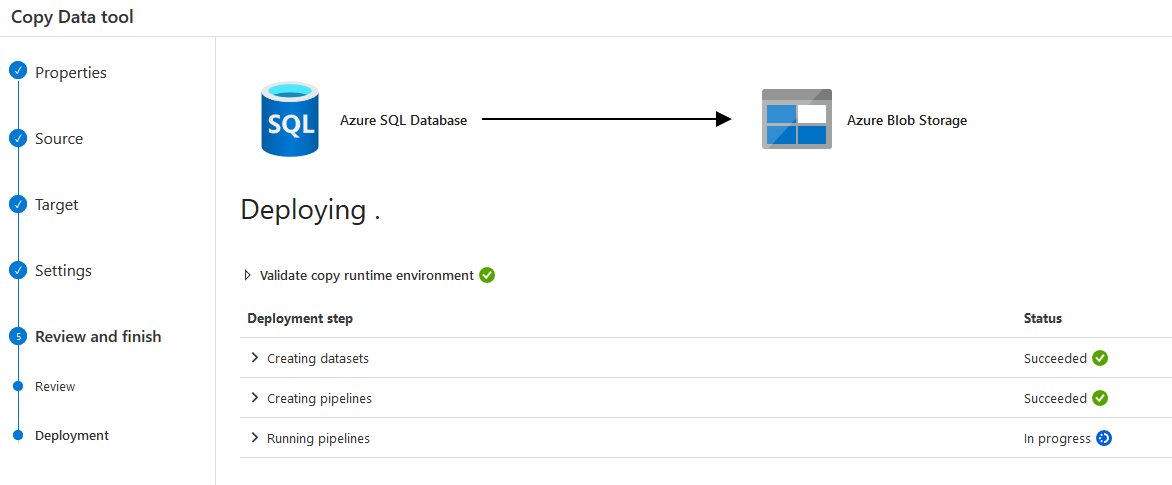
It finishes the data export from the Azure database and stores the individual tables as a separate CSV file in the blob storage.
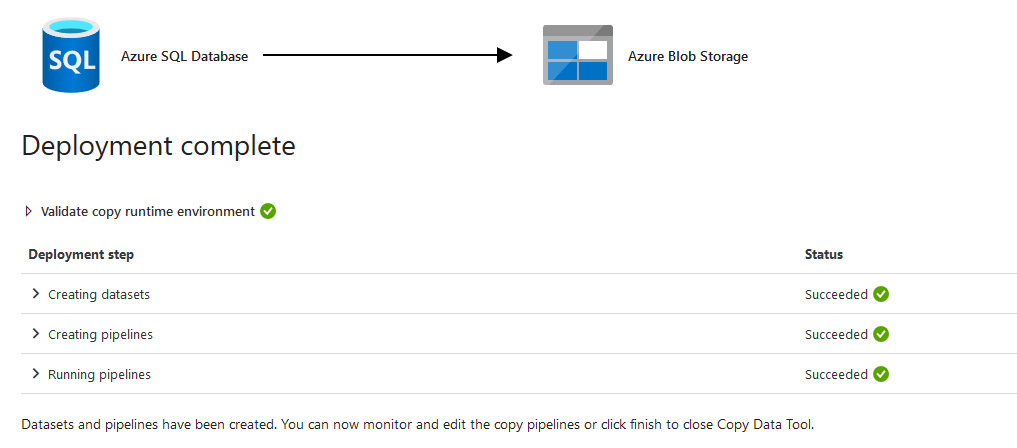
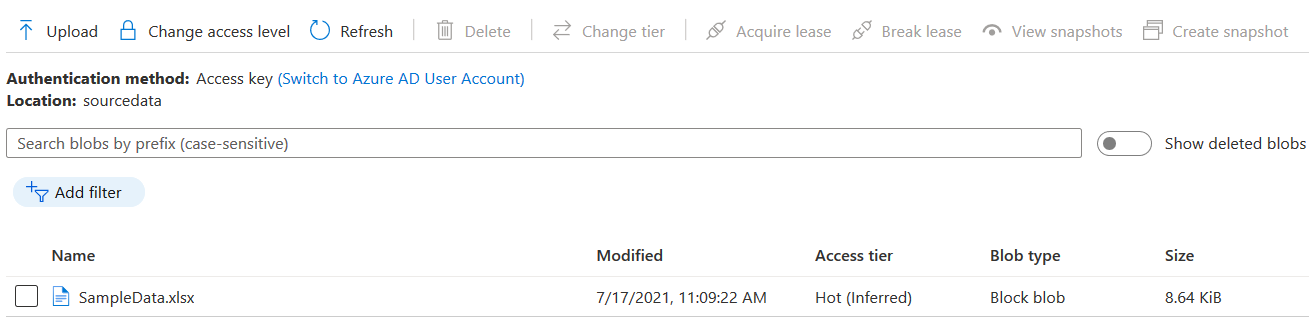
You can go to the storage account and blob container to view these exported tables.
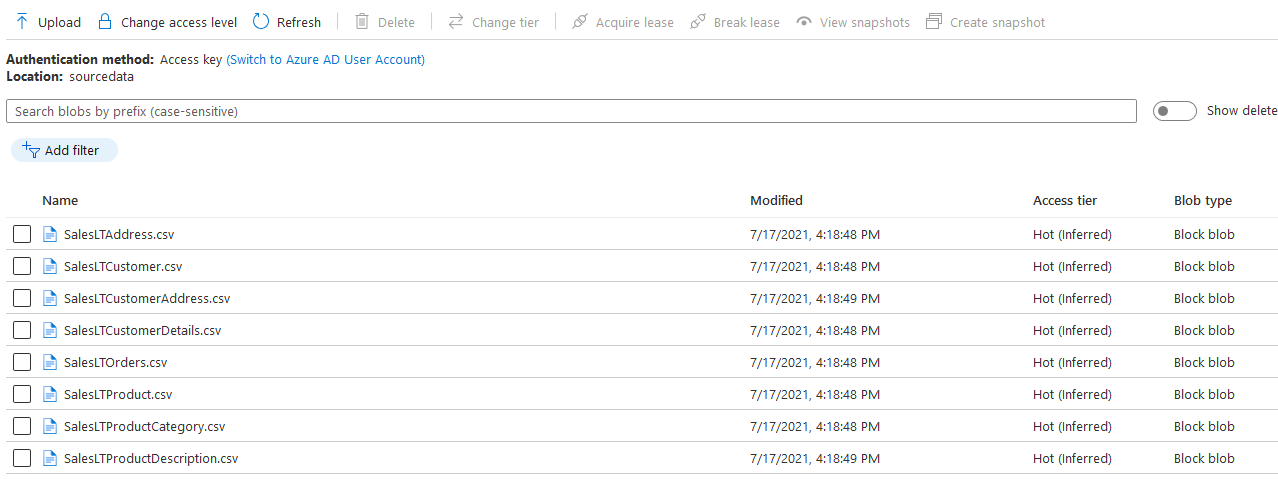
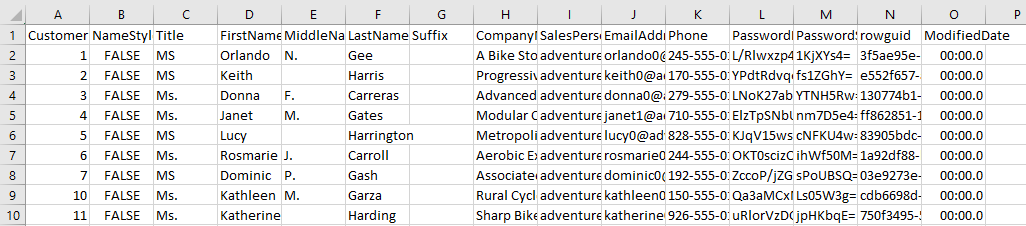
You can click on an individual file, download it and open Microsoft excel to view its data. For example, in the below screenshot, we have data for the SalesLTCustomer.CSV
Monitor pipeline runs in Azure Data Factory
You can monitor the current running pipelines or workflow using the ADS dashboard. Click on the Author and pipelines runs. By default, it shows the last 24 data. You can change the filter to get the required data.
In the following screenshot, we see the pipeline status. You can also distinguish between the manual trigger and scheduled trigger using the triggered by column.

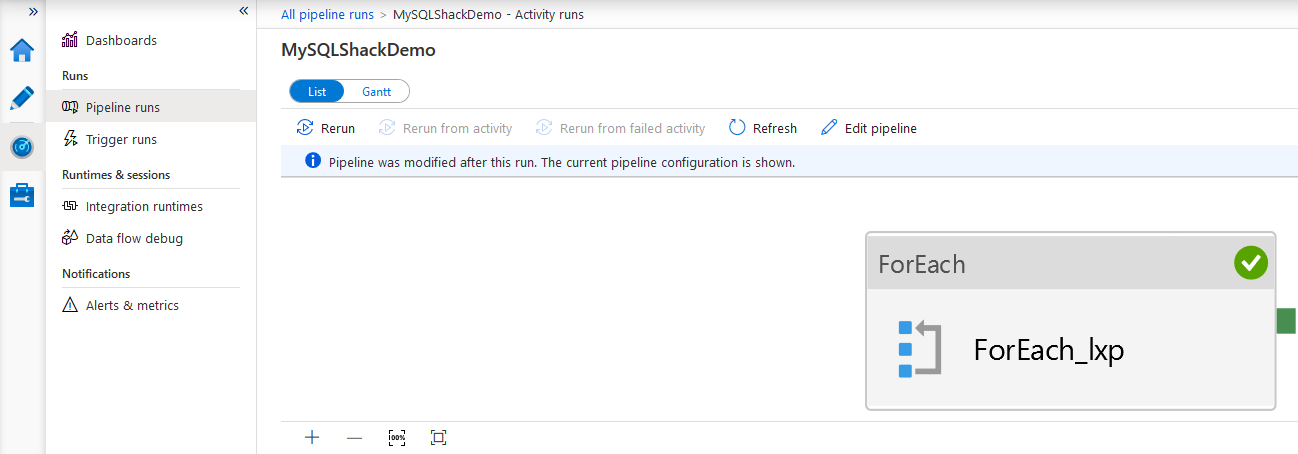
Click on the pipeline name to get a graphical view of the components.
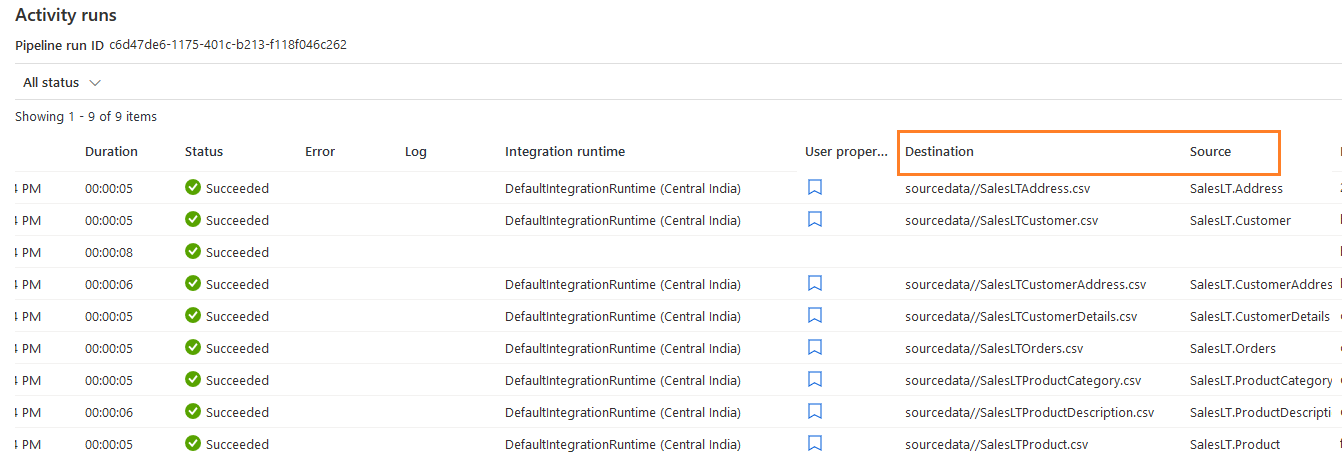
Scroll down and get the activity run history. For example, we exported data from Azure SQL Database tables to Azure blob storage. Therefore, in the activity runs, it shows individual tables source and destination details.
To get further details, hover the mouse pointer to any activity row. It gives the following options.
- Input
- Output
- Details

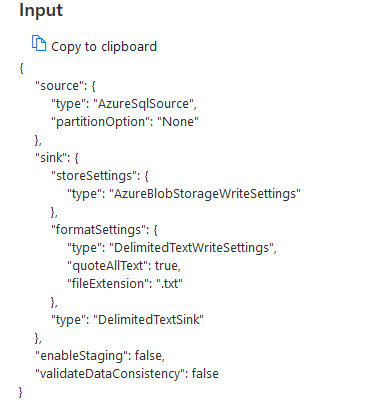
Input: Click on the Input tab and get JSON data for source, destination, and file formats.
Output
In the output section, you can view the information such as the number of rows read, rows copied, data read, data written, billable duration, throughput, source and destination details of Azure SQL Database.
- Note: You can refer to data factory pricing for more details on the pricing part

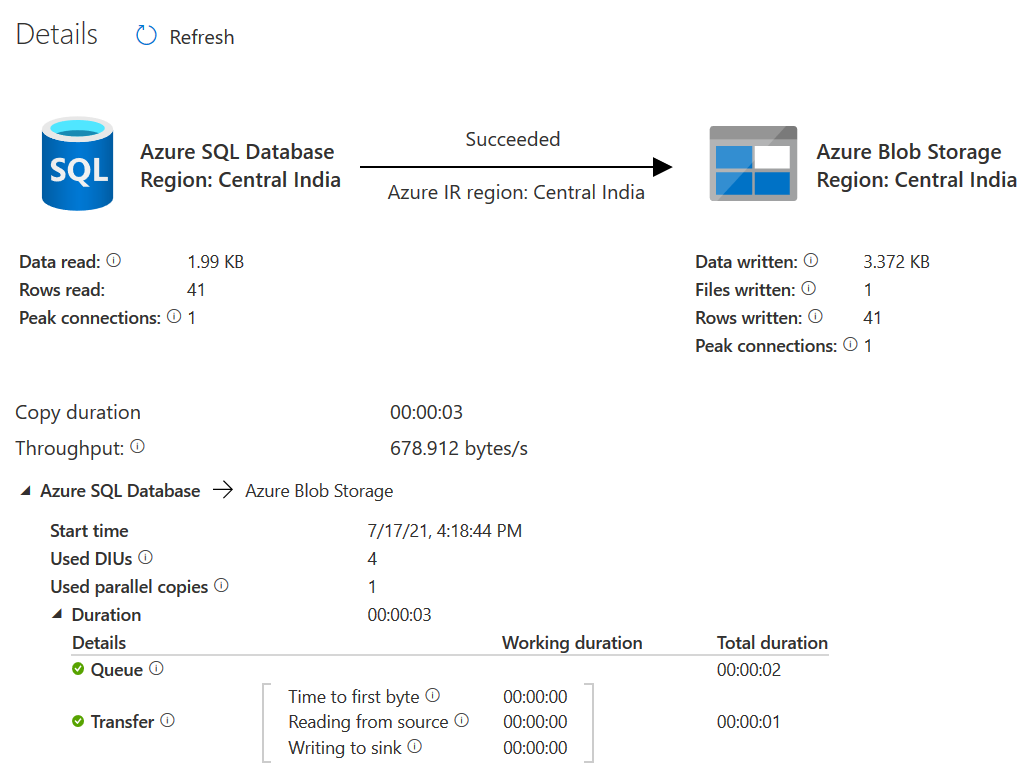
Details: The details section gives a graphical overview of both source, destination, task status, Azure Integration service runtime, throughput, start time, end time. You can use this window to go through details you got from both the Input and Output tabs.
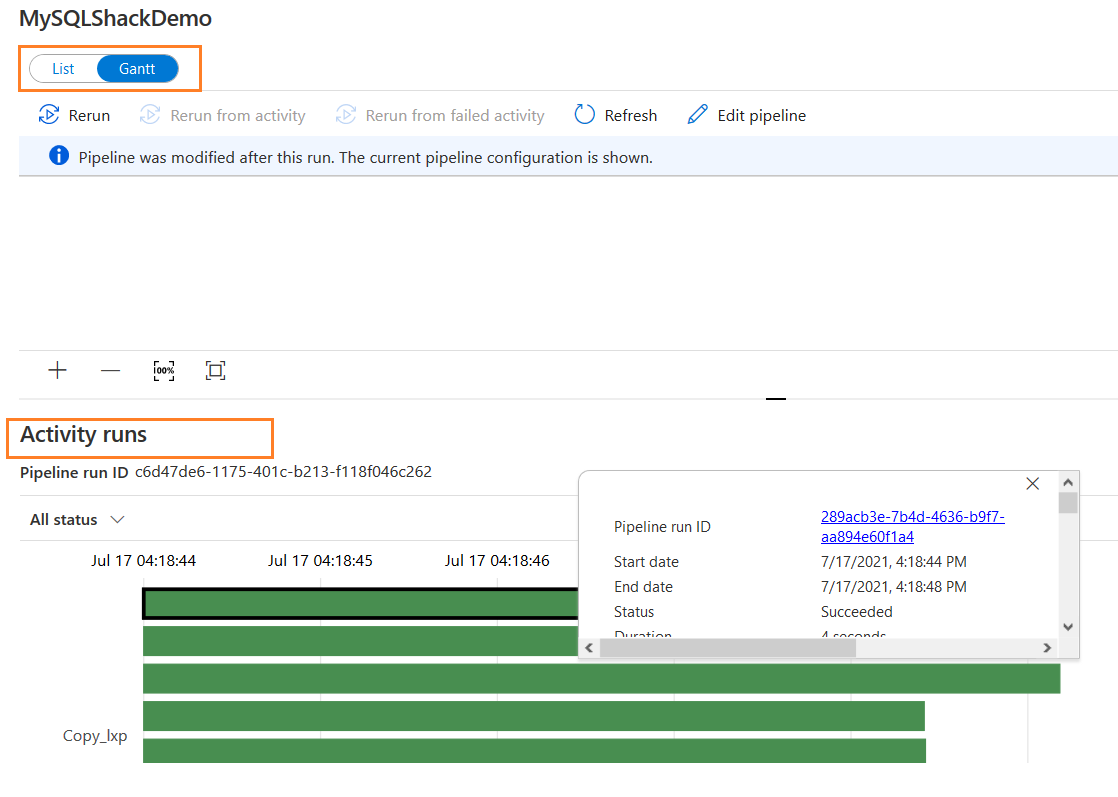
You can also view activity information in the Gantt chart. Click on the Gantt on the top, and it converts the tabular activity log to graphical format. Click on the chart to display JSON format information as shown below.
Conclusion
This article explored the Azure Data Factory Copy Data tool for exporting Azure SQL Database data into CSV format. It stored these CSV files into the Azure blob storage. This copy data tool has 90+ built-in containers to configure and use in the pipeline project for data transfer or transformation. You can schedule the pipeline to execute it at a specified time and frequency automatically.

I am the author of the book "DP-300 Administering Relational Database on Microsoft Azure". I published more than 650 technical articles on MSSQLTips, SQLShack, Quest, CodingSight, and SeveralNines.
I am the creator of one of the biggest free online collections of articles on a single topic, with his 50-part series on SQL Server Always On Availability Groups.
Based on my contribution to the SQL Server community, I have been recognized as the prestigious Best Author of the Year continuously in 2019, 2020, and 2021 (2nd Rank) at SQLShack and the MSSQLTIPS champions award in 2020.
Personal Blog: https://www.dbblogger.com
I am always interested in new challenges so if you need consulting help, reach me at rajendra.gupta16@gmail.com
View all posts by Rajendra Gupta
- Understanding PostgreSQL SUBSTRING function - September 21, 2024
- How to install PostgreSQL on Ubuntu - July 13, 2023
- How to use the CROSSTAB function in PostgreSQL - February 17, 2023