
This article will talk about loading data into Azure SQL databases from Azure Blob Storage with the help of Azure Data Factory.
Introduction
In a Data Lake model on Azure Cloud, data generally lands on the Azure storage layer using the Azure Blob Storage, especially for semi-structured data. Data may be exported from various data sources in the form of JSON, CSV, Parquet, ORC and various formats and hosted on blob storage, from where it would be channeled to other purpose-specific repositories. Azure SQL Database is one of the most popular data repositories for hosting structured data on the Azure cloud. From this perspective, Azure blob storage is one of the most frequently used data sources and Azure SQL Database is of the most frequently used data destinations. Azure Data Factory on Azure cloud helps to transport and transform data from-and-to to a variety of data repositories. In this article, we will learn how to use Azure Data Factory to populate data from Azure Blob Storage to Azure SQL Database.
Initial Setup
In this exercise, we will source data from Azure Blob storage and populate the same into Azure SQL Database. For this, we need a few items to be set up, before we can start focusing on the actual exercise of populating the destination with the source using Azure Data Factory.
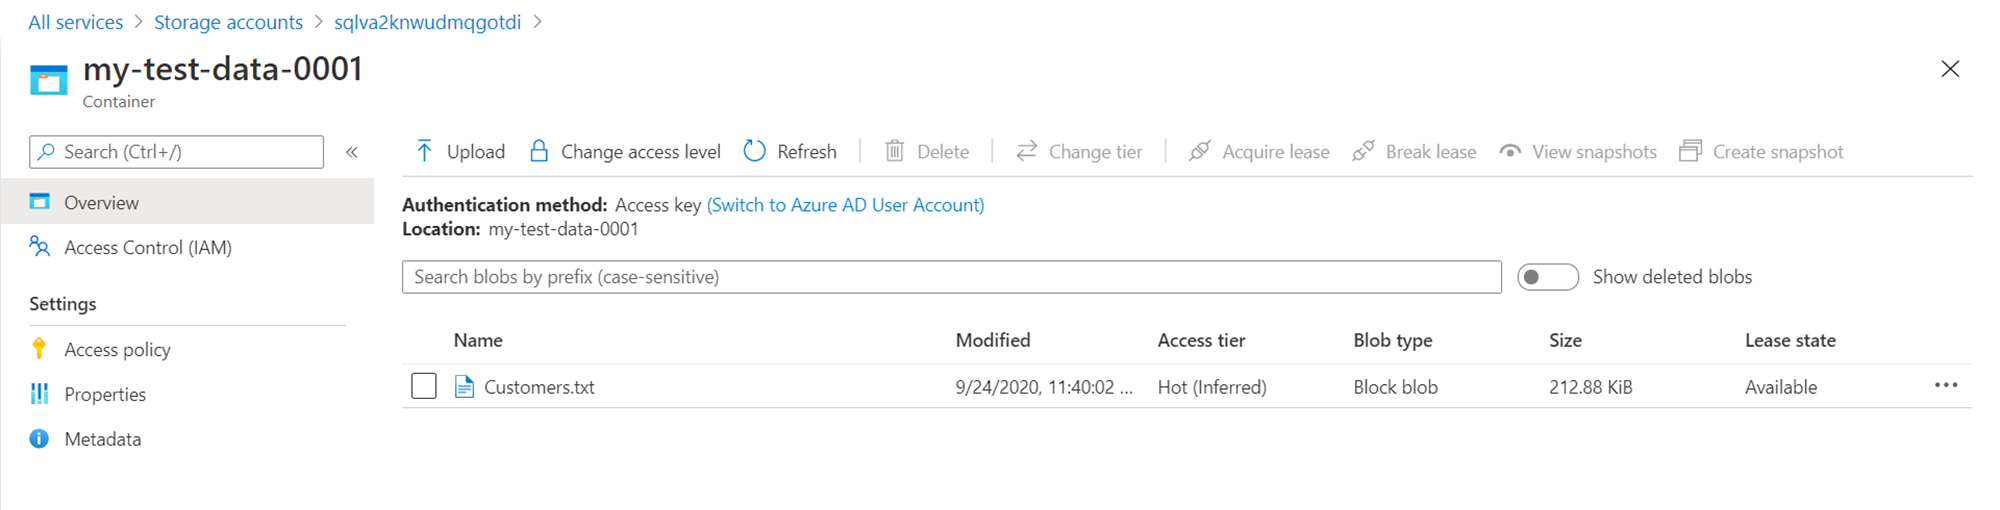
The first item that needs to be in place is having a storage account, a container in that storage account, and at least some file-based data (like CSV files for example). This would act as the source data for our exercise. For this, here we have a storage account with a container named my-test-data-0001, and a CSV file named Customers with some data in it as shown below.
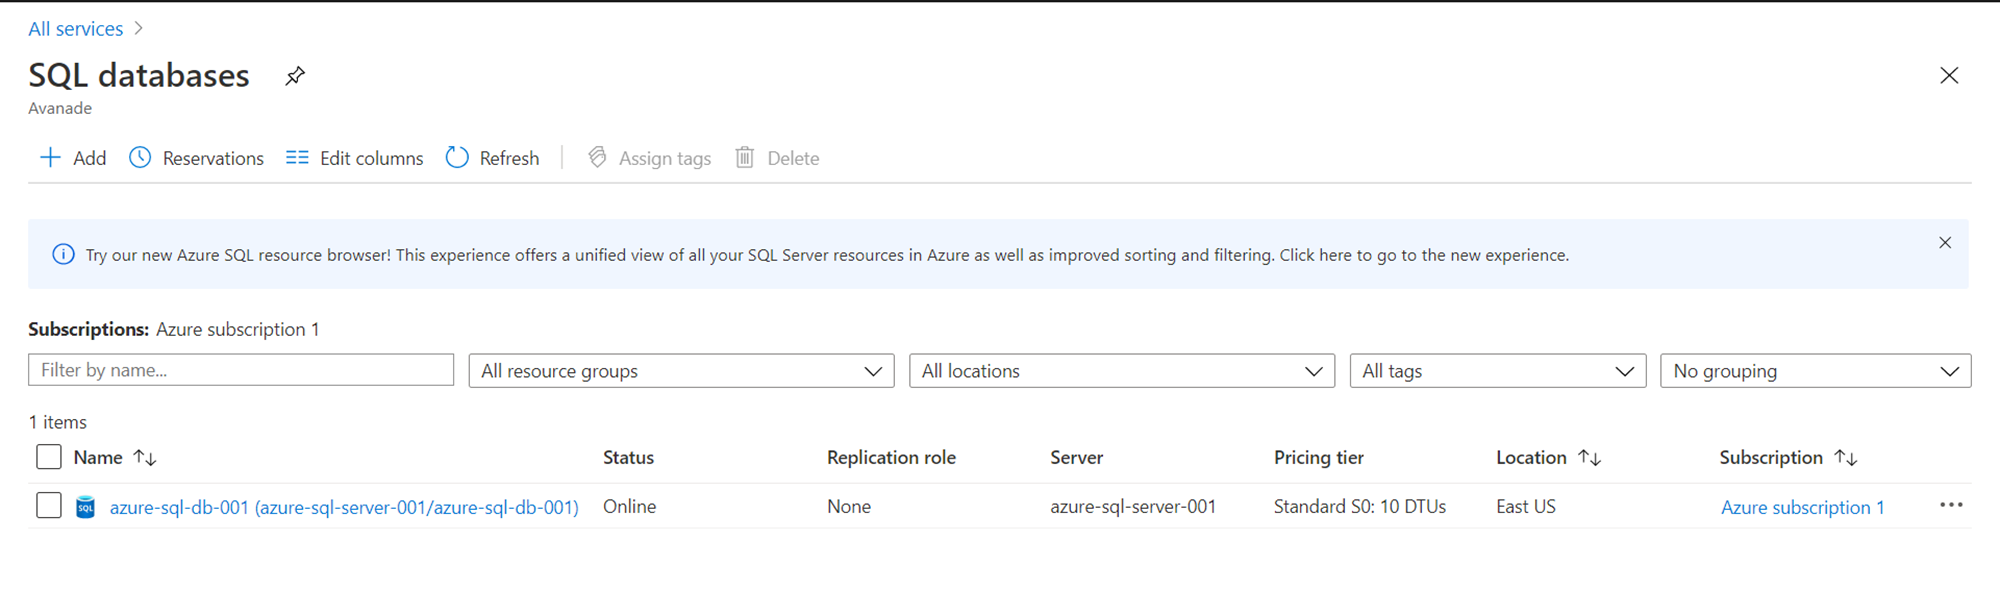
The next item that needs to be in place is an Azure SQL Database hosted on an Azure SQL Server instance. This would act as the destination where we would populate the data from the source files using the Azure Data Factory.
Once the above pre-requisites are setup, we can proceed with the rest of the exercise which would focus on populating the data from source to destination.
Azure Data Factory
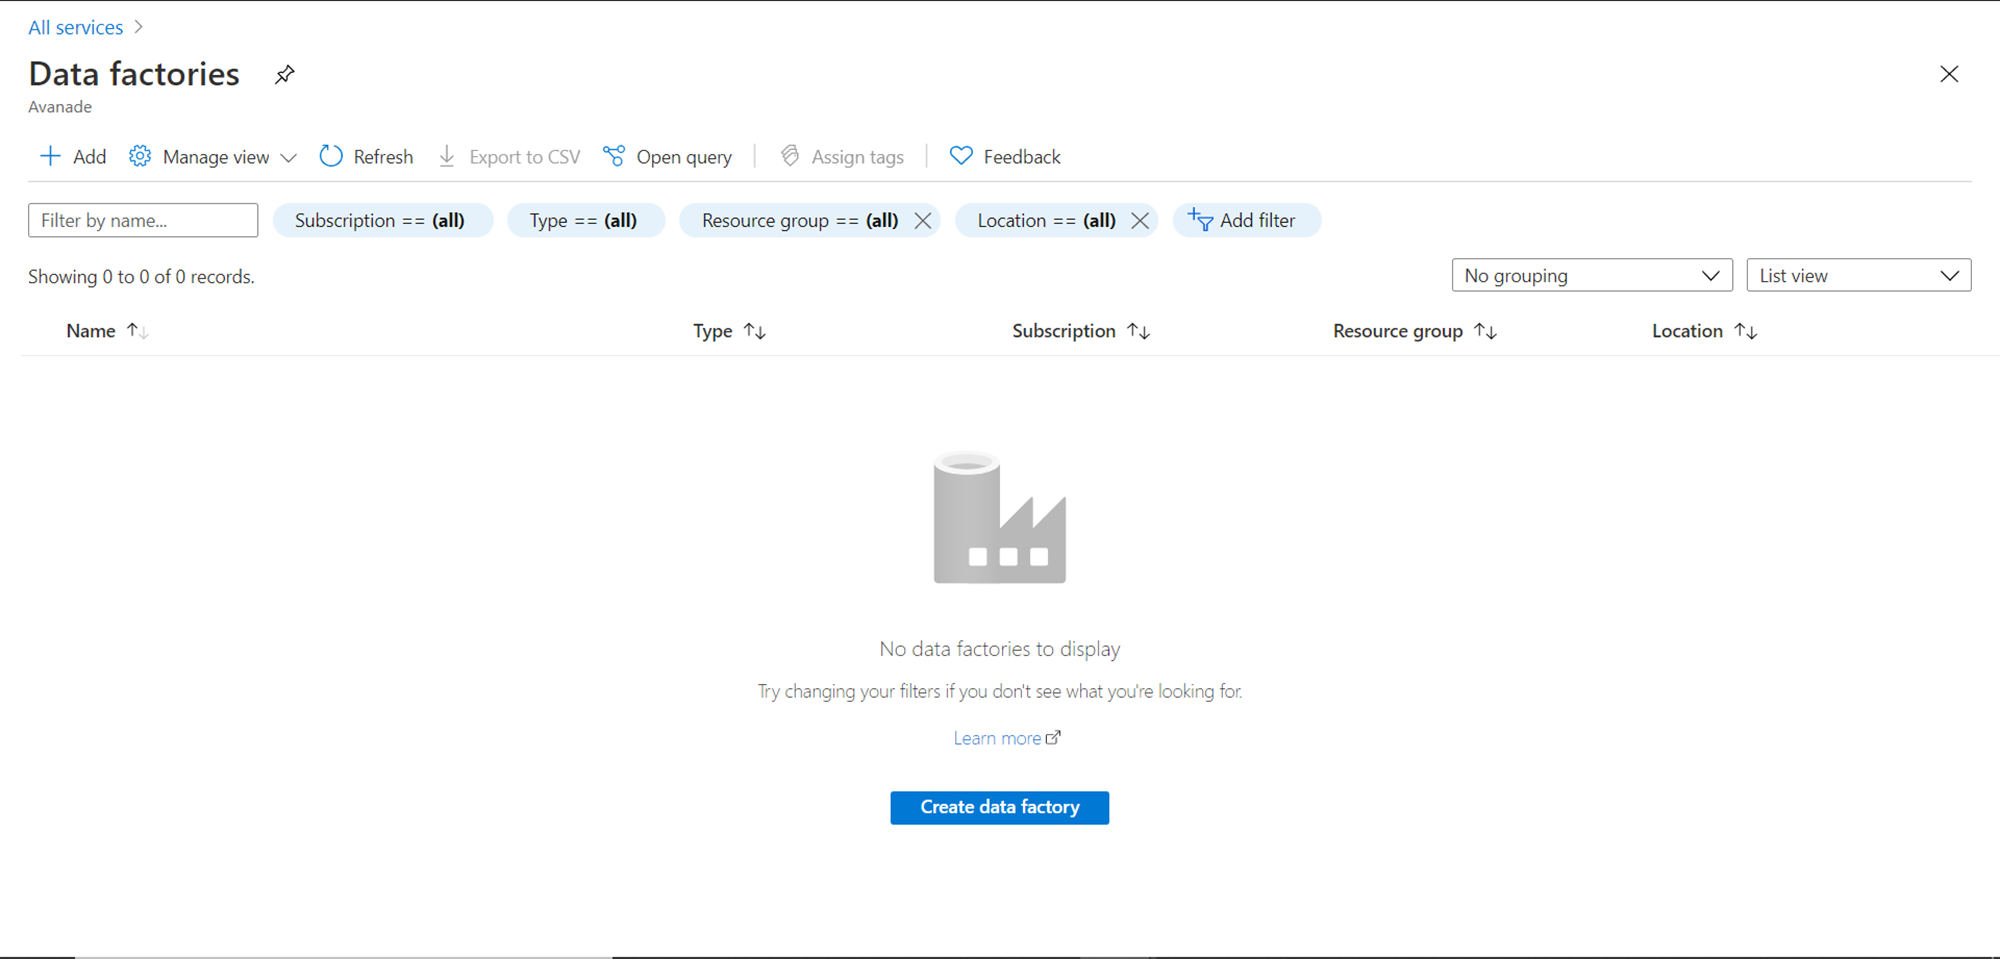
To start populating data with Azure Data Factory, firstly we need to create an instance. From the navigation pane, select Data factories and open it. You would find a screen as shown below. If you do not have any existing instance of Azure Data Factory, you would find the list blank. Click on the Create data factory button to start creating an instance.
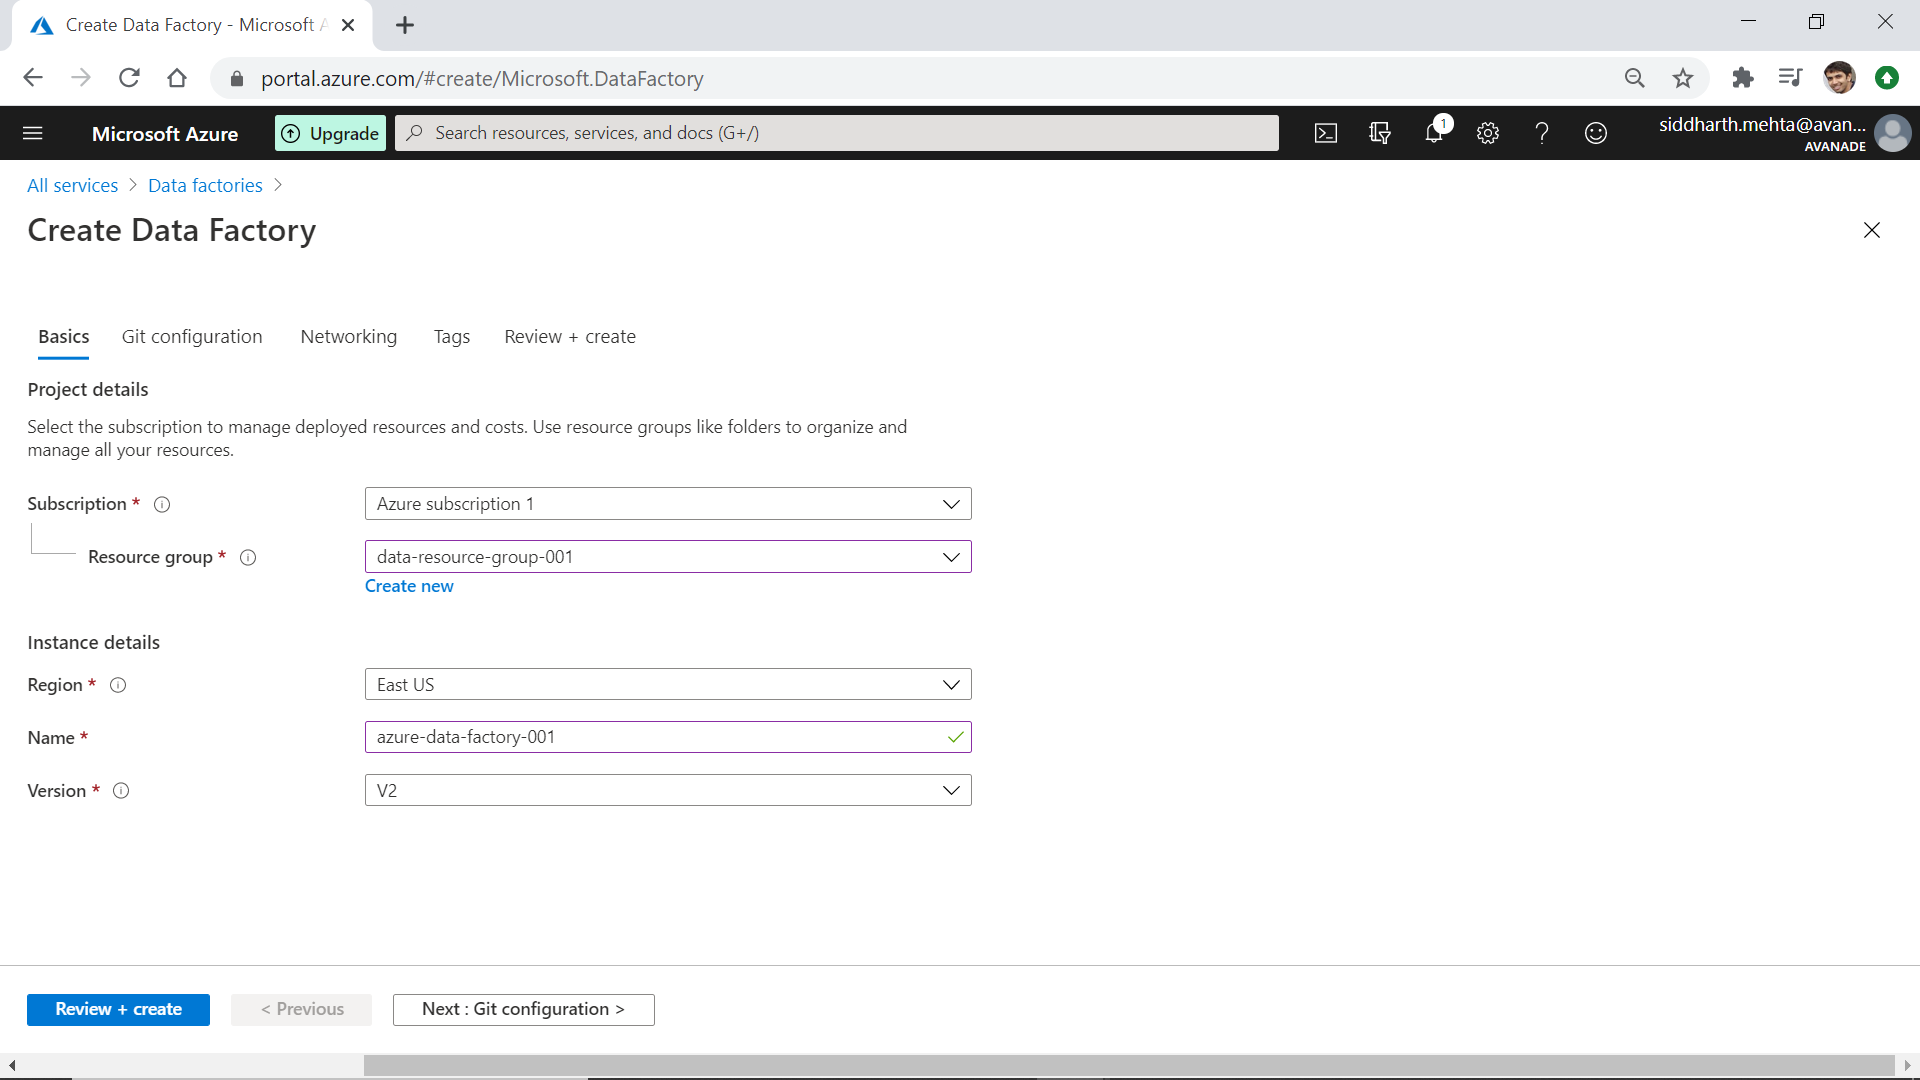
A wizard will open up as shown below. Provide basic details like Subscription name, Resource group name, Region, instance name and version (V2 by default). We can opt to customize other details like Git configuration, Networking, Tags etc. For this exercise, we do not need to customize this, so we can click on the Review + create button. On the summary screen, click on the Create button which would result in the creation of an Azure Data Factory instance.
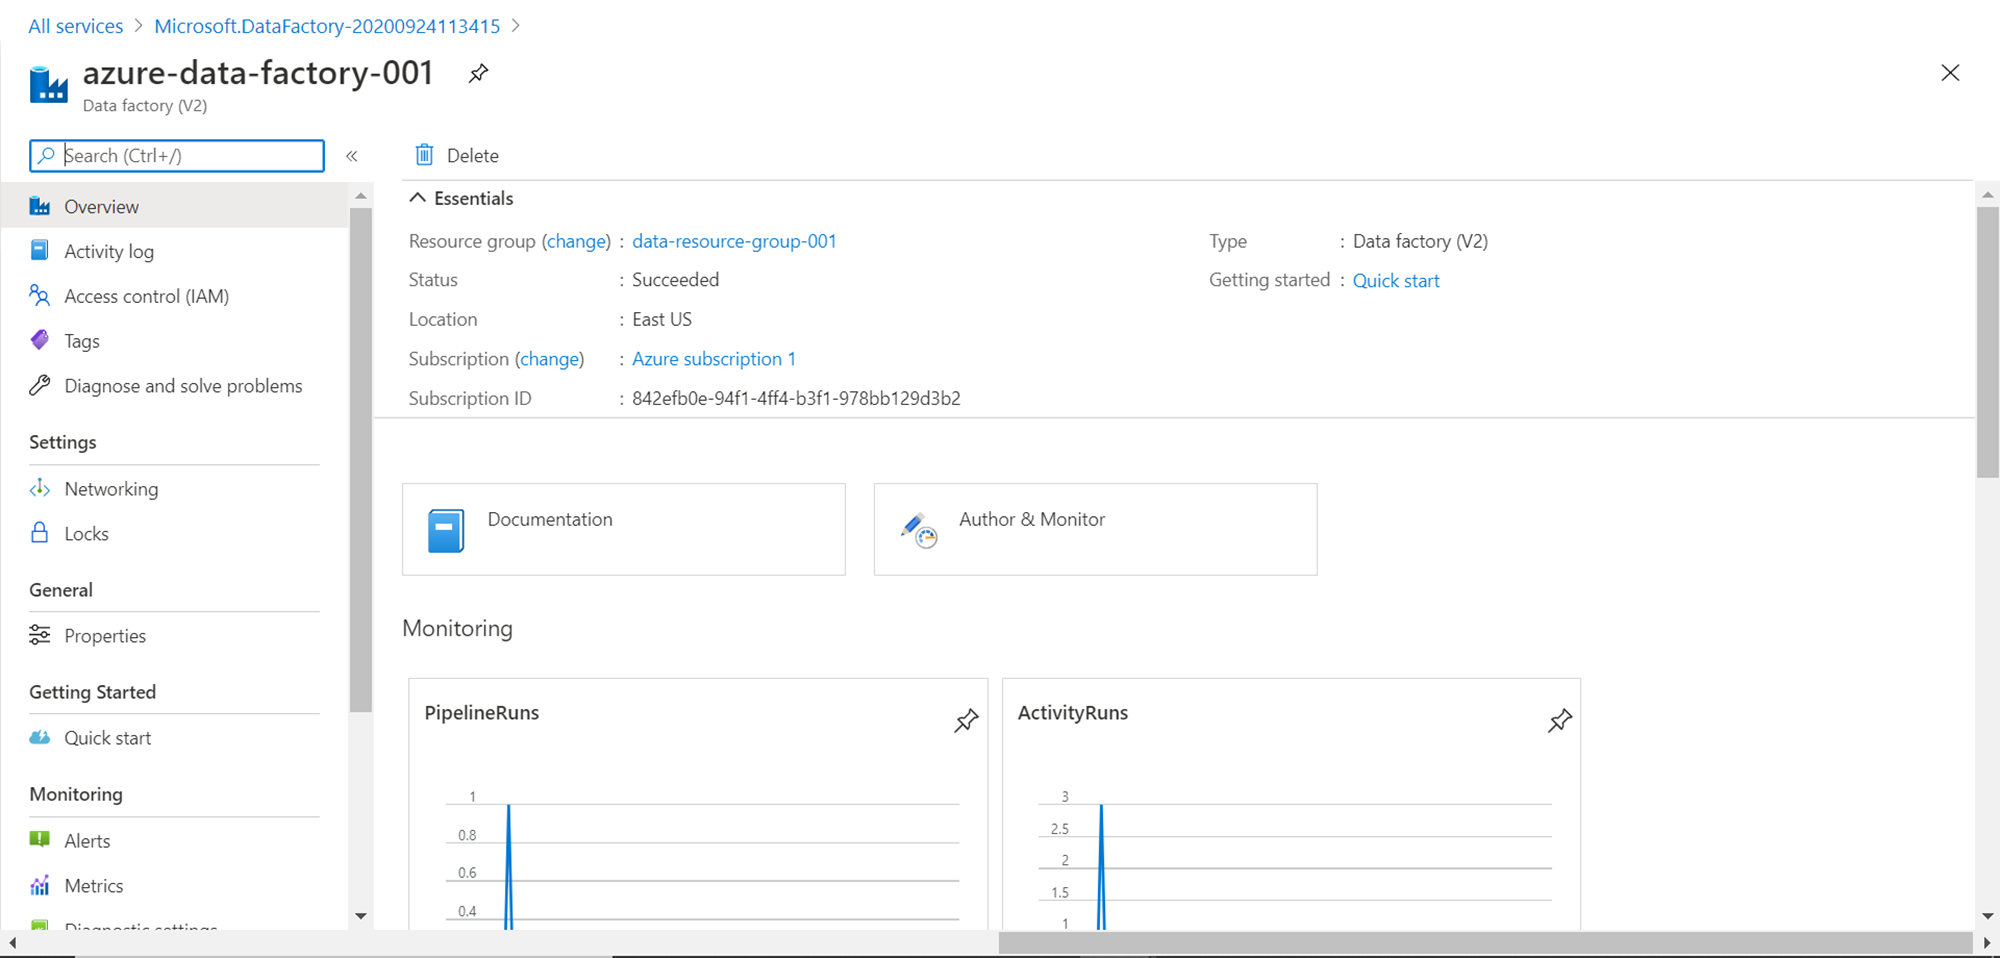
Open the Azure Data Factory instance and you would see a screen as shown below. Click on the Author and Monitor button to open the Azure Data Factory portal in a separate tab.
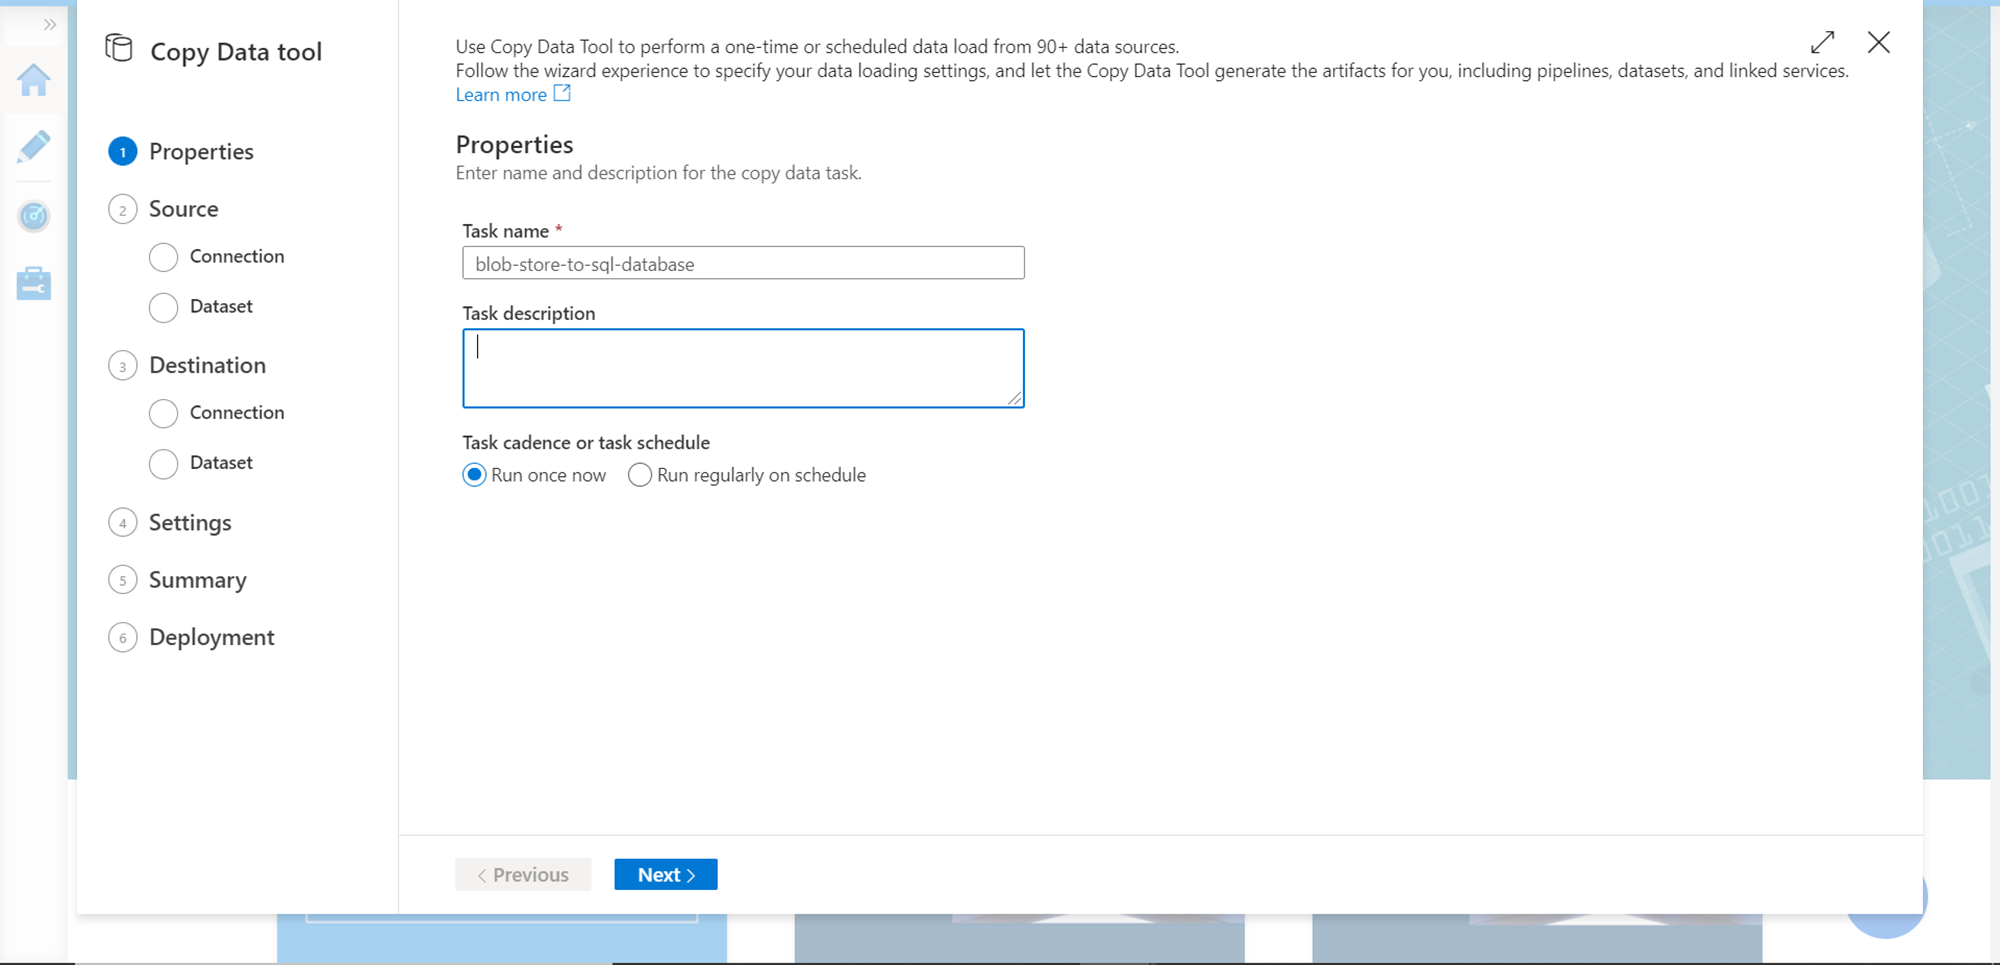
You would find different options on the portal. Click on the Copy Data option and it would open up a new wizard as shown below. Let’s proceed step by step to provide the relevant source, destination and mapping details. In the first step, provide the task name and select the frequency of execution. For now, we can continue with defaults on this step and click on the Next button.
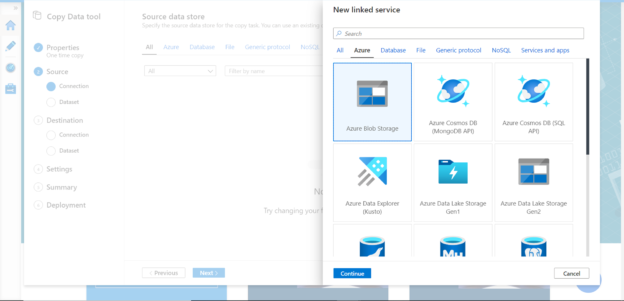
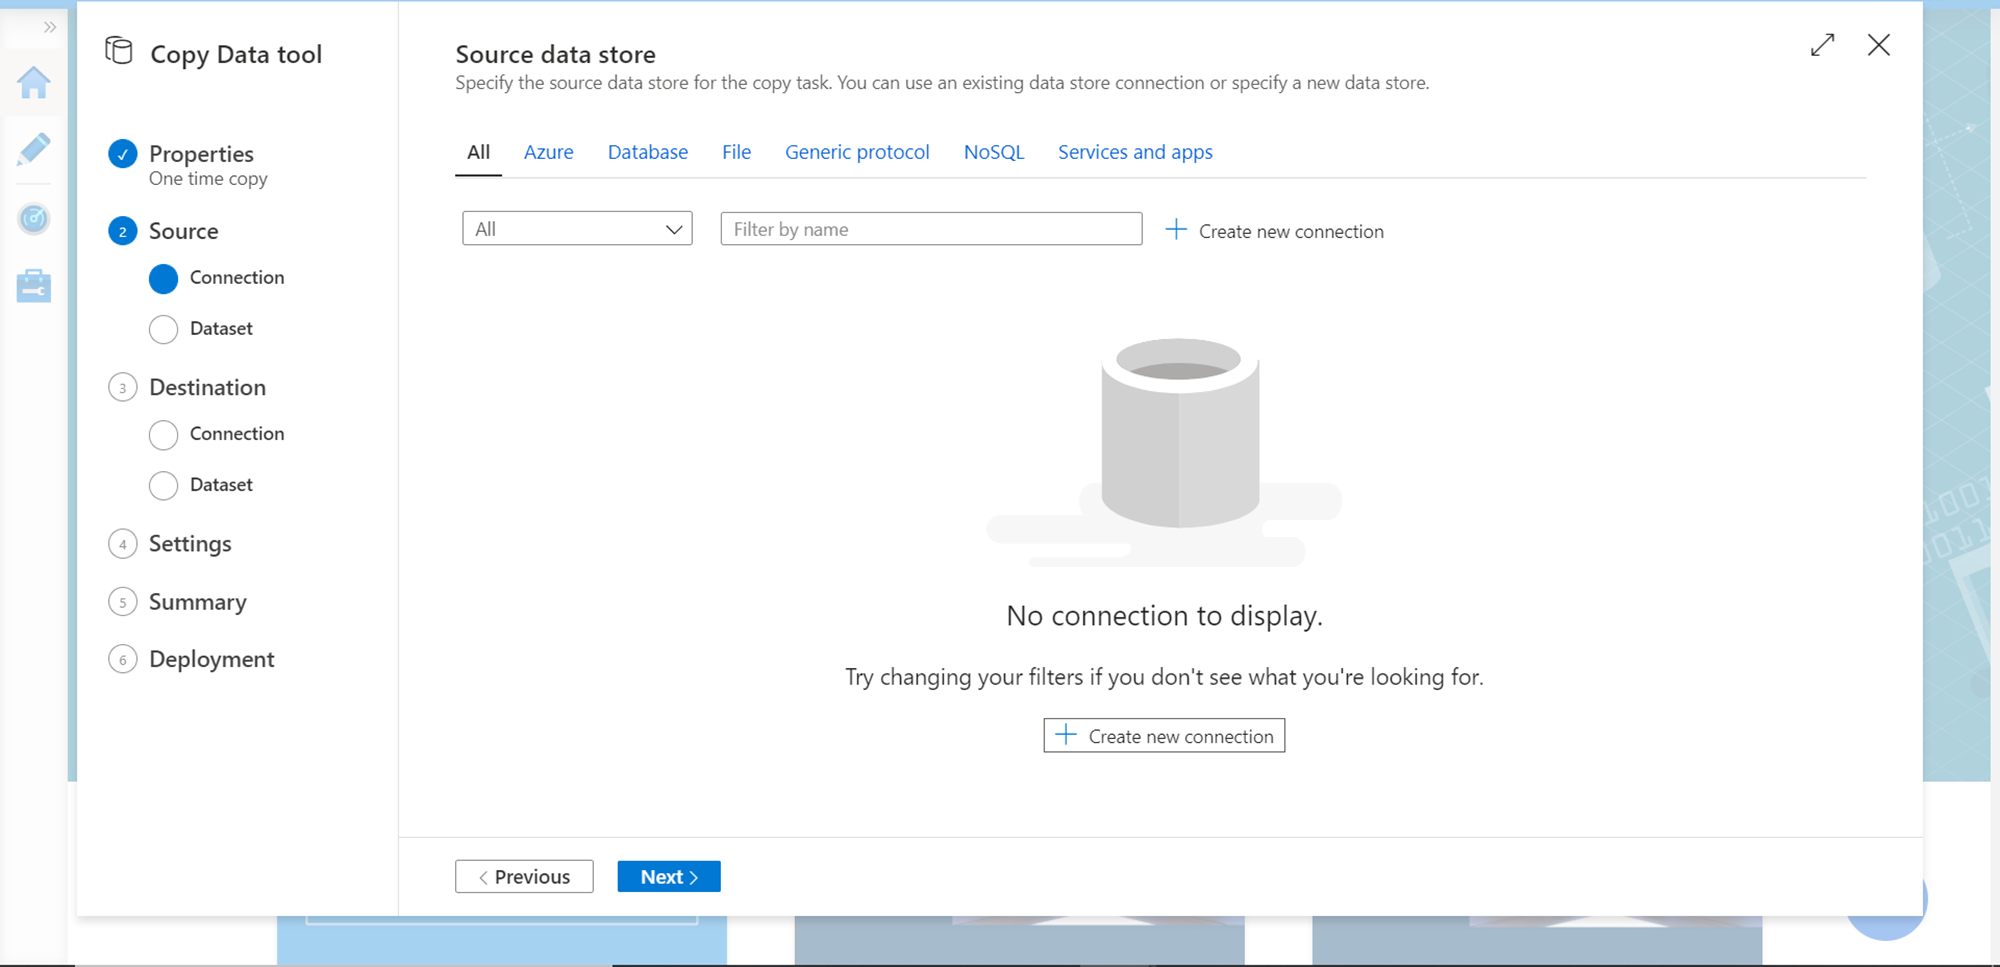
In the second step, we need to configure the source. We do not have any source system registered yet, so our list would be empty. Click on Create a new connection button to register a new source.
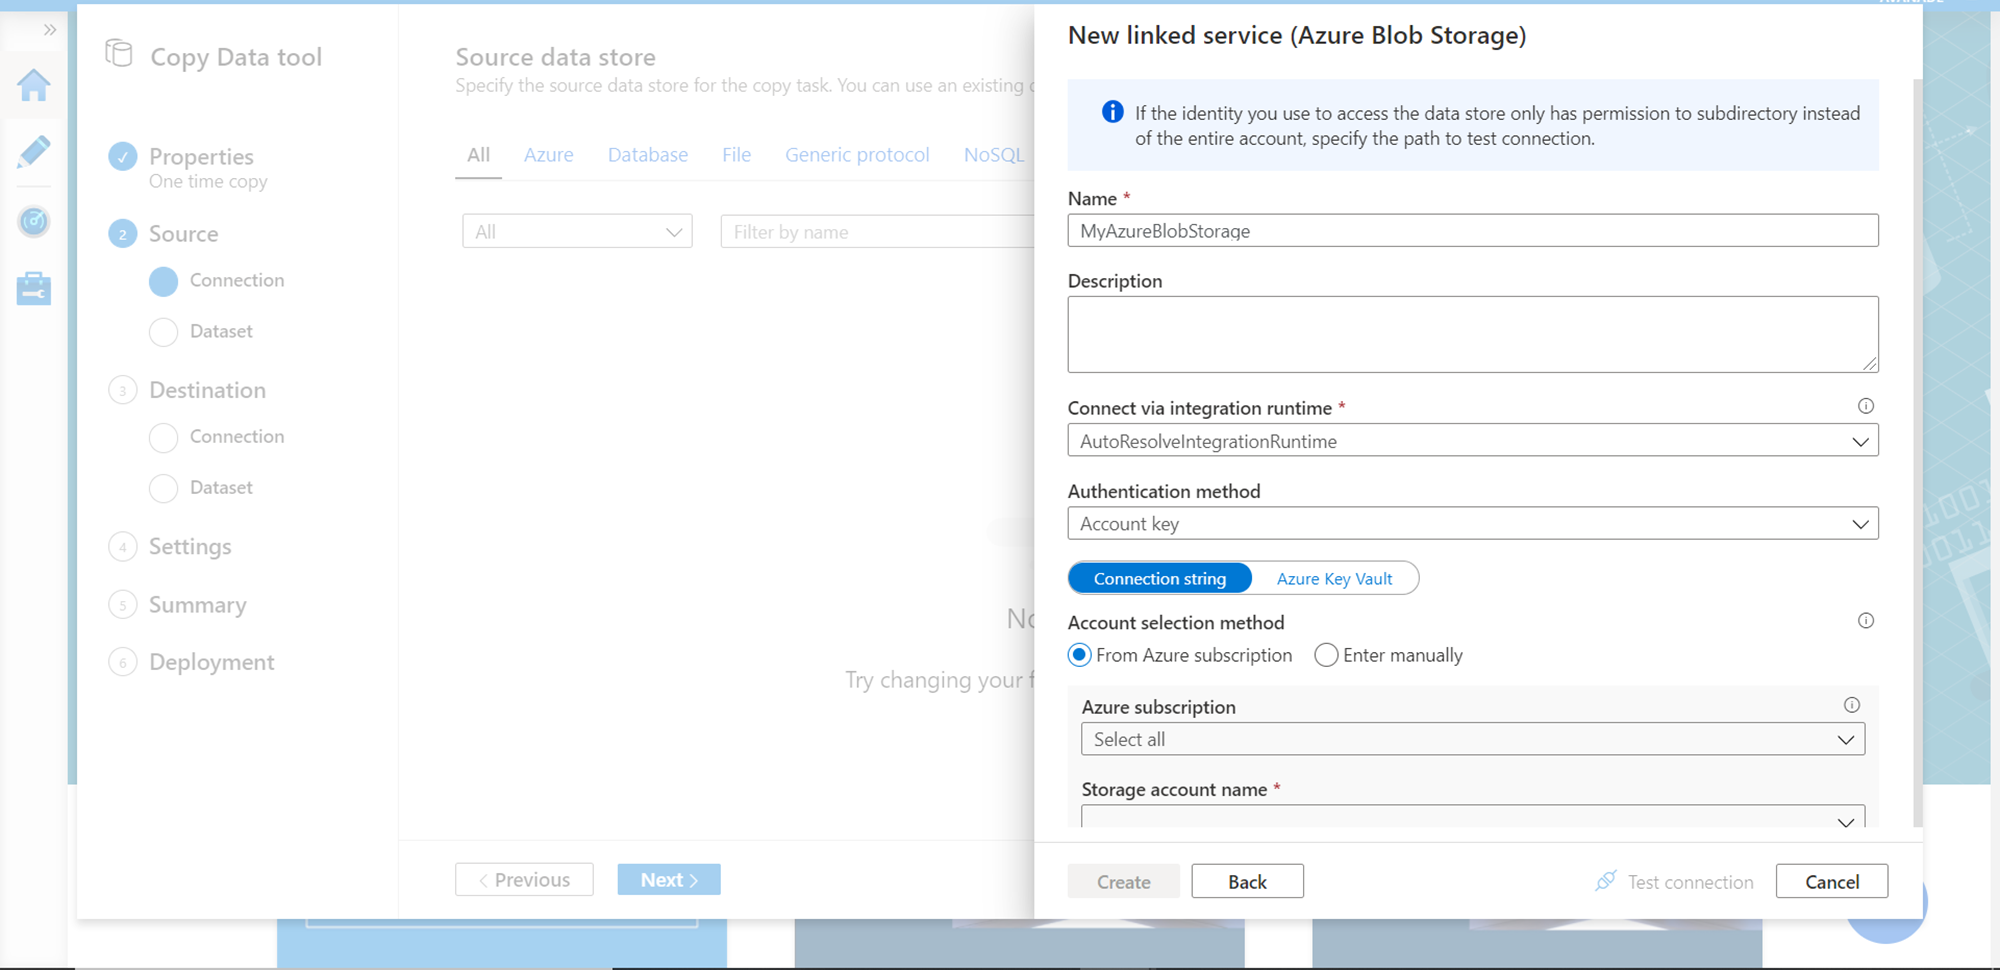
Azure Data Factory supports many data sources. For our exercise, we need to select Azure Blob Storage as the linked service in the data source setup. Click on the continue button.

After selecting the Azure Blob Storage, provide specific details of the storage account that hosts the container in which the data file is hosted. After providing the details, click on the Create button which would create the linked service as a data source. Click on the Next button.
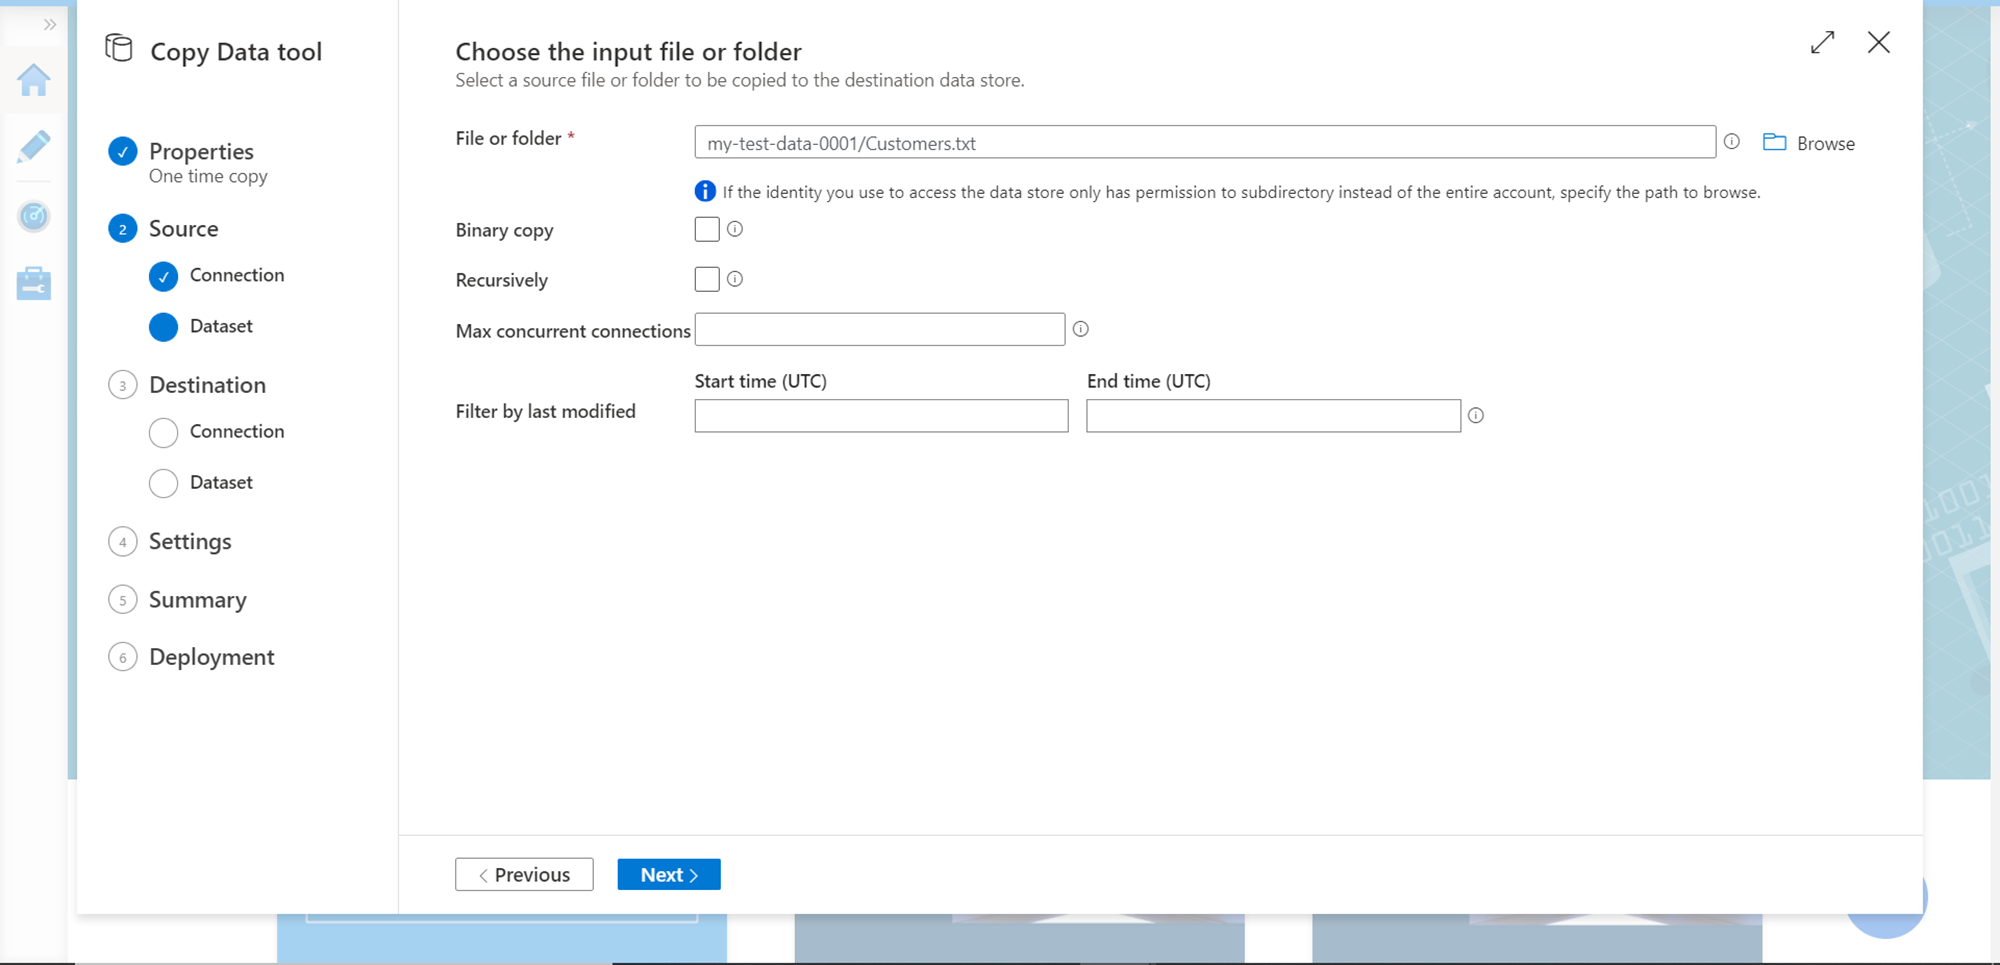
In this step, we need to configure the exact file and folder in the container that we registered in the last step as shown below. You can configure additional options to specify the criteria based on which files should be selected. We only have one file in our case, so we have selected the same. Click on the Next button.
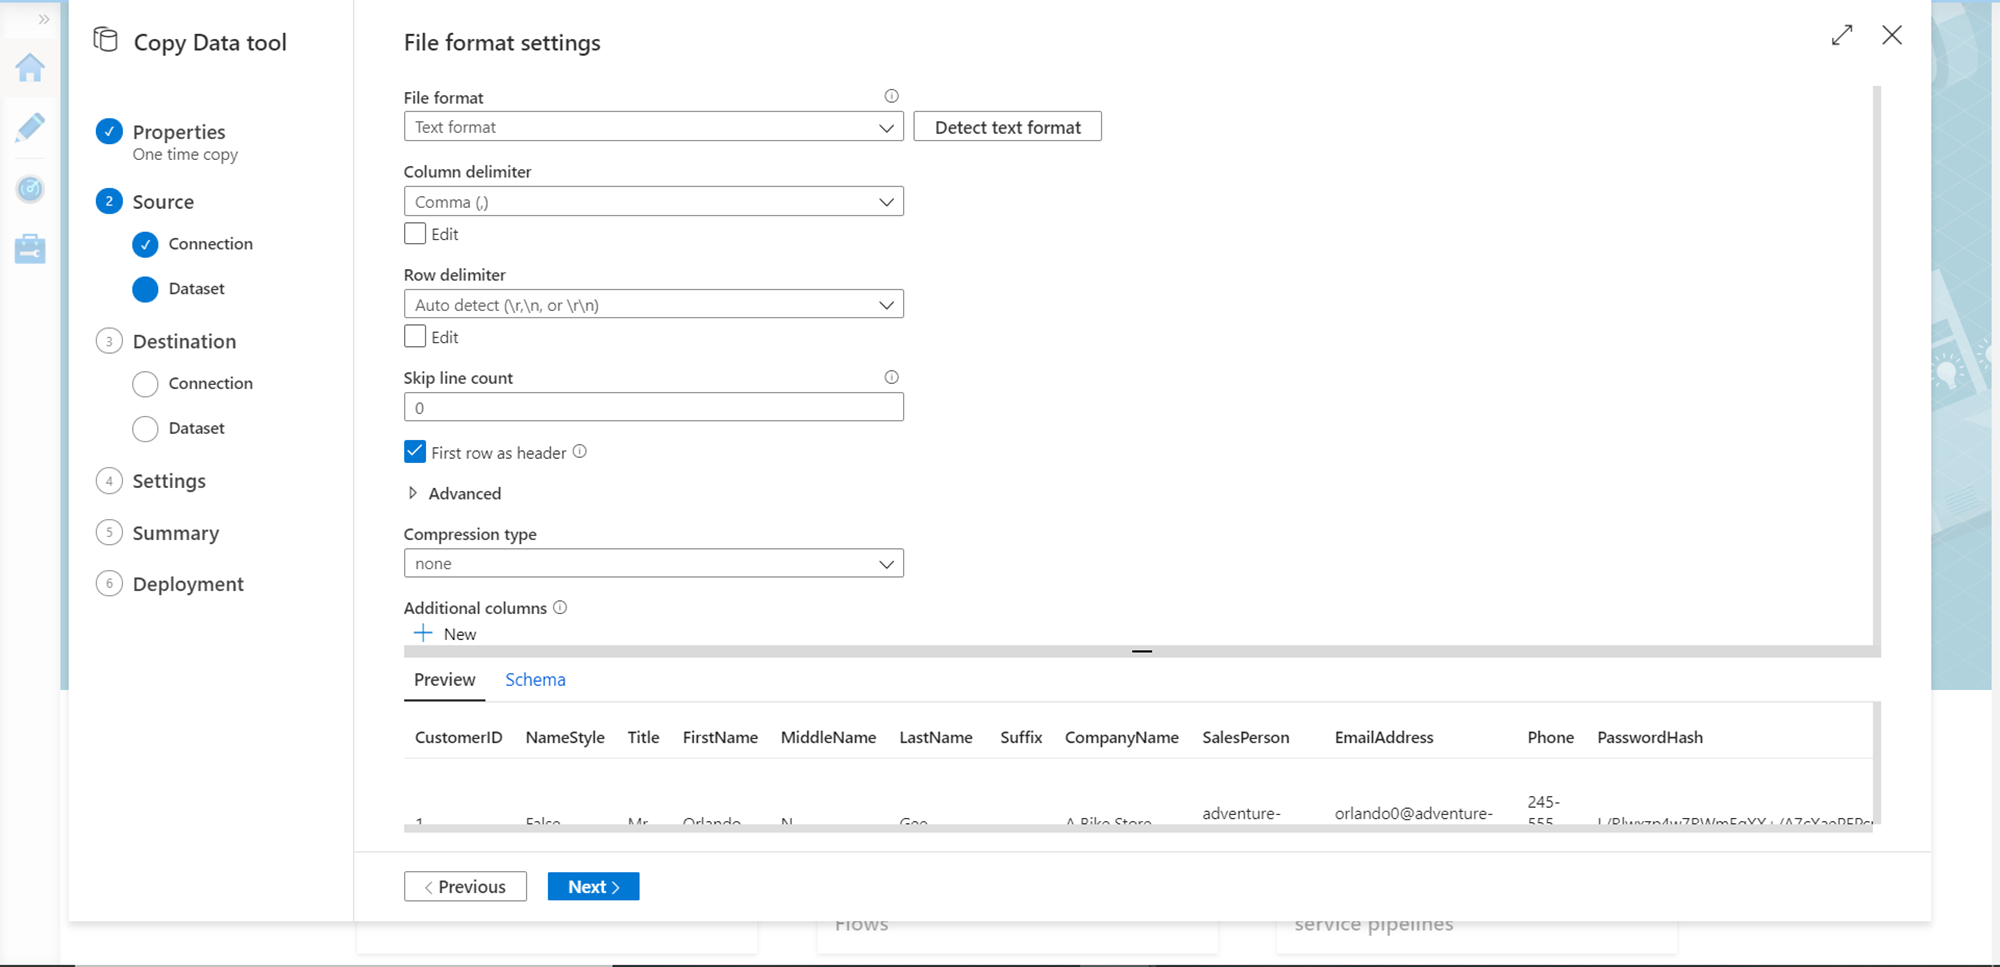
In this step, as we selected the file, we need to select the file format. By default, this step would detect the format, which is CSV in our case. You can configure the specific settings as per the format of the data in the file. For example, we have selected the first row as header as in this case the first row contains column names. You can also preview data as well as a schema in the bottom half pane of the screen. After configuring the options, click on the Next button.
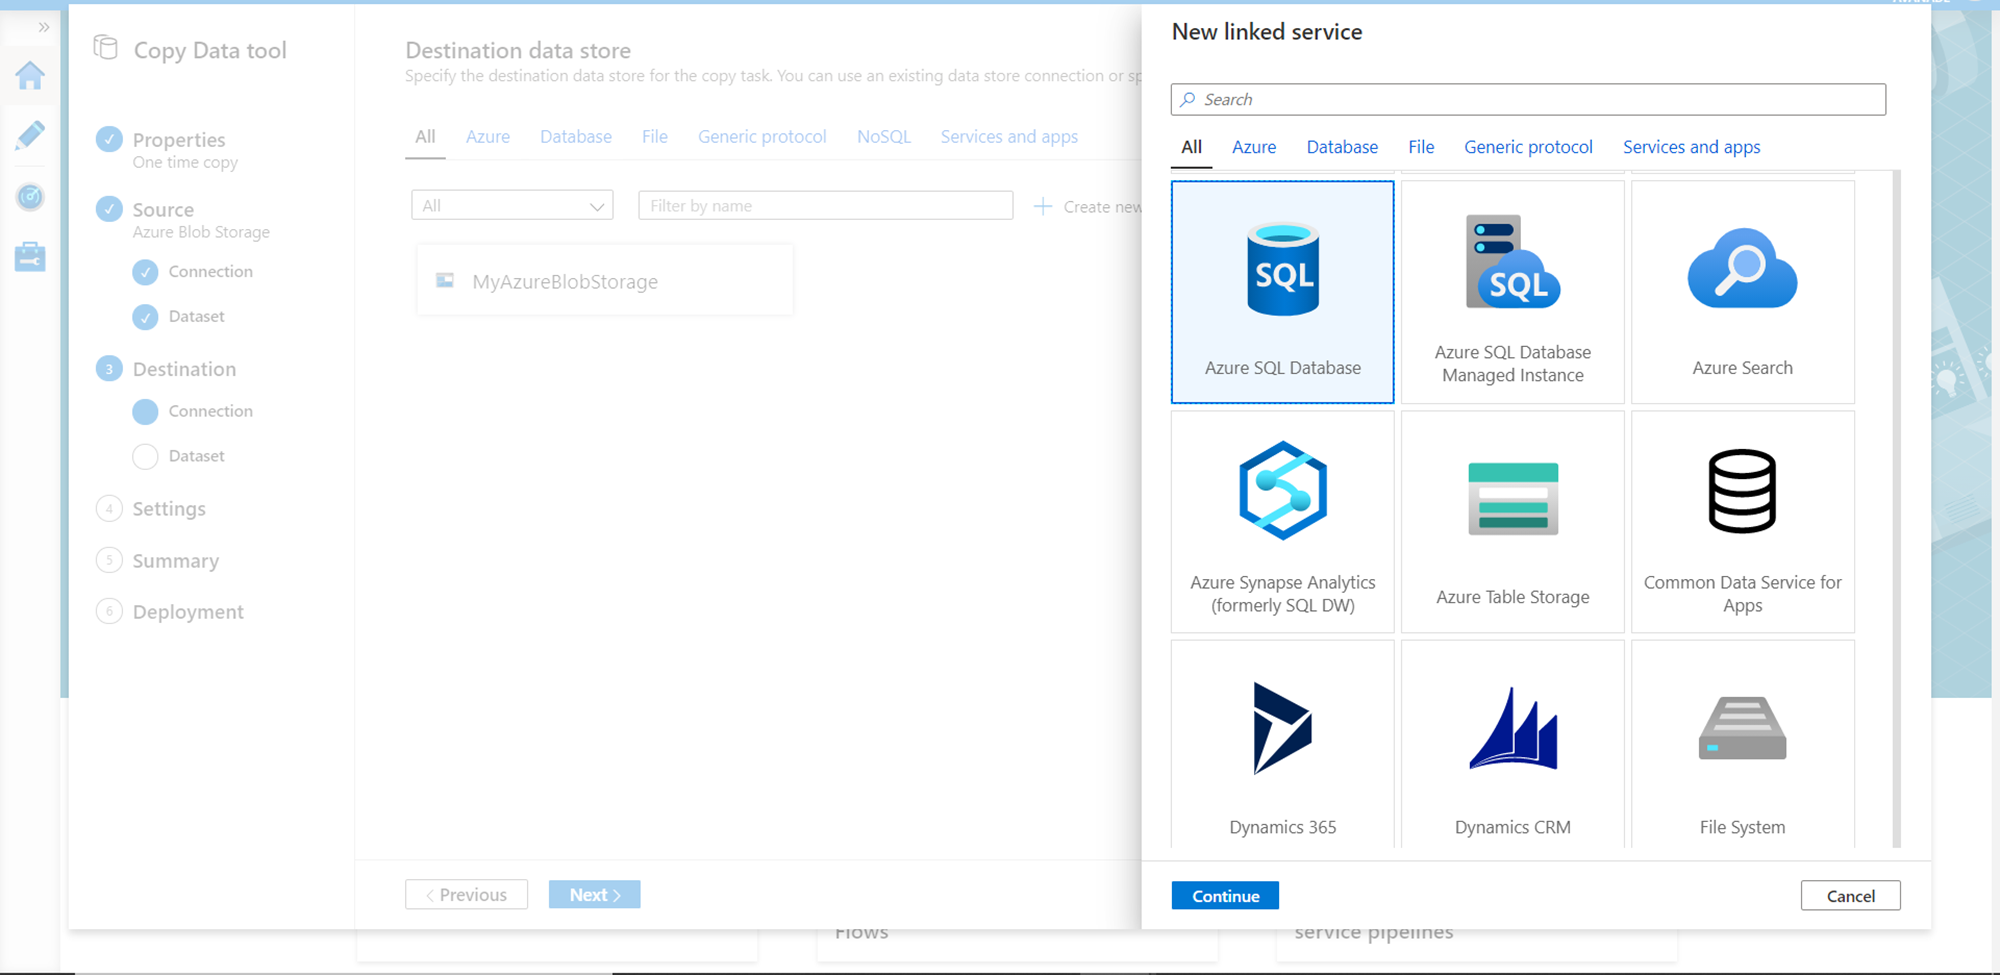
In this step now we need to select the destination where we intend to populate the data i.e. Azure SQL Database as shown below. Select this option and click on the Continue button.
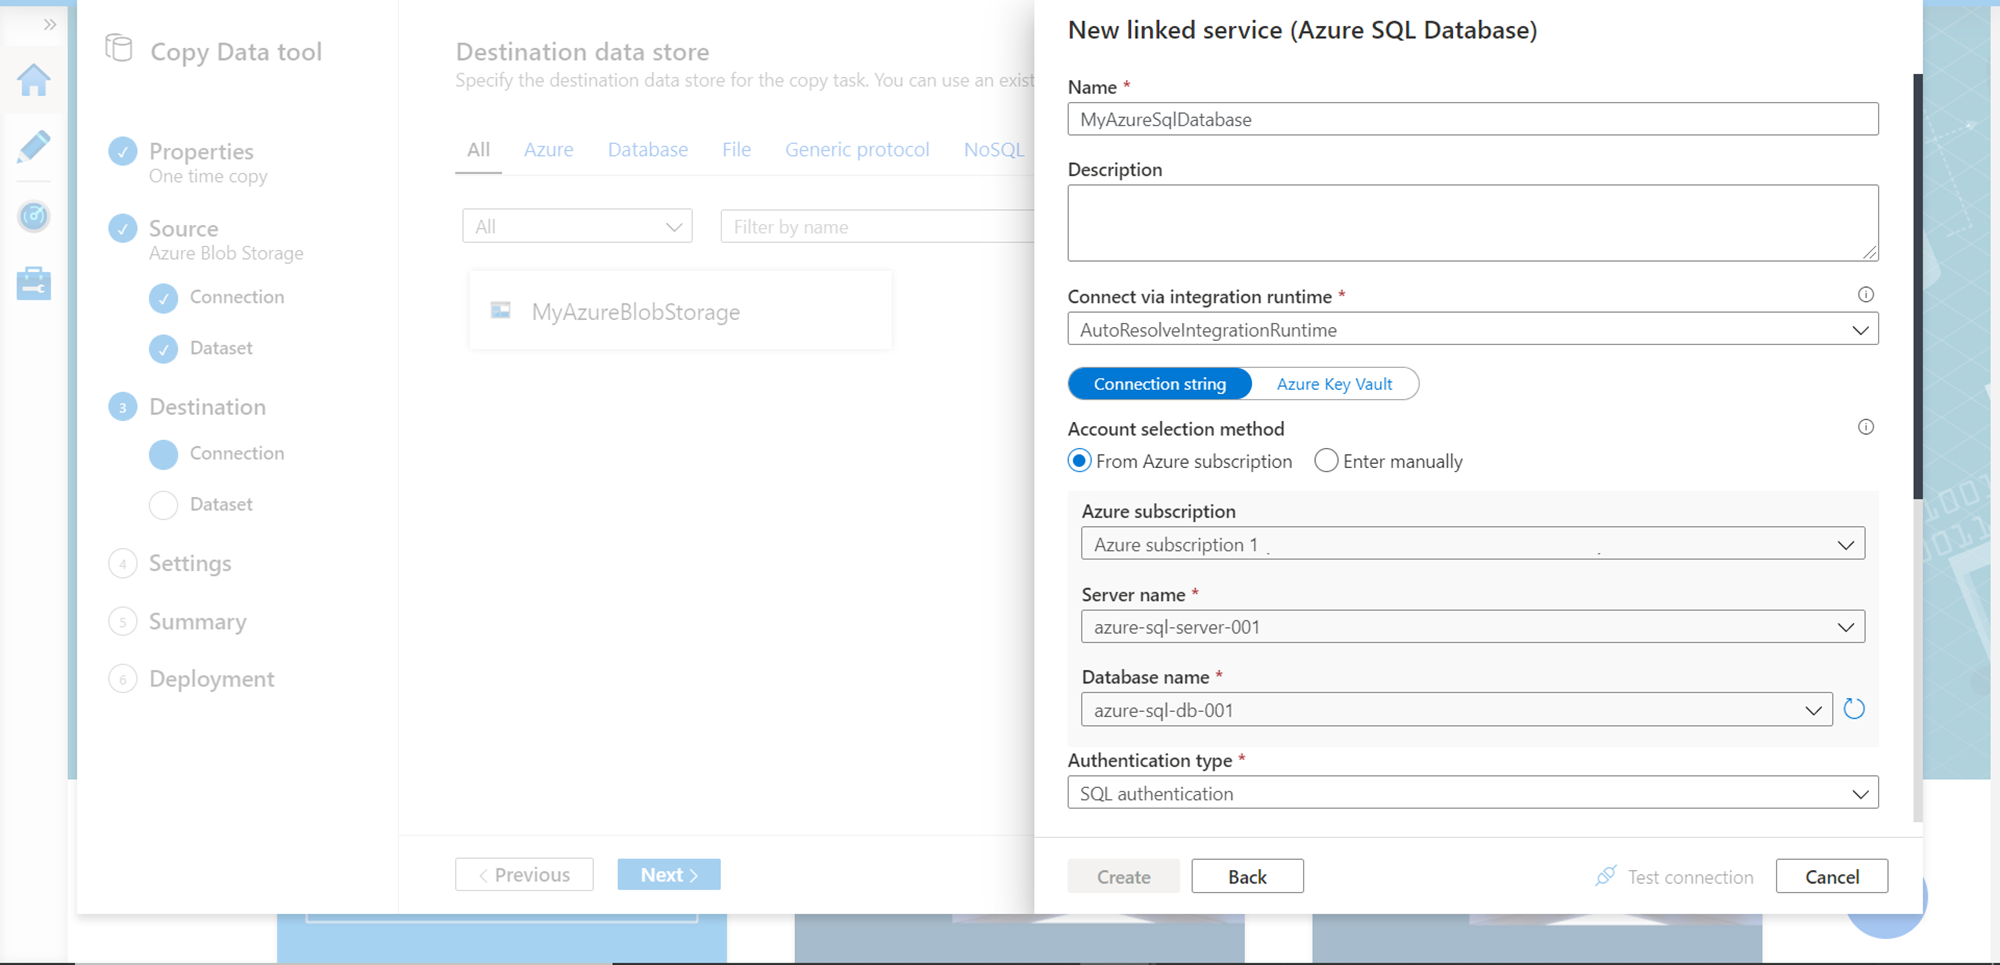
In this step, we need to provide details of the destination like the subscription, Azure SQL Server instance as well as the database name where we intend to populate the data, and the credentials to connect to it. After providing the details, you can also click on the Test connection button to test the connectivity. After connectivity is successful, click on the Create button to register the destination as a Linked Service.
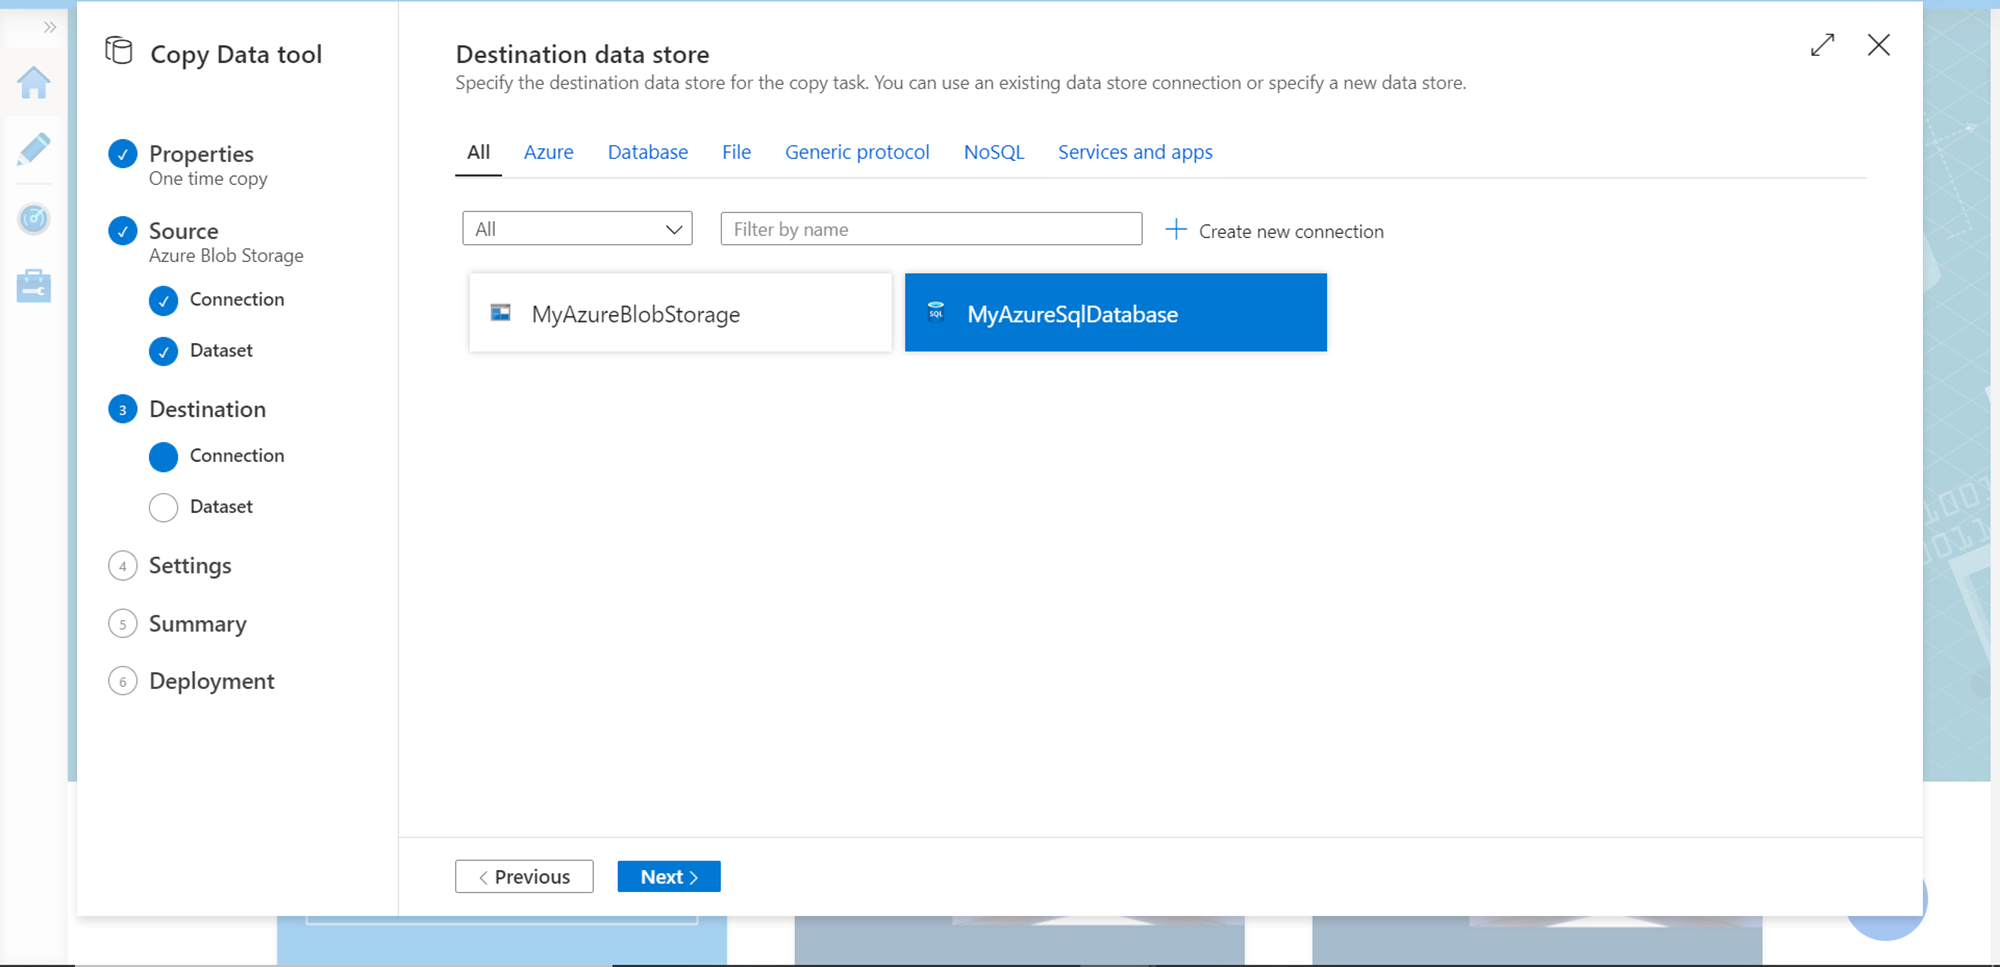
You should be able to find source and destination sources registered as shown below.
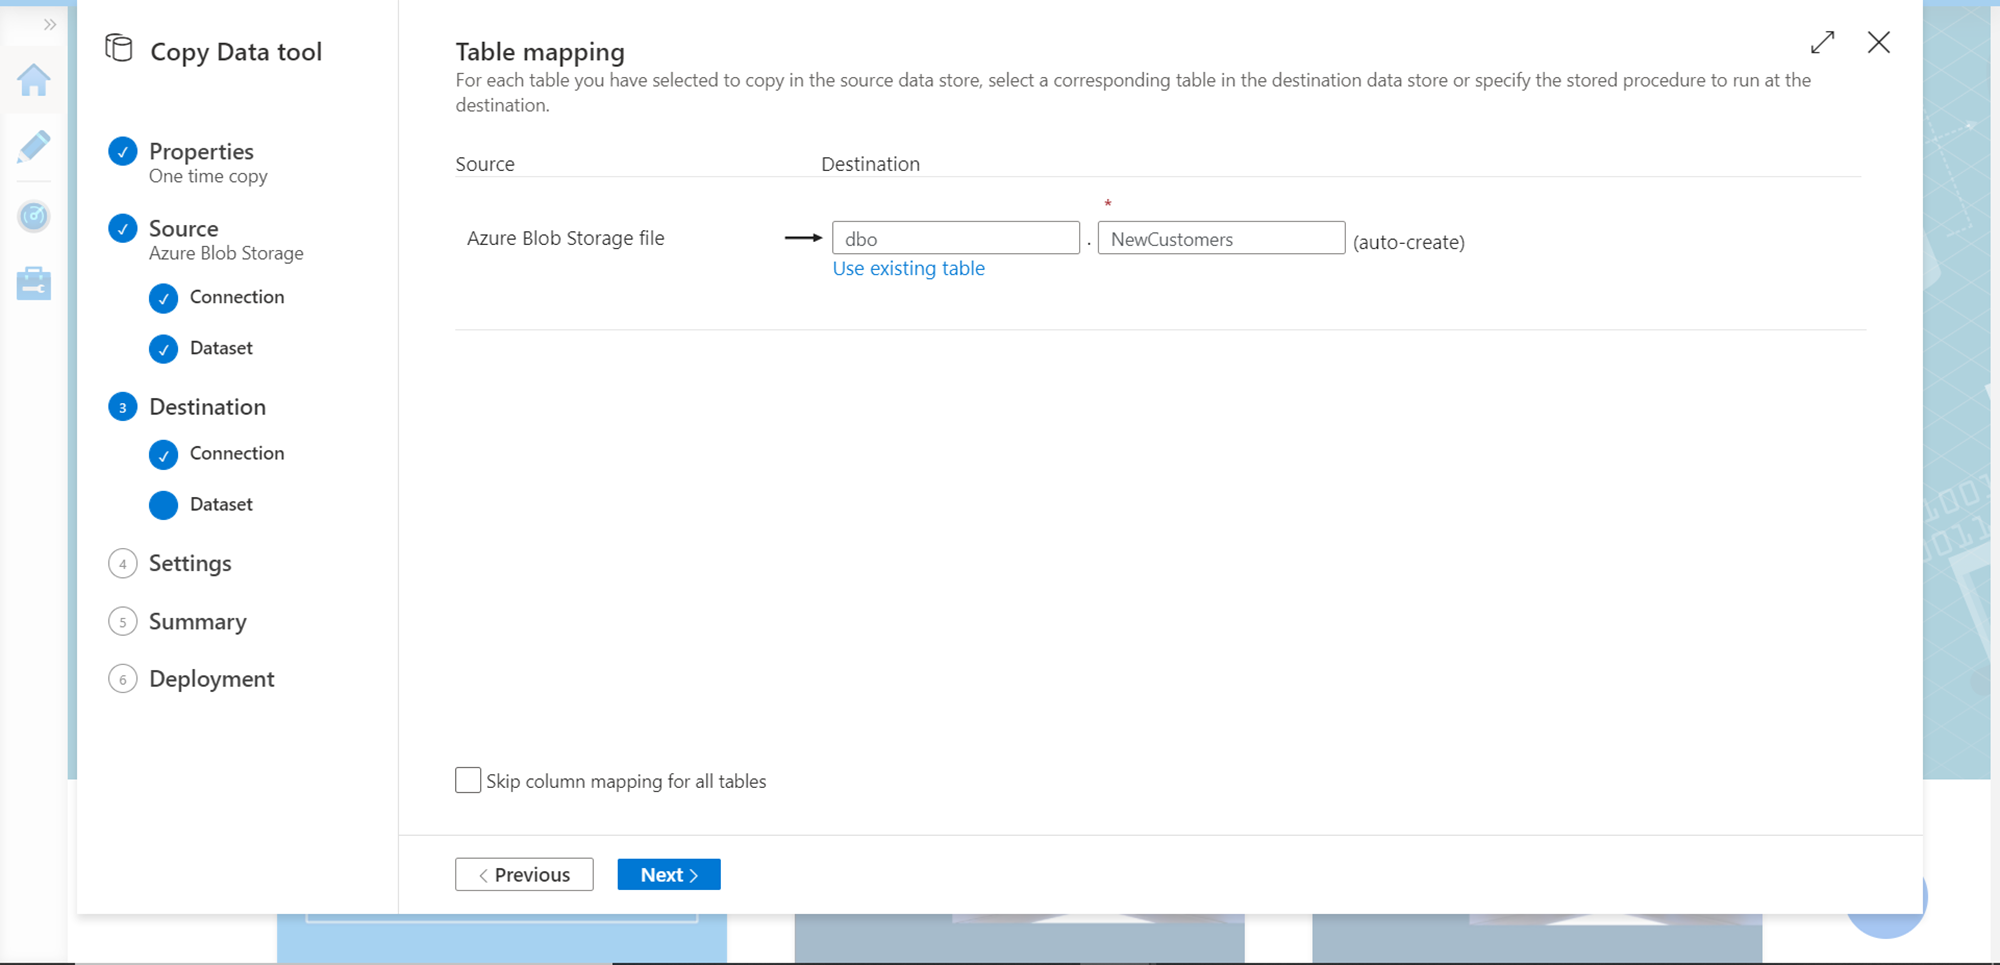
After specifying the source and destination, the next step is to specify table mapping, which means in which table the data would be populated from the source file. If we intend to use the existing table, we can click on Use existing table. In this case, we intend to populate data in a new table. Provide schema (dbo) and table name (NewCustomers) as shown below. This would auto-create a new table in the Azure SQL Database, which is the destination in this case. Click on the Next button.
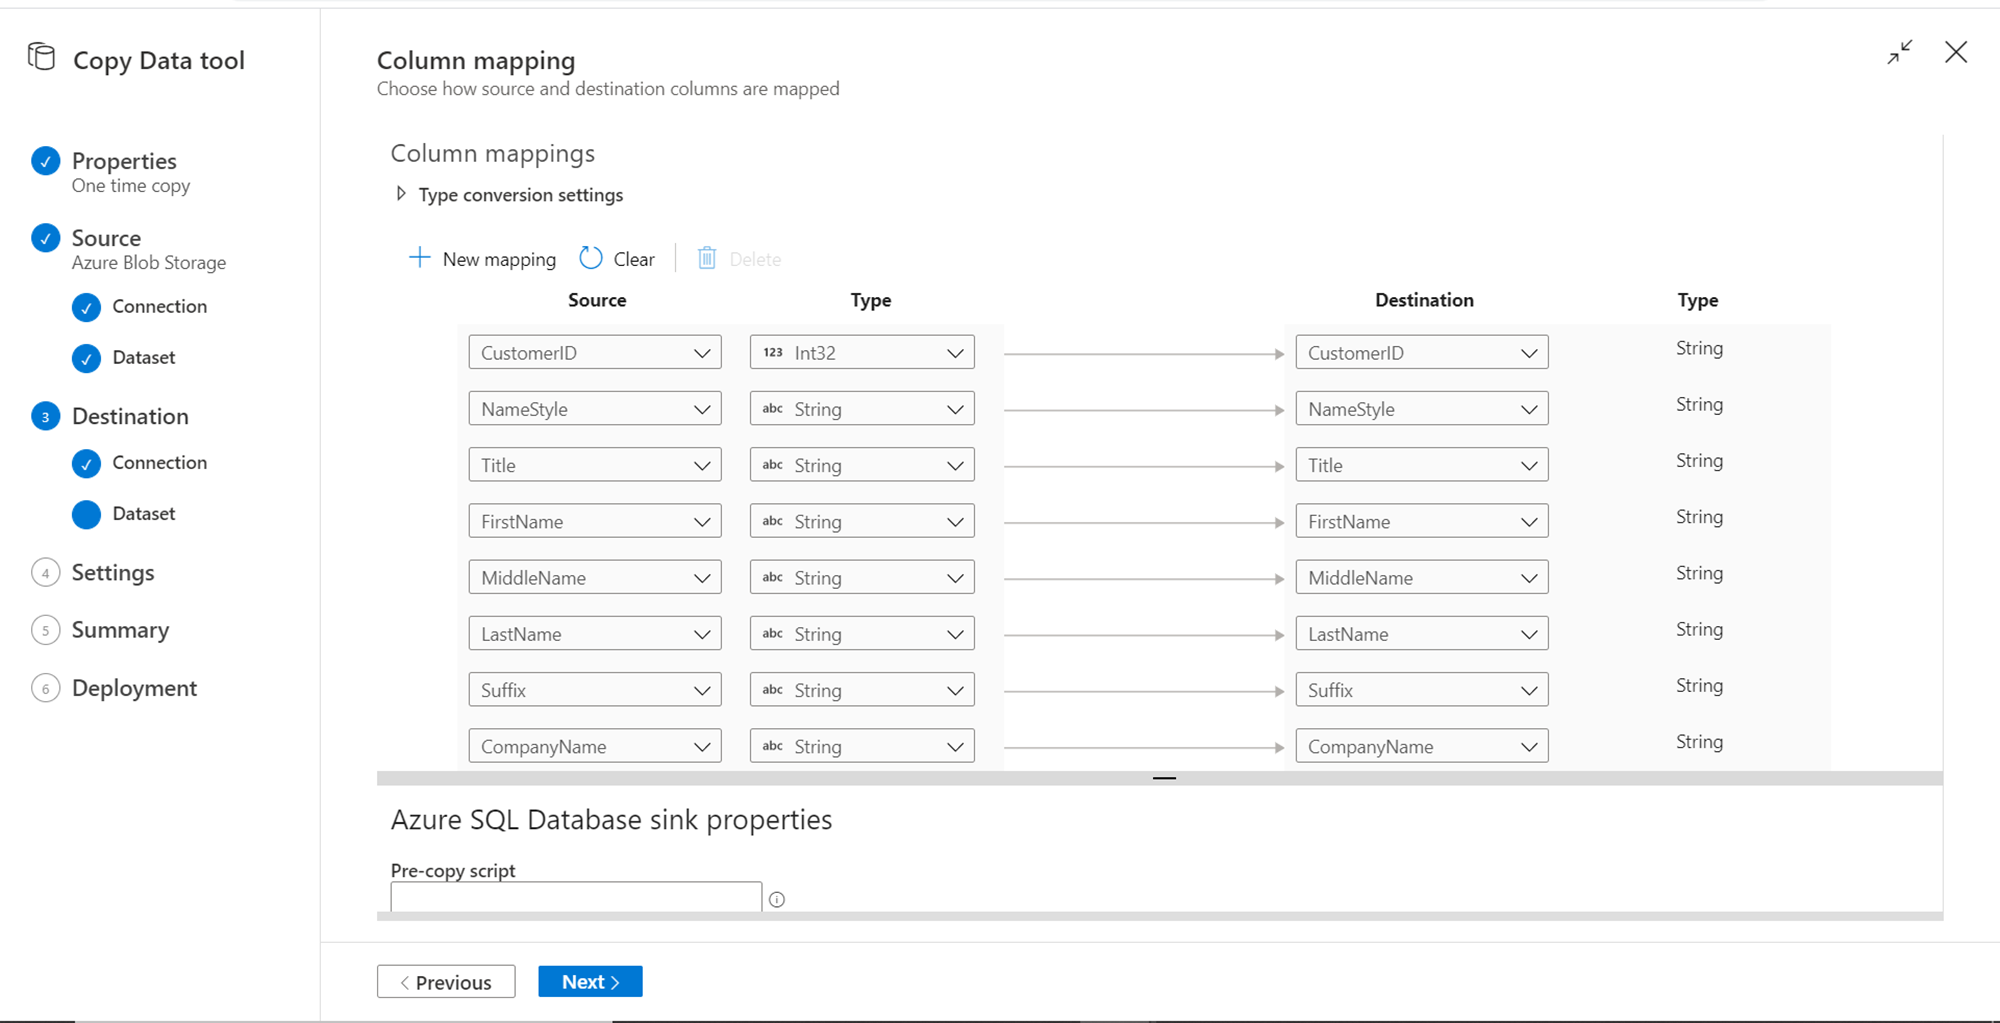
In this step, after the table mapping, we need to provide details of column mapping. You can choose to continue with the default mappings or change it. In this case, here we have changed the data type of one of the fields – Customer ID, from String to Int32 for testing purposes. After configuring the column mapping properties, click on the Next button.
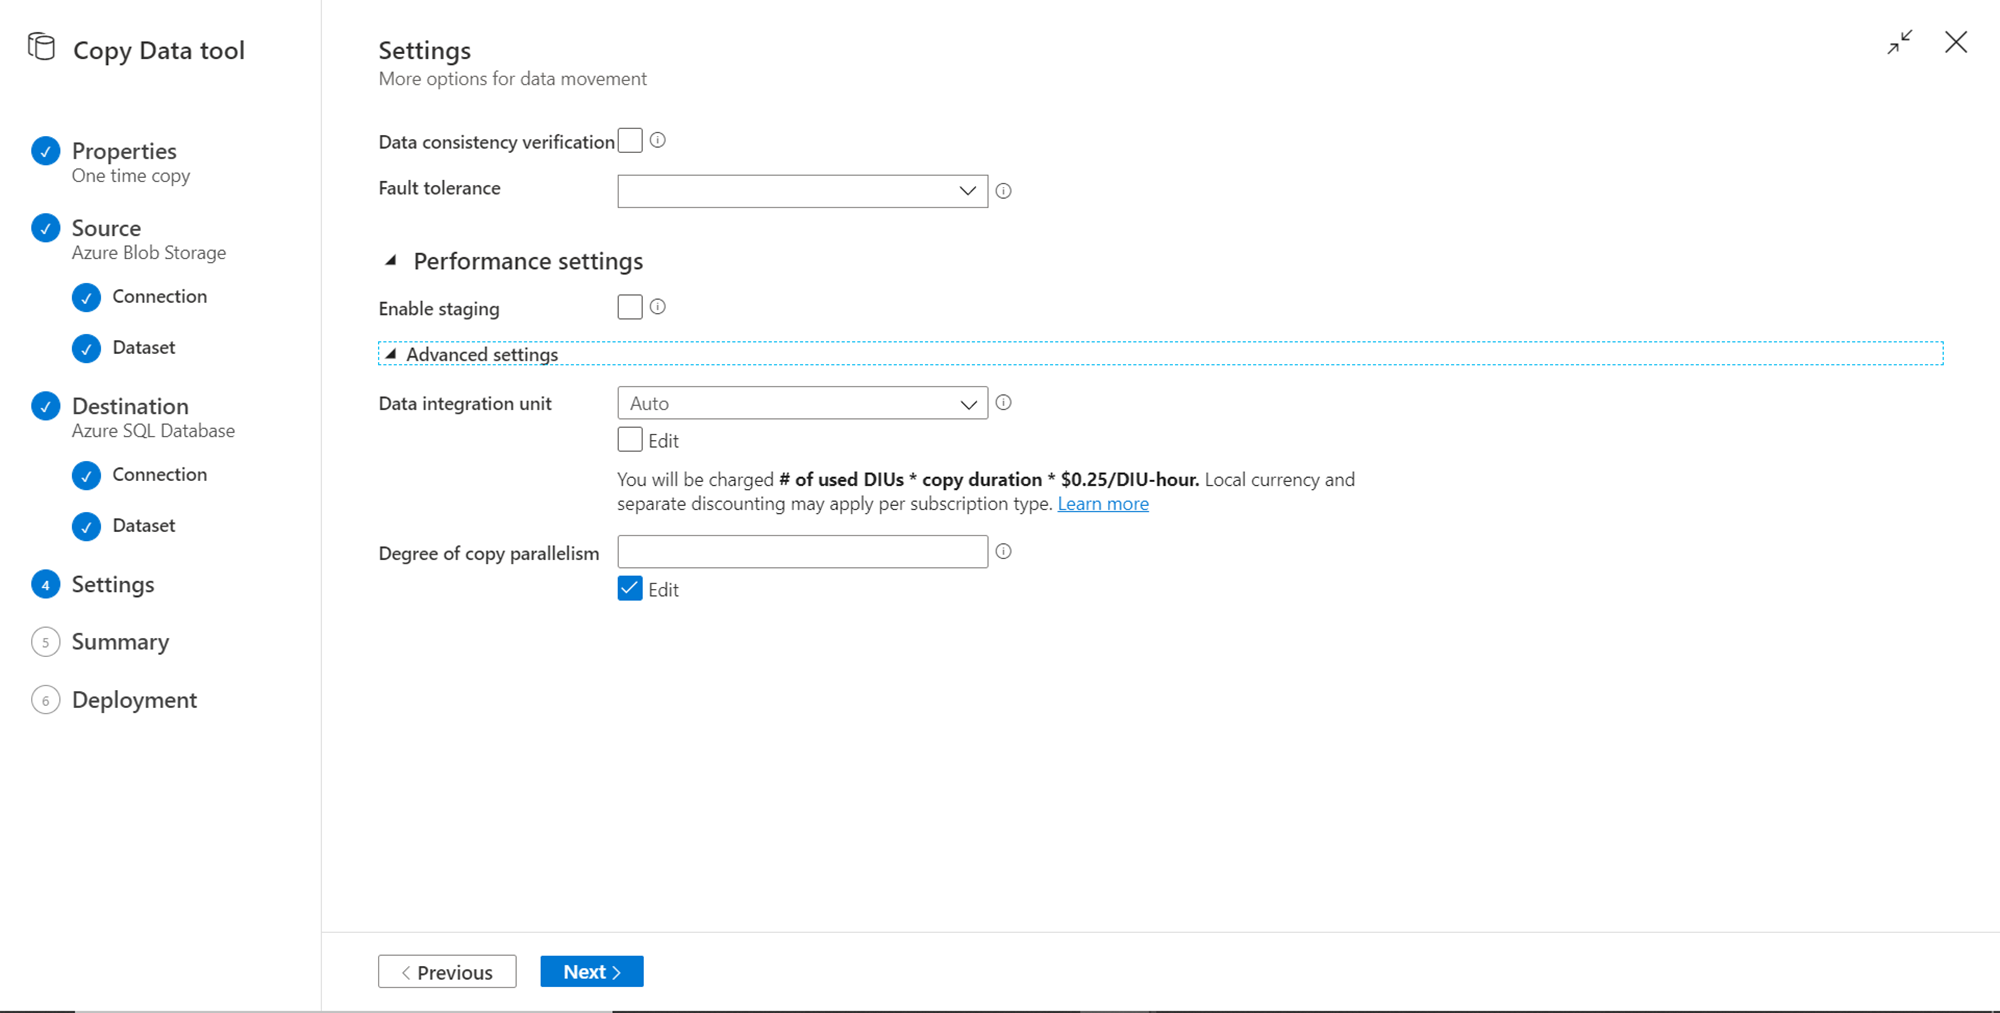
In this step, we can configure settings for data parallelism, data consistency and other relevant details. We can continue with defaults as these steps are optional. Click on the Next button.
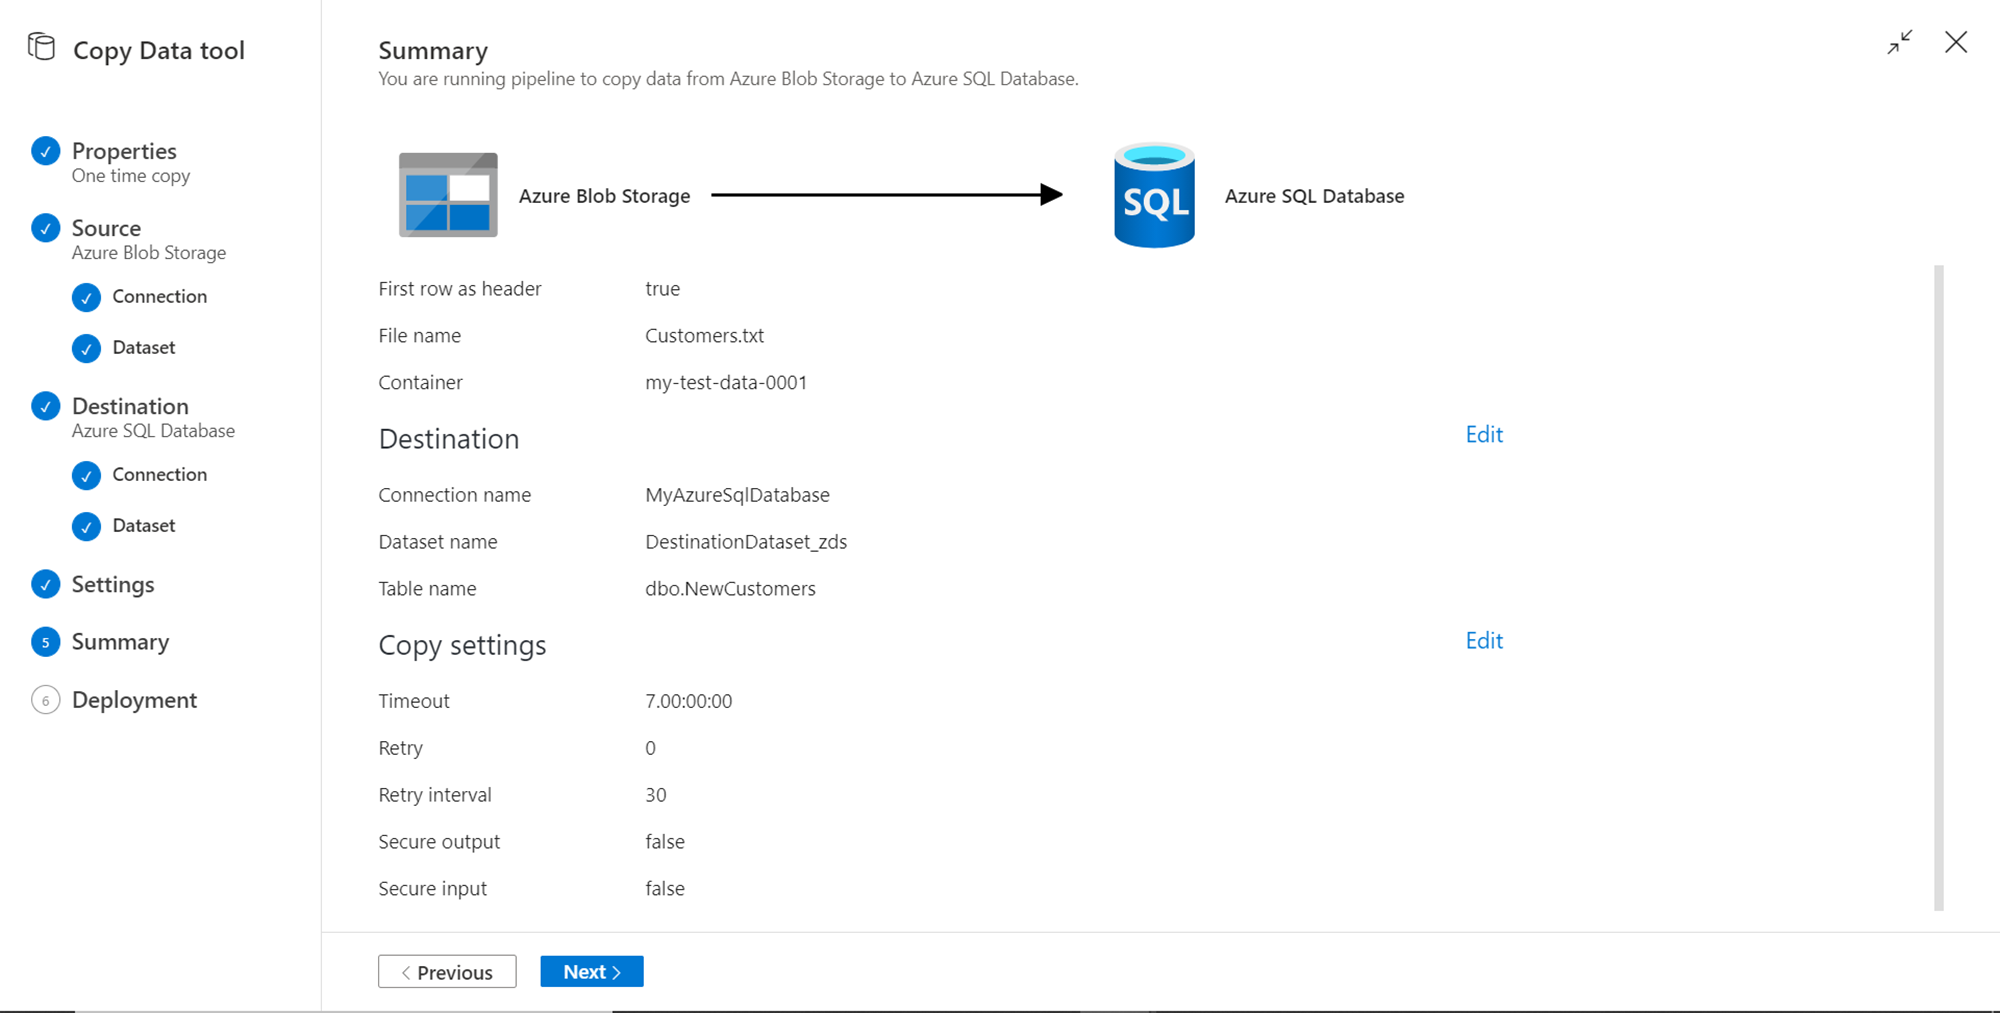
Finally, we are on the Summary page where the entire configuration details are available for review and editing. After confirming the same, click on the Next button.
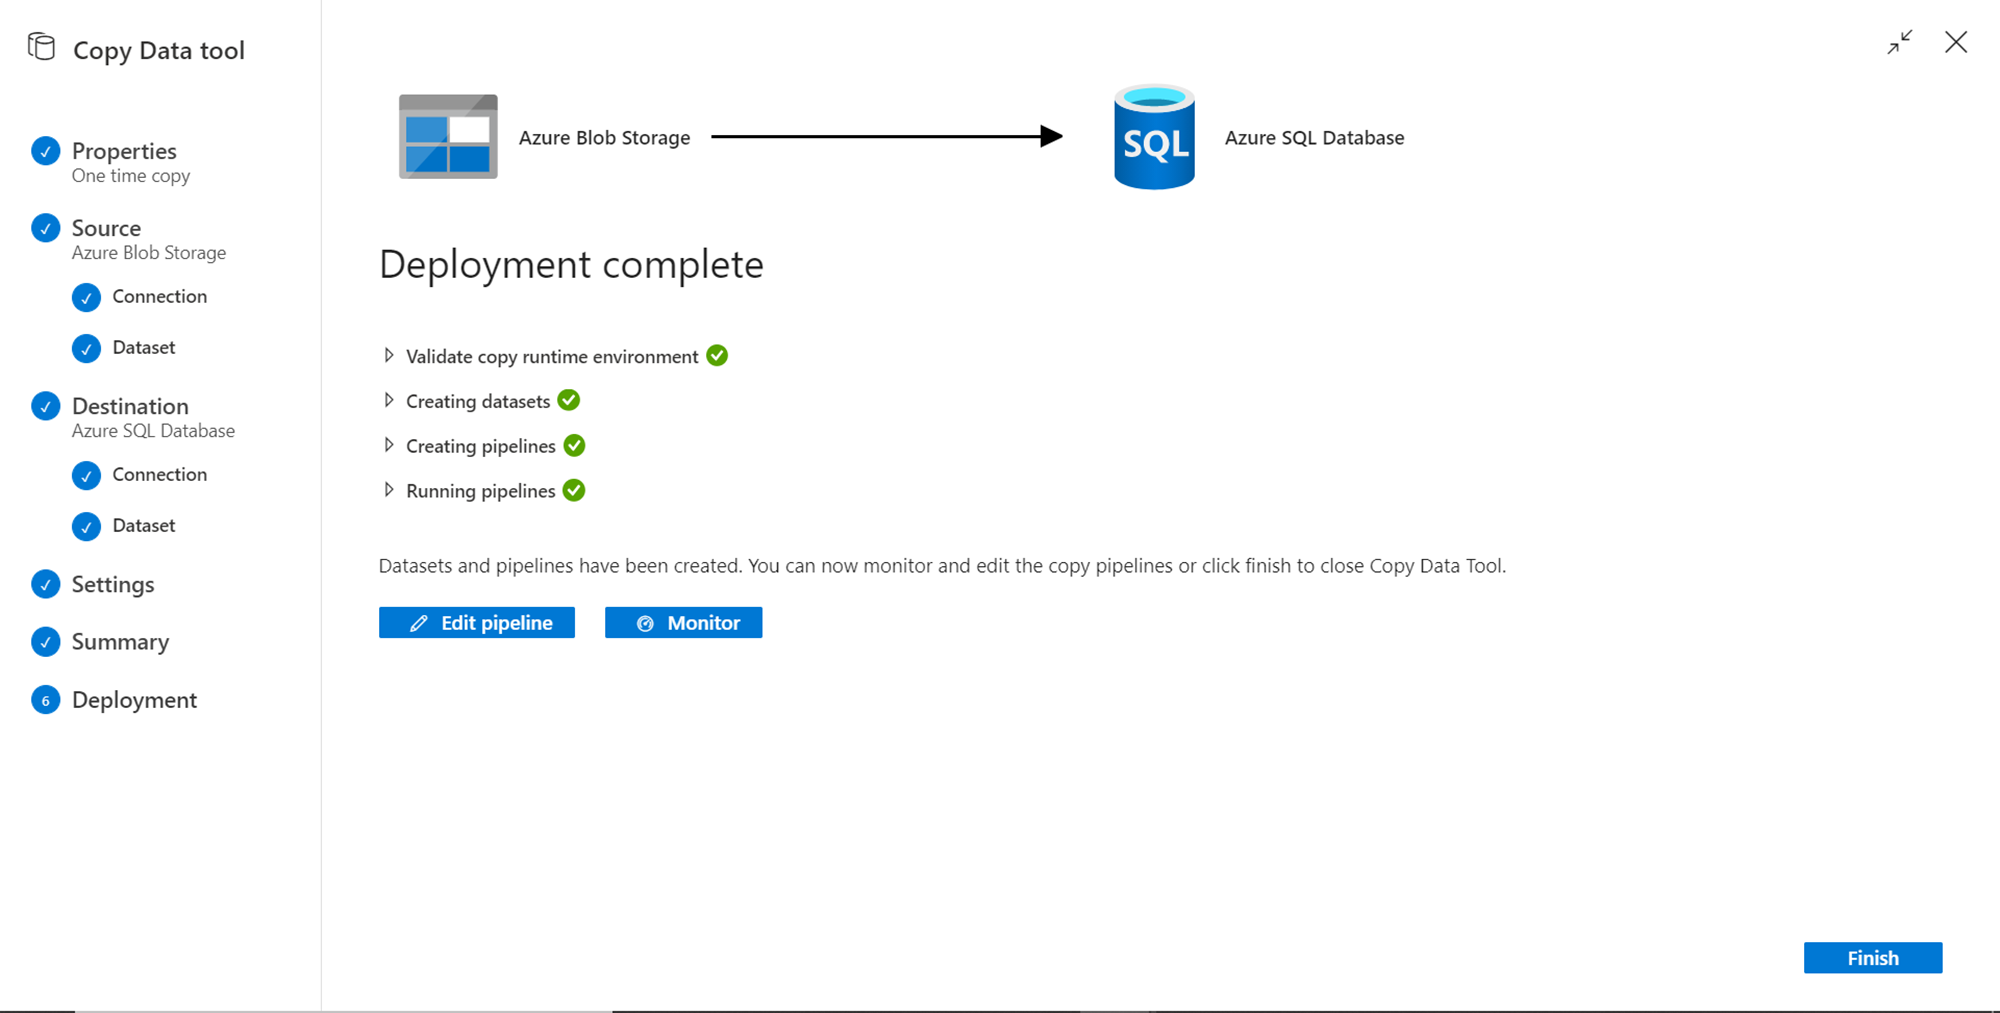
This would start the deployment process and create a run-time environment, datasets, linked services, and pipelines. Post creation, it would start the execution of the data pipeline as well. Shown below is the successful deployment and execution of the data pipeline. This implies that the data got loaded successfully from Azure blob storage to Azure SQL Database. Click on the Finish button.
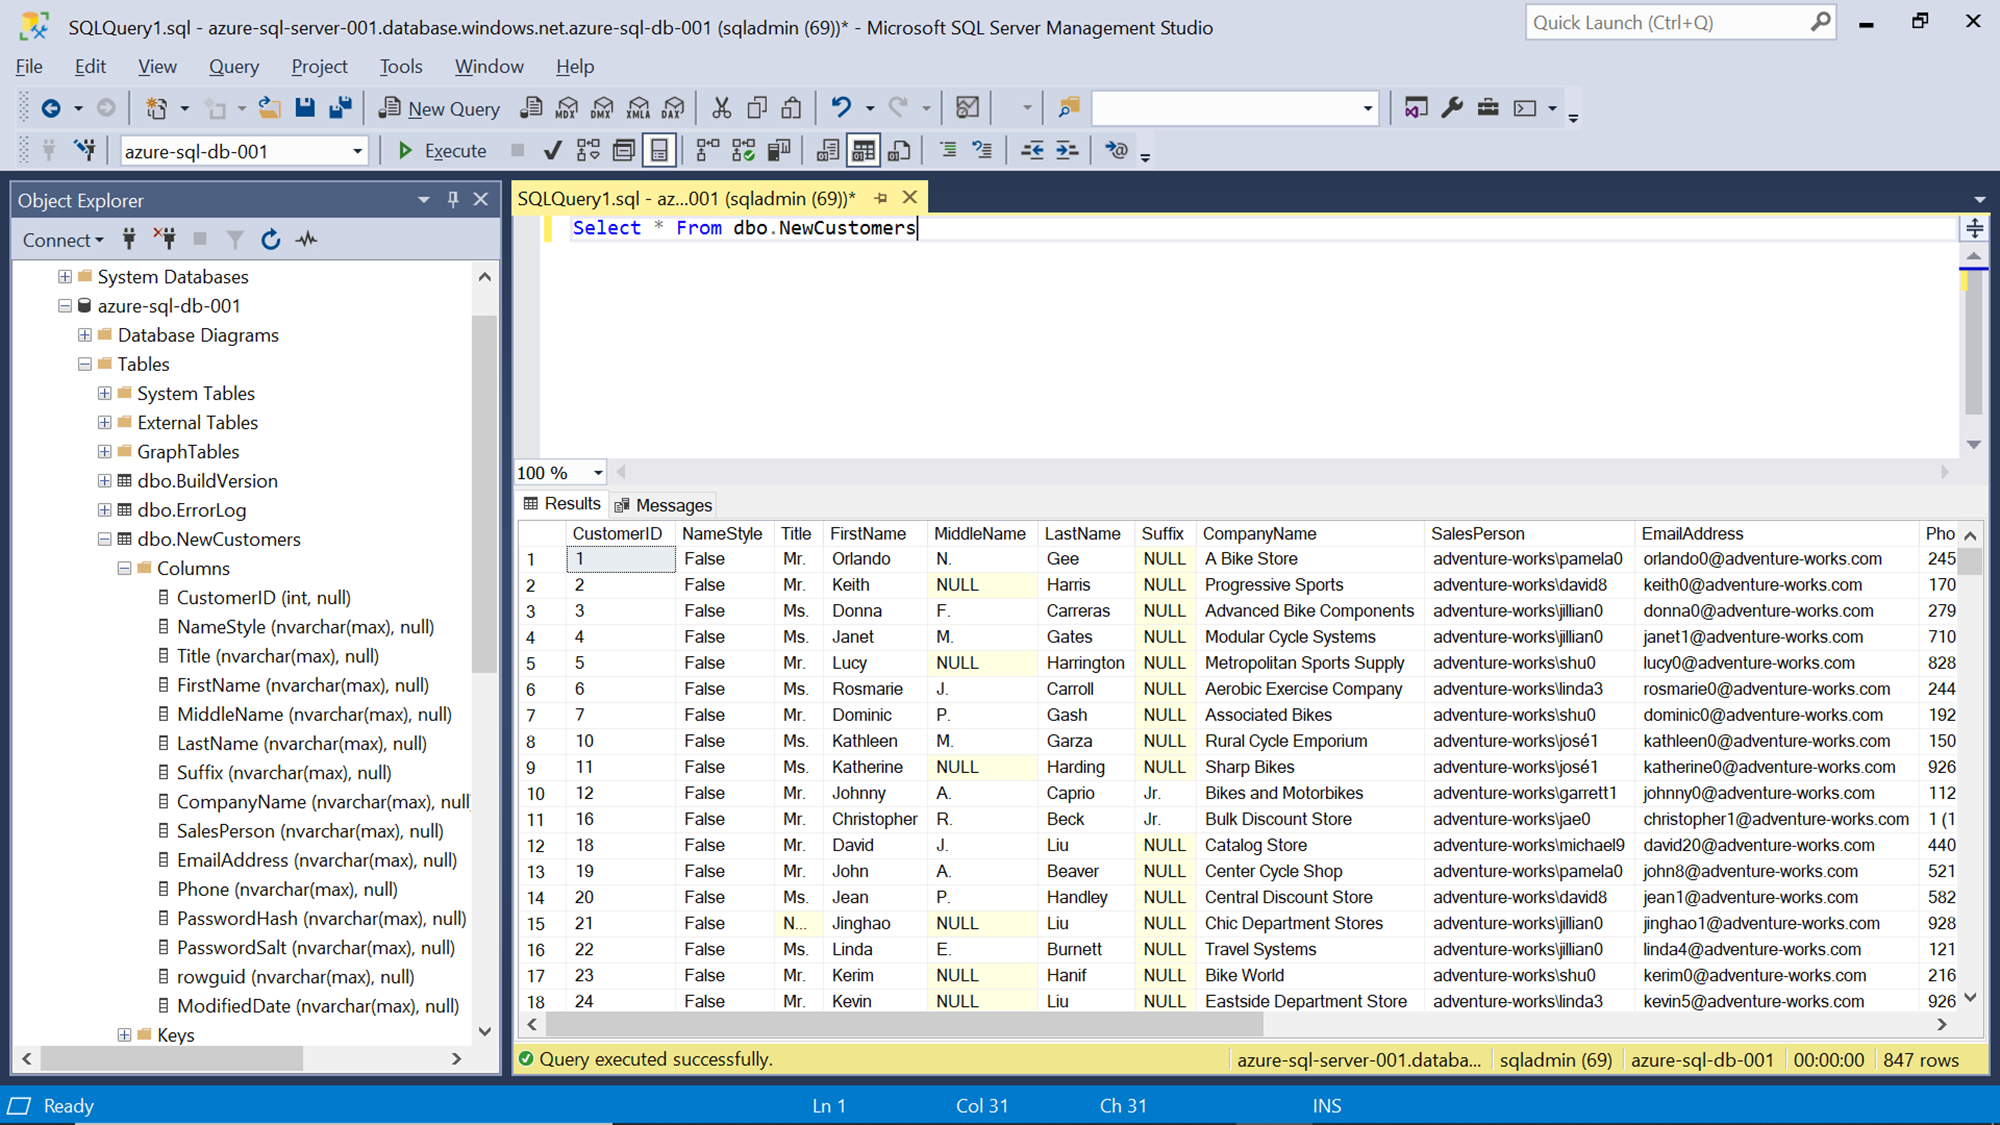
To verify the newly populated data in the Azure SQL Database, connect to the database using Query Editor or SSMS as shown below, and you would find the data successfully loaded in a new table as shown below.
In this way, we can use Azure Data Factory to load data from Azure blob storage to Azure SQL Database.
Conclusion
In this article, we performed an exercise with the setup of Azure blob storage and Azure SQL Database as the source and destination. We used Azure Data Factory as the integrator to source data from a CSV file hosted in a container on Azure blob storage, configured and created the data pipeline, and populated this data in Azure SQL Database as the destination for this pipeline. We also learned different artifacts of Azure Data Factory like Linked Services, Pipelines, Azure Data Factory instance and configuration settings.

He has worked internationally with Fortune 500 clients in various sectors and is a passionate author.
View all posts by Rahul Mehta
- Finding Duplicates in SQL - February 7, 2024
- MySQL substring uses with examples - October 14, 2023
- MySQL group_concat() function overview - March 28, 2023