

In this article, we will learn how to work with MySQL foreign keys with a few examples.
Introduction
A typical data modeling process starts with conceptual data modeling followed by logical and physical data modeling. Usually, entities and relationships are identified first, followed by identifying attributes and modeling these attributes into tables. Data Integrity is one of the most essential features that is required in the data model so that related data that is hosted into multiple tables is stored and maintained with strong data integrity. Lack of data integrity will result in poor data quality and accordingly, there will be related issues in the overall data ecosystem. The de-facto method of maintaining data integrity at the database level is by implementing the required checks and balances on the data objects while accepting data. This is done typically by adding constraints at the table level and foreign keys between master and child tables.
MySQL is a very popular open-source database management system. In this article, we will learn how to work with MySQL foreign keys with a few examples.
Setting up an Azure MySQL Instance
There are different ways of setting up MySQL. It can be downloaded free from here and installed on a local machine. Another way of quickly setting up MySQL is on Azure using Azure Database for MySQL Servers. In this article, we would assume that one has either installed MySQL on a local machine or will be setting up MySQL on Azure. We will cover how to set up MySQL on Azure and then we will learn how to work with MySQL foreign keys. Now let’s start setting up MySQL on Azure, and it’s assumed that one has the required Azure Subscription and Privileges to administer MySQL on Azure.
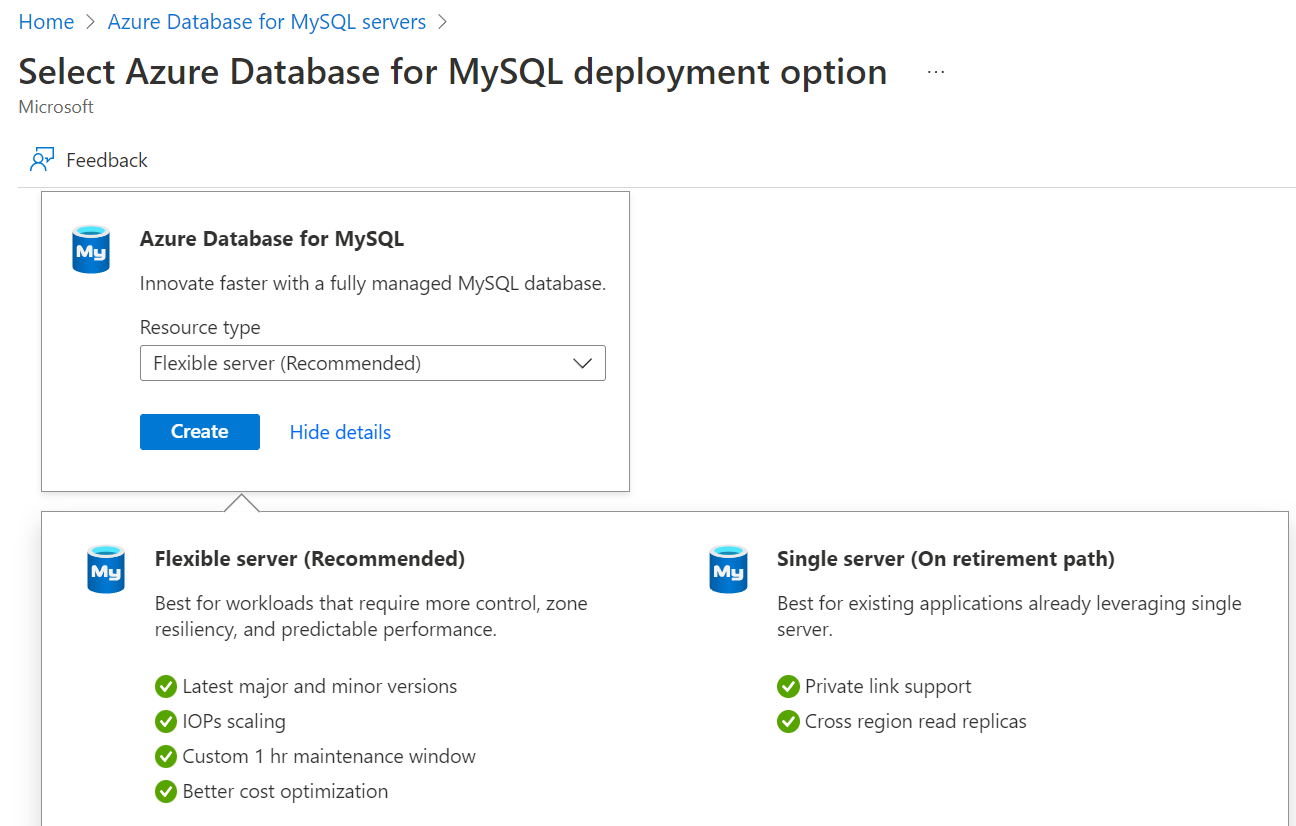
Navigate to the Azure portal and open the MySQL service homepage which would look as shown below. The service is known as Azure Database for MySQL Server. There won’t be any instances listed if you are accessing the service for the first time. Click on the Create Azure Database for MySQL Server to invoke the wizard for creating a new instance.

The first option would be to select the type or edition of MySQL server. The flexible server is the recommended edition for most of the use cases, so we will go with this option as shown below. Though we will be looking at steps to create a flexible server option, one can also opt to create a single server edition. The only difference mostly would be encryption-related settings, in terms of the difference in steps to configure the instance.
The first step in creating a flexible server is providing basic configuration details like subscription name, resource group, server name, and other details as shown below.
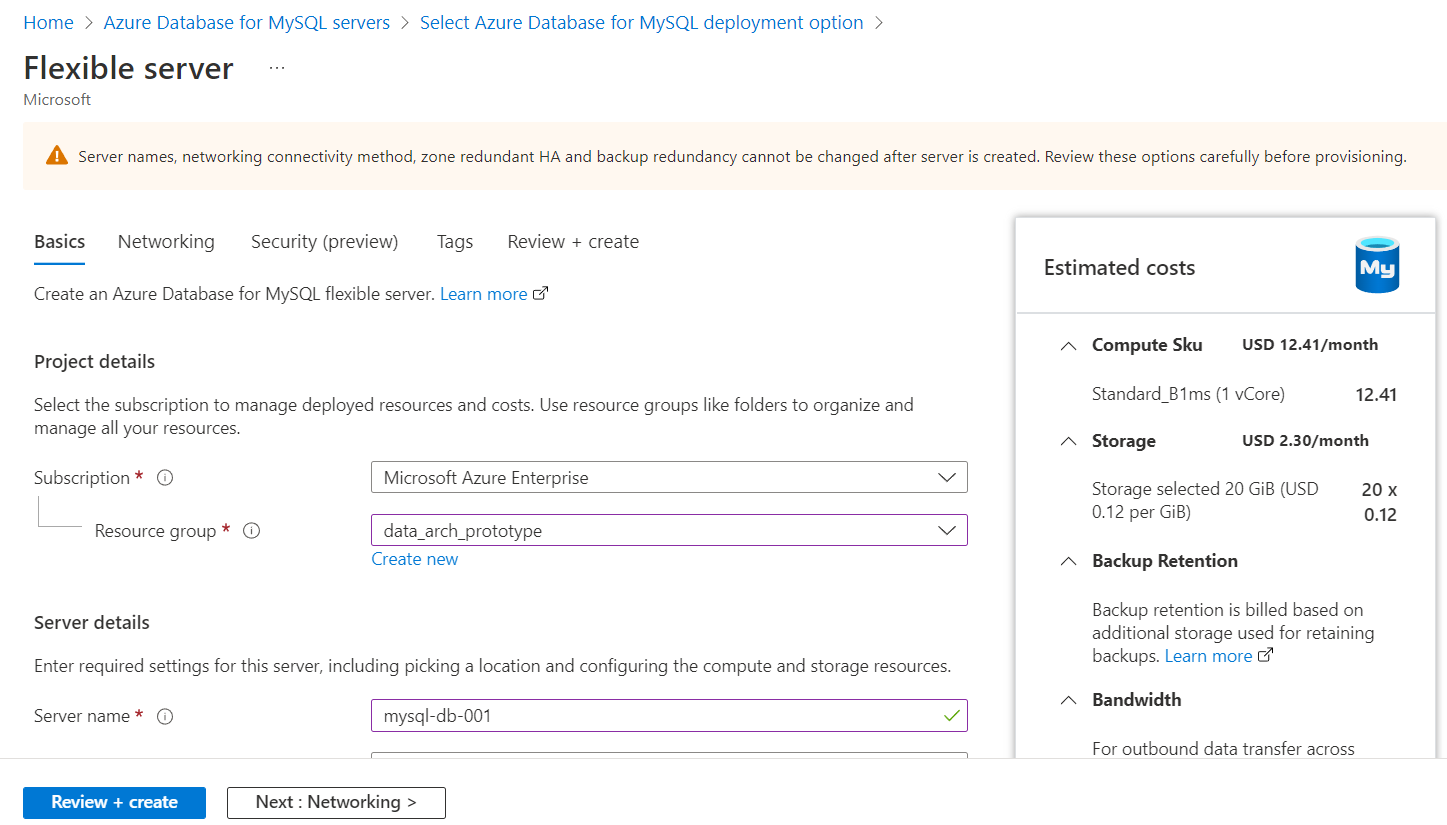
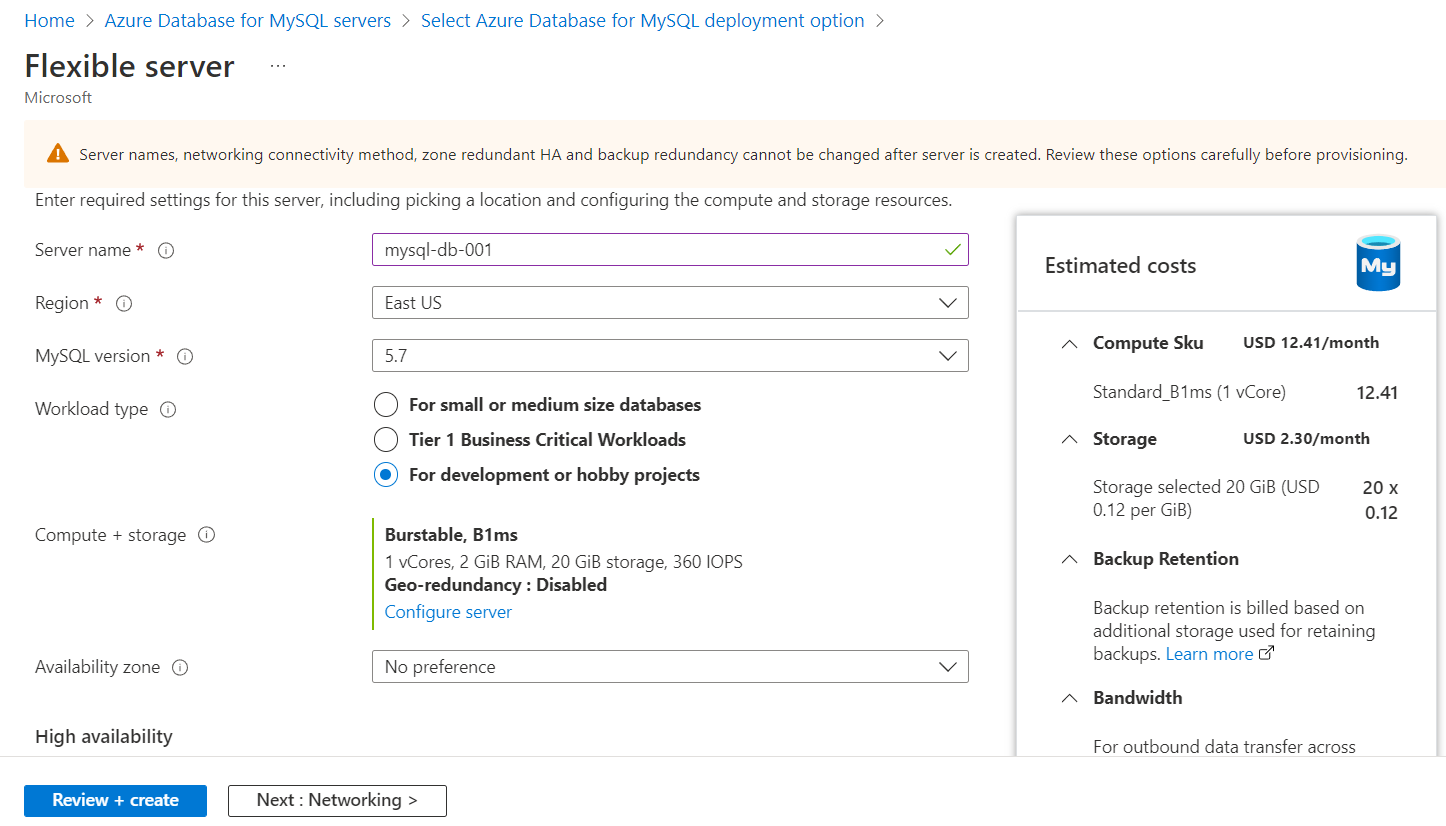
Scroll down and you would find more configuration details to configure the capacity of the instance being created. For now, we would continue with the default options.
The next step is to provide credentials for the instance being created. These are the admin credentials that will be used to connect to the instance and create database objects. Provide the same and proceed to the next step.
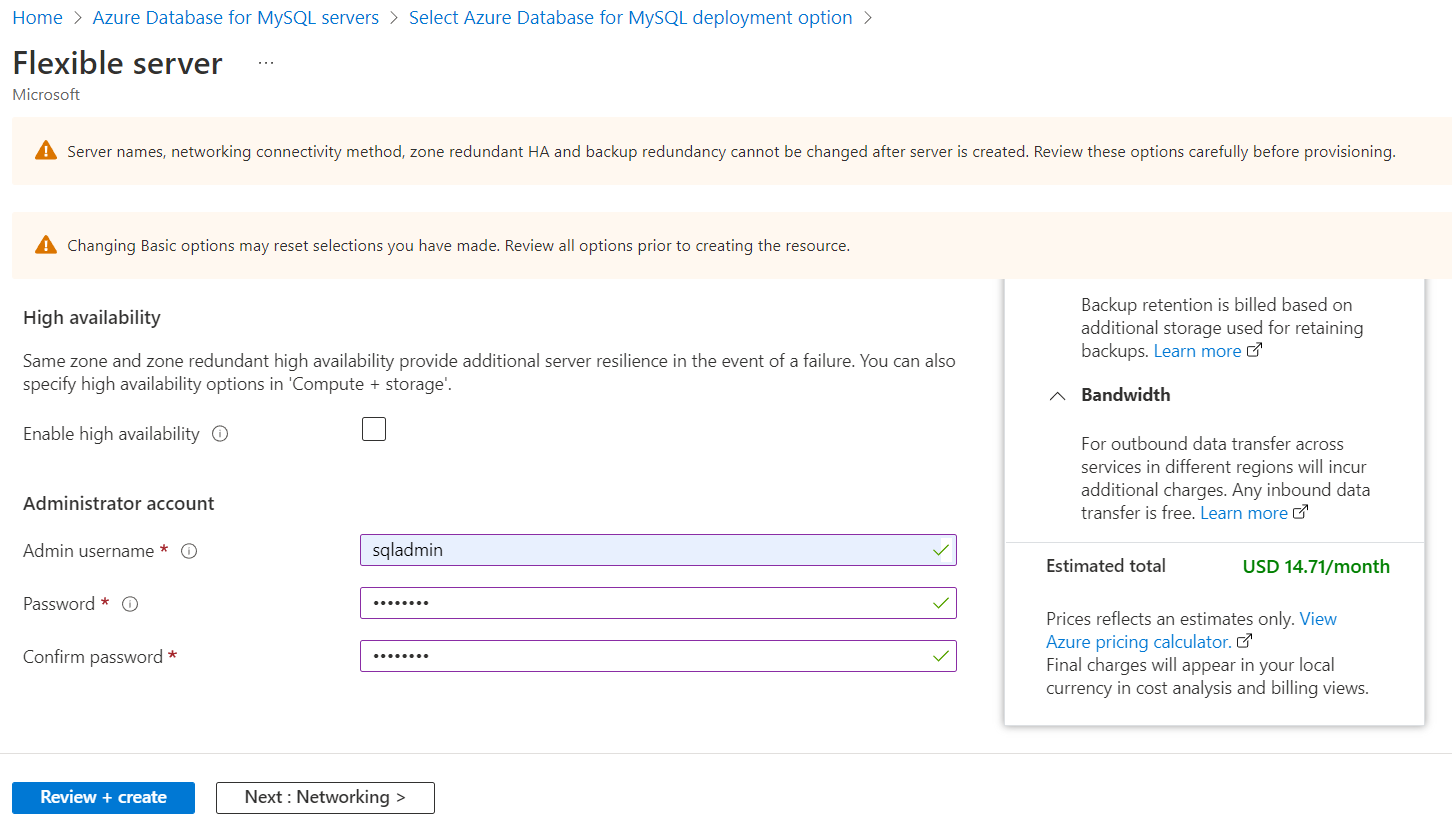
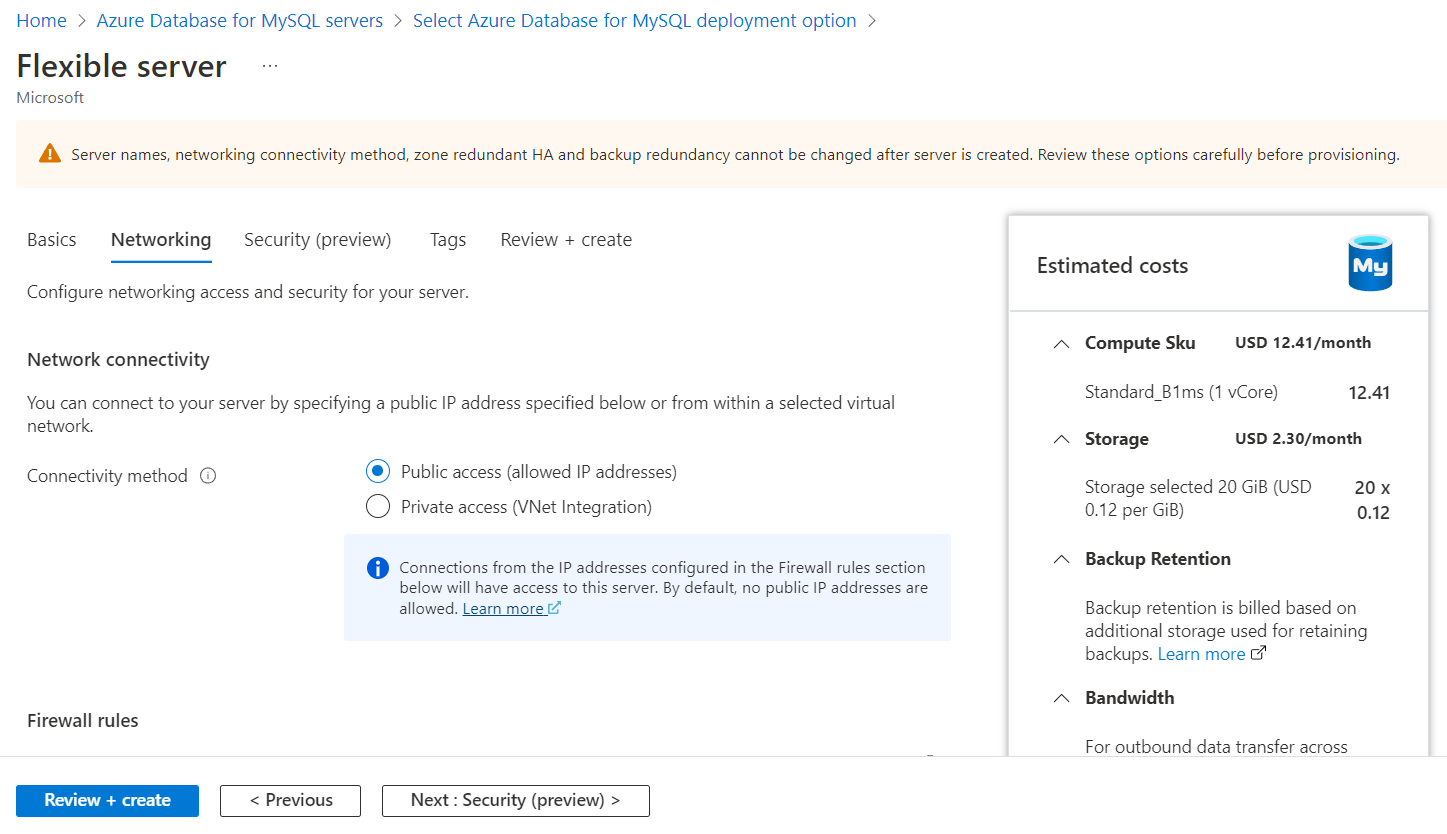
The next step is to configure the network access. One can set up private or public access depending on the requirement. For our use case, we will proceed with the default option. In the firewall rules section, ensure that your machine’s IP address is added to the list of allowed IPs list so that incoming and outgoing connection between your machine and the MySQL instance is allowed. We will need this connectivity to connect from an IDE which will be installed on the local machine to the MySQL instance being created.
The Security configuration option shown below is in a preview state as of this draft and is available only in the Flexible server. If one faces challenges in configuring this feature or is not well versed in configuring these details, one can opt for the single server option and follow the same steps shown above. In the single server option, one won’t need to configure this security-related option. This feature is not required for us to try out the MySQL foreign key feature.

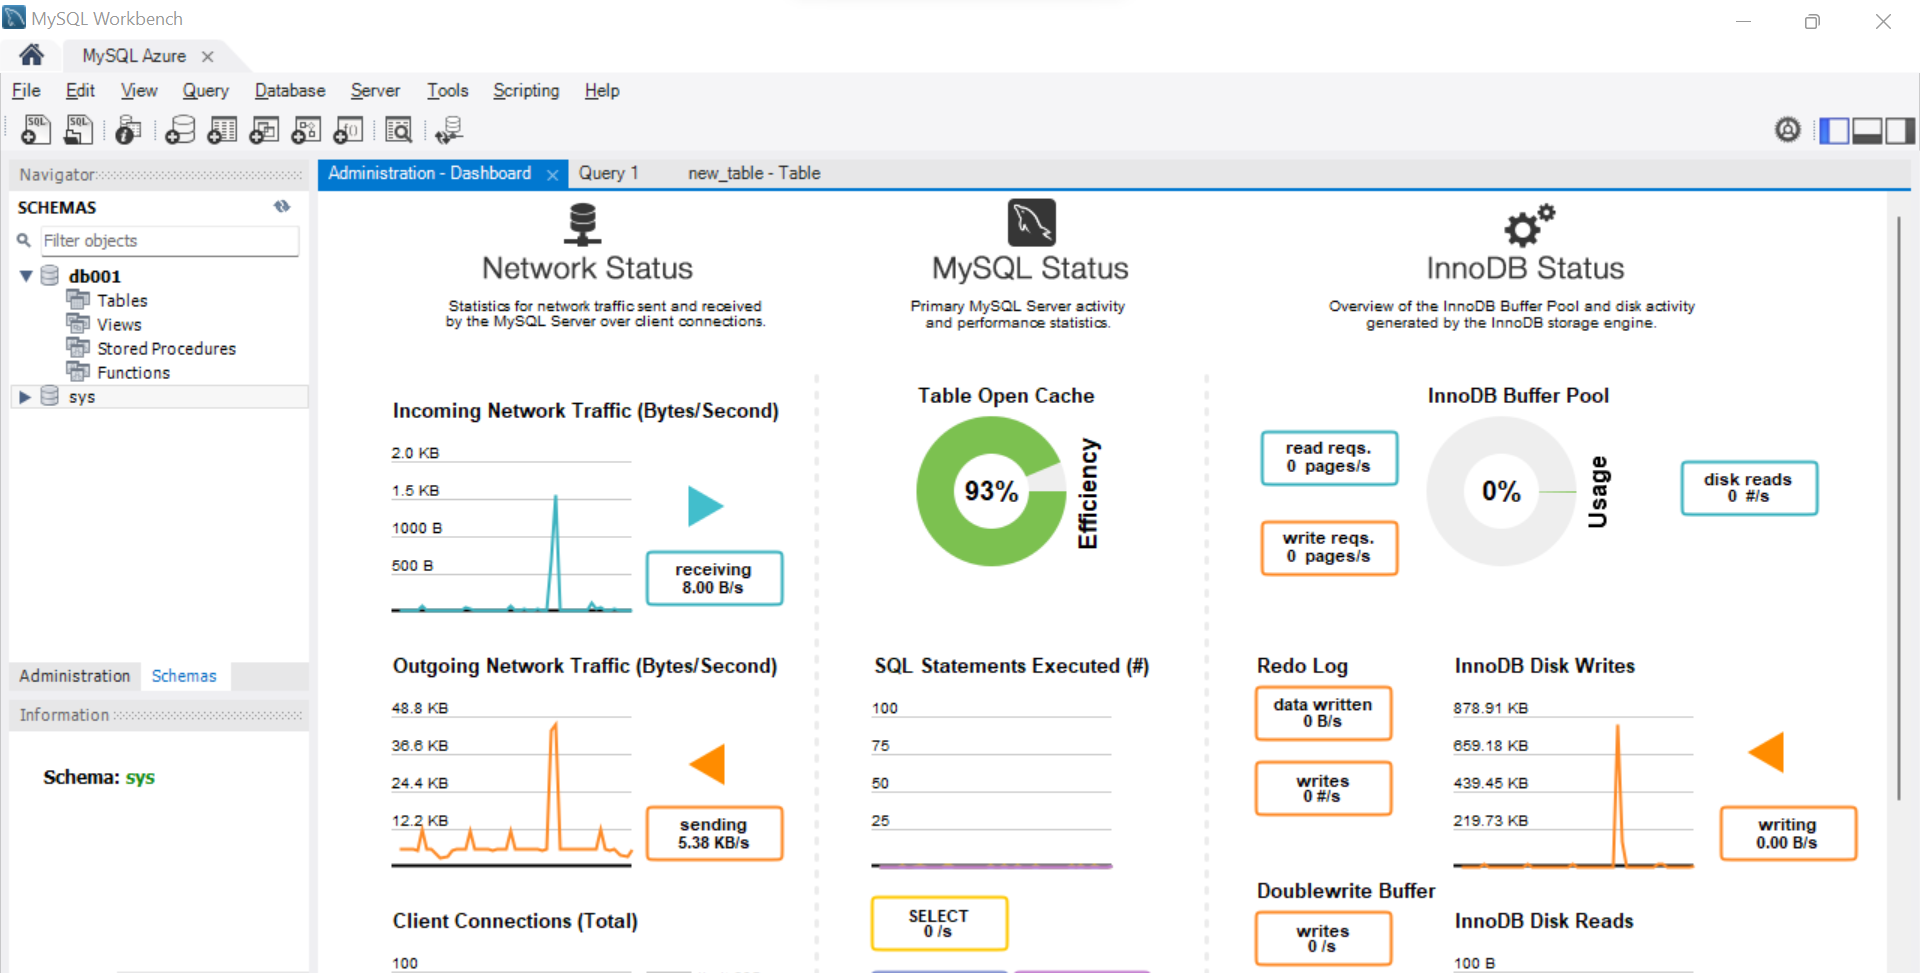
Once this is configured, navigate to the instance and you would be able to see all the details. Now we intend to create a set of tables with foreign keys. For this, we would need to execute several SQL statements which are typically done using a query editor. MySQL Workbench is one of the most popular query editors for MySQL. It is available freely and can be downloaded on a local machine to connect to the instance we just created. It is assumed that this setup is already available, and you are connected to the MySQL Instance. Once you open the MySQL workbench and connect it with the instance, the dashboard of the instance would look as shown below.
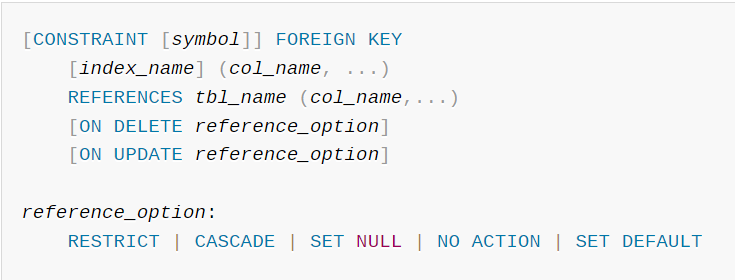
Before we start executing the DDL command to create tables, let us look at the syntax of adding MySQL Foreign Key constraint as shown below. As we can see, when we add a foreign key constraint to a table, we can optionally specify the action to be taken when a referenced record is updated or deleted in the parent table. We will look at these options through an example soon.
Let’s start to create the database object constructs which will lay the foundation for our MySQL foreign key examples. The first step is to create a new database using the create database command as shown below. Once the database is created, we can execute the USE command as shown below to make it the active database, so that all the queries we execute would be in the context of this database.

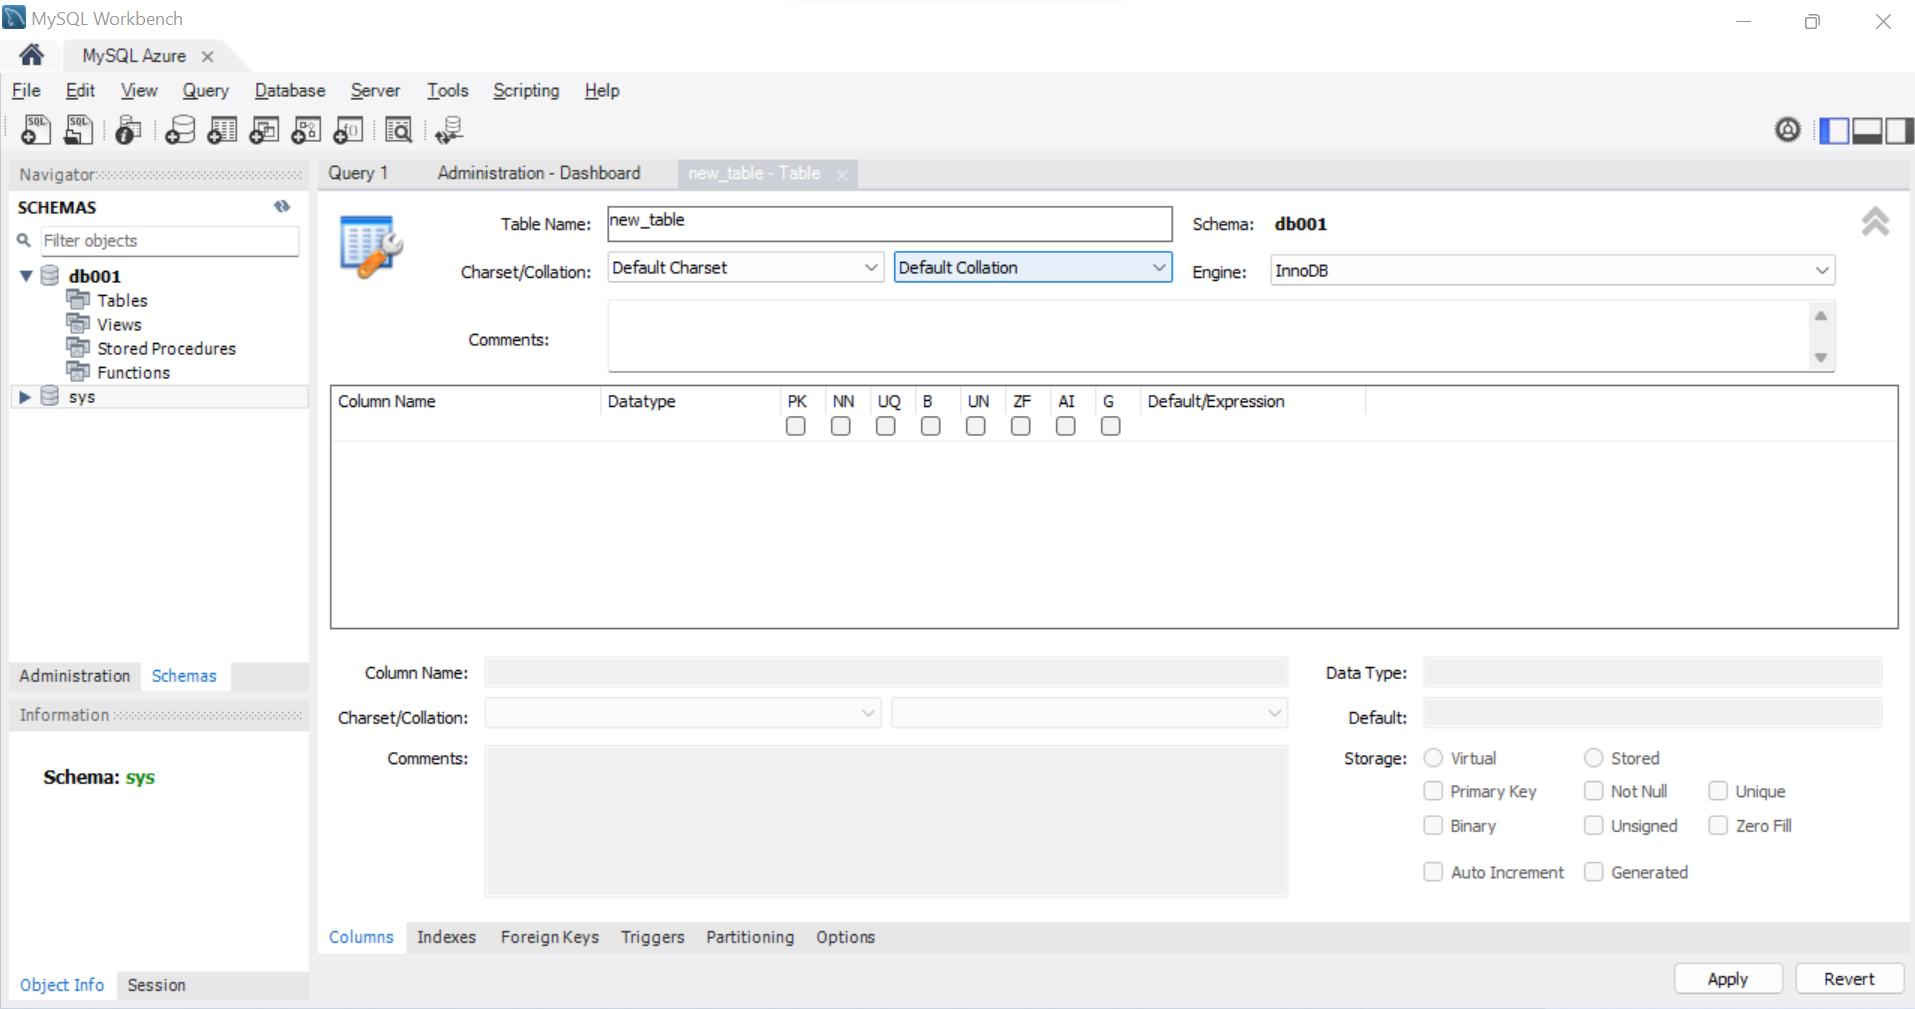
In MySQL, the database is treated as schema also. So, when you expand the schema section, you would find the name of the database listed under it. We need to create a set of master and child tables and associate them with a MySQL foreign key. There are two ways to create a new table, either using the graphical designer of the MySQL workbench tool as shown below or using the commands.
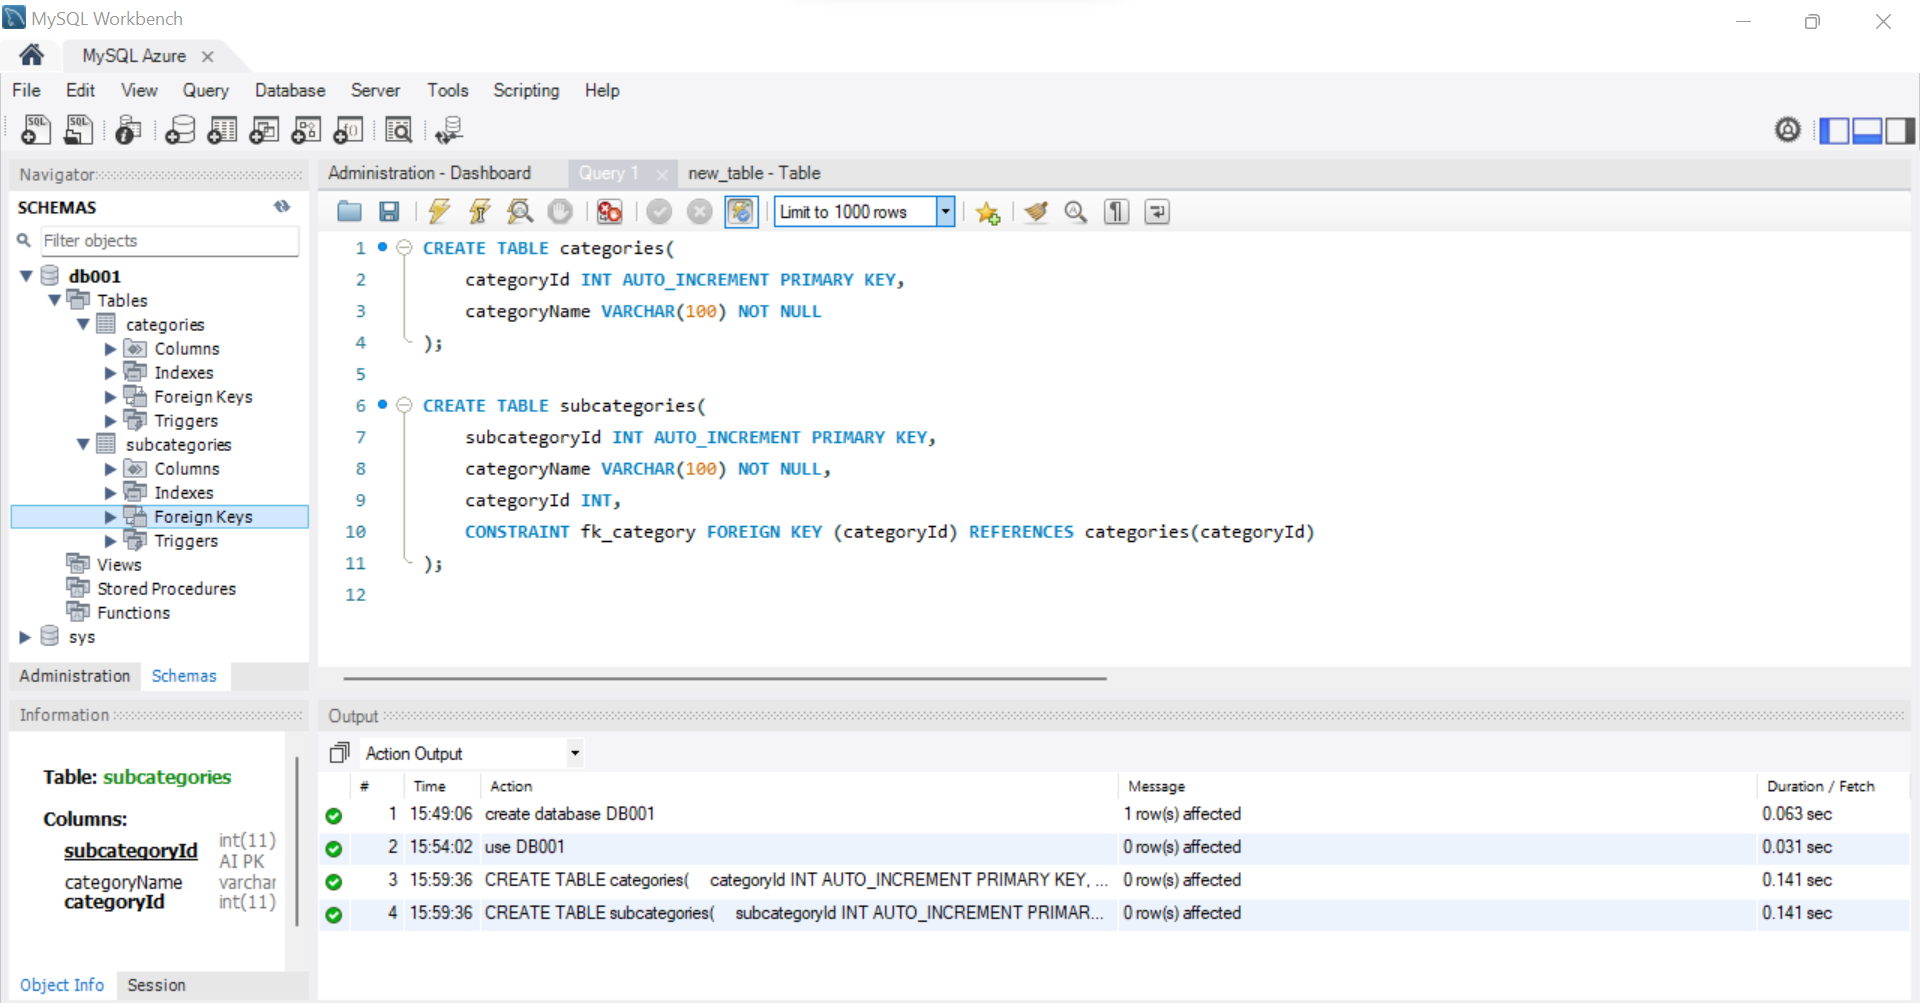
We can create both tables using the CREATE TABLE command as shown below. The first command creates a table named categories with two fields. The field CategoryId is the primary key with auto-increment set to on. The second field hosts the name of the category. This table is treated as the master table. The child table is the subcategories table, which has similar fields for subcategories and an additional field named CategoryId. This field is the foreign key. To make this field the foreign key, i.e., the values in this field should be referenced from the master table, we need to add a Foreign Key constraint to it, which is shown in the last line of the command. We are adding a constraint using the CONSTRAINT keyword, the type of constraint is Foreign Key which means the MySQL Foreign Key and using the REFERENCES keyword we are specifying that this field is being referenced from the master table categories.
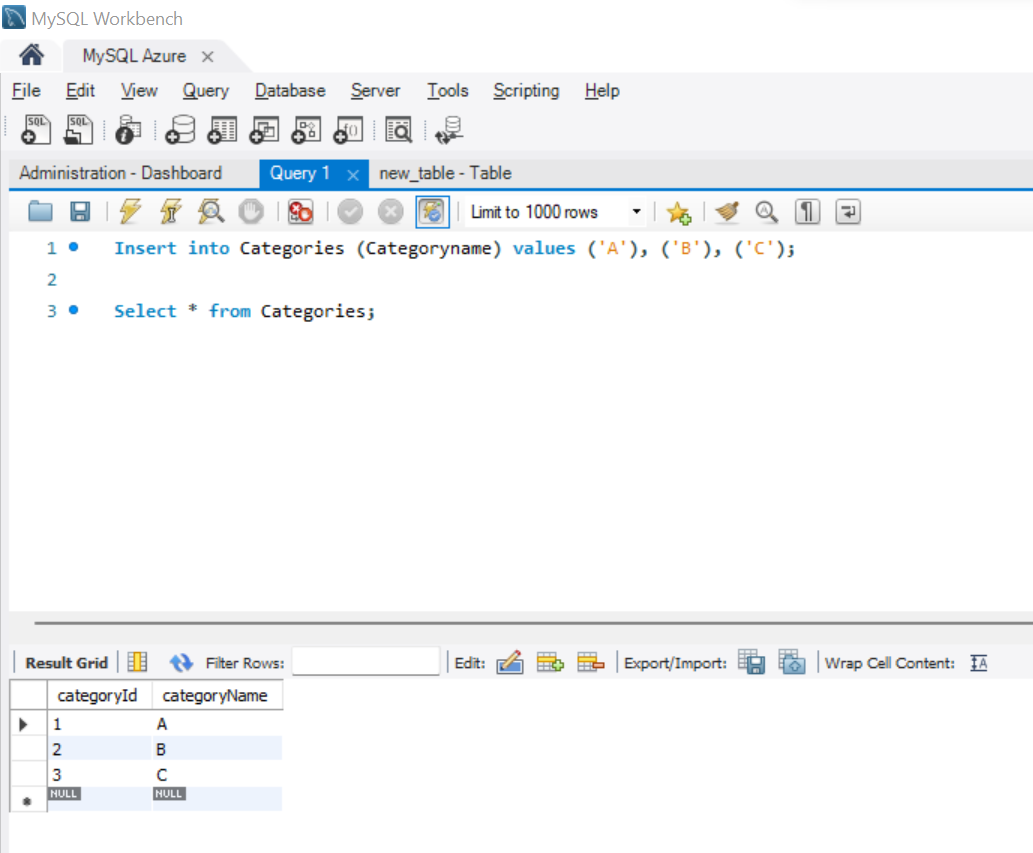
It’s time to test whether the foreign key is working. Insert a few values in the master table as shown below. Here we have added three values to the master table categories.
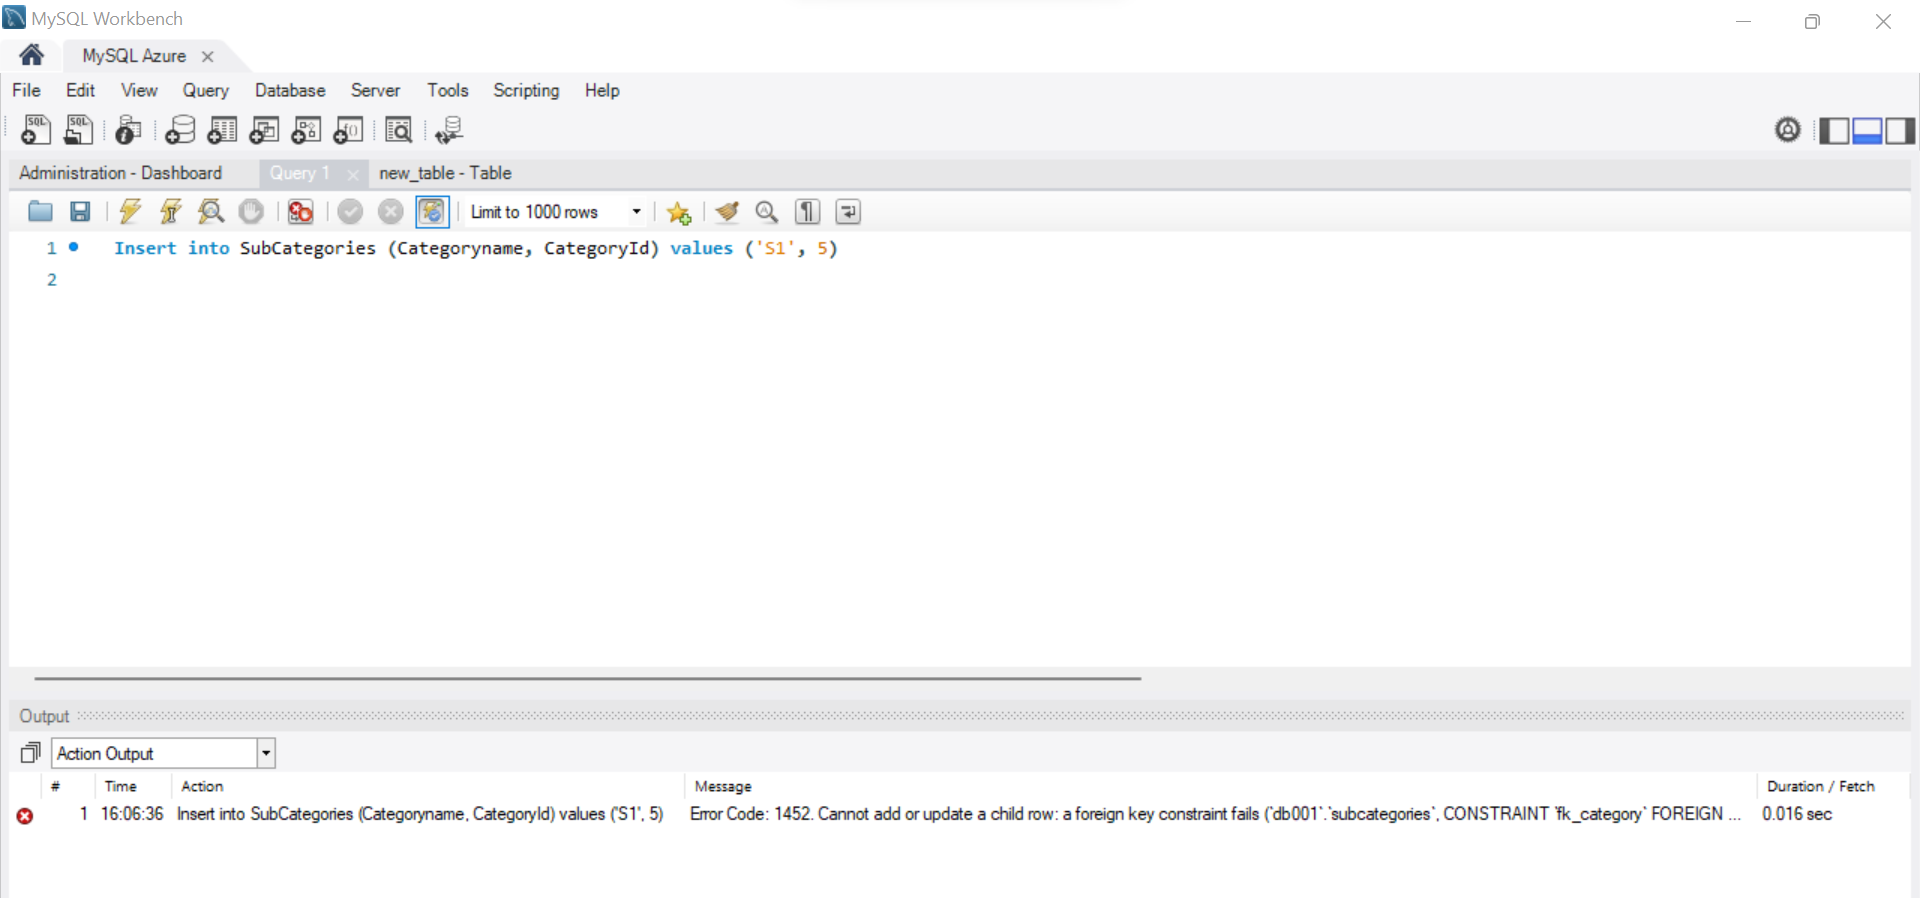
Let’s try to insert a record in the child table subcategories, using a CategoryId that is not present in the master table. When we execute the insert command using such a value, we would encounter an error as shown below. The reason is that the MySQL Foreign Key constraint is violated with such a value, hence the table won’t accept inserting this record.
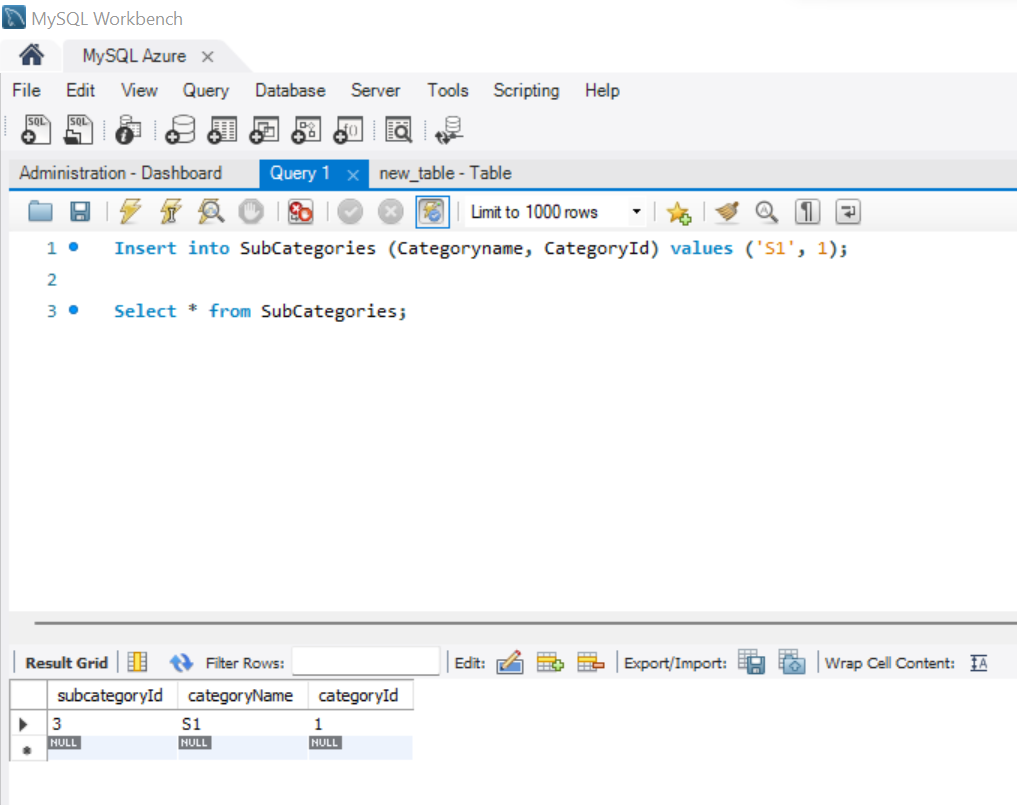
When we attempt to add a record with a CategoryId that is present in the master table, that value would go through successfully, as shown below, as the MySQL Foreign Key is being honored in this case.
If we right-click on the table from the explorer window and look at the table properties, we can see that we would get the option to change the update and delete related actions. This can also be done by altering the DDL of the table. Let’s say that we want to delete corresponding records from the child table when a table from the master record gets deleted. In that case, we can update the On Delete action and set it to the value Cascade as shown below.
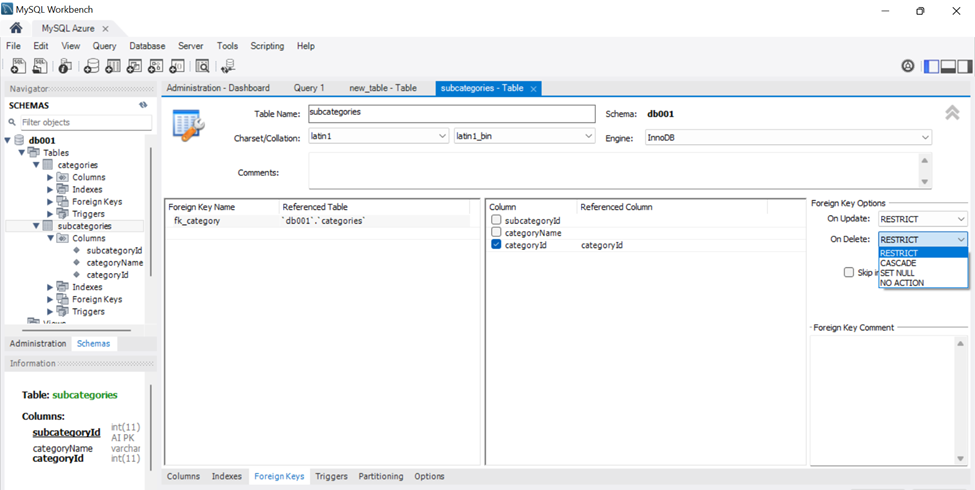
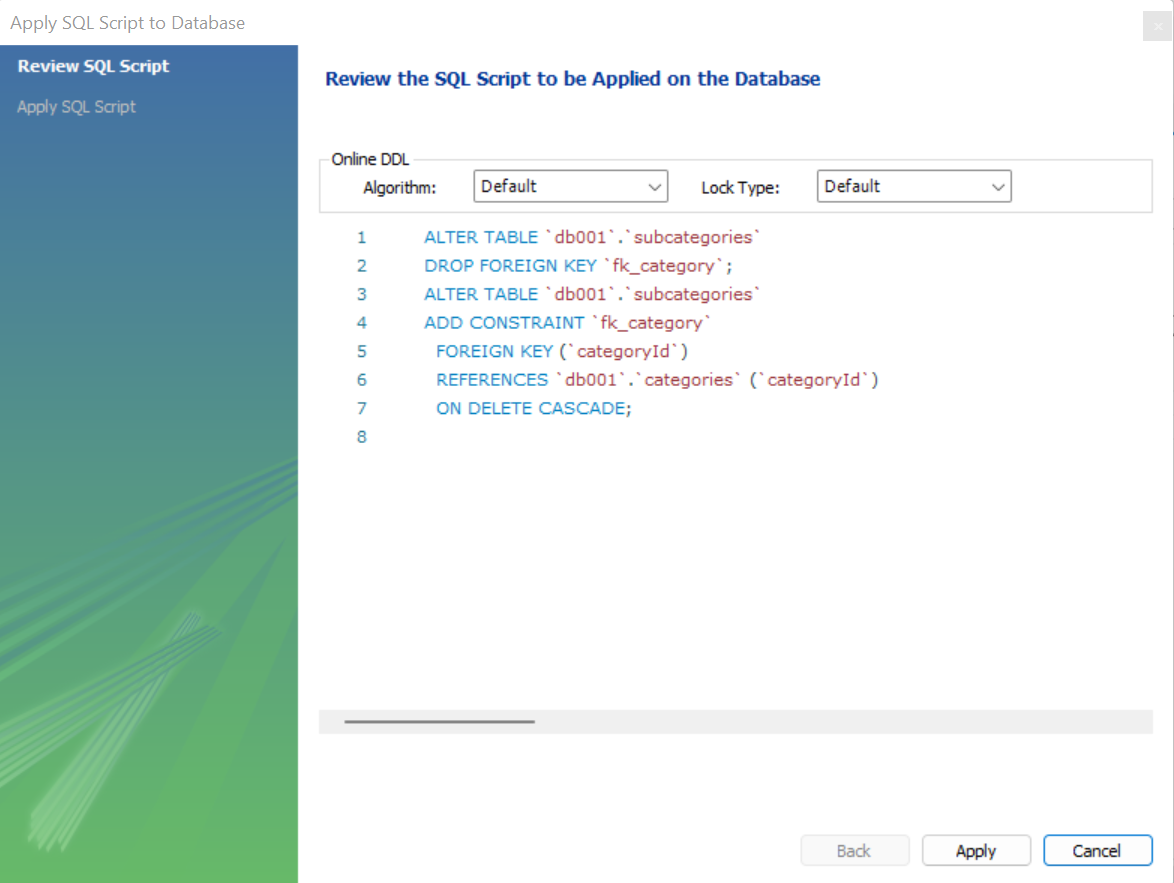
Once we apply this, we would be shown the DDL that automatically gets generated here. Now the MySQL Foreign Key constraint for this table would get updated, and the ON DELETE CASCADE keyword would get added to it. Click on Apply to add this criterion.
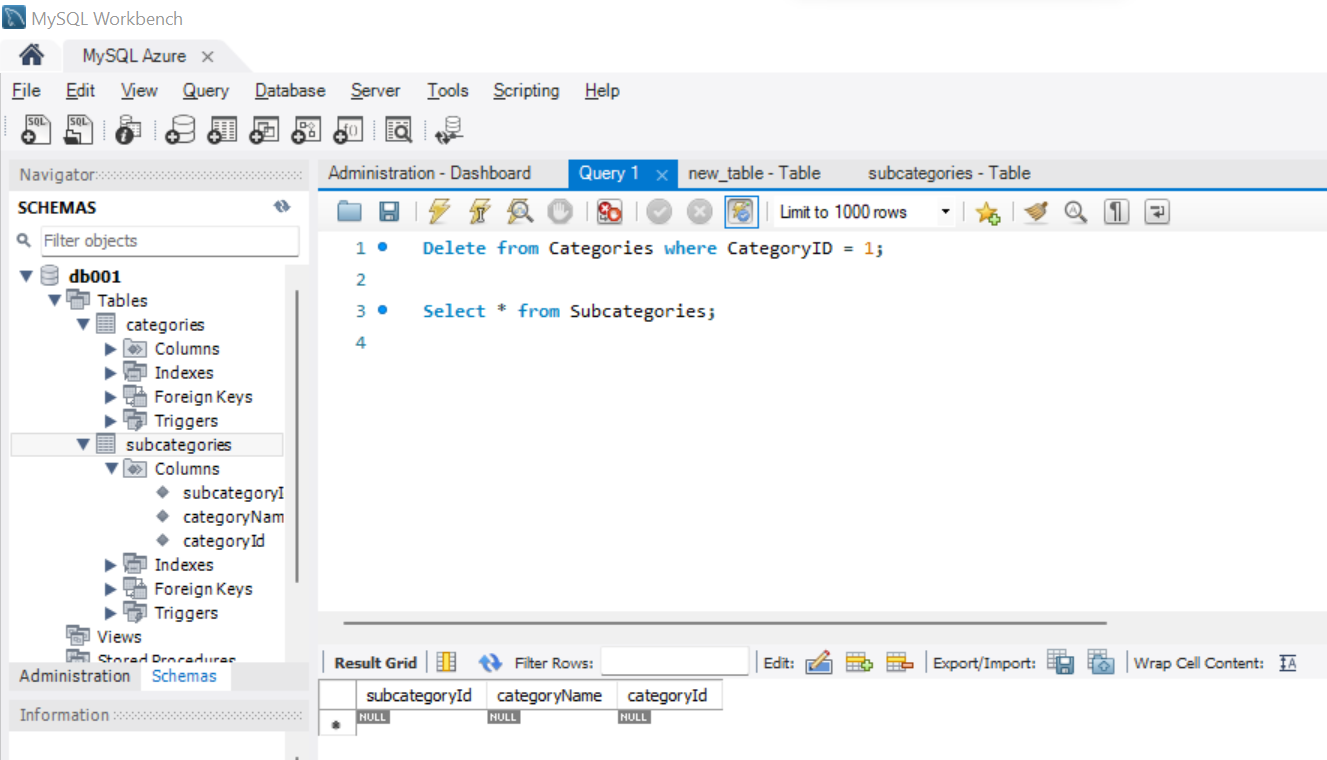
Now attempt to delete a record from the master table categories, and you would find that the corresponding record in the child table has got deleted automatically, as shown below due to the cascading action that we applied on the MySQL Foreign Key.
In this way, we can use the MySQL Foreign Key constraint and maintain the referential integrity of the data between database objects in MySQL.
Conclusion
In this article, we learned the concept of foreign keys and learned how to maintain the referential integrity of the data in MySQL using the MySQL Foreign Key constraint.

She has a deep experience in designing data and analytics solutions and ensuring its stability, reliability, and performance. She is also certified in SQL Server and have passed certifications like 70-463: Implementing Data Warehouses with Microsoft SQL Server.
View all posts by Gauri Mahajan
- Oracle Substring function overview with examples - June 19, 2024
- Introduction to the SQL Standard Deviation function - April 21, 2023
- A quick overview of MySQL foreign key with examples - February 7, 2023