
There are several advantages to using Azure storage irrespective of type. Azure storage is easily scalable, extremely flexible and relatively low in cost depending on the options you choose.
There are 4 types of storage in Azure, namely:
- File
- Blob
- Queue
- Table
For the traditional DBA, this might be a little confusing. In this article, I will explain the different types of storage and when each of them should be used.
Disk Types
Azure offers 2 types of disk storage:
-
Managed
Managed disk has some advantages over unmanaged disks in the sense that disks will be created and managed for you. This is a IaaS offering.
-
Unmanaged
With unmanaged disks, you must manage it yourself. Basically, this means that your virtual hard disks are stored in a storage account as page blobs.
And two types of disks:
-
Premium
Which means your data will be placed on solid state disks
-
Standard
Where data is placed on regular hard disk drives
As shown below, you choose the type of disks you want by selecting either Standard or Premium when creating your storage account.
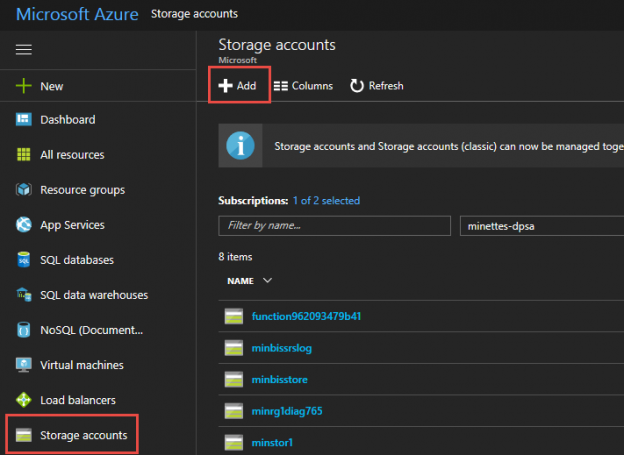
How to create a storage account
In the Azure portal ➜ click on Storage Accounts ➜ then on Add

Figure 1: Storage Account
Fill in all required fields and choose the relevant options:
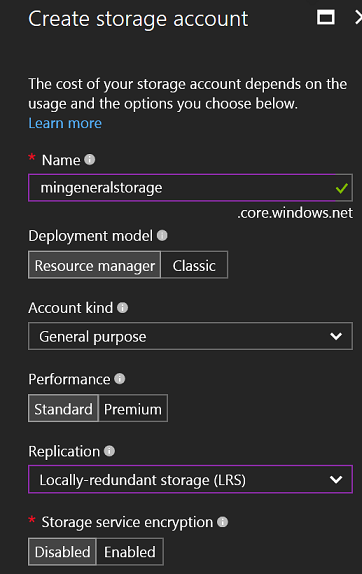
Figure 2: Create Storage account part 1
-
Name
The name of your account.
-
Deployment Model
If you have legacy programs which might access this account, choose classic. For the purpose of this article we will use resource manager.
-
Account Kind
There are 2 kinds of accounts: General purpose accounts which you can use for any storage type, including blobs, and blob accounts which are specifically for blobs. Unlike the general storage account, you can set hot or cold service tiers for blob storage.
-
Performance
Depending on what you want to do with the storage, you can choose Standard which is on HDD or Premium which is on SSD. Obviously, the latter incurs a higher cost than the former.
-
Replication
This has to do with how redundant you want your data to be. For the purpose of this article I am using locally redundant storage. This topic is however beyond the scope of the article, but you can read more about storage redundancy in this link.
-
Encryption
This allows for your data to be either encrypted or not. Encryption is always a good policy, but in this case I will go without.

Figure 3: Create storage account continued
-
Subscription
Your subscription name.
-
Resource group
You can create either a new resource group or reuse an existing one.
-
Location
In which region, would you prefer your data to be?
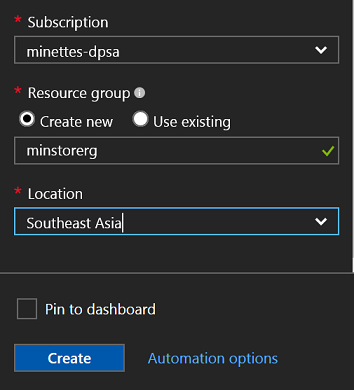
The click on Create. And you are all set.
Blob Storage
The word blob is an acronym which stands for binary large object. Blobs typically include large files that are unstructured, such as images, video, music files, backup files etc.
Blob storage can be divided into two access tiers, a hot access tier for data which is accessed frequently and a cold access tier for data which is not accessed very often.
The cold access tier is cheaper than the hot access tier and as such you can store more data at a lower cost, it is also slightly less available, like 99% as opposed to the 99.9% of the hot storage tier.
It’s also possible to switch between access tiers at any point if you wish to do so.
There are essentially 3 different types of blobs (in a nutshell):
-
Block blobs
As suggested by the name, block blobs are made of blocks. Each block has a block ID. Blocks can be different sizes, potentially up to a maximum of 4.75TB. Block clients are set to 32MB size block by default, but this can be configured using the SingleBlobUploadThresholdInBytes property.
Block blobs are optimized for data streaming, and has some features which helps you to manage blobs such as an MD5 hash for verification or parallel uploads.
-
Append blobs
Append blobs are used to append data. Basically, this means that each time you make changes to the blob, the data will be appended at the end of the blob. Data cannot be changed or deleted, only appended.
-
Page blobs
A page blob consists out of pages. A page is 512 bytes, and the blob can go up to 1 TB in size.
This is typically used for fast read and write operations.
You must choose the type of blob when you create the blob and unfortunately once the blob is created it’s not possible to change it to a different type.
Create a storage blob
Click on the storage account and the select Blobs as the type of service you want.
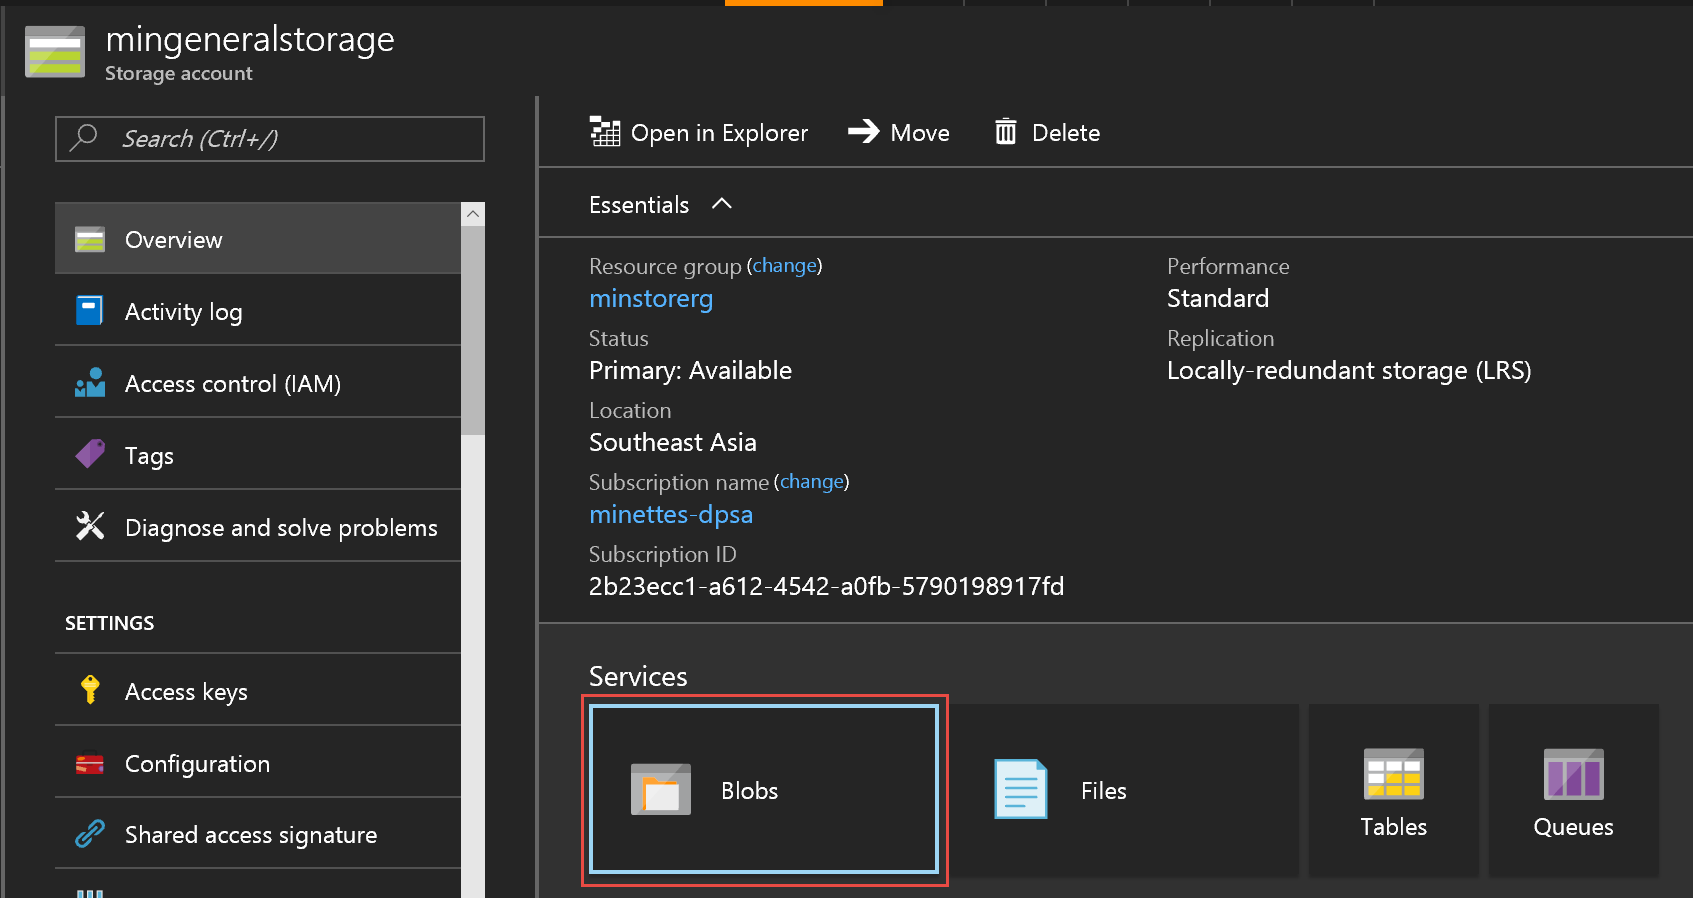
Figure 4: Blob storage
On the Blob service screen:
- Click on + Container
Then enter the:
-
Name
The name of the blob
-
Access Type
There are 3 possible access types:
-
Private
This is the default. Data is only available to the account owner.
-
Blob
This enables read access publicly.
-
Container
Allows list and read access to the entire container.
-
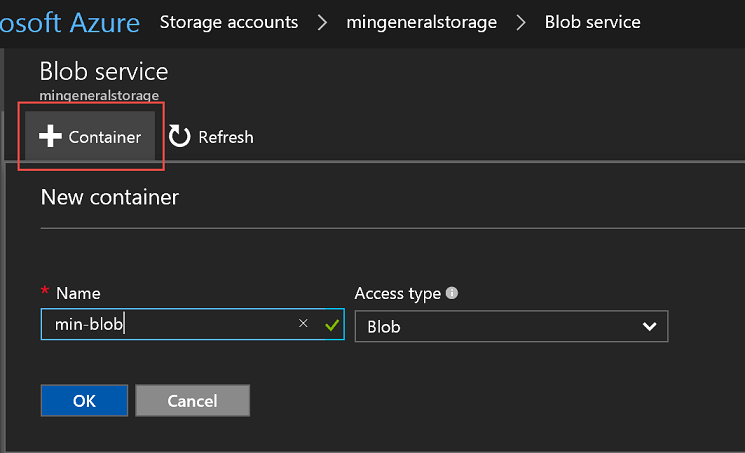
Figure 5: Blob service
Queue Storage
Queue Storage is somewhat like MSMQ. It allows you to decouple your components and have reliable asynchronous communication. In Azure Queue Storage, the number of queues is only limited by the capacity of the storage account.
Queues and messages can be created programmatically or using the Storage Explorer tool.
Queue storage consists out of the following components:
-
Account
This is your Azure Storage account which contains your queue storage.
-
Queue
These are groups of messages; you can create multiple queues for different purposes. Queue names must be in lowercase.
-
Message
This is a message placed in the queue to be processed. A message can be up to 64KB each.
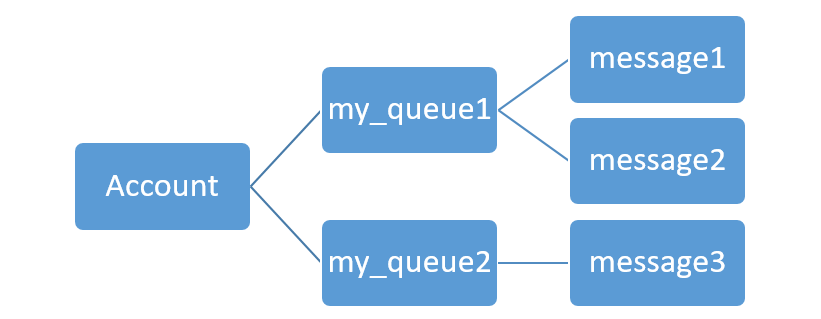
Figure 6: Queue Storage
Table Storage
Table storage is used to store semi-structured data in a key-value format in a NoSQL datastore. Azure table storage can store petabytes of data, can scale and is inexpensive. Table storage can be accessed using REST and some of the OData protocols or using the Storage Explorer tool.
Table storage has the following components:
-
Account
This is the storage account where you wish to save your tables.
-
Table
This is not a traditional table in the sense of a transactional database, this is rather a schema-less collection of entities. Table names must be unique in your account and cannot be more than 63 characters.
-
Entity
An object which consists out of properties. Each entity has a partition key, a row key and a timestamp by default. An entity can store 252 properties. An entity can have a maximum size of 1MB.
-
Properties
The properties are the key-value pairs. A property name must not be longer than 255 characters and is case sensitive.
The following types are supported for properties:
| Common Language Runtime type |
| Byte[] |
| Bool |
| DateTimr |
| Double |
| Guid |
| Int32 or int |
| Int64 or long |
| String |
File Storage
Azure file storage makes it easy to move applications which depend on regular file shares to the cloud. File storage uses the SMB 2.1 or 3.0 protocol and can be accessed by multiple applications simultaneously. There are some SMB features which are not currently supported. For a complete list, see this link.
File storage encompasses 4 component types:
-
Account
This is your Azure storage account, in which you created your main file share.
-
Share
File shares created in the main file share. Share names can be 63 characters long.
-
Directory
Any hierarchy of folders and directories. Directory names can be up to 255 characters long.
-
Files
Any files uploaded to the share, to a maximum size of 1 TB.
Create a file share
To create a file share, click on your storage account and select Files as the type of service you want.
On the File service screen:
- Click on + File share
Then enter the:
-
Name
The name you want to give the file share
-
Quota
The quote you want to allocate to the file share. This can be anywhere from 1 GB to approximately 5 TB.
- Click on OK.
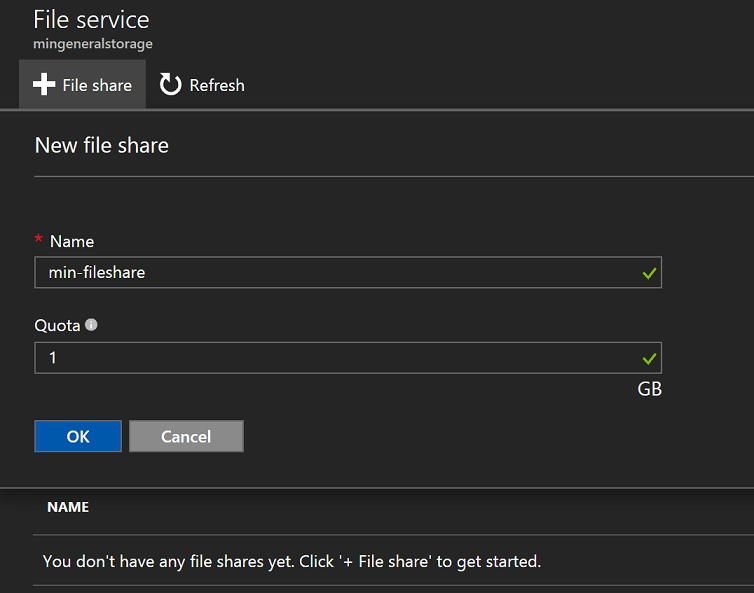
Figure 7: File Share
You can then proceed to click on the file share and create directories or add files just as you would with a normal file share.
Storage Explorer Tool
To manage the objects on your storage you can use the free Storage Explorer tool. Since this tool is open source, you can also download the source code for it. This tool is currently still in preview and new features are added on a regular basis.
But I find it quite useful since when you are logged into your Azure account, it shows almost all information regarding the account, including the primary and secondary connection strings for each of your storage accounts.
It also allows you to create tables and queues which you cannot do directly in the Azure Portal.
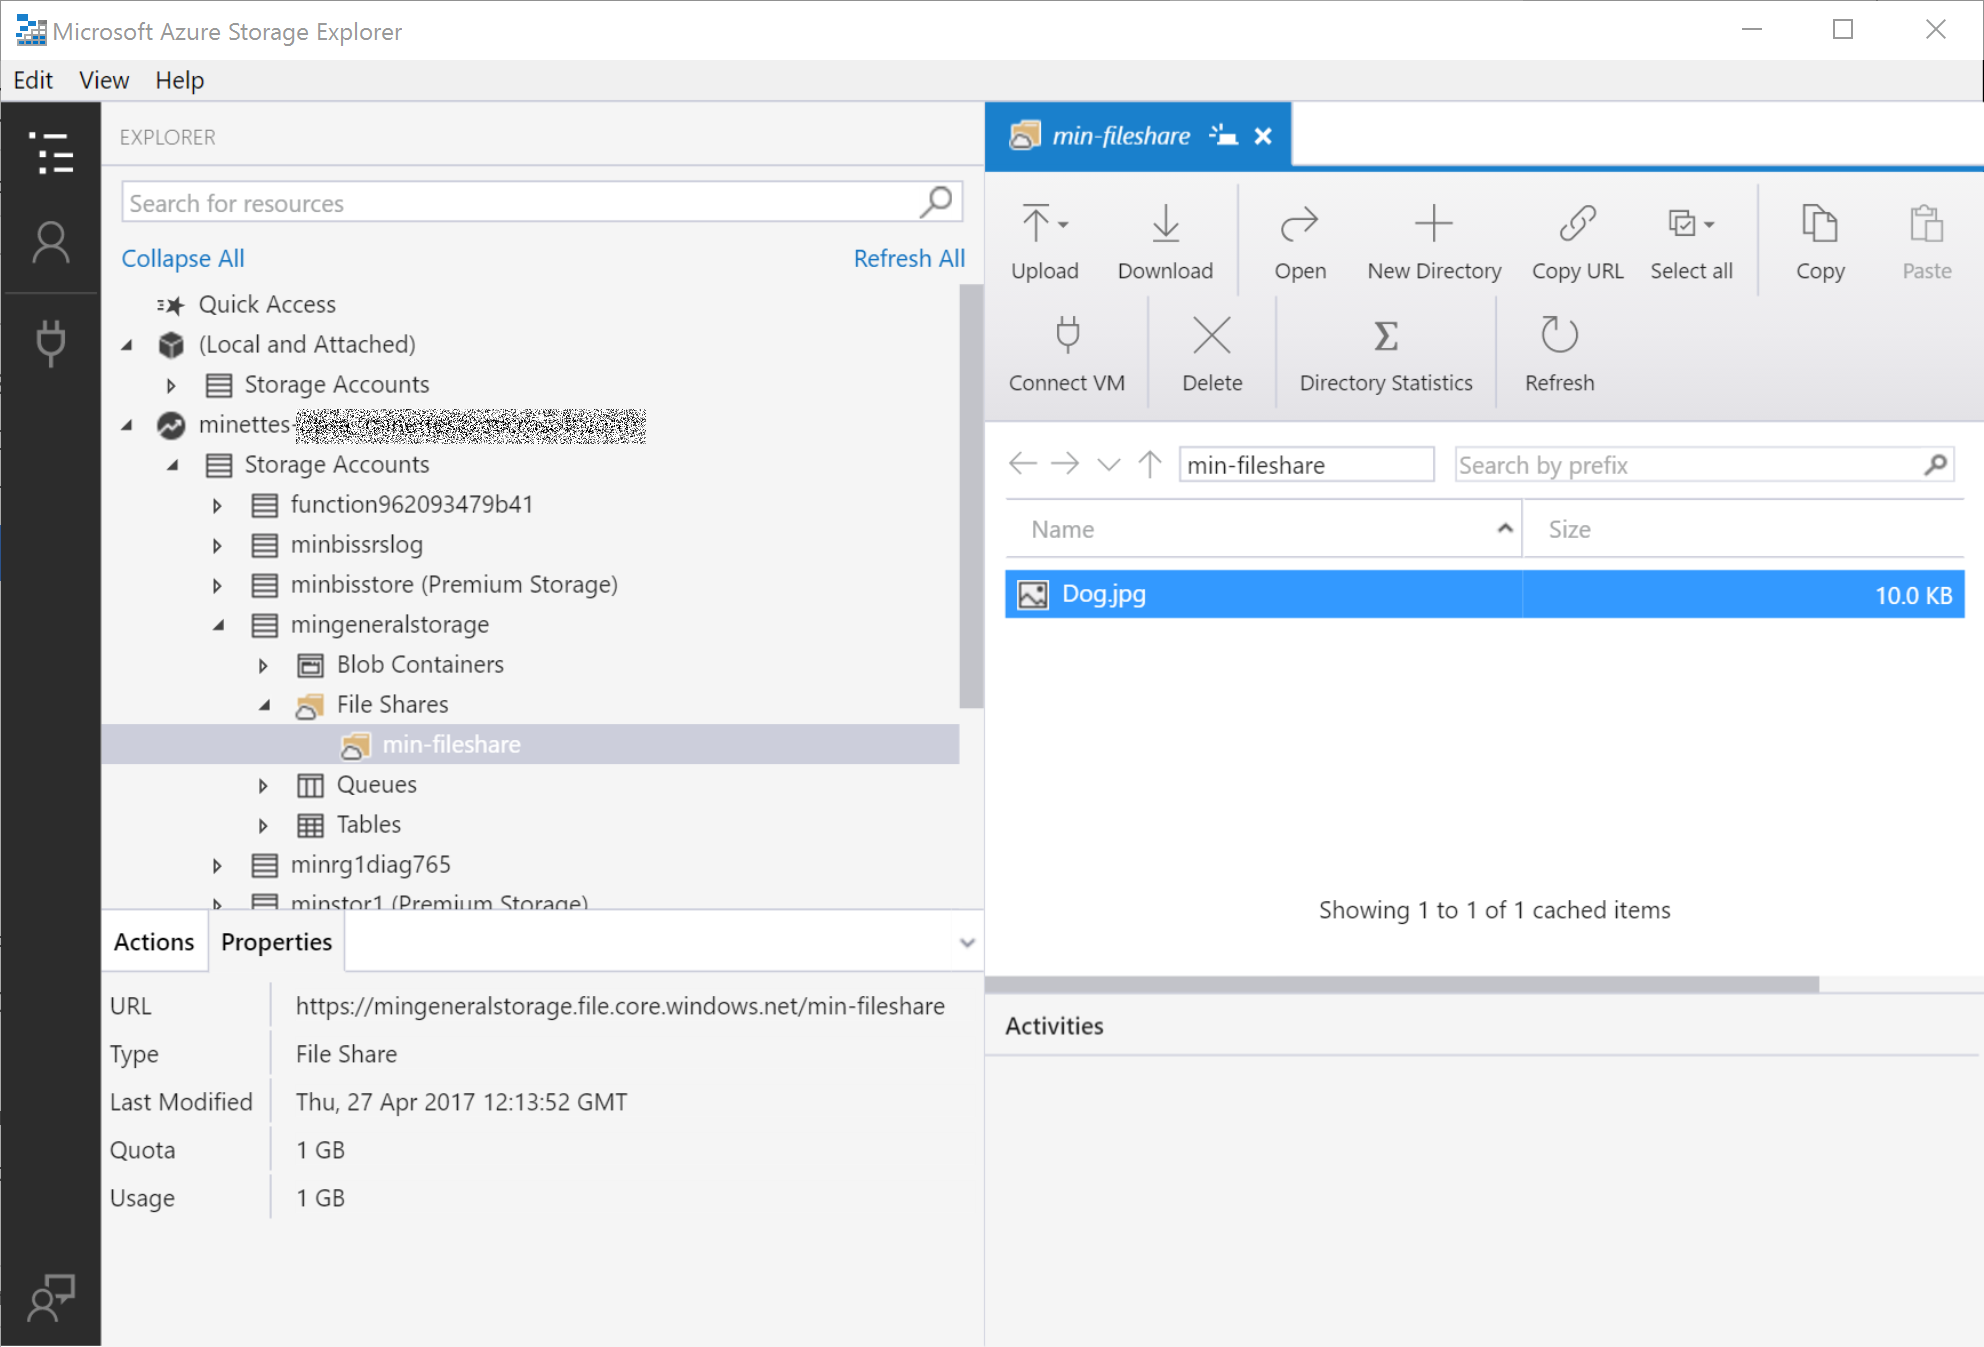
Figure 8: Storage Explorer tool

Minette currently works as a Data Platform Solution Architect at Microsoft South Africa.
View all posts by Minette Steynberg
- The end is nigh! (For SQL Server 2008 and SQL Server 2008 R2) - April 4, 2018
- 8 things to know about Azure Cosmos DB (formerly DocumentDB) - September 4, 2017
- Introduction to Azure SQL Data Warehouse - August 29, 2017