
In this article, we will learn how to configure a newly created Data Explorer pool in Azure Synapse followed by data ingestion into the same pool.
Introduction
In my previous article, Getting started with Data Explorer pools in Azure Synapse, we learned how to create Data Explorer pools in Azure Synapse and the unique value that Data Explorer brings to semi-structured and free-text data. The creation of the Data Explorer pool is the first step in the process. After the pool is created, one can create data structures, ingest data and then use it for consumption. Data Explorer pool interface provides different ways of ingesting data into the pool including one-click ingestion.
Ingesting data in Azure Synapse Data Explorer pool
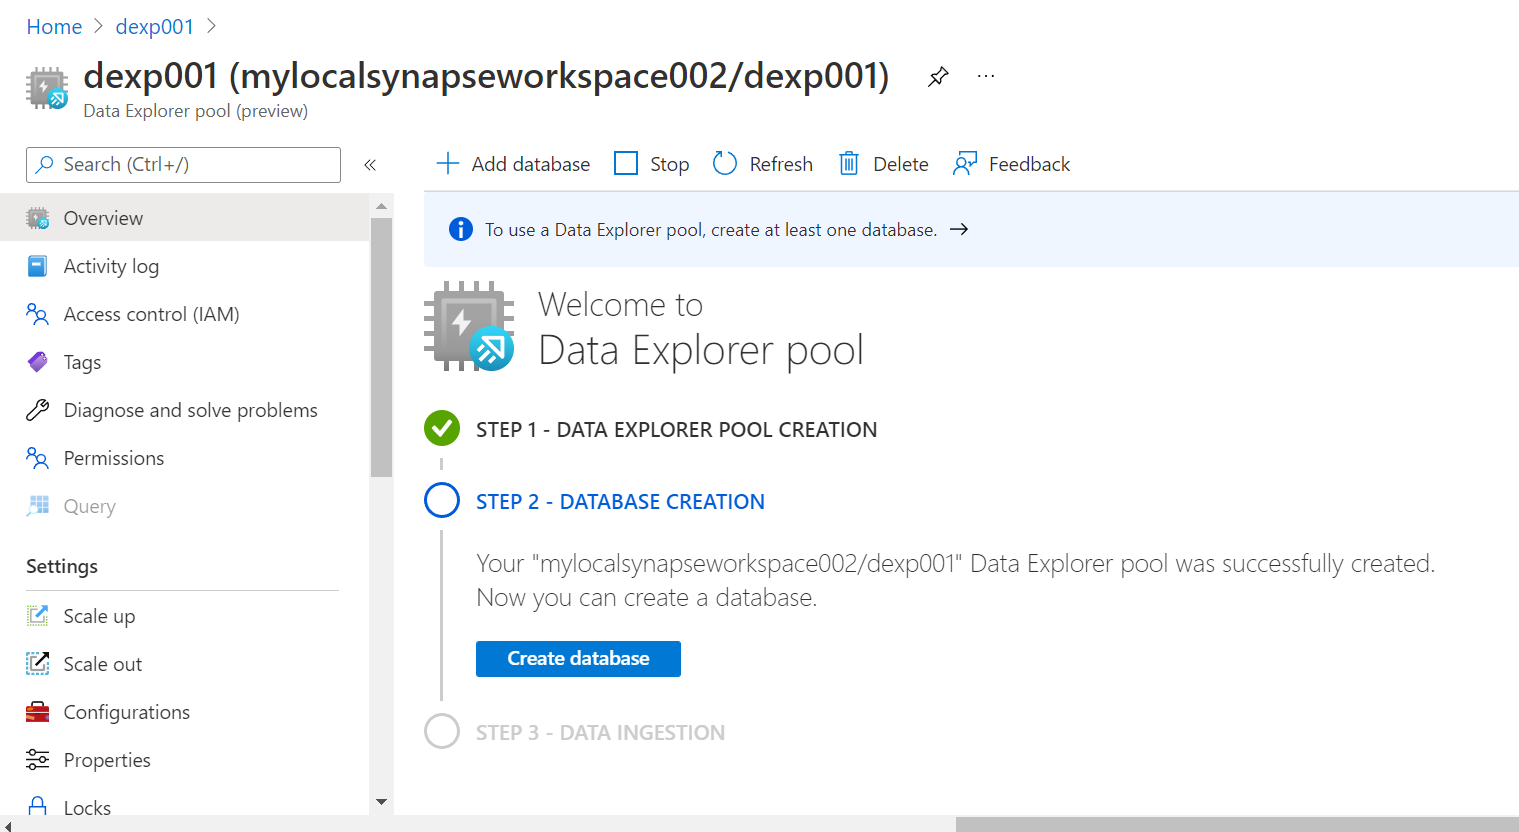
Before we proceed with this exercise, it is assumed that an instance of Azure Synapse as well as an Azure Data Explorer pool is already created as explained in the last article. Once the pool is created, it would look as shown below. The creation of the pool is the first step in the process. Once the pool is created, the next step would be to create a new database in the Azure Data Explorer pool as shown below on the pool dashboard.
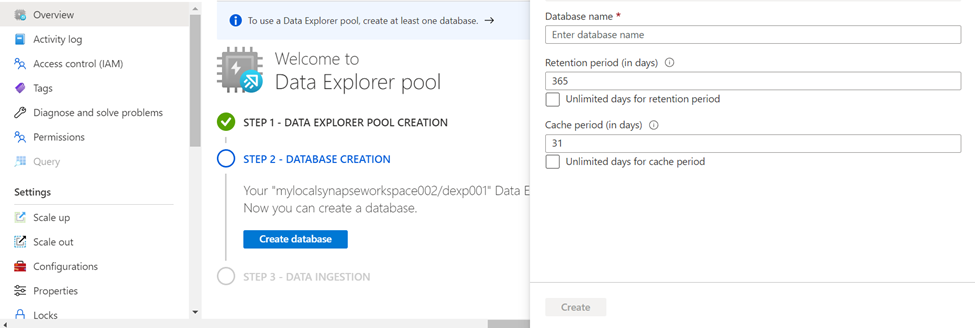
Click on the Create database button to create a new database using the new database creation wizard. We just need to provide basic details – database name, retention period and cache period. These are in units of days and the default value of the retention period is 365 days and the default value of the cache period is 31 days. Provide these values and click on the Create button to create a new database in the Azure Data Explorer pool in Azure Synapse.
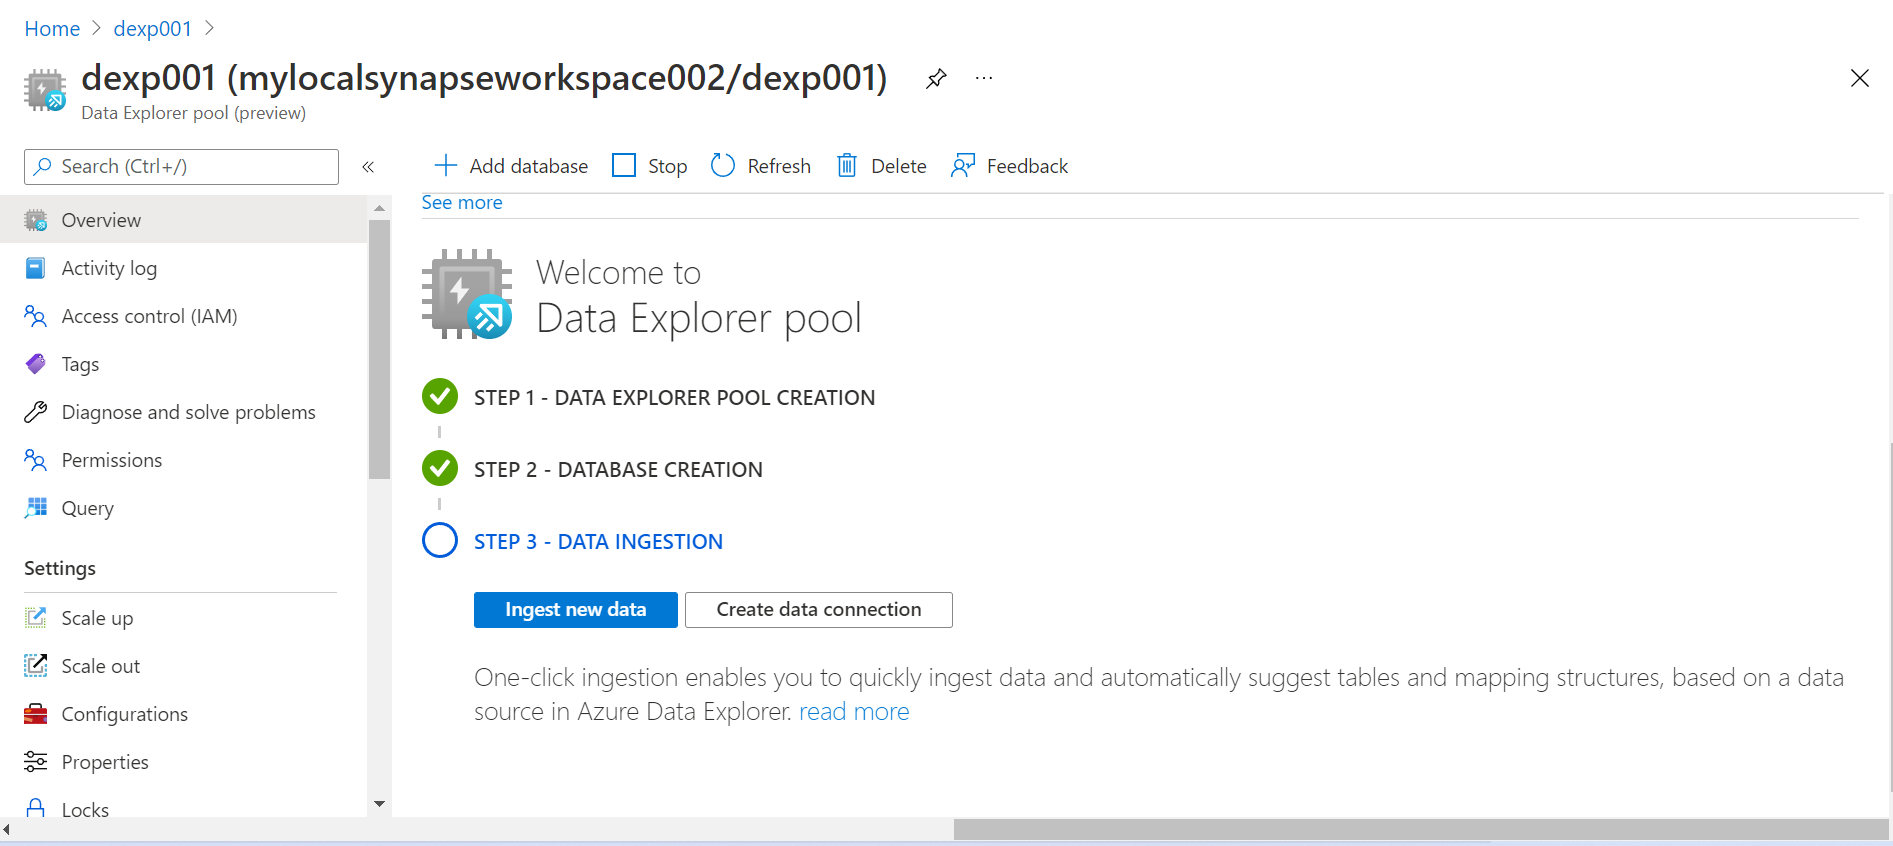
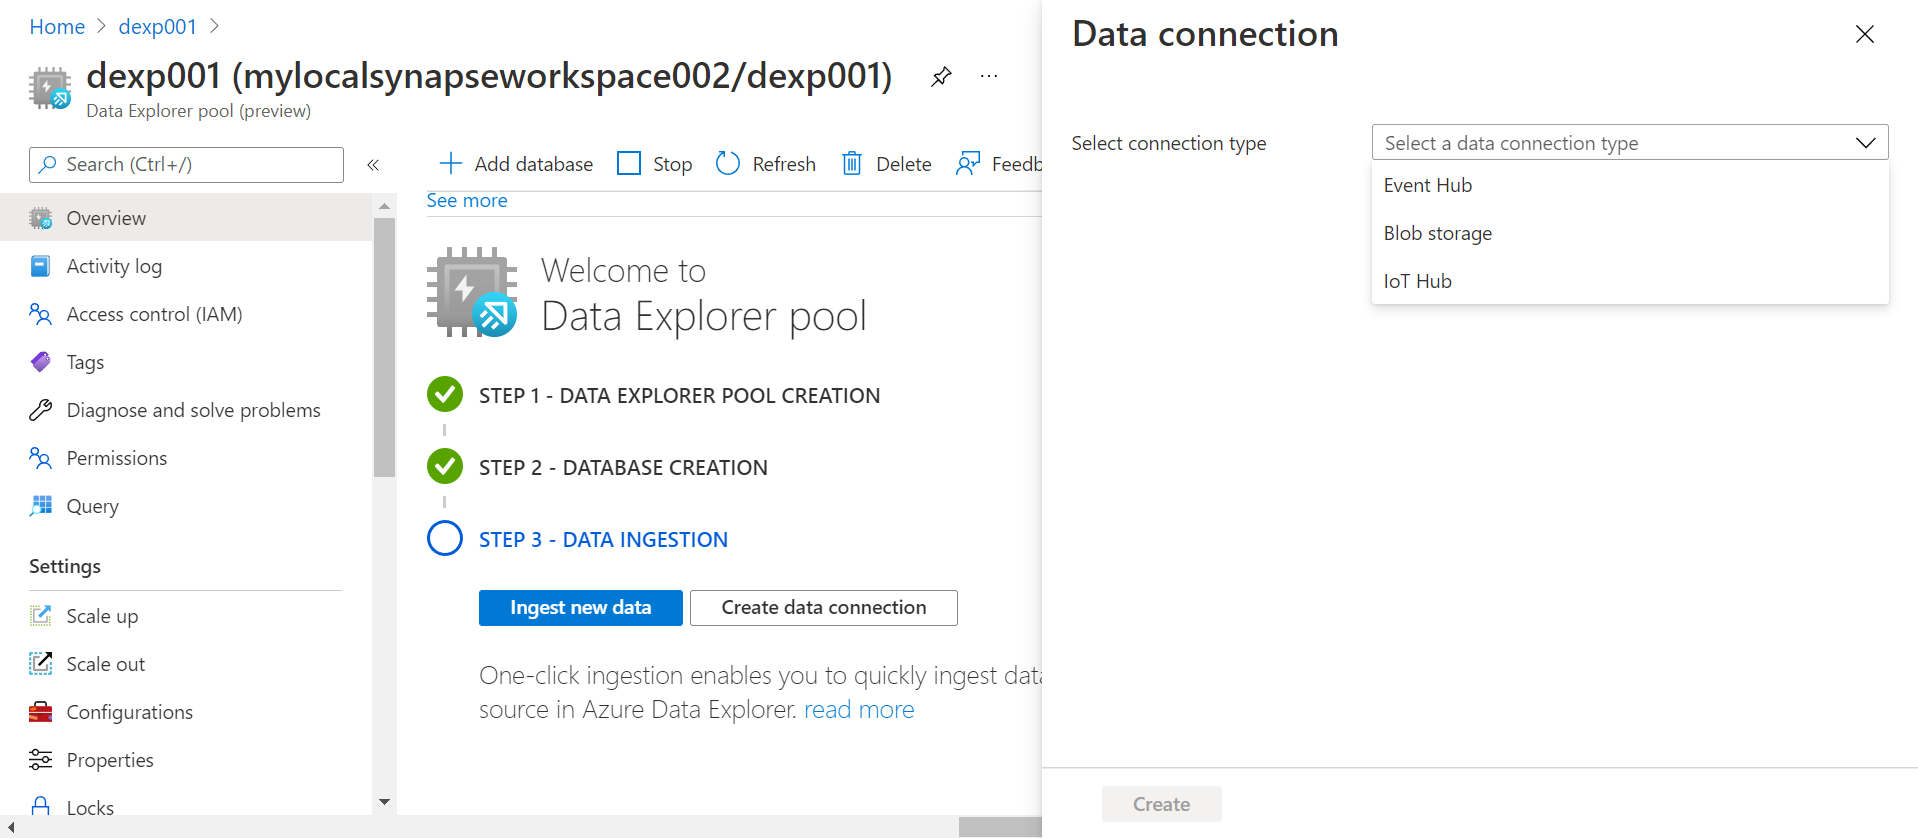
Once the new database is created, the next step is to start creating data structures in it and populate it with data. Once the database is created, we will get two options as shown below. Once is to Ingest new data right away and during the ingestion process create new data structures. Another option is to create a new data connection to another data explorer pool or cluster. Once click ingestion, as mentioned below enables to ingest data automatically and offers a variety of data management features as well.
Click on the Create data connection button and it would open a new screen a shown below. As of the draft of this article, the data explorer pool supports three types of connections which are with Event Hub, Blob Storage, and IoT Hub. These are sources of data that typically deliver data in semi-structured formats like JSON, CSV, parquet and other such formats. For now, we will not focus on creating new connections with these sources, instead, we will focus on ingesting new data from Azure Data Lake Storage which generally is the primary data source in a Data Lake scenario.
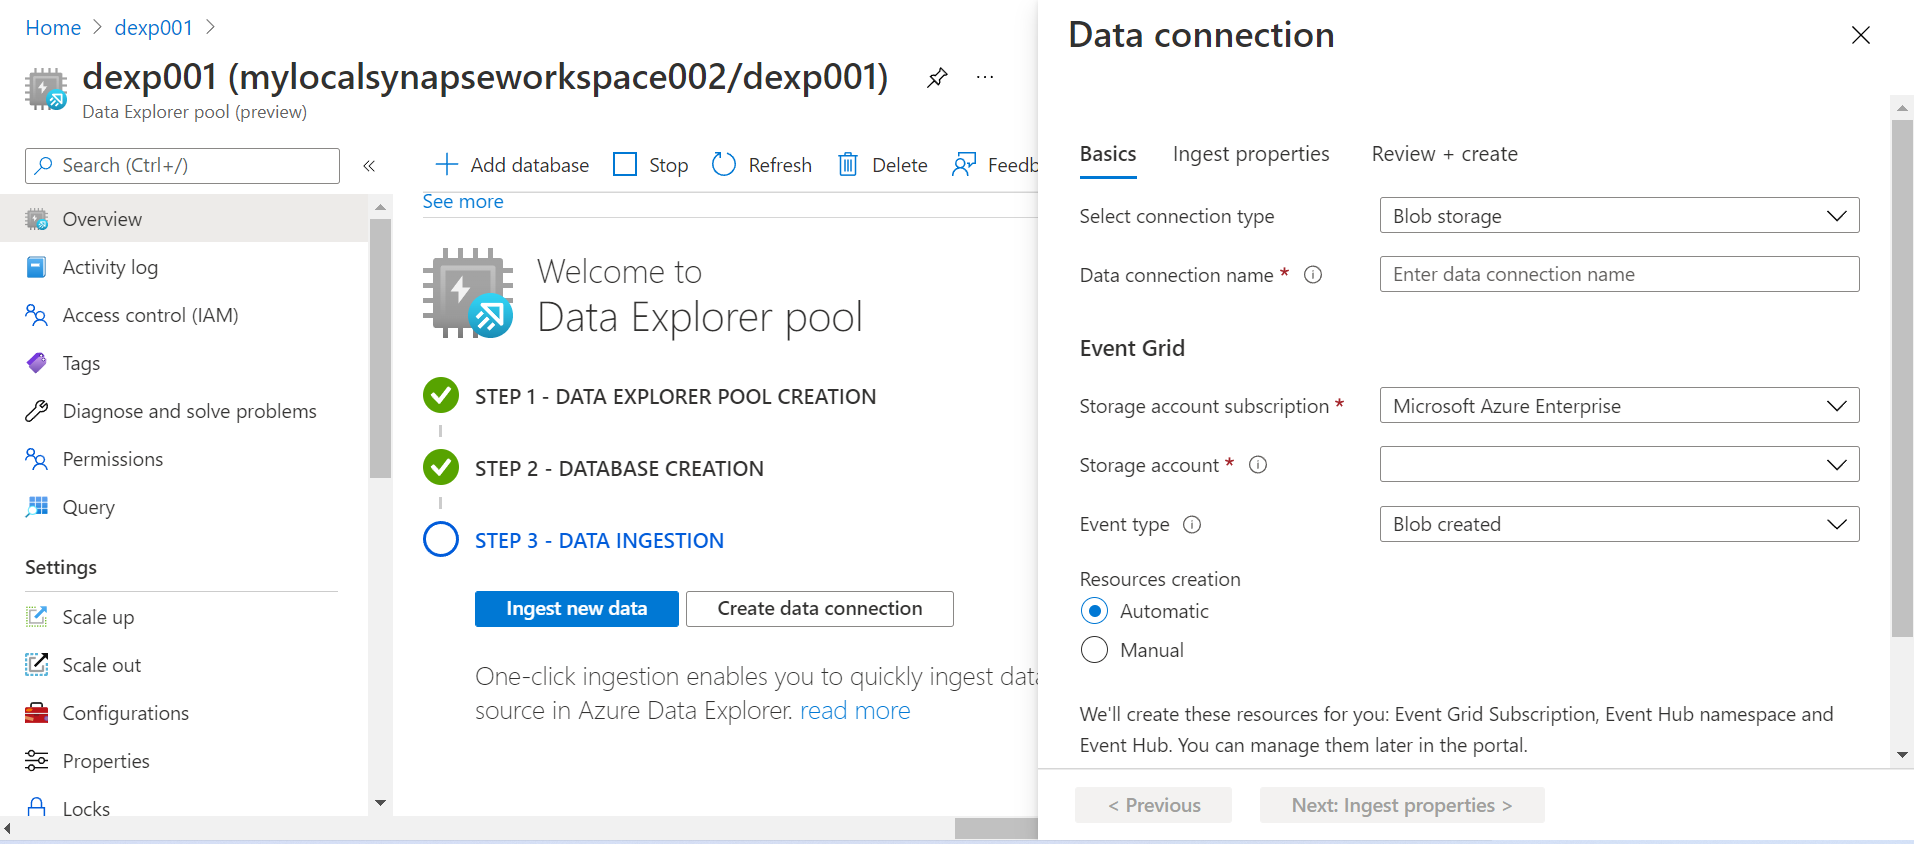
Before we click on the Ingest new data button, we can also look at how to create a connect to the Azure Data Lake Storage from this step. Select the Blob storage option and it would show the below page to define the configuration to create a new connection to the Azure Data Lake Storage. We need to select the Azure Data Lake Storage account in the Storage account setting and the rest of the details can have default values. For now, we will park the data connection topic and proceed with the data ingestion aspect.
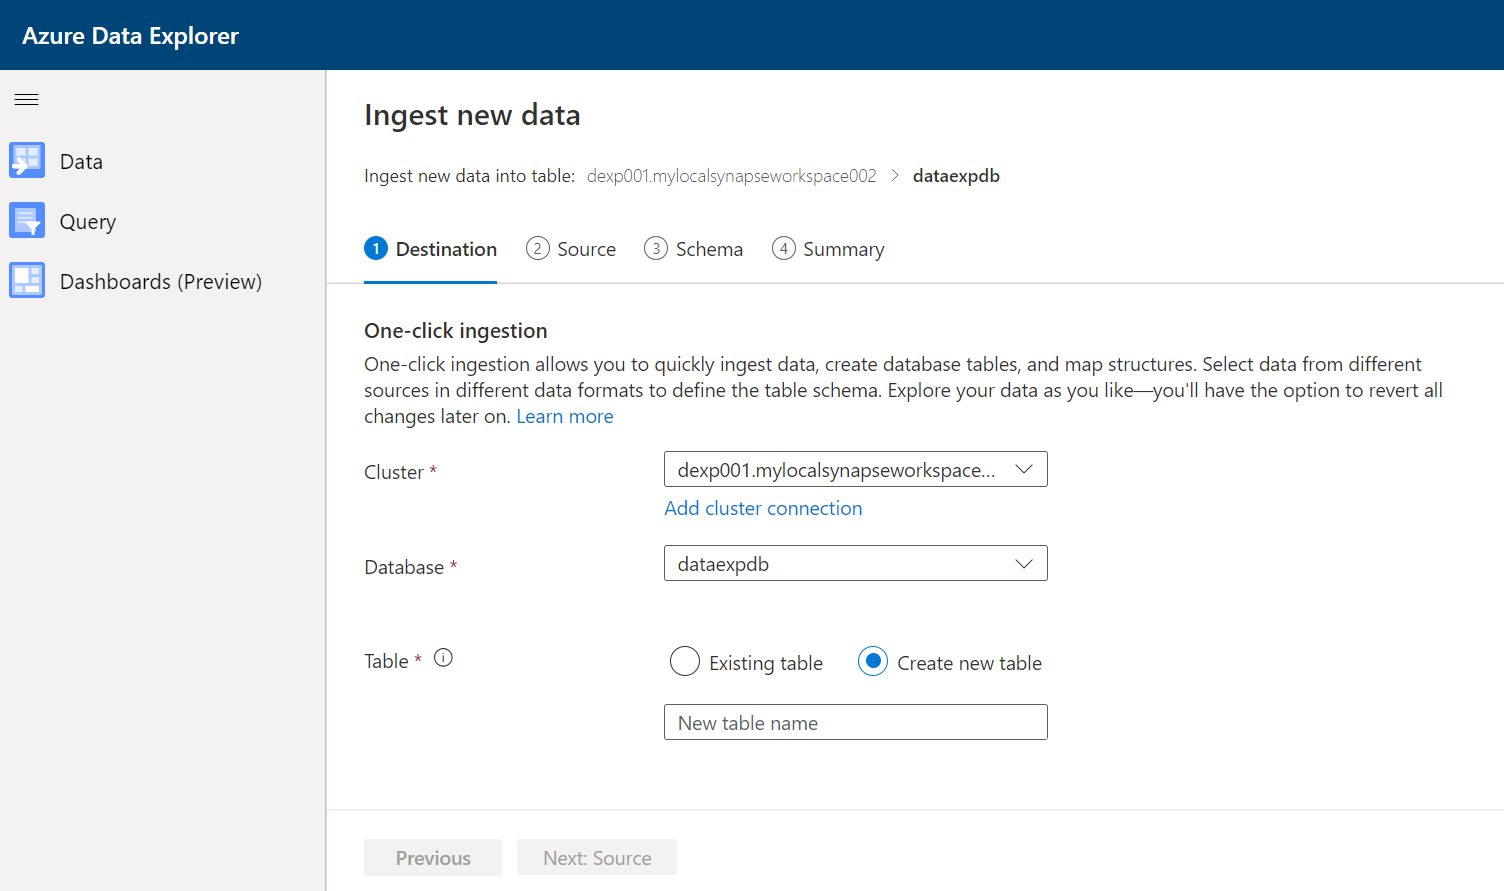
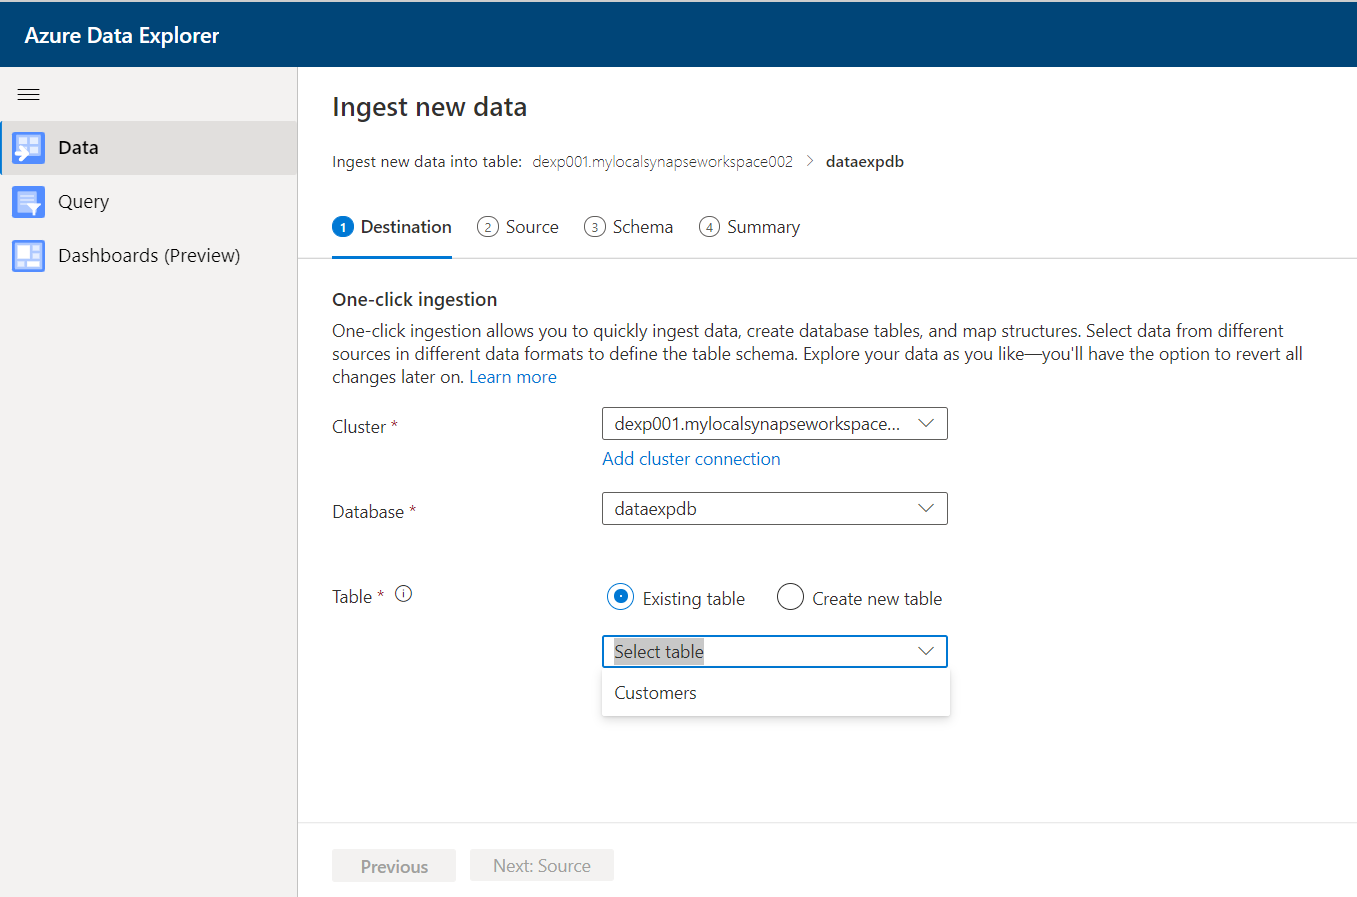
Once we click on the Ingest new data button, it would open a new interface as shown below. The wizard to ingest data would already be open and the first step would need registering of the Azure Data Explorer pool or Azure Data Explorer cluster, with a database that is hosted on it. We have the option to create a new table or use an existing one to populate it with the data being ingested.
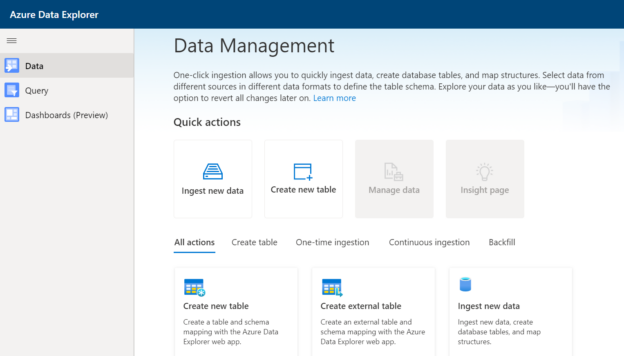
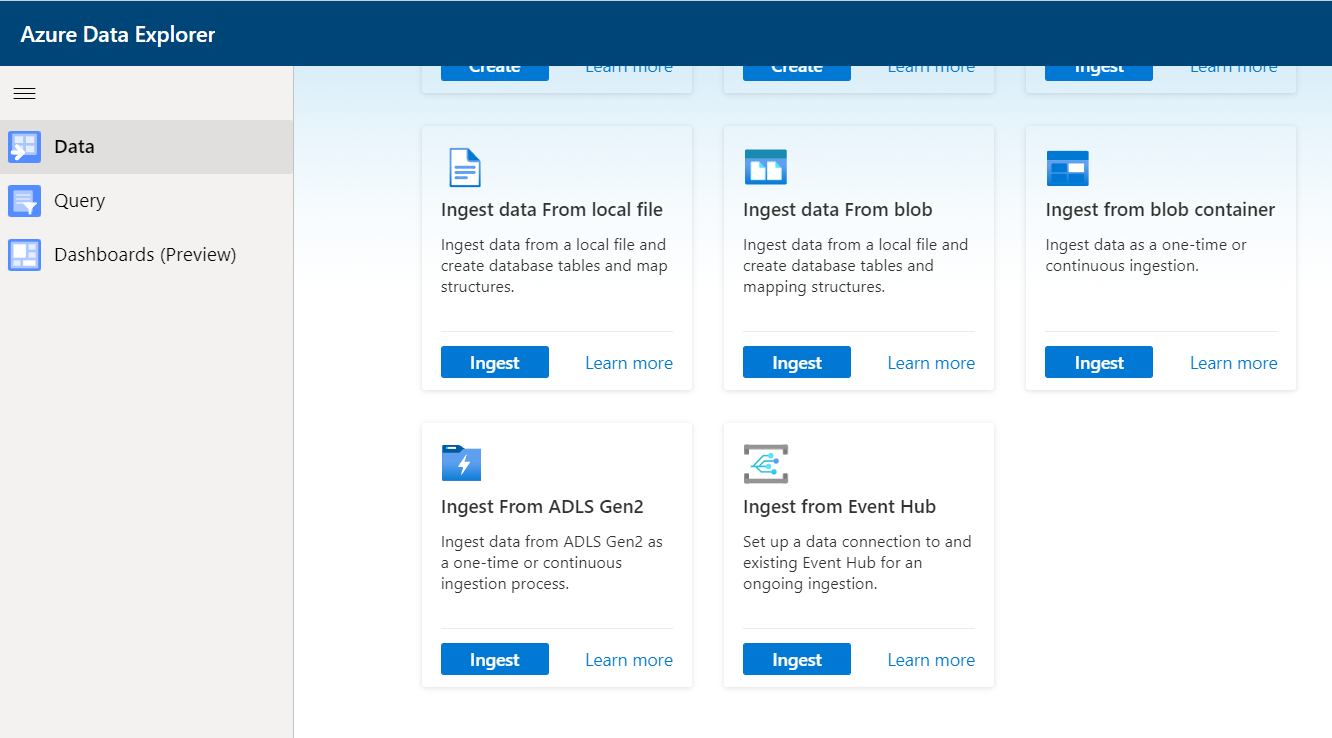
In this interface, before we go ahead with the rest of the steps, we can look at the Data tab in the left pane as shown below. This tab lists all the different data management options that can be performed on the data explorer pool. The primary or the most frequent actions are to create a new table or ingest data into a table, and these are listed in the quick actions section as shown below.
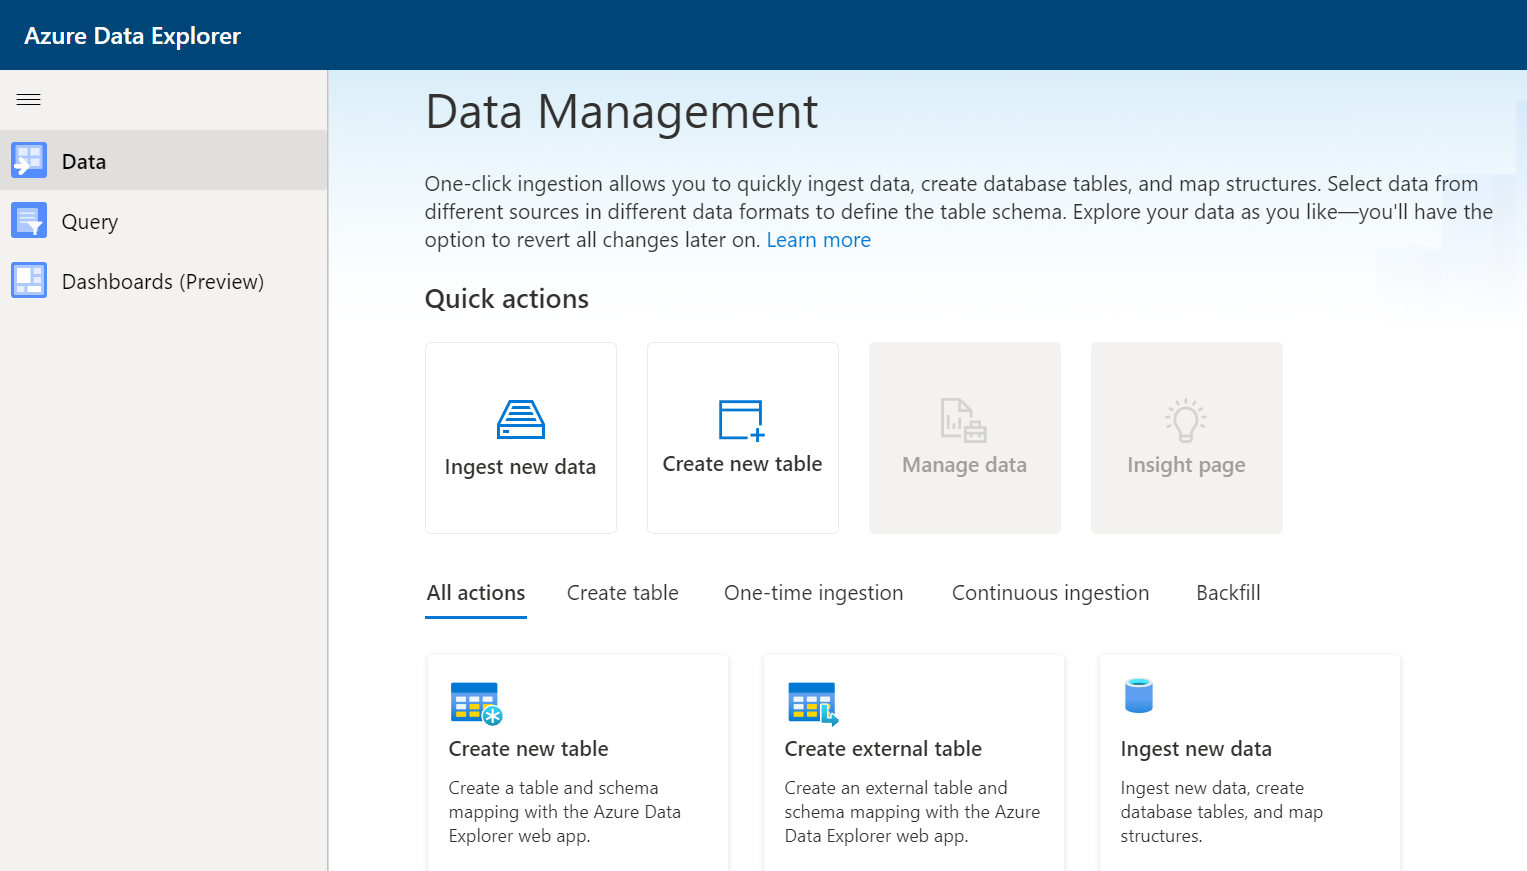
Below the quick actions pane, we would find options to register external data, create new tables as well as ingest data from data sources like local files, blob containers, ADLS and Event Hub. For now, we will continue with the step of ingesting data from Azure Data Lake Storage. To do the same, click on Ingest data option from the quick links section.
The cluster here already lists the Azure Data Explorer pool that we have created on Azure Synapse. The database listed here is the one that we created in Step 2, after we created the Data Explorer pool. Using the Create new table option, here I have already created a table for demonstration purposes, so it already lists the table here. In case those do not have any table, they can select the Create new table option as well which will result in the creation of a new table first and then it would get populated with data from the data source.
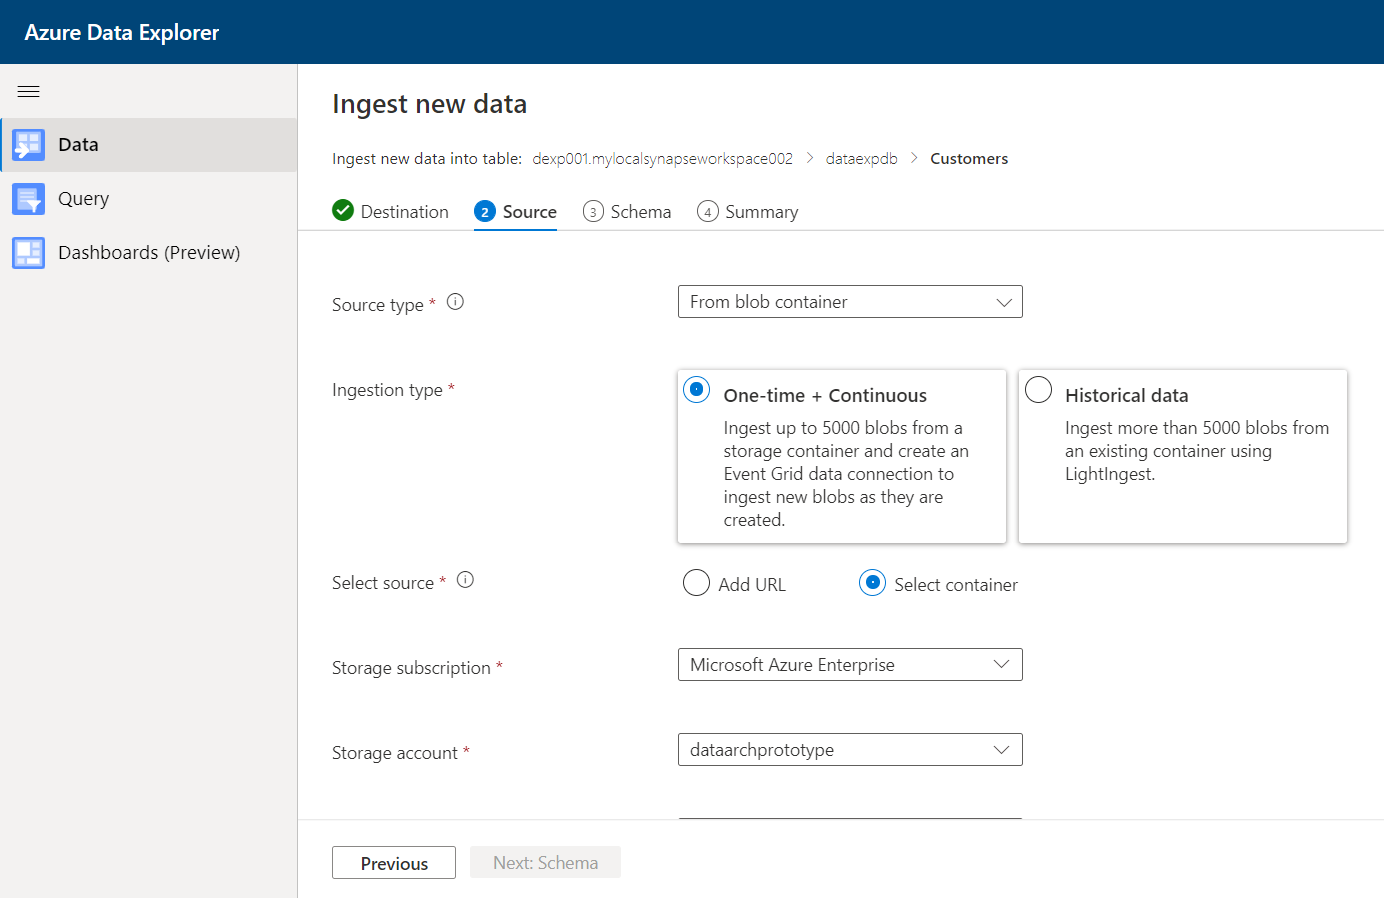
In the next step, we need to select the configuration for the data source. As we are going to source data from Azure Data Lake Storage, the source type will be a blob container. As seen below, we can either bulk load a large volume of data using the historical data option or continue with the default option of one-time and continuous load where it will load the data for now and then create an event grid connection for subsequent loads. In our case, we will continue with the default option of one-time and continuous. We can specify the exact container while the source file(s) may be hosted, so instead of going with the URL option, we will select the container option as shown below. Then we can select the Azure Data Lake Storage account in the storage account setting as shown below. Once done, select the exact file that we intend to use as the source for ingesting into the Azure Data Explorer pool in Azure Synapse.
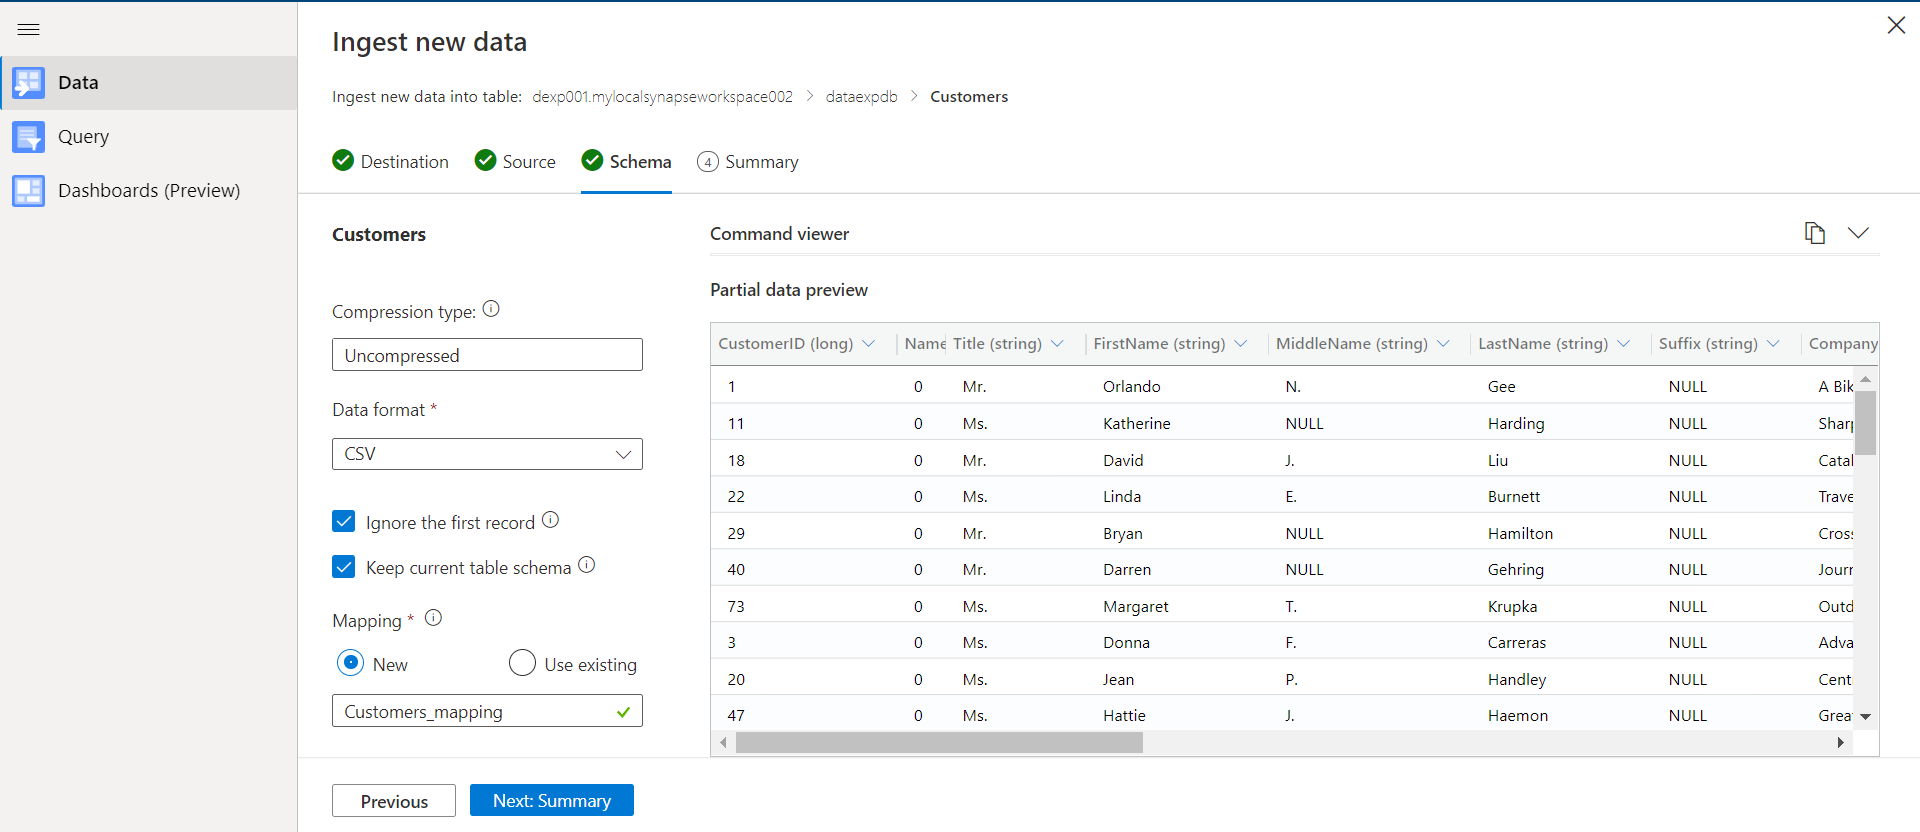
In the next step, we will be able to view the schema of the file that this tool inferred from the file. Here it detected the fields’ values and data accurately. We have the option to configure the data parsing settings so that the data is read as desired. We can use the existing field mapping between the source fields and the destination fields in the existing table or can create a new mapping as well.
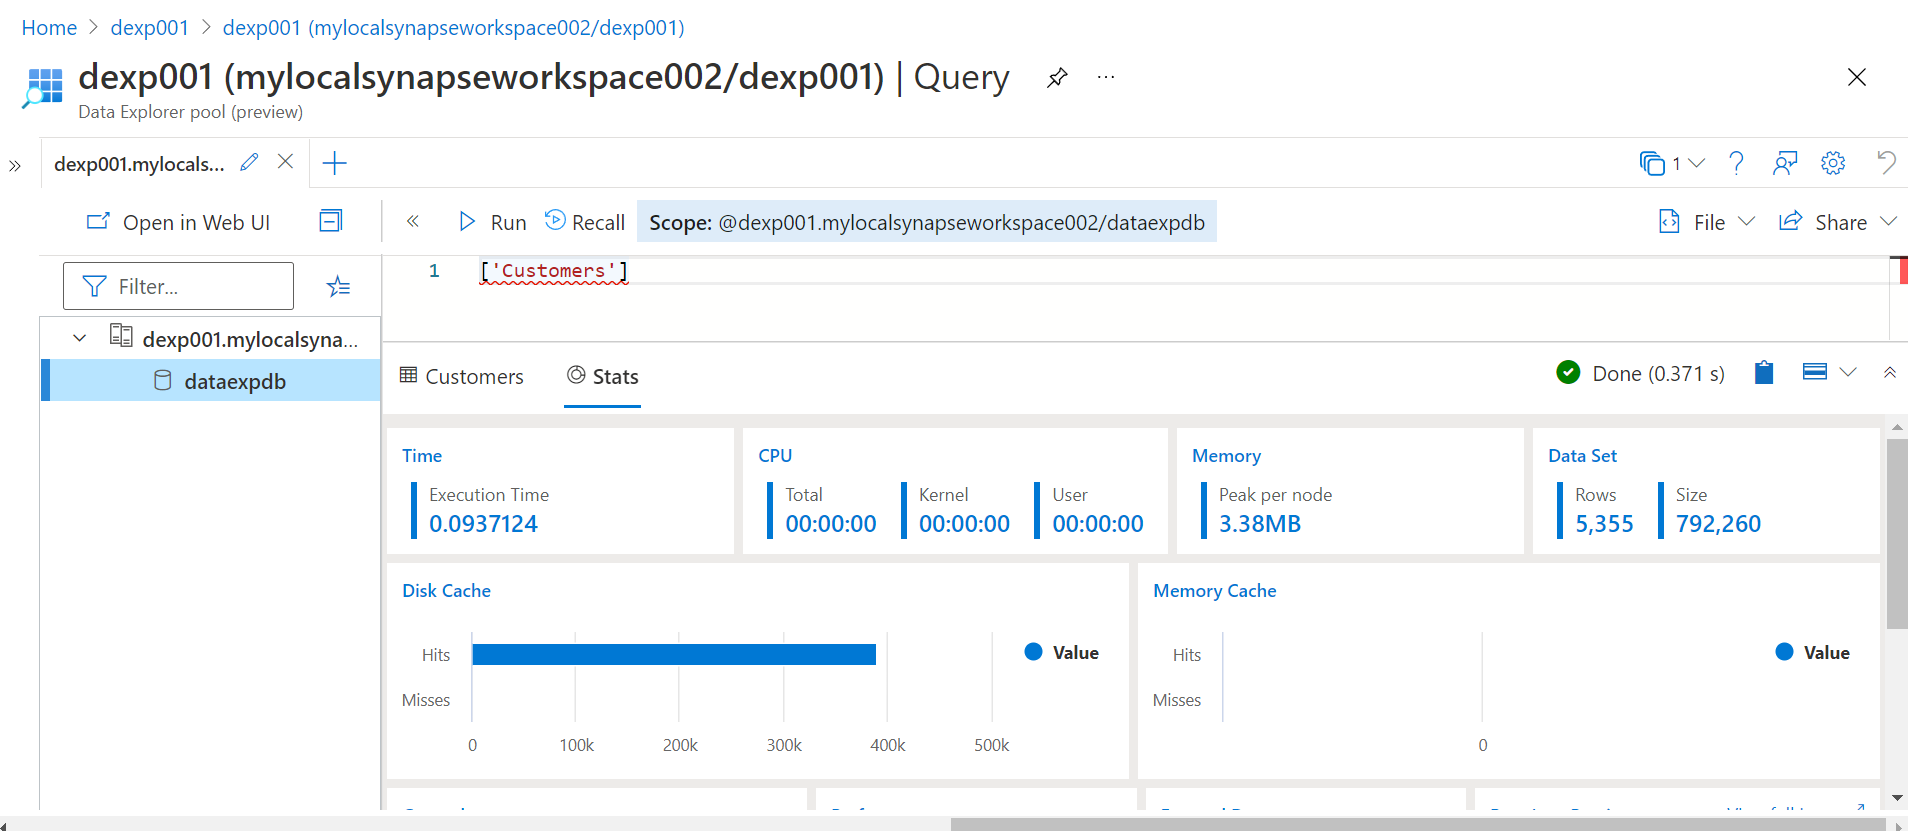
Once done, click on the Next button to review the Summary details. Post reviewing proceed with the next step to populate the data in the destination table in the Azure Data Explorer pool in Azure Synapse. Once the data is loaded, we can navigate to the Azure Synapse Analytics studio and open the Web UI interface to explore the data objects in the Data Explorer pool and query data from these objects. Type the name of the table as shown below and we would be able to find the results and statistics of this table. Here it will show the size of the dataset along with the total records in it as well.
In this way, we can ingest data into tables hosted on the Azure Data Explorer pool in Azure Synapse.
Conclusion
In this article, we started with a setup of the Azure Data Explorer pool in Azure Synapse and configured it by creating a database and creating tables in it. We populated it with data from Azure Data Lake Storage and accessed the same from the Data tab in Azure Synapse Studio.

She has a deep experience in designing data and analytics solutions and ensuring its stability, reliability, and performance. She is also certified in SQL Server and have passed certifications like 70-463: Implementing Data Warehouses with Microsoft SQL Server.
View all posts by Gauri Mahajan
- Oracle Substring function overview with examples - June 19, 2024
- Introduction to the SQL Standard Deviation function - April 21, 2023
- A quick overview of MySQL foreign key with examples - February 7, 2023