
In one of my previous articles Installation of SQL Server vNext CTP on Linux Distribution CentOS 7, I spoke about the installation of SQL Server 2017 on a Linux computer. Let us now look at another way to showcase that a SQL Server installation and configuration can also be managed using the Secure Shell (SSH) protocol using PuTTY. We shall look at the important details, such as, how to get PuTTY, SQL Server, how to install/uninstall SQL 2017 CTP2.1, Upgrade to SQL 2017 RC1, and install/remove SQL Tools.
Linux support opens up a bigger market for SQL Server, but it also means that SQL Server pros will need to possess some familiarity with Linux in order to effectively deploy and manage the database on Linux using the available tools and techniques.
This article details the steps involved in installing and configuring SQL Server 2017 using the SSH protocol, including:
- Installation and configuration of PuTTY
- Installation of SQL Server 2017 CTP 2.0 on Linux CentOS
- Configuration and removal of SQL using an SSH connection using PuTTY
- Upgrade of SQL database engine from SQL Server 2017 CTP to RC1
- Details SQL tool installation
- Uninstallation of SQL tools
Pre-requisites
- PuTTY
- CentOS/RHEL Server
- SQL Server 2017 CTP 2.1 and SQL Server 2017 RC1
- SQL Server Management Studio (SSMS) 16.5 or higher
PuTTY
This section covers the installation and configuration of SQL Server in a RedHat Enterprise Linux-based Linux distribution, CentOS, using PuTTY. PuTTY is an open source software tool used to establish an SSH session from a Windows to UNIX system platforms.
Before we continue, head over and download PuTTY!
Let’s now look at the different options to open SSH session
-
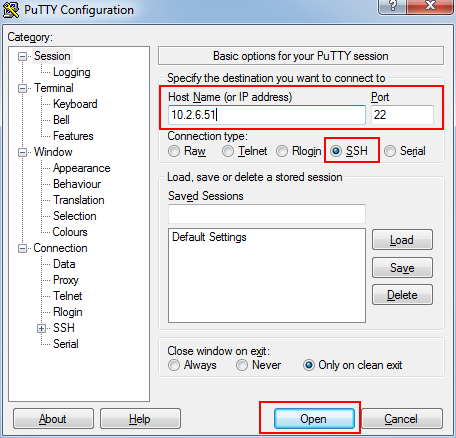
The first one involves using the PuTTY Explorer
-
Open the SSH session by entering the IP address of the Linux instance
-
Click Open
-
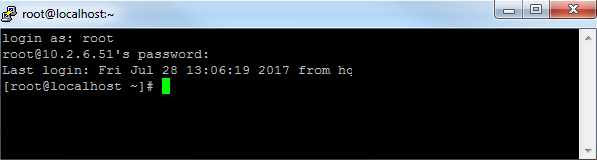
Enter the credentials to connect to the Linux machine

-
-
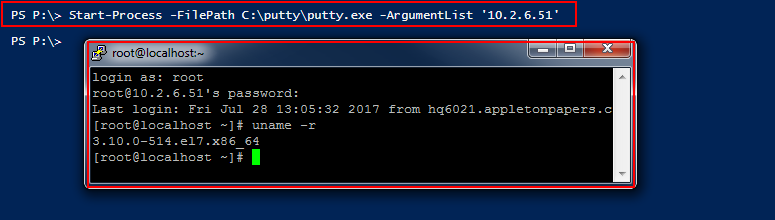
The second is using PowerShell
-
Install PuTTY and give the executable file path in the Start-Process cmdlet. I’ve installed PuTTY at C:\Putty.
PS P:\> Start-Process -FilePath C:\putty\putty.exe -ArgumentList ‘10.2.6.51’
-
Enter the root credentials to open an SSH session to the Linux machine
-

Install SQL Server 2017 CTP 2.0 using PuTTY
This section includes the step-by-step installation of the SQL instance on the Linux machine. Microsoft has a repository to download the SQL Server database engine and tools libraries. Here’s a high-level view of what we’re going to do
- Get the installation libraries: mssql-server.rep and prod.repo
- Download the two aforementioned repositories using the wget utility
- Place the libraries in the configuration folder /etc/yum.repos.d/
-
Use yum to install and configure the SQL Services
YUM is a package management tool for RPM-based Linux systems - Accept the license agreement and configure the SQL Server instance
- Check the status of the SQL service
- Configure the firewall to listen on TCP port 1433
- Note the IP
- Use a Windows computer to access the Linux machine, using SSMS
Let’s walk through all the steps in detail
First of all, install the wget utility to download the files
# yum -y install wget
-
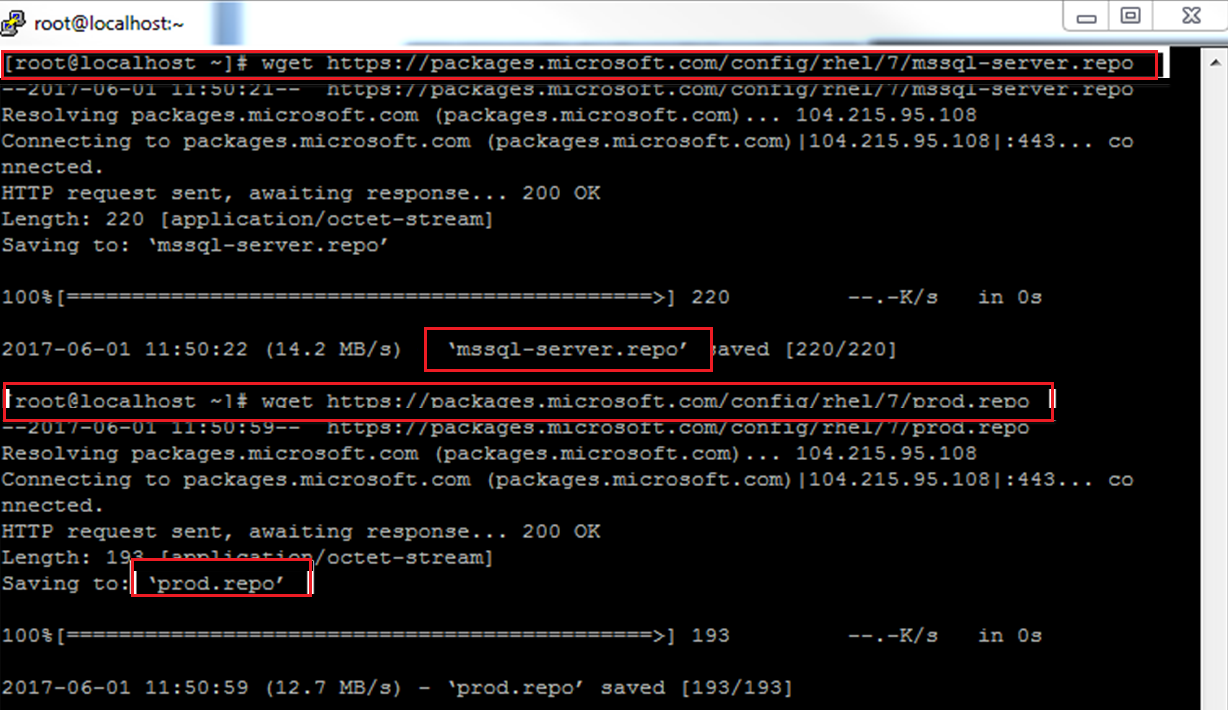
Get the mssql-server.repo library for SQL database engine
# wget https://packages.microsoft.com/config/rhel/7/mssql-server.repo
-
Get the prod.repo for SQL tools installation
# wget https://packages.microsoft.com/config/rhel/7/prod.repo
-
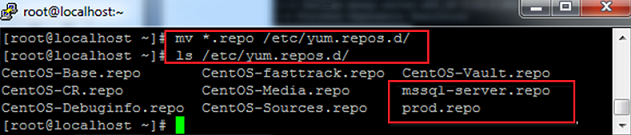
Move the repositories to the configuration folder, /etc/yum.repos.d/
# mv *.repo /etc/yum.repos.d/
# ls /etc/yum.repos.d/
-
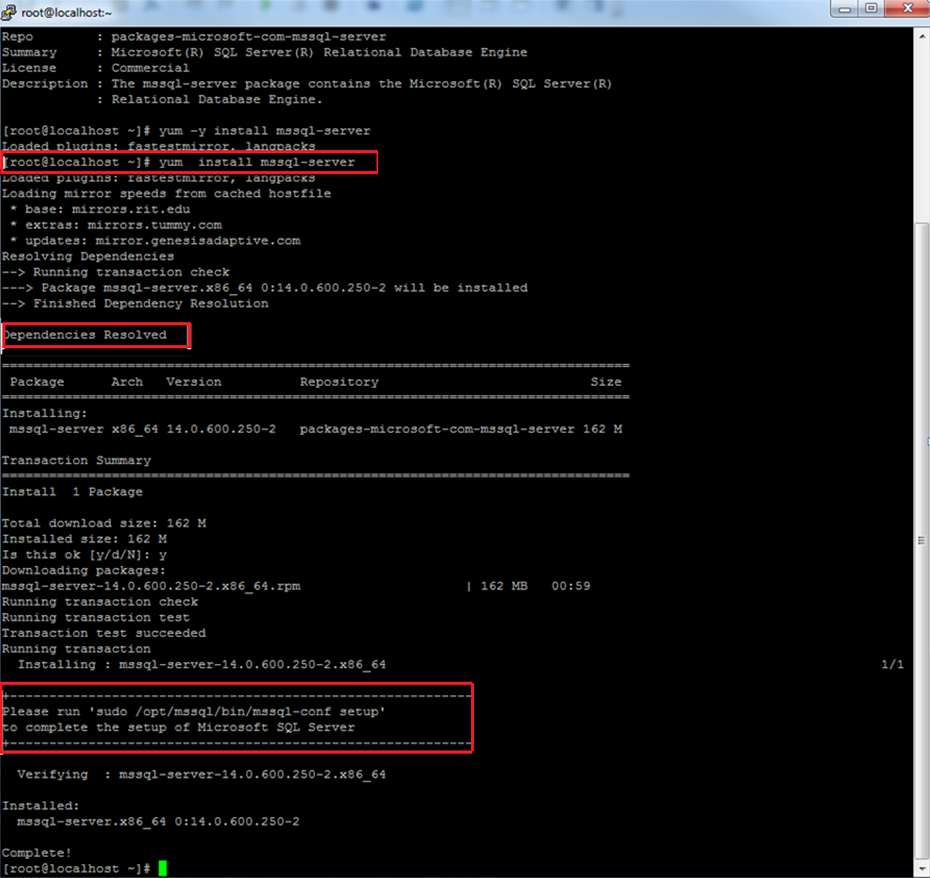
Install the SQL database service using yum
# yum –y install mssql-server
-
Set the SQL Server Administration password ‘SA’ in an environment variable
# echo SA_PASSWORD=”thanVitha@2015″ | sudo tee –append /etc/environment
-
Exit the PuTTY session
-
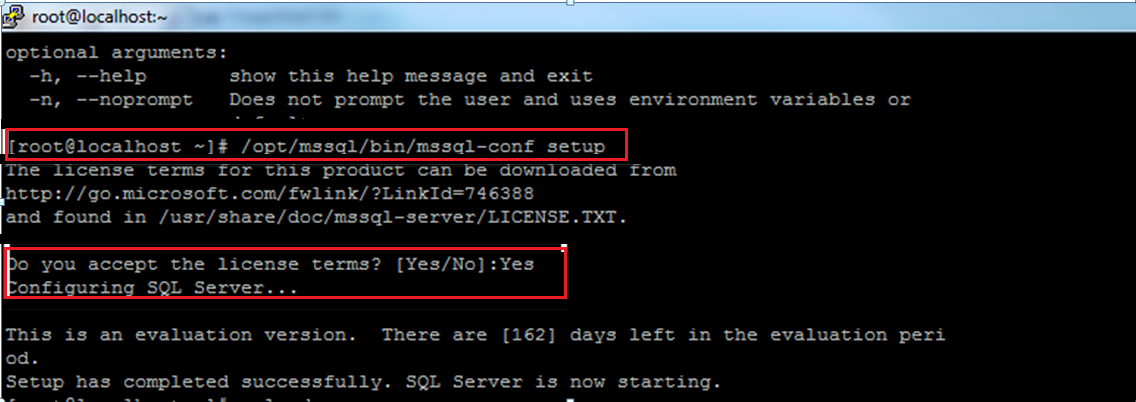
Log into the PuTTY session again. Configure the SQL instance by accepting the license agreement
# /opt/mssql/bin/mssql-conf setup
-
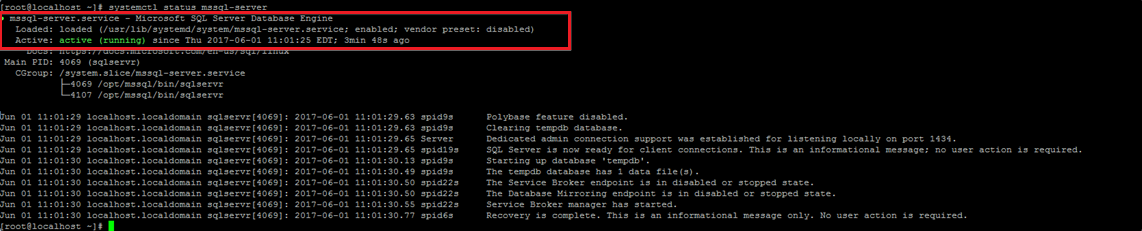
Check the status of the MSSQL service. This is to check if the installation went through as desired.
# systemctl status mssql-server
-
Open up TCP port 1433 on the firewall
# firewall–cmd –zone=public –add-port=1433/tcp –permanent
# firewall-cmd –-reload
-
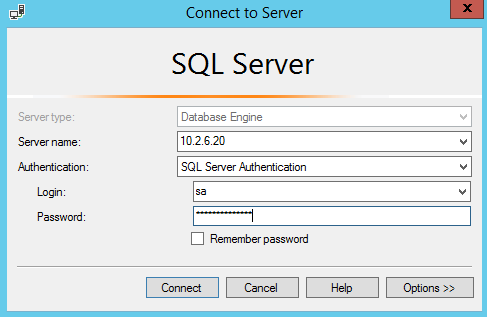
Access the instance using another machine using the SQL Server Management Studio on a Windows computer.


Sometimes the SQL server agent is grayed out on the Windows machine. To enable SQL Server Agent, issue the following SQL query. This capability is available starting from SQL Server vNext Community Technology Preview (CTP) 1.4.
|
1 2 3 4 5 6 7 8 9 |
EXEC SP_CONFIGURE 'show advanced options',1 GO RECONFIGURE GO EXEC SP_CONFIGURE 'Agent XPs',1 GO RECONFIGURE |
Uninstallation of SQL Server 2017
To begin the uninstallation of the standalone SQL instance, consider this important information: While the uninstallation of mssql-server engine does remove the binaries, the database files are retained. These have to be removed manually by deleting the files.
To remove the mssql-server package on CentOS, follow these steps:
- Check the status of the SQL Service, MSSQL-SERVER
- Get the details of the installed repository
- Check the location of the binaries of the SQL instance; the default location is /opt/mssql/
- List the data file path; the default location is /opt/mssql/data
- Remove the libraries using the remove option in yum
- Remove the data files and other metadata details
- Check the SQL Service Status
Let’s dig into the steps and see the commands that are used to uninstall the SQL instance
-
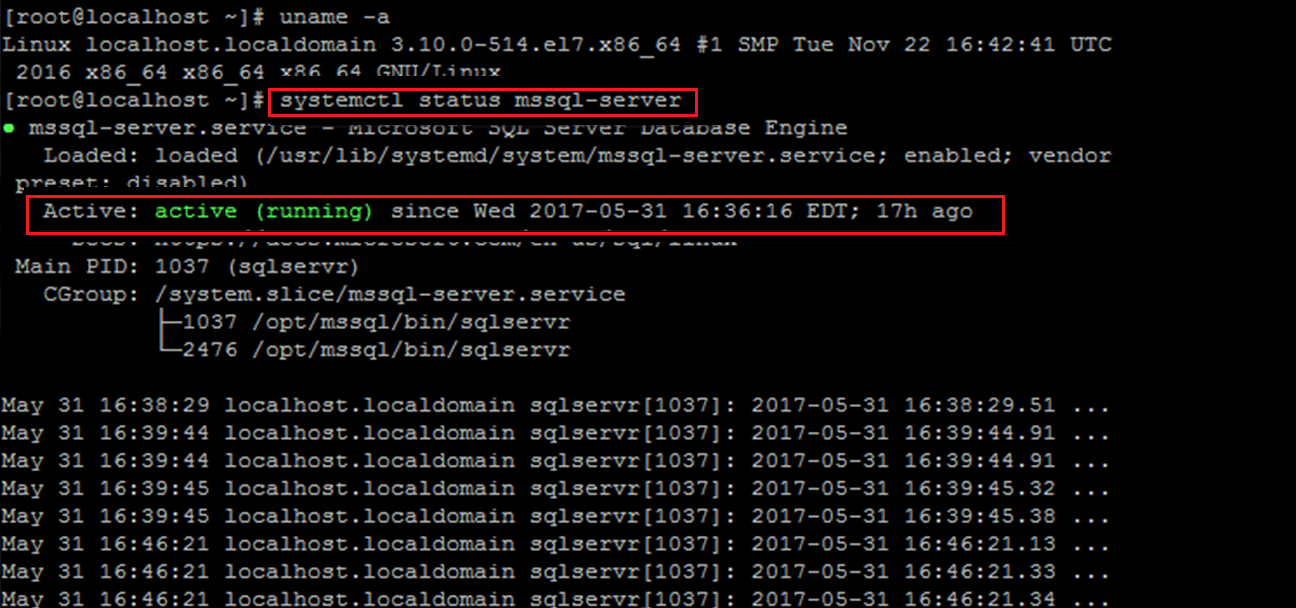
Check the SQL Server service status mssql-server
[root@localhost ~]# systemctl status mssql-server
-
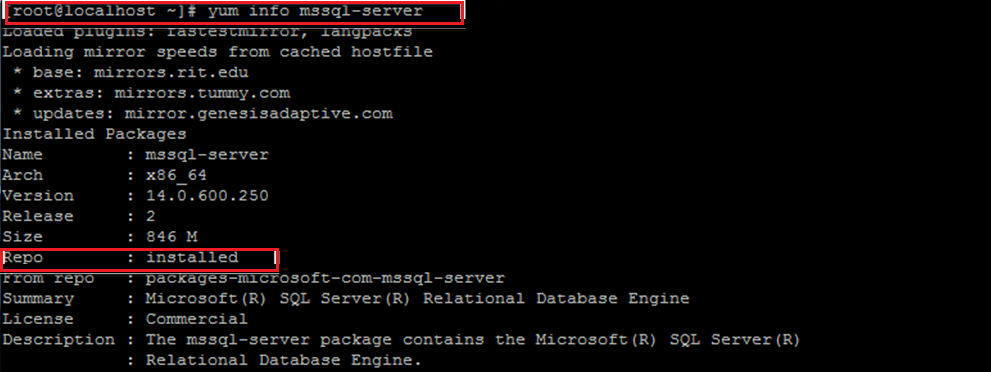
Get the details of the installed packages
[root@localhost ~]# yum info mssql-server
-
The SQL Server binaries resides on /opt/mssql/ folder
[root@localhost ~]# ls -lrt /opt/mssql
-
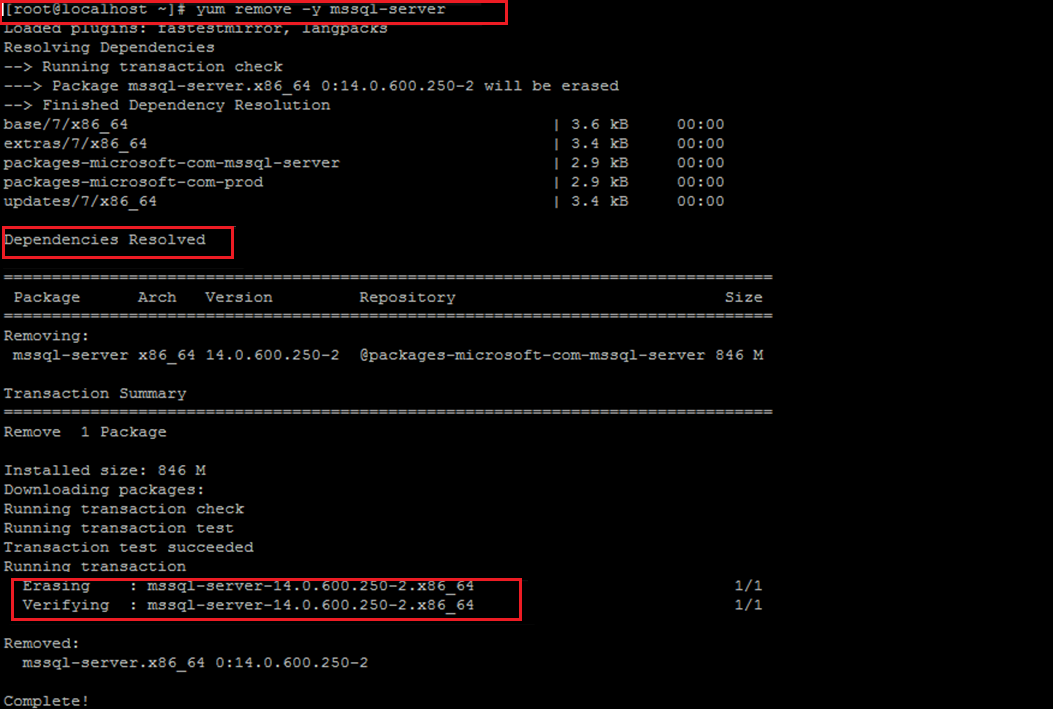
Issue the following command to remove the SQL Server installation libraries
[root@localhost ~]# yum remove -y mssql-server
-
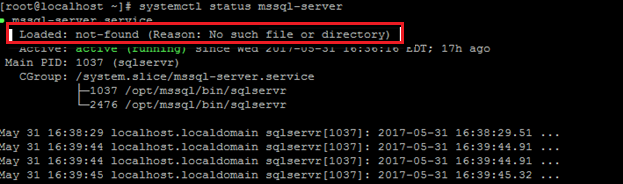
Check the service status. This tells us about the success of the uninstallation.
[root@localhost ~]# systemctl status mssql-server

List and Remove SQL server files located at /var/opt/mssql/
[root@localhost ~]# ls -lrt /var/opt/mssql/data
[root@localhost ~]# rm -rf /var/opt/mssql/
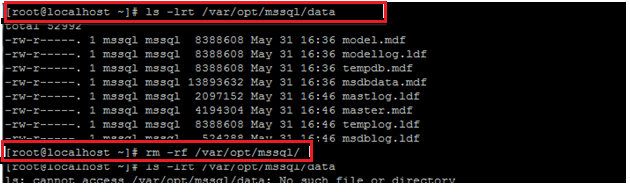
This concludes the uninstallation of the SQL instance!
Upgrade to SQL 2017 RC1
This topic describes how to upgrade the SQL Server instance to a later version. A good understanding of YUM gives us the flexibility to perform the upgrade with ease.
Let’s see the steps required to upgrade the SQL Server 2017 CTP 2.1 database instance to SQL Server 2017 RC1:
- Check the SQL instance version and editions
- Get information on the available updates
- Check for MSSQL-Server update package
- Perform the upgrade
- Validate the SQL instance
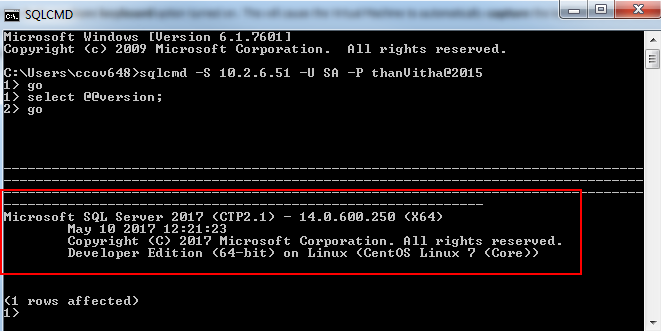
Connect to SQL instance and check for the SQL update
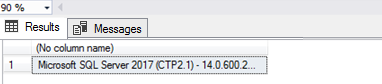
To Find SQL Server version and Edition, run:
SELECT @@VERSION
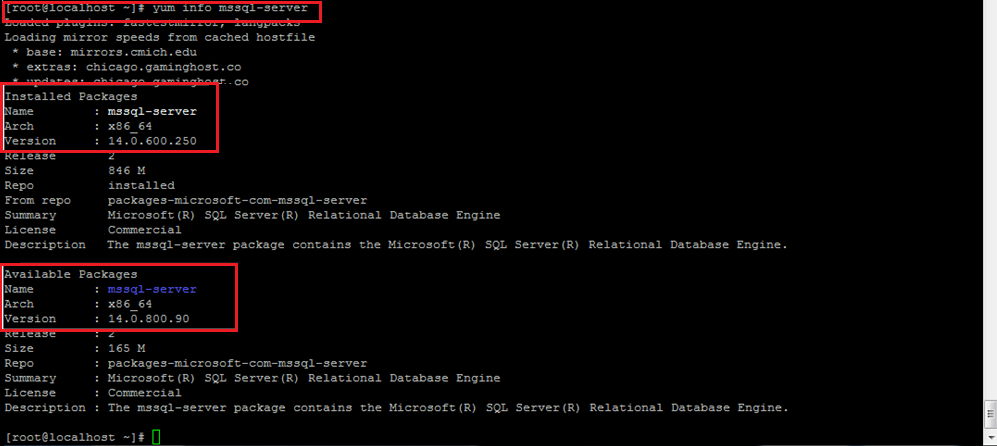
The following screenshot indicates that there is an update available for SQL Server 2017
To check the updates for all the available packages, run:
[root@localhost ~]# yum update
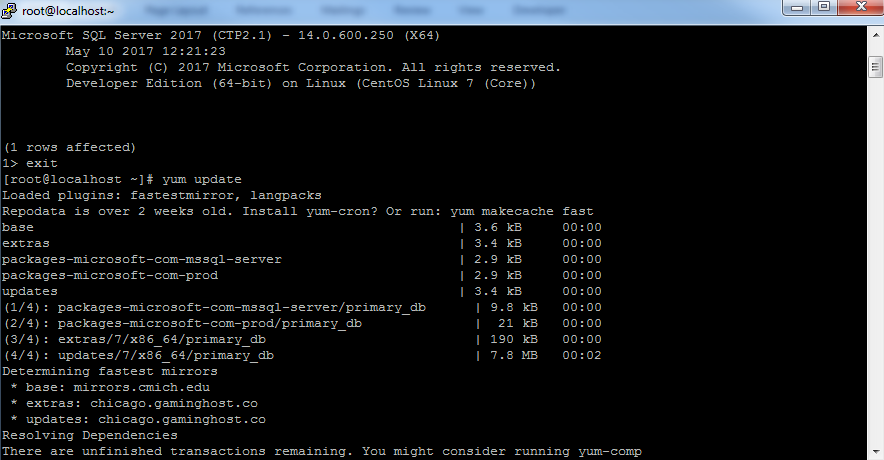
Yum, as you might’ve already understood, is the primary tool for getting, installing, deleting, querying, and otherwise managing Red Hat Enterprise Linux RPM software packages. Yum can handle the update of any of the available packages as well.
The output indicates that update 14.0.800.90-2 is available.
[root@localhost ~]# yum check-udpate mssql-server

The package metadata can be found using the info parameter. The output shows the available version and size details.
[root@localhost ~]# yum info mssql-server
Let’s upgrade the SQL instance to the latest available package.
Enter Y to continue the upgrade process.
[root@localhost ~]# yum update mssql-server

The screen should now show the download progress
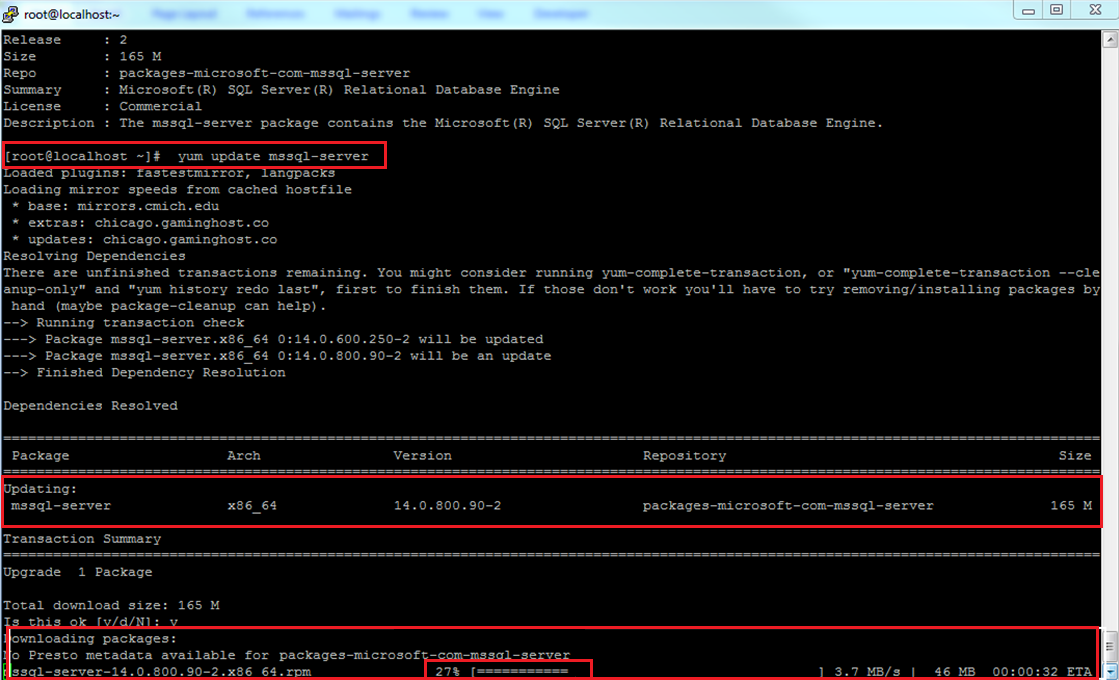
SQL Server has now been upgraded from 14.0.600.250 to 14.0.800.90.
Let’s now proceed to verify the SQL instance. Issue the same command as you did in the beginning of the process of uninstallation:
Sqlcmd –S 10.2.6.51 –U sa –P thanVitha@2015
select @@version
Installation of SQL Tools on CentOS/RHEL
We’ve successfully completed the installation of SQL Server on CentOS. To connect to the Linux SQL instance we need to install the mssql-tools package.
The package can be found here.
[root@localhost ~]# sudo ACCEPT_EULA=Y yum install mssql-tools -y -q
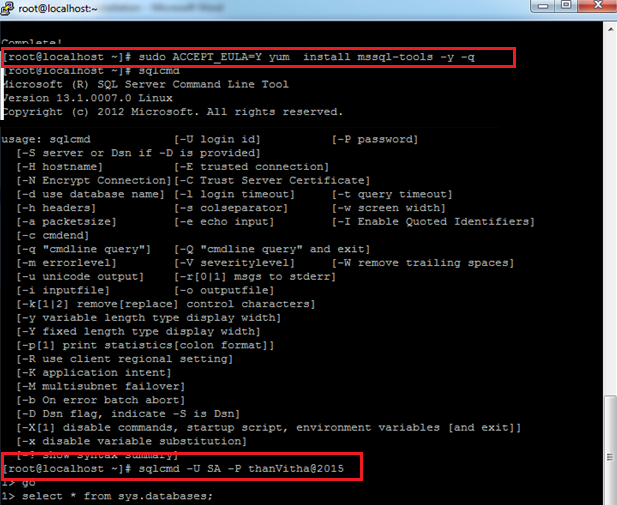
That’s correct. That’s all that’s required to install SQL Tools.
The mssql-tools package contains:
- sqlcmd, the Command-line query utility
- bcp, the Bulk import-export utility
Once the package is installed, we can use sqlcmd to interact with the database. Run sqlcmd -? to get help on how to run sqlcmd. However, you’ll find that running sqlcmd at the prompt will throw the following error:
[root@localhost thanvitha]#sqlcmd
“bash : sqlcmd : command not found”
Modify your PATH at ~/.bash_profile in order to make sqlcmd/bcp accessible from shell. You can now log into the sessions. To add sqlcmd to your PATH, run:
echo ‘export PATH=”$PATH:/opt/mssql-tools/bin”‘ >> ~/.bashrc
source ~/.bashrc
We could also create a symbolic link, if you don’t want to touch the PATH. You can create these using the ln command.
For example, the following would create a soft link called /user/bin/sqlcmd to /opt/mssq-tools/bin/sqlcmd
[root@localhost thanvitha]#ln –sfn /opt/mssql-tools/bin/sqlcmd /usr/bin/sqlcmd

[root@localhost thanvitha]#sqlcmd –U sa –P thanVitha@2015
1>select @@version;
2>go
Now, we can see that sqlcmd is working. We can now create demo objects.
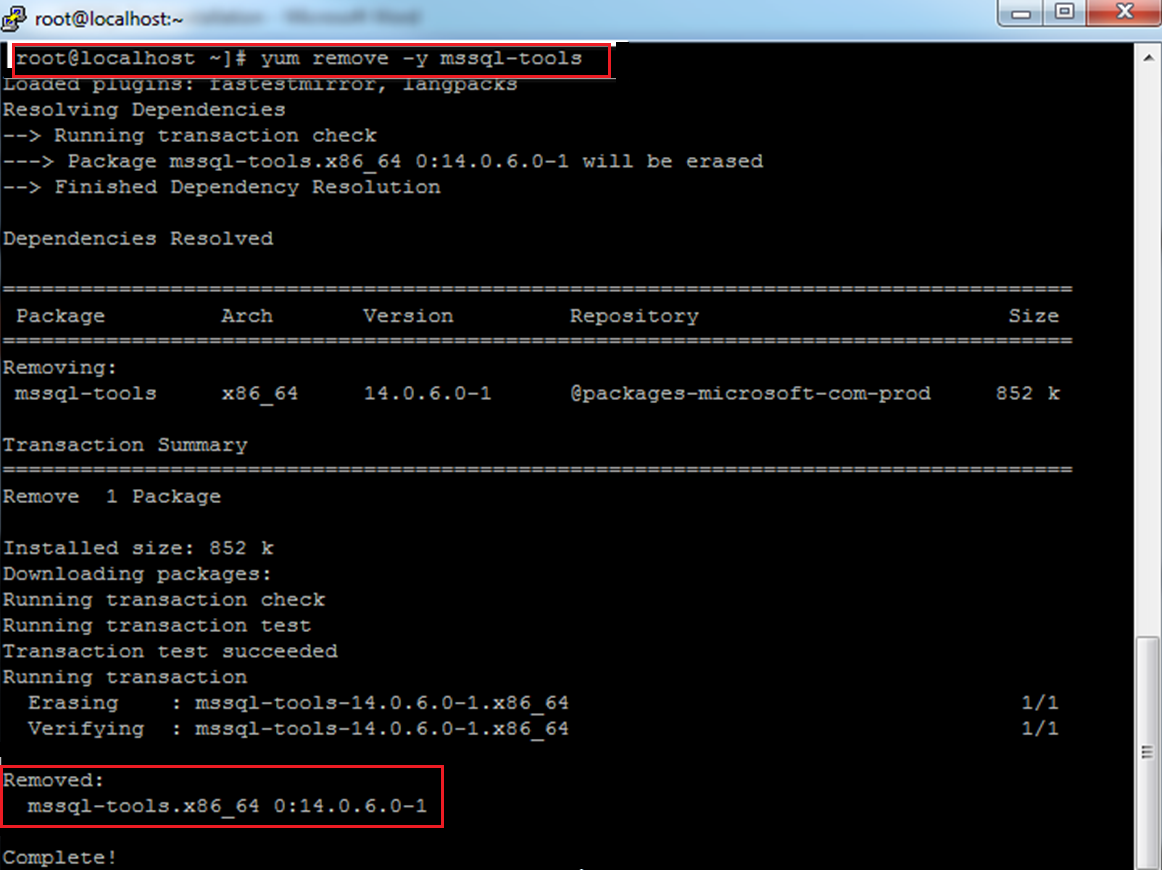
Uninstallation of SQL Server tools
Uninstallation is straightforward. Just run the following command.
[root@localhost ~]# yum remove -y mssql-tools
Summary
This article is an effort to describe the complete installation and uninstallation process of SQL Server, using SSH over the open source terminal-like software tool called PuTTY. This is a step-by-step guide to control and manage the destination SQL Server database using the SSH protocol for connection. The steps remain the same for someone who wants to perform these steps directly on the machine, without having to use SSH to manage remote servers.
We also talk about the configuration of SQL Server Tools, along with the procedure to upgrade the SQL Server database engine.
Table of contents

My specialty lies in designing & implementing High availability solutions and cross-platform DB Migration. The technologies currently working on are SQL Server, PowerShell, Oracle and MongoDB.
View all posts by Prashanth Jayaram
- Stairway to SQL essentials - April 7, 2021
- A quick overview of database audit in SQL - January 28, 2021
- How to set up Azure Data Sync between Azure SQL databases and on-premises SQL Server - January 20, 2021