

Introduction
This is a second article that is a continuation of the Microsoft SQL Server Migration Assistant (SSMA) v7.1 for Oracle. In my first article, I wrote an overview of the tool and how to install it. In this second article I will write about how to use it to migrate data and objects from an Oracle database to a SQL Server database.
As described in my first article, SSMA v7.1 for Oracle consists of a GUI client application, which must be installed on the computer from which you will perform the migration steps and there is also an extension pack to be installed on the target SQL Server machine. To start working with this tool, connect to the machine that has the GUI client application installed and click in the icon on the desktop. If for some reason you don’t have it on your desktop you can find the application file in the location you installed it (default path is C:\Program Files (x86)\Microsoft SQL Server Migration Assistant for Oracle\bin) where should be the 64bit (SSMAforOracle.exe) and 32bit (SSMAforOracle32.exe ) versions.
Figure 1 – SSMA v7.1 for Oracle icon
NOTE: The SQL Server Agent service must be running in the target SQL Server instance to create and run migration jobs.
Required Oracle permissions
There is no need for a user with high privileges as SYSDBA to execute the migrations. As usual and for security reasons, always uses the minimum required privileges and for SSMA v7.1 for Oracle the account to connect to the Oracle database must have CONNECT permissions to obtain metadata from schemas owned by the user. In the case the user needs to migrate from objects in other schemas the account must have the following permissions:
- CREATE ANY PROCEDURE
- EXECUTE ANY PROCEDURE
- SELECT ANY TABLE
- SELECT ANY SEQUENCE
- CREATE ANY TYPE
- CREATE ANY TRIGGER
- SELECT ANY DICTIONARY
The environment
When opening the GUI for the first time the default layout will be presented:
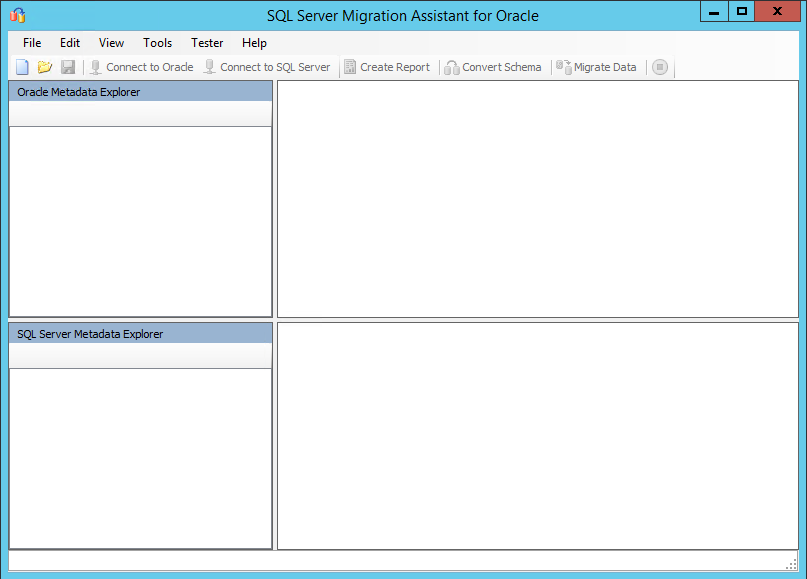
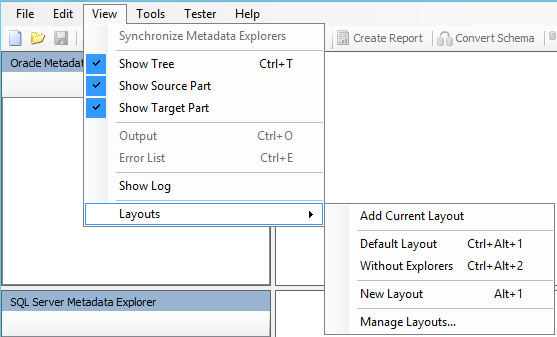
At the top it has the usual menu options and toolbar icons, followed by the two Metadata Explorer parts. In the first part it will be presented the metadata information from the source (an Oracle database) and in the second part it will be presented the metadata information from the target (a SQL Server instance). This Layout can be altered by using the menu View / Layouts:
Migration process
New project
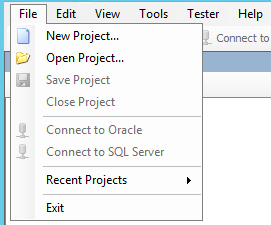
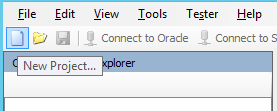
A new project needs to be created to start a migration process. A new project can be created using the menu File/New Project… option or simple by clicking in the New Project… icon in the toolbar.
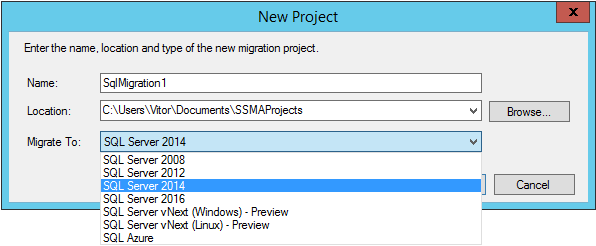
Provide a Name to the project, a path for the Location of the project files (source database metadata information, configurations and mappings are saved in those files) and chose the target database version from the supported versions in the Migrate To combo box:
Project settings
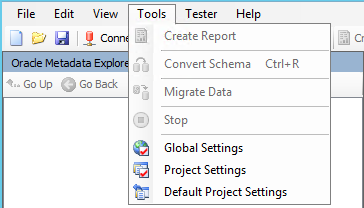
After the creation of the project you are able to review and change the settings for the current project in the menu Tools / Project Settings (for specifying settings for all SSMA projects, select Default Project Settings instead):
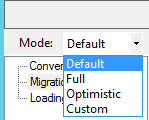
Clicking in the (Default) Project Settings you will see on the top left side you can choose between 3 predefined Modes (Default, Full and Optimistic) and a Custom mode where you can configure it as you will. For the sake of this article size and to keep things simple, in this article I will proceed with the Default mode but you can play around to see how some options change with the different modes (they will be in bold so you can see better those changes):
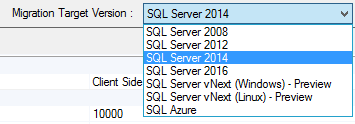
On the top right side there is a combo box where you will need to provide the Migration Target Version of the SQL Server. I am using a SQL Server 2014 to write this article so is the one that I will use:
There are few settings that worth to be explained in the Migration pane since they are important to understand the rest of this article:
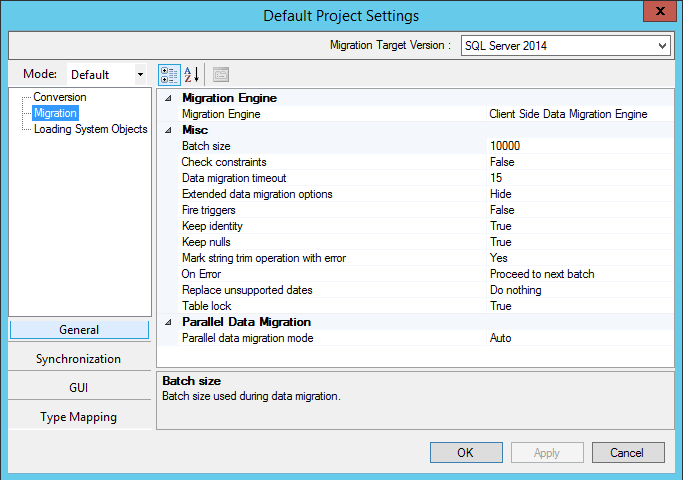
Migration Engine | Client Side Data Migration Engine mode will use the SSMA client to retrieve data from the Oracle database and Bulk Insert method to insert the data in the SQL Server database. Server Side Data Migration Engine mode will use a SQL Agent job to run a BCP command to retrieve data from the Oracle database and insert the data in the SQL Server database. When choosing this method you will need to specify which version of the BCP is pretended to use (32bit or 64bit):
|
Batch size | Data are migrating in batches from Oracle tables into SQL Server tables inside transactions. The batch size option sets the number of rows loaded into SQL Server in each transaction. The default number is 10000. |
Parallel Data Migration Mode | This option is only available on choosing Client Side Data Migration Engine mode and it sets the number of parallel threads to be used in parallel. By default is set to Auto (10 threads). To change this value set this option to Custom and provide the new number of threads to be run in parallel:
|


Connect to databases
After creating a project the Connect to Oracle and Connect to SQL Server will be available.
From the menu:

And from the toolbar:

In case of errors during the connections, check the Output pane for respective error messages that can lead you to solve the issue. You can also check the log (default location is C:\Users\UserID\AppData\Roaming\Microsoft SQL Server Migration Assistant\Oracle\log\) for more detailed information about the error.
Connect to Oracle
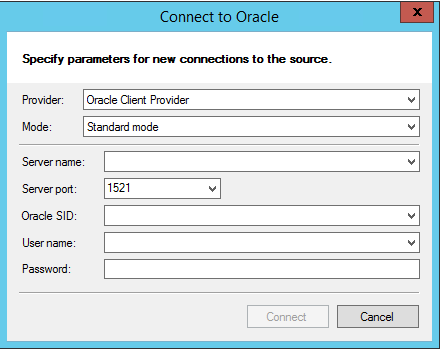
To connect to the desired Oracle database you will need to provide the necessary information for SSMA can establish the connection to the source database.
The first step is to click on the Connect to Oracle option to provide the necessary information for the connection to the source database.
Choose the Provider depending on the client that you have installed:

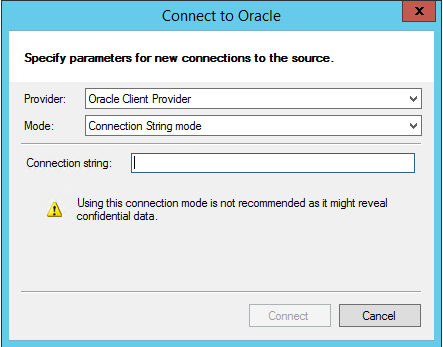
And there are three modes available:

In the Standard mode provide the Serve name, port (by default is presented the port 1521), an Oracle SID and the user credentials (name and password):
In the TNSNAME mode provide the connection identifier previously added in the TNSNAMES.ora file and the user credentials (name and password):

The Connection String mode is not recommended because it leaves the password visible. You can see a warning stating that in this option:
The connection to the source database server stays active until the project is closed. When reopening the project a reconnect to the source database is also needed. All the connection information is stored and you will only need to provide the password when reconnecting. The exception is for the Connection String mode where the password is stored together with the Connection String.
Working offline is also possible but a connection to the source database will be requested when you need to refresh the metadata (can only be done manually since is not automatically refreshed) or load the database objects into SQL Server and migrate the data.
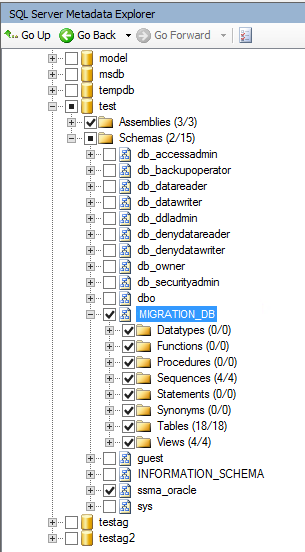
After a successful connection, Oracle schemas it will appear in Oracle Metadata Explorer.
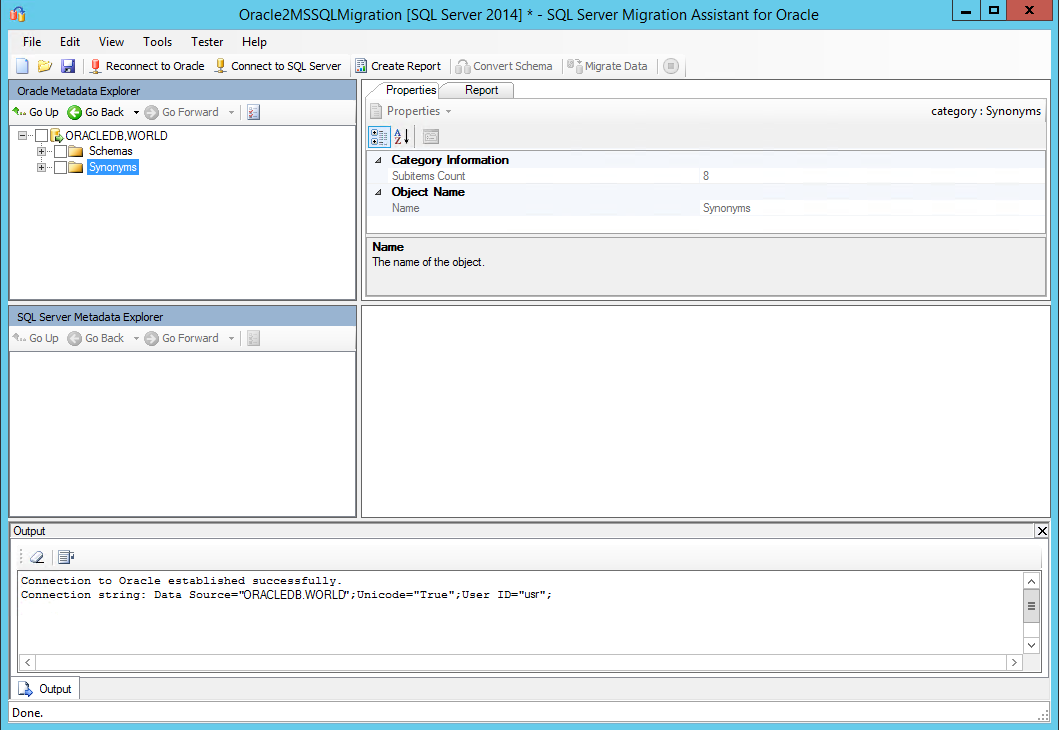
In the top left pane, called Oracle Metadata Explorer, you will see the Oracle database and the available schemas and synonyms if any exists. Drilling down to an object level you will see in the top right pane the respective object properties. It varies depending on the object type.
Right-clicking on objects in Oracle Metadata Explorer, a context menu will appear with the available tasks that can be performed for the respective object. Those tasks can also be performed by using the toolbars and menus.
Connect to SQL Server
After connecting to the source Oracle database you should now connect to the target SQL Server instance by clicking on the Connect to SQL Server option and provide the necessary information for the connection to the target database.
Provide the Server name for the SQL Server instance and the Server port if it is not using the default port 1433. Indicate the Database that will receive the migrated objects and data and configure the Authentication mode. If you are using SQL Server Authentication mode you’ll need to provide the SQL Server user and password that will be used for the connection. Be sure that the user that is provided has sysadmin server role in the target SQL Server instance:
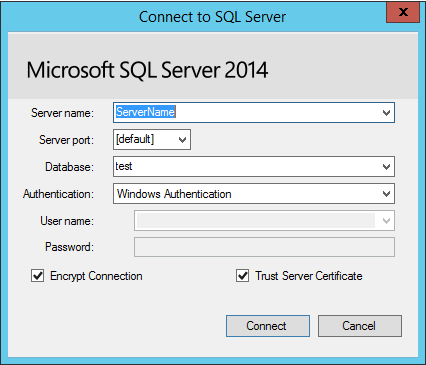
If you are not running the SSMA tool locally then for security reasons keep the Encrypt Connection and Trust Server Certificate options checked.
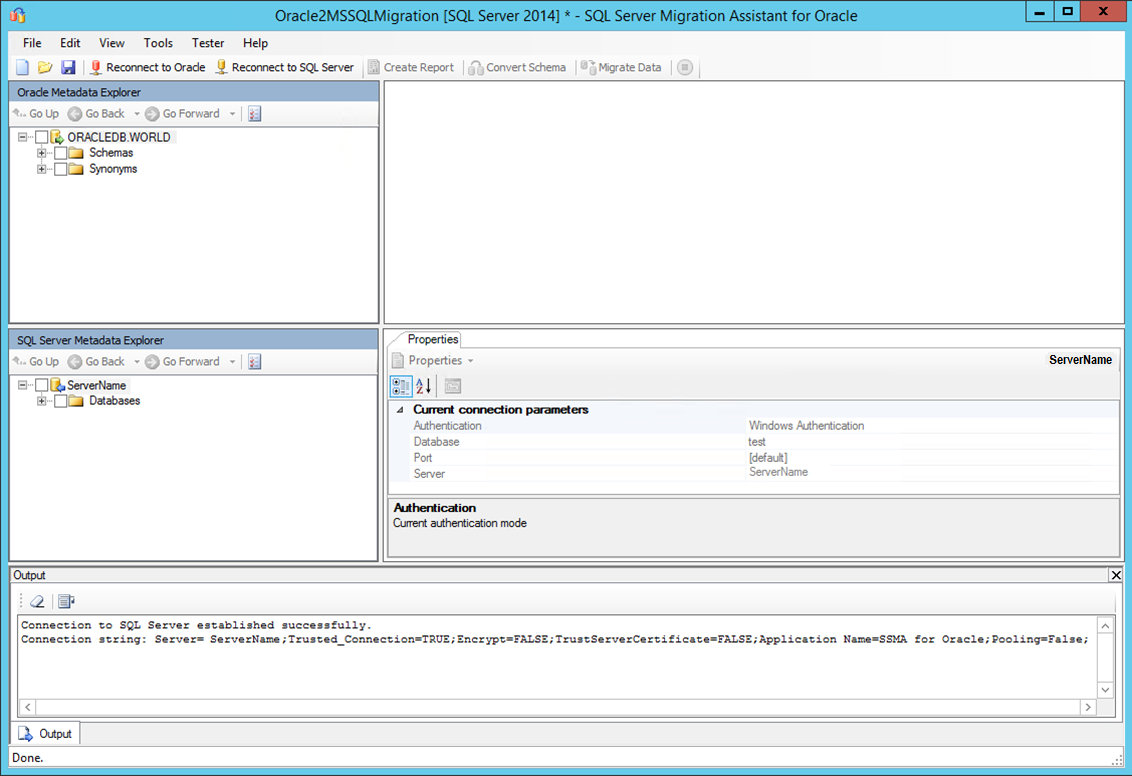
After a successful connection your SSMA screen should look similar to the next one:
Migrate objects and data
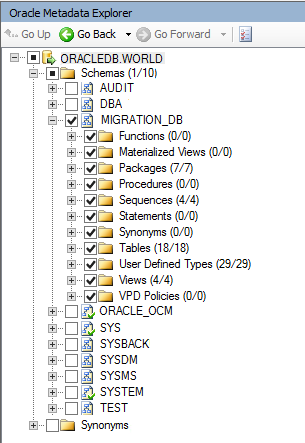
In the Oracle Metadata Explorer drill drown until the Schemas level and chose in the Schema that you want to migrate the objects to be migrated. When migrating all objects, click at the Schema level so all the objects belonging that Schema will be automatically selected. It will also present the number of selected objects from the total number of objects that exists in each object type:
After connecting to Oracle and SQL Server databases, move the focus to the Oracle Schema that you want to migrate to have the following options enabled in the Toolbar (same options can be found enabled in the menu Tools):

By default a target schema with the same name as the source schema will be created in the target SQL Server database. This can be changed by providing the new schema name. To do that select the source schema name in the Oracle Metadata Explorer so the scope in the respective Details pane will be the schema:

Click on Modify button to provide the new target schema name (you can also use this option to modify the target database):
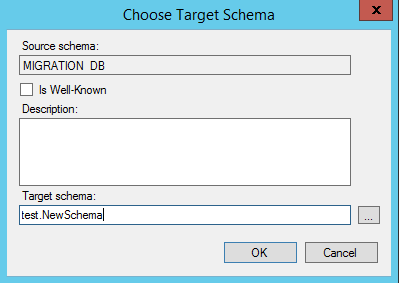
NOTE: In this article we are going to continue with the default names.
Create a report
Use this option before starting with the migration process. This will return a report of errors and warnings identifying potential migration issues, so you can mitigate them first before proceeding with the migration.
In case of errors it usually means that a particular object can’t be migrated as is and the object should be rewritten to be convertible for SQL Server. Other option is to remove the object(s) from the migration list if it’s acceptable that it won’t be needed or it will be replaced in the SQL Server migrated database with some other native solution.
In case of warnings it usually means that the object can be migrated but will lose some particular feature that doesn’t exist in SQL Server. You can accept that outcome or alternatively rewrite the object creation code to be 100% convertible for SQL Server.
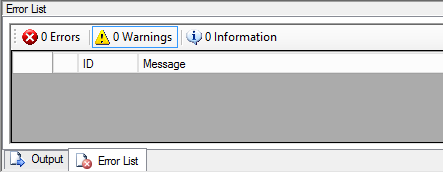
In my case I had no errors and the warnings presented in the next figure:
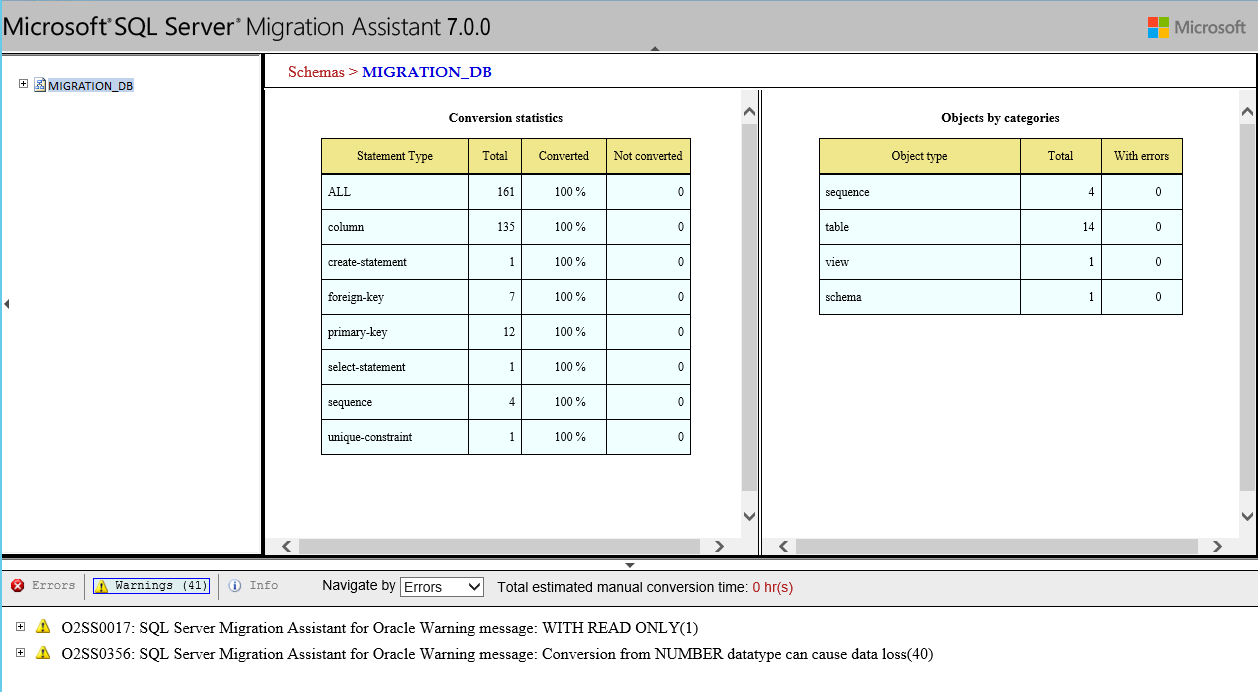
The report is generated in an HTML format and can be read by any browser. Besides presenting the errors, warnings and other informational data it also allows you to navigate through each error and warning presenting valuable information to mitigate each one. And it also presents an estimated manual conversion time for each issue’s mitigation as well the estimated total manual of time needed to mitigate all issues.
Convert schema
After getting the assessment report from the previous step you can now start to convert objects from Oracle Schema to the respective SQL Server objects. This option will not create or load the information into the SQL Server instance but load only the information into the SSMA metadata so you can view the objects and their properties in the SQL Server Metadata Explorer pane.
Similar to the Create Report option, Schema conversion prints output messages to the Output pane and error messages to the Error List pane. Use the output and error information to determine whether you have to modify your Oracle databases or your conversion process to obtain the desired conversion results.
In my case there is an Oracle View created WITH READ ONLY option and I just need to remove the respective line by editing the View definition.
NOTE: Altering the code in SSMA does not really alter the code in the Oracle database. These changes only affect the local metadata that will be used for the migration.
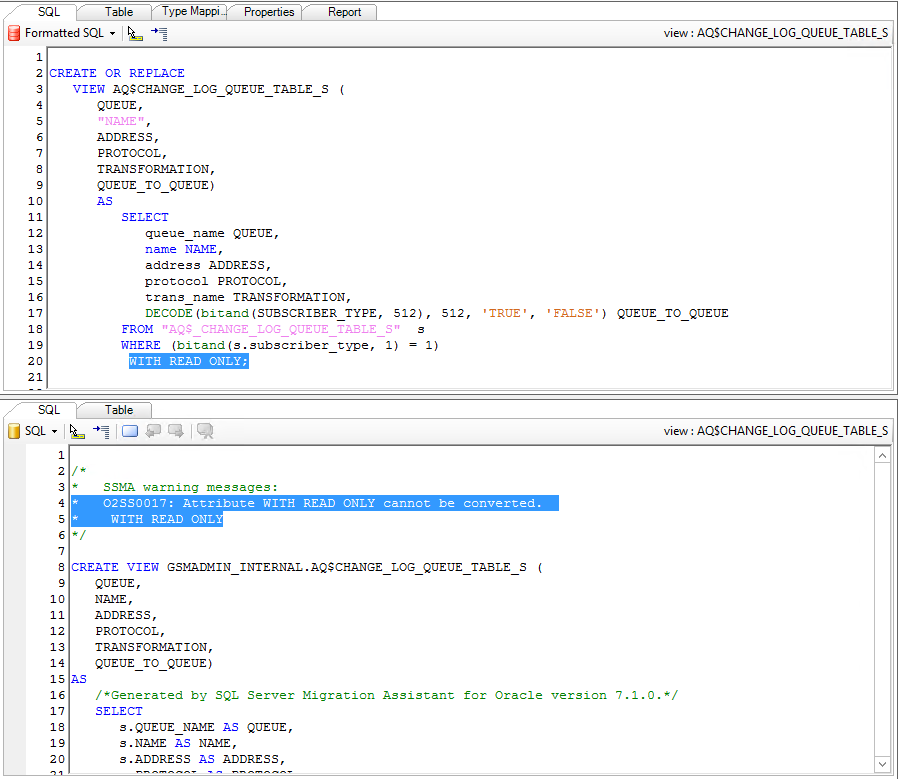
Selecting an object in the Oracle object details pane will present in the converted object code in the SQL Server object details pane where you can find comments about the errors and warnings so you can make the necessary changes to allow the migration running without errors.
I still have 40 conversion warnings about a conversion issue. I could just accept any possible data loss but I will opt for changing the target data type by editing the Type Mapping in the Project properties for the Columns Type Mapping so this change will affect all objects in the current migration project:
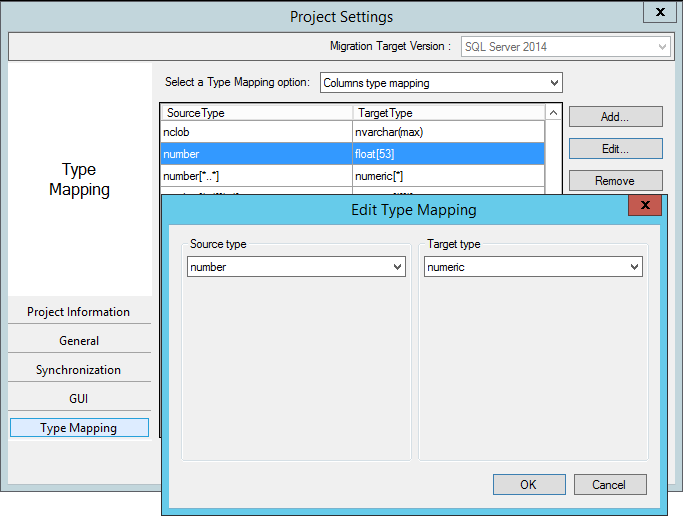
By default a number data type in Oracle is mapped to a float[53] in SQL Server. Changing this to numeric and run the convert schema again by overwriting the existing object definitions it should clear my warning list.
This was a quick mitigation example but do not expect this to be easy for every migration. Database with more objects may lead to more complex mitigations.
Migrate data
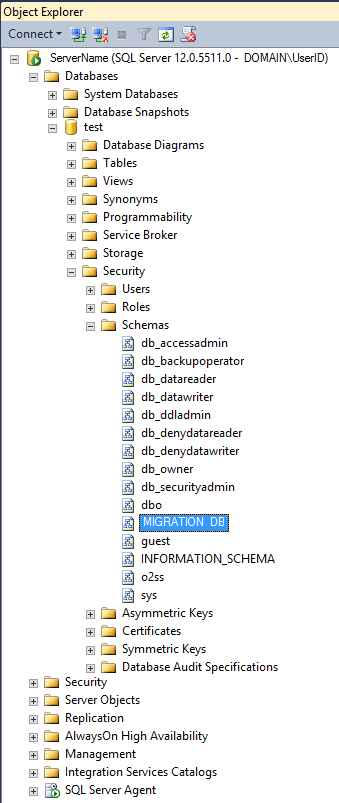
Now that you have all objects of the Oracle schema converted into SSMA metadata and the issues mitigated, you are able to start the migration of the data into the SQL Server database. You can confirm in the SQL Server Metadata Explorer that a Schema has been created to receive the data from Oracle:
There is also a new schema called ssma_oracle that is used to support the migration and should be deleted by SSMA as soon the migration ends.
By clicking in the Migrate Data option you will be asked to connect again to the Oracle and SQL Server databases. A pop-up window will report about the success of the migration and you can then confirm it by logging in the SQL Server database using the SQL Server Management Studio (SSMS):
Confirm that all objects and data are corrected migrated and you should have finished with success your Oracle to SQL Server migration.

He participates in some SQL Server forums, helping other professionals solving SQL Server issues and acting as their mentor whenever is possible.
Vitor also has a website with some useful information about SQL Server: https://f1-sqlserver.wixsite.com/f1-sqlserver
View all posts by Vitor Montalvão
- An introduction to sp_MSforeachtable; run commands iteratively through all tables in a database - August 18, 2017
- SQL Server system databases – the model database - August 9, 2017
- SQL Server system databases – the msdb database - July 14, 2017