
The process of importing or exporting large amounts of data into a SQL Server database, is referred to as bulk import and export respectively. Fortunately, we are provided with a plethora of native tools for managing these tasks incluing
- bcp utility
- Openrowset (Bulk) function
- SQL Server import and export wizard
- Bulk insert statement
- Select into statement
In this article, we’ll review various methods for accomplishing bulk data moving operations from one database to another.
SQL Server import and export wizard
The SQL Server Import and export wizard provides a graphical user interface onto a SQL Server Integration Services (SSIS) package. Once created the package can be automated, to run on a schedule. It can be further configured and modified by using SQL Server Data Tools (SSDT)
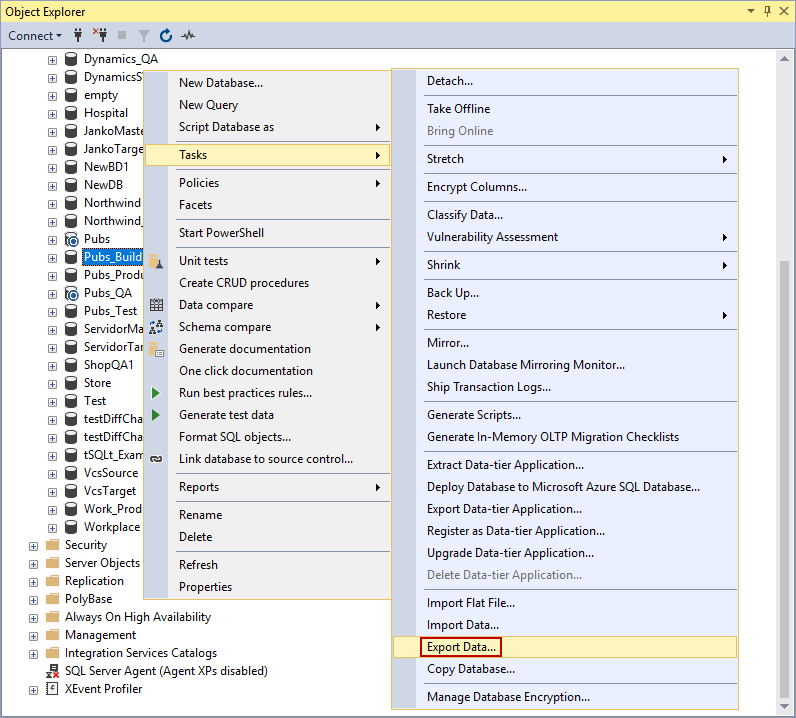
To begin, open the Import and export wizard, right-click a database and select the Tasks sub-menu -> Export data command:
-
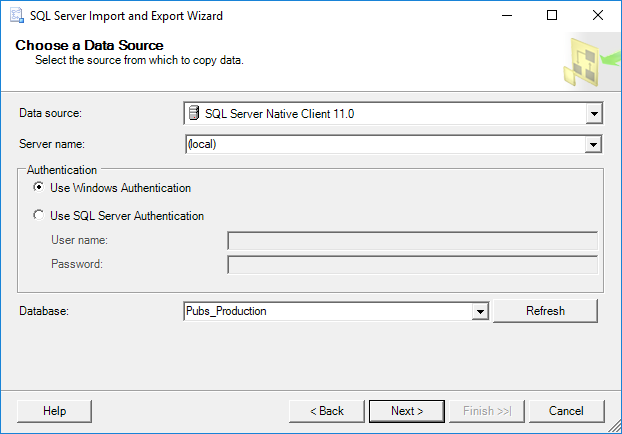
Connect to a source database via the Choose a data source step.
Permissions: You will need the following permissions to for the source data source/instance
- read data from the database or file
- Insert permission on the msdb database to save the SSIS package

-
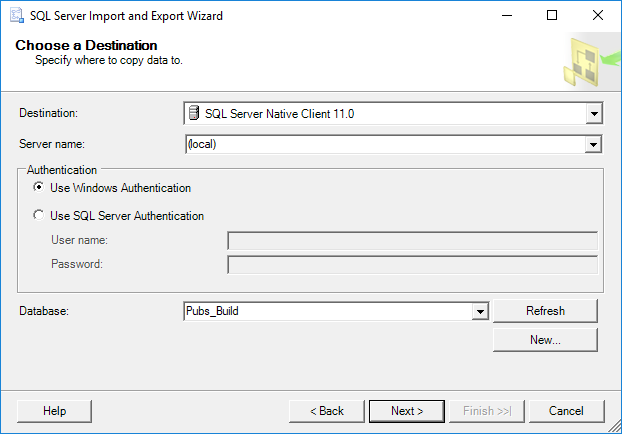
Connect to a destination SQL Server database in the Choose a destination step.
Permissions: The following permissions are required for the destination instance:
- write data to the database or file
- permissions to create a database
- if necessary, permission to create table
-
Choose the Copy data from one or more tables or views option, In the Specify table copy or query step:
-
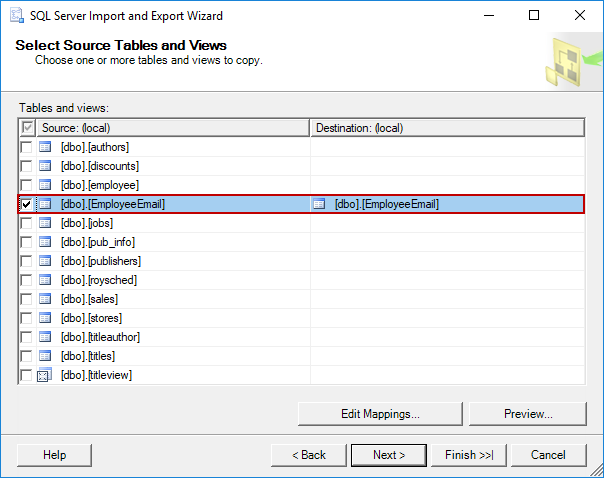
In the Select source tables and views step, choose the table(s) for which you want to export data from:
-
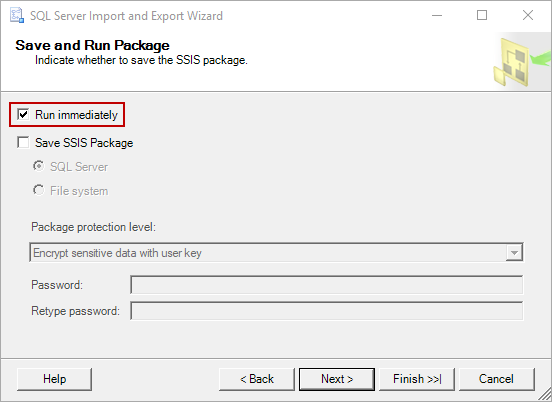
In the Save and run package step, choose the Run immediately option:
-
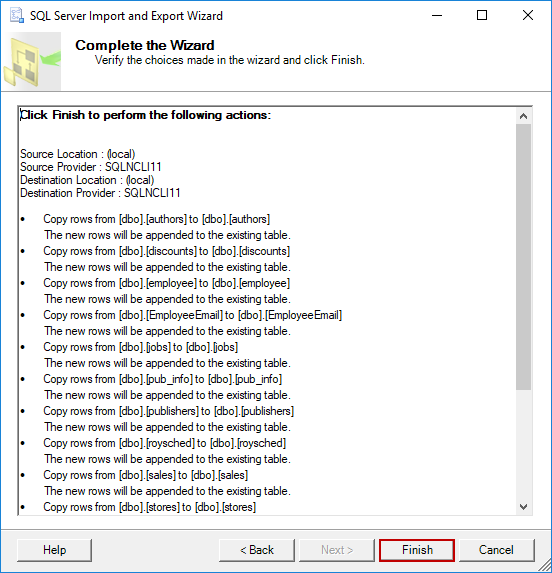
in the Complete the wizard step, Click Finish
-
Once completed, the following dialog will be displayed:


Troubleshooting: The SQL Server import and export wizard will not distinguish identity columns from any other column type. This will lead to errors when inserting data into such columns
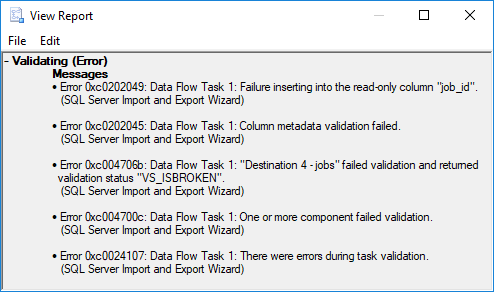
Troubleshooting: The SQL Server import and export wizard also doesn’t process tables based on dependency order. An example might be loading a table, with a foreign key (the child), before the referencing table the parent, causing a foreign key constraint failure
Bulk copy
bcp utility
The BCP utility is a console application, managed via the command line, that can build import/export data from a database to a file and visa versa
For example, to export all TeamMemberIDs and Emails to the TeamMembers.txt file from the TeamMemberEmail table in the QA database, run the following bcp command:
bcp QA.dbo.TeamMemberEmail out TeamMembers.txt –c -T
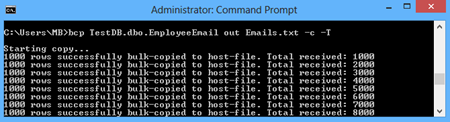
The -c switch specifies that the utility is being used with character data and that the -T switch states that this process will use a trusted connection, the Windows login credentials of the user that is currently logged. If the -T option is not specified a username and password must be specified with the -U and –P options.
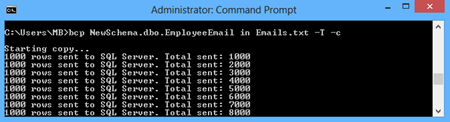
As would be expected, the destination table must exist prior to the import and the table must have the expected number and data types of columns to match the imported data.
To insert data from the TeamMembers.txt file into the NewSchema.dbo.TeamMemberEmail table use the following bcp command:
bcp NewSchema.dbo.TeamMemberEmail in TeamMembers.txt -T –c
Permissions: Select permissions are required on the source table
Bulk insert statement
Another option for importing/exporting data between files and tables is the Bulk insert statement. The same restrictions and requirements that apply to BCP apply to Bulk insert as well including the requirement for a table to exist that matches the imported data
First let’s specify location of the file from which to import the data and the destination database and table:
|
1 2 3 |
BULK INSERT TestRemote.dbo.TeamMemberEmail FROM 'C:\TeamMembers.txt '; GO |
Openrowset(Bulk) function
Openrowset(Bulk) is a T-SQL function that connects via an OLE DB data source to read data. It can access remoted data sources from a remote connection vs a linked server
|
1 2 3 4 |
INSERT INTO AllEmails(Email) SELECT * FROM OPENROWSET( BULK 'C:\TeamMembers.txt ', SINGLE_BLOB) AS x; |
The Openrowset(Bulk) function provides an alternative to accessing objects from a linked server and it is suitable for one-off entry of data from a remote source.
SELECT INTO
The Into clause used, in combination with the Select statement, enables creating a new table based on the result set of the Select statement. For example, to copy the TeamMemberEmail table, on the same instance, in the default schema of the QA database, run the following query:
|
1 2 |
SELECT * INTO QA.dbo.TeamMemberEmail FROM Neptune.HumanResources.TeamMemberEmail; |
Select into cannot be used to create a new table on a remote SQL Server instance, but a remote source can be included in the Select statement, if there is a link to the remote instance.
Any constraints, indexes, and triggers will not be transferred to the new table. Columns in the newly created table will not inherit the Identity property from the query output if the Select statement contains an aggregate function, a Join clause, or a Group by clause, and if an identity column is used in an expression, is used more than once, or is from a remote data source.
Export and Import data by using ApexSQL Script
Using ApexSQL Script, a SQL Server data and schema scripting and migration tool, you can make a SQL script to export data, or both data and schemas, from a source instance and execute it on a destination instance to perform the import.
To script SQL Server database data using ApexSQL Script, follow these steps:
- Run ApexSQL Script
-
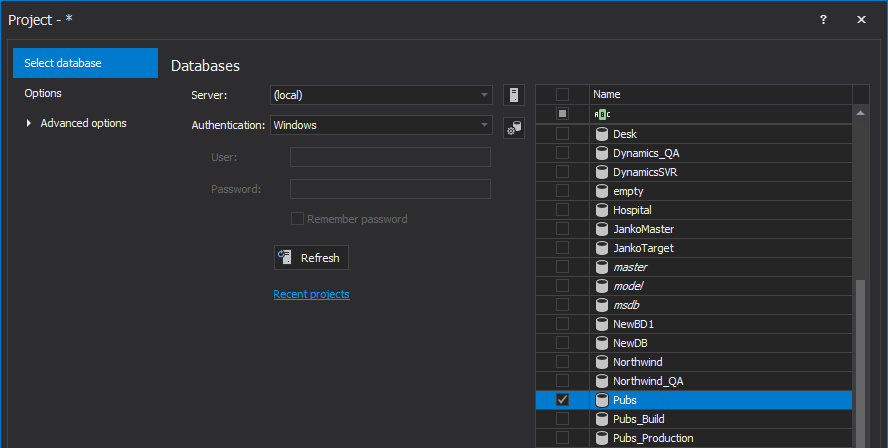
In the New project window, specify the server, data source and credentials to connect to a datasource:
-
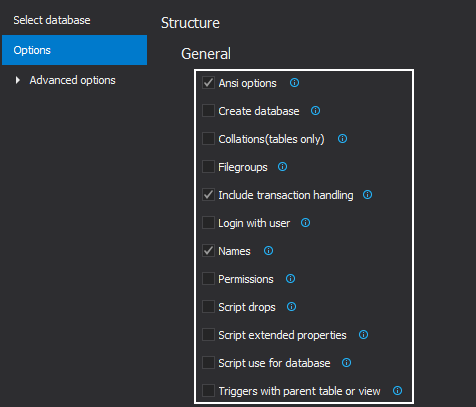
ApexSQL Script can script objects, data or both. If both data and objects are scripted, in the Options tab, under the Structure section, assuming that a destination database exists, uncheck the Create database option and the Script use for database option.
If a tables containing constraints, indexes, or foreign keys exist, check the Names option to script the names of those objects:
-
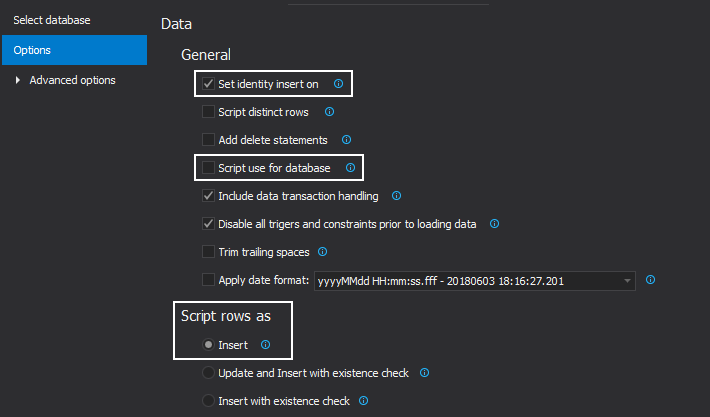
ApexSQL Script handles identity fields. Under the Data section in the Options tab, check the Set identity insert on option. Under the Script rows as section, select the Insert option:
-
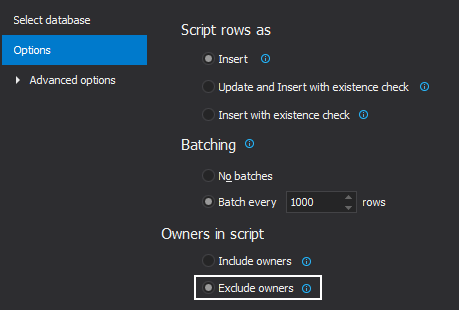
If a destination database has a different schemas than the source database, in the Options tab, under the Owners in the script section, select the Exclude owners option to exclude schemas from the object names:
- Once you have configured your export profile to your satisfaction, click the Load button in the bottom-right corner of the New project window
-
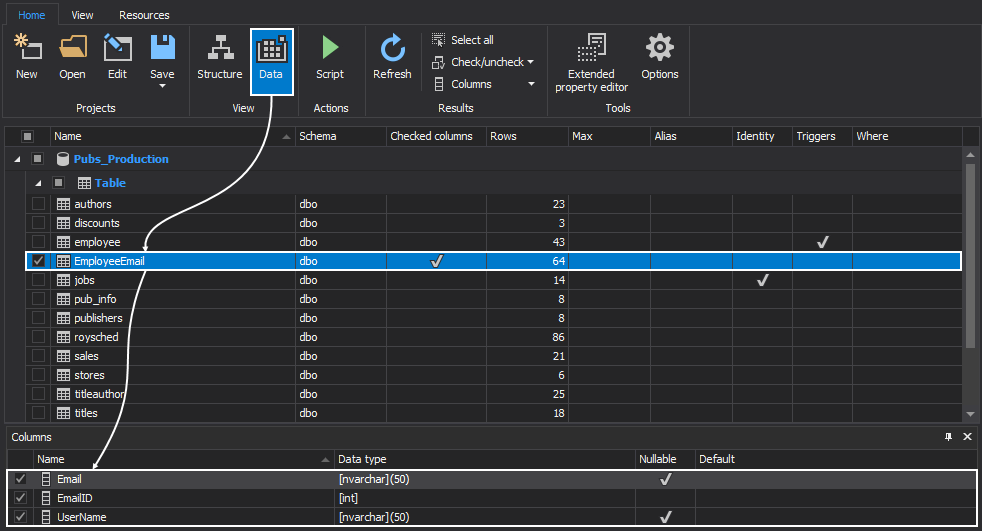
In the Results grid, you can visualize the data to be scripted, at an aggregate level. In the Home tab, show the Data grid view. You can specify tables and even individual columns
-
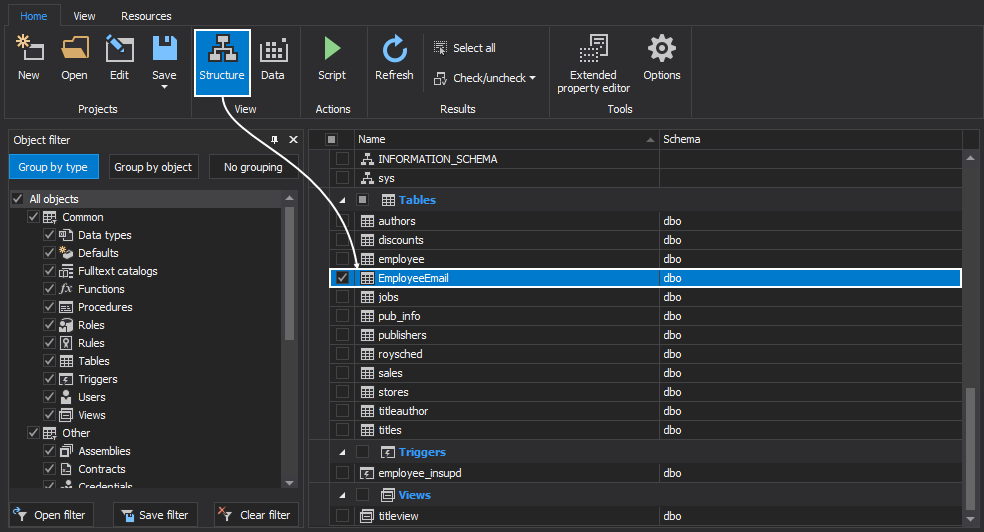
Clicking on the Structure button from the Home tab, switch to the Structure grid view and select specific tables (and/or views) to script:
-
Now that the scripting profile is complete, click the Script button from the Home tab to initiate the Script wizard:
-
The script wizard will be shown. In the first step of the Script wizard, select the Structure and data scripting mode and click Next:
-
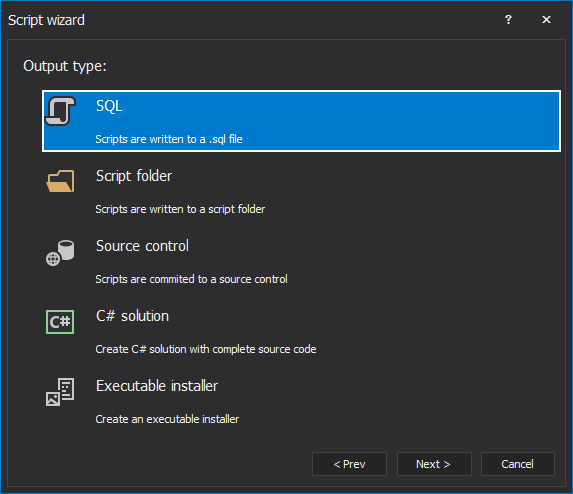
In the Output type step, select the SQL output type and click Next:
- Any dependent objects will be shown and checked by default in the Dependencies step
-
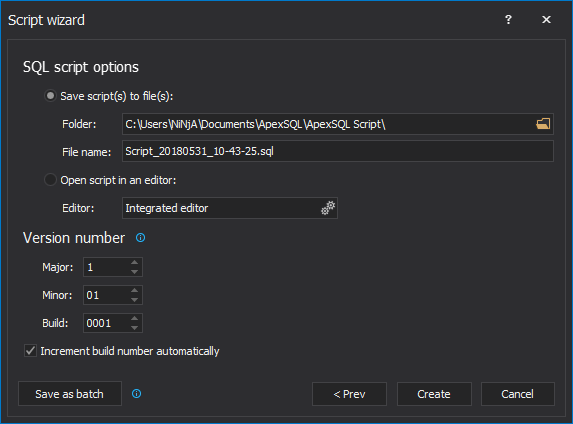
In the final step, the SQL Script options step, select the Save the script to file option and click Create:
-
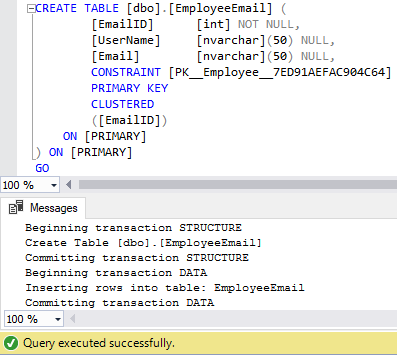
Open the newly created script in SQL Server Management Studio and execute it on the database of your choice


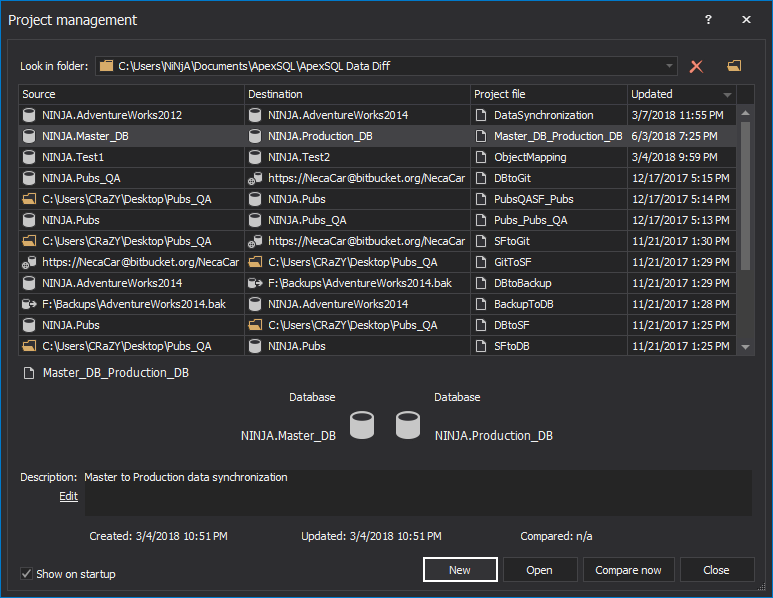
Copy data by using ApexSQL Data Diff
ApexSQL Data Diff is another useful tool for moving data. It is primarily designed as a comparison and synchronization tool, and as such it assumes that two tables, of similar structure, will exist in both databases.
If a destination table already exists and it has the same structure as the source table, you can use ApexSQL Data Diff to migrate, import and export data. ApexSQL Data Diff is a SQL data compare tool that can compare and synchronize database tables but also copy data from one table or tables to a destination database table or tables, as we’ll demonstrate now.
To move data with ApexSQL Data Diff, follow these steps:
- Run ApexSQL Data Diff
-
In the New project window, click the New button:
-
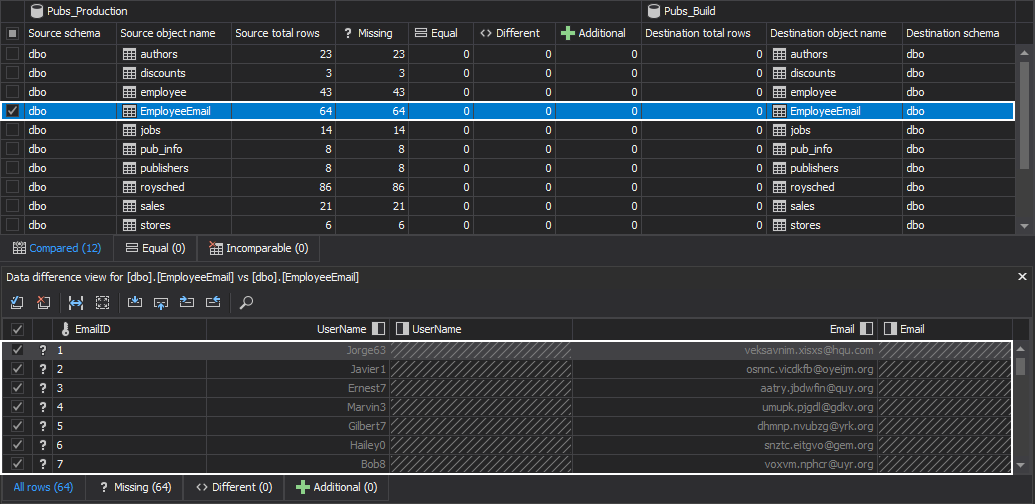
Under the Data sources tab of the New project window, connect to the source and destination databases, and click the Compare button:
-
In the Results grid, select specific tables even specific rows to copy:
-
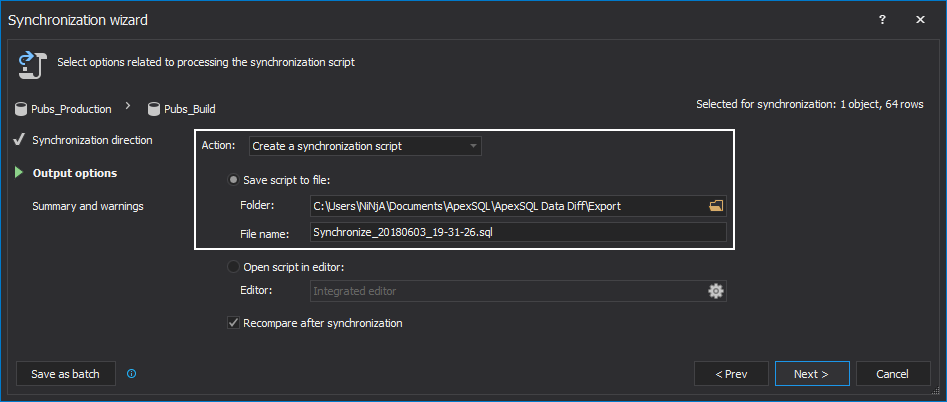
Click the Synchronize button to initiate the Synchronization wizard:
-
Go through the Synchronization wizard and under the Output options step, select the Create a synchronization script action along with the Save script to file option:
-
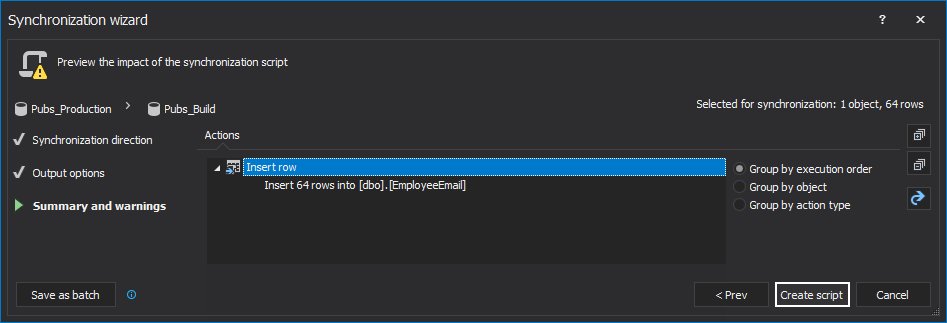
In the last step of the Synchronization wizard preview the impact of the synchronization script and review any warnings and actions, before deciding to proceed:
-
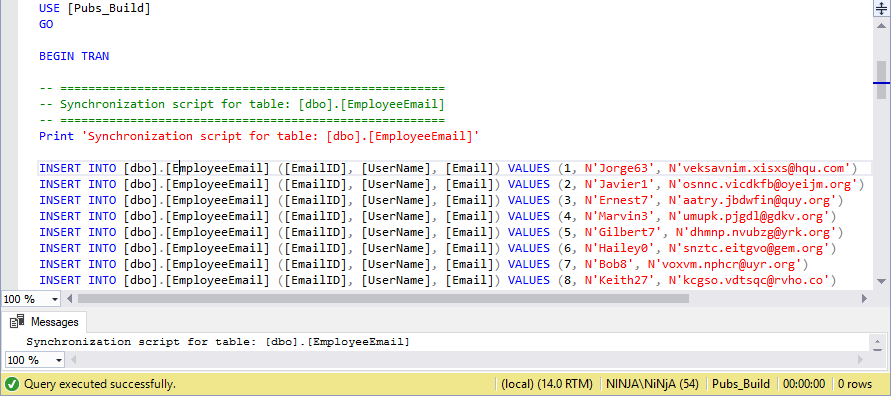
Click the Create script button, open it in SQL Server Management Studio and execute the script. Your data will have been successfully moved:
Nemanja is an IT enthusiast who enjoys reading books, playing and watching soccer and basketball, and traveling.
He uses his spare time on tuning and styling of his car, playing video games, and fishing.
Nemanja is currently working for ApexSQL LLC as a Software sales engineer. He’s specialized in SQL database schema and data comparison and synchronization, and he helps customers with technical issues, providing DEMO presentations, and does the quality assurance for ApexSQL Data Diff and ApexSQL Diff.
View all posts by Nemanja PopovicLatest posts by Nemanja Popovic (see all)