
As DBAs, we all face a lot of challenges while performing the migration of SQL Server databases from one server to another or even the whole servers at some times. The Database Migration process is not always a simple Backup and Restore process so we might need a huge amount of effort if we have to migrate objects which are not included in the native backups for a specified database, these objects are called Non-Contained Objects.
I will give you detailed, yet simple and comprehensive information here, about migration of SQL Server non-contained object migration which is core part of Database Migration and required in mostly Disaster Recovery implementations.
So, before going into the details I would like to present some scenario for you and you will find a good example where a simple backup and restore will not be enough.
Scenario in which we might use the below mentioned approach is given below:
You have couple of databases on a Source Server A and you need to create Always On Availability Group Replica on Destination Server B for full disaster recovery solution. After you configure each and every detail of AG (Availability Group) and perform and full failover of databases and bam! there you go, all the security object, jobs, alerts, Operators, PBMs, LinkedServers, Database Mail Settings, SQL Server User objects in Systems Databases or permissions are missing.
So, what will you do? Will you transfer everything manually? Okay for one server you can but what if you have 50 servers with AG configured? Now you need some more robust and intelligent yet automated solution for transferring Non-Contained Object Migration. And Powershell is the solution here and there is nothing you can do in Powershell which you can perform in SQL server. Even backing up the SQL Server Replication for Disaster Recovery which is not natively supported. I won’t explain it here as that will be out of the scope of current article.
So, here is the solution you will need in the scenario discussed above.
Some of the most common object which are required in migration process but not included in the backups are security object, jobs, alerts, Operators, PBMs, Linked Servers, Database Mail Settings, SQL Server User objects in Systems Databases and permissions.
The quick way to install the Powershell modules produced by DBA Tools Team. Thanks to the “DBA Tools” Team and extremely hard working DBAs working for community work on this site that we are able to do this easily like a piece of cake using PowerShell Modules. DBA Tools is a free PowerShell toolkit and it’s free to download from the URL. The Toolkit is really vast and has a variety of options available. I have used only eight of the commands but registered ALL the modules in the PowerShell windows.
Here is a way to deploy the DBA Tools and use them for your environment for Non-Contained Object Migration in SQL Server.
- Registration of PowerShell modules in windows
- Setting the right Execution Policy
- Commands for migration of non-contained objects
- Automating the migration
- Registration of PowerShell modules in windows
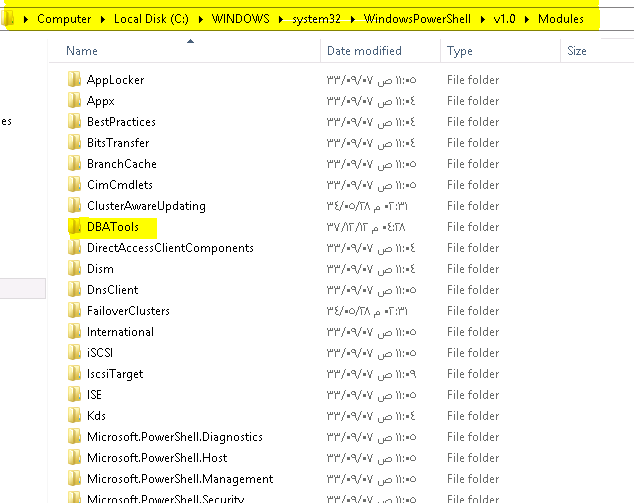
Before we can use any command from the PowerShell modules from dbatools in windows we need to register it in the windows.
Registering is a very easy setup, you just need to copy the folder containing the modules to the windows path where PowerShell is hosted. Mostly the path is as follows and you can find it easily by starting the PowerShell ISE and taking properties and getting path from there.
“C:\WINDOWS\system32\WindowsPowerShell\v1.0\Modules”
Source Folder containing the dbatools which will be copied to the destination.
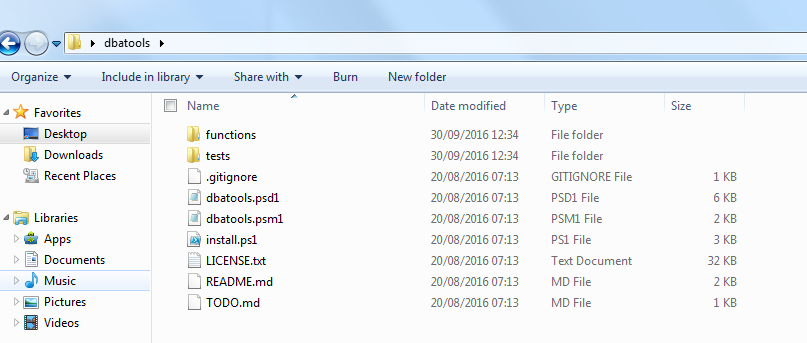
Destination folder where you need to copy the modules where other modules (windows PowerShell) will be residing.
- Setting the right Execution Policy
On the PowerShell ISE before starting the execution of the dbatools scripts you need to set the execution policy to bypass to allow the custom scripts to be executed. For this purpose, you need to issue the command on powershell cmd or ISE and accept it as YES when prompted.
Set-ExecutionPolicy -Scope Process -ExecutionPolicy Bypass
After registration and setting the execution policy right, you can use any command and like Copy-SqlLogin and specify source and destination servers and it will migrate.
In SQL Server AlwaysOn Availability Groups as a Disaster Recovery Solution, migrating the Non-Contained Objects more often would be preferred and keep in mind that we can only transfer the Non-Contained Objects as the destination database are already in Read-Only mode on any of the Secondary Replica and all the Contained Objects will automatically be migrated any way.
- Commands for migration of non-contained objects
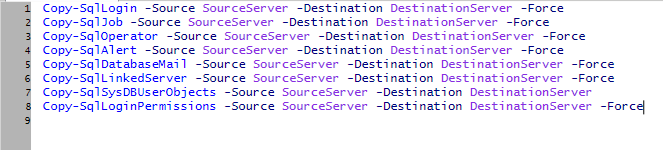
Copy-SqlLogin -Source MySourceServer -Destination MyDestinationServer -Force Copy-SqlJob -Source MySourceServer -Destination MyDestinationServer -Force Copy-SqlOperator -Source MySourceServer -Destination MyDestinationServer -Force Copy-SqlAlert -Source MySourceServer -Destination MyDestinationServer -Force Copy-SqlDatabaseMail -Source MySourceServer -Destination MyDestinationServer -Force Copy-SqlLinkedServer -Source MySourceServer -Destination MyDestinationServer –Force Copy-SqlSysDbUserObjects -Source MySourceServer -Destination MyDestinationServer Sync-SqlLoginPermissions -Source MySourceServer -Destination MyDestinationServer
Almost all the commands which I have used are using the optional parameter “Force” which will enforce that the object mentioned will be dropped and re-created. In my environment its feasible so if you don’t want to drop/re-create the objects then it’s your choice you can easily remove the –Force optional parameter and get only the merge functionality.
- Automating the migration
To Automate the migration process, simply place the above mentioned commands with your actual server names in a .ps1 (PowerShell File) file and place the file anywhere which can be accessed by your Source/Destination Server on which you want to create the automation jobs.
After placing the file in a location you can simply call that file in TSQL and schedule it to run over the weekend or any time which is suitable for your load.
123456DECLARE @SQLString nVARCHAR(1000)SET @SQLString = 'powershell.exe -file "X:\Poweshell\Migrate Non Contained Objects to DR.ps1" 'EXEC xp_cmdshell @SQLStringGOKeep in mind that whenever creating the logins the above mentioned commands will re-create the sql logins and while re-creating them the connection to the DR will be dropped so if you have any secondary replica reading applications then keep in mind that the object migration should only be done while a non-production hour for the replica.
The job will take some time between 30-40 minutes (in my environment) or more depending upon the network latency and number of objects to migrate.
The first run should be monitored and should only be executed by experienced DBAs and after detailed verification you can deploy it and then make your life easier by having a confidence that now you have each and everything replicated.
So, Powershell with this module in combination with AG is really a great match. It will save a lot of time and manual effort in case of actual disaster.
He has 9+ Years of Database Development & Administration experience with Medical Billing, Startup & Financial Companies. He is a Microsoft Certified Expert for Data Platform (SQL Server 2012/2014).
Currently, performing duties as Senior SQL Server Consultant at multiple Saudi Private and Governmental Organizations.
View all posts by Musab Umair
- How to identify slow running queries in SQL Server - May 31, 2017
- Adaptive Query Processing in SQL Server 2017 - April 28, 2017
- What is the SQL Server Virtual Log file and how to monitor it - April 26, 2017