
In this article, we will understand how we can manage a SQL Database in CentOS 8.0. This article is the first article on the topic Manage SQL Server on CentOS.
- Step-by-step Installation of SQL Server and client tools in CentOS
- Create and connect to the SQL Database
I have created a virtual machine on a workstation and installed CentOS 8.0. First, let us install SQL Server on CentOS.
Install SQL Server on CentOS
To install a SQL Server on CentOS, perform the following steps.
Step 1: Update the CentOS system package
Before we start the installation, we should update the CentOS system packages and repositories. To do that, run the following command.
root@localhost ~]# sudo yum install -y mssql-server
Step 2: Add SQL Server repository
Once packages are updated, we must add Microsoft SQL Server 2019 repository in CentOS. To add the repository, run the following command.
root@localhost ~]# curl https://packages.microsoft.com/config/rhel/8/prod.repo > /etc/yum.repos.d/msprod.repo
Step 3: Install SQL Server 2019
Once the repository is installed, we can begin the installation of the SQL Server 2019. To do that, execute the below command.
[root@localhost ~]# sudo yum install -y mssql-server
Step 4: Configure the SQL Server instance
To configure the SQL Server instance, we can use the mysql-conf file. The mysql-conf is a configuration file that helps to install the SQL Server in a Linux environment. While configuring, you will be asked to enter appropriate values to configure the SQL Server; therefore specify the appropriate configuration parameters to complete the installation successfully. Let us begin the configuration process by running the following command.
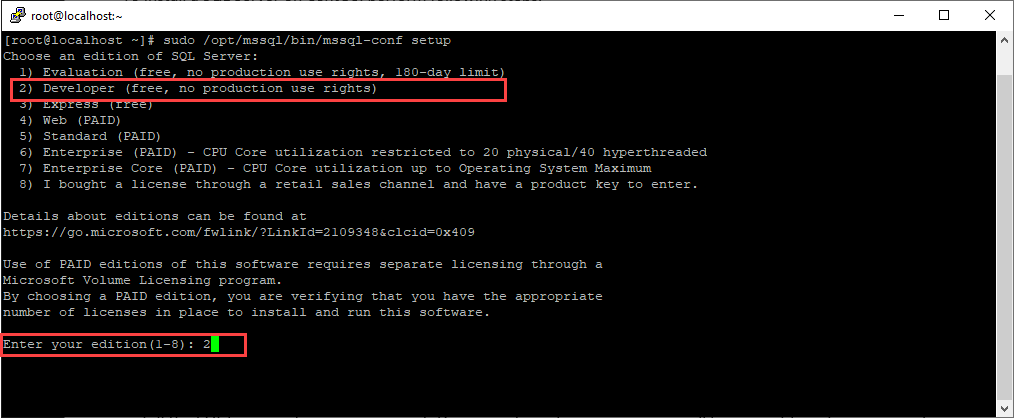
[root@localhost ~]# sudo /opt/mssql/bin/mssql-conf setup
First, you must enter the edition of SQL Server 2019. The appropriate values are
- Evaluation (Free trial for 100 days)
- Developer (Free version, but you can use it in a non-production environment)
- Express (free)
- Web
- Standard (Paid license with resource cap. it is ideal for small and medium-sized organizations or applications)
- Enterprise (Paid license without any resource cap)
- I bought a license through a retail sales channel and have a product key to enter. (In this option, you must enter the product key to use the SQL Server)
In our setup, choose developer edition. And hit Enter key.
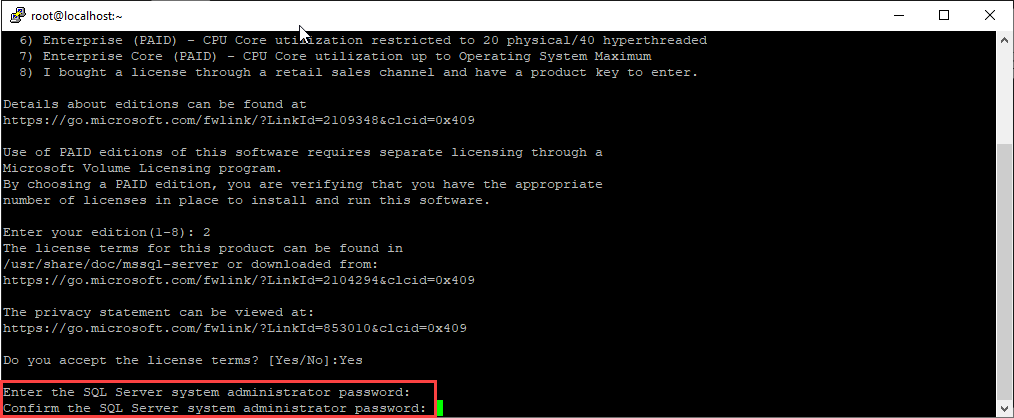
Next, you are asked to accept or reject the license terms. Press Yes to accept the license terms.

Next, provide the SQL Server system administrator password. Provide the desired password.
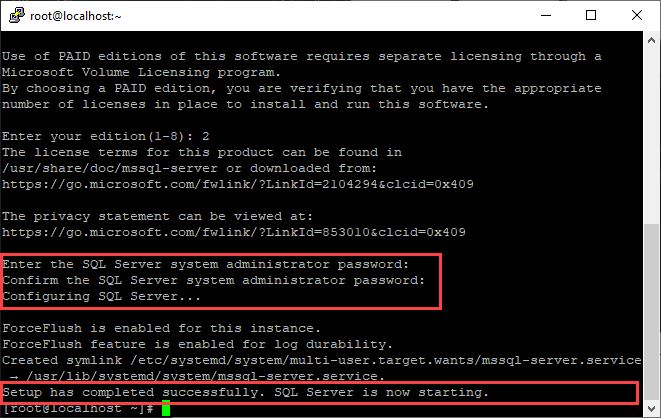
Once the password is set, the SQL Server finishes the configuration, and the SQL Server services will be started.
You can view the status of the SQL Services by running the following command.
[root@localhost ~]# service mssql-server status
Output
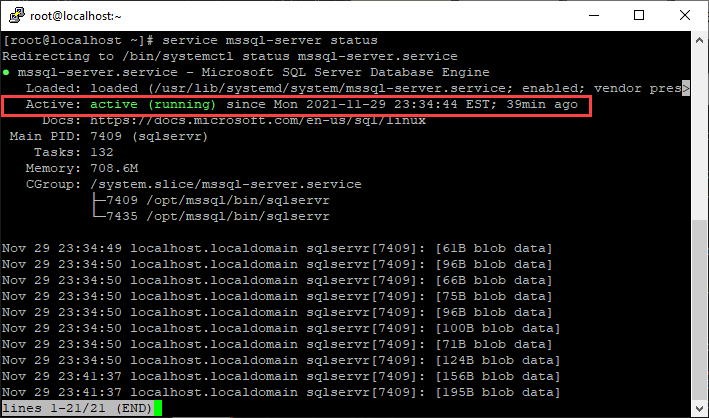
As you can see in the above image, the SQL Server services are running.
Now, we must set an environment variable to use the SQL Server executables and command-line tools without specifying the entire path. Add /opt/mssql-tools/bin directory to $PATH variable. To do that, run the following command.
[root@localhost ~]# echo ‘export PATH=”$PATH:/opt/mssql-tools/bin”‘ >> ~/.bashrc
[root@localhost ~]# source ~/.bashrc
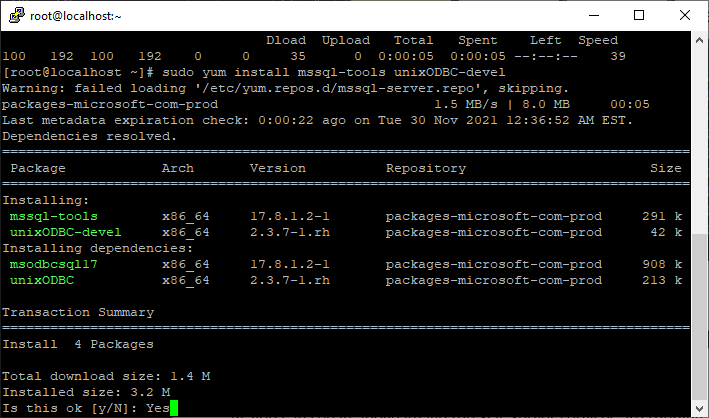
Let us install the client tools to connect the database engine and access the SQL database. Run the following command.
[root@localhost ~]# sudo yum install mssql-tools unixODBC-devel
Following unixODBC packages will be installed.
- mssql-tools
- unixODBC-devel
Following dependencies will be added.
- msodbcsql17
- unixODBC
Screenshot:
If required, open the SQL Server default port in the firewall.
[root@localhost ~]# sudo firewall-cmd –add-port=1433/tcp –permanent
[root@localhost ~]# sudo firewall-cmd –reload
Once everything is set up, let’s connect to the SQL Server using SQL Server command-line tools. Launch the following command.
[root@localhost ~]# sqlcmd -U sa
Password:
Once connected, run @@version statement to view the SQL Server edition.
1> select @@version
2> Go
Command output
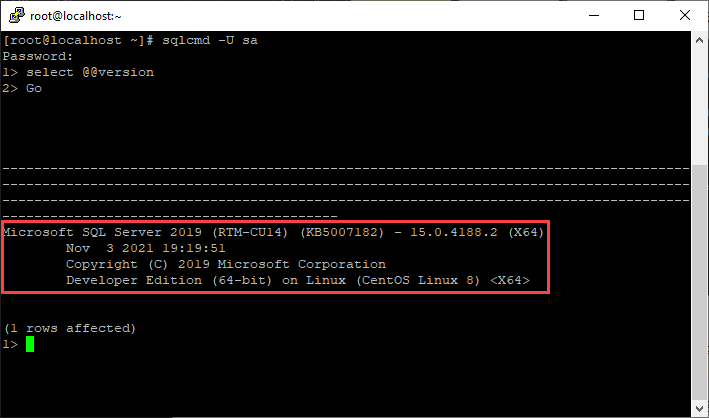
As you can see, The SQL Server is installed successfully, and we are connected to the database engine.
Connect to SQL Server on CentOS using SQL Server management studio
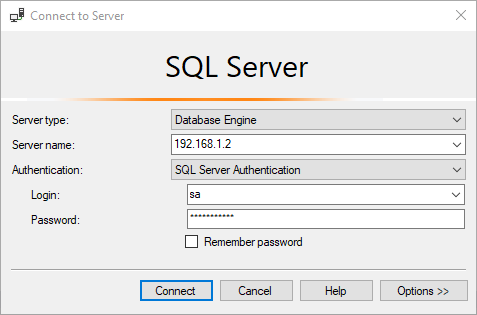
Let’s connect to it using SQL Server management studio. As I have mentioned at the beginning of the article, I have configured the CentOS on my virtual machine and the SQL Server management studio on the machine. While connecting to the SQL Server, we will specify the IPAddress of the virtual machine. Launch SQL Server Management studio and in Connect to Database engine enter the connection parameters as shown below.
- Server type: Database Engine
- Server name: 192.168.1.2
- Authentication: SQL Server authentication
- Login: sa
- Password: Provide the appropriate password that you have set while installing SQL Server
Screenshot:
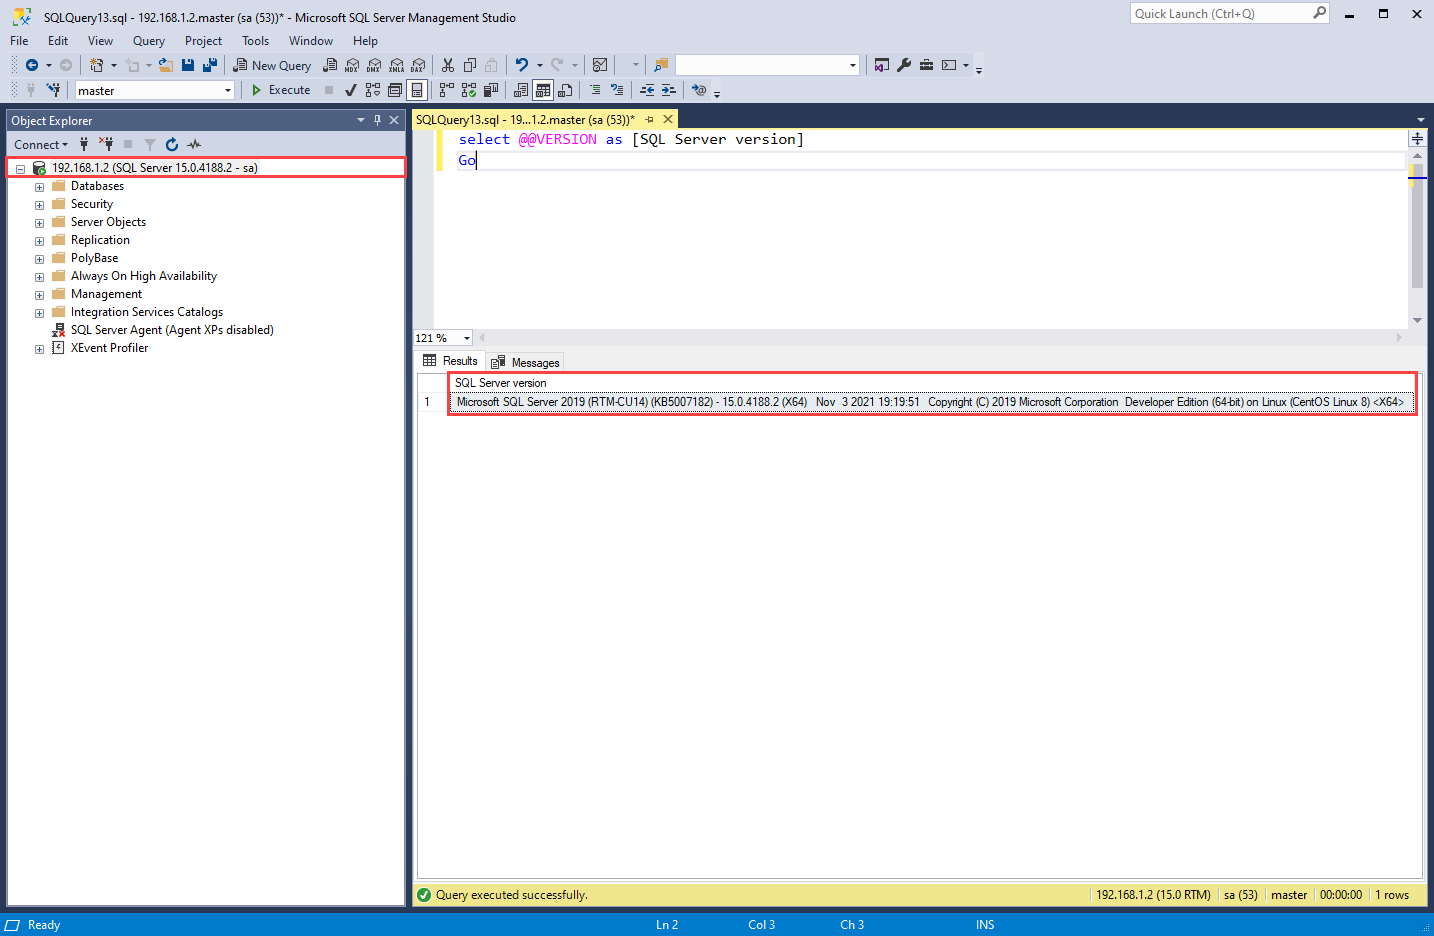
Again, run the @@version statement in the query editor window.
Select @@version
Query output
Now, let us populate some basic information of SQL Databases and SQL Server instances.
Create a SQL Database
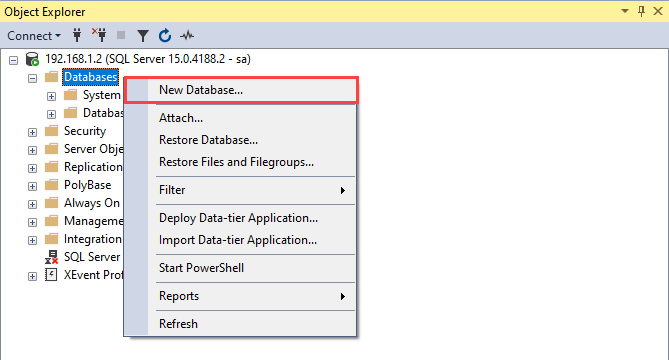
Let us create a SQL Database using SQL Server management studio. To do that, right-click on Databases 🡪 Select New Database…
In the New Database dialog box, enter the appropriate database name. In our case, the database name is Stackoverflow2010.
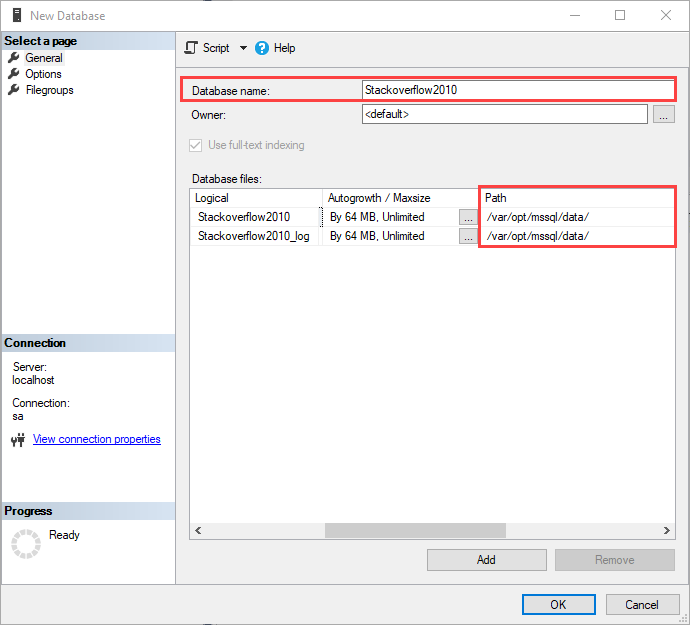
As you can see, the location of the SQL database is /var/opt/mssql/data/, which is the default location. We can change the settings of SQL Database by editing configuration files. I will explain it in my upcoming articles.
Summary
In this article, we understood how to install the SQL Server 2019 on CentOS. I have explained:
- The step-by-step installation process of SQL Server on CentOS.
- Connect to SQL Server using SQL Server management studio.
- Create a sample database and view the location of the database files.

He has expertise in database design, performance tuning, backup and recovery, HA and DR setup, database migrations and upgrades. He has completed the B.Tech from Ganpat University. He can be reached on nisargupadhyay87@outlook.com
- Different ways to identify and change compatibility levels in SQL Server - July 22, 2024
- Copy SQL Databases between Windows 10 and CentOS using SQL Server data tools - October 19, 2022
- Changing the location of FILESTREAM data files in SQL Database - October 14, 2022