

In this article, we are going to learn how we can install PostgreSQL on CentOS. Just like Ubuntu and Redgate, CentOS is a Linux distribution and is used by many organizations. I have written an article, How to install PostgreSQL on Windows that covers the step-by-step installation process of the PostgreSQL on windows 10.
In this article, we will talk about the following:
- How to install a CentOS on a virtual machine.
- How to install and configure the PostgreSQL on CentOS.
- How to install and configure the pgAdmin4.
First, let us prepare a demo environment.
Prepare Demo environment
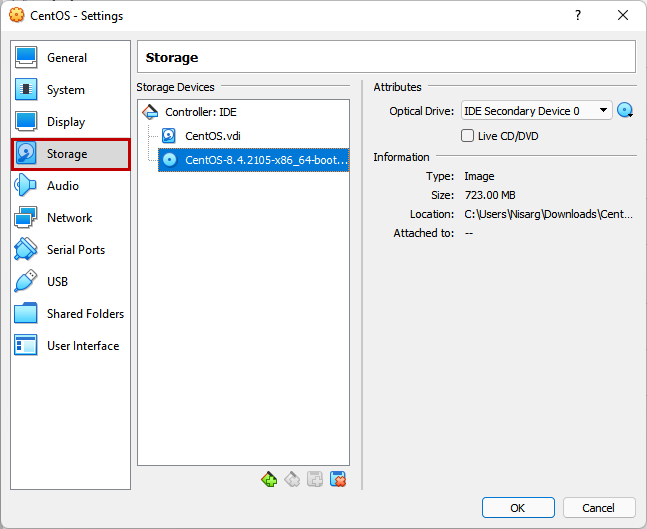
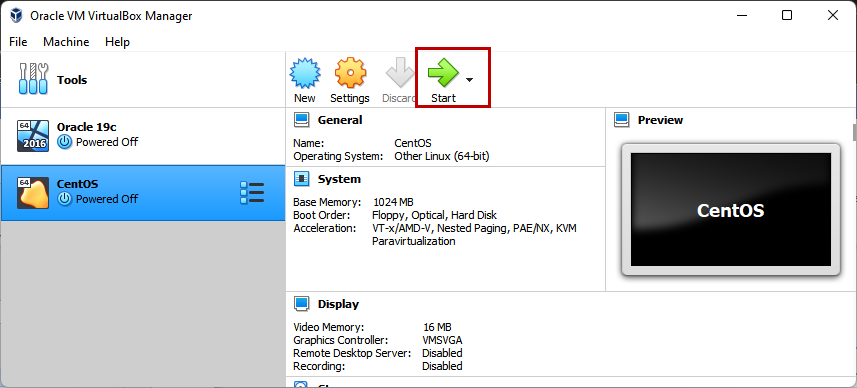
I have downloaded an image file of the CentOS from here. I have created a virtual machine named CentOS in the Oracle VM Virtual Box. I have mounted the disk image of CentOS Linux in the virtual optical drive.
Now, click on Start to begin the installation.
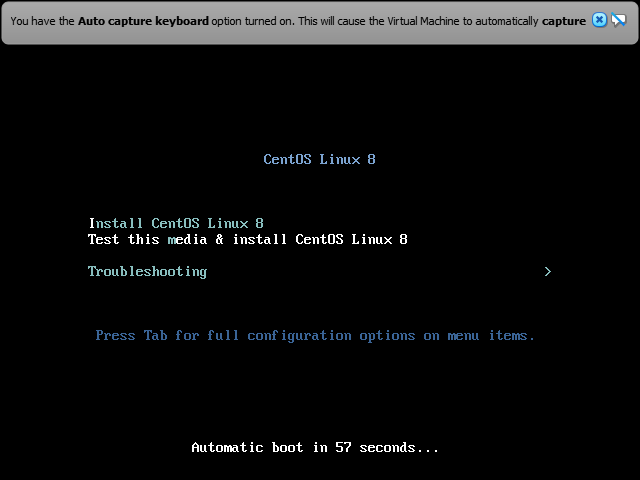
On the first screen, select Install CentOS Linux 8.
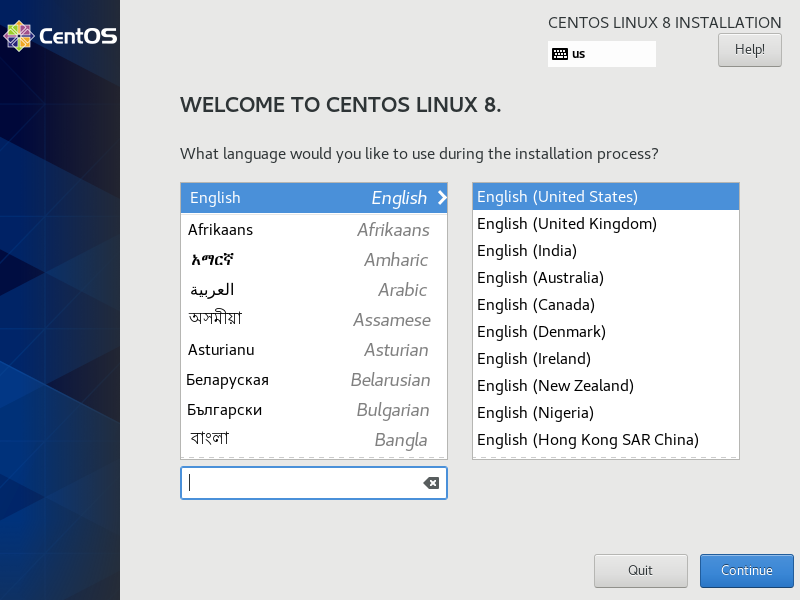
The installation process begins. On the Welcome to CentOS Linux 8 screen, select the desired language you want to use during the installation process. I have chosen English. Click Continue.
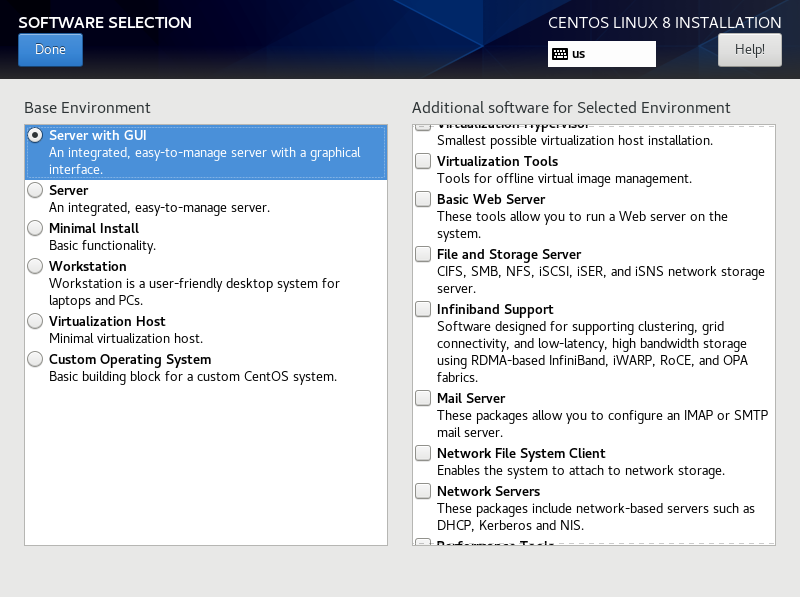
On the Installation Summary screen, you can configure the localization, software, and system configuration. We have not selected any software so click on Software Selection.
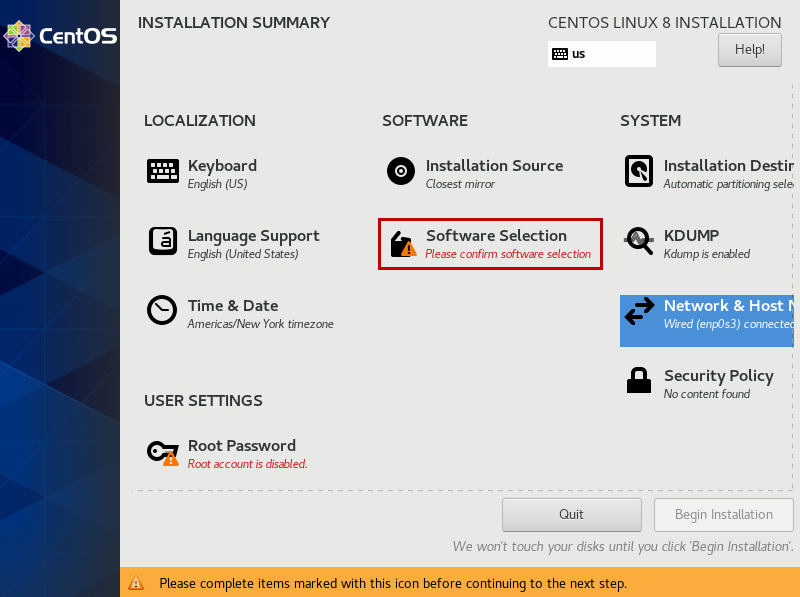
On the Software Selection screen, you can select the type of base environment and additional software. On the screen, you can view the various base environments and a list of additional software. I am installing the CentOS server with GUI, so I have selected the Server with GUI option. Click Done.
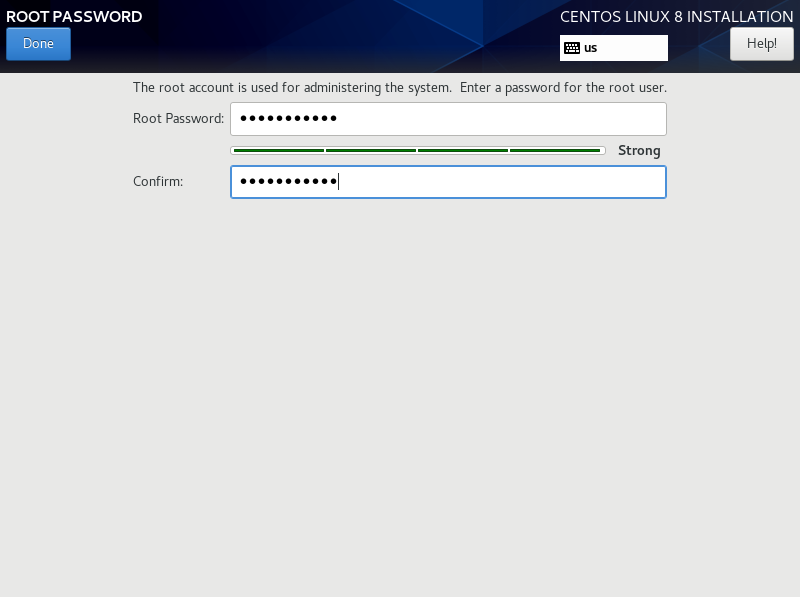
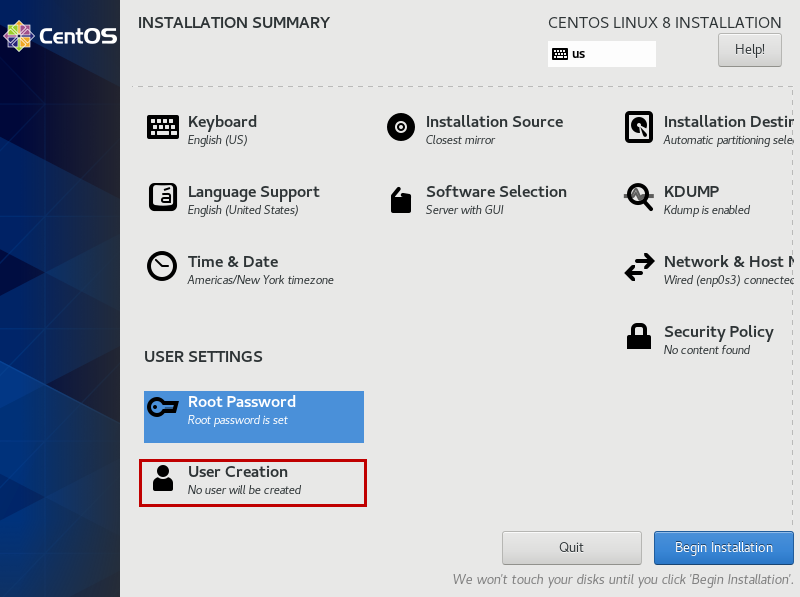
I want to enable the root user, so click on the Root Password option in the installation summary screen.
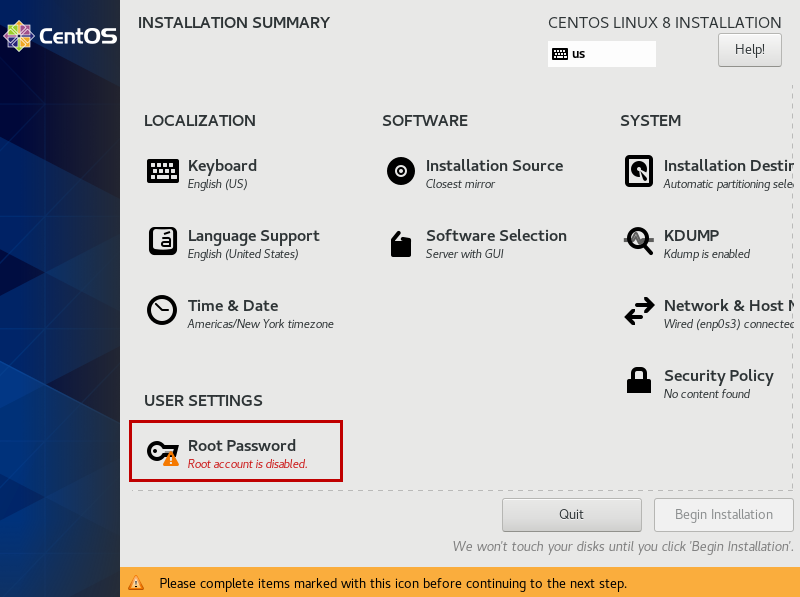
On the Root Password screen, enter the desired password and click on Done.
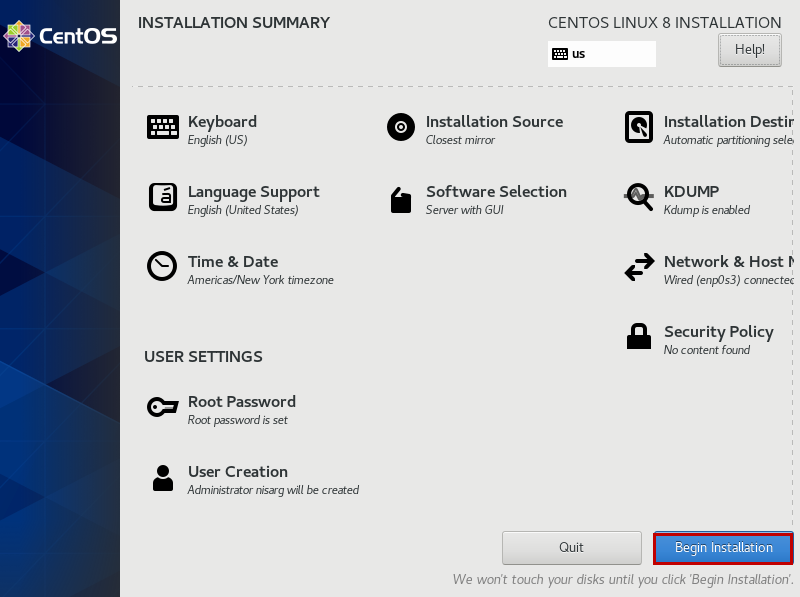
Back to the Installation Summary screen, you can see that the Begin Installation button is enabled. Along with the root user, I want to add another user named Nisarg. To do that, click on User Creation.
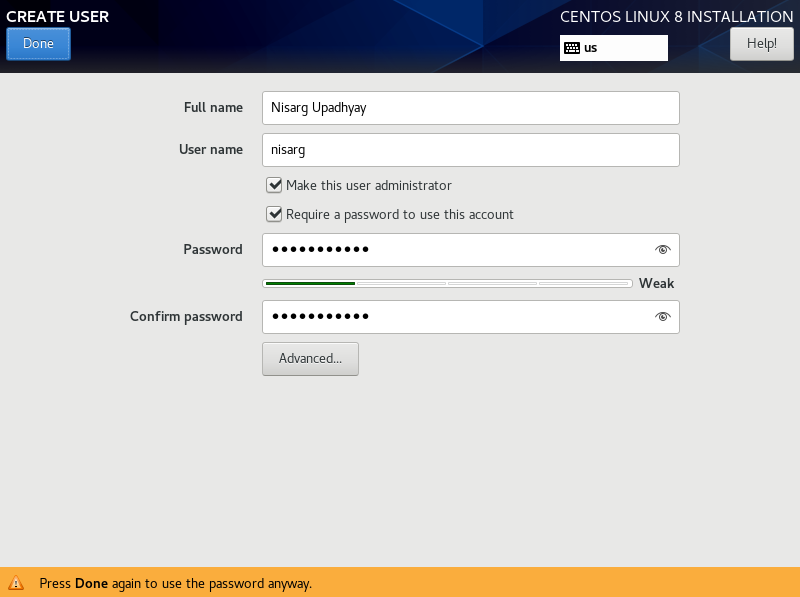
On Create User screen, specify Nisarg as User name and provide the desired password. I want to make the user an administrator, so I have selected the Make this user administrator option. Click on Done to create the user.
Now, click on Begin Installation to start the installation process of CentOS 8.
The installation process begins.
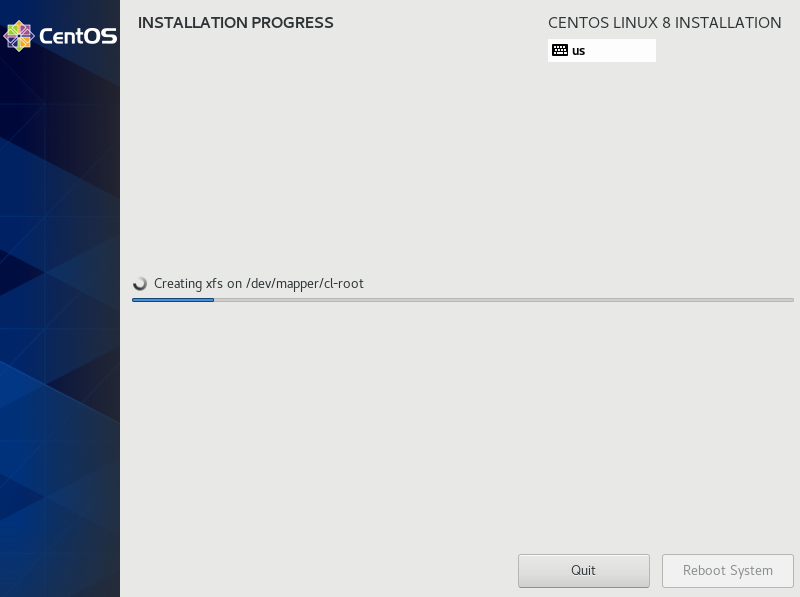
Note: I have downloaded the basic media image; therefore, the installation process will download the required packages from the CentOS repository.
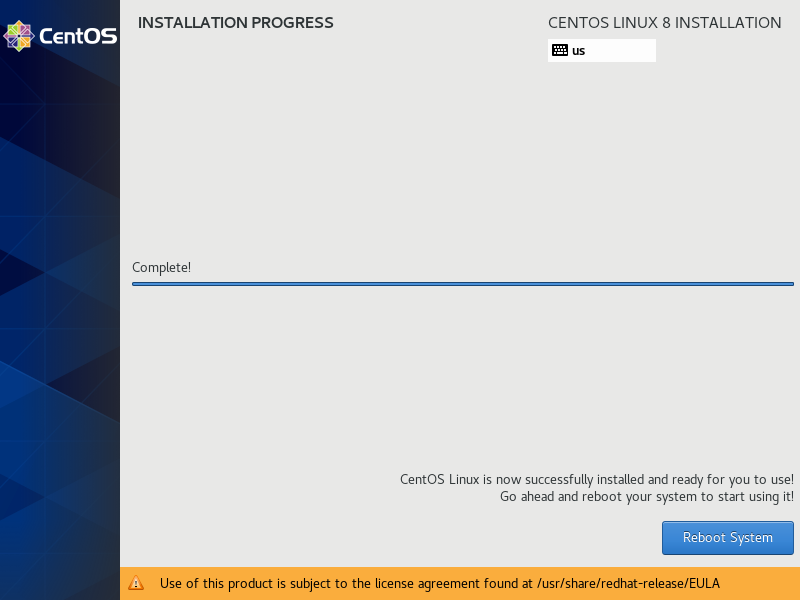
Once the installation completes, click on Reboot System to restart the virtual machine.
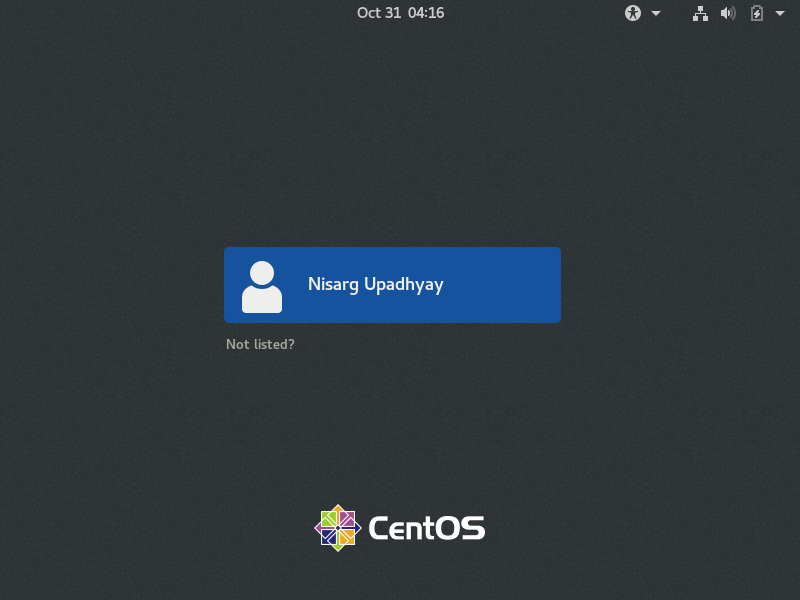
Once the virtual machine is rebooted, the login screen appears, which indicates that CentOS has been installed.
Now, let us install PostgreSQL on it.
Install PostgreSQL on CentOS.
We are going to install PostgreSQL from the CentOS 8 repository. To install PostgreSQL server and client packages, run the following command.
|
1 2 3 |
[root@localhost /]# sudo yum install postgresql-server.x86_64 |
Once PostgreSQL and client tools are installed, run the following command to initialize the PostgreSQL database.
|
1 2 3 |
[root@localhost /]# sudo postgresql-setup initdb |
Now, start the PostgreSQL services by executing the following command.
|
1 2 3 |
[root@localhost /]# sudo systemctl start postgresql |
You can view the status of the PostgreSQL services by running the following command
|
1 2 3 |
[root@localhost /]# sudo systemctl status postgresql |
We want to start the PostgreSQL services automatically when the server reboots; therefore, run the following command to start the service automatically.
|
1 2 3 |
[root@localhost /]# systemctl enable postgresql |
Now, let us access the PostgreSQL database server. We will use the pSQL command line utility. First, we must set the password of the Postgres user. Let us connect to the PostgreSQL database server using pSQL.
Connect to PostgreSQL
When we install PostgreSQL on Linux, the installer automatically creates a user named postgres. Before connecting to PostgreSQL, we must set the password of the postgres user. To do that, run the following command
|
1 2 3 |
[root@localhost ~]# passwd postgres |
It will prompt you to enter a new password for PostgreSQL users. Specify the desired password and hit Enter.
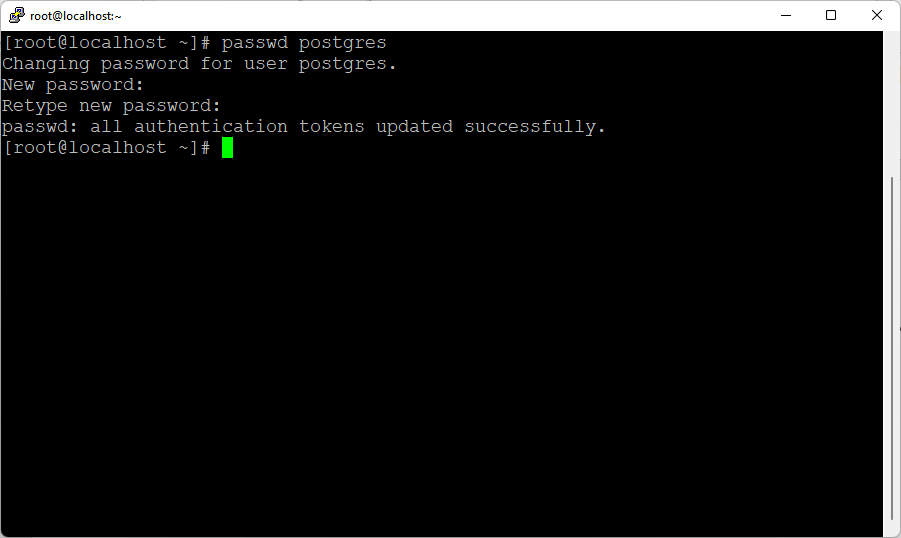
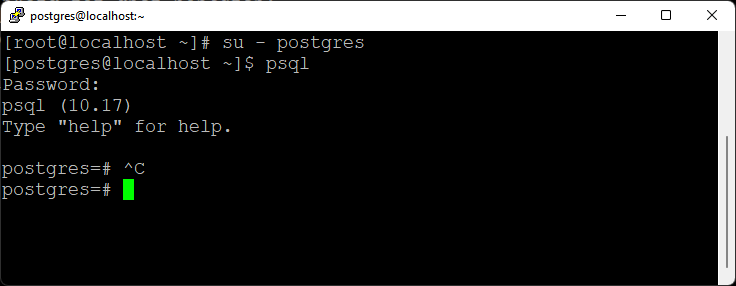
The password for postgres user has been set successfully. Now, run the following command to switch to the postgres user and launch pSQL.
|
1 2 3 4 |
[root@localhost ~]# su - postgres [postgres@localhost ~]$ psql |
Output
Let us run a few queries and verify that we can access the database properly. First, let us get the list of databases.
Query
|
1 2 3 |
postgres=# \l |
Output

Now, create a database named VSDatabase in PostgreSQL.
Query
|
1 2 3 4 |
postgres=# Create database VSDatabase; postgres=# \l |
Output
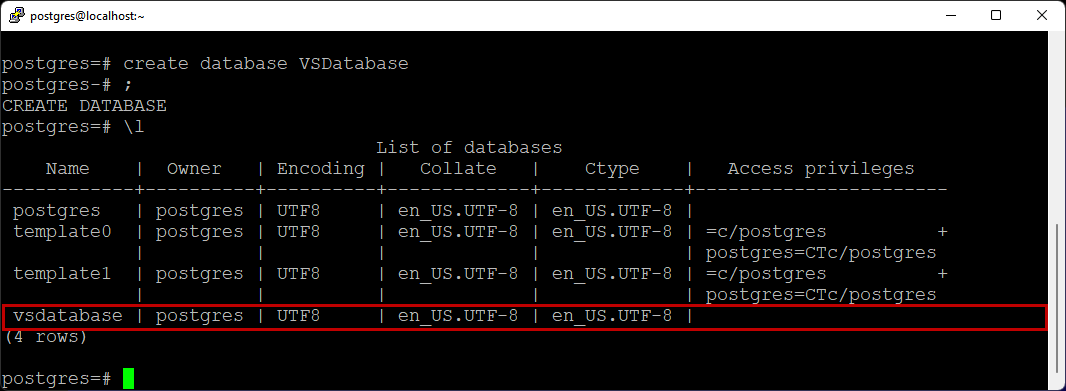
As you can see, both queries were executed successfully, which was expected behavior that indicates that the PostgreSQL has been installed successfully.
Install and configure pgAdmin4
The pgAdmin4 is a web-based tool that helps to manage the PostgreSQL database server. The httpd service must be running to use the pgAdmin4, and if you are using the firewall in your environment, then port numbers 80 and 443 must be open in the firewall. When we install PostgreSQL on Windows, the pgAdmin 4 installs automatically. In Linux, we must do it manually.
First, enable pgAdmin and EPEL repository by running the following command.
|
1 2 3 4 |
[root@localhost ~]# dnf install epel-release [root@localhost ~]# dnf install -y https://ftp.postgresql.org/pub/pgadmin/pgadmin4/yum/pgadmin4-redhat-repo-1-1.noarch.rpm |
Run the following query to install pgAdmin4.
|
1 2 3 |
[root@localhost ~]# yum install pgadmin4 |
The pgAdmin4 package contains a configuration script that is used to configure the web services. It performs the following tasks:
- It creates a user account that is used to connect to the pgAdmin4 web interface.
- It configures the SELinux policies and Apache webserver.
To run the script, execute the following command:
|
1 2 3 |
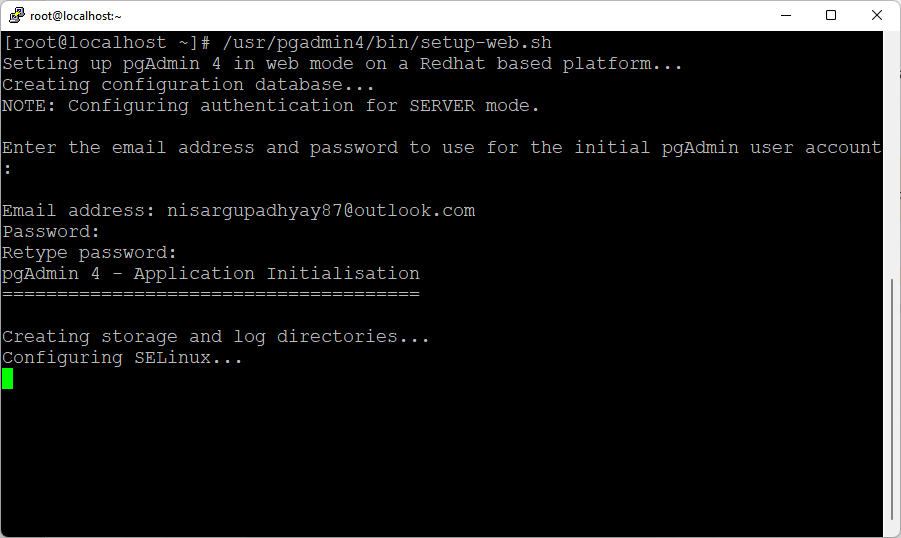
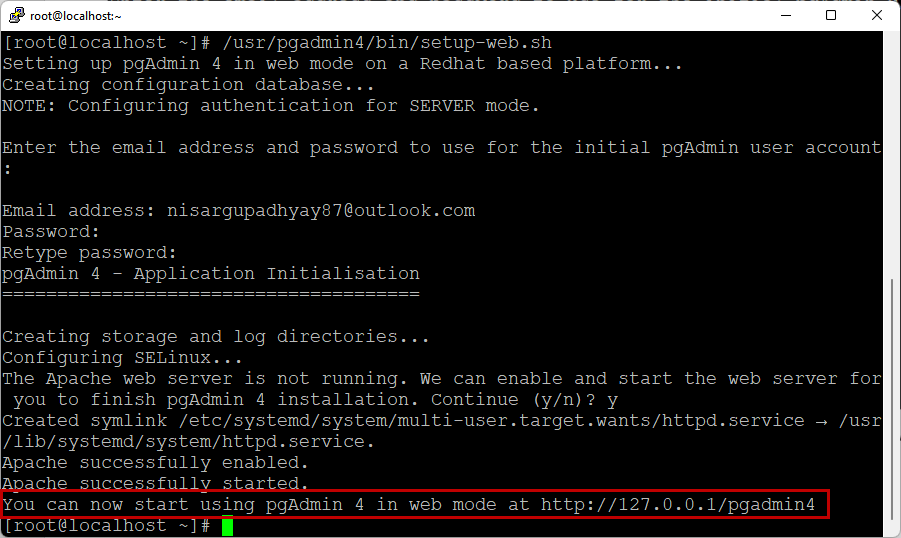
[root@localhost ~]# /usr/pgadmin4/bin/setup-web.sh |
Output
Once the configuration completes, the script shows the URL to access the pgAdmin4 web interface. In this demo, the web interface URL is http://127.0.0.1/pgadmin4.
Screenshot
The pgAdmin4 has been installed and configured successfully. Now, let us access it.
Configure the authentication in PostgreSQL on CentOS
Before accessing the web interface, we must configure the authentication method so the client tools like pgAdmin4 can connect to the PostgreSQL. The PostgreSQL supports the password-authentication that uses the any of the following:
- Md5
- Crypt
- password
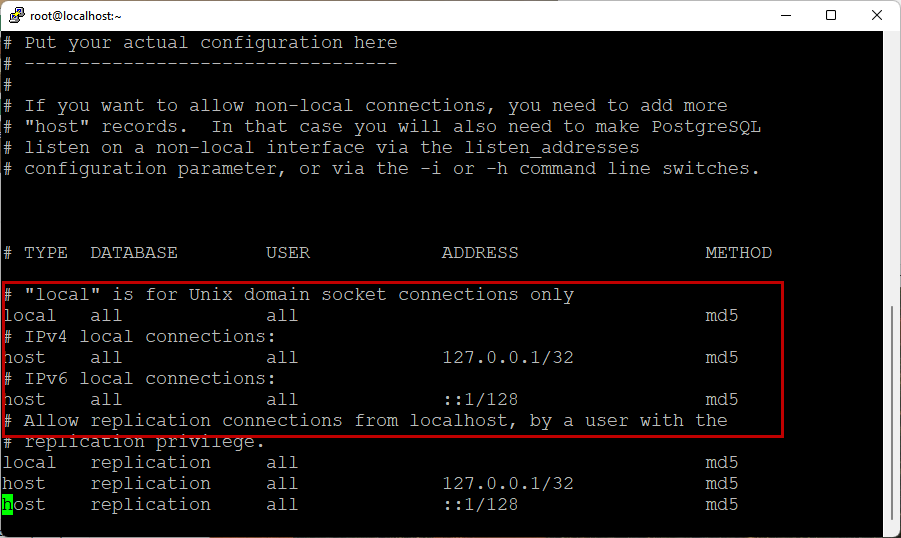
In this demo, we are using md5 authentication method. The authentication methods are in /var/lib/pgsql/data/pg_hba.conf file. Edit the configuration file using the vi editor. Run the following command
|
1 2 3 |
[root@localhost ~]# vi /var/lib/pgsql/data/pg_hba.conf |
In the configuration file, change the authentication from ident to md5 as shown in following image:
Once changes are made, save the configuration file. Restart the PostgreSQL Services by executing the following command.
|
1 2 3 |
[root@localhost ~]# service postgresql restart |
Once services are started, we can start configuring the pgAdmin4.
Access the pgAdmin4 web interface.
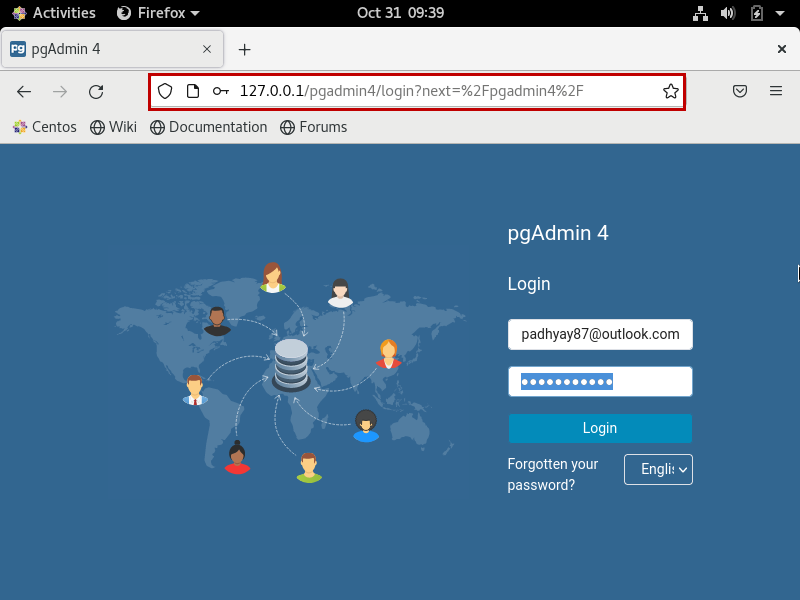
Login to CentOS and open firefox or desired web browser. Specify the URL in the http://127.0.0.1/pgadmin4 address bar and hit enter. On the web page, enter the email ID and password to access the web interface.
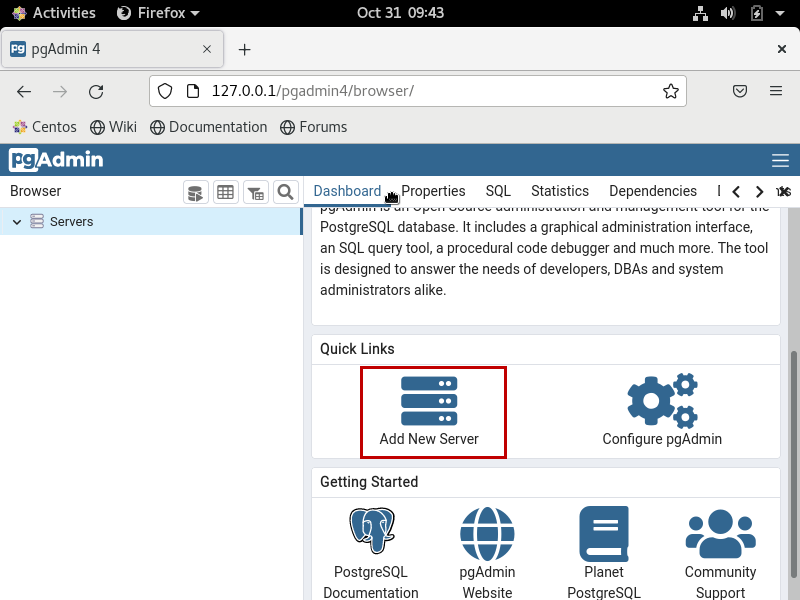
The pgAdmin4 launches. In the browser pan, you can view the list of PostgreSQL servers. We have not added any servers yet, so click on Add New Server.
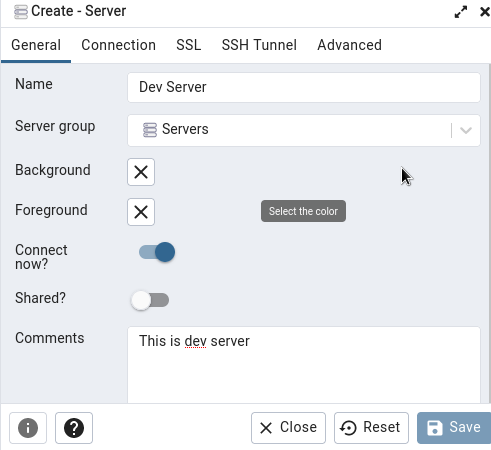
On create server screen, enter values for the following parameters
General Tab.
- Name: Specify the Server name
- Server group: Specify the name of the server group. We have not created any server group, so I have not changed the default value
- Comment: Specify the details of the server
Connection Tab
- Hostname/ Address: Specify the hostname or IP address on which the PostgreSQL is installed. I have specified the IP address of the virtual machine
- Port: Specify the port on which the PostgreSQL services are running. We are using the default port
- Maintenance database: Specify the name of the maintenance database
- Username: Specify the username that we are using to connect to PostgreSQL
- Password: Specify the password of the user which we are using to connect to the PostgreSQL
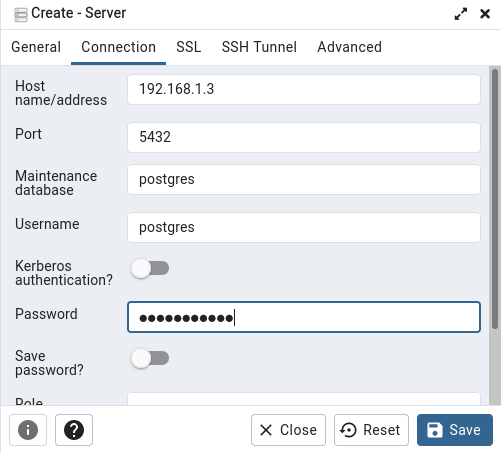
We have not configured SSH and SSL; therefore, I have not changed the configuration parameters in the SSL and SSH tunnel tab. Click on Save. Once the connection is created, you can view it in the browser pan.
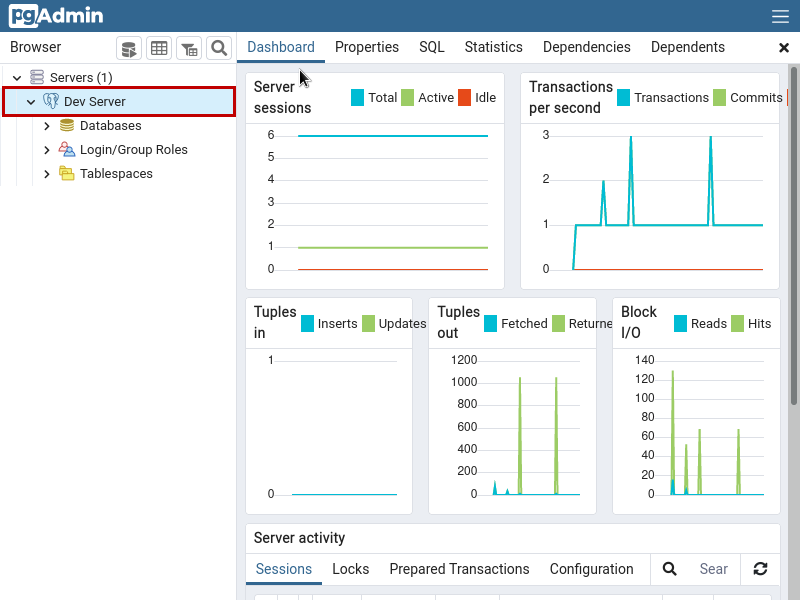
As you can see, we are connected to PostgreSQL database using the pgAdmin4.
Summary
In this article, we learned how we could install PostgreSQL on CentOS. We covered the below steps:
- The step-by-step installation process of CentOS Linux.
- Installation and configuration process of PostgreSQL on CentOS.
- Installation and configuration process of pgAdmin4 tool.

He has expertise in database design, performance tuning, backup and recovery, HA and DR setup, database migrations and upgrades. He has completed the B.Tech from Ganpat University. He can be reached on nisargupadhyay87@outlook.com
- Different ways to identify and change compatibility levels in SQL Server - July 22, 2024
- Copy SQL Databases between Windows 10 and CentOS using SQL Server data tools - October 19, 2022
- Changing the location of FILESTREAM data files in SQL Database - October 14, 2022