
In this article, we will learn how we can backup and restore the SQL Database in CentOS. This article is the second article on the topic Manage SQL Server on CentOS. In my previous article, Install SQL Server on CentOS, we learned how we could install and create a SQL Database in CentOS.
- Backup and restore SQL database between windows 10 and CentOS Linux using SQL Server management studio
- Copy data of SQL server instance on windows 10 to the SQL instance on CentOS using SQL Server Data Tools
- Copy data of SQL server instance on windows 10 to the SQL instance on CentOS using SQL Server Import and export wizard
In this article, we will learn the backup and restore method to copy SQL Server data from Windows to CentOS.
I have created a virtual machine on a workstation and installed CentOS 8.0. I have downloaded and configured the stackoverflow2010 database on the SQL Server instance of Windows 10.
We are using WinSCP software to copy the backup file from windows to Linux. It’s a free SFTP client that is used to copy data between local and remote computers. To copy the data, it uses the following file transfer protocols.
- Secure file transfer protocol (SFTP)
- File transfer protocol (FTP)
- Secure Copy Protocol (SCP)
- Amazon S3: It’s a cloud storage service. You can copy between Amazon S3 and local computer
- WebDAV: Web distribution Authoring and versioning. It is an extension of the HTTP protocol that is used for remote file editing and modification.
You can download WinSCP from here. Installation is simple and interactive.
Review database schema
Before copying the SQL database from source and destination, it is advisable to review the database files, schema structure, and data. Run the following set of queries.
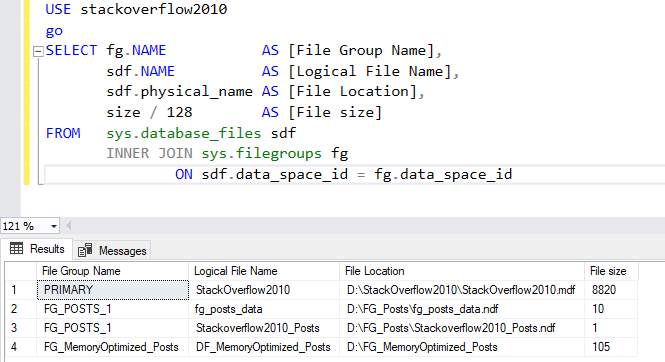
Run the following query to view the list of files and filegroups
|
1 2 3 4 5 6 7 8 9 10 11 |
USE stackoverflow2010 go SELECT fg.NAME AS [File Group Name], sdf.NAME AS [Logical File Name], sdf.physical_name AS [File Location], size / 128 AS [File size] FROM sys.database_files sdf INNER JOIN sys.filegroups fg ON sdf.data_space_id = fg.data_space_id |
Output
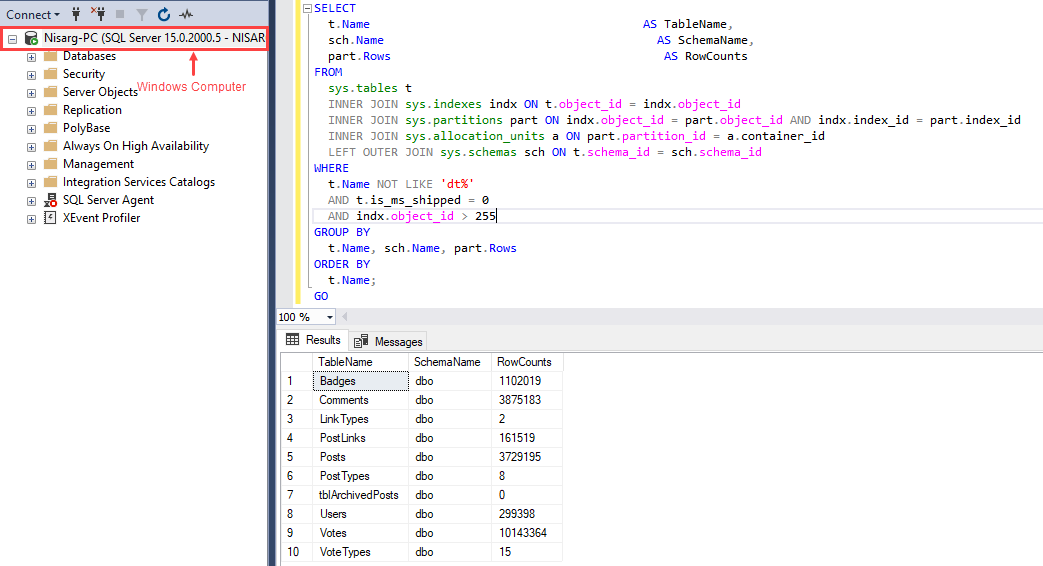
Run the following query to view the list of tables and data.
|
1 2 3 4 5 6 7 8 9 10 11 12 13 14 15 16 17 18 19 20 21 |
SELECT t.Name AS TableName, sch.Name AS SchemaName, part.Rows AS RowCounts FROM sys.tables t INNER JOIN sys.indexes indx ON t.object_id = indx.object_id INNER JOIN sys.partitions part ON indx.object_id = part.object_id AND indx.index_id = part.index_id INNER JOIN sys.allocation_units a ON part.partition_id = a.container_id LEFT OUTER JOIN sys.schemas sch ON t.schema_id = sch.schema_id WHERE t.Name NOT LIKE 'dt%' AND t.is_ms_shipped = 0 AND indx.object_id > 255 GROUP BY t.Name, sch.Name, part.Rows ORDER BY t.Name; GO |
Query Output
Let us generate a copy-only backup of the stackoverflow2010 database. The backup is generated in the D:\SQLBackups\StackOverflow folder.
|
1 2 3 4 |
BACKUP DATABASE [StackOverflow2010] TO DISK = 'D:\SQLBackups\StackOverflow\StackOverflow2010.bak' WITH copy_only, stats=5 |
Once the backup is generated, let us copy it to CentOS. I have created a directory named SQLServer in the root directory of Linux. The directory path is /SQLServer. I have created another directory named SQLBackup in /SQLServer directory. We are copying the backup in the/SQLServer/SQLBackup directory. Create the directories by running the following command.
[root@localhost /]# mkdir /SQLServer
[root@localhost /]# mkdir /SQLServer/SQLBackup
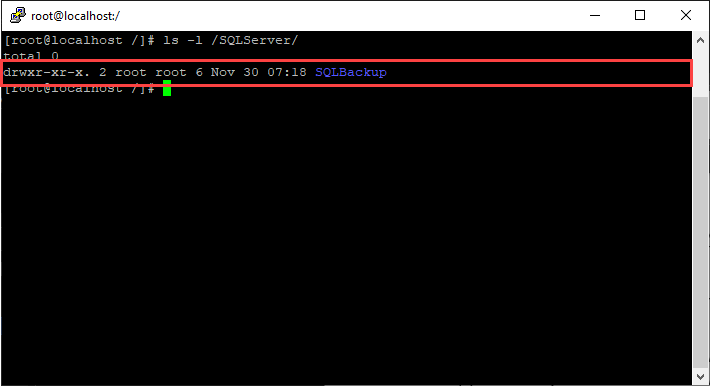
The directory has read, write and execute permission to the user named root. To view the permissions, you can run the ls -l command.
[root@localhost /]# ls -l /SQLServer/
Command output
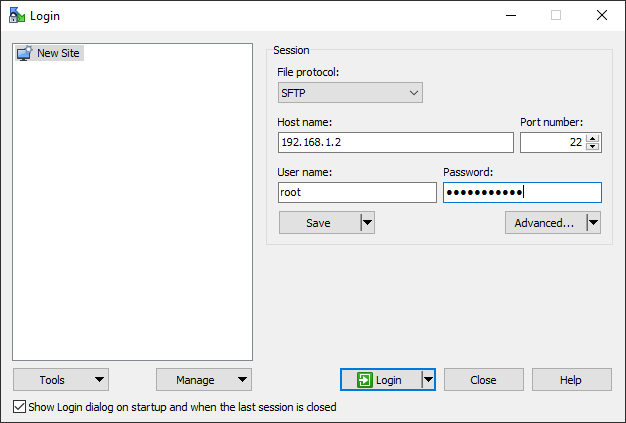
Now, let us copy the backup files. Launch WinSCP. First, we must configure a session to copy files between servers. On the login screen, you can provide the login details. Enter appropriate configuration values to connect to the CentOS file share. Enter the following values of configuration parameters.
- File protocol: Specify the appropriate file transfer protocol. In our case, we are using SFTP protocol, so we selected SFTP from the drop-down list.
- Hostname and Port: Specify the hostname/IP Address and the port of the computer that you want to connect. We are connecting to my workstation, and IPAddress is 192.168.1.2. So, I have specified 192.168.1.2, and the port number is 22.
- Username: Specify the username of the remote machine. I am connecting using root user, so I have entered root as a username.
- Password: Specify the appropriate password to connect to the remote machine. I have entered the password of the root user.
Click on Login. Following is the screenshot of the Login screen.
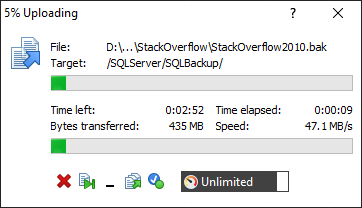
We can drag and drop the backup files between the D:\SQLBackup\Stackoverflow folder to /SQLServer/SQLBackup directory. See the following illustration.

The upload process begins.
Once the backup file is copied, let us check that backup file is copied or not. Also, we must check the permissions on the backup file. Run the following command.
[root@localhost /]# ls -l /SQLServer/SQLBackup/
Output
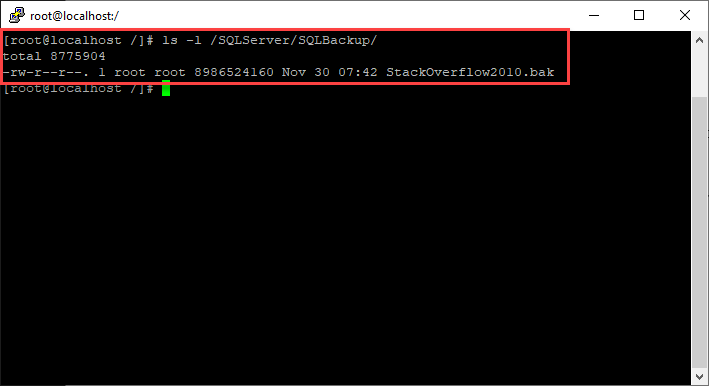
As you can see in the above image, the backup file is copied, and permissions are also applied properly. Let us restore the database in SQL Server on CentOS. To do that, run the following restore command.
|
1 2 3 4 5 6 7 8 9 10 11 12 |
USE [master] RESTORE DATABASE [StackOverflow2010] FROM DISK = N'/SQLServer/SQLBackup/StackOverflow2010.bak' WITH FILE = 1, MOVE N'StackOverflow2010' TO N'/var/opt/mssql/data/StackOverflow2010.mdf', MOVE N'fg_posts_data' TO N'/var/opt/mssql/data/fg_posts_data.ndf', MOVE N'Stackoverflow2010_Posts' TO N'/var/opt/mssql/data/Stackoverflow2010_Posts.ndf', MOVE N'StackOverflow2010_log' TO N'/var/opt/mssql/data/StackOverflow2010_log.ldf', MOVE N'DF_MemoryOptimized_Posts' TO N'/var/opt/mssql/data/FG_MemoryOptimized_Posts', NOUNLOAD, STATS = 5 GO |
Once the SQL database is restored, let us run a few queries to verify that database is restored successfully.
Run the following query to view the list of files and filegroups
|
1 2 3 4 5 6 7 8 9 10 11 |
USE stackoverflow2010 go SELECT fg.NAME AS [File Group Name], sdf.NAME AS [Logical File Name], sdf.physical_name AS [File Location], size / 128 AS [File size] FROM sys.database_files sdf INNER JOIN sys.filegroups fg ON sdf.data_space_id = fg.data_space_id |
Query Output
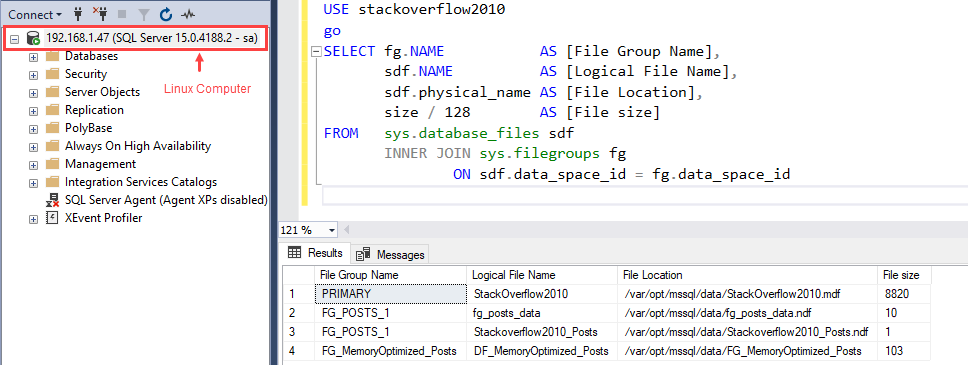
As you can see, filegroups are created. Now, Run the below query to view the list of tables and data.
|
1 2 3 4 5 6 7 8 9 10 11 12 13 14 15 16 17 18 19 20 21 |
SELECT t.Name AS TableName, sch.Name AS SchemaName, part.Rows AS RowCounts FROM sys.tables t INNER JOIN sys.indexes indx ON t.object_id = indx.object_id INNER JOIN sys.partitions part ON indx.object_id = part.object_id AND indx.index_id = part.index_id INNER JOIN sys.allocation_units a ON part.partition_id = a.container_id LEFT OUTER JOIN sys.schemas sch ON t.schema_id = sch.schema_id WHERE t.Name NOT LIKE 'dt%' AND t.is_ms_shipped = 0 AND indx.object_id > 255 GROUP BY t.Name, sch.Name, part.Rows ORDER BY t.Name; GO |
Query Output
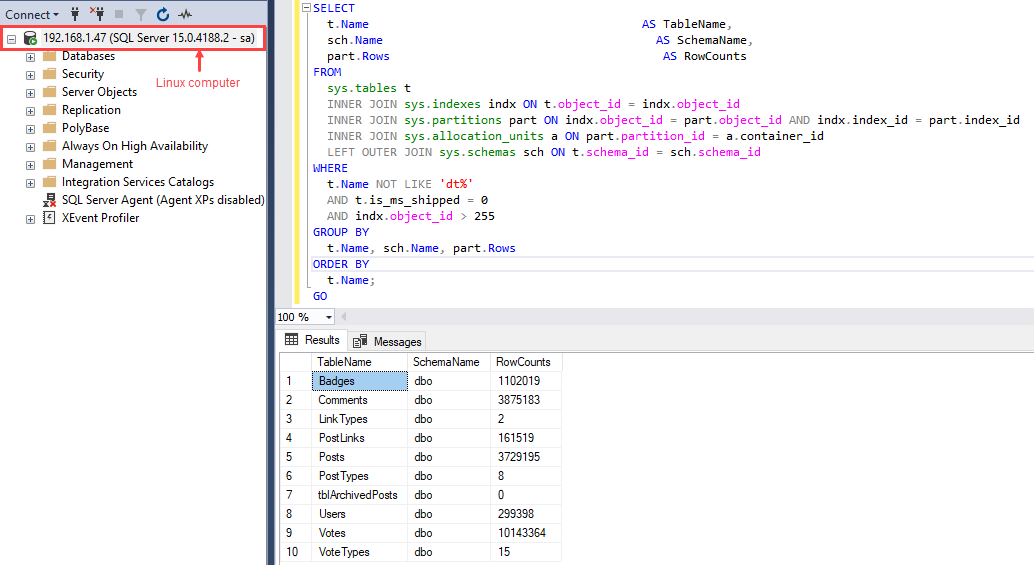
As you can see, the table and data are restored successfully.
Summary
This article explains how to copy the data of the database from Windows 10 to CentOS. I have explained a backup and restore database method. Suppose you are planning to migrate the operating system of SQL Server from Windows Server to Linux. In that case, this article helps you set up a development environment which helps to set up a development environment. In the next article, we will learn how to copy the SQL Database from Windows 10 to CentOS using the SQL Server Import-export wizard.

He has expertise in database design, performance tuning, backup and recovery, HA and DR setup, database migrations and upgrades. He has completed the B.Tech from Ganpat University. He can be reached on nisargupadhyay87@outlook.com
- Different ways to identify and change compatibility levels in SQL Server - July 22, 2024
- Copy SQL Databases between Windows 10 and CentOS using SQL Server data tools - October 19, 2022
- Changing the location of FILESTREAM data files in SQL Database - October 14, 2022