
Introduction
We can rely on Azure SQL to build reliable, high-quality relational database solutions. In the cloud, Google offers BigQuery as a big data product that has large data capacities, and a standard SQL syntax. Although it can handle data manipulation, it works better as a data warehouse product because of certain product limitations. If we can integrate these products, they become even more useful. This two-part article will show how to link these products together. Part one here will show how to build a BigQuery resource, and then build a Google OAuth refresh token, or security key. Part two will show how to set up an Azure SQL data resource, and build, configure, and test the Azure Data Factory that will link those resources.
Set up the resource
Awhile back, I wrote articles showing how set up BigQuery, but because so much has changed about the product, we’ll examine the process here. Although we could use the sample datasets that Google provides, we’ll see how to upload our own dataset from scratch. The Google Cloud Free Tier provides $300 of Google Cloud resources for ninety days, which will cover the resources we’ll build. Our later steps will transfer this data to the Azure SQL resource. We’ll place the data from the zbp11totals.zip file, available from the U.S. Census Bureau here, into the resource we’ll build. This file has basic payroll information for American zip codes. After the download, extract CSV-format file zbp11totals.txt from it.
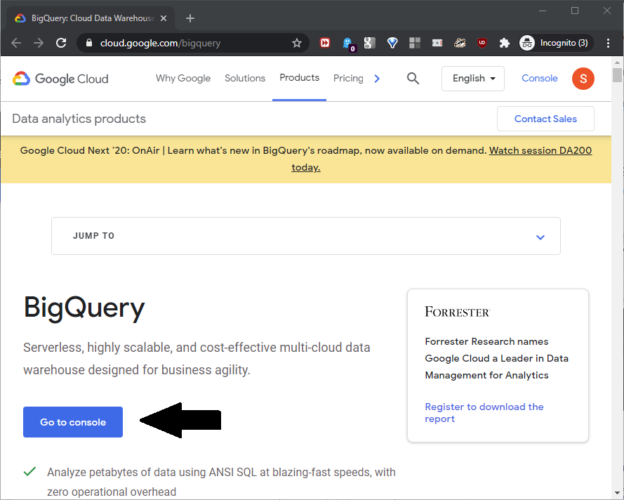
First, log into a Google account, and register for the free Google tier here. Even though it’s free, you’ll need a credit card for this step. At the resource page, click “Go to console” as shown in this screenshot:

When the console opens, click “My First Project” as shown in this screenshot:

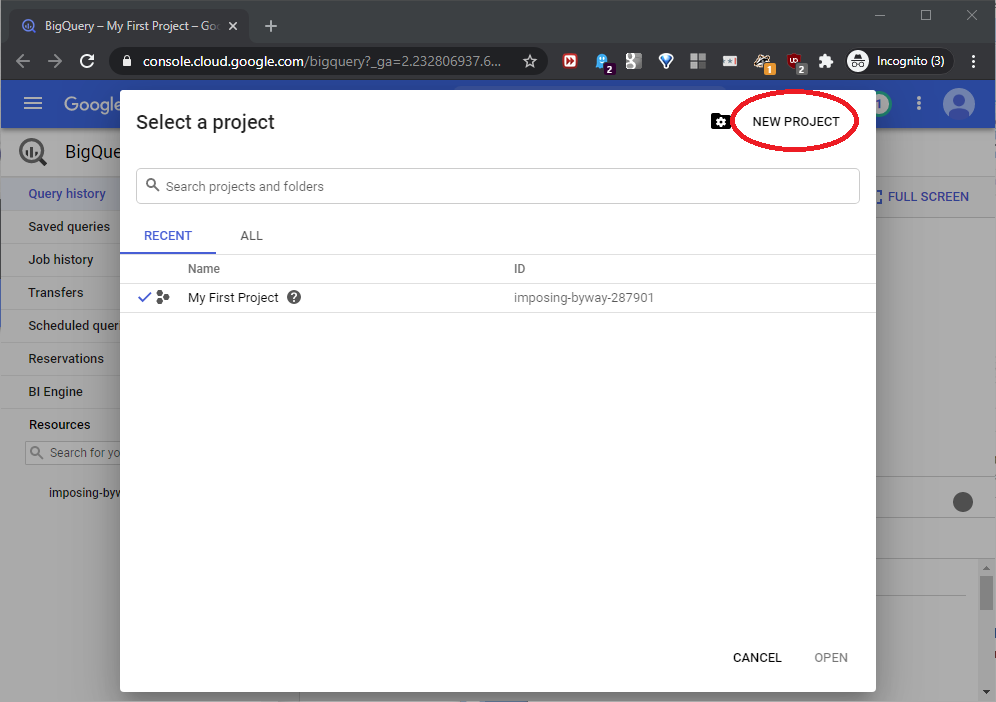
“Select a project” will open; click NEW PROJECT to open the project creation page, as shown in this screenshot:
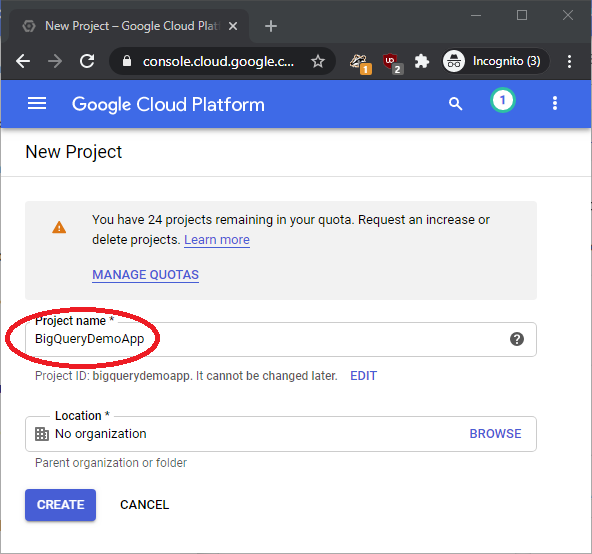
At the New Project page, name the project BigQueryDemoApp, ignore the Location box, and click CREATE, as shown in this screenshot:
Back at the console, click the project dropdown as seen in this screenshot:

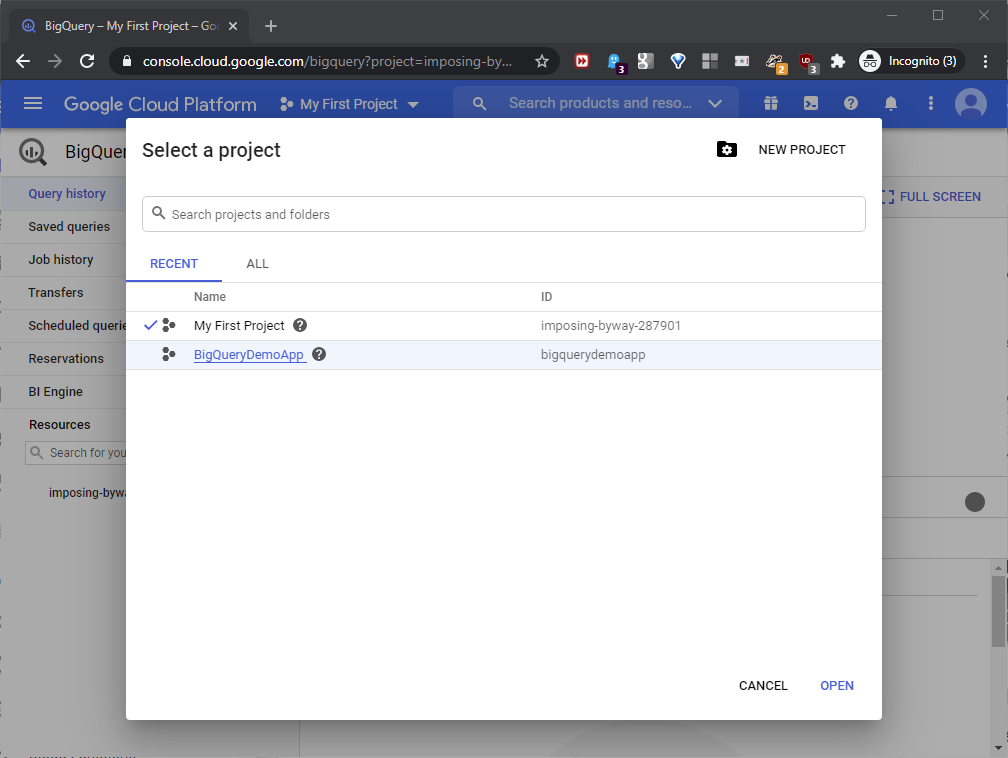
Highlight BigQueryDemoApp and click OPEN, as shown here:
This opens the console once again.
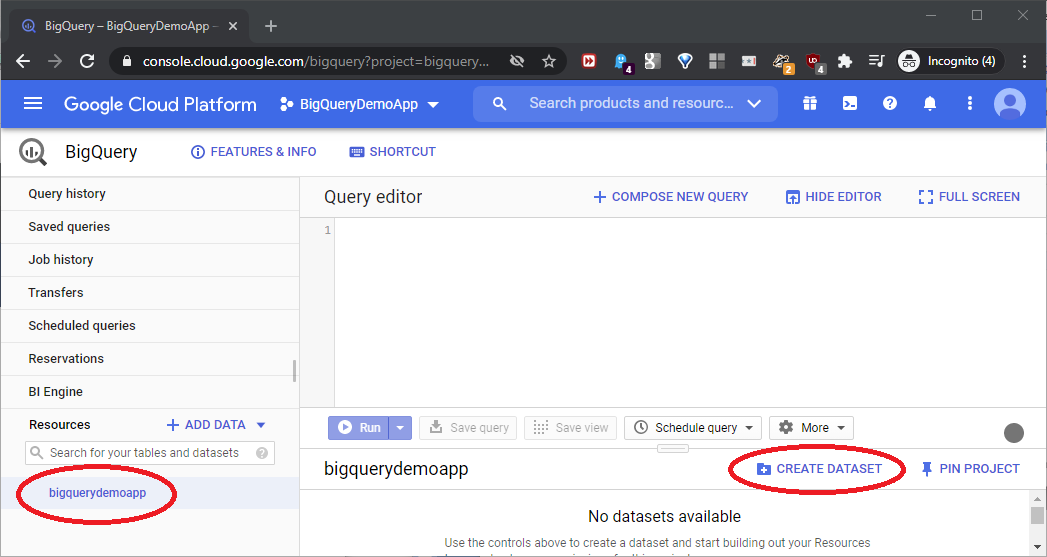
Now, we need to create a dataset in BigQueryDemoApp. The dataset will hold the uploaded data as a SQL-like table. Highlight bigquerydemoapp, and click CREATE DATASET, as shown in this screenshot:
The Create dataset window will open. Name this dataset BigQueryDemoApp, keep the defaults, and click Create dataset, as shown in this screenshot:

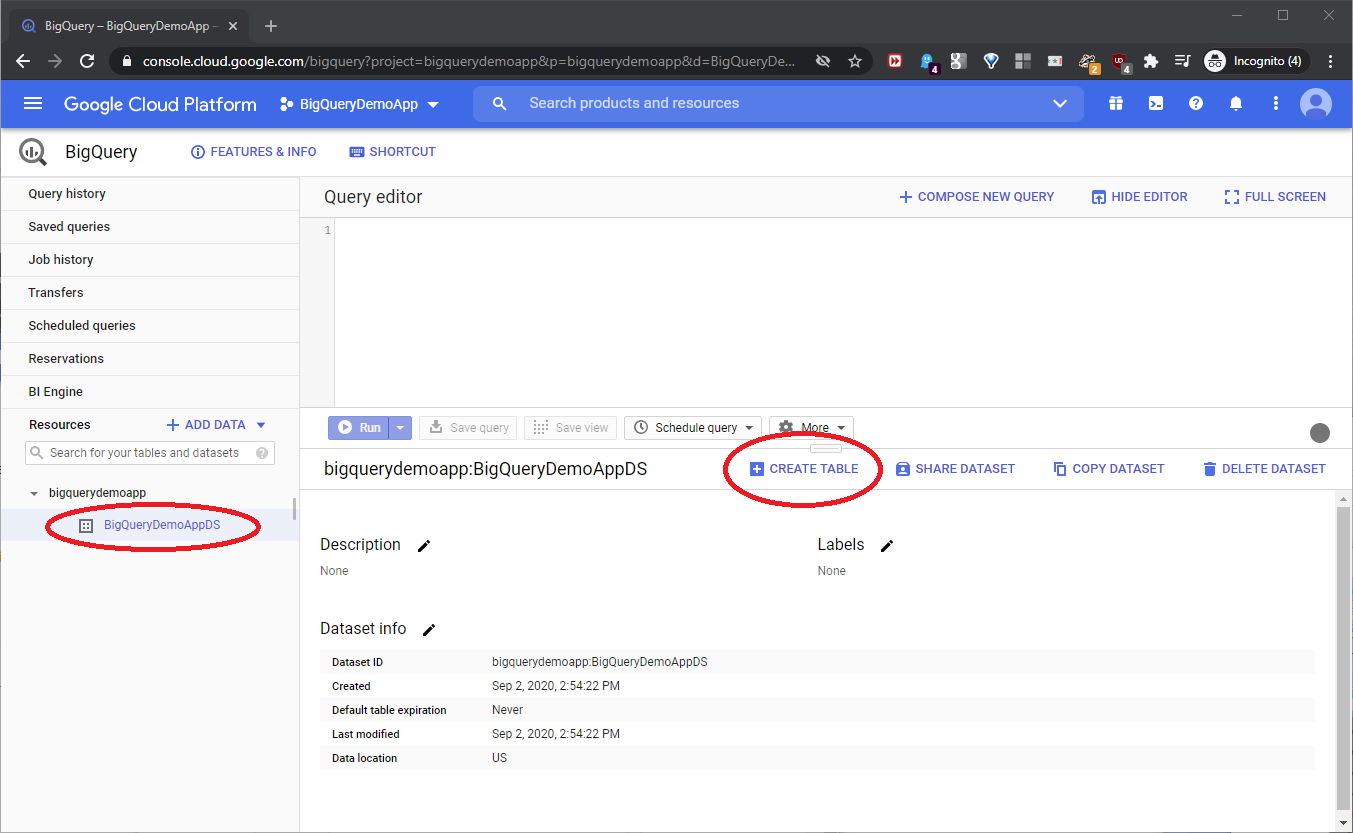
Back at the console, highlight the BigQueryDemoApp dataset, and click CREATE TABLE to create the new table, as shown here:
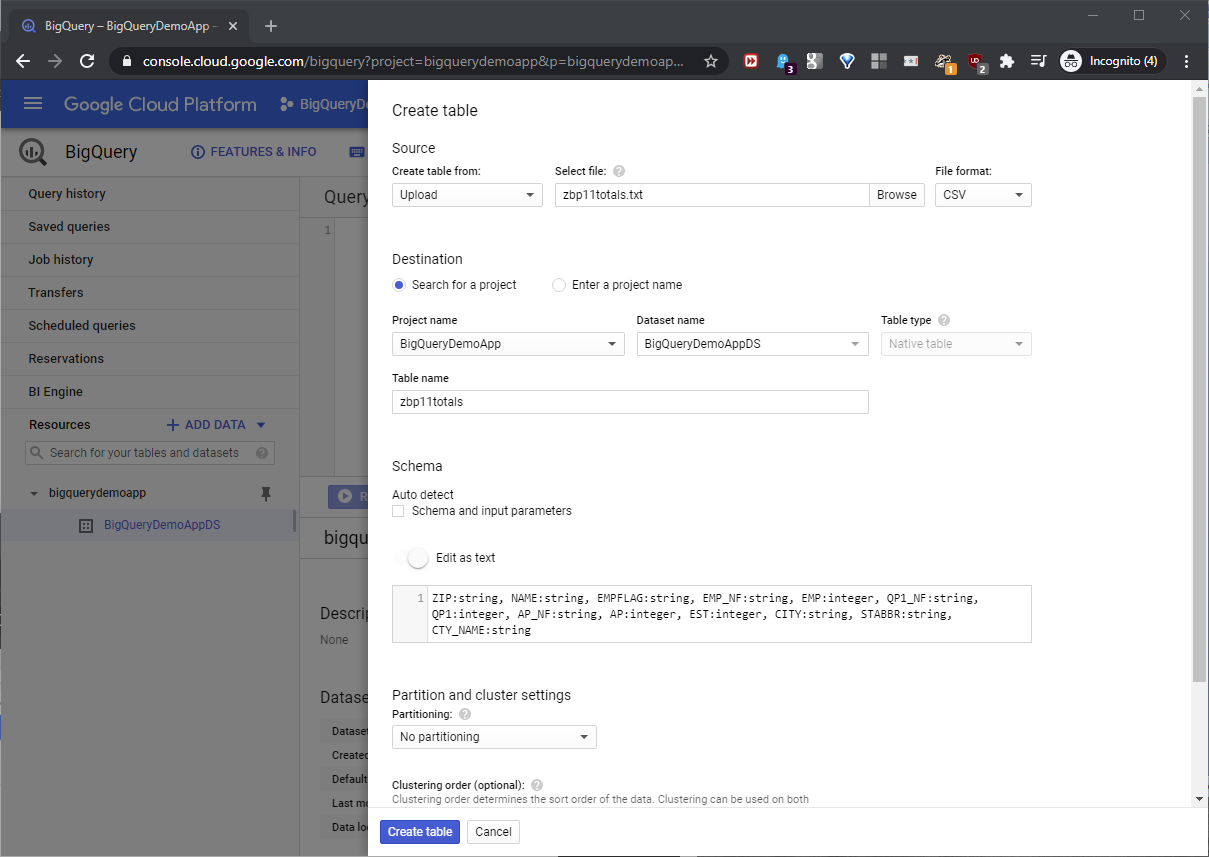
When the Create Table page opens, name the table zbp11totals. a BigQuery file upload can auto-detect the column data formats, but here, this would build a ZIP column, for example, with an integer data type. As a result, it would truncate the first two characters of ‘00501’ as a ZIP column value. To solve the problem, place the text below in the Edit as text textbox of the Schema section.
ZIP:string, NAME:string, EMPFLAG:string, EMP_NF:string, EMP:integer, QP1_NF:string, QP1:integer, AP_NF:string, AP:integer, EST:integer, CITY:string, STABBR:string, CTY_NAME:string
This will specify the exact data types of the table columns that BigQuery will build, in the table it creates. Set the rest of the metadata choices as shown in this screenshot:
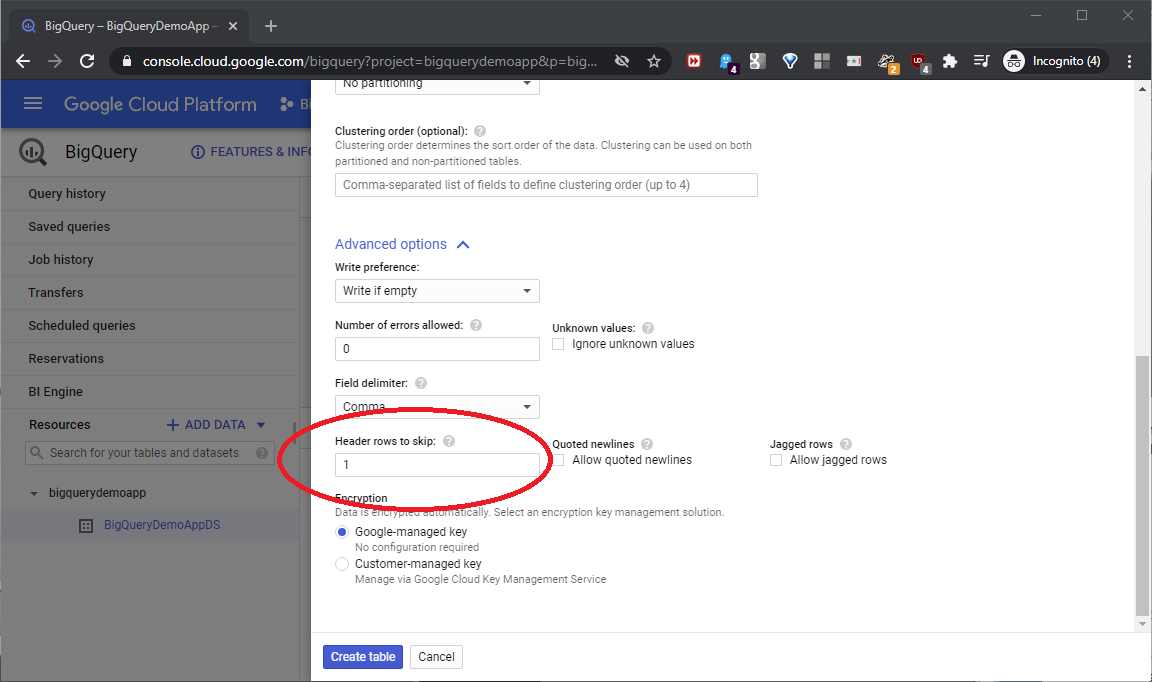
Next, scroll down, and expand Advanced options at the lower left. Uncheck Auto detect at the left- center, and click Advanced options at the lower left. The zbp11totals.txt source file has a header row, so set the Header rows to skip textbox to 1. Keep the other defaults, and click Create table as shown in this screenshot:
Back at the console, we can see that we successfully created the table, as seen in this screenshot:
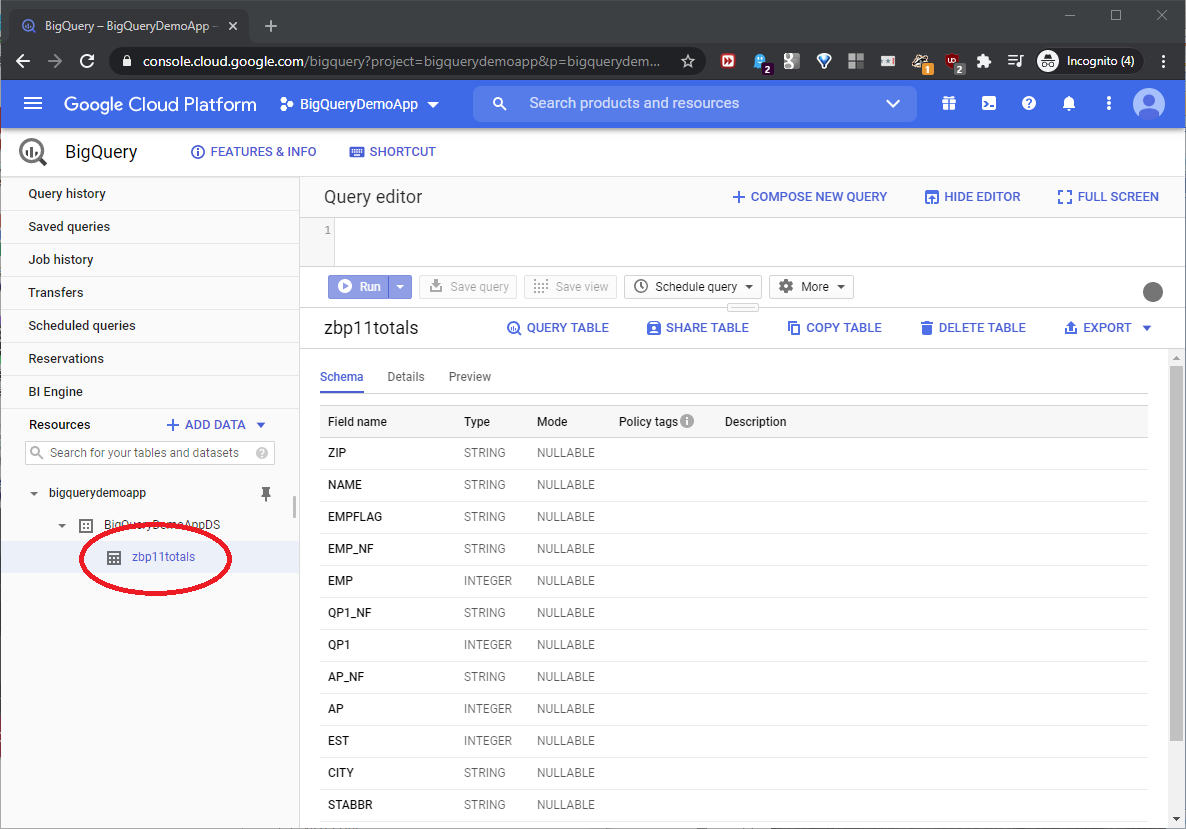
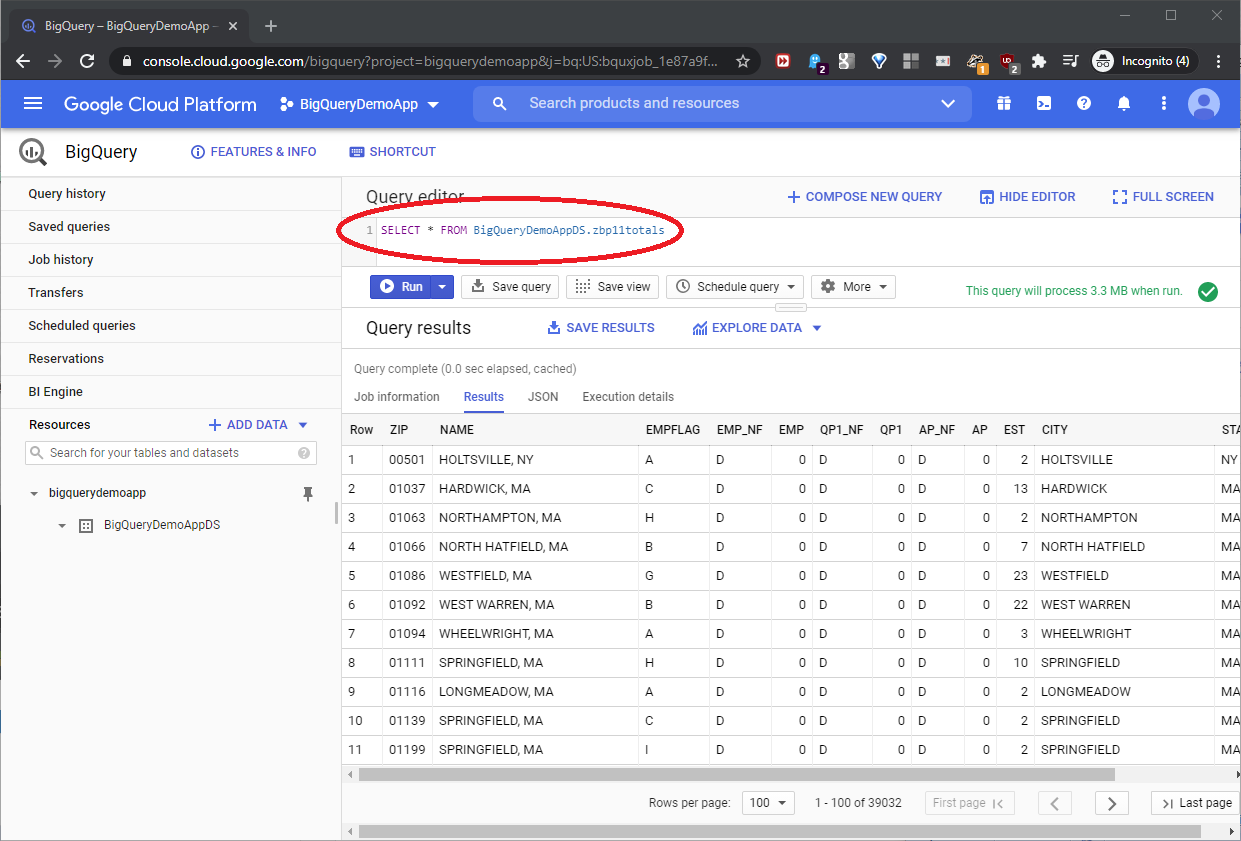
To test everything, type the below query in the Query editor textbox, and click Run.
|
1 |
SELECT * FROM BigQueryDemoAppDS.zbp11totals |
This query uses a conventional, case-sensitive SQL Server syntax. In a BigQuery query, include the dataset name ahead of the table name. The result set will appear in the Query results section, as seen in this screenshot:
Build a Google OAuth refresh token
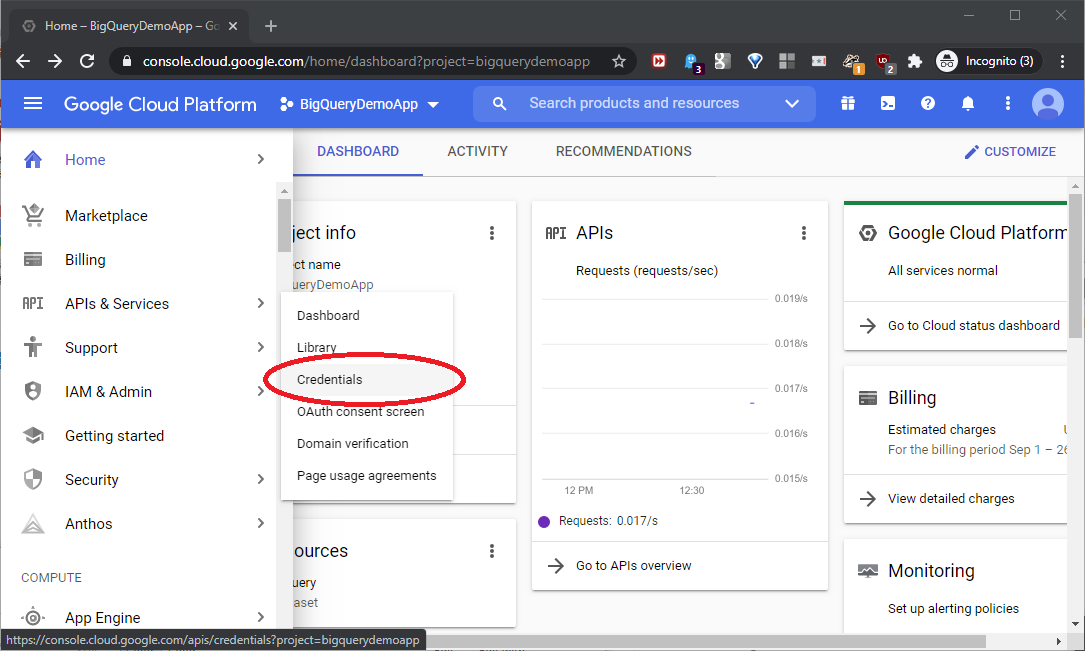
A later Azure configuration step will need the specific OAuth refresh token security value that we’ll generate now in the Google cloud resources. Start at this URL:
Drill down to APIs & Services -> Credentials as shown in this screenshot:
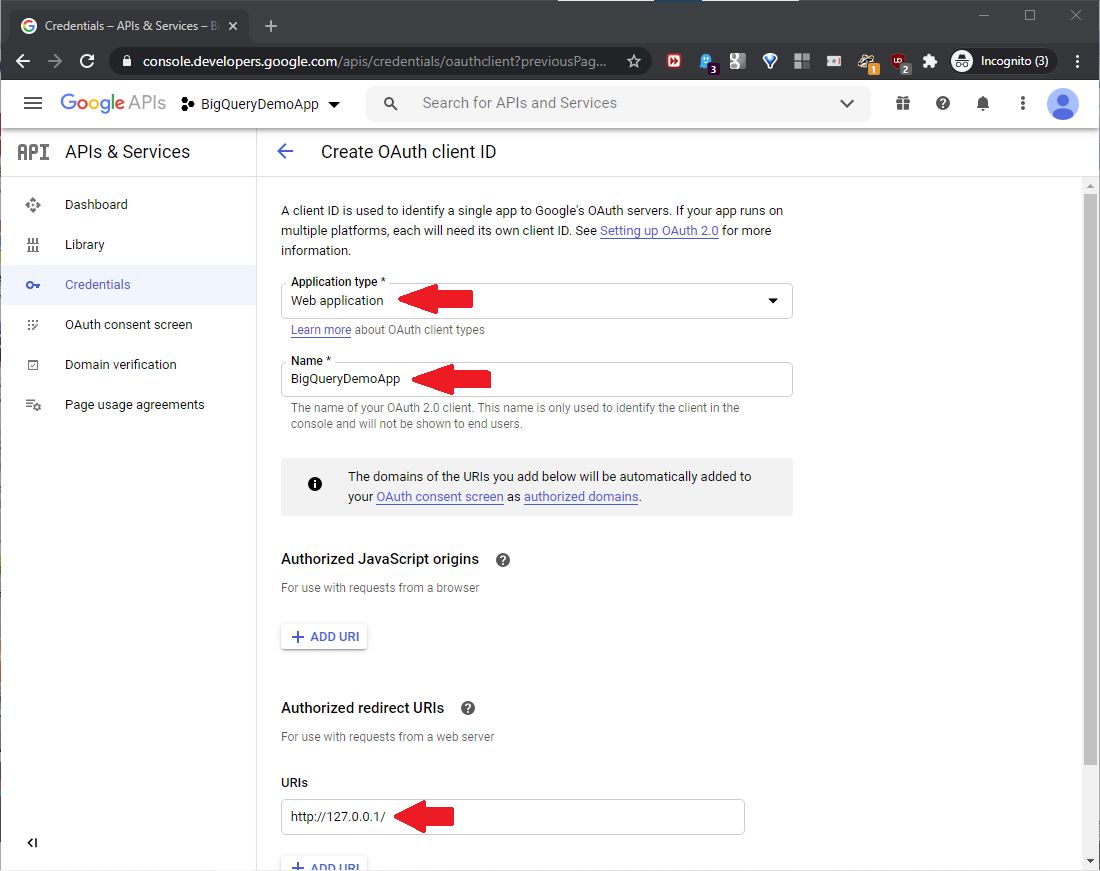
Drill down to CREATE CREDENTIALS -> OAuth client ID as shown in this screenshot:

The Create OAuth client ID page will open, set the below:
- Application type = Web application
- Name = BigQueryDemoApp
- Authorized Redirect URIs -> URIs = http://127.0.0.1/
Scroll down to click CREATE, as shown in this screenshot:
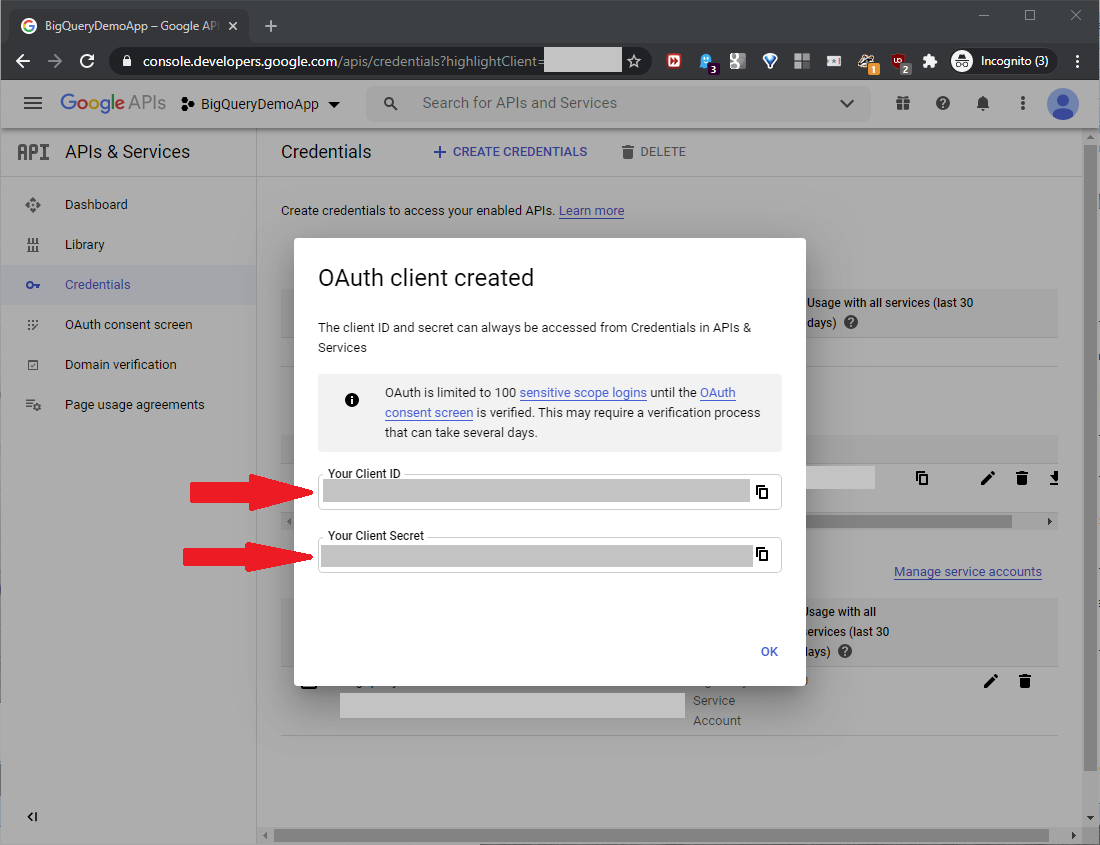
Scroll down, and click Create. Save the generated Client ID and Client Secret values, as seen in this screenshot:
Now, we need to build values for security credentials. Starting with this URL “template”
https://accounts.google.com/o/oauth2/v2/auth?
access_type=offline&
client_id={Client ID}&
prompt=consent&
redirect_uri={URL Encoded Redirect URI}&
response_type=code&
scope={URL Encoded Scope}
Build this list of values:
- {Client ID} = the new Client ID value built at the Create OAuth client ID page above
- {URL Encoded Redirect URI} = http%3A%2F%2F127.0.0.1%2F
This value started with the Authorized Redirect URI value http://127.0.0.1/ used in the Create OAuth client ID page above, and replaced the original embedded “:” with “%3A” and “/” with “%2F” as URL-encoded values:
{URL Encoded Scope} = https%3A%2F%2Fwww.googleapis.com%2Fauth%2Fbigquery
Starting with the scope value “https://www.googleapis.com/auth/bigquery”, we made character replacements identical to those just above.
With these values, including a custom fake Client ID value for this example, the template will look like this:
https://accounts.google.com/o/oauth2/v2/auth?
access_type=offline&
client_id= dghw3456Wg3q4asdfhFZdnhtuio68shflsdn3vbhw3hs6.apps.googleusercontent.com&
prompt=consent&
redirect_uri=http%3A%2F%2F127.0.0.1%2F&
response_type=code&
scope=https%3A%2F%2Fwww.googleapis.com%2Fauth%2Fbigquery
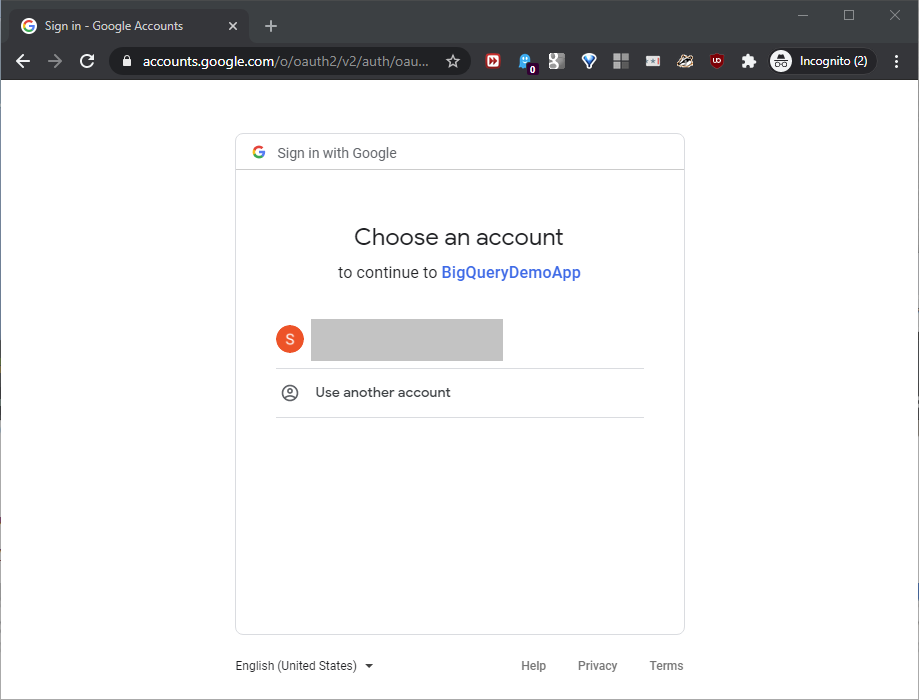
Copy this URL, place it in a browser URL bar, and hit enter. It will first return an authorization page, as shown in this screenshot:
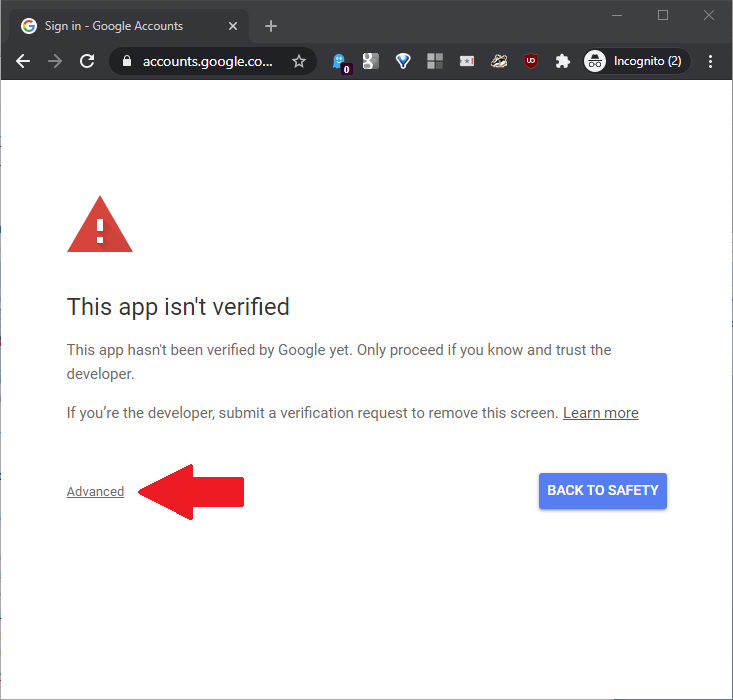
Log in with the Google account used for this BigQuery development work. On the next page, click Advanced as shown in this screenshot:
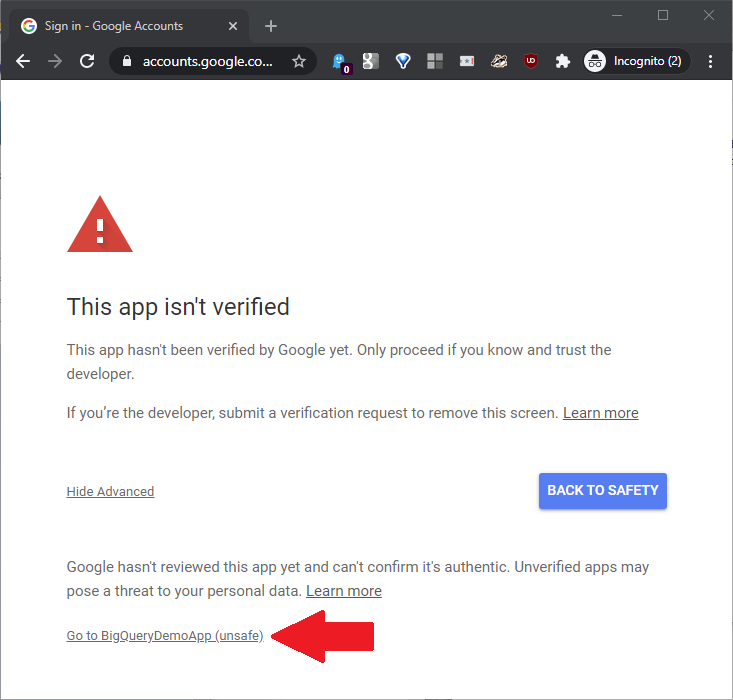
Next, click Go to BigQueryDemoApp (unsafe) as shown in this screenshot:
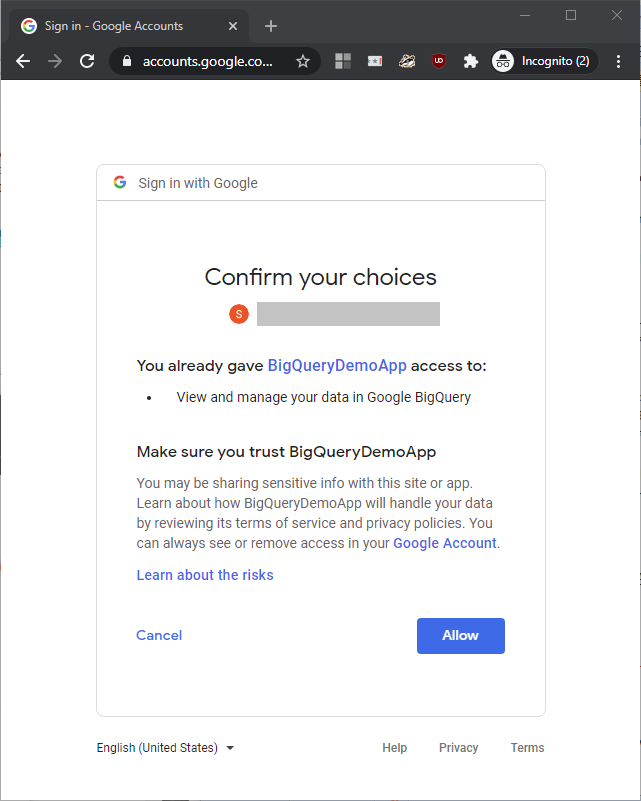
At the confirmation page, click Allow as shown in this screenshot:
This will return an error page, as shown in this screenshot:
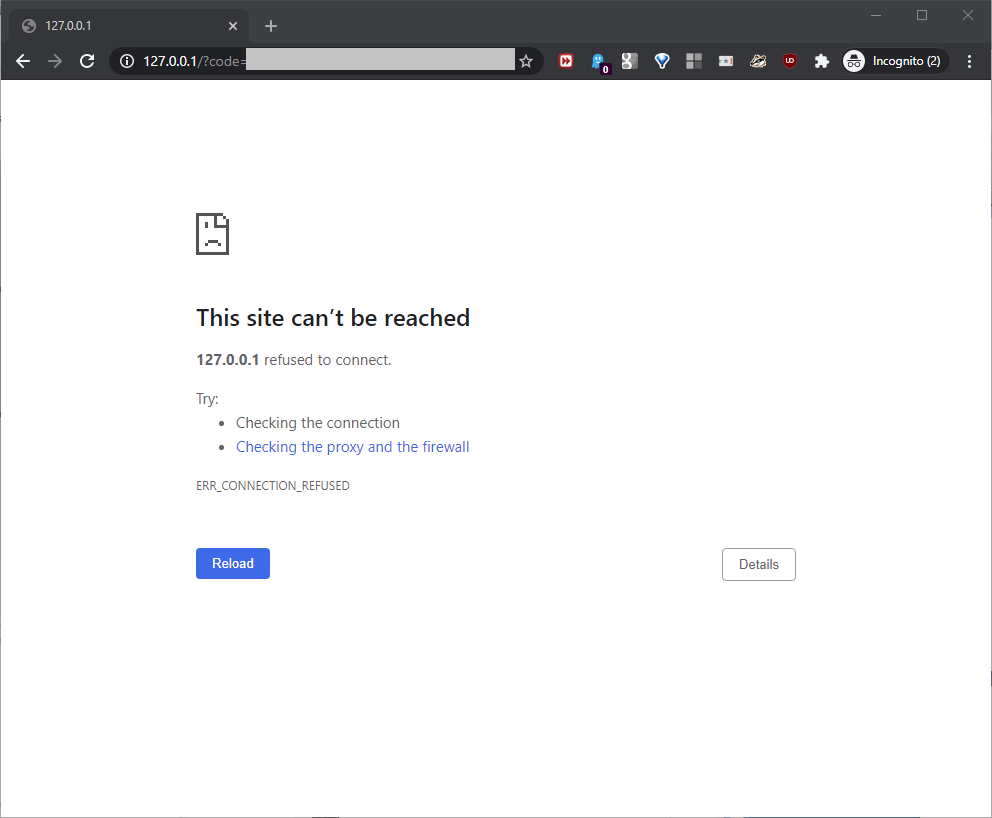
Ignore that error – don’t worry about it. Instead, focus on the URL address bar value. It will look like this:
https://127.0.0.1/?
code=4/4ertyRerheyi56mns5ztuiodfghcvSRTsdfereuaffQqwec5h77zgsnM7thsdERQ45y354hebwEBs7AIDFHdfgh&
scope=https://www.googleapis.com/auth/bigquery
Pull out the “code” parameter from the URL string, and substitute “%2F” for the “/” value:
code=4%2F4ertyRerheyi56mns5ztuiodfghcvSRTsdfereuaffQqwec5h77zgsnM7thsdERQ45y354hebwEBs7AIDFHdfgh
This will become the authorization code value that we’ll need shortly. Now, we’ll move to a second URL. For this second URL “template”, build the below list of values:
https://www.googleapis.com/oauth2/v4/token?&
client_id={Client ID}&
client_secret={Client Secret}&
code={Authorization Code Value}&
grant_type=authorization_code&
redirect_uri={URL Encoded Redirect URI}
Where:
- {Client ID} = the Client ID value built at the Create OAuth client ID page above
- {Client Secret} = the Client Secret value built at the Create OAuth client ID page above
- {Authorization Code Value} = the authorization code value we built in the previous step just above
- {URL Encoded Redirect URI} = http%3A%2F%2F127.0.0.1%2F
With these values, including fake Client ID, Client Secret, and Authorization Code Values for this example, the template will look like this:
https://www.googleapis.com/oauth2/v4/token?&
client_id=dghw3456Wg3q4asdfhFZdnhtuio68shflsdn3vbhw3hs6.apps.googleusercontent.com&
client_secret=45wgfeWQRTqwe341gZQ2Er34&
code=4%2F4ertyRerheyi56mns5ztuiodfghcvSRTsdfereuaffQqwec5h77zgsnM7thsdERQ45y354hebwEBs7AIDFHdfgh&
grant_type=authorization_code&
redirect_uri=http%3A%2F%2F127.0.0.1%2F
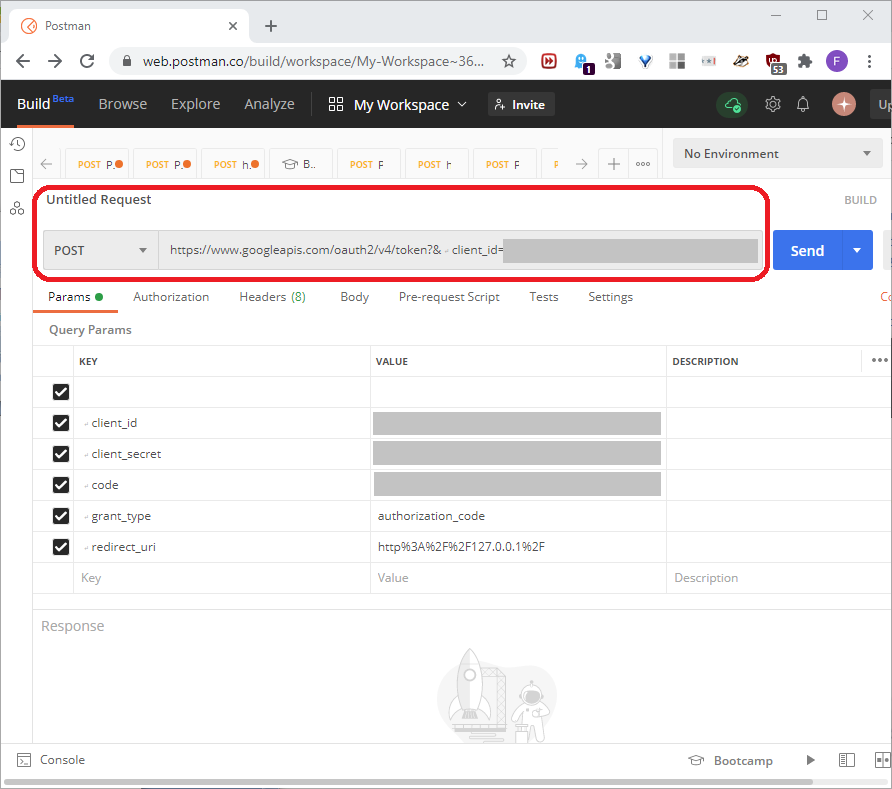
To build the BigQuery security values we want, we need the POST value that this URL will return. We’ll use Postman for this. First, build a Postman account, open Postman, and place the templated URL in the Untitled Request bar as seen in this screenshot:
Click SEND to generate the refresh token, as seen in this screenshot:
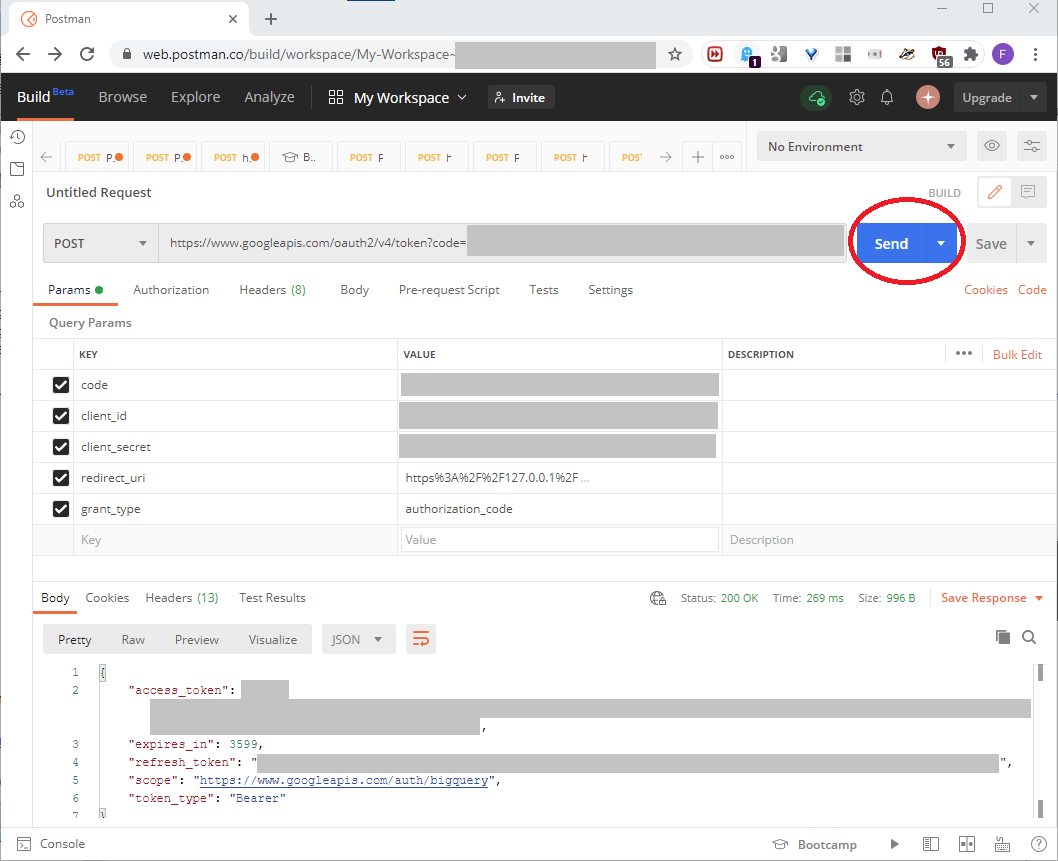
Save that generated refresh_token value. We’ll need it in Part Two. Note carefully that to build a new refresh token in this process, we can’t re-use any of the values previously used in this process, except for the application name. Here, we used “BigQueryDemoApp” as the application name. To build a new refresh token, we would need to start at the first step of this process.
Conclusion
In this article, we saw how to set up a BigQuery resource, and build a Google OAuth refresh token, or security key. Part Two will first show how to set up an Azure SQL data resource. Then, it will show how to build, configure, and test an Azure Data Factory that connects the Azure SQL and BigQuery resources.
Table of contents
| Build a Google BigQuery Resource |
| Link Google BigQuery resources into an Azure SQL resource |
| Build a Google BigQuery report with Google Data Studio |

See more about Frank at LinkedIn.
Remove the non-standard characters from this address: fb} <s.author@gmail.com to reach him by email.
- Lever the TSQL MAX/MIN/IIF functions for Pinpoint Row Pivots - May 16, 2022
- Use Kusto Query Language to solve a data problem - July 5, 2021
- Azure Data Explorer and the Kusto Query Language - June 21, 2021