
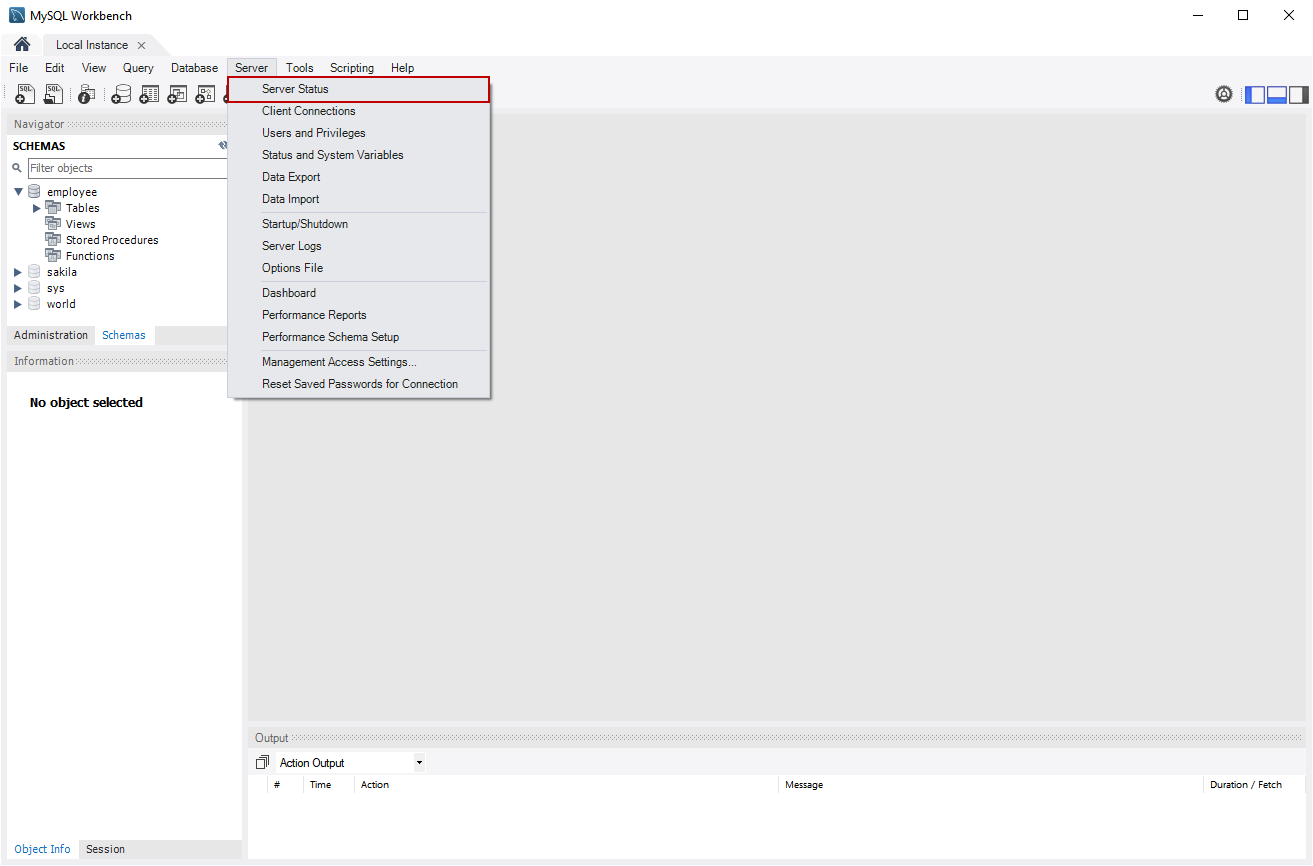
This article explains how we can run multiple instances of the MySQL Server on a single machine. In How to install MySQL database server 8.0.19 on Windows 10 article, I have explained the installation process of MySQL on windows 10. For the demonstration, I have installed MySQL 8.0.19 on my workstation. We can view the status of the MySQL Server using MySQL workbench. To view the server status, open MySQL workbench connect to the MySQL instance Click on Server Select Server Status.
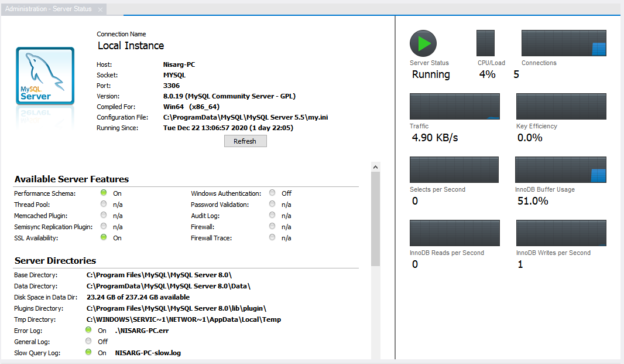
In the Server Status tab, you can view the status of the MySQL instance and the configurations like the installed features, server directories, and real-time information of network consumption, memory used by the database engine, read-write per second, and select queries executed per second.

When we install MySQL Server, a MySQL service named MYSQL80 is created. To view the service, Open Administrative tools open Services.
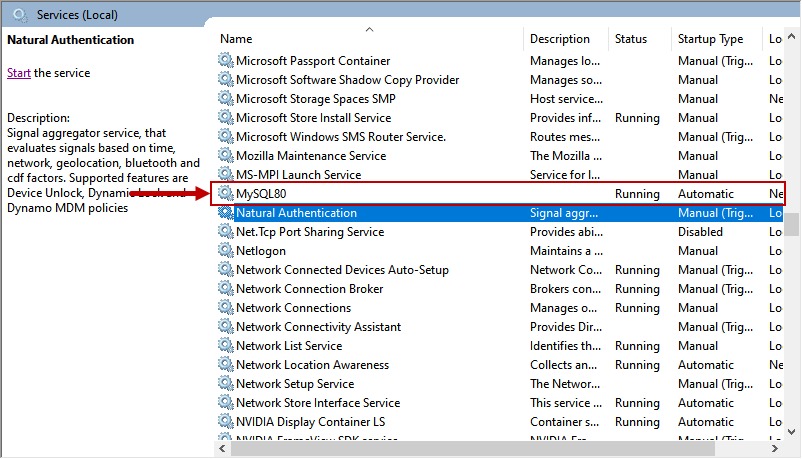
As you can see in the above image, the service MySQL80 is running.
It is easy to install and configure multiple instances of SQL Server on the same machine. You can create multiple named instances and store the system database, and log files in separate directories. Once SQL Server instances are installed, you can connect them by specifying the HOSTNAME/INSTANCE name in the connection string of the application server or the SQL Server Management Studio (SSMS).
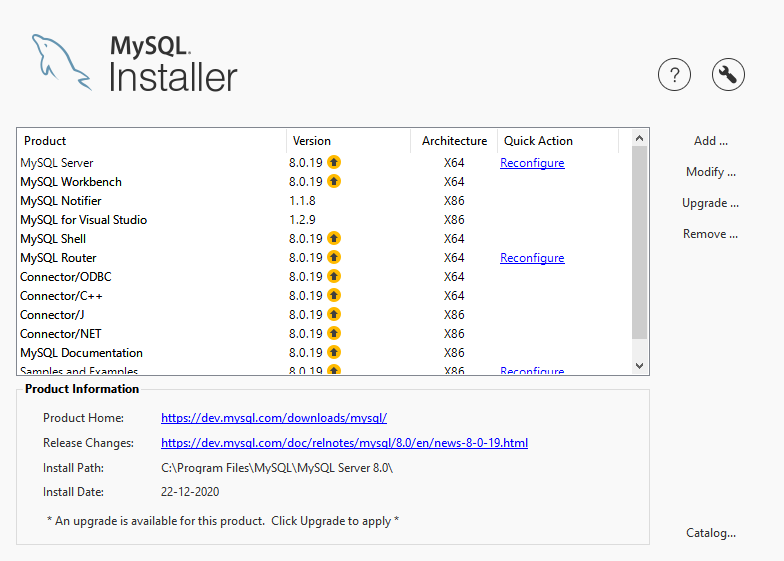
Let us try to use the same method that we use to install multiple instances on SQL Server. I have downloaded and installed the MySQL community installer on my workstation. You can download it from here. Now, run the MySQL community installer. In MySQL Installed, you can view the list of installed products.
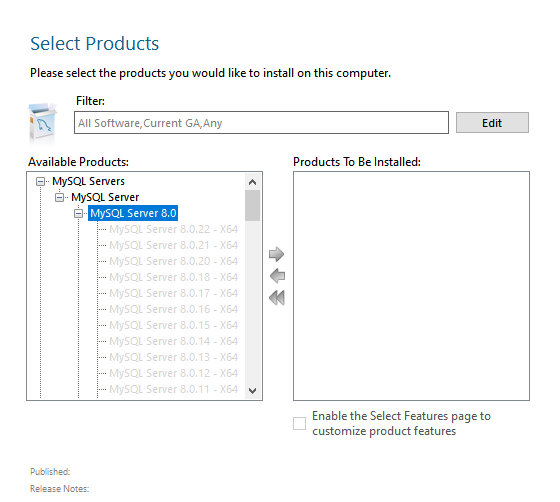
To add another instance of the MySQL Server, click on Add. In the Select Products screen, you can view the available version of the MySQL Server. We want to install a new instance of MySQL 8.0; therefore, Expand MySQL Server Expand MySQL Server 8.0.
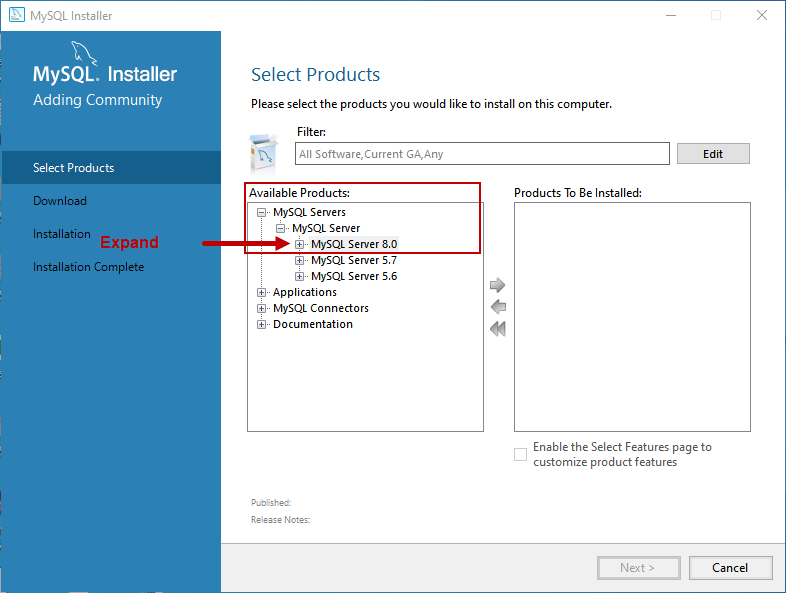
All versions are of MySQL 8.0 are disabled.
To view another version of MySQL, expand MySQL Server 5.7.
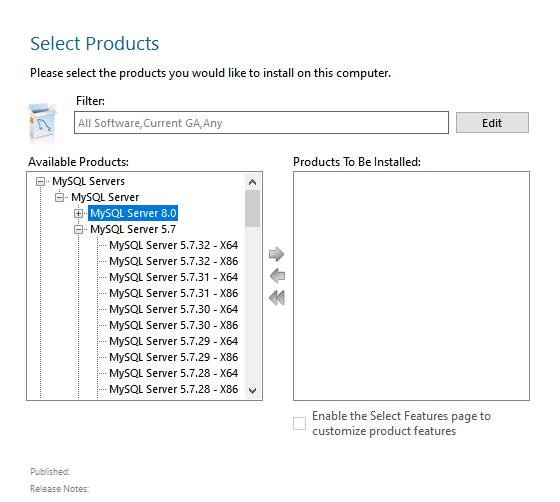
As you can see in the above screenshot, the version of MySQL 8.0 is greyed out, but the versions of MySQL Server 5.7 and 5.6 are enabled. This indicates that using the MySQL community installer, we can install a different version of MySQL but cannot install multiple instances of the same version. To run multiple instances, the second instance of MySQL must install as a windows service. The installation must be performed manually using a command prompt. We are using mysqld to install MySQL, and the step-by-step process is following.
- Create a new directory named MySQLDev in C:\ drive and copy the content of the MySQL base directory, data directory, and configuration file (my.ini) to the C:\ MySQLDev folder
- Rename the configuration file
-
Update the configuration file by making the following changes
- Change the port
- Change the value of the base directory and the data directory
- Change the value of the named-pipe
- Start the manual installation of MySQL using the mysqld command. The installation uses the updated configuration file
- Start the service
- Connect to the new instance from MySQL workbench
- If required, change the password of the root user
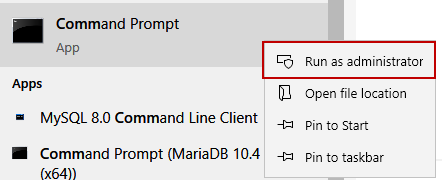
Let us perform the installation. Open the command prompt using an administrator account. To do that, Right-click on the Command prompt and select Run as Administrator.
Create the directory and copy the files
First, create a new directory named MySQLDev on C:\drive of the computer.
C:\> mkdir MySQLDev
Copy the content of the MYSQL base directory to C:\MySQLDev using the XCOPY command. If you have installed MySQL using default settings, the directory location is C:\Program Files\MySQL\MySQL Server 8.0. You can view the location of the base directory of the MySQL server from the Server Status screen of MySQL workbench.
C:\> xcopy C:\”Program Files”\MySQL\”MySQL Server 8.0″ C:\MySQLDev /E /H
Once the subdirectories and files of the MySQL base directory are copied, copy the data directory and configuration file to the C:\MySQLDev. The default location of the data directory is C:\ProgramData\MySQL\MySQL Server 8.0\Data.
XCOPY command to copy Data directory
C:\> xcopy C:\”ProgramData”\MySQL\”MySQL Server 8.0″\data C:\MySQLDev\Data /E /H
COPY Command to copy configuration file
C:\>copy C:\ProgramData\MySQL\”MySQL Server 8.0″\my.ini C:\MySQLDev
Rename the configuration file
Change the name of the configuration file named my.ini to MyDev.ini using the REN command.
C:\> ren C:\MySQLDev\my.ini MyDev.ini
Change the parameters in the configuration file
Now, let us change the values of the configuration parameters in the MyDEV.ini file. We are making changes in the following parameters:
|
Parameter Name |
Existing value |
New Value |
|
Port |
3306 |
2505 |
|
Datadir |
C:/ProgramData/MySQL/MySQL Server 8.0/Data |
C:/MySQLDev/Data |
|
Basedir |
C:/Program Files/MySQL/MySQL Server 8.0/ |
C:/MySQLDev |
|
Share-memory-base-name |
MYSQL |
MYSQLDEV |
|
Socket |
MYSQL |
MYSQLDEV |
To change the parameters, you can use any text editor. Make the changes as shown in the below image:

Save and close the configuration file.
Install MySQL using a new configuration file
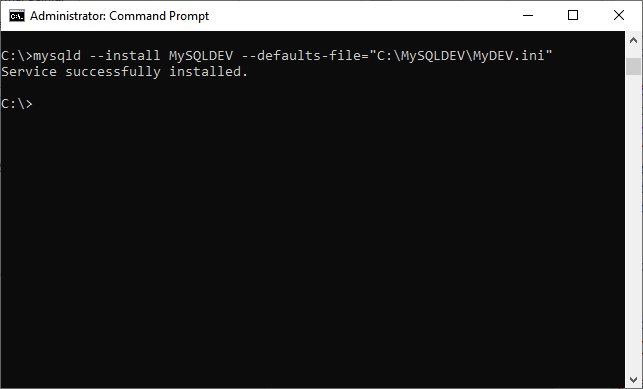
To manually install MySQL as a Windows service, use mysqld command line utility. The command is the following:
C:\> mysqld –install MySQLDEV –defaults-file=”C:\MySQLDEV\MyDEV.ini”
The service is installed successfully.
Once MySQL is installed as a windows service, let us start it.
Start MySQL instance
To start the service, open the control panel open Administrative Tools Open Services. In the Services console, you can see the MySQLDEV service is installed. Right-click on it and click on Start.
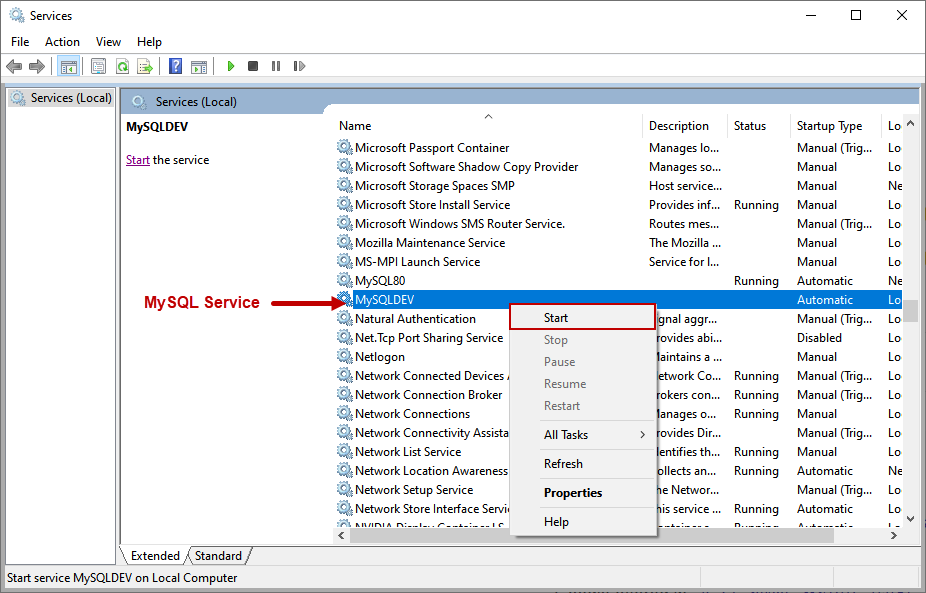
If the configuration is made correctly, then the service will be started successfully. Alternatively, you can start the MySQLDEV service by running the following command.
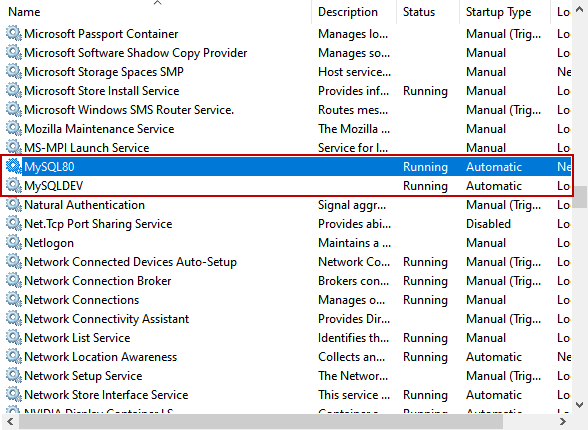
As you can see in the above image, both instances of MySQL are running. Let us verify the details of the configuration.
Connect to the new instance
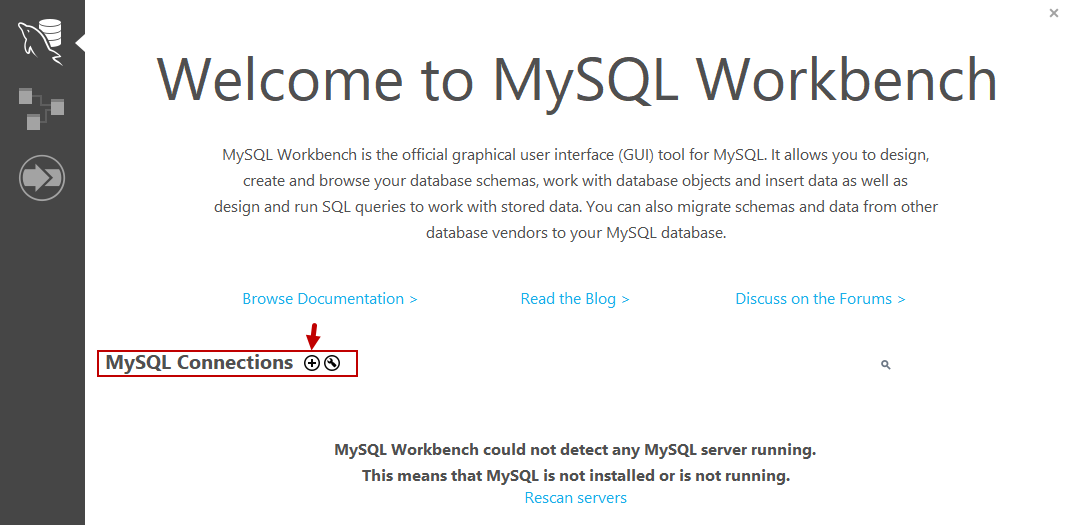
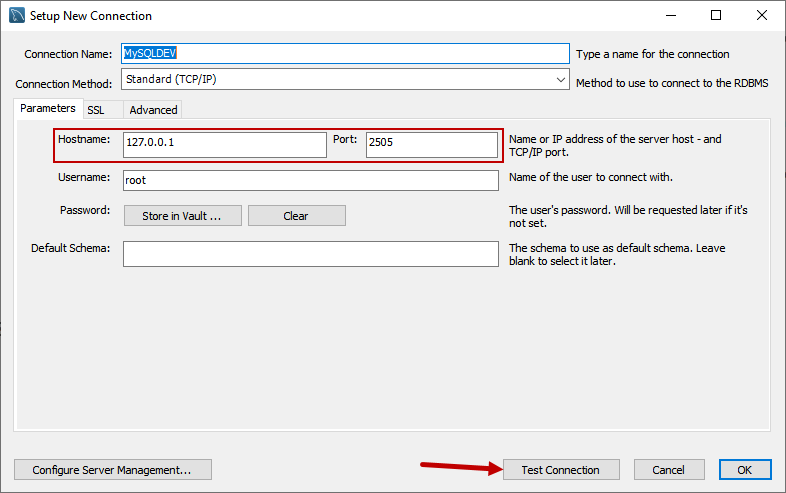
We are using MySQL workbench to check the configurations of the MySQLDev instance. We are connecting to the MySQLDEV instance, so we must set up a connection in MySQL Workbench. Open MySQL Workbench and click on the (+) icon.
In Setup New Connection dialog box, specify the connection name. We are connecting to MySQL using TCP/IP, so choose Standard (TCP/IP) from the connection method drop-down box. In the Hostname dialog box, specify the 127.0.0.1 or Localhost. The new MySQLDEV instance is listening on port number 2505; therefore, in the port number text box, specify 2505. We are using the root user to connect to the MySQL instance. Click on Test Connection.
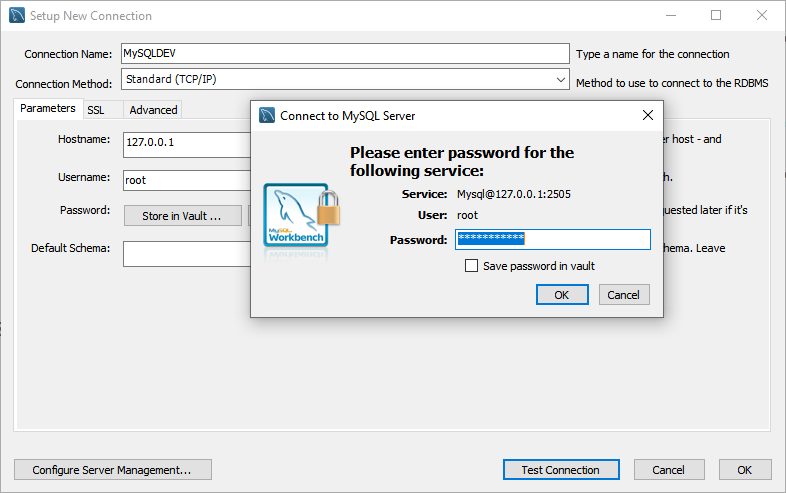
MySQL workbench prompts for the password of the root user. Specify the appropriate password and click OK.
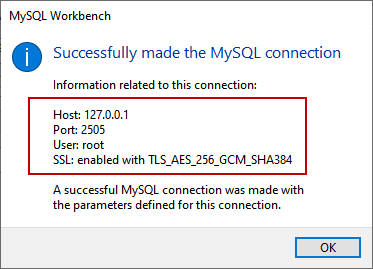
A connection is established successfully. The information related to the connection can be viewed in the dialog box.
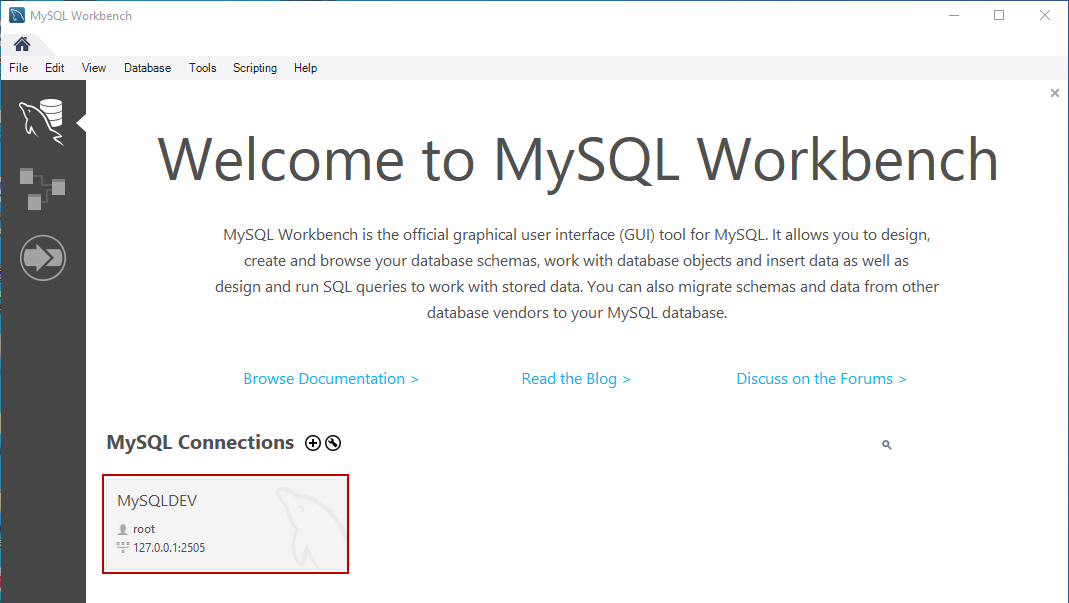
Back to the Welcome screen, you can see the connection named MySQLDEV has been added. Click on it to open the query window.
Let us check the configuration of the MySQLDEV instance. The details can be viewed from the Server Status. Click on Servers and select Server Status.
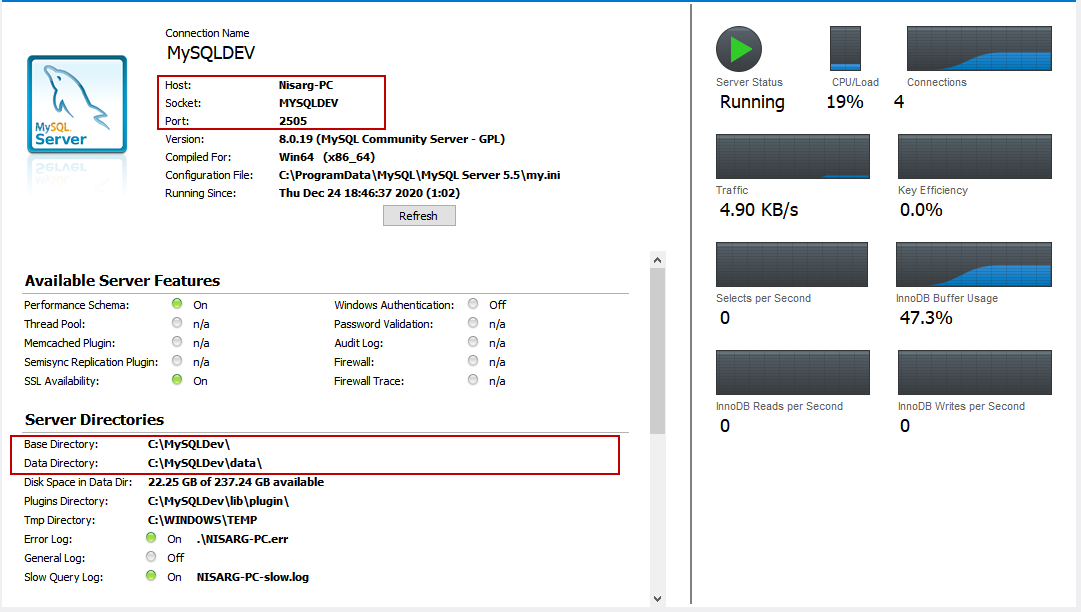
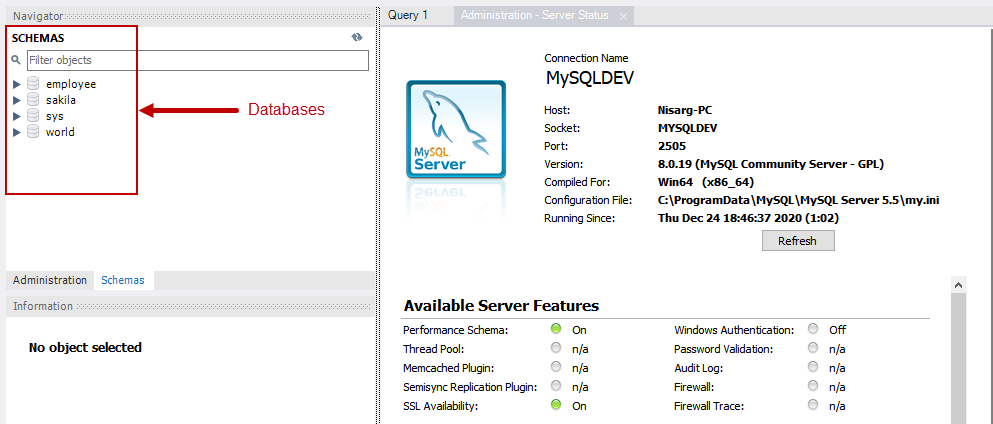
You can see the Hostname, socket name, and port number used by the MySQLDEV instance on the Server Status screen. You can also see the path of the base directory and the data directory of the MySQLDEV instance. We have copied the entire data directory of the default instance (MySQL80) of MySQL; therefore, the databases created on the MySQL default instance are copied to the MySQLDEV instance. You can view the list of databases in Schemas pan of Navigator.
Summary
In this article, we learned how we could install multiple instances of MySQL. While learning MySQL, I realized that Microsoft SQL Server has much flexibility to configure SQL Server databases. The configurations of database instances, backup and restoration of the databases, high availability and disaster recovery solutions, and performance tuning and monitoring can be done without any issue. The SQL Server installer has made the installation process of multiple instances of SQL Server is very easy. MySQL involves many manual tasks, and the configuration process of databases and other features are more complicated than SQL Server.
Table of contents

He has expertise in database design, performance tuning, backup and recovery, HA and DR setup, database migrations and upgrades. He has completed the B.Tech from Ganpat University. He can be reached on nisargupadhyay87@outlook.com
- Different ways to identify and change compatibility levels in SQL Server - July 22, 2024
- Copy SQL Databases between Windows 10 and CentOS using SQL Server data tools - October 19, 2022
- Changing the location of FILESTREAM data files in SQL Database - October 14, 2022