AWS provides a command-line interface (AWS CLI) tool to work with its various cloud services. It is a single tool with many useful commands and allows you to automate a particular task using scripts. You might need to do specific tasks regularly. You can use the AWS Web Console for it. However, it requires you to go through all configuration options all over again.
In the previous articles on the Learn AWS CLI, we explored the following points.
- An Overview of AWS CLI (AWS Command Line Interface): We get an overview of the CLI tool along with its installation and profile configuration for your AWS account using access and secret key. You should perform the steps mentioned in this article to go ahead with the article
- Interact with AWS S3 Buckets using AWS CLI: This article gives instructions for CLI commands related to Amazon S3 buckets such as create a bucket, upload & download objects, list S3 buckets, and remove a bucket
AWS provides two kinds of users to work in both AWS web console and CLI interface.
- Root user: It is the account you create once you sign up for AWS services. It has the highest privileges, and you should not use this account to work with any services
- IAM user: We create user accounts in AWS, assign permissions, roles, attach policies so that users can authenticate themselves and can do the authorized work
We will explore more about the IAM user in this article. I will walk through both AWS web console, and AWS CLI commands for it.
IAM user with administrative access using AWS Web Console
As highlighted earlier, we should not use the root account for doing any operational work in AWS. Some users might require administrative permissions so we can create an IAM user with administrative access.
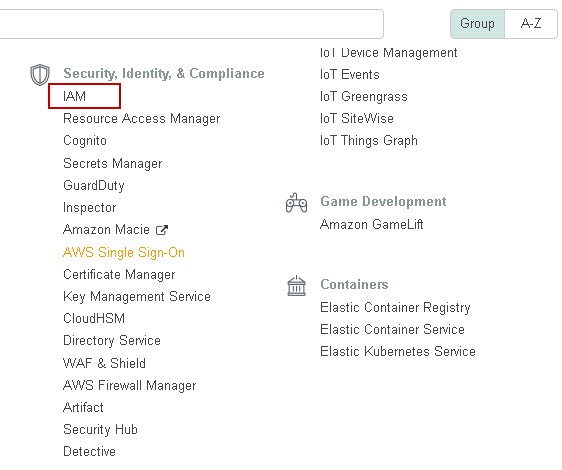
First, sign up to AWS console and navigate to IAM in the Security, Identity & Compliance group:
It opens the Identity and access management web page. You can see existing IAM users, roles, groups along with a Web URL for IAM users:
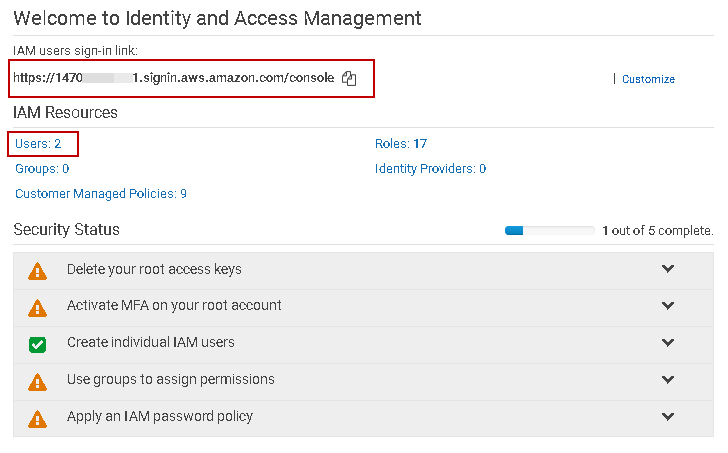
As you can see, we have two existing users in my account. Click on Users, and it gives you a list of users:
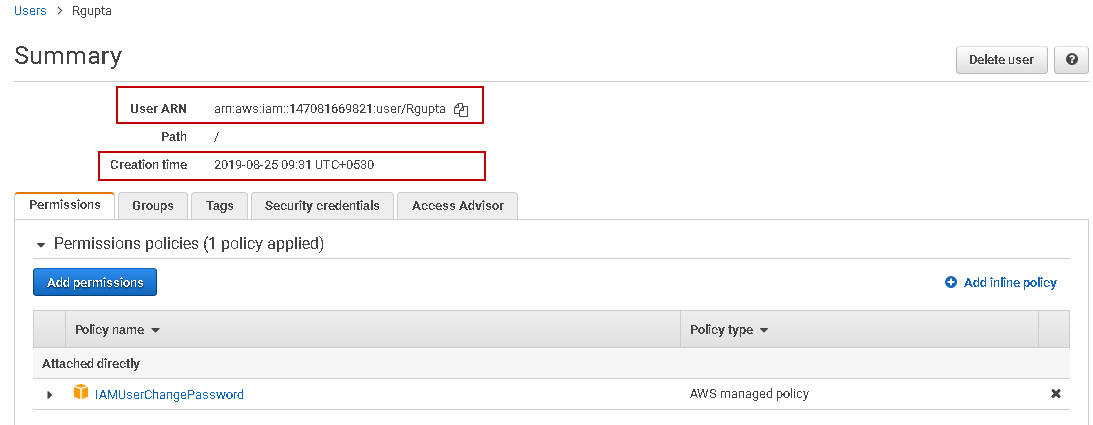
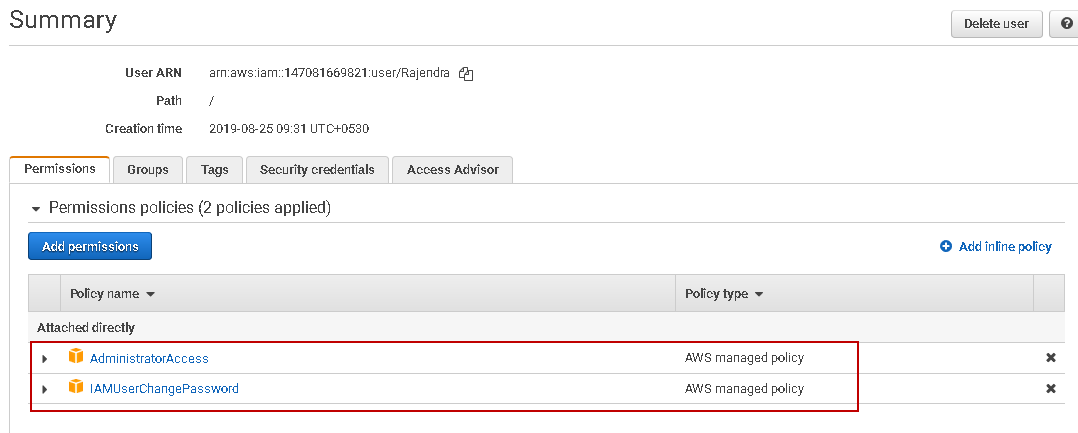
Click on any IAM user, and it gives you information such as User ARN, Creation time, attached policies:
Let’s fetch this information using AWS CLI. We can use the following CLI command for this purpose.
>aws iam list-users
You get users lists in the JSON format.
- User Name: It is a friendly user name that we specify while creating the IAM user
- User ID: It is a unique id of each IAM user
- ARN: It is the Amazon resource name to identify the user
- Create Date: It is the user creation date in ISO 8601 date-time format
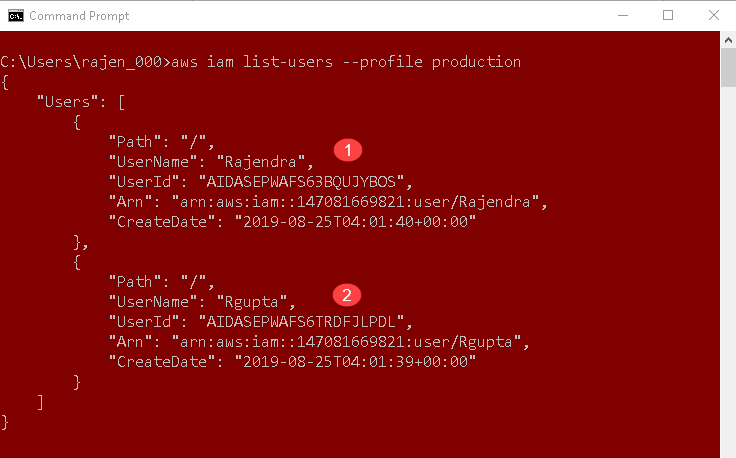
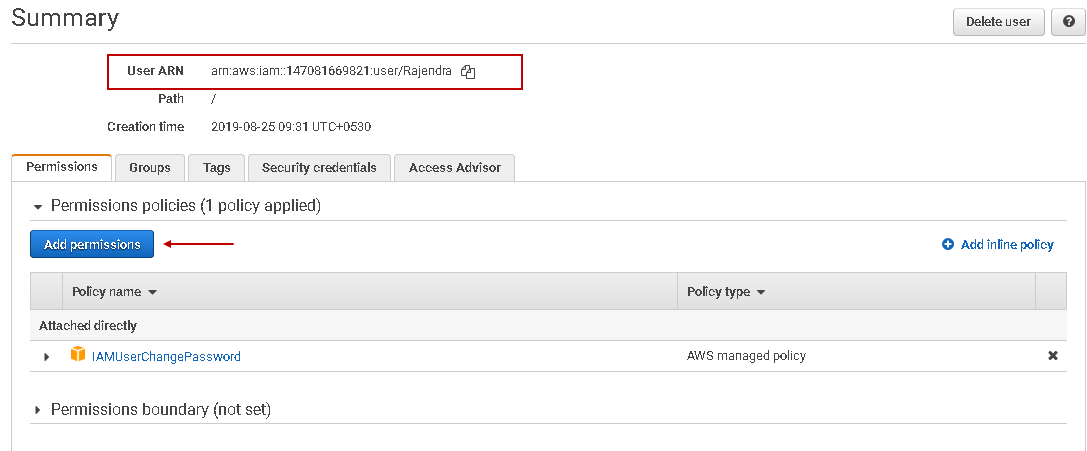
The list-users command does not provide you with a list of policies attached to the user. Let’s go back up AWS console and click on Add Permissions:
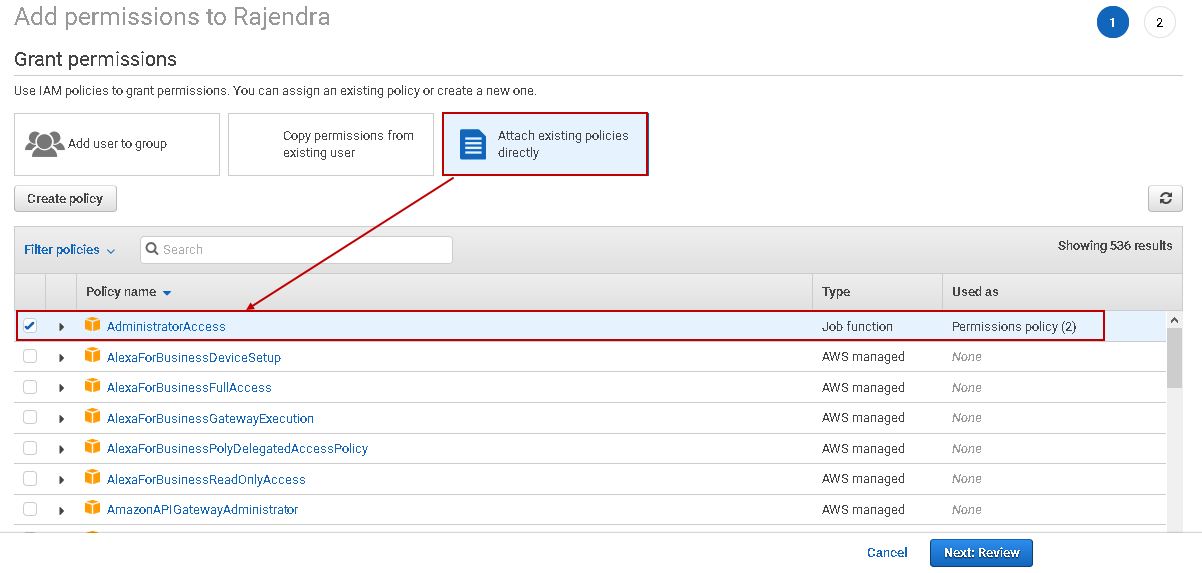
On the next page, navigate to Attach existing policies directly. It lists all AWS managed and custom user policies(if we have created earlier).
- AWS managed policy: You can assign these policies to users, groups, or roles, but we cannot modify the permissions in an AWS managed policy. It is managed by AWS and might not be suitable for your requirement
- Customer Managed Policy: If you do not want to apply the AWS managed policy, you can configure your policy, manage it, create different versions, or remove it as required. AWS does not manage the policy
Let’s assign an existing AWS managed policy as of now to the IAM user. Put a check on AdministratorAccess policy to add this permission to the specified user
Click on Next: Review:
Click on Next: Review on the previous screen, confirm the permission. In the title, we can see it will assign the permissions to the user named [Rajendra]:
We can verify in the following screenshot that the user [Rajendra] is having two AWS managed policy attached.
- AdministratorAccess
- IAMUserChangePassword
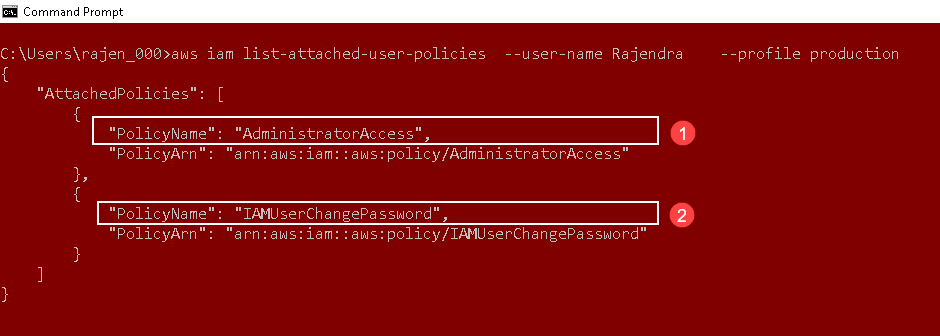
Now, switch back to the AWS CLI command prompt. We want to view the policies attached to the user [Rajendra]. It should return the policies listed in the above image.
In the CLI, we use command list-attached-user-policies to list attached policies for a user.
> aws iam list-attached-user-policies –user-name Rajendra –profile production
We can see both AWS managed policies and PolicyARN attached to the user [Rajendra]:
Create a customer-managed AWS policy
In the previous section, we assigned an AWS managed policy to the IAM user. These AWS managed policy cannot be modified. It is always a good practice to configure your custom policy with appropriate permissions and assign it to the users or groups.
First, let’s view the policy creation using the AWS web console. In the IAM menu, click on the Policies->Create policy:
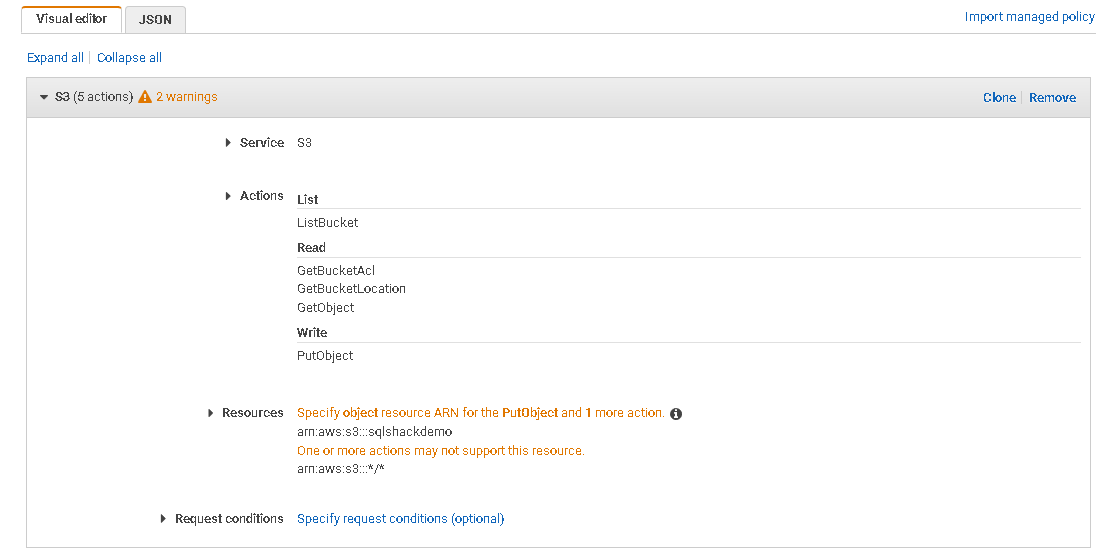
In the create policy wizard, select the AWS service, permissions, resources, and conditions, if any. For this demo, we use the Amazon S3 service. You should understand the permission levels and assign them appropriately. I do not cover the use of the S3 service in this article:
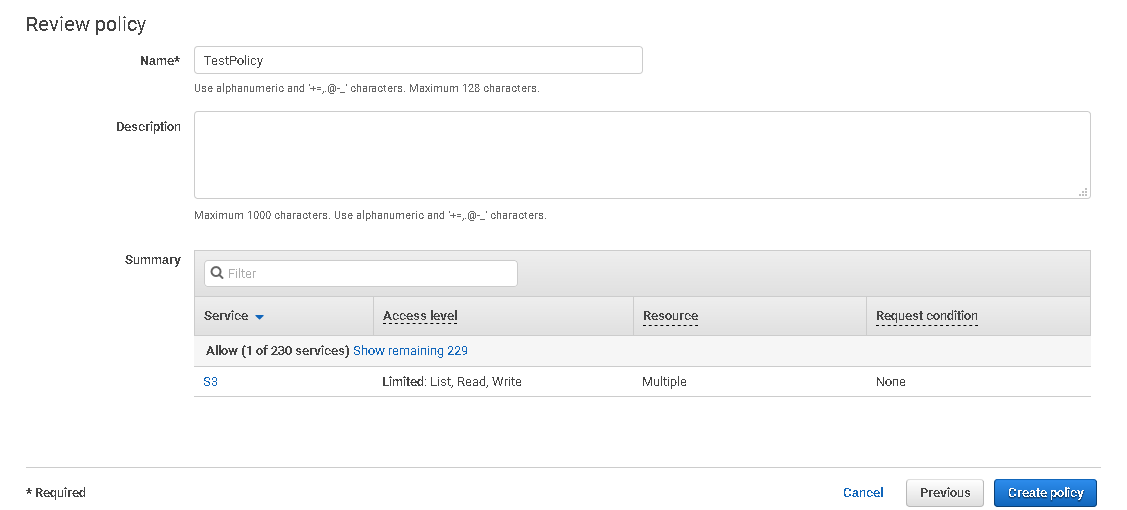
Give a suitable name for the new policy, review it, and click the Create policy button:
We have created the AWS policy. You can filter the policy and view it:
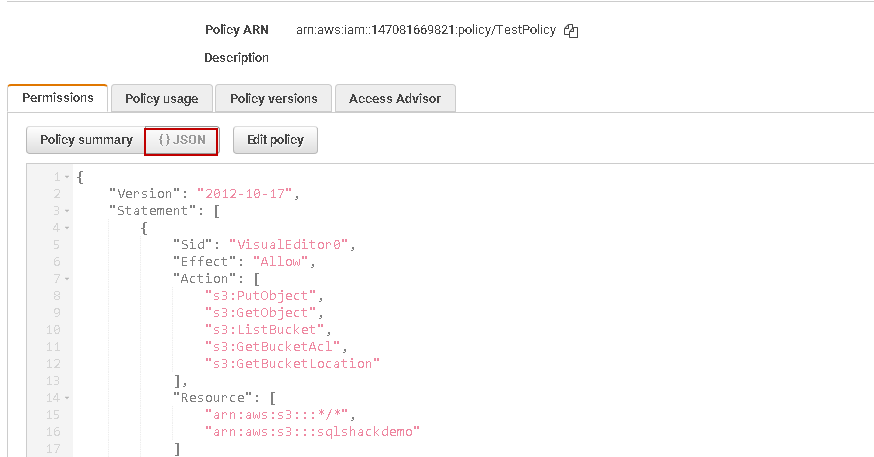
Click on the policy and view the JSON statement for this policy:
Copy this JSON, paste in the notepad and save the file in the JSON extension such as MyPolicy.JSON
In the next part, we create the policy using AWS CLI and the JSON file created above. In the CLI, we use create-policy command and specify the JSON statement file location in the command.
In the below command, we create the AWS policy [my-policy] and use argument policy-document to specify the JSON file path. You can refer to AWS docs for more details.
> aws iam create-policy –policy-name my-policy –policy-document file://C://sqlshack//AWS/MyPolicy.json –profile production
This command returns the AWS IAM policy name, policy ID, policy ARN, created, and updated date of the policy:
Refresh the AWS console, and you can see policy created using CLI in the web console:
We can create multiple versions(up to 5 versions) of a policy and can define a version as a default version. This default version is attached to users, roles, or groups.
Let’s make some changes in the JSON file and save it. To create a new version, we use the create-policy-version command. It requires ARN of the existing policy.
You can either note the ARN from the output of a create-policy command or open the policy in AWS web console to copy the policy ARN as shown below.
> aws iam create-policy-version –policy-arn arn:aws:iam::147081669821:policy/my-policy –policy-document file://C://sqlshack//AWS/MyPolicy.json –set-as-default
In the below screenshot, we see two different versions of an existing policy. In the output, it returns the version V2 and V3 of it. We might have assigned this policy for existing users, roles. Once we create a policy version with the set-as-default parameter, it becomes effective for all existing users, the role to which this policy is attached:
Create IAM user using the AWS CLI
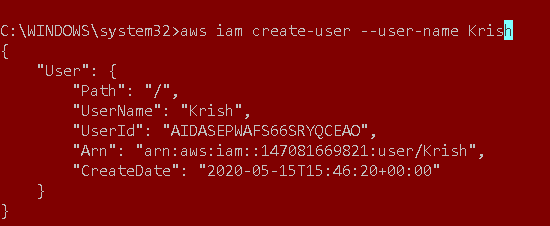
In the above examples, we used existing IAM users and assigned the policy to those users. In this section, let’s create an IAM user with AWS CLI commands. It uses create-user in CLI to create the user in the current account.
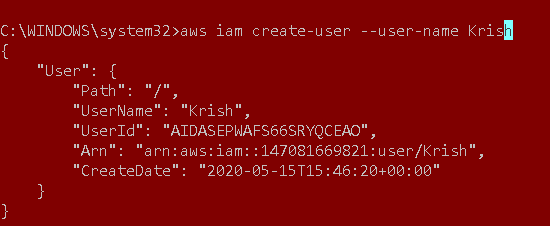
> aws iam create-user –user-name Krish
You get the username, user id, ARN, and the created date for the IAM user:
Conclusion
In this article, we explored the useful commands of AWS CLI for creating IAM user, attach existing AWS managed policies, create a new customer managed policy. CLI commands can make you manage AWS resources effectively without going through the web console wizard. It is useful for you to automate the task you frequently do in your environment.
- Understanding PostgreSQL SUBSTRING function - September 21, 2024
- How to install PostgreSQL on Ubuntu - July 13, 2023
- How to use the CROSSTAB function in PostgreSQL - February 17, 2023

