
This article gives you an overview of integrating AWS S3 buckets with AWS RDS SQL Server.
Introduction
AWS provides a fully managed relational database service (RDS) in the cloud. We do not require to manage the hardware, backups, patching, and focus on the application tasks. It provides the following database systems. It is secure, reliable, scalable, highly available, and low cost.
- MySQL
- Microsoft SQL Server
- Oracle
- MariaDB
- Amazon Aurora
- PostgreSQL
You can use this article AWS RDS SQL Server – Launching a new database instance to create a new Amazon RDS SQL instance.
AWS also provides an object storage solution known as Simplified Storage Service. Suppose you need to import or export data from the RDS SQL Server. You can use the S3 bucket for this purpose. We can store any kind of objects such as text, CSV, XML in the S3 bucket. In this article, we will view the steps to integrate an AWS S3 bucket with RDS SQL Server.
We can download and upload the files from the S3 bucket to the RDS instance. RDS uses the D:\S3 folder for this purpose in the RDS instance. We will cover more on it later in this article.
Prerequisites
- You should follow the article AWS RDS SQL Server – Launching a new database instance to create a new DB instance in RDS
- We cannot use RDS S3 integration in the Multi-AZ instances. You can follow the article Multi-AZ Configuration for AWS RDS SQL Server to understand the difference in single and Multi-AZ instance
S3 bucket and IAM policy
We need to remember that the S3 bucket and the RDS SQL instance should be in a region. For example, my RDS instance is in the us-east-1f region, so we cannot use an S3 bucket that does not belong to the RDS region.
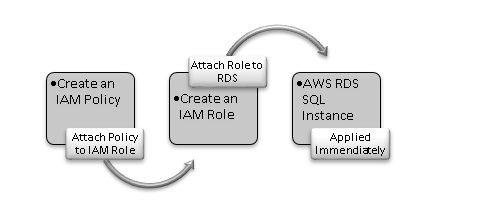
In the following image, we get a high-level overview of steps required to integrate an S3 bucket and AWS RDS SQL Server.
Create an AWS S3 bucket
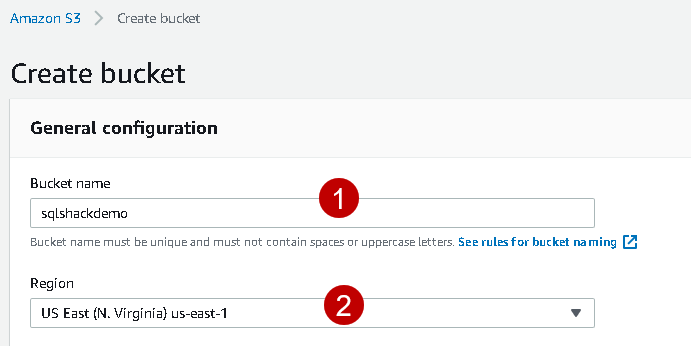
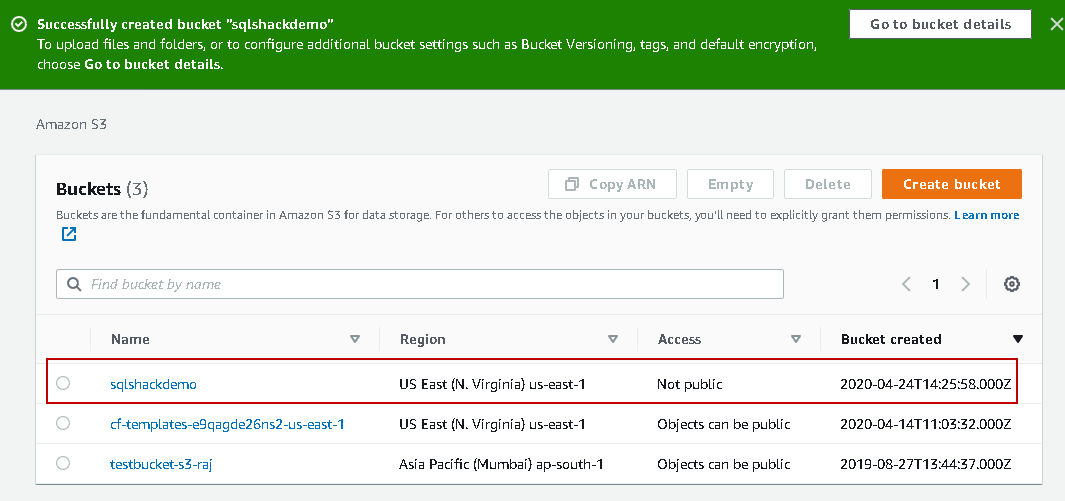
Let’s create a new S3 bucket for this article. In the Services, go to S3 and click on Create Bucket.
In this article, we create the bucket with default properties. Specify a bucket name (unique) and the region, as shown below.
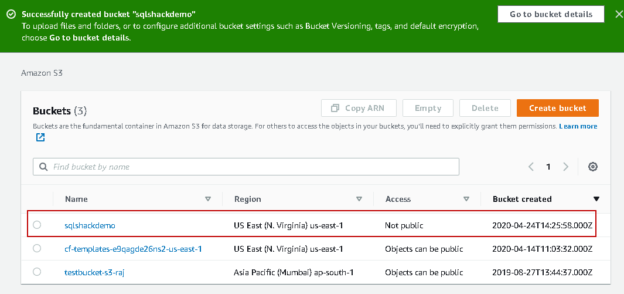
Click Ok, and it configures this SQLShackDemo with default settings.
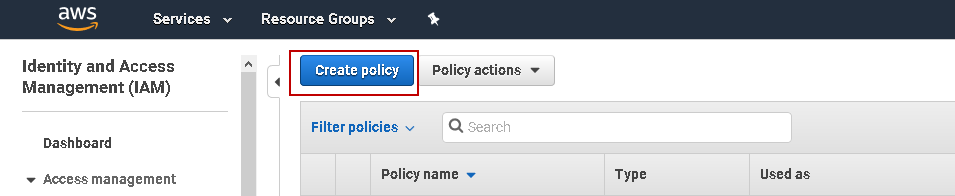
We need to create IAM (Identity Access Management) policy to integrate S3 and RDS. Navigate to IAM in the Services and click on Create Policy.
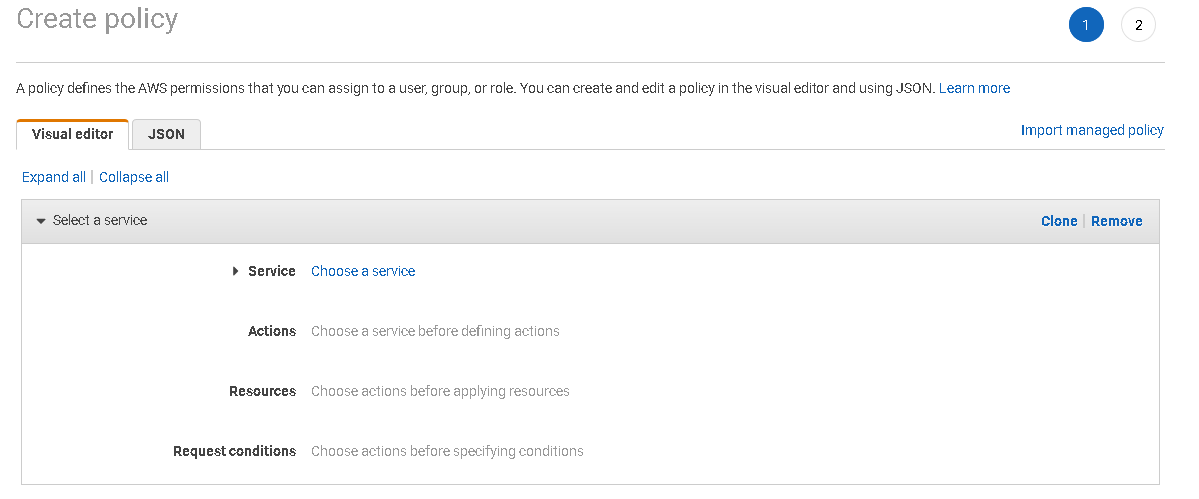
In the create policy window, we can either use a Visual editor or specify a JSON(Javascript object notation). You can refer to an article on SQLShack to learn JSON language.
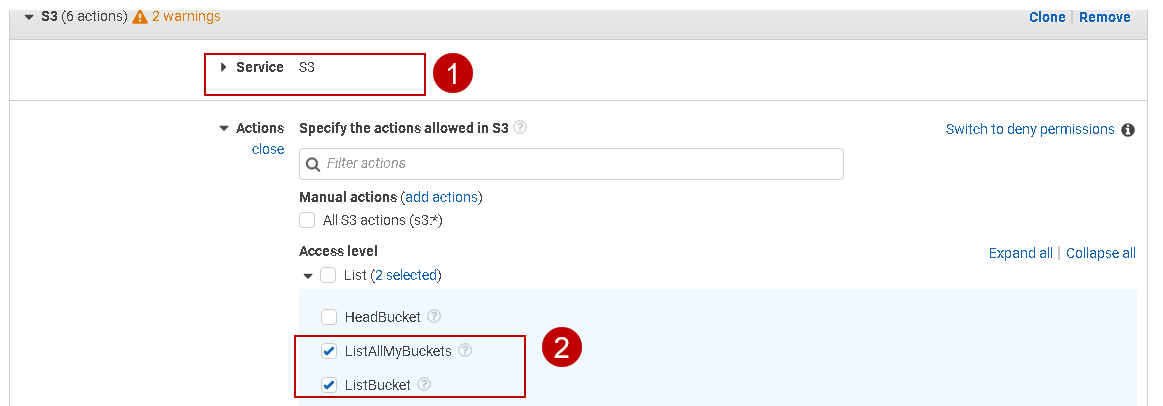
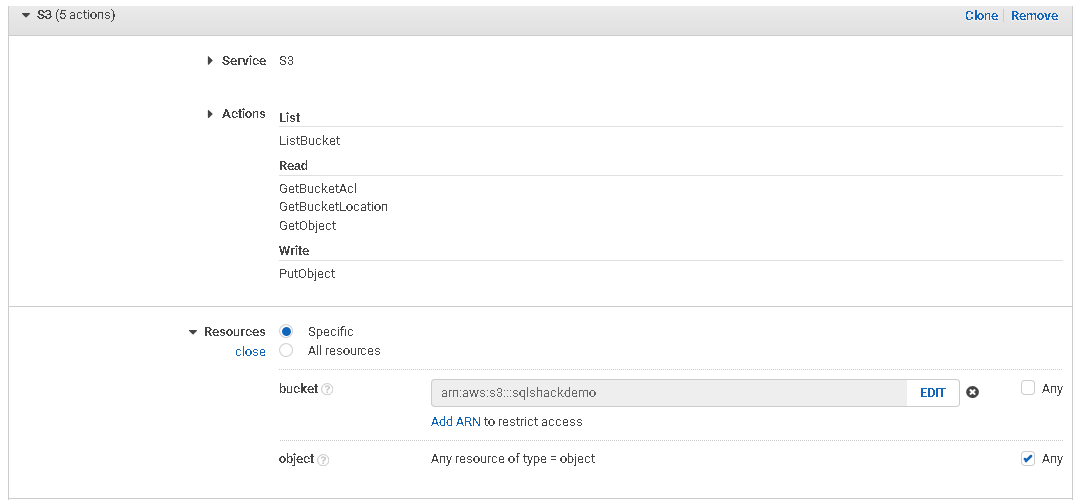
We have many permissions available for the AWS S3 bucket. We use the following permissions in this article.
Access Level Category | Access Commands | Description |
List | ListAllMyBuckets | It returns a list of S3 buckets for the authenticated AWS user |
List | ListBucket | It returns a list of objects in an AWS S3 bucket |
Read | GetBucketACL | It returns the access control list ( ACL) for a bucket |
Read | Get-BucketLocation | It returns a bucket AWS region |
Read | GetObject | It is required to retrieve objects from an S3 bucket. We use to download files from S3 to D:\S3 folder |
Write | PutObject | It is required to upload a file from D:\S3 folder to S3 bucket |
Now, go back to create a policy wizard and select the following parameters.
- Service: S3
Actions: here, we specify the actions required for the AWS S3 bucket using this policy:

Similarly, select the other access levels defined in the above permissions table. We can give full permission for this bucket using the All S3 actions checkbox.
Resources
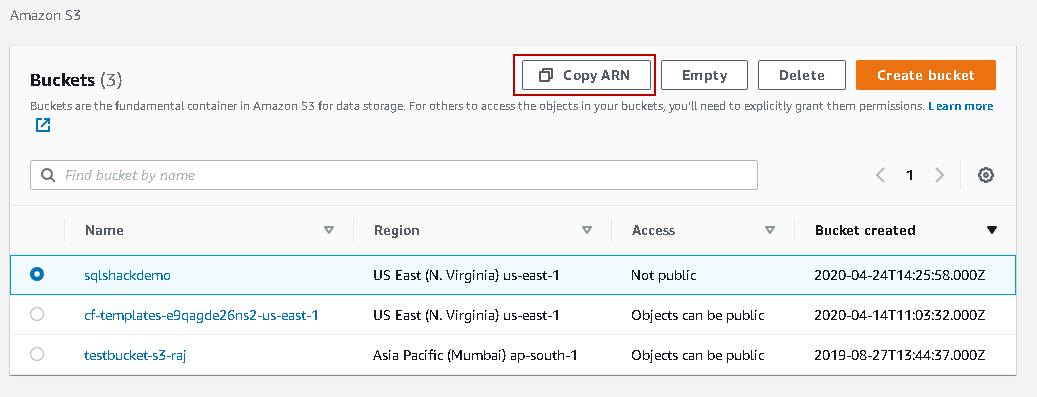
Here, we need to specify the Amazon Resource Name (ARN) for the S3 bucket. It is a unique name for the S3 object, and you get it from the S3 bucket properties. For this ARN, go to buckets, select the bucket and use the Copy ARN option:
Click on ARN in the IAM policy and paste the ARN you copied earlier.
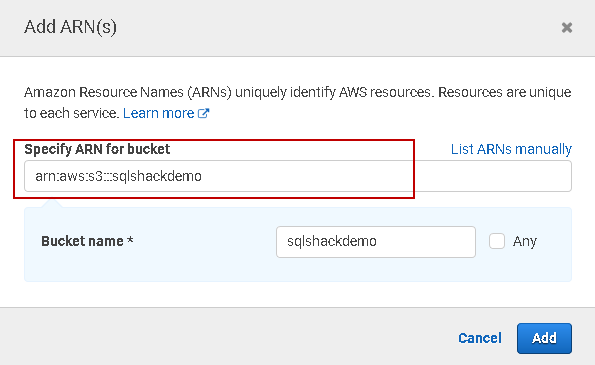
Once you add it, you see configurations, as shown below. We will skip the object parameter because it gives us the flexibility to restrict access to specific objects.
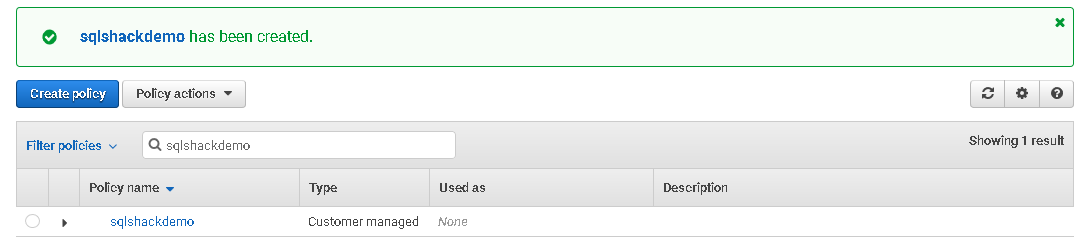
Click on the Review policy and specify a name for this policy.

It creates the policy, and you can see it as a customer-managed policy.
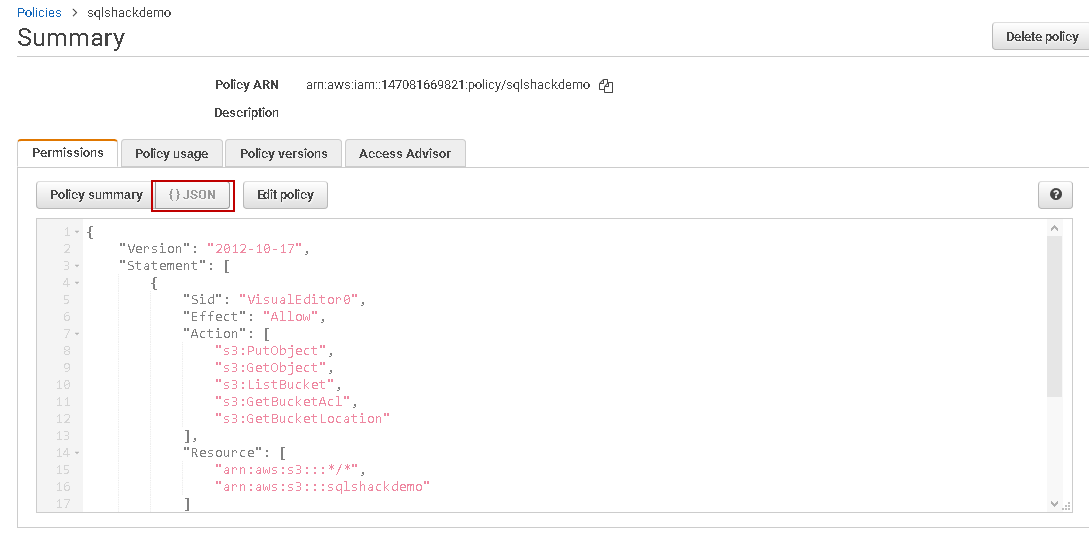
Click on this policy, and you can view the equivalent JSON statements. You can easily make changes in the JSON or copy it to create another policy.
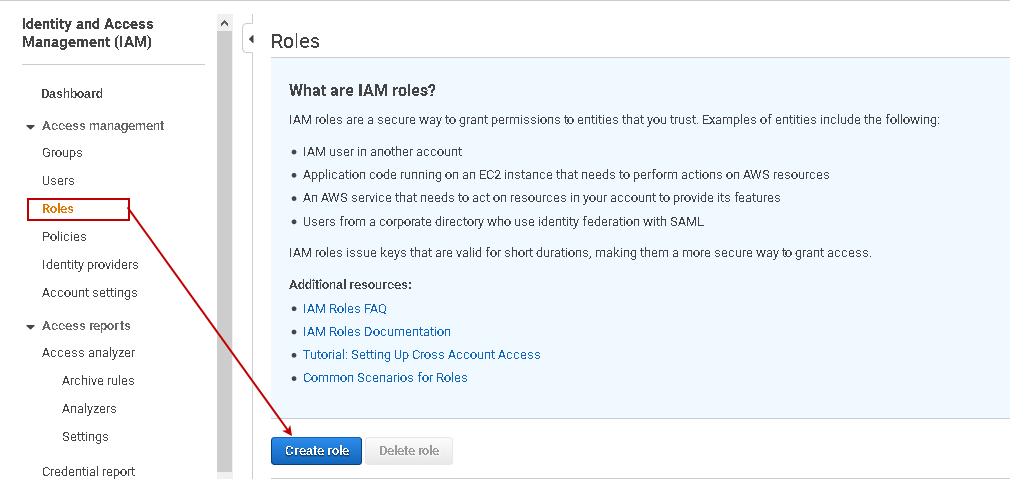
IAM Role to use the S3 policy
In the next step, we define an IAM role that uses the IAM policy we defined for the S3 bucket. Navigate to Roles in the IAM console. You also get a brief description of IAM roles on the home page of Roles.
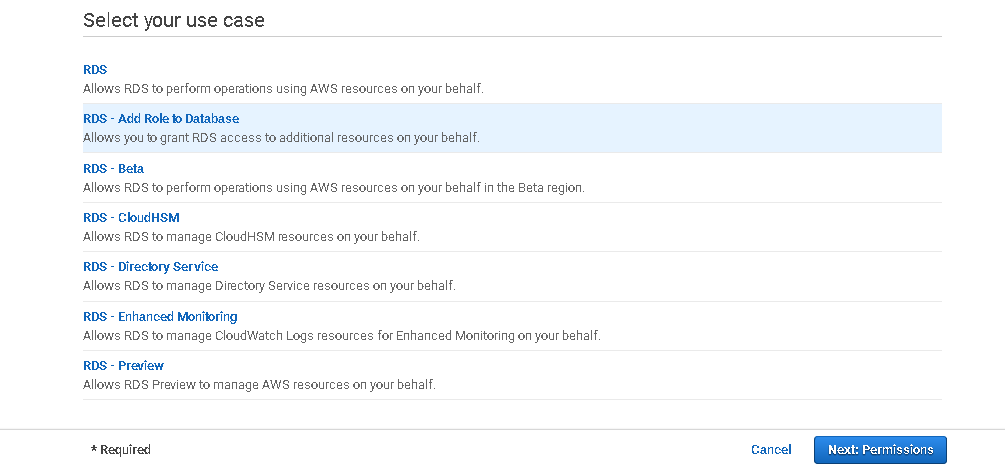
Click on Create role. On this page, select the AWS service that uses the IAM role. We require an IAM role for the AWS RDS SQL Server.
Select the user cases as RDS – Add Role to Database.
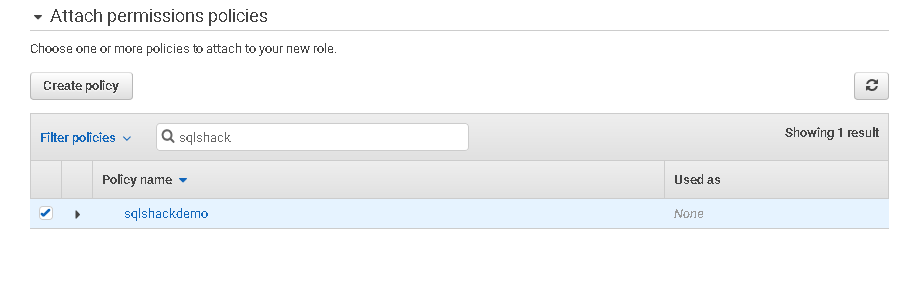
In the next step, search the S3 bucket policy that we created earlier.
Click Next. We need to give an appropriate name to this custom role on the review page.
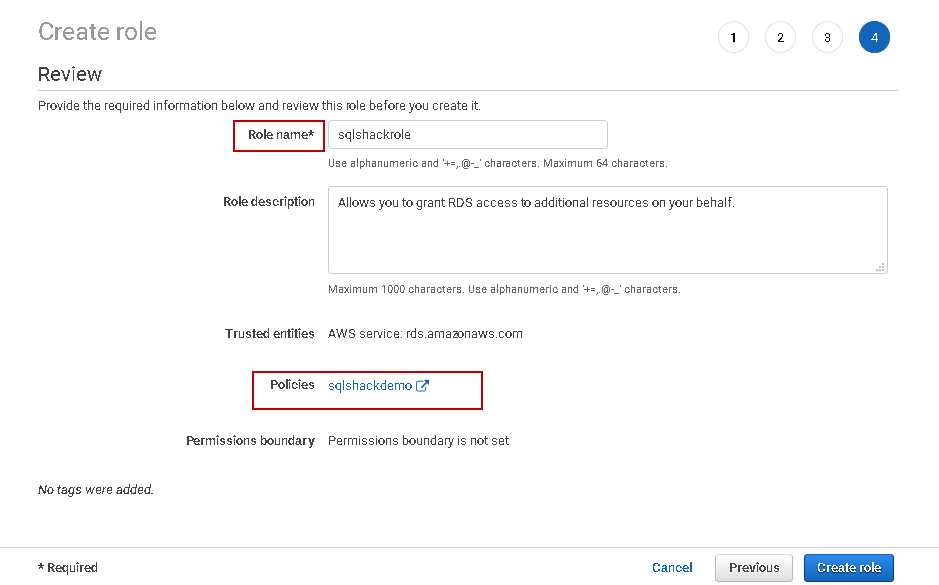
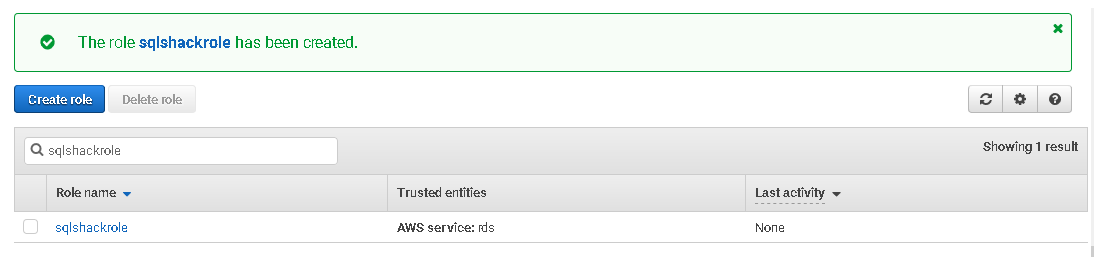
Click on Create role, and it creates a user-defined role for you.
Attach the IAM role with AWS RDS SQL Server
We need to attach the IAM role with the SQL instance. This IAM role already has an IAM policy attached to it.
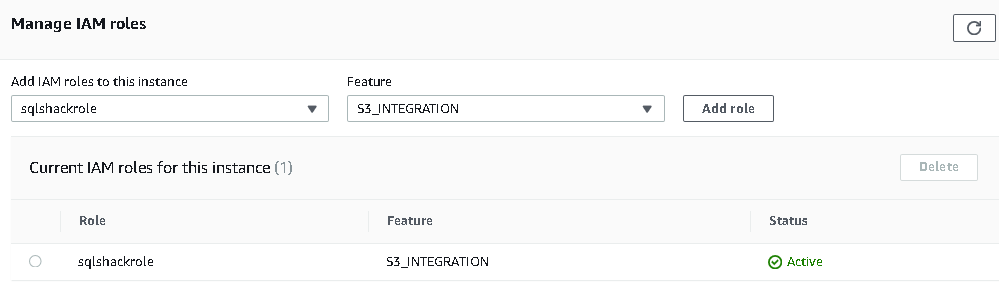
Go to the RDS instance and navigate to Connectivity & Security.
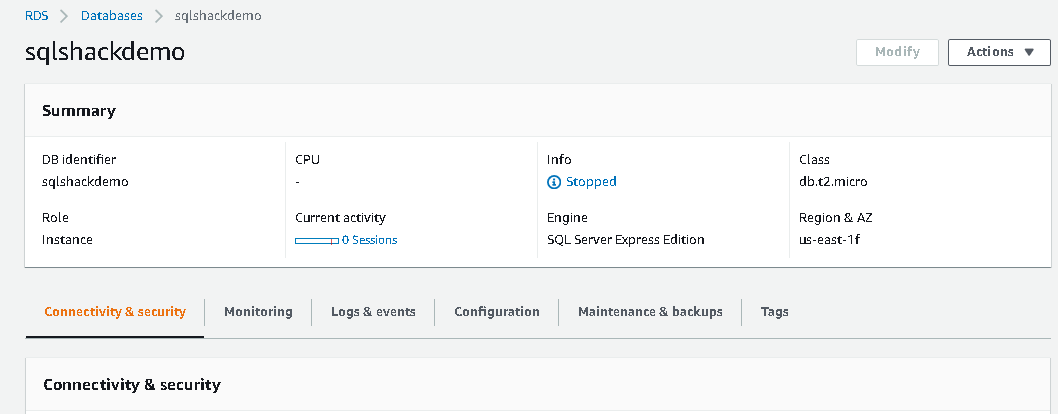
In this Connectivity & Security, scroll down and look for Manage IAM roles. The RDS instance should be in the available state to add an IAM role. If RDS is in the stopped state, it does not enable Add Role options in the Manage IAM roles.
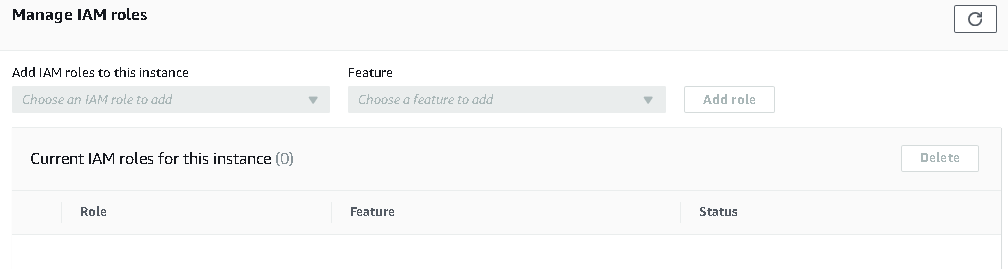
Once it is available, find a suitable role from the drop-down and click on Add Role. It applies to the IAM role without restarting the SQL instance.
Use S3 integration with RDS SQL instance
Once we have applied for the IAM role in the RDS instance, we can connect to the S3 bucket using the RDS SQL instance. RDS provides stored procedures to upload and download data from an S3 bucket. We need to use S3 ARN to access the S3 bucket and objects inside it. At a time, we can have two in-progress tasks in the queue. If we schedule any tasks, we should be careful that it should not override each other.
Upload file from S3 bucket to RDS instance
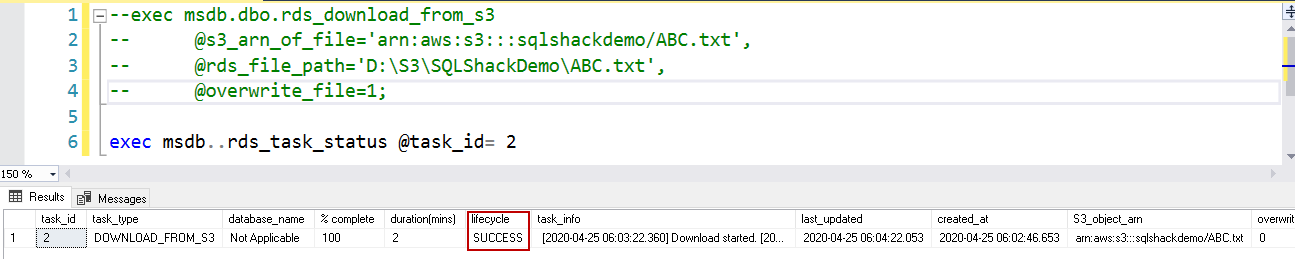
As we highlighted earlier, the RDS instance D:\S3 folder to store the files you upload in an S3 bucket. It uses a stored procedure msdb.dbo.rds_download_from_s3 for this purpose.
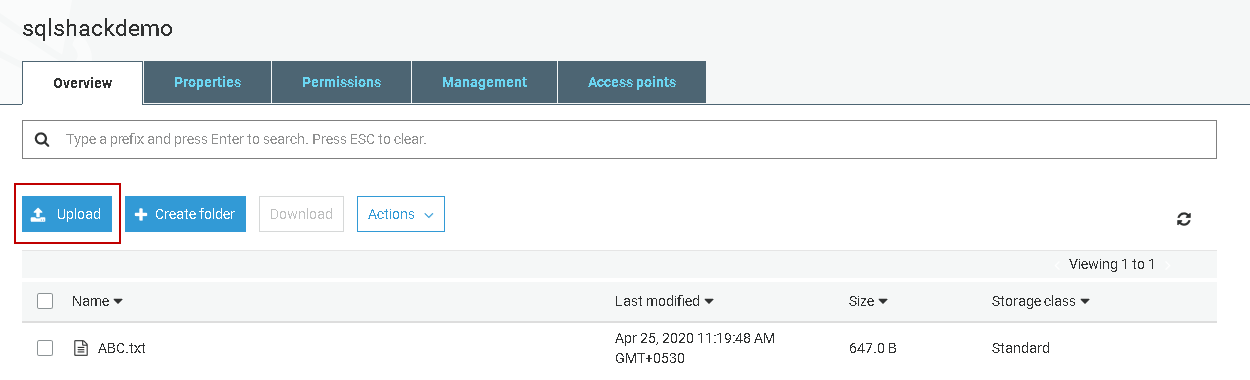
First, open the S3 bucket and upload a file into it.
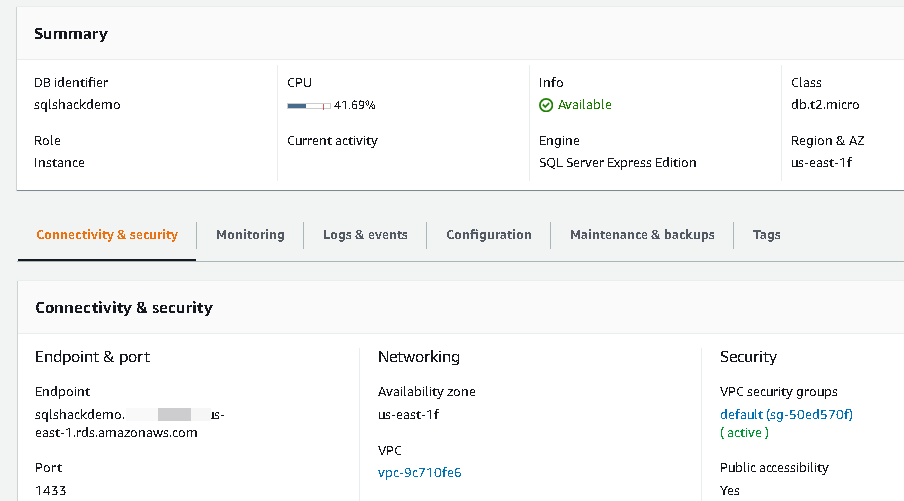
Now, connect to RDS SQL Instance in SSMS using the endpoint. You can get the endpoint from the instance property page. You should have set Public Accessibility property to true. If not, modify the instance appropriately and allow public access to the RDS instance.
In the SSMS, new query window, execute the following query. It uses the following arguments.
- S3 object ARN(@s3_arn_of_file): It is the object ARN path in the S3 bucket
- RDS file path (@rds_file_path): It is an optional argument. We can specify a subfolder inside the D:\S3 directory. RDS automatically creates this folder for you. If we do not specify any folder, RDS stores files in the ‘D:\S3 folder
Overwrite(@overwrite_file): We can override a file if it already exists using this argument. By default, it does not overwrite the file (@overwrite_file=0)
1234exec msdb.dbo.rds_download_from_s3@s3_arn_of_file='arn:aws:s3:::sqlshackdemo/ABC.txt',@rds_file_path='D:\S3\SQLShackDemo\ABC.txt',@overwrite_file=1;
Now, check the task status using the stored procedure rds_task_status.
1EXEC msdb..rds_task_status @task_id = 2;
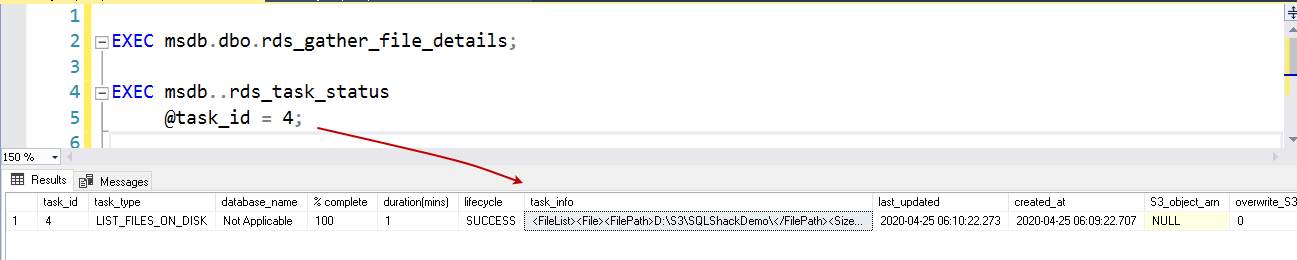
To verify the files in the D:\S3 directory, first, run the stored procedure exec msdb.dbo.rds_gather_file_details and get a task id for it. In the next step, we can either use the procedure rds_task_status or msdb.dbo.rds_fn_list_file_details to get file details.
-
Check file using the msdb..rds_task_status stored procedure
It gives you a file list with its properties in the task_info column.
1234EXEC msdb.dbo.rds_gather_file_details;EXEC msdb..rds_task_status@task_id = 4;
-
Check file using the msdb.dbo.rds_fn_list_file_details function. It gives output in a tabular format with the following columns:
- Absolute file path
- Size in bytes
- Last modified time in UTC
- An option that shows whether the item is a directory or not

In the below output, we can see two files in the SQLShackDemo folder. The first row indicates the root folder and does not have a file in it.
|
1 2 3 |
EXEC msdb.dbo.rds_gather_file_details; SELECT * FROM msdb.dbo.rds_fn_list_file_details(4); |

Deleting Files on the RDS Instance
We can delete the files from the RDS instance directory using the MSDB stored procedure msdb.dbo.rds_delete_from_filesystem.
In the below procedure, we want to delete the ABC.txt file from the SQLShackDemo folder.
|
1 2 3 |
EXEC msdb.dbo.rds_delete_from_filesystem @rds_file_path = ‘D:\S3\SQLShackDemo\ABC.txt’; |

We can also delete a subfolder created in the ‘D:\S3 directory. It also requires an additional argument @force_delete=1, and it tells RDS to delete the complete directory.
|
1 2 3 |
EXEC msdb.dbo.rds_delete_from_filesystem @rds_file_path = 'D:\S3\SQLShackDemo\', @force_delete=1; |
Conclusion
In this article, we explored the process of integrating an AWS S3 bucket with AWS RDS SQL Server. You can use this process to upload and import data into the S3 bucket and RDS directory.

I am the author of the book "DP-300 Administering Relational Database on Microsoft Azure". I published more than 650 technical articles on MSSQLTips, SQLShack, Quest, CodingSight, and SeveralNines.
I am the creator of one of the biggest free online collections of articles on a single topic, with his 50-part series on SQL Server Always On Availability Groups.
Based on my contribution to the SQL Server community, I have been recognized as the prestigious Best Author of the Year continuously in 2019, 2020, and 2021 (2nd Rank) at SQLShack and the MSSQLTIPS champions award in 2020.
Personal Blog: https://www.dbblogger.com
I am always interested in new challenges so if you need consulting help, reach me at rajendra.gupta16@gmail.com
View all posts by Rajendra Gupta
- Understanding PostgreSQL SUBSTRING function - September 21, 2024
- How to install PostgreSQL on Ubuntu - July 13, 2023
- How to use the CROSSTAB function in PostgreSQL - February 17, 2023