
In this article, we will learn how to create a serverless instance of Azure Cosmos DB as well as understand its applicability in use-cases.
Introduction
Azure Cosmos DB is a multi-model, fully managed, hyper-scale NoSQL database offering the Azure data stack. There are a variety of applications of Cosmos DB and the default capacity mode is provisioned throughput where an administrator configures a fixed capacity of read units (RUs), and the cost of consumption remains fixed as per the allocation. In today’s era of elastic and flexible workloads, there are many use-cases where the workloads are volatile, a fixed capacity provisioning approach may not be efficient in terms of scale as well as cost. In these types of scenarios, the need is to have a provisioning approach where the capacity is scaled on-demand and the cost is as per the use. This mode of provisioning is generally available from many database services in a serverless model, where there is no need to create a fixed capacity instance, and instead, the instance capacity scales are per the workload. Azure Cosmos DB has introduced an option to create a serverless instance in preview mode (as of the draft of this article). Let’s go ahead and quickly create a serverless instance of Azure Cosmos DB.
Creating Serverless Instance of Azure Cosmos DB
It is assumed that you have an Azure account with privileges to use Azure Cosmos DB. Log in to the Azure portal, open the Cosmos DB service option which would open the dashboard page. Click on the New button to start the creation of a new Cosmos DB account, and it would open a wizard as shown below.
We need to provide the basic details on this page like the name of the subscription and the resource group in which we intend to create the new account. In the instance details section, we need to provide the name of the account, which will be the name of the instance. Azure Cosmos DB provides a variety of APIs that can be used to create an account. For now, we would select the Core (SQL) API. If we desire to work with Notebooks, we can keep it enabled else there is an option to disable it as well.
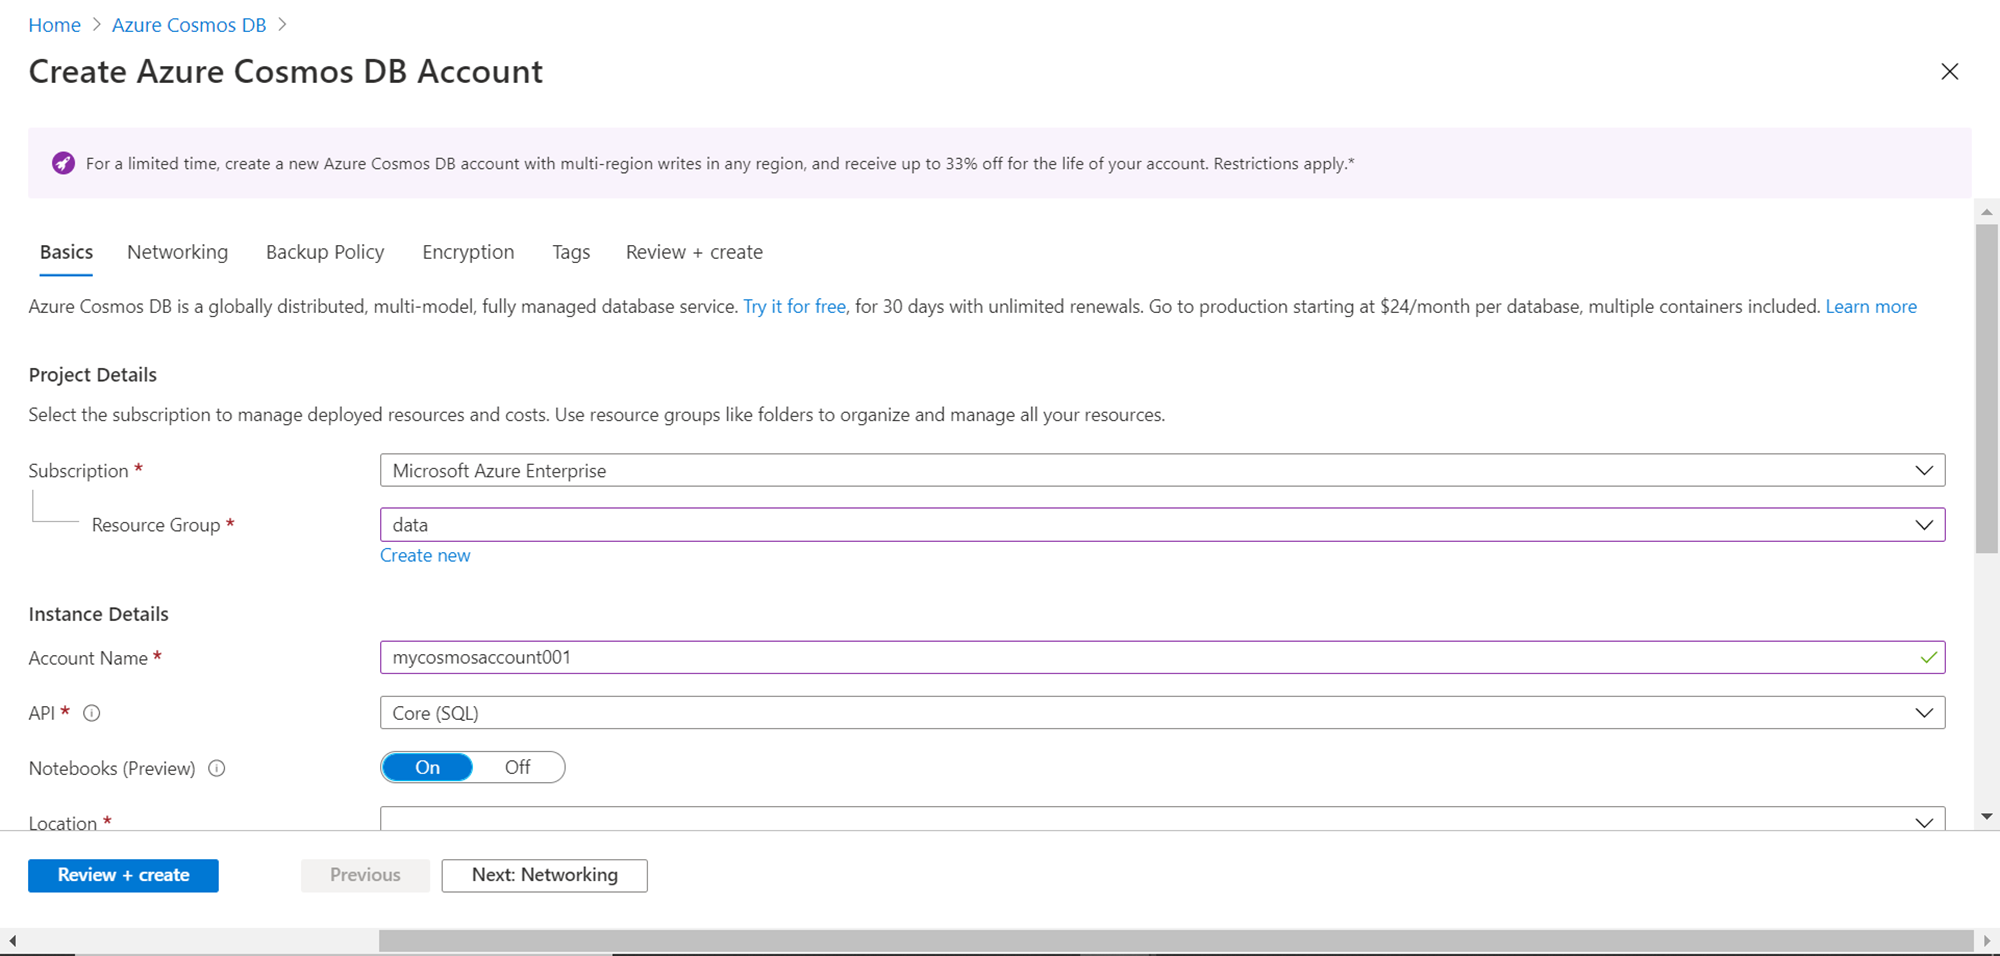
Scroll down and you would be able to find more options to configure. Select the region where the account is to be created. In the Capacity mode, the default value would be “Provisioned throughput”. This is the configuration that decides whether we would create a serverless instance or a provisioned throughput instance. To learn about the difference between the two in detail, click on the link below and it would navigate to the page that lists all the details.

We intend to create a serverless account, so click on the “Serverless” option as shown below. As soon as the option is changed, the other configuration settings shown below would change and some of them would not be offered for configuration, as those do not apply in the serverless mode as shown below. Select the account type as required. For now, till the serverless option is in preview mode, it’s advisable to select account type as non-production as using it only for non-production purposes. We can leave the availability zones option disabled as we are not deploying this in production. Once these settings are configured, click on the Next button.

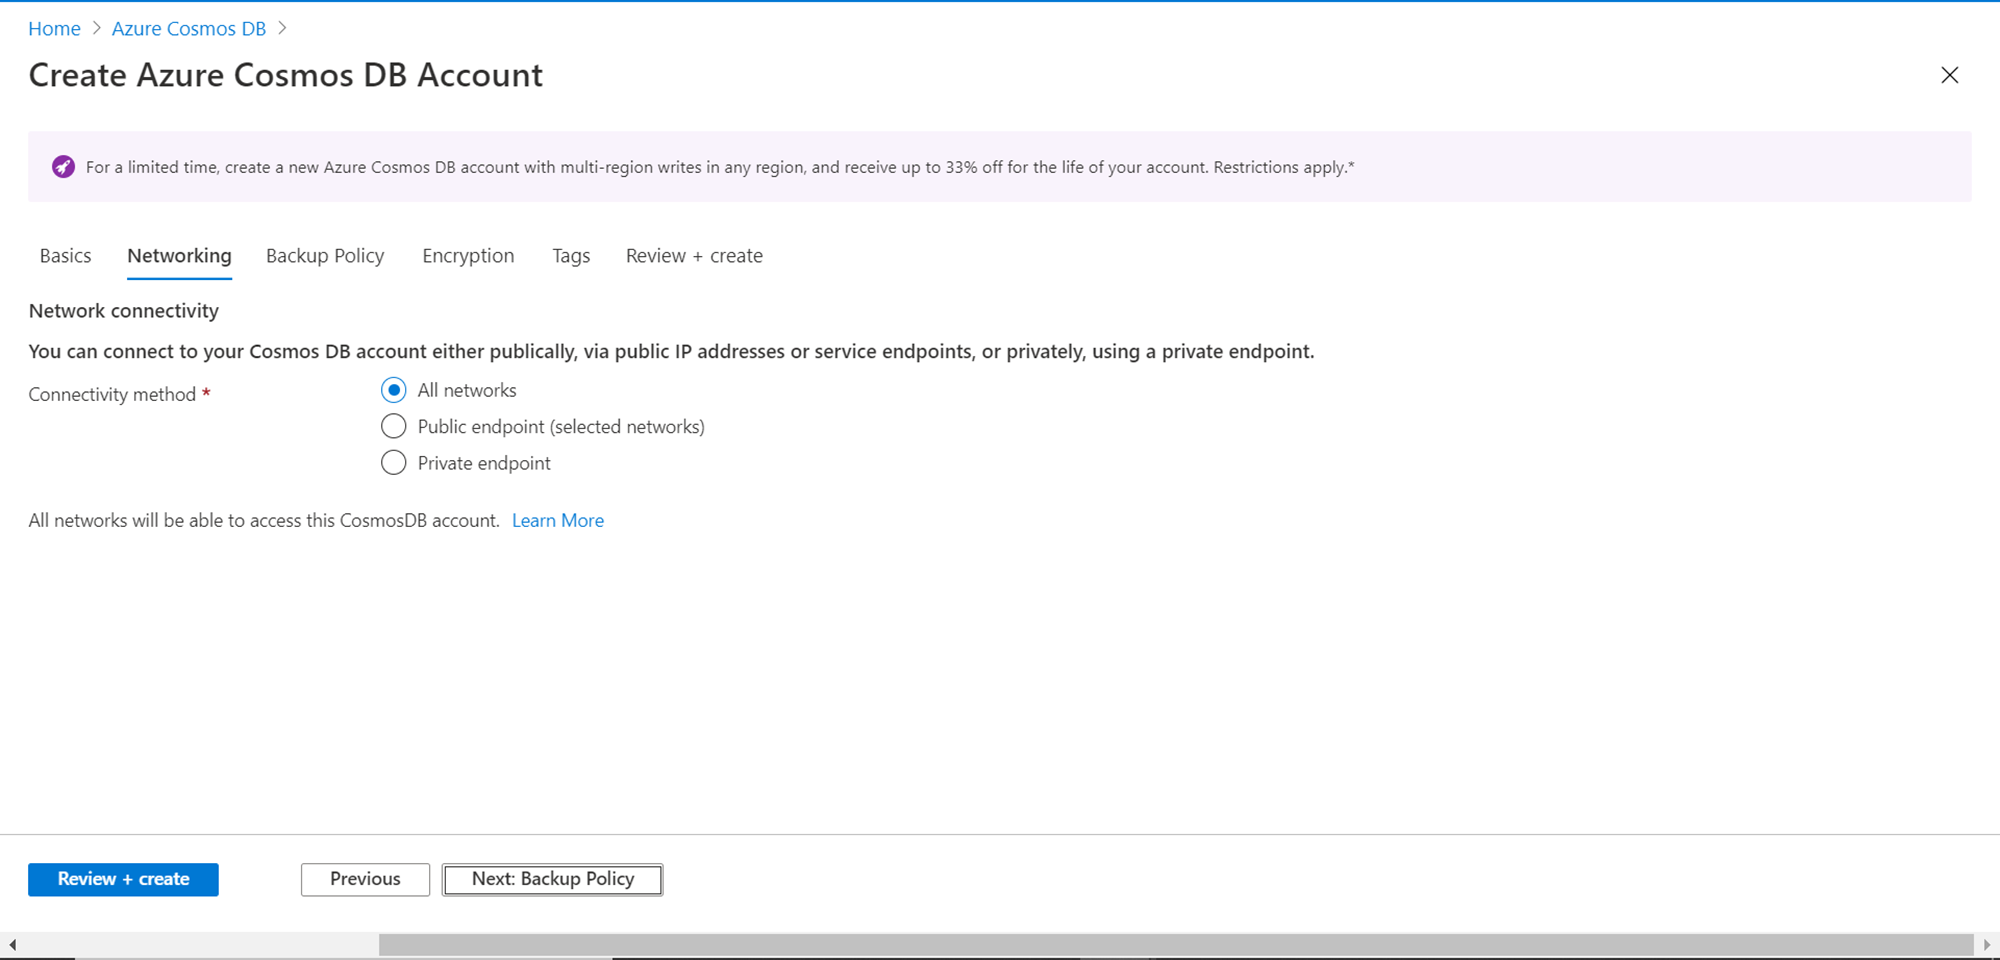
In this step, we need to provide networking related details. The default option is All networks, and we will proceed using the same option for now. When deploying in a production environment, one may want to configure specific networks. Once done, click on the Next button.
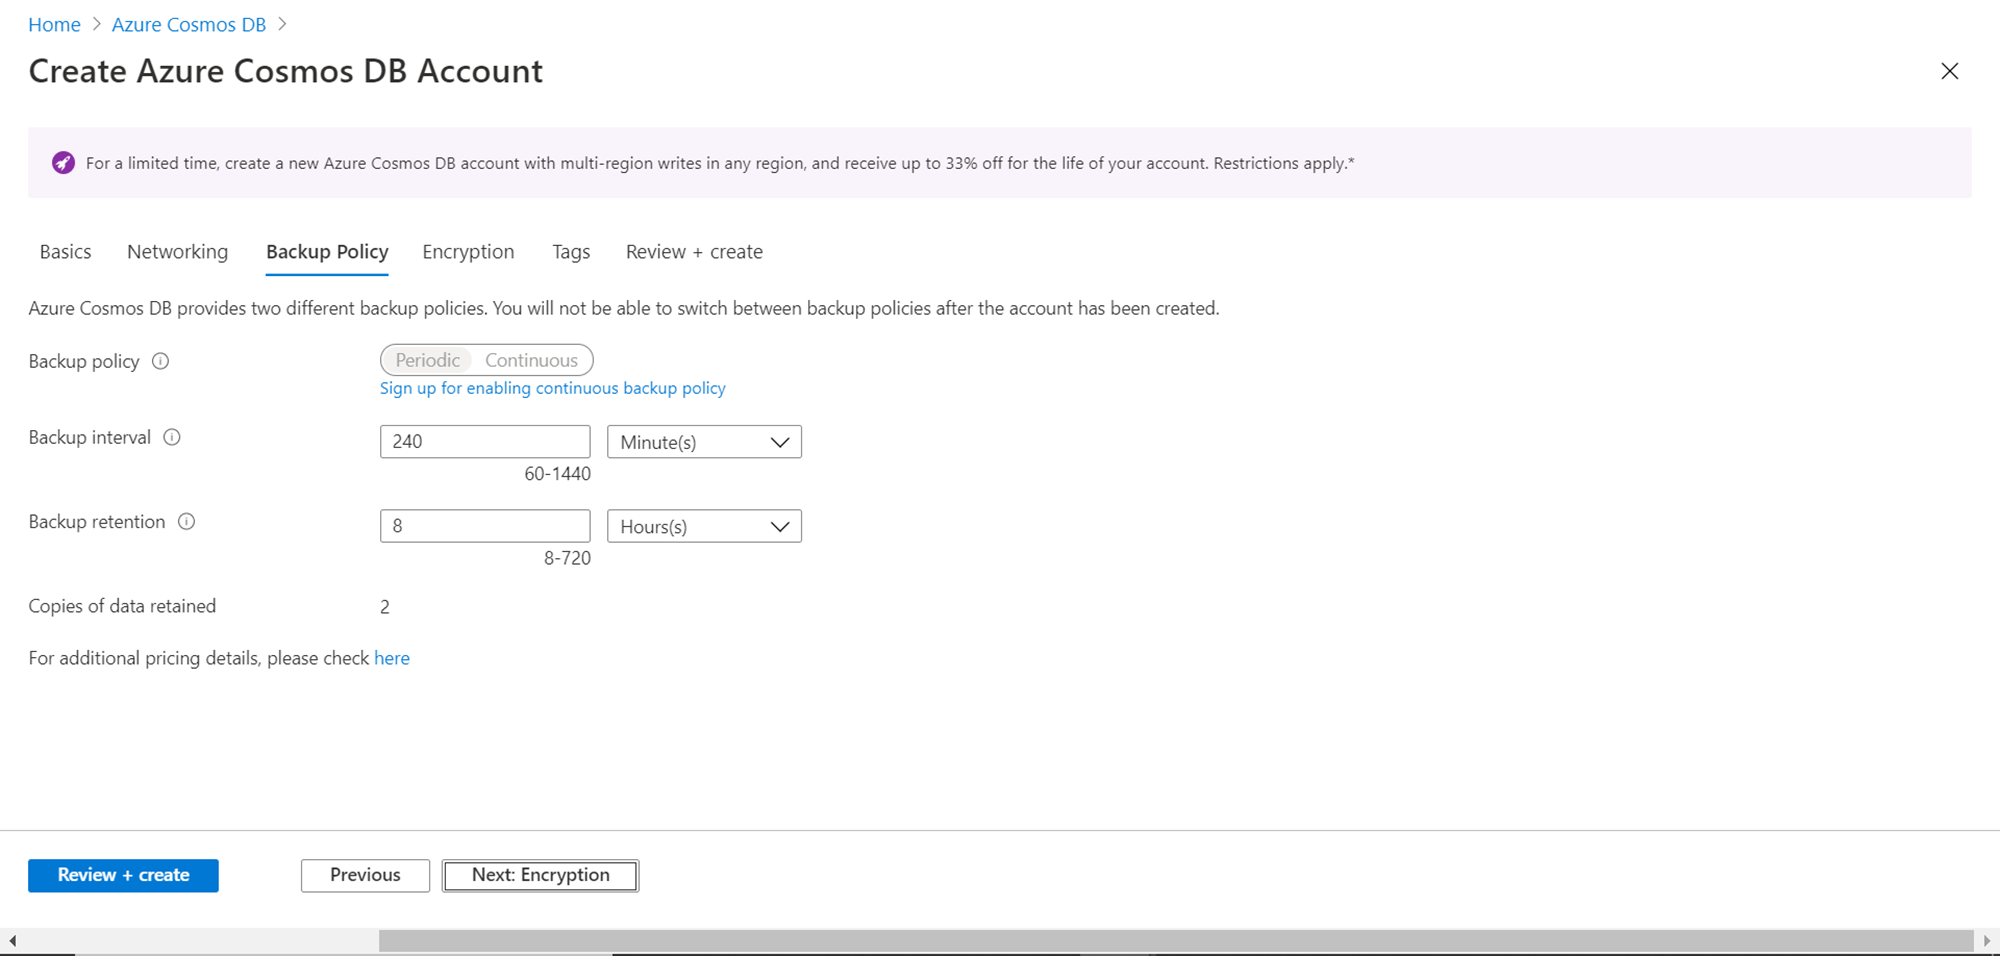
In this step, we need to provide details related to Backup Policy. We do not have the option to change the backup policy and the default value is periodic. If we intend to have a continuous backup policy option, we need to sign up for the same using the link provided below this option. The default backup interval and backup retention values are as shown below. By default, two copies of the data are retained. We do not need to change any configuration here, unless the default values do not meet your specific use-case. Make appropriate changes if required, and then click on the Next button.
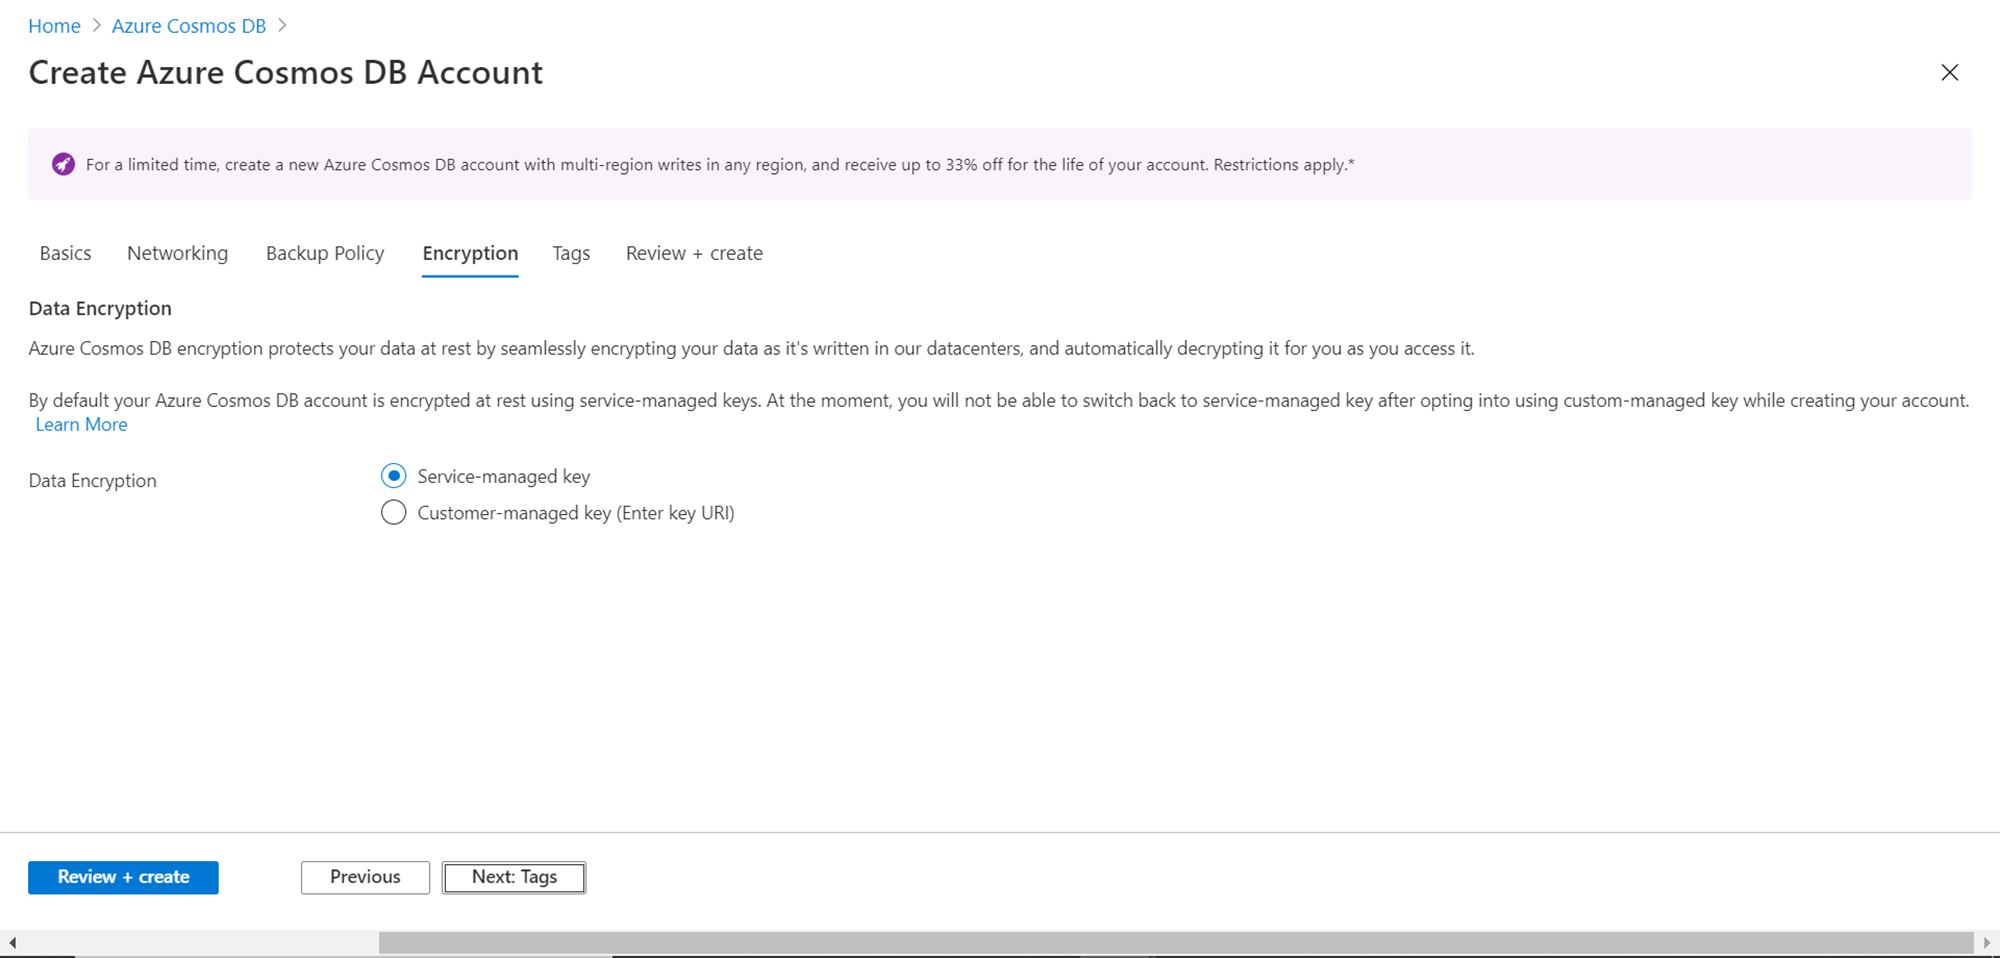
In this step, we need to provide data encryption relation configuration details as shown below. The default selection is a service-managed key, which means the service would use the default key configured for the encryption service. In certain cases, for enhanced security, one may desire to use their own key for encryption. For this purpose, one can select a Customer-managed key. For now, we do not need to change any configuration here. Click on the Next button.
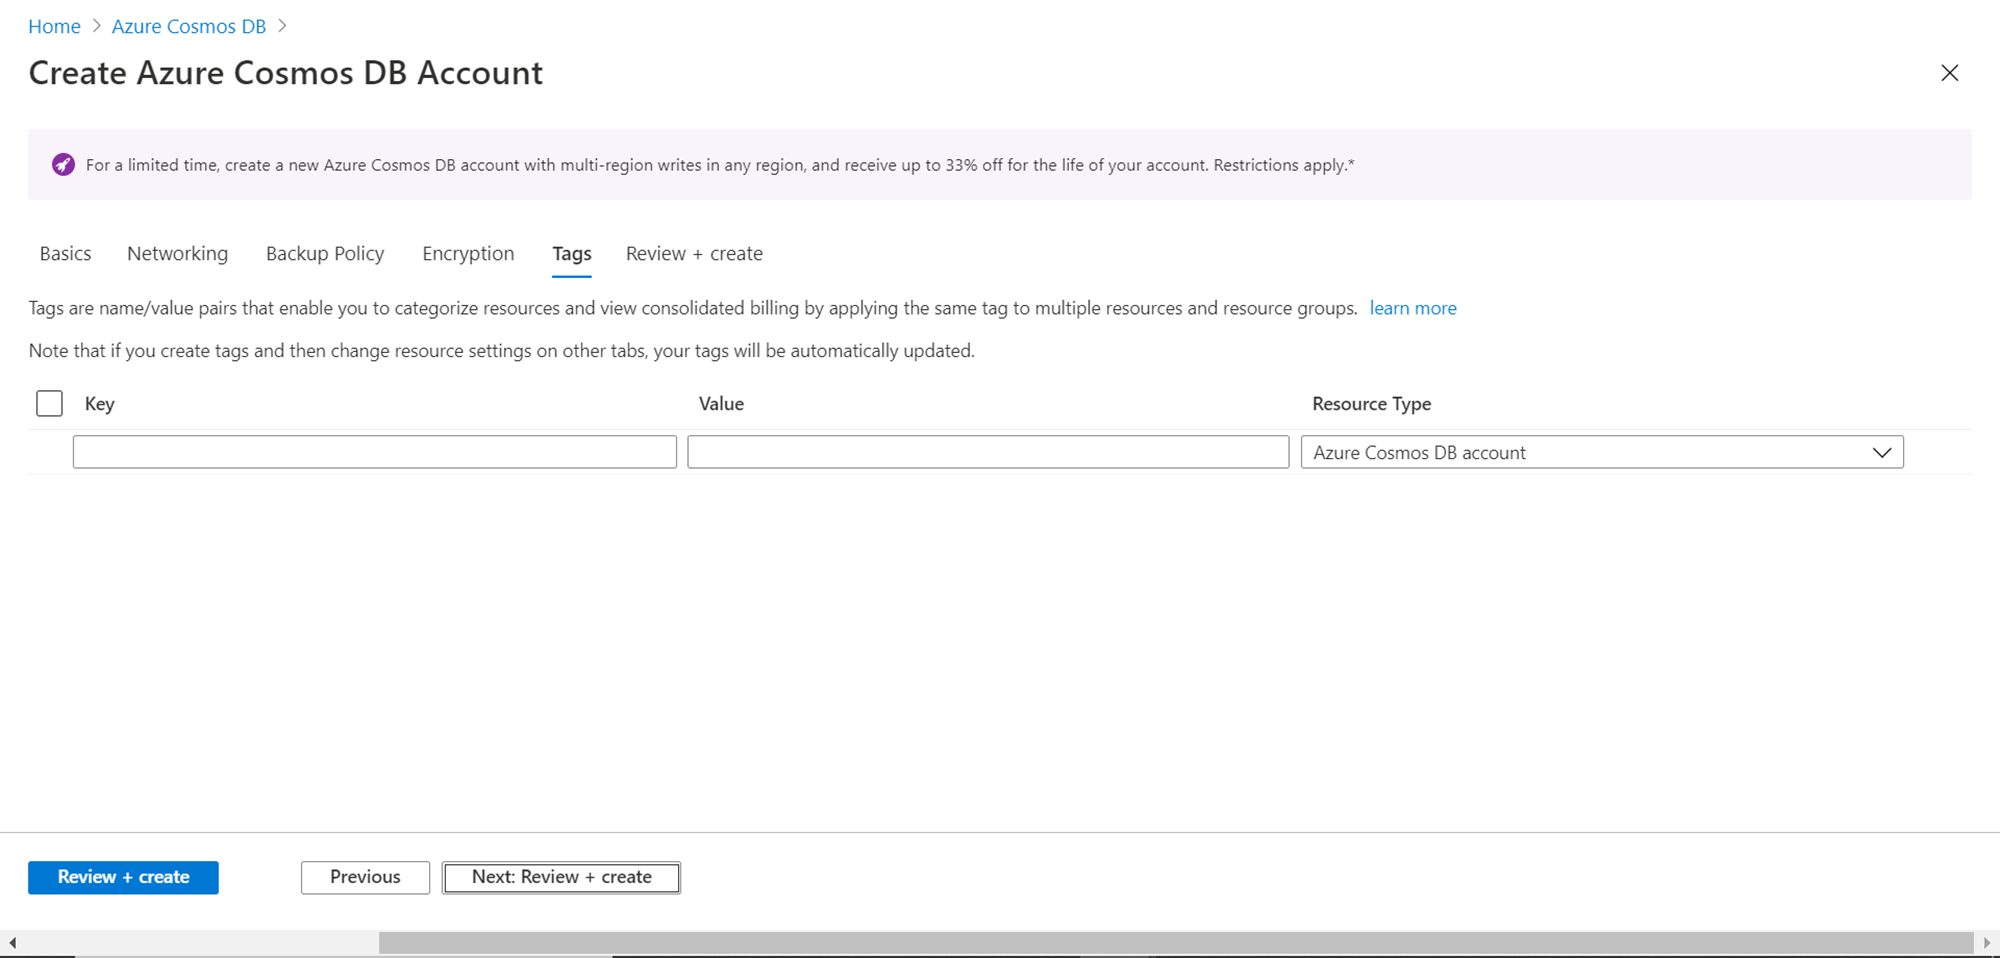
In this step, provide any required tags for this account. It’s an optional step, but as we are using a service that is in preview mode, it’s advisable to add tags that clearly specify the purpose of using this service as well as explicitly mentioning that this service is in preview mode. Once the serverless option is made generally available by Azure, then that tag can be modified later. Once we are done adding any required tags, click on the Next button.
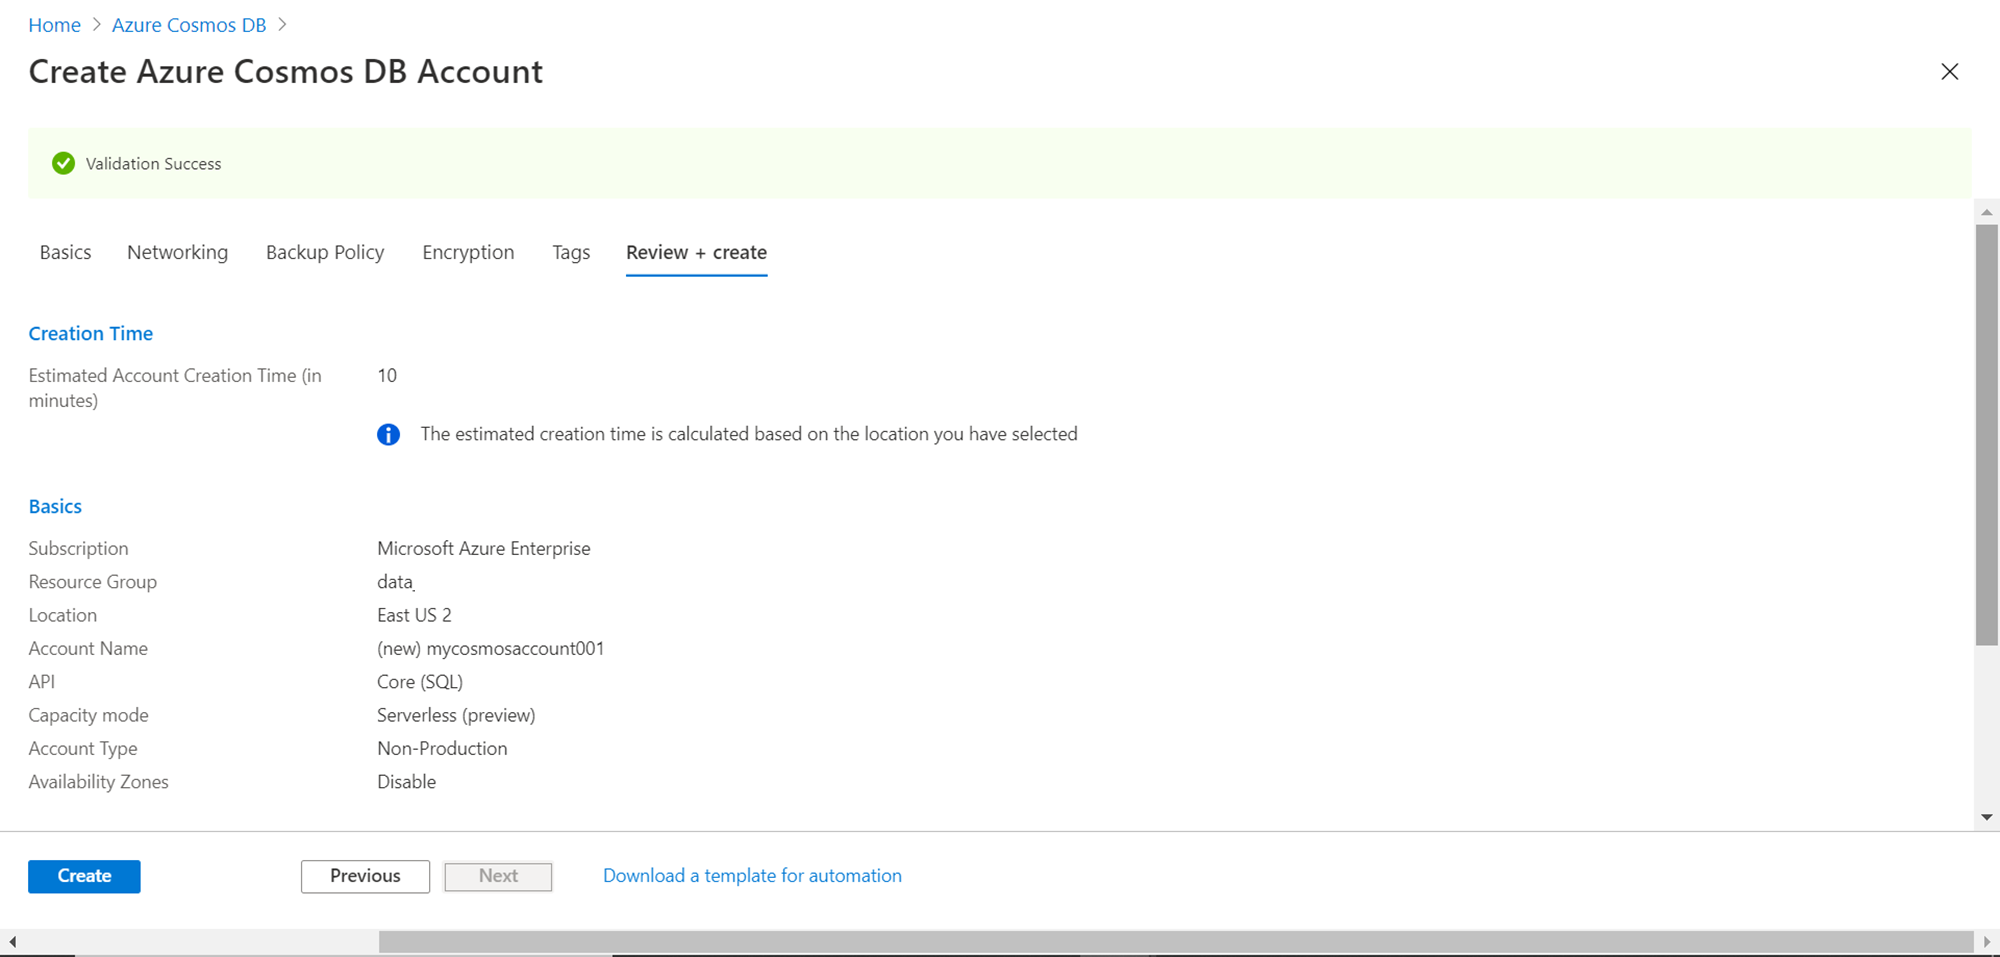
In this step, we finally need to review all the configuration details that we have specified so far. Review the same and click on the Create button, which would start the creation of the Azure Cosmos DB serverless account. The Creation Time option shows that the estimated duration to create this new account is up to 10 minutes. So, it may take a little time before the account is created and provisioned for use.
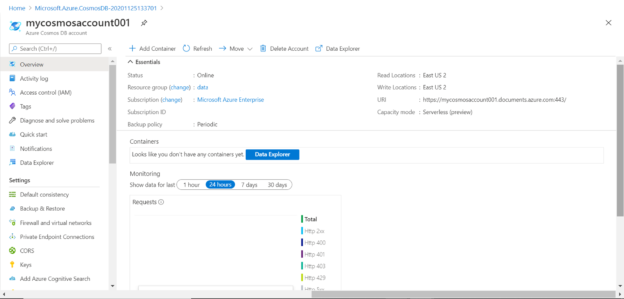
Once the account is created, click on the Go to Resource button to navigate to the dashboard page as shown below. Here you would be able to explore and operate through different details of the Azure Cosmos DB account. The first thing to take note of is that the Capacity mode is stated as “Serverless (preview)”, which is exactly what we intended.

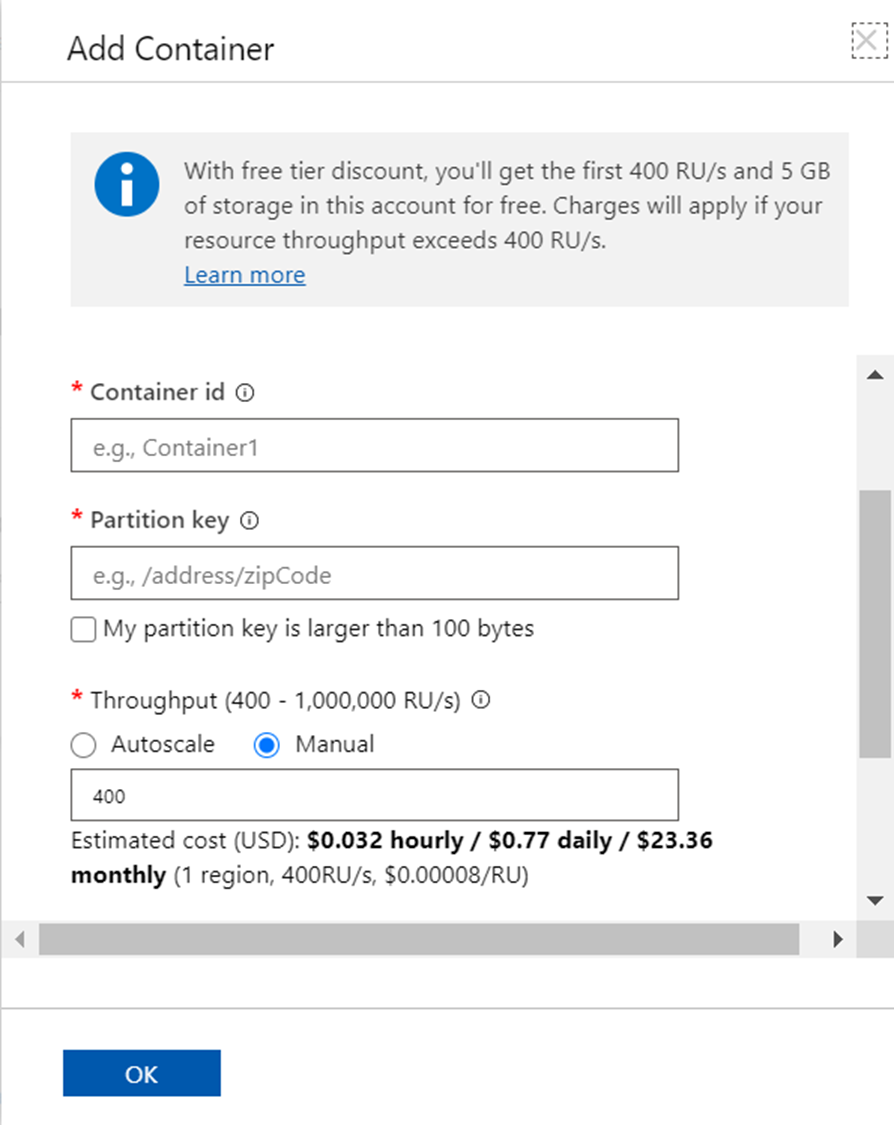
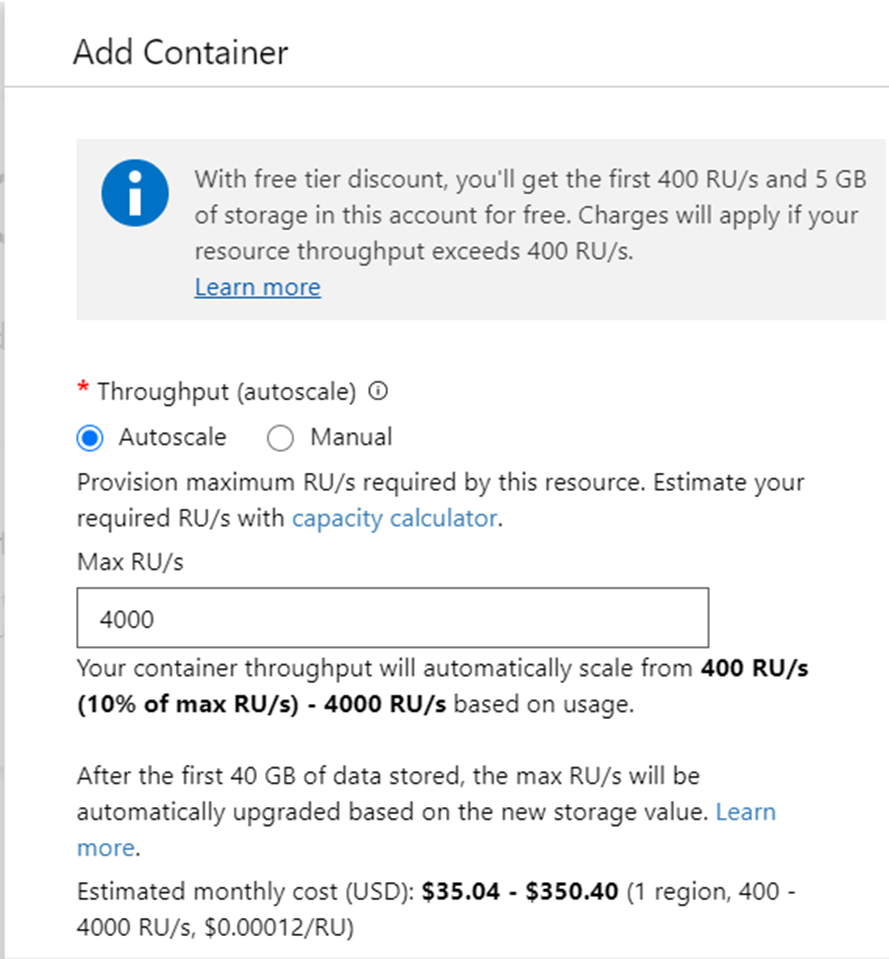
An easy way to test the difference between a provisioned capacity account and a serverless account is by attempting to create a new database or a new container. If we would have created an Azure Cosmos DB account in provisioned capacity mode, and we would have attempted to create a new container by clicking on the Add Container button, it would have provided us an option to configure the provisioned capacity units as shown below.
The autoscale option in the provisioned throughput mode may seem similar to the serverless option where the capacity may scale as required. But there are limitations and differences between this option as well as the serverless option as well. For example, the serverless option can scale only up to 5000 RUs and maximum storage of 50 GB. If your workload needs capacity beyond this, the only option is to use provisioned capacity mode. These limitations make the serverless option optimal for small to medium non-critical workloads with light traffic.
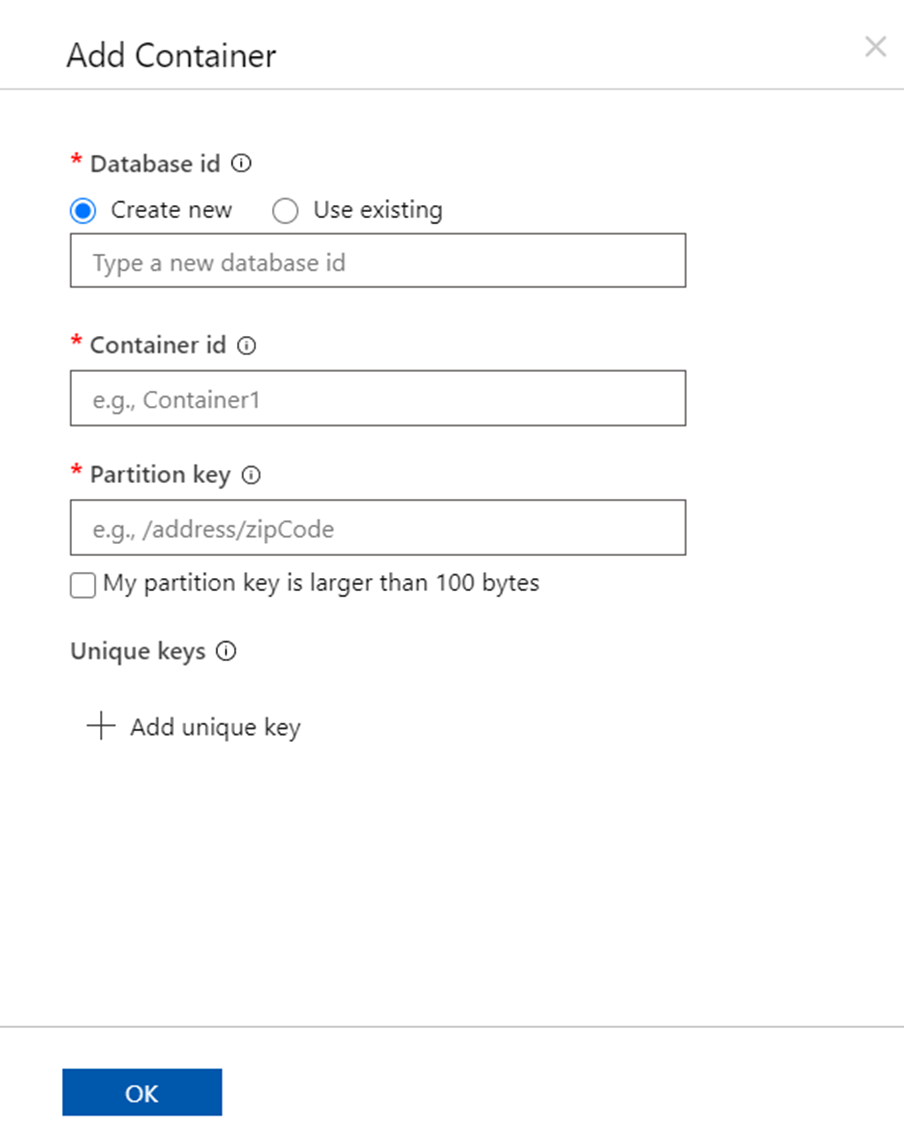
If we try to create a new container in an Azure CosmosDB serverless account, it would look as shown below where we would not be provided any option to configure the capacity in terms of RUs.
In this way, we can create an Azure Cosmos DB serverless account or instance and apply it in use-cases with low to medium volatile workloads.
Conclusion
In this article, we learned to create a new Azure Cosmos DB serverless instance. We learned about the different use-cases where it can be used, configuration settings to create a serverless account, as well as learned the differences between a provisioned capacity model versus the serverless model.
Table of contents

He has worked internationally with Fortune 500 clients in various sectors and is a passionate author.
View all posts by Rahul Mehta
- Finding Duplicates in SQL - February 7, 2024
- MySQL substring uses with examples - October 14, 2023
- MySQL group_concat() function overview - March 28, 2023