
SQL Server 2019 is recently launched in the ignite 2018 event by Microsoft. We can get an overview of SQL 2019 preview version and learn how to install it on Windows environment by following up the article SQL Server 2019 overview and installation.
We will explore SQL 2019 Enhanced PolyBase feature in a series of article. In this first part of the article, we will explore below topics
- Overview of ETL and PolyBase
- Install PolyBase into SQL 2019
- Overview and Installation of Azure Data Studio
- SQL Server 2019 preview extension in Azure Data Studio
Overview of ETL and PolyBase
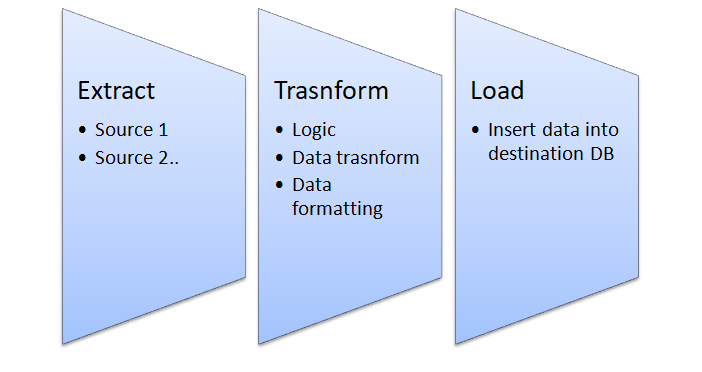
In today’s industry requirement, we have data in various databases such as Oracle, MongoDB, Teradata, PostgreSQL, etc. The application requires accessing data from these various data sources and combining data into a single source. It is a challenging task for the database developers and data scientists. We normally use ETL (Extract-Transform-Load) to move the data around the different sources.
Below are the steps involved in ETL processes
- Read data from the data source of your choice and extract the specific data
- Transform process works on this data based on the logic, rules, and convert data
- Load process writes the data to the destination database
ETL provides great values to apply business logic to the data transform data from various sources and move the data into a single destination or multiple formats. ETL process is having some challenges as below:
- We need to move data from the source that will require extra resources in terms of disk space
- Data security is also another aspect. Copy of the data should be should be secured from unauthorized access
- An ETL process is slow to process and requires efforts to maintain due to its complex logic
In SQL Server 2016, we came across new feature ‘PolyBase’ that allows querying relational and non-relational databases. This data virtualization allows integrating data from the multiple sources without moving the data. This actually creates a virtual data layer called as data lake or data hub. We can access all data from the single sources that allows controlling security as well from a single point. We can query Hadoop and Azure Blob Storage using PolyBase in SQL Server 2016.
In the article, SQL Server 2016 – PolyBase tutorial, we explored query a CSV file stored in Azure Blob storage from SQL Server 2016 using PolyBase.
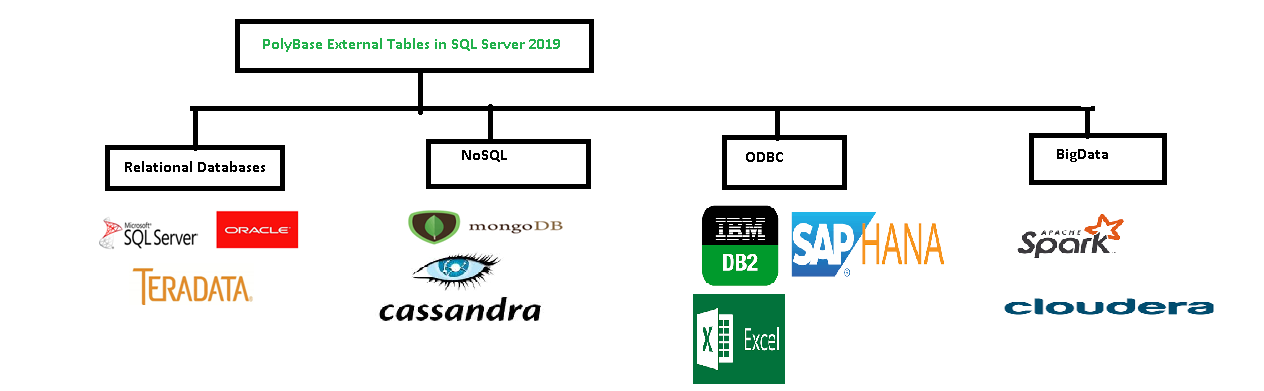
SQL 2019 provides enhancement to PolyBase to access data from various data sources such as Oracle, Teradata, MongoDB, and PostgreSQL. We can also access data from any data sources with an ODBC driver. We can create external tables that link to these data sources (SQL Server, Oracle, Teradata, MongoDB, or any data source with an ODBC). Users can access these data from external tables similar to a relational database table. These external tables are linked to the data sources and when we execute any query, data from an external table is retrieved and shown to the user.
On the image below, we can see PolyBase in SQL Server 2019:
Install PolyBase into SQL Server 2019
Let us first install PolyBase into SQL 2019. In an earlier article, SQL Server 2019 installation on Windows, we installed SQL 2019 preview version. Therefore, I will not cover complete installation here.
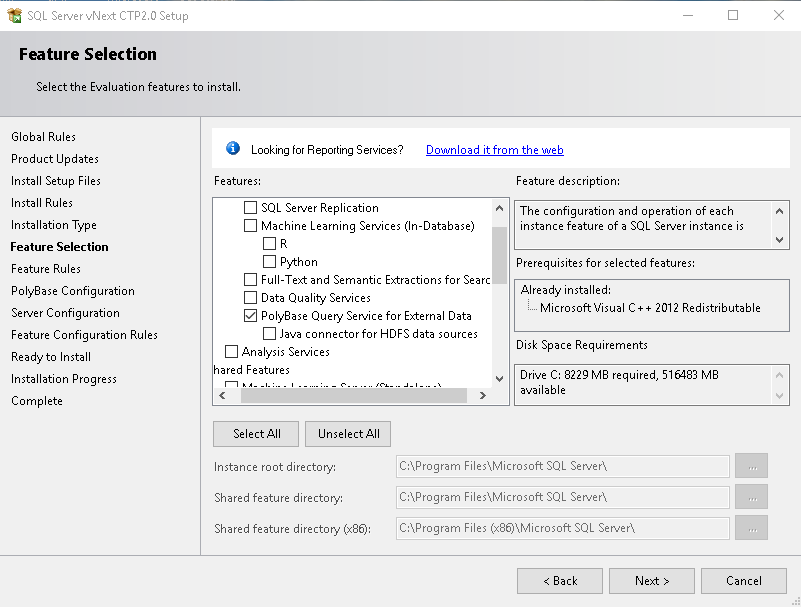
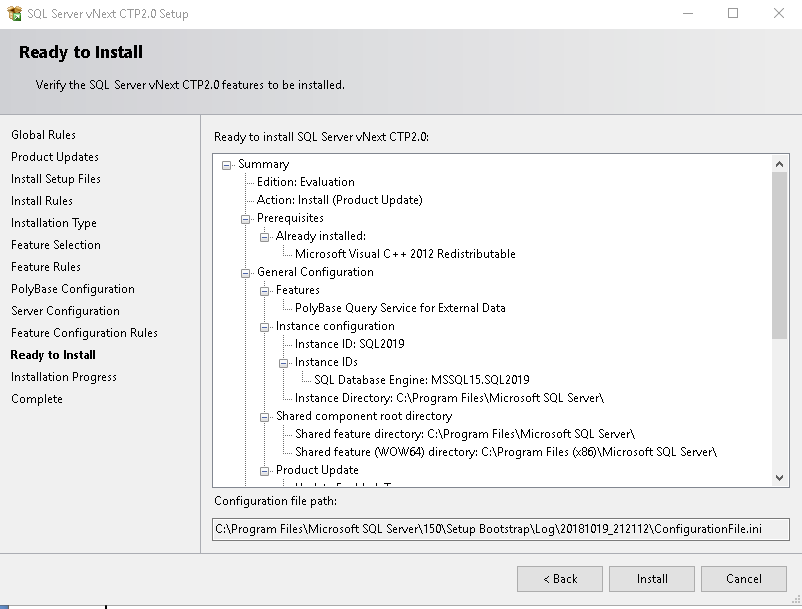
Put a checkbox against ‘PolyBase Query Service for external data’ in the feature selection page.
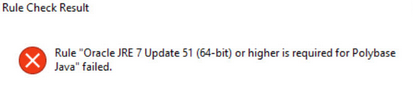
You need to install Oracle JRE 7 update 51 or higher to install Polybase. If it is not installed, you will get below error message while checking the rules for installation.
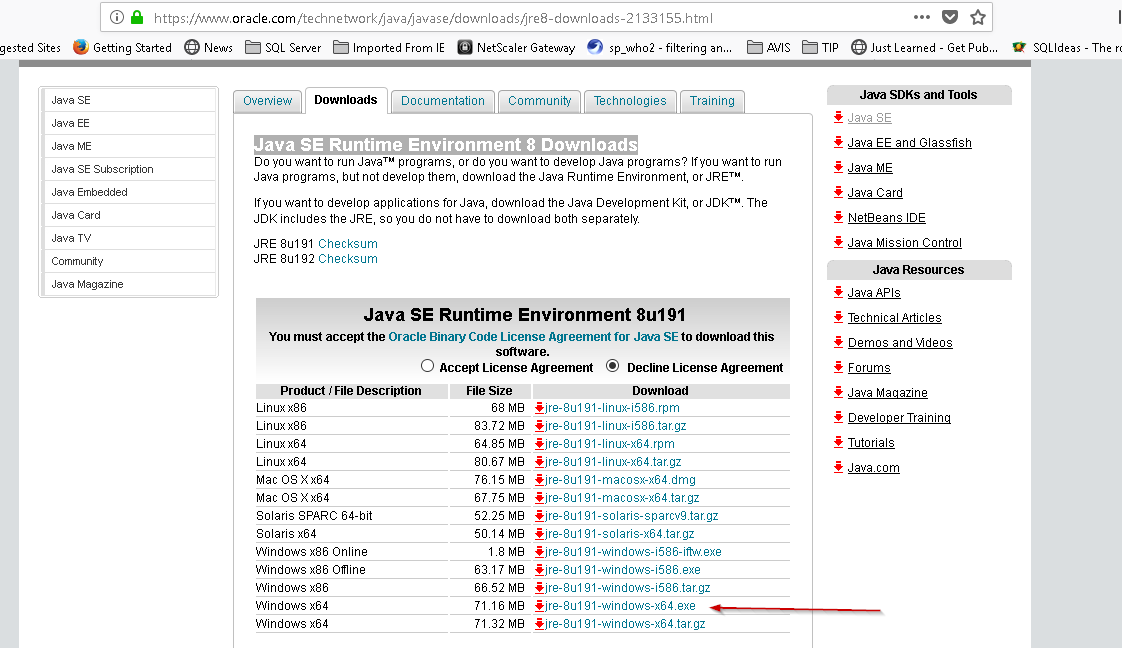
To fix this error, go to ‘Java SE Runtime Environment 8 Downloads‘ and download Java SE Runtime Environment 8u191E. Double click on the setup file to install it.
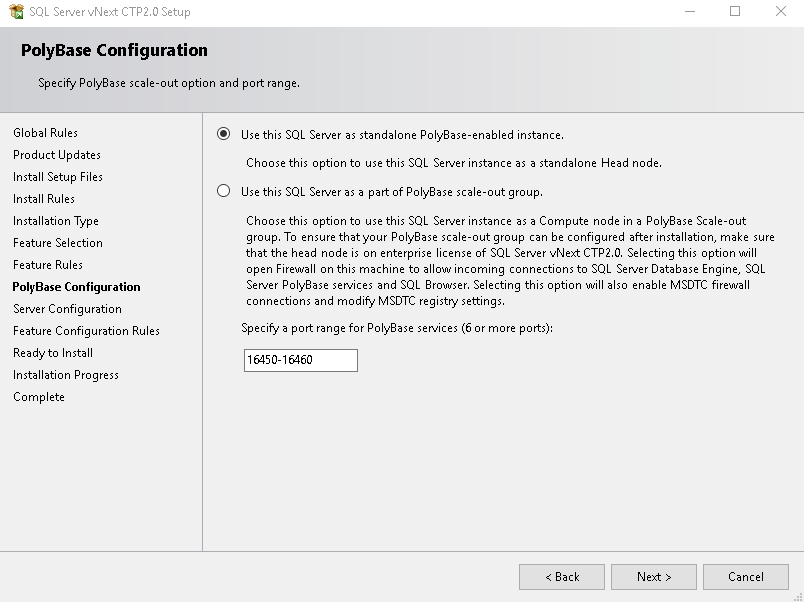
In the next page, we need to do the PolyBase Configuration. If we are installing PolyBase on a standalone instance, select the option ‘ Use this SQL Server as standalone PolyBase enabled instance’
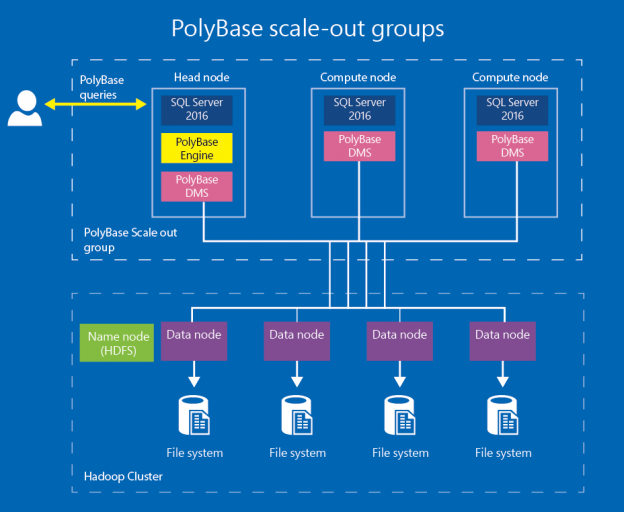
We can also set up PolyBase a scale-out configuration in which we define the head node and compute nodes. This allows getting performance improvement for the large data sets. You can get more information about this option from PolyBase scale-out groups as shown in below image obtained from this page.

In this article, we will use PolyBase on standalone SQL Server instance. Therefore, select the first option ‘Use this server as a standalone PolyBase enabled instance’ and click Next.
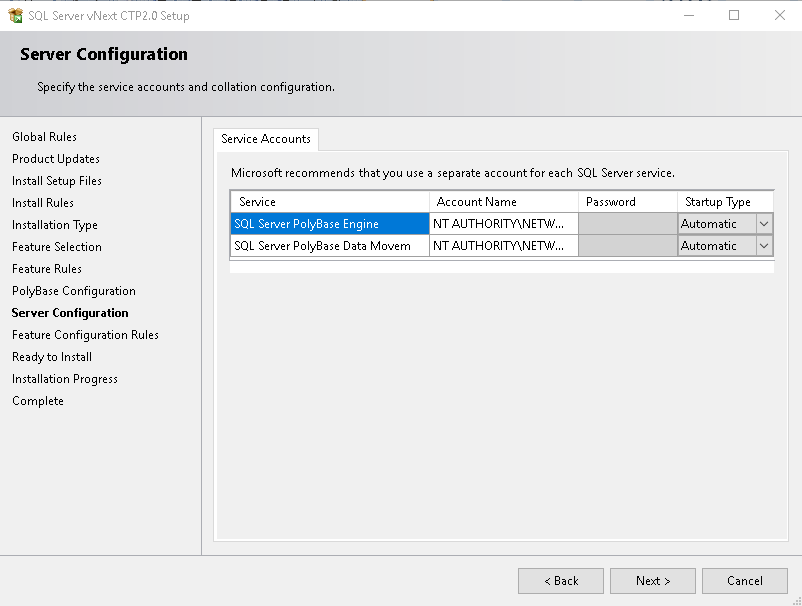
In the next page, we can specify the service accounts for below two PolyBase services. Service account should be the same for both the services.
- SQL Server PolyBase engine
- SQL Server PolyBase data movement
Review the configuration and click on Install.
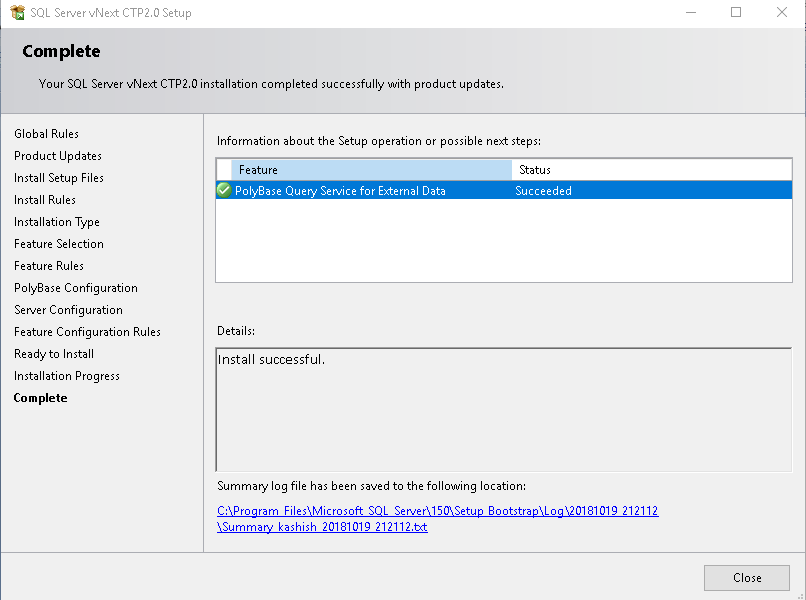
Below is the confirmation page after ‘PolyBase Query Service for External data’ service installation is successful.
Check the services in the configuration manager. It should be in running state.

Overview and Installation of Azure Data Studio
In the previous articles, Azure Data Studio, we learned that Azure Data Studio is a new GUI based tool that works on Windows, Mac OS and Linux operating systems. It connects to SQL Server, Azure database, and SQL Data Warehouse.
Azure Data studio is now a new name for SQL Operation Studio. Azure Data studio provides support for the SQL Server 2019 new features in the October release such as support to big data clusters, enhanced PolyBase, Azure notebook, Azure resource explorer.
We can install Azure Data Studio on Windows, Linux, and MacOS. In this article, we will install on the windows environment.
Follow the below steps:
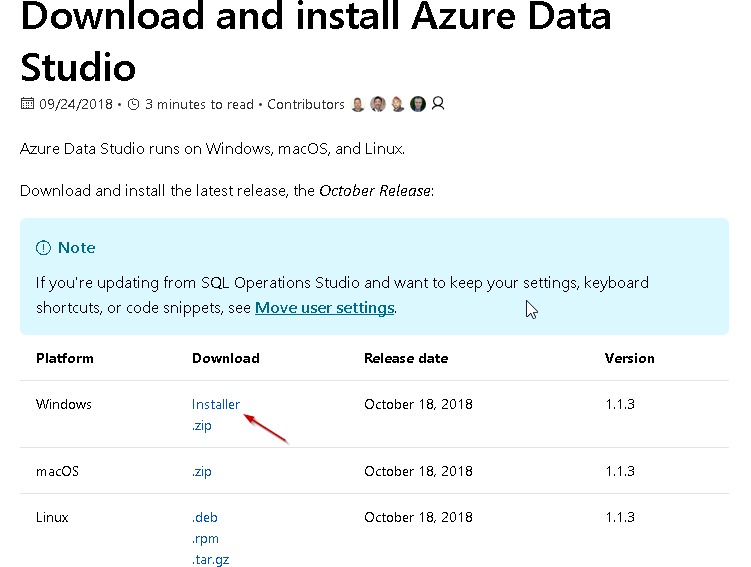
- Download the latest October release of Azure Data Studio from the link
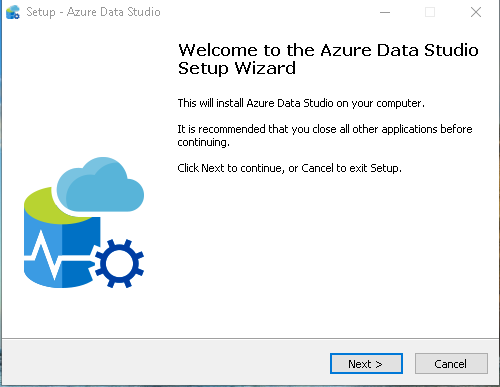
Once the setup download is complete, double-click to launch the setup wizard.
.
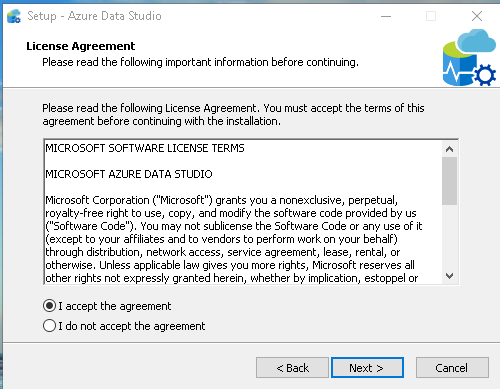
Accept the license agreement and click on Next.
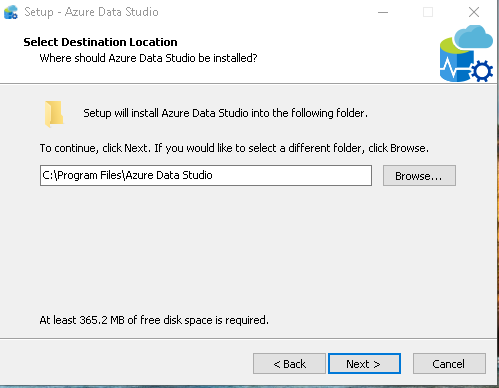
Specify the destination directory. The default location is ‘C:\Program Files\Azure Data Studio’. We need to have at least 365.2 MB of free disk space in the disk.
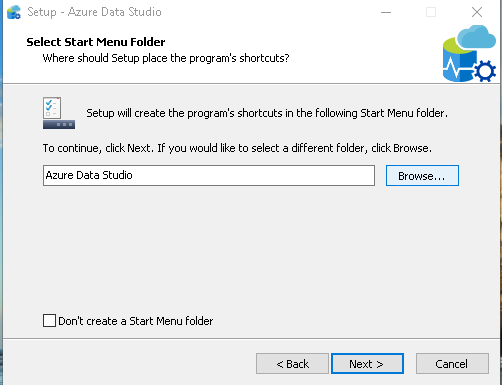
Setup creates the start menu folder. We can select the folder in the start menu. If we do not want to create the startup menu folder, put a checkbox on ‘Don’t create a Start Menu folder’.
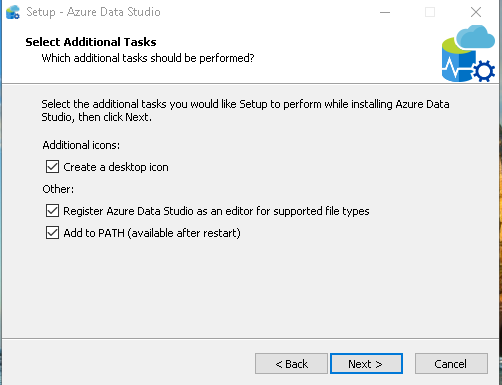
We can also select to create a desktop icon. This also adds a PATH in the environment variable.
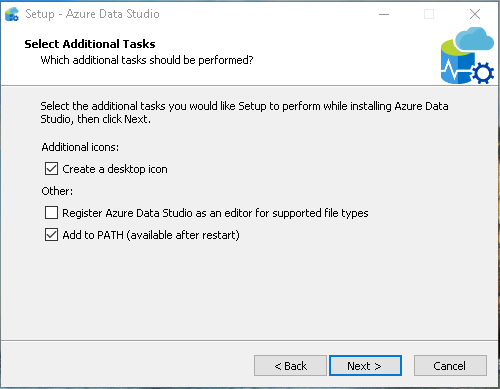
We can also register Azure Data studio to use an editor for the supported file types. To do so, put a check here as shown below.
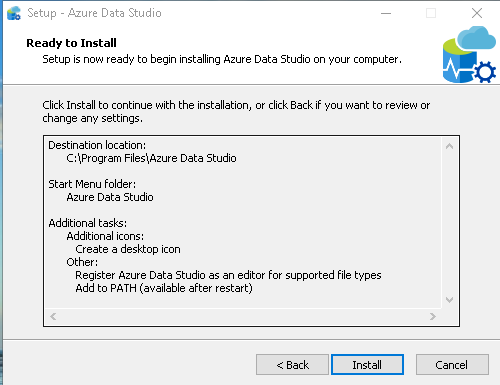
Configuration is now completed, Click on Install to complete the installation process of Azure Data Studio.
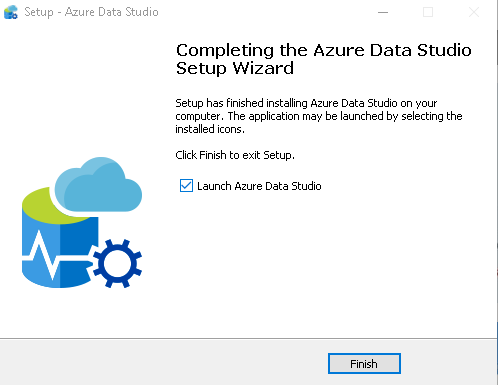
We get the below screen once the setup is complete for the Azure Data Studio. We can launch the Azure Data Studio from here itself or from the Start menu.
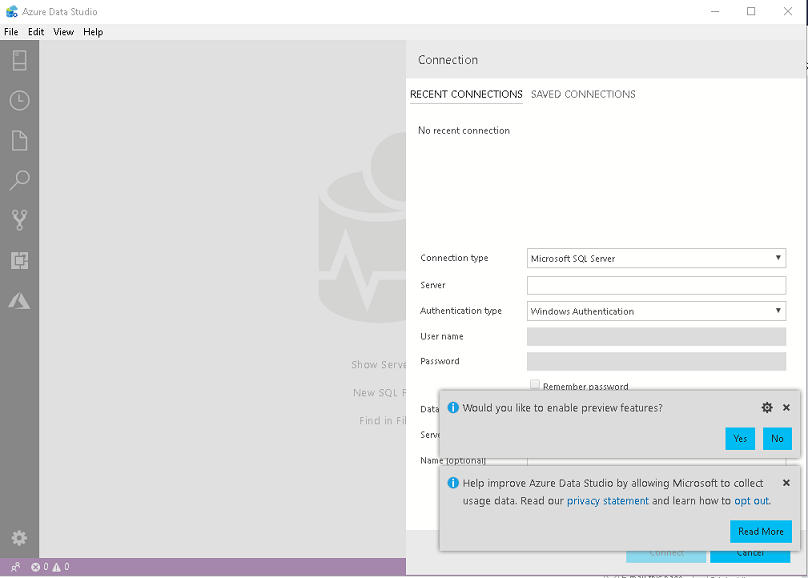
Default screen for the Azure Data Studio is as shown below. SQL Server 2019 is in preview state so here we get the option whether we want to enable preview features. Click on yes to enable the preview features.
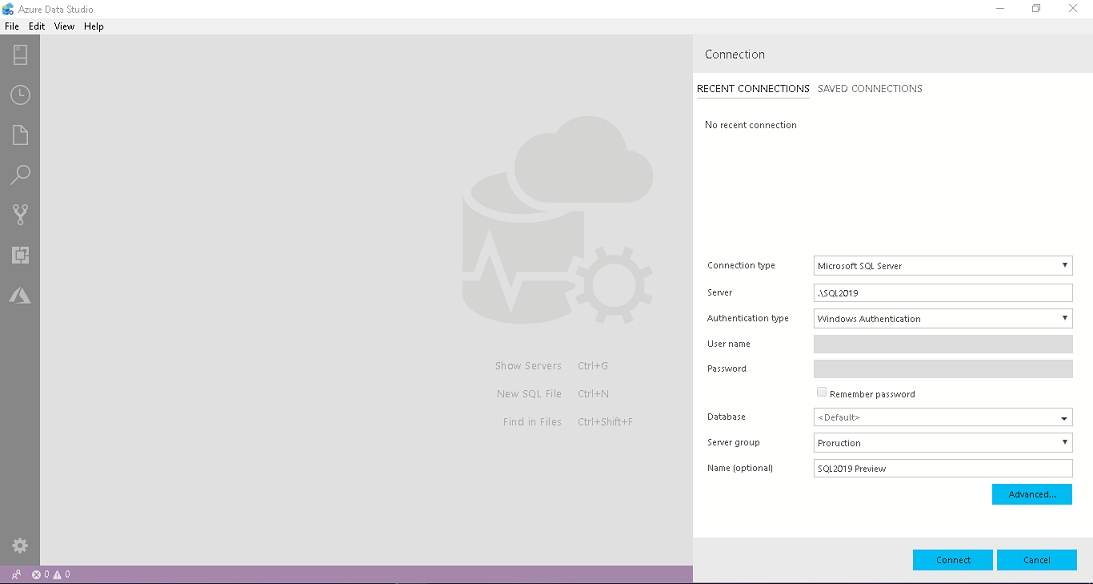
Enter the connection details like instance name, authentication type, server group (we can select existing server group or create a new group).
Azure Data Studio also allows specifying the friendly name for the connection in the recent release.
As shown below, we are connected to SQL 2019 preview instance with the friendly name in Azure Data Studio.

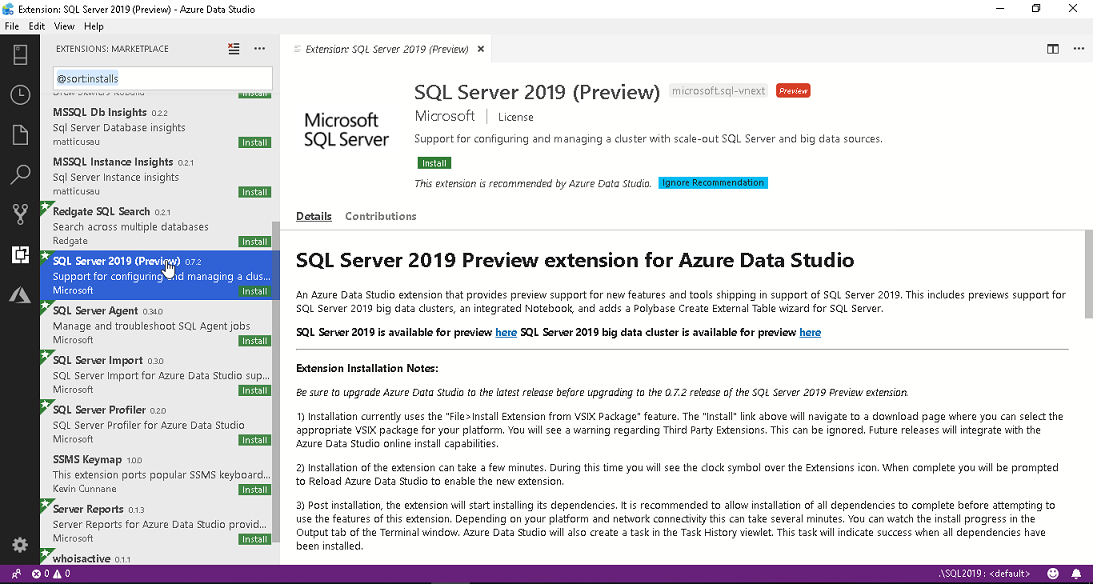
Now in order to use SQL 2019 preview version all features, we need to install ‘SQL Server 2019 (Preview)’ extension from the Marketplace.
Click on the ‘SQL Server 2019 (Preview)’ extension in the Marketplace and we can get an overview of the preview extension. You can go through it to get more information about the extension.
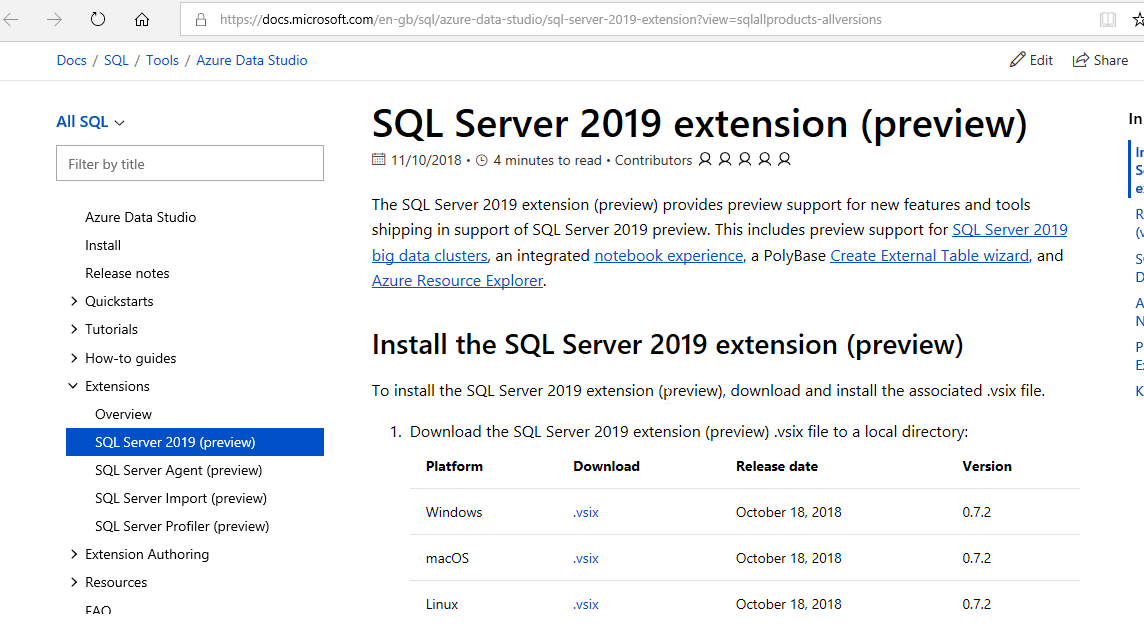
Click on Install opens up a webpage where we can download the SQL Server 2019 extension (preview) .vsix file.
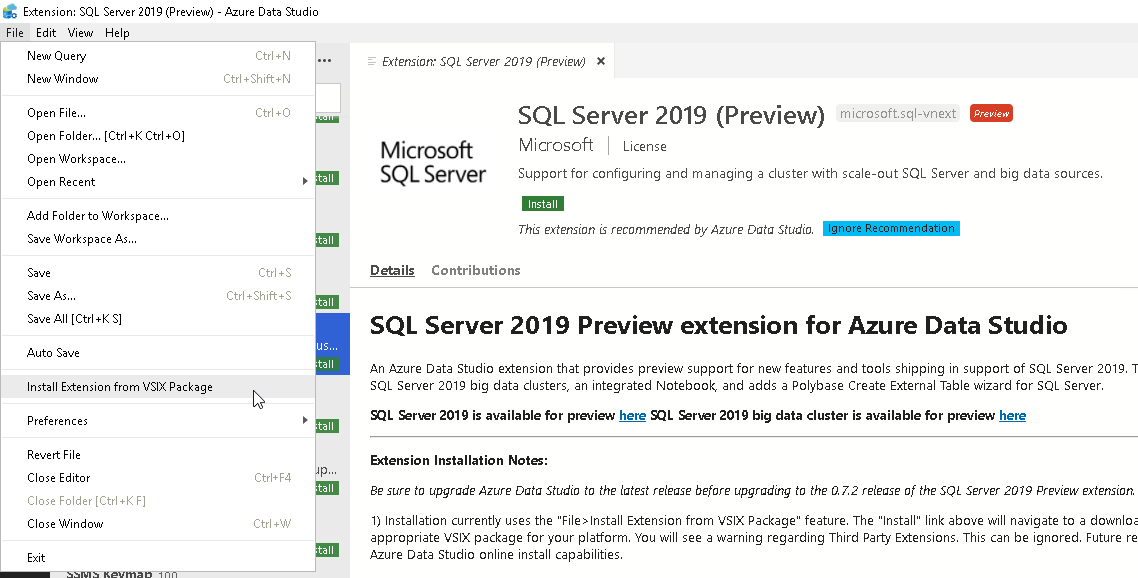
Now go to file -> “Install Extensions from VSIX Package” and provide the path of the downloaded .vsix file.
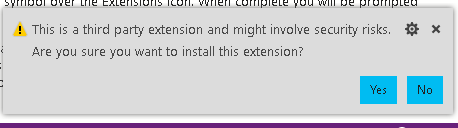
Click Yes to install the extension. This will take some time to install this SQL Server 2019 preview extension.
We get the below message after the extension is successfully installed. Click on Reload Now to install its dependencies and take this extension into effect.

Conclusion
In this article, we took an overview of SQL 2019 PolyBase enhancements, Azure Data Studio installation and its extension to support SQL Server 2019 preview features. In the next article, we will create sample database objects in the Oracle and create external tables to access these objects from the SQL 2019 PolyBase external tables.
Table of contents
| Enhanced PolyBase SQL 2019 – Installation and basic overview |
| Enhanced PolyBase SQL 2019 – External tables for Oracle DB |
| Enhanced PolyBase SQL 2019 – External tables using t-SQL |
| Enhanced PolyBase SQL 2019 – External tables SQL Server, Catalog view and PushDown |
| Enhanced PolyBase SQL 2019 – MongoDB and external table |

I am the author of the book "DP-300 Administering Relational Database on Microsoft Azure". I published more than 650 technical articles on MSSQLTips, SQLShack, Quest, CodingSight, and SeveralNines.
I am the creator of one of the biggest free online collections of articles on a single topic, with his 50-part series on SQL Server Always On Availability Groups.
Based on my contribution to the SQL Server community, I have been recognized as the prestigious Best Author of the Year continuously in 2019, 2020, and 2021 (2nd Rank) at SQLShack and the MSSQLTIPS champions award in 2020.
Personal Blog: https://www.dbblogger.com
I am always interested in new challenges so if you need consulting help, reach me at rajendra.gupta16@gmail.com
View all posts by Rajendra Gupta
- Understanding PostgreSQL SUBSTRING function - September 21, 2024
- How to install PostgreSQL on Ubuntu - July 13, 2023
- How to use the CROSSTAB function in PostgreSQL - February 17, 2023