

In this 5th part of the ongoing series of SQL Server 2019 Enhanced PolyBase, we will learn how to install and configure MongoDB and create an external table.
SQL Server 2019 supports MongoDB Teradata and ODBC based data sources. We will install MongoDB on both the windows environment as well as on Ubuntu OS.
MongoDB installation on Windows system
MongoDB is a non-relational and open-source document-based database. It offers important features such as high performance and automatic scaling. MongoDB comes into two editions Enterprise and the Community edition. In this article, we will install the MongoDB community edition on windows environment.
- Download the MongoDB Community Servers
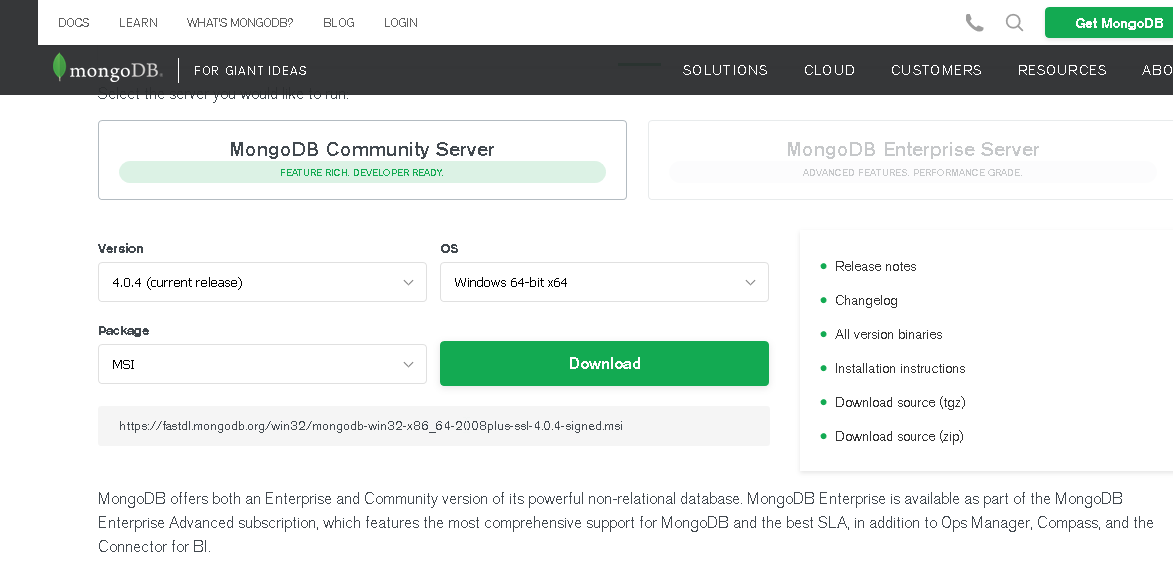
Once MongoDB package file download completes double-click on the file to launch it.
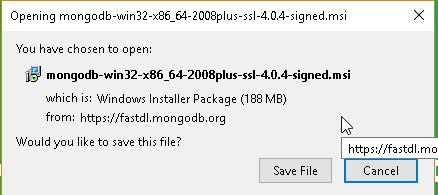
It launches the MongoDB 4.0.4 set up wizard. Click on next to continue the setup wizard.

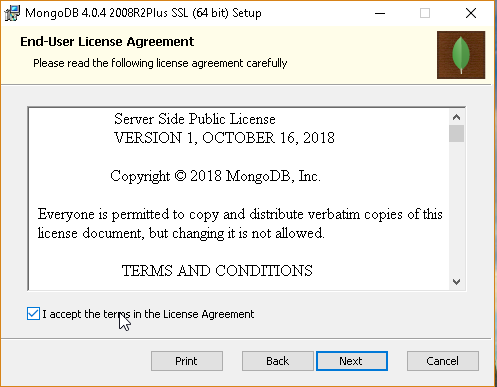
Accept the end user license agreement and click Next.
We need to choose the setup type:
- Complete: installs all program features. It will require additional disk space as compared to the custom set up. This is recommended to use if we do not have much knowledge about MongoDB
- Custom: In this setup mode, we need to choose the program features. It requires an advanced level of knowledge to install custom level set up
In this article, we will perform a complete installation.

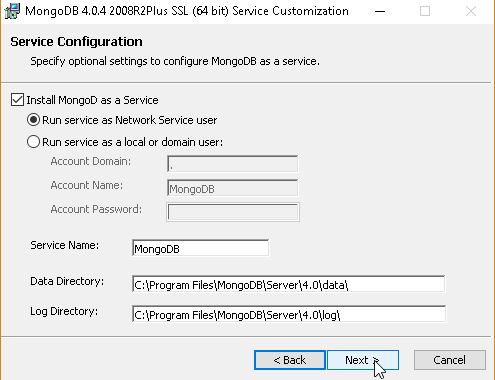
The next page is the service configuration. We will go with the default configuration here.
If required, change the below directory locations:
- Data Directory: C:\program Files\MongoDB\Server\4.0\data\
- Log Directory: C:\program Files\MongoDB\Server\4.0\log\
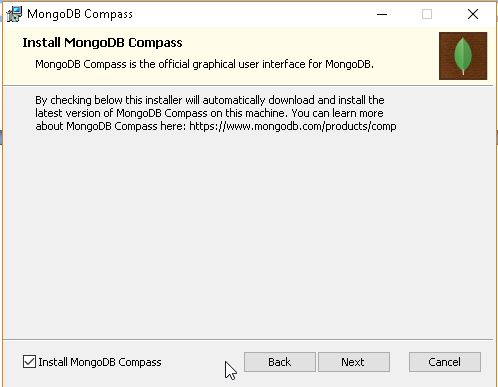
In next page, we can choose to install MongoDB Compass official graphical user interface tool. We can skip this as well.
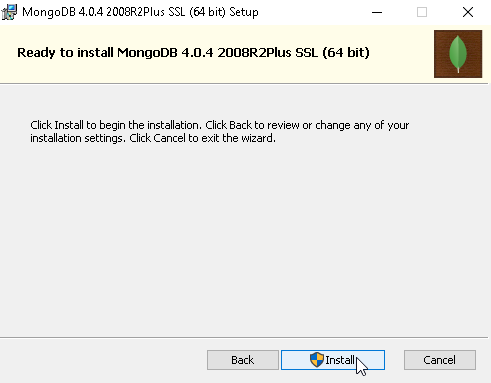
In the next screen, click on ‘Install’ to begin the installation.
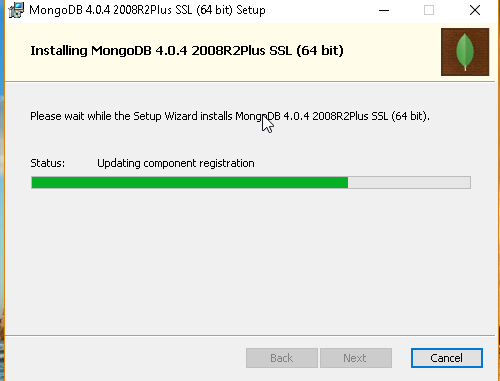
You can monitor the installation status in the progress window.

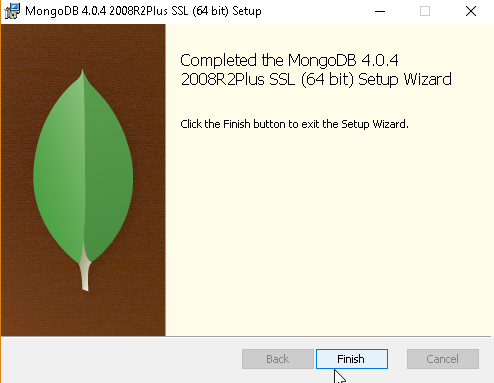
We have installed MongoDB 4.0.4 in the windows environment.
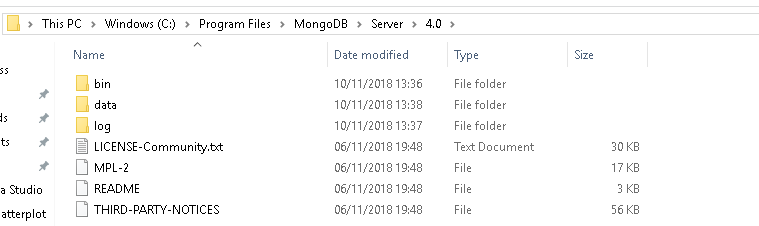
During the installation, we have specified the MongoDB directory. Below is the content for MongoDB directory.
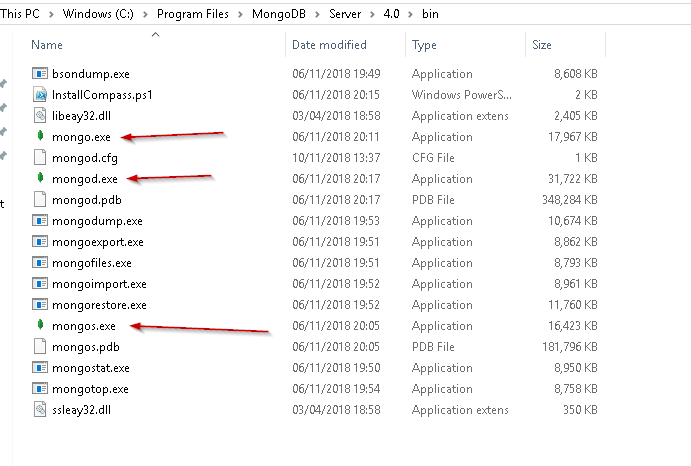
In the ‘C:\program files\MongoDB\Server\4.0\bin’ directory, we can find the highlighted .exe files
- Server process: mongod.exe
- Client process: mongo.exe
- MongoDB shard process: mongos.exe
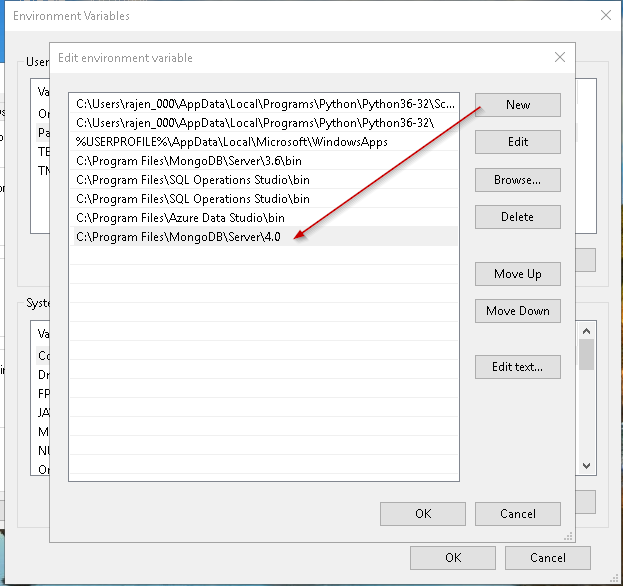
We need to add the path of the MongoDB directory into the environment variable under the ‘PATH’ variable.
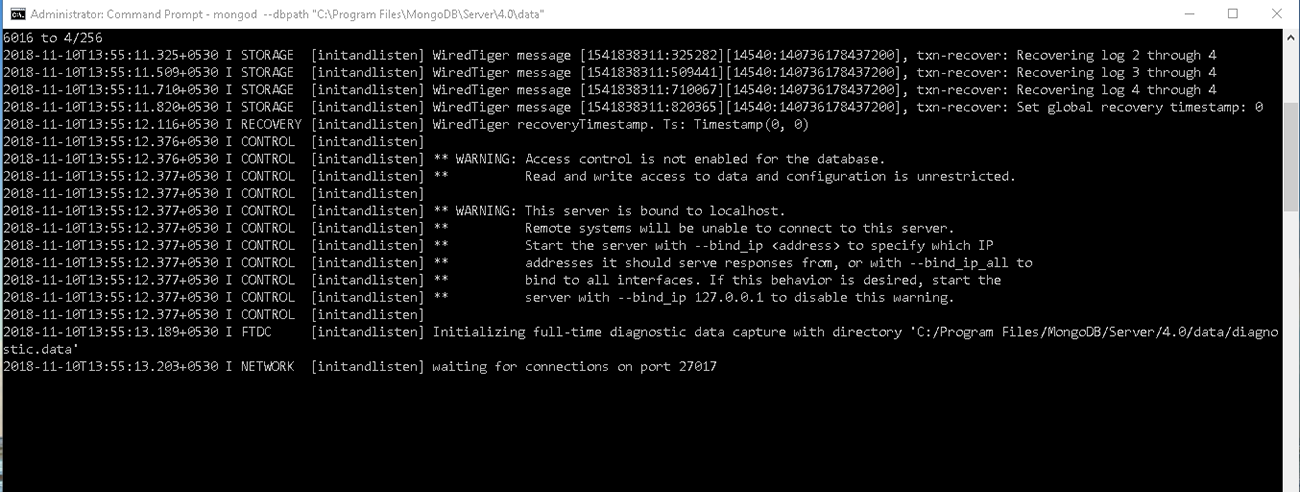
Open the command prompt with administrative permission and launch the mongod.exe server process with below command.
>mongod –dbpath “C:\Program Files\MongoDB\Server\4.0\data”
Here –dbpath points to the database directory.
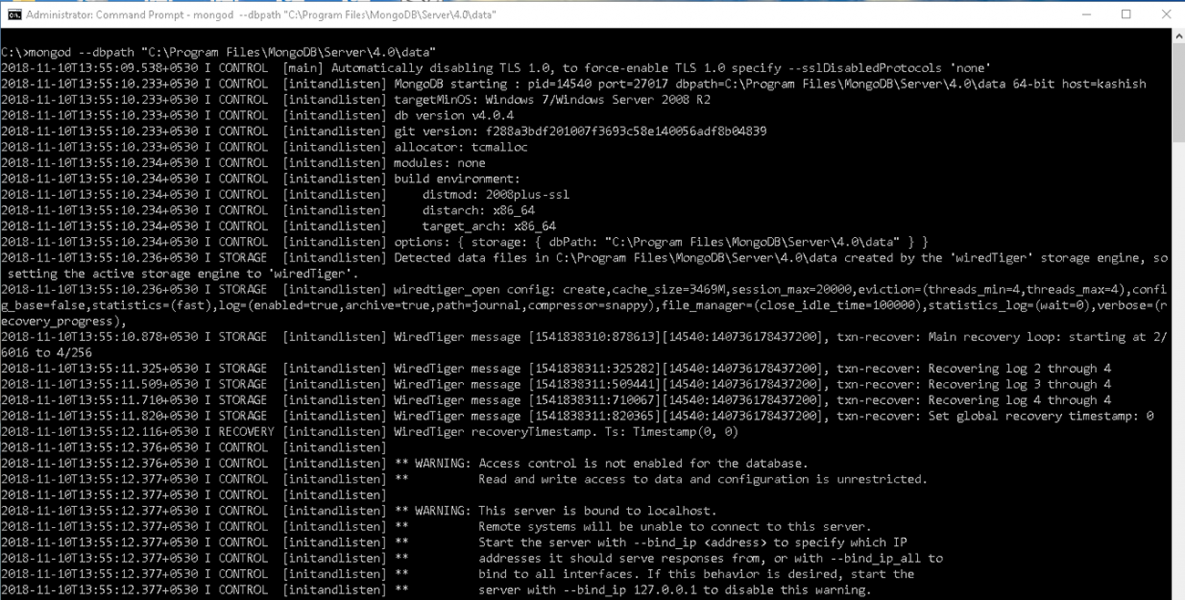
This command starts the mondod.exe server service and you can see the status ‘waiting for connections on port 27017’
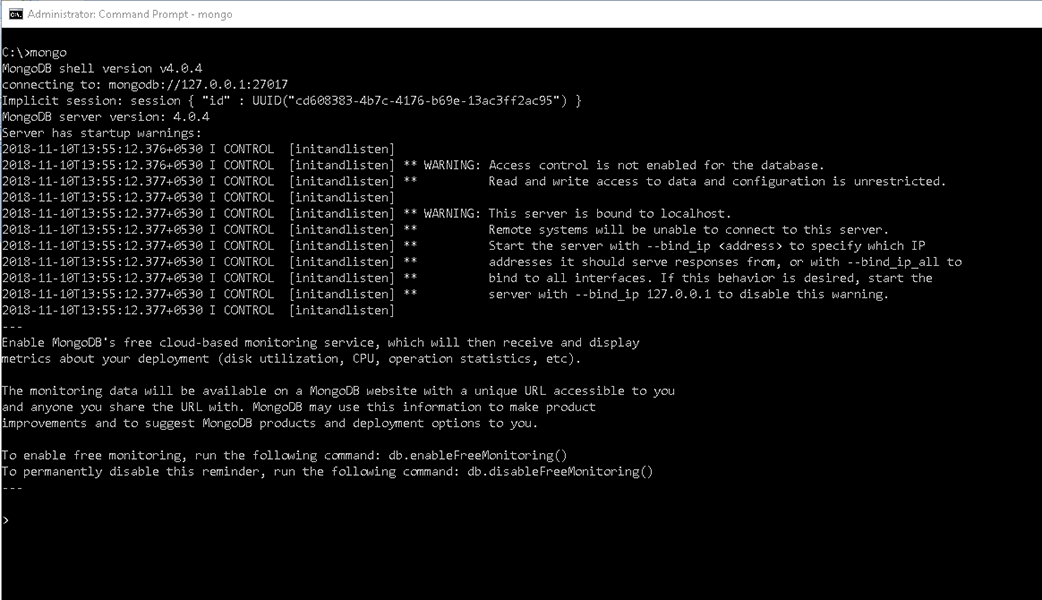
Launch another command prompt and run the ‘mongo’ to start the client tool. It connects to the mongo server service and we can see the prompt ‘>’. We can run the queries in MongoDB now.
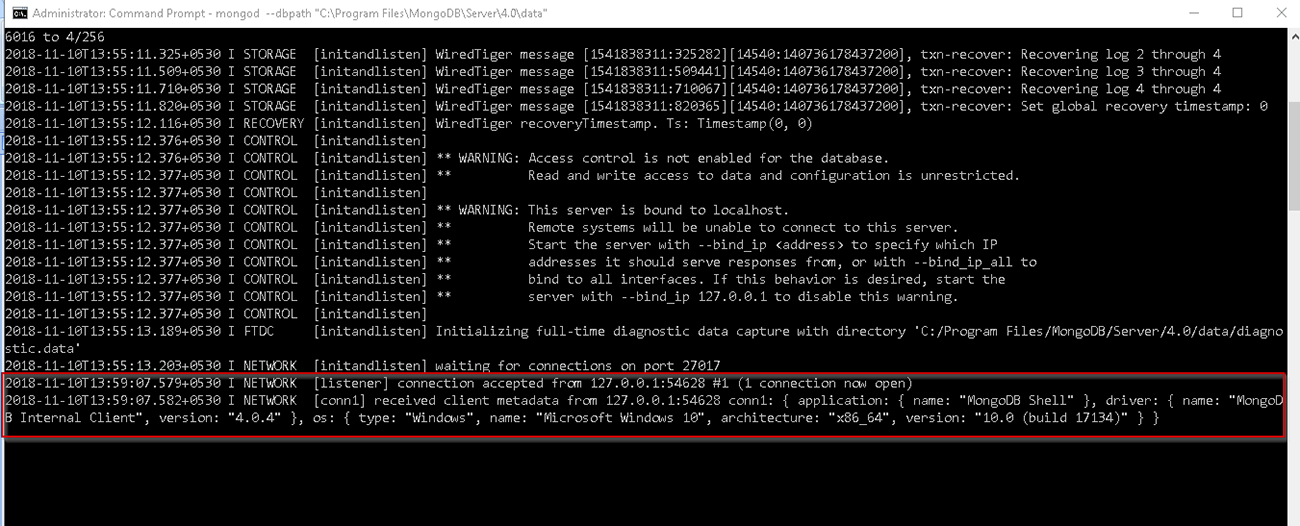
While the client processes connect to the host MongoDB server instance, we can view the status as highlighted. We can see the connection information in the server instance command prompt. You get the information about the client OS type, name, version, architecture as well.
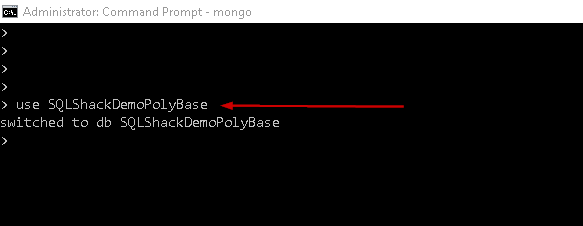
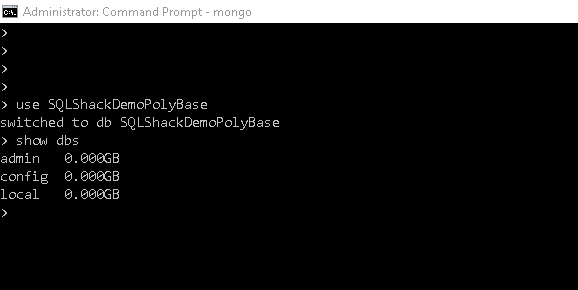
In MongoDB, we can connect to any database name. If just switch to that database. It is not required to create the database first.
In below screen, we connected to the database:
>use SQLShackDemoPolyBase
We can see the message ‘switched to DB SQLShackDemoPolyBase’
We can list down the database using the command ‘show dbs’
You can notice here that it does not show the database ‘SQLShackDemoPolyBase’. We have not created any document in this database; therefore, it is not listed under the database names.
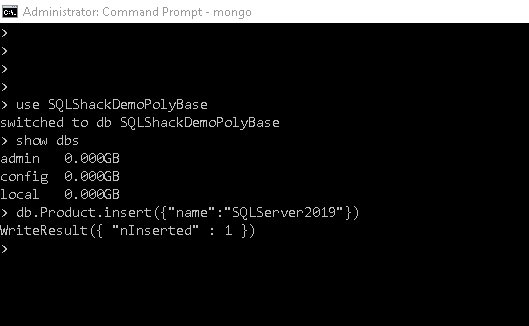
We can insert the document in below format.
>db.product.insert({“name”:”SQLServer2019″})
Once the document is inserted, you get a message ‘writeResult ({“nInserted”:1})’
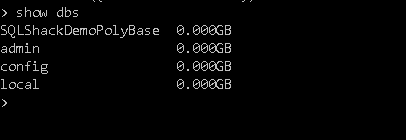
Now, if you run the query ‘show dbs’ to view the databases, we can see the DB ‘SQLShackDemoPolyBase’
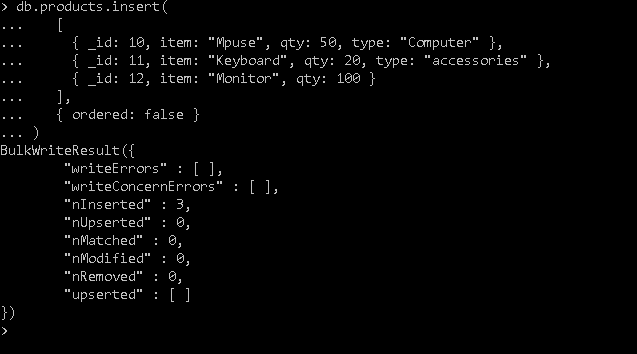
We can create multiple documents using the below format.
|
1 2 3 4 5 6 7 8 |
db.products.insert( [ { _id: 10, item: "Mpuse", qty: 50, type: "Computer" }, { _id: 11, item: "Keyboard", qty: 20, type: "accessories" }, { _id: 12, item: "Monitor", qty: 100 } ], { ordered: false } ) |
MongoDB on Ubuntu Linux
We have learned how to install MongoDB in a windows environment in the above steps. Now, we will install MongoDB on the Ubuntu Linux. In this article, I am using a virtual machine configured with the Ubuntu OS. You can follow the article Linux with Ubuntu to configure the virtual machine.
Open a terminal connection in Putty and run the below steps.
-
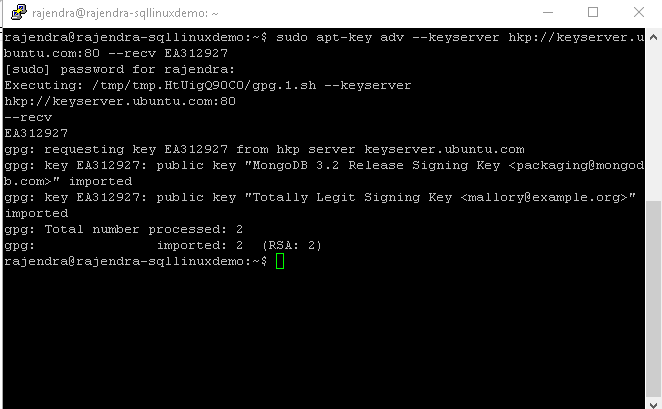
We need to import the GPG keys using the below command
sudo apt-key adv –keyserver hkp://keyserver.ubuntu.com:80 –recv EA312927
-
In this step, we need to add list file in sources.list.d. Run the below command.
1echo “deb http://repo.mongodb.org/apt/ubuntu “$(lsb_release -sc)”/mongodb-org/3.2 multiverse” | sudo tee /etc/apt/sources.list.d/mongodb-org-3.2.list

-
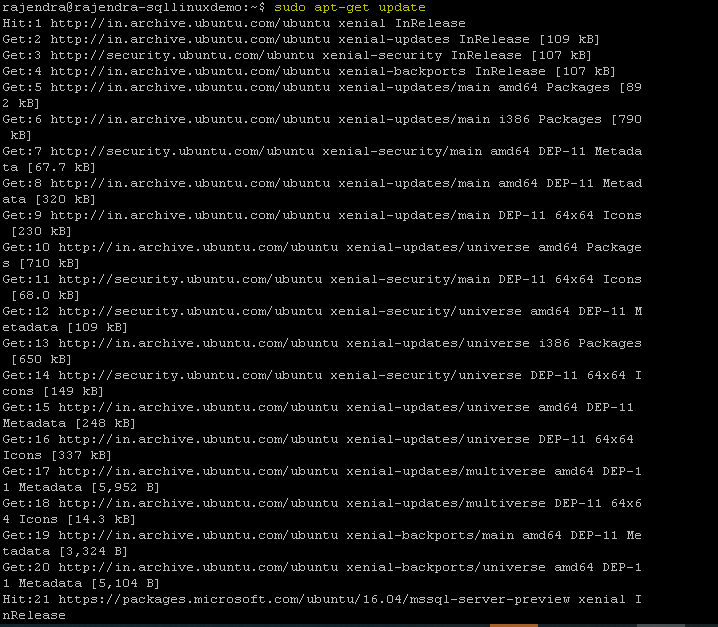
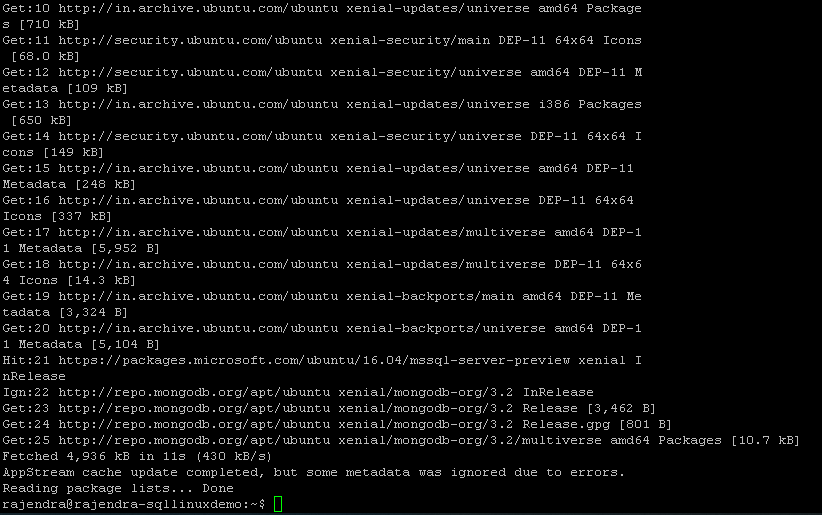
Update the repository. This updates the software repository with the latest configurations.
Sudo apt-get update
-
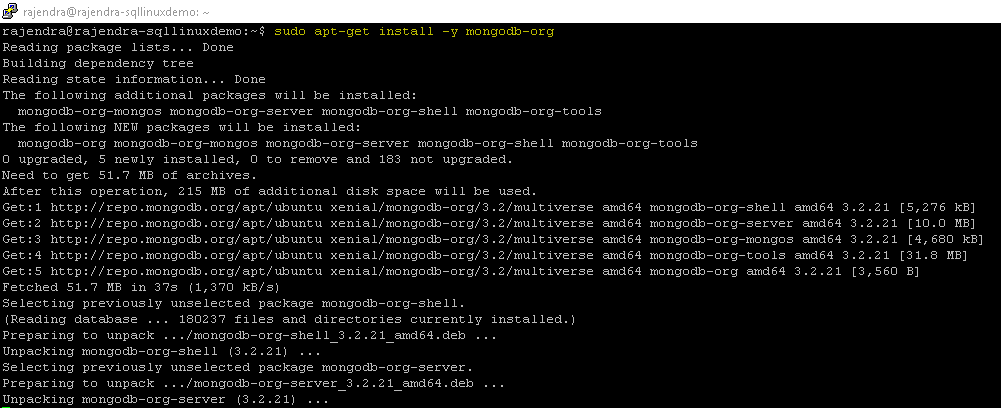
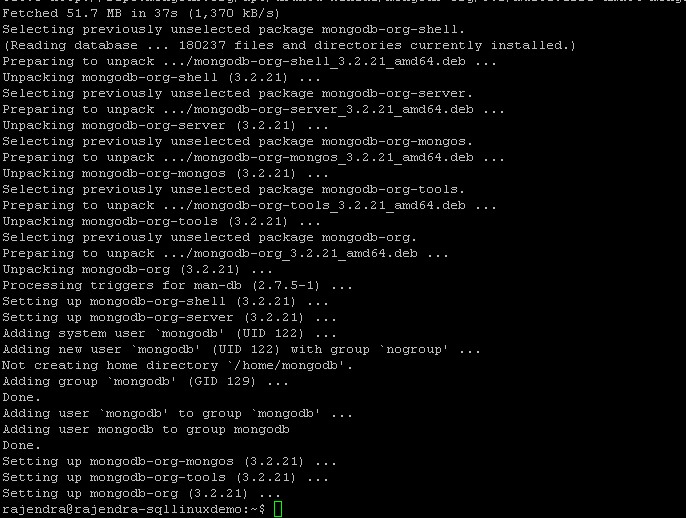
Now, we can install MongoDB using the below command
sudo apt-get install -y MongoDB-org
It downloads and installs the MongoDB in the Ubuntu Linux. You can view the setup messages in the following screen.
-
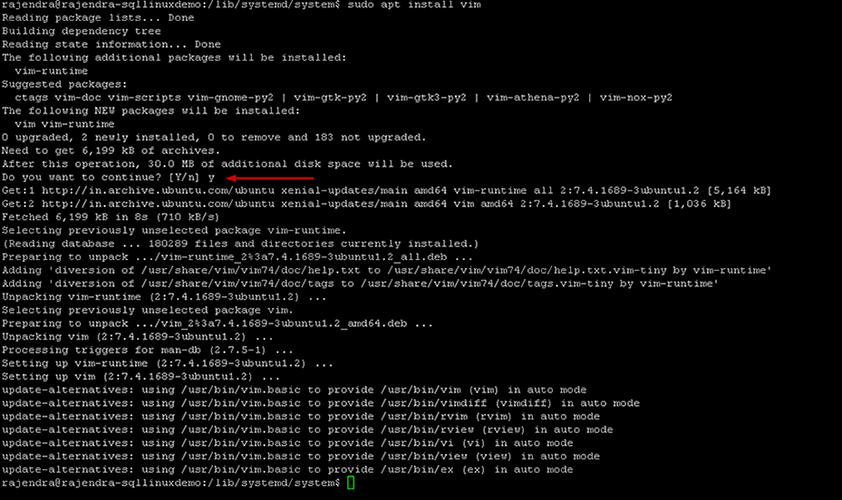
Install the vim package using the command
sudo apt install vim
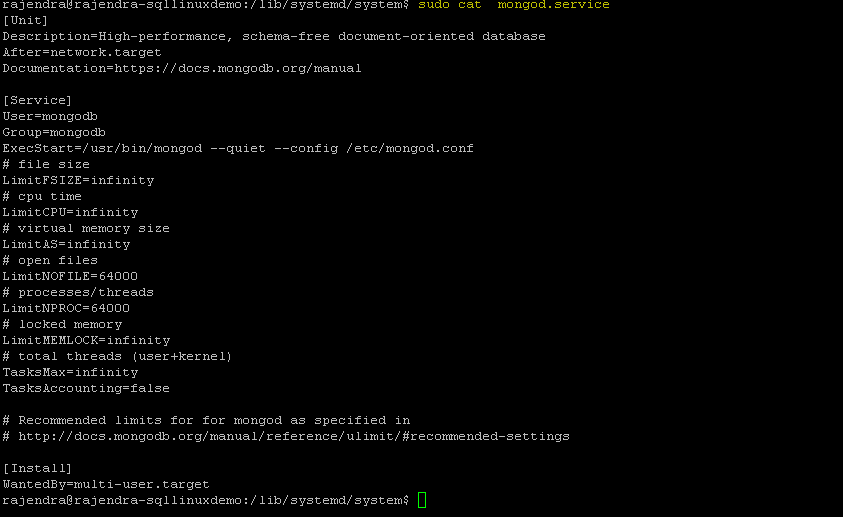
We can view the content of mongod.service file using the below commands
$cd /lib/systemd/system/
$ sudo cat mongod.service

Update the system service with the command:
$ sudo cat mongod.service

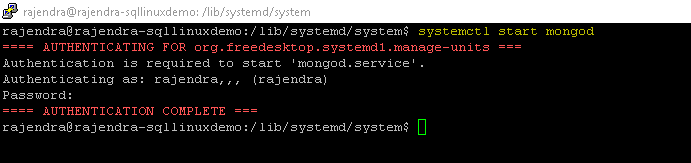
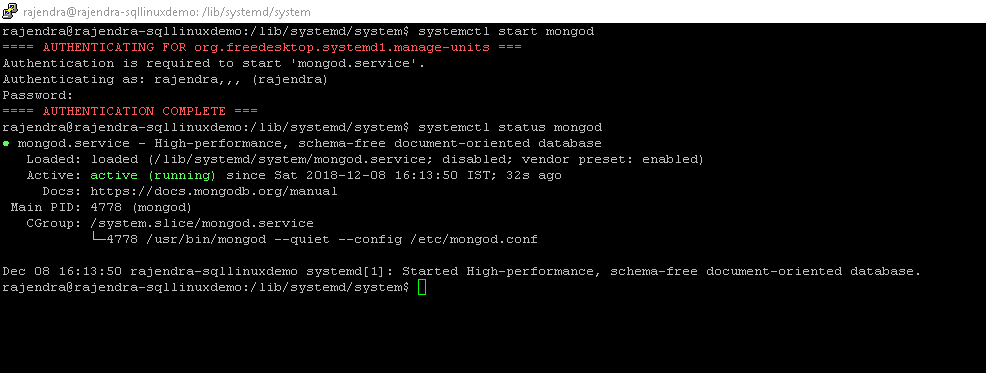
Start the mondo service:
$ systemctl start mongod
Check the status of mongod service. Service status should be active (running):
$ systemctl status mongod
Start another putty session and run the command ‘mongo’ to start the client process.
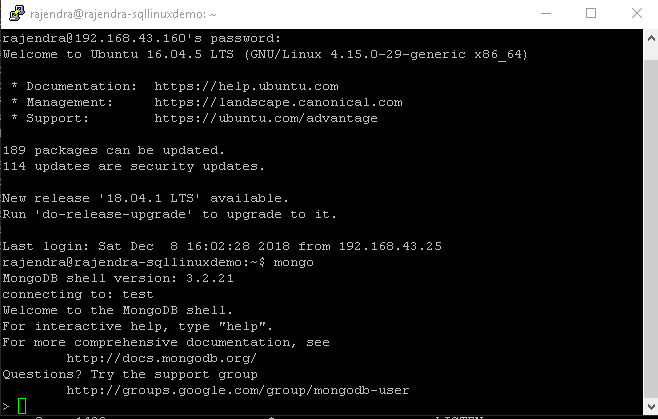
Similar to windows environment, we can run the query in the client tool.

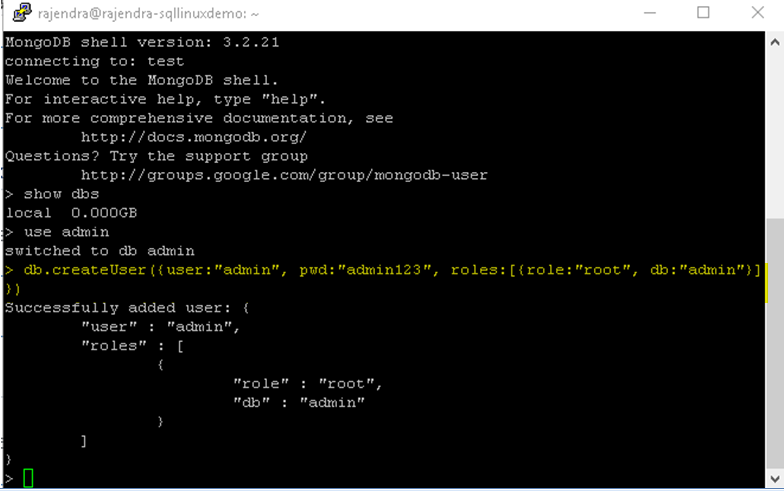
We can create the admin user with the highlighted command.
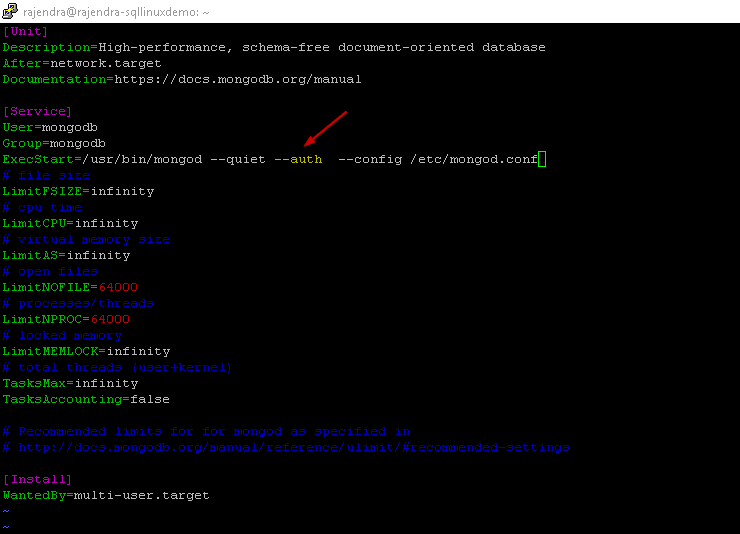
We can enable authentication in MongoDB with the -auth parameter. Edit the mongod.service with the vim command.
$ vim /lib/systemd/system/mongod.service
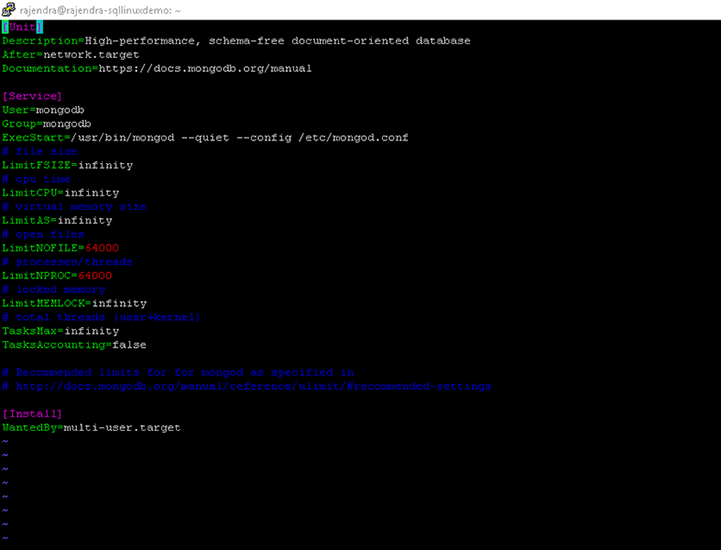
Press ‘i’ to enable insert in the configuration file.

Go to the line and add -auth parameter in the ‘execstart’
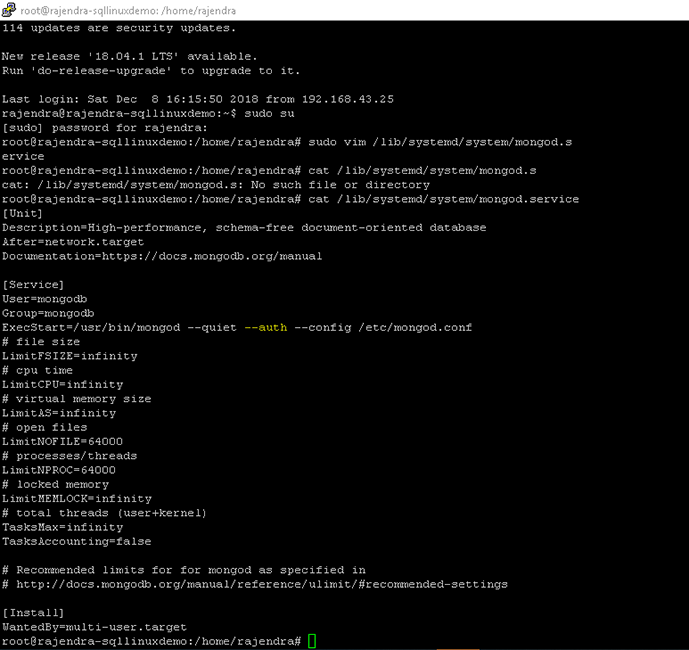
Save and close the configuration file, we can view the content with the cat command.
$ cat /lib/systemd/system/mongod.service
You can see the -auth parameter is added into the configuration file successfully.
Restart the mongod service and check the status.
$ sudo service mongod restart
$sudo systemctl status mongod

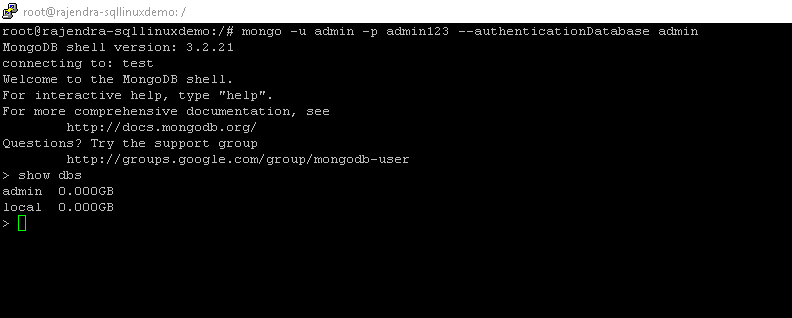
Connect the client process with the credentials in below format.
# mongo -u ‘user’ -p ‘password’ –authenticationdatabase admin
Configure PolyBase to access MongoDB
In a previous article, Enhanced PolyBase SQL 2019 – Installation and basic overview, we configured PolyBase to access data from the SQL Server and the Oracle data source. We can create an external table using the external table wizard in Azure data studio. For other data sources, we can only do this buy running the create an external table using a query.
Below services should be running in the source SQL Server 2019 instance.

Steps are almost similar to create an external table for MongoDB as it is for SQL and Oracle. Let us view the steps.
-
Crate Database Master key – Specify the password for encryption
1CREATE MASTER KEY ENCRYPTION BY PASSWORD = 'password@123'; -
Create a Database scoped credential
12CREATE DATABASE SCOPED CREDENTIAL MongoDBWITH IDENTITY = admin, Secret = admin123; -
Create external data source – In this step, you need to specify the mongodb location. It is the change in the external table configuration as compared with SQL and Oracle data source
1234567LOCATION format '<type>://<server>[:<port>]'.CREATE EXTERNAL DATA SOURCE MongoDBSourceWITH (LOCATION = 'mongodb://192.168.43.160:27017',CREDENTIAL = MongoDB --specify credential created in step 2);
-
Create an external table – In the external table create the columns as per the document in the MongoDB. Here you can find the sample query to create an external table
123456789CREATE EXTERNAL TABLE Employee([Name] varchar(50) NOT NULL,[location] varchar(50) NOT NULL,[website] varchar(100) NOT NULL)WITH (LOCATION='Employee.Employee',DATA_SOURCE= MongoDBSource);
Conclusion
In this article, we explore the MongoDB installation on both the windows and the Ubuntu environment. We learned the basics of MongoDB that will help you to prepare for enhanced PolyBase using a MongoDB data source.
Table of contents

I am the author of the book "DP-300 Administering Relational Database on Microsoft Azure". I published more than 650 technical articles on MSSQLTips, SQLShack, Quest, CodingSight, and SeveralNines.
I am the creator of one of the biggest free online collections of articles on a single topic, with his 50-part series on SQL Server Always On Availability Groups.
Based on my contribution to the SQL Server community, I have been recognized as the prestigious Best Author of the Year continuously in 2019, 2020, and 2021 (2nd Rank) at SQLShack and the MSSQLTIPS champions award in 2020.
Personal Blog: https://www.dbblogger.com
I am always interested in new challenges so if you need consulting help, reach me at rajendra.gupta16@gmail.com
View all posts by Rajendra Gupta
- Understanding PostgreSQL SUBSTRING function - September 21, 2024
- How to install PostgreSQL on Ubuntu - July 13, 2023
- How to use the CROSSTAB function in PostgreSQL - February 17, 2023