
In the other article in this series: Deploy SQL Server for failover clustering with Cluster Shared Volumes – part 1 we have seen what a cluster shared volume is and what are the advantages and other considerations to keep in mind when deploying CSVs for SQL Server workloads. In this article, I will walk though actual installation of a failover cluster Instance leveraging CSVs.
To begin with, I will walk you through my cluster setup from 20,000 foot view. I created two brand new VMs running windows server 2012 R2 and renamed them accordingly. Nothing special w.r.t disk drives at this point, Just basic VMs with a system drive(C$).
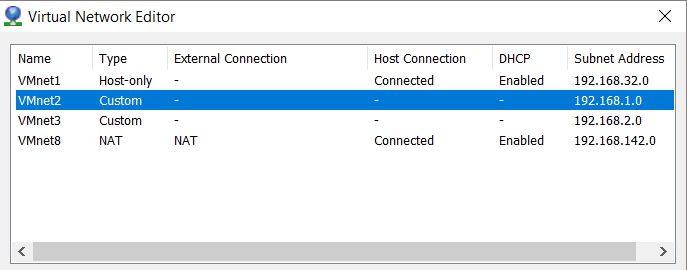
I also created 2 virtual networks in my VMWare workstation which I will be using for configuring my Public and private NICs on my nodes.
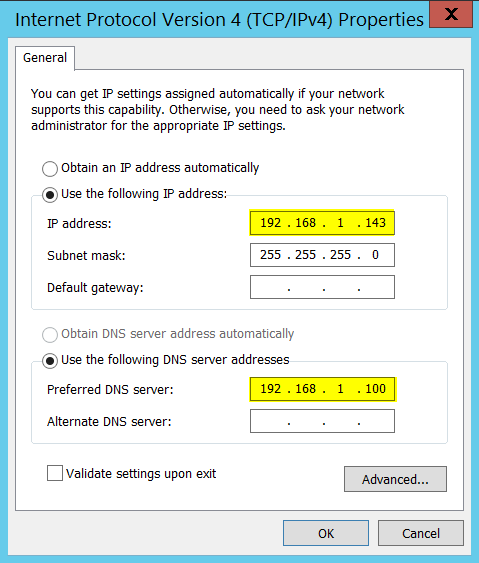
On my first node:
192.168.1.100 is the IPv4 address of my DNS server and below are my NIC settings.
Once IP address has been configured, below is how I joined my node to domain (sqltrek.local in my case).
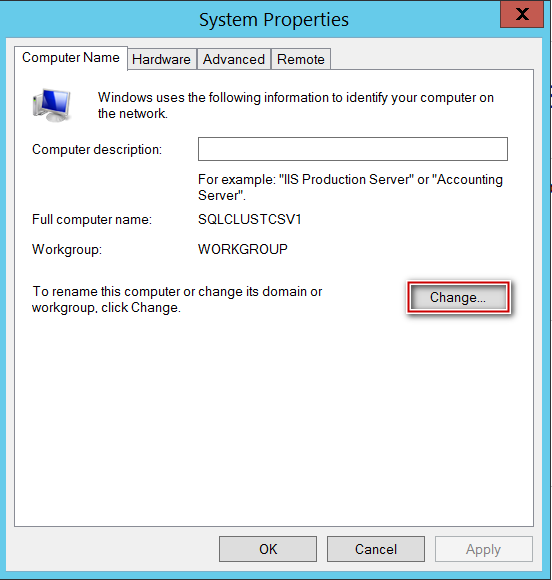
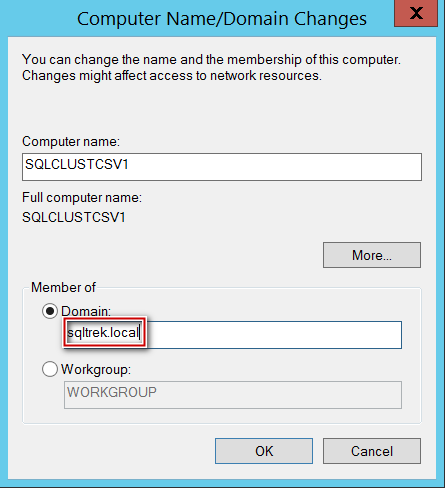
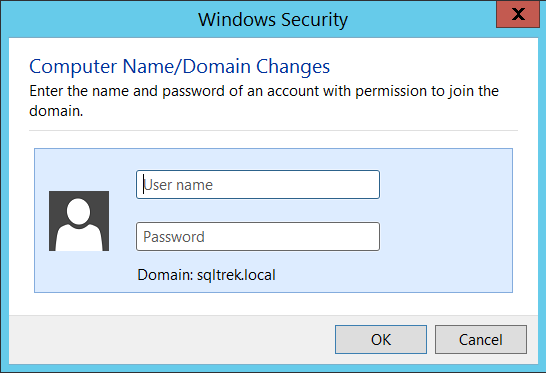
After providing domain admin credentials in the above screenshot, my node (SQLCLUSTCSV1) was added to my domain successfully. I followed the same process on my second node as well to join it to my domain. Once this part is done, I configured disks (traditional way) and installed Failover Clustering feature on both nodes.
Please refer How to add a new disk to an existing SQL Server failover clustered instance for understanding how to add disks to WSFC (Windows Server Failover Cluster).
Once all the prerequisites are in place, I created my windows cluster. Below is the snapshot of my cluster from Failover Cluster Manager.

Nothing fancy has been done so far, it’s just a traditional Failover cluster. You can notice that I used dedicated disk for my Quorum, you can use a file share or Azure Blob storage as witness instead if needed.
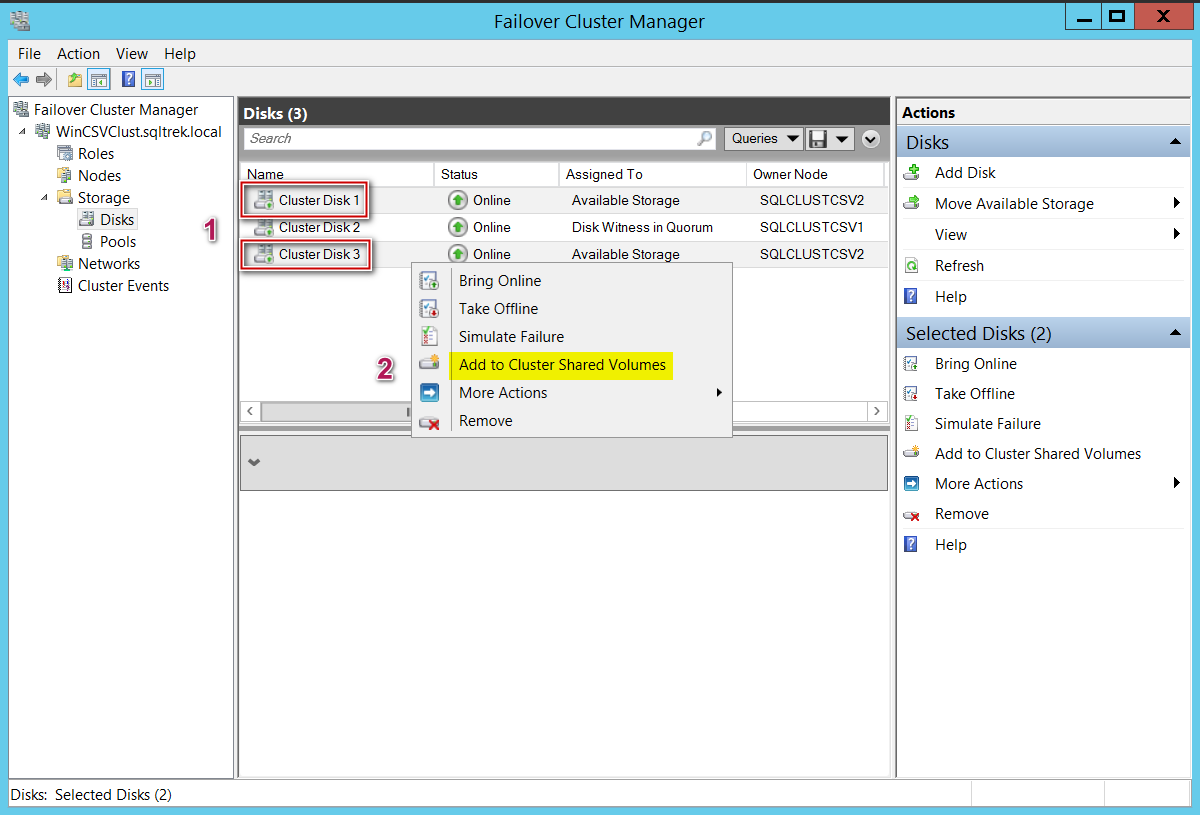
At this point, I have got two disk drives (Cluster disk 1 and cluster disk 3) which I would like to convert to Cluster shared volumes. To make them CSVs, select the available storage (you can select multiple drives at once as well), right click and select convert to CSV. That’s it, it’s really that simple to convert your traditional shared storage to CSVs as shown in the below screenshot.
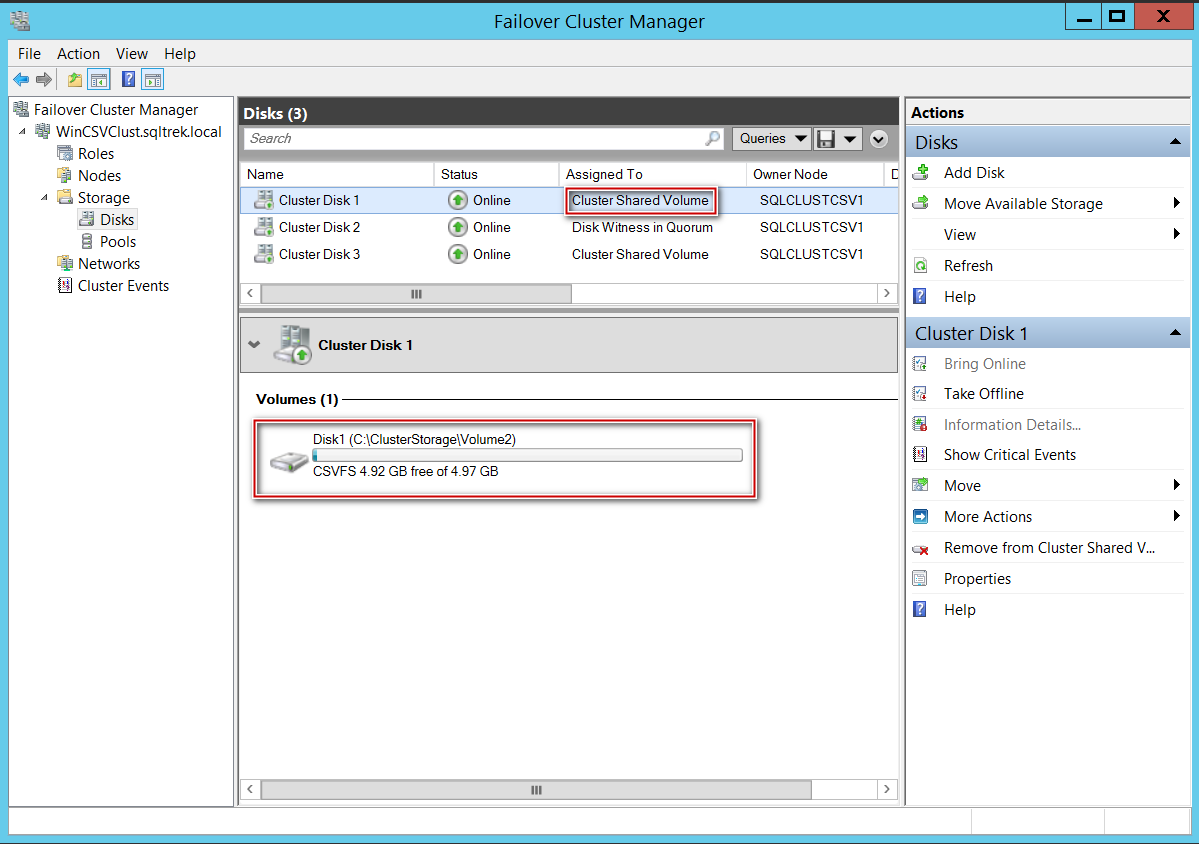
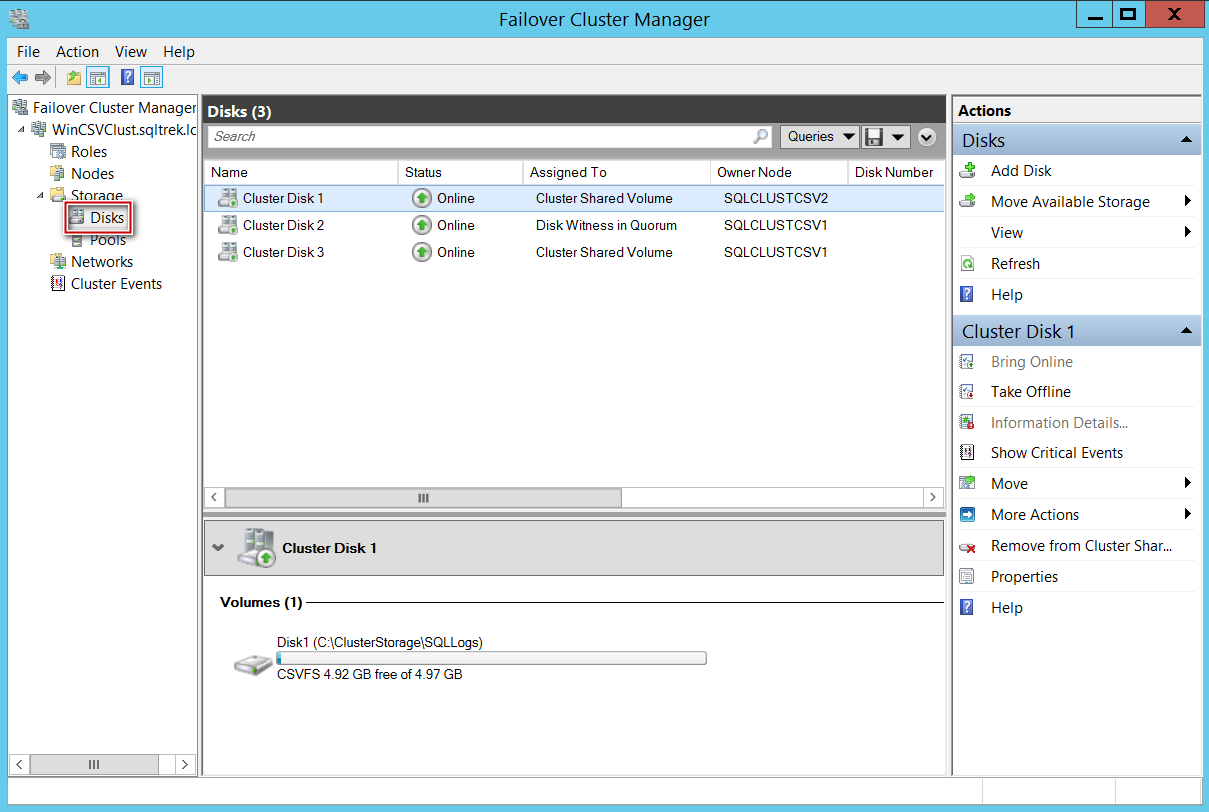
Once the drives got converted to CSVs successfully, you can see FCM reporting my disk drives as CSVs in below screenshot.
Well, now let’s see how things will show up from disk management MMC.
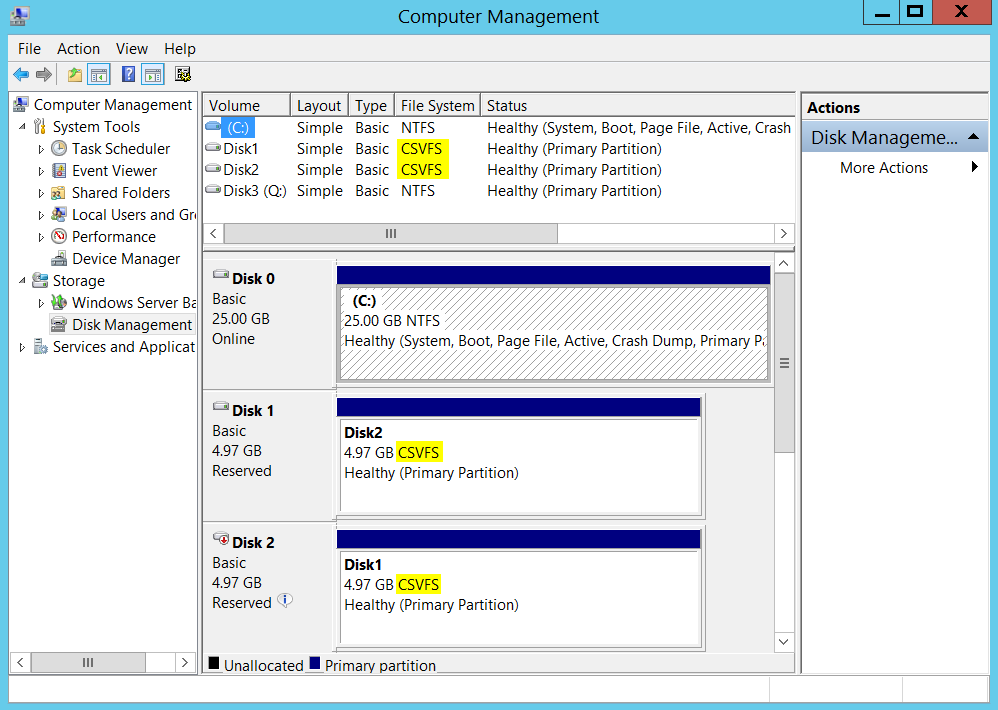
As you can see the CSV enabled volumes will appear as “CSVFS” instead of NTFS. As mentioned in the first part of this series, CSVFS is basically NTFS file system behind the scenes and the volumes are still formatted with NTFS. CSVFS is just an abstraction layer which enables applications (SQL Server in our case) to be aware that they are running on CSVs.
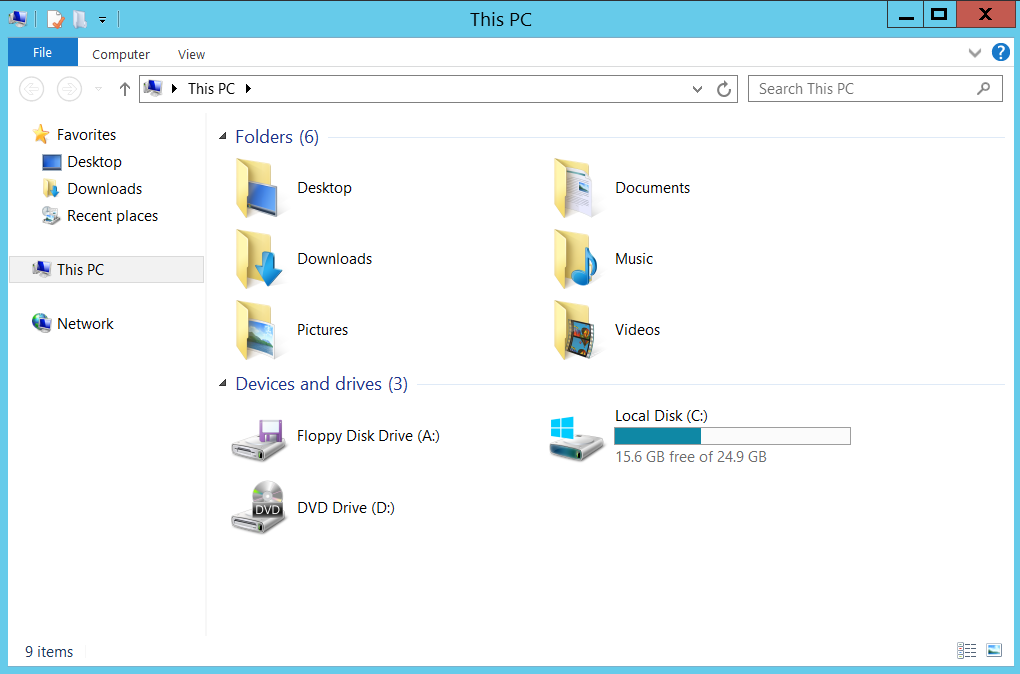
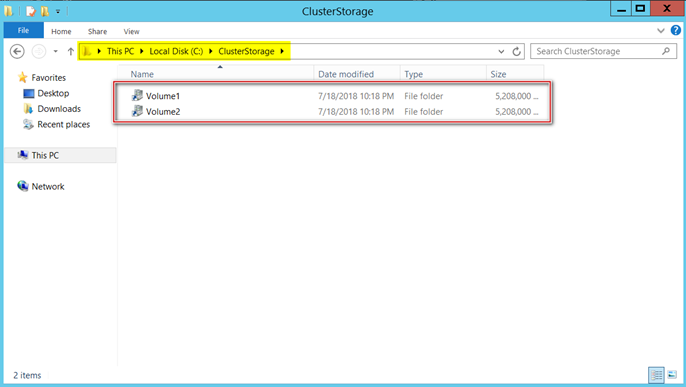
Now let’s see how things will appear by navigating from file system (explorer). As mentioned earlier, CSVs can be accessed and managed from any node. In other words, we get a consistent file/folder path across all the nodes. Windows exposes CSV volumes as folders under “ClusterStorage” in system drive (That’s typically our C: Drive) as shown below.
I renamed my CSVs to “SQLDATA” and “SQLLOGS” and you can see it reflects the same from both my nodes.
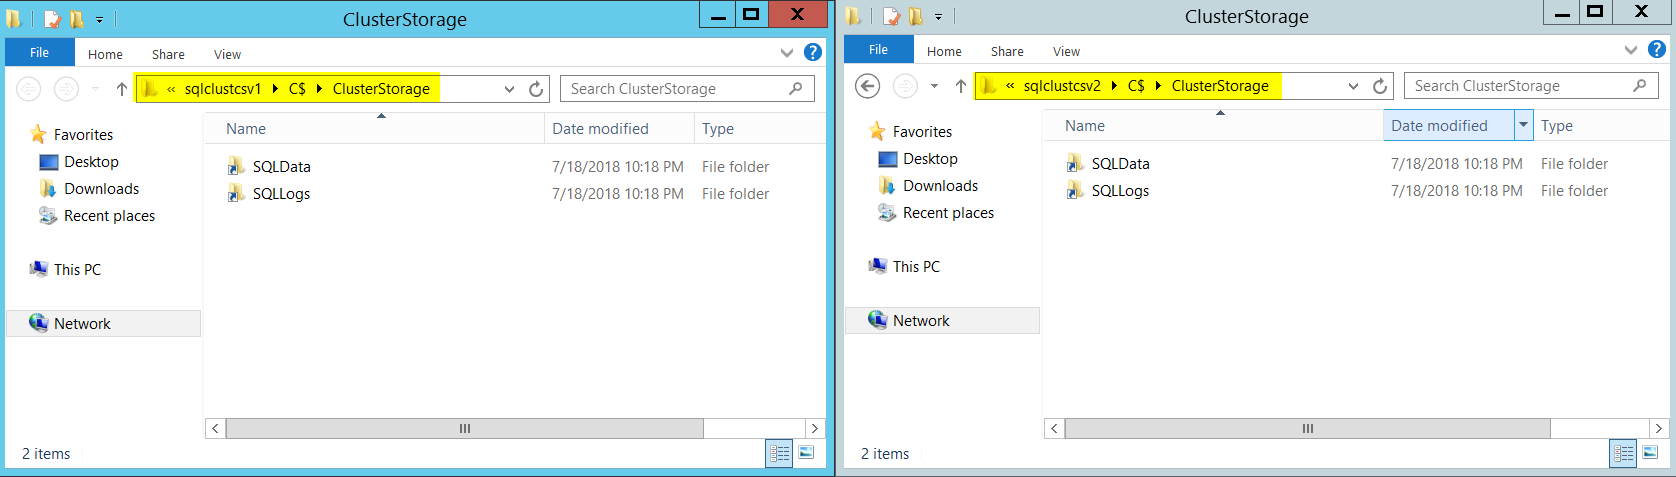
Note: Microsoft recommends renaming the volumes accordingly before Installing SQL Server. Messing with volume names after setting up FCI might lead to unwanted behaviors.
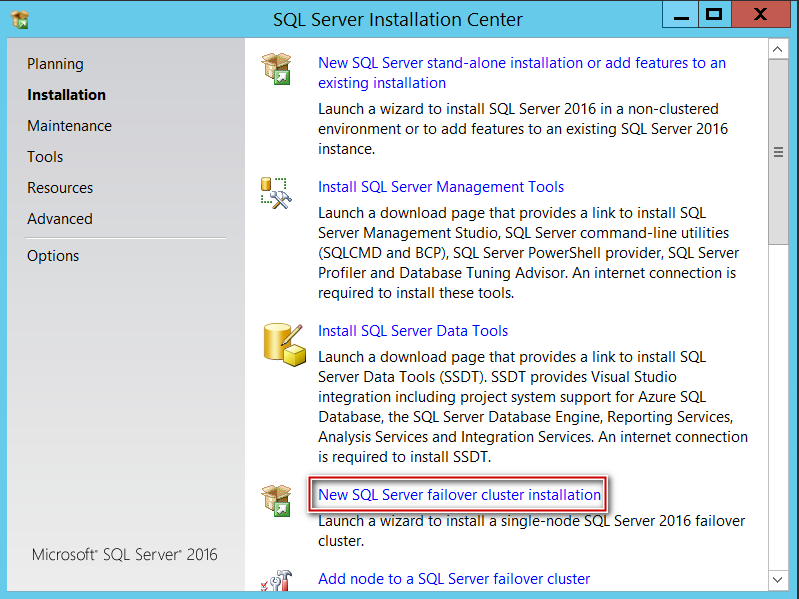
Now, let’s begin installing SQL Server FCI. I have my SQL Server media inserted on SQLCLUSTCSV1.
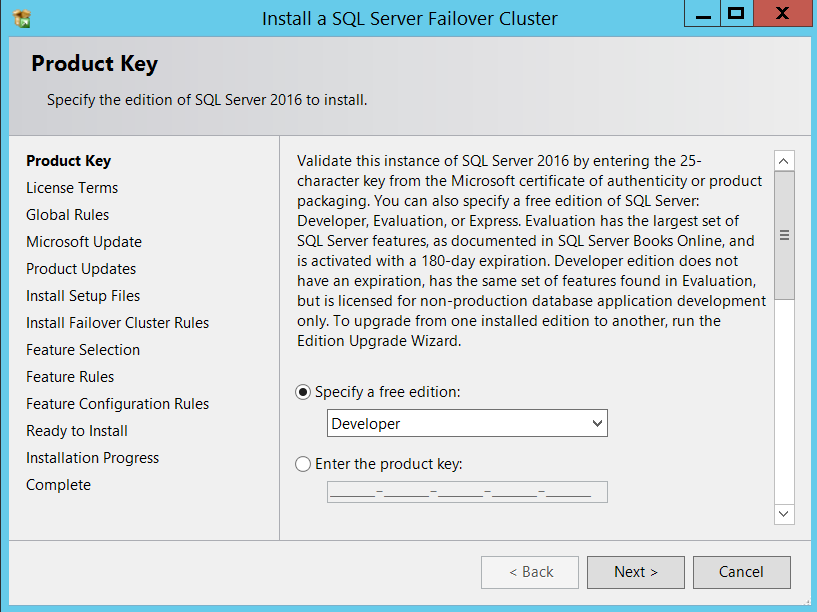
It’s time to choose your edition, I’ve selected developer for this demonstration purpose.
Accept EULA and select Next.
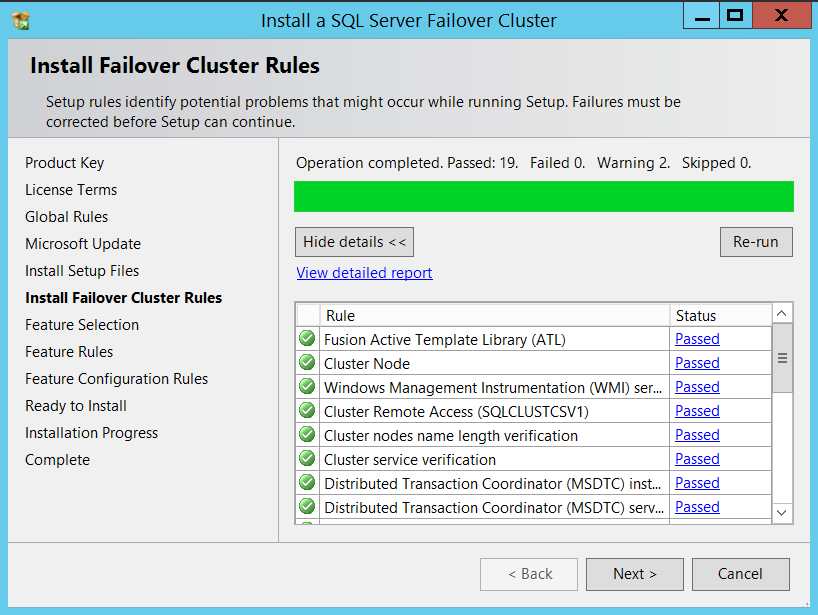
Okay, now it’s time for validation, make sure you verify all the warnings and fix errors before proceeding further.
Now select all the required features based on your requirement and click Next.

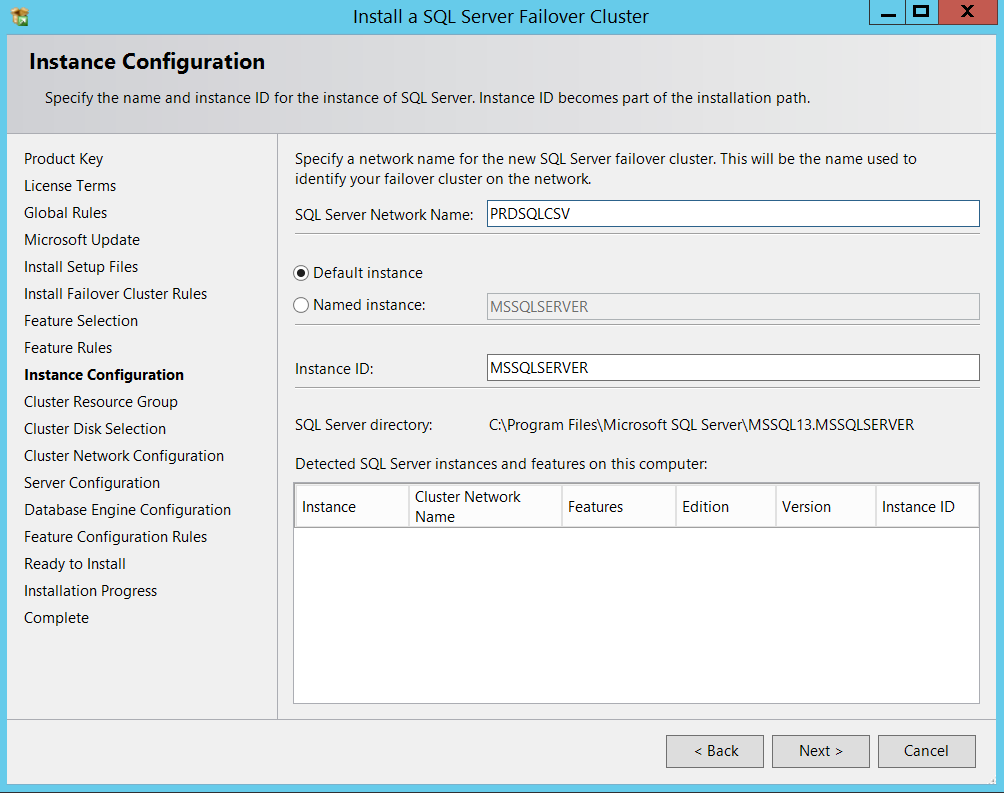
Provide a SQL Server Virtual network name and Instance name (I used PRODSQLCSV as my network name and a default Instance in this example).
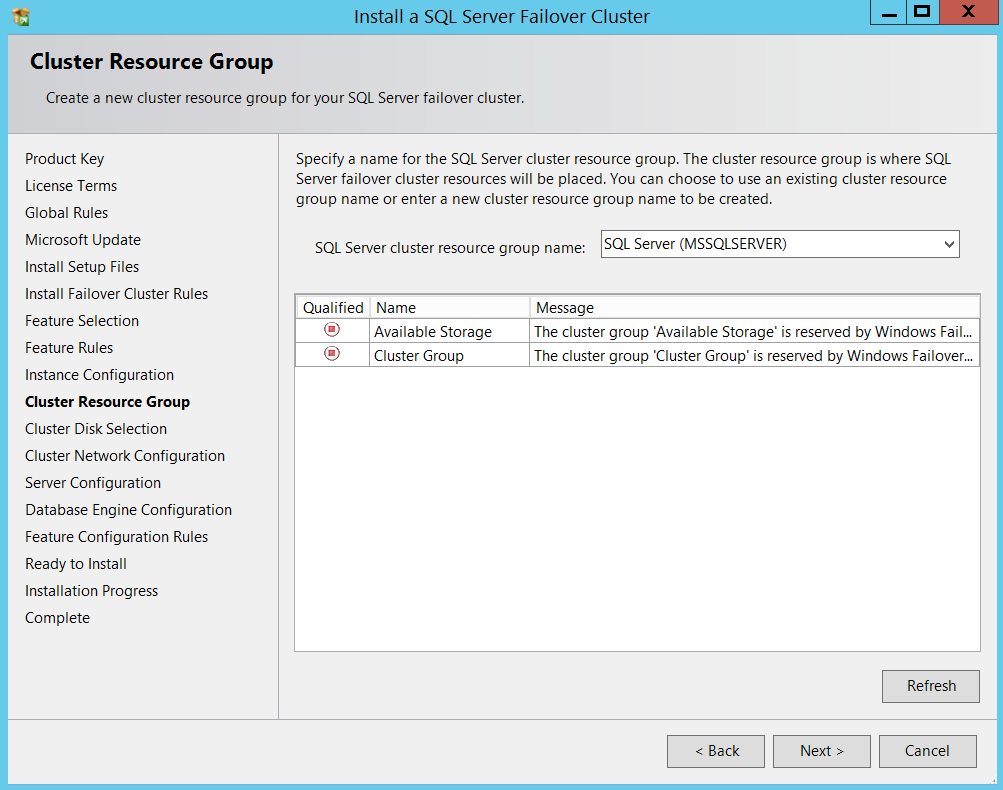
Now you can specify a name for SQL resource group if needed and click Next, I am just proceeding with defaults.
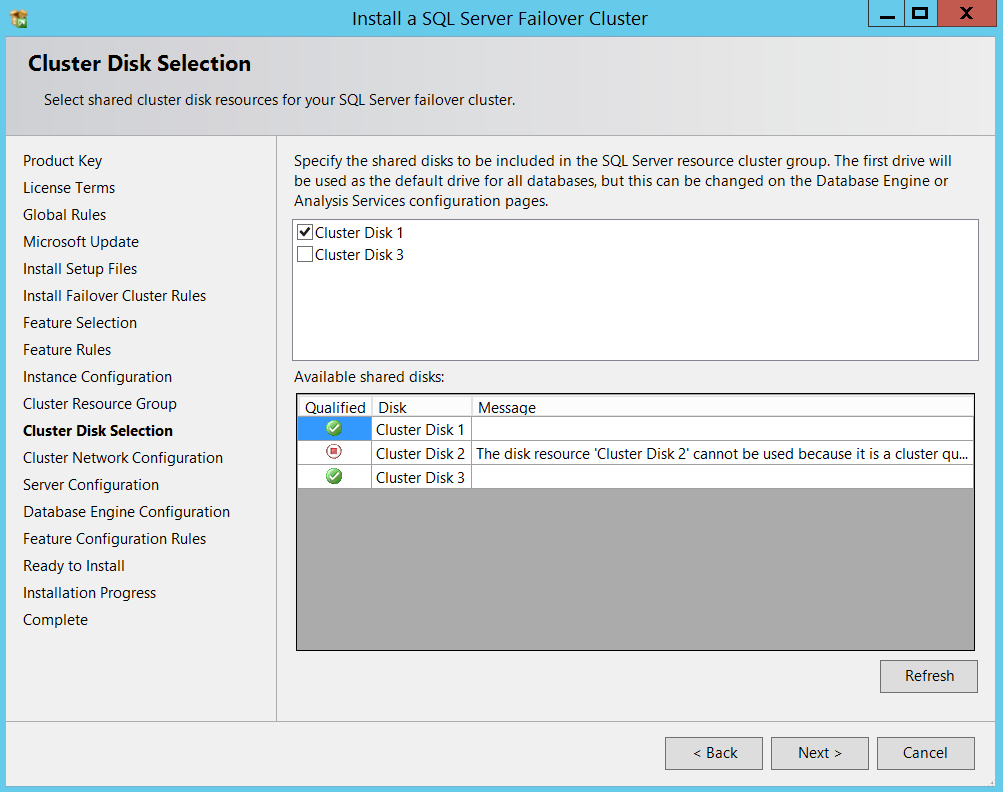
Now comes the cluster disk selection part, I am just proceeding with default selections for now. I will set my required paths when I get into Database engine configuration portion of the setup.
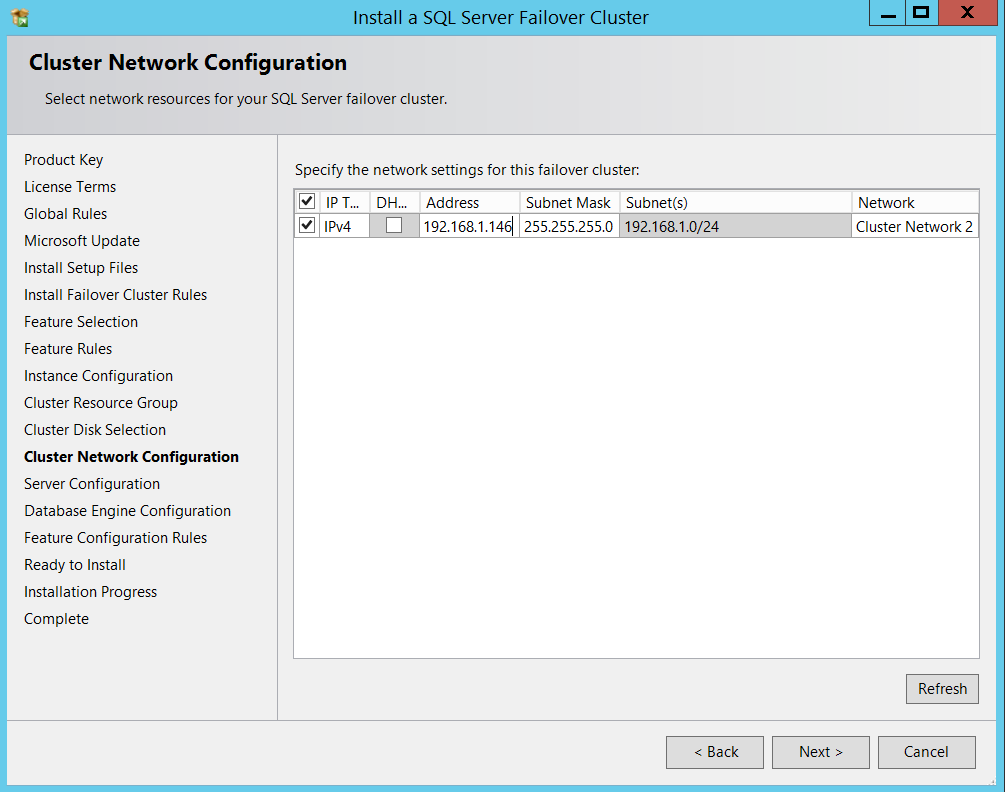
Uncheck DHCP and give it an IP and provide your service account details.
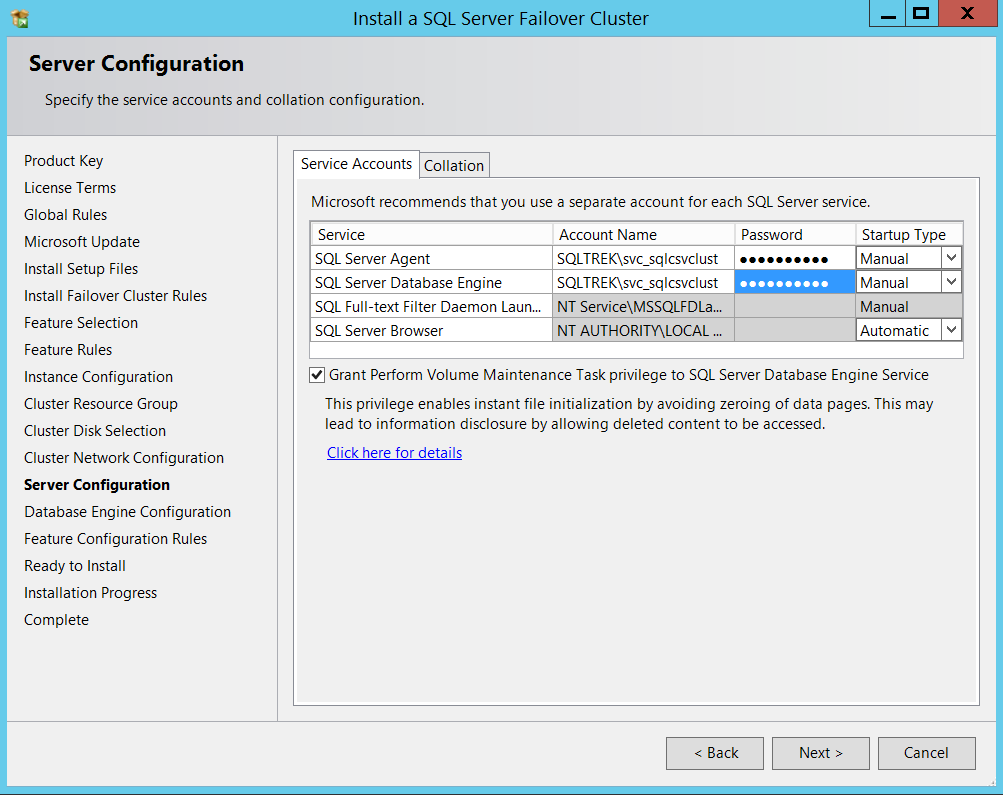
Tip: I usually recommend selecting “Grant Perform Volume Maintenance Tasks” check box. This basically enables Instant File Initialization for your data files.
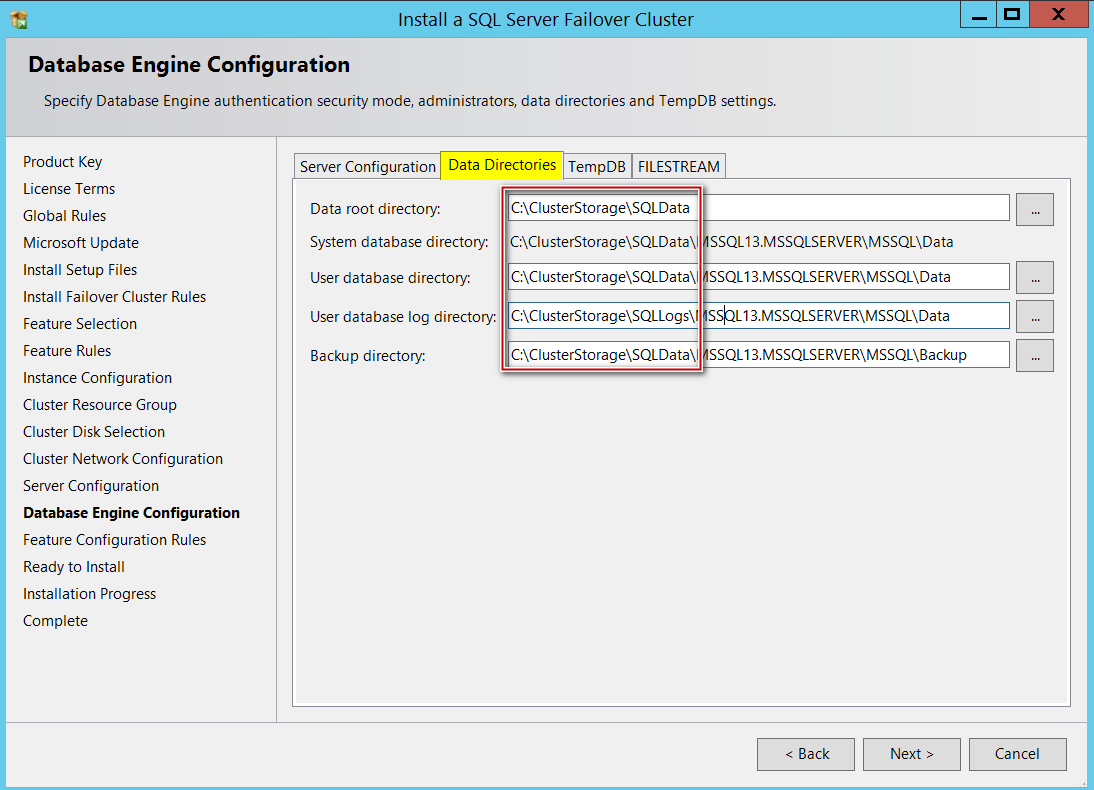
Now, we are at Database Engine Configuration section. This is where I provide my CSVs paths under “Data Directories” tab to host my databases.

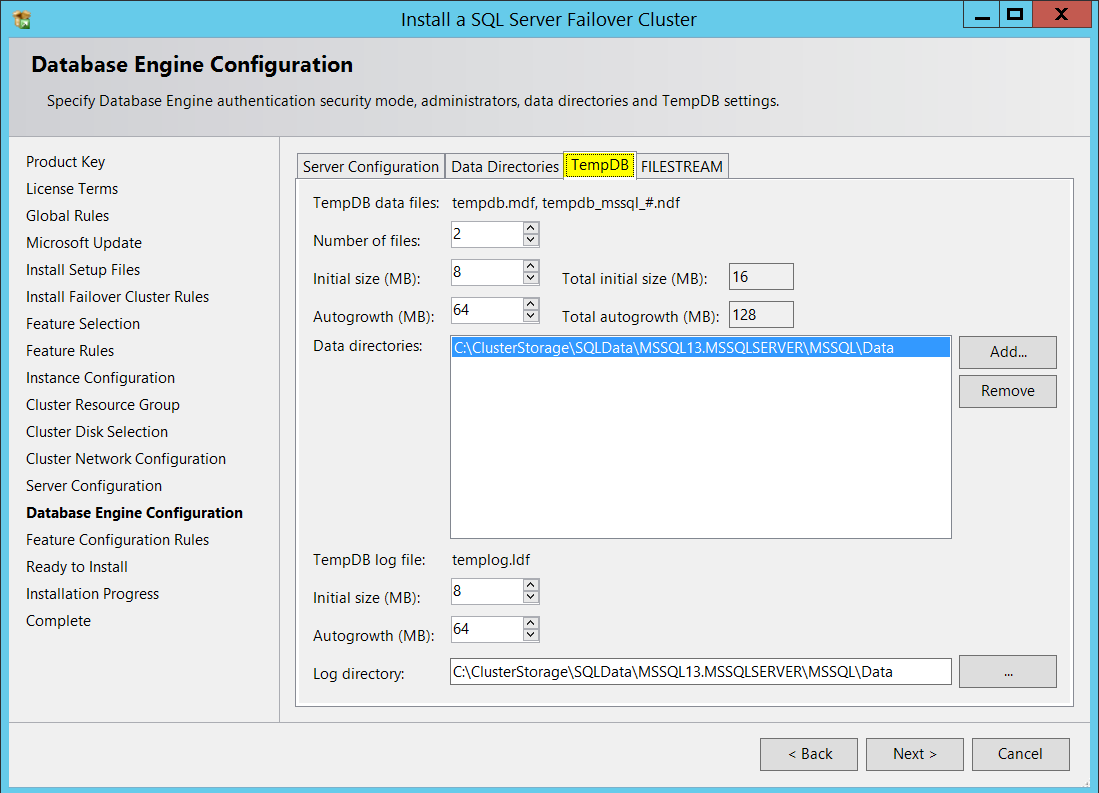
If you are curious, tempdb database file paths are shown below (You can also have your Tempdb on local disk(s) if that’s the standard practice you have in place)
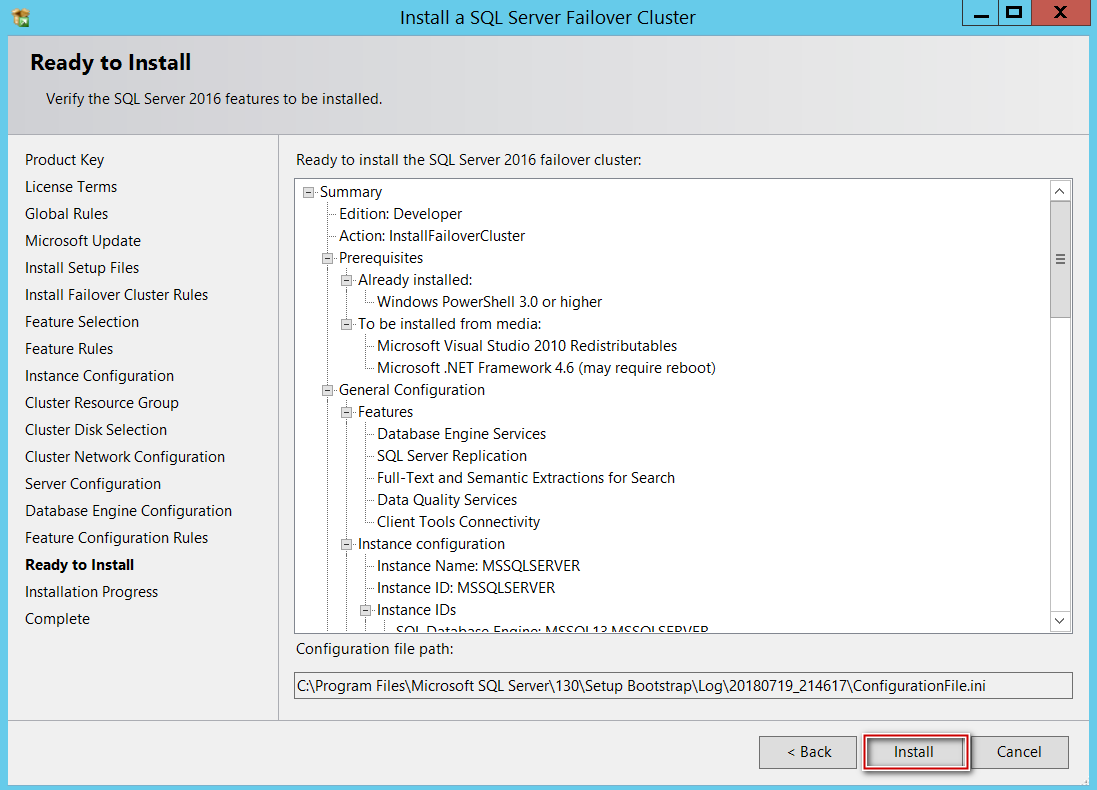
Once the database(s) paths have been configured pointing to CSV drives, click on Next and finalize Installation.
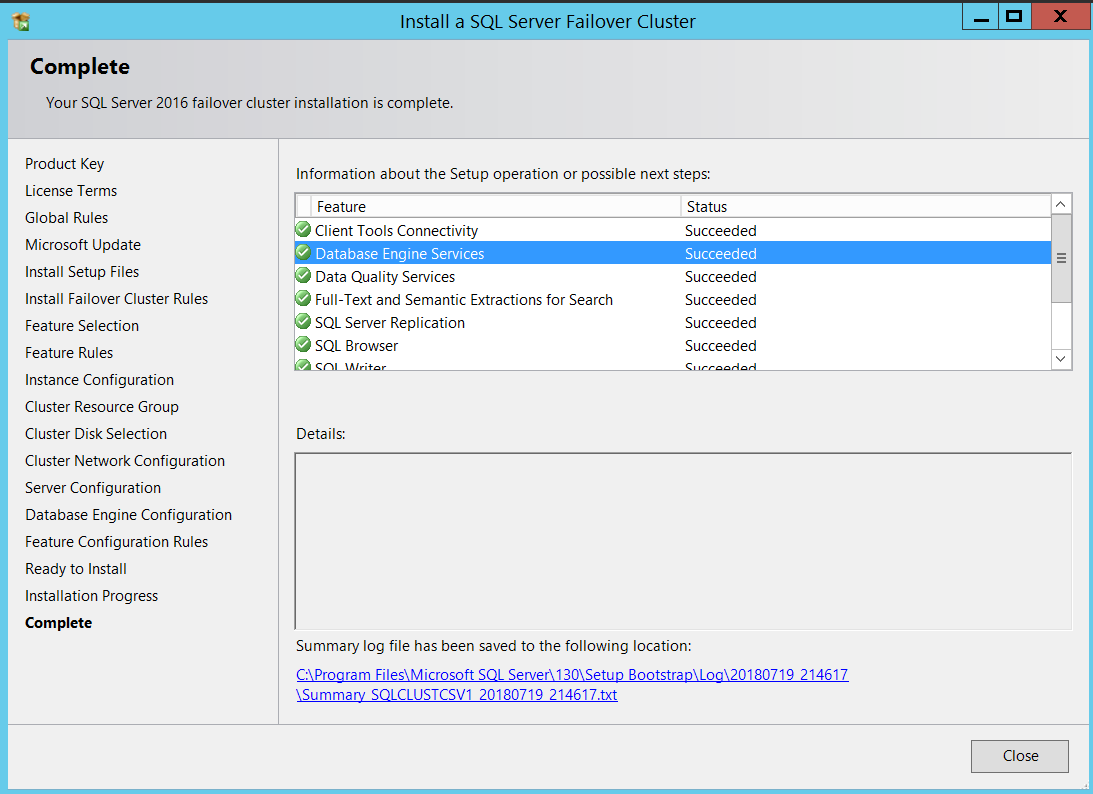
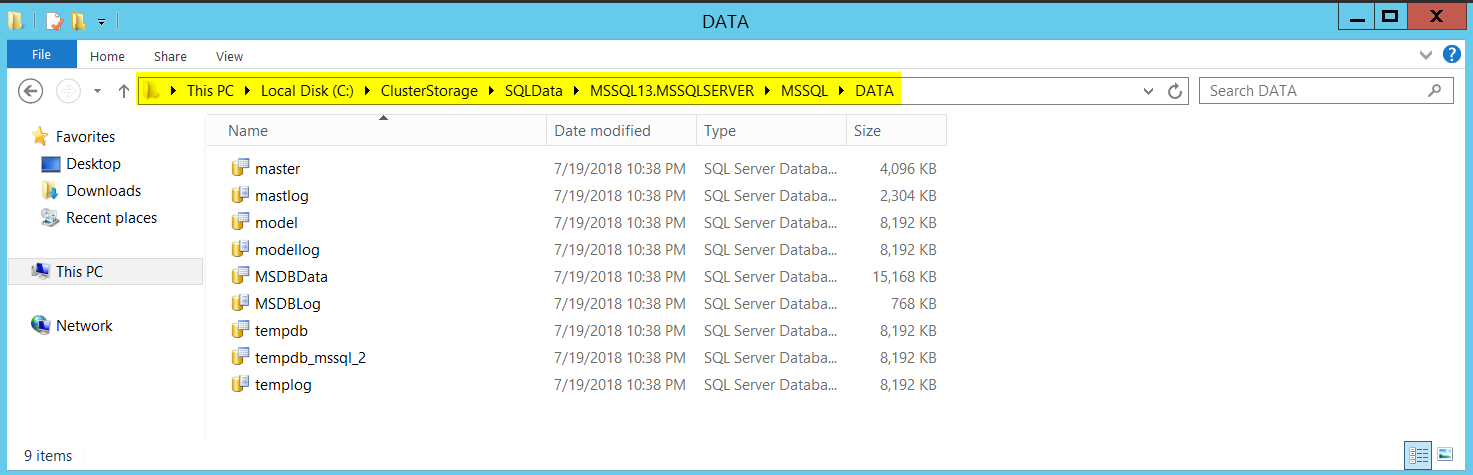
Upon successful Installation on my first node, below is how it looked navigating the file system.
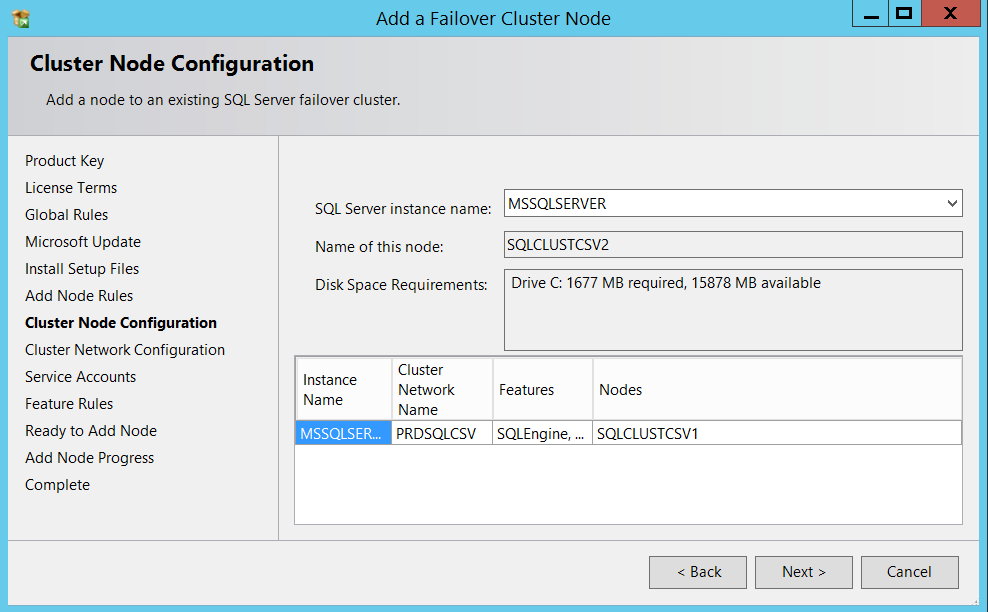
Now that we are done with installing SQL on first node, it’s time to add my second node (SQLCLUSTCSV2) to the SQL Server Failover cluster.
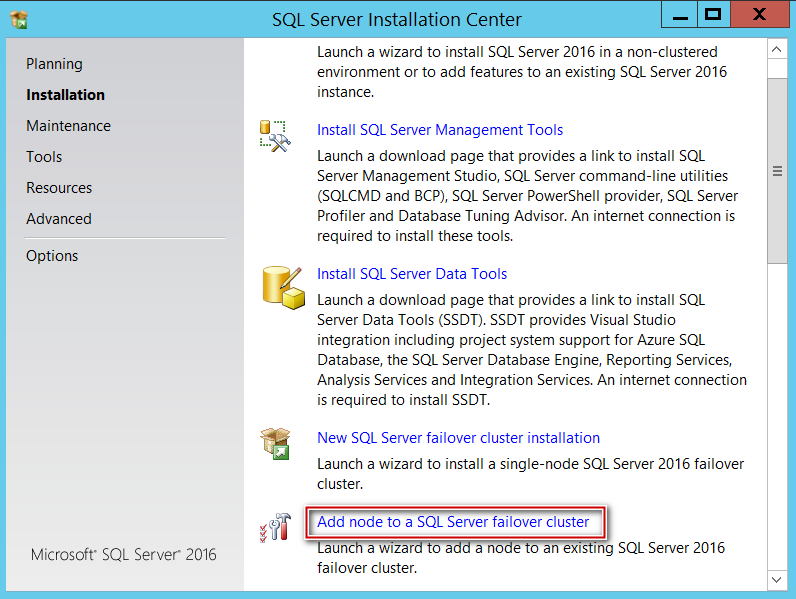
Inserted my SQL media on my Node 2 and made all the selections like choosing edition, Accept EULA and let the rule check run.
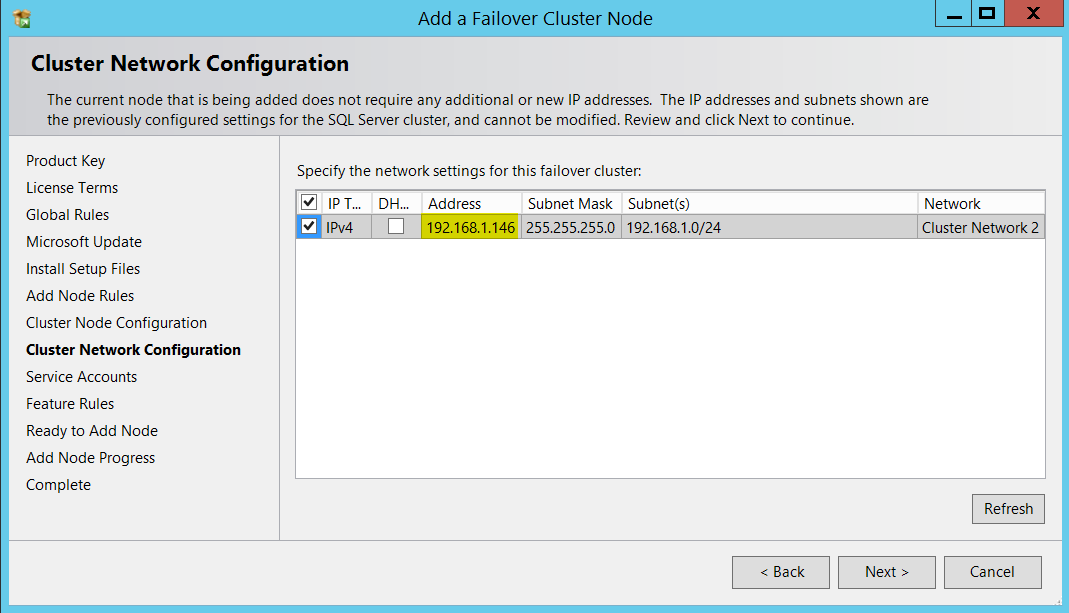
Made sure everything is intact in cluster network configuration section.
Now, it’s time to provide the service account(s) password(s).
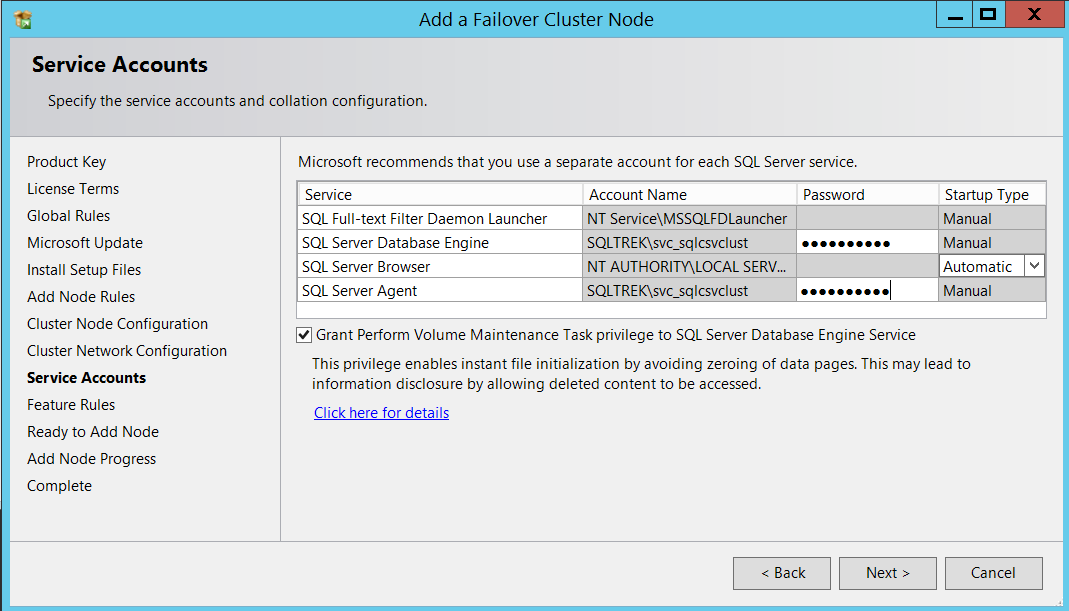
Proceed to Next and click Install, That’s about it.
This completes Installation of SQL Server Failover Cluster Instance leveraging CSVs. At this stage you can initiate a manual failover to make sure everything works as expected. Before concluding this article, I will show you what’s different when using CSVs instead of traditional shared storage from Failover Cluster Manager Standpoint when you connect to your cluster.
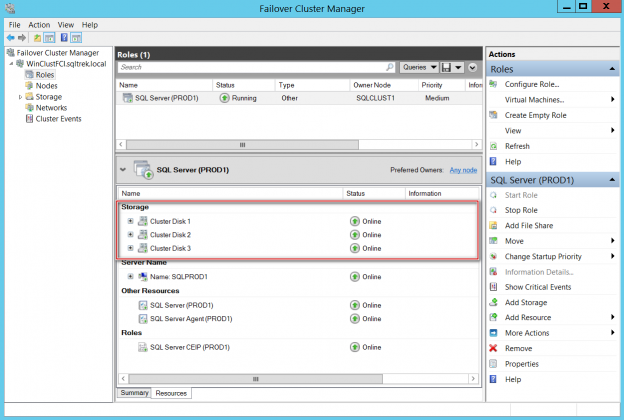
Below is the screenshot of my SQL Server FCI leveraging CSVs from Failover Cluster Manager.
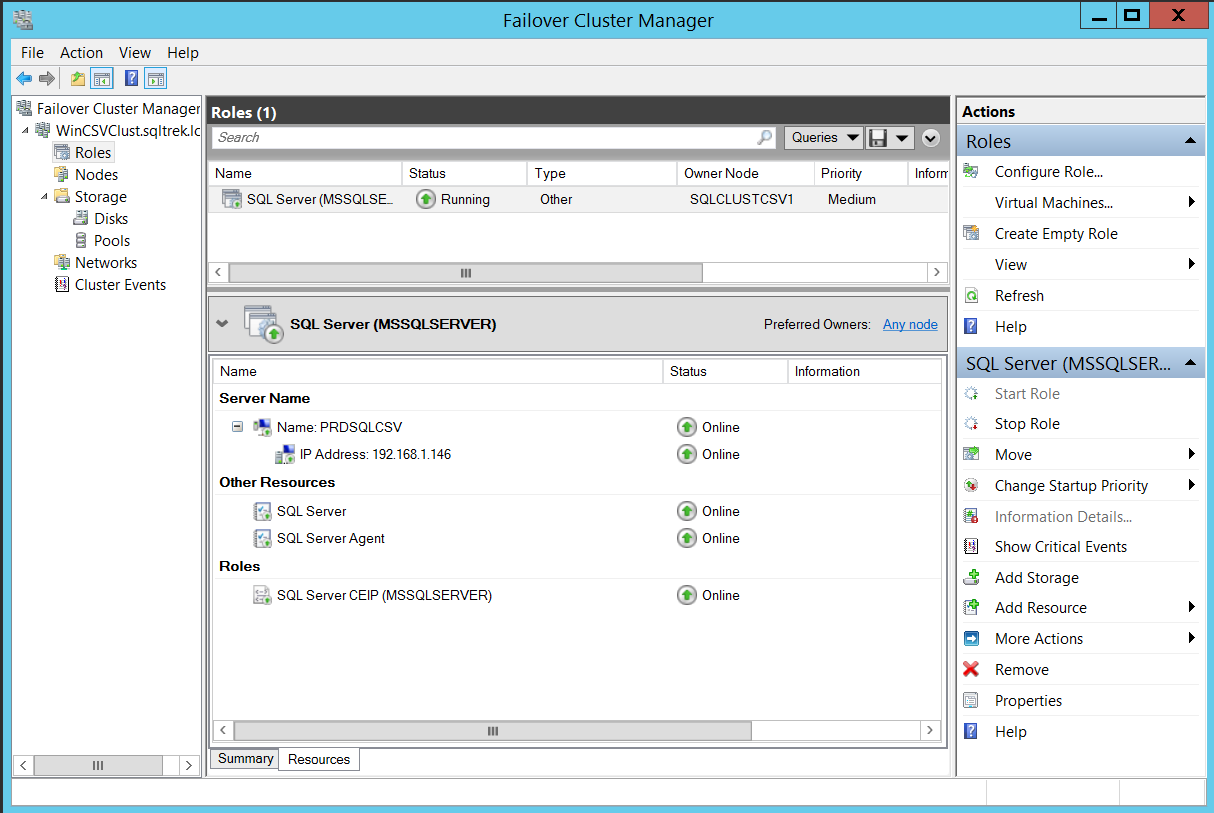
Notice that the disks are not listed (There is no visible storage group) under resources for SQL Server role, that’s because there is no direct dependency on the disks as we discussed earlier.
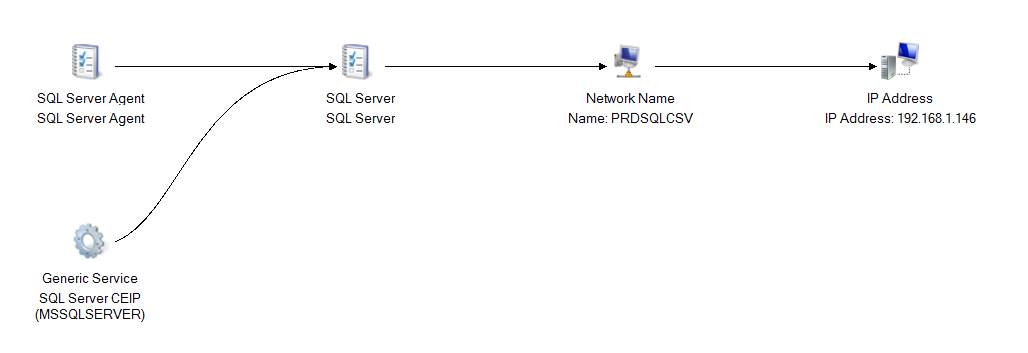
Below is the generated dependency report, you can see disks not being listed here as well!
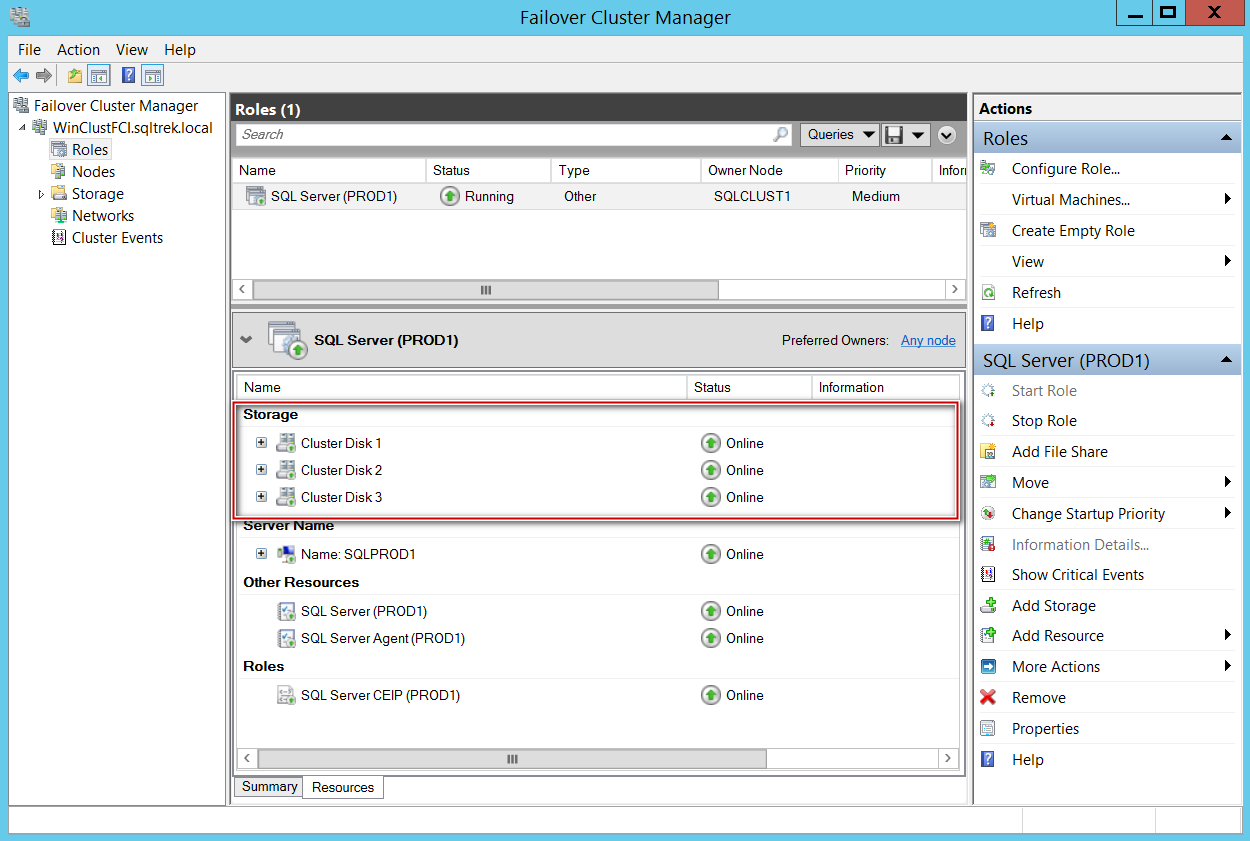
Let’s compare it what I have in my other FCI with traditional shared storage setup. You can see disks listed under resources and also being displayed in Dependency report.

Conclusion:
Cluster Shared Volumes are definitely a great enhancement which SQL Server DBAs can take advantage of assuming you are running SQL 2014 or above. With so many added benefits over traditional storage solution, I suggest to test CSVs or at least consider implementing in POC environments when setting up an FCI.
<
View all posts by Sreekanth Bandarla
- SQL Server with a Docker container on Windows Server 2016 - April 15, 2019
- Simulating a Multi Subnet cluster for setting up SQL Server Always On Availability Groups – lab setup - March 14, 2019
- Deploy SQL Server with Cluster Shared Volumes – part 2 - September 19, 2018