

In this article, we will learn how to configure Azure Purview to catalog data hosted in AWS S3.
Introduction
Data exists in various types of formats and hosted in equally varied type repositories depending on the format of data. With the advent of the cloud, generally, every public cloud provider like Amazon AWS, Microsoft Azure, and Google Cloud Platform provides a variety of data hosting avenues. A large-scale enterprise is very likely to have a multi-cloud footprint, where data is hosted on more than one cloud. As the data footprint on the cloud becomes larger, the need for a data catalog becomes increasingly important. Each cloud provider provides its format of the cloud-native data catalog. But even after employing a cloud provider-specific catalog, an enterprise may struggle to get a 360-degree view of data on the cloud. The reason being each cloud provider providers the ability to catalog data hosted on its own cloud only, which compels the end-users to reconcile or reference data from multiple catalogs, as the data catalog on the cloud may not integrate with cross-cloud data hosting services. As the client needs evolve, so do the cloud services. Azure Purview is the brand-new data catalog and governance-related service on the Azure cloud. It has introduced features to support cataloging data hosted on AWS Simple Storage Service (S3), which is typically considered the storage layer of data lake on AWS.
Pre-requisite
Before we start with the actual configuration tasks, some pre-requisites are needed to be met, so that we can focus on the Azure Purview configuration. Firstly, it is assumed that one has access to an Azure account with administrative privileges to operate the Azure Purview service. Ensure that you have access to this service before starting the below exercise. Secondly, as we are going to catalog data hosted in AWS S3, we need an AWS account with some sample files hosted on S3 in a bucket, at the least. It is assumed that one has administrative privileges to access AWS S3 and AWS IAM (Identity and Access Management) services, to host data as well as configure roles and privileges such that access can be granted to Purview to scan the data. Once this setup is in place, we are good the start the actual configuration tasks.
Configuring Azure Purview for integrating with AWS S3
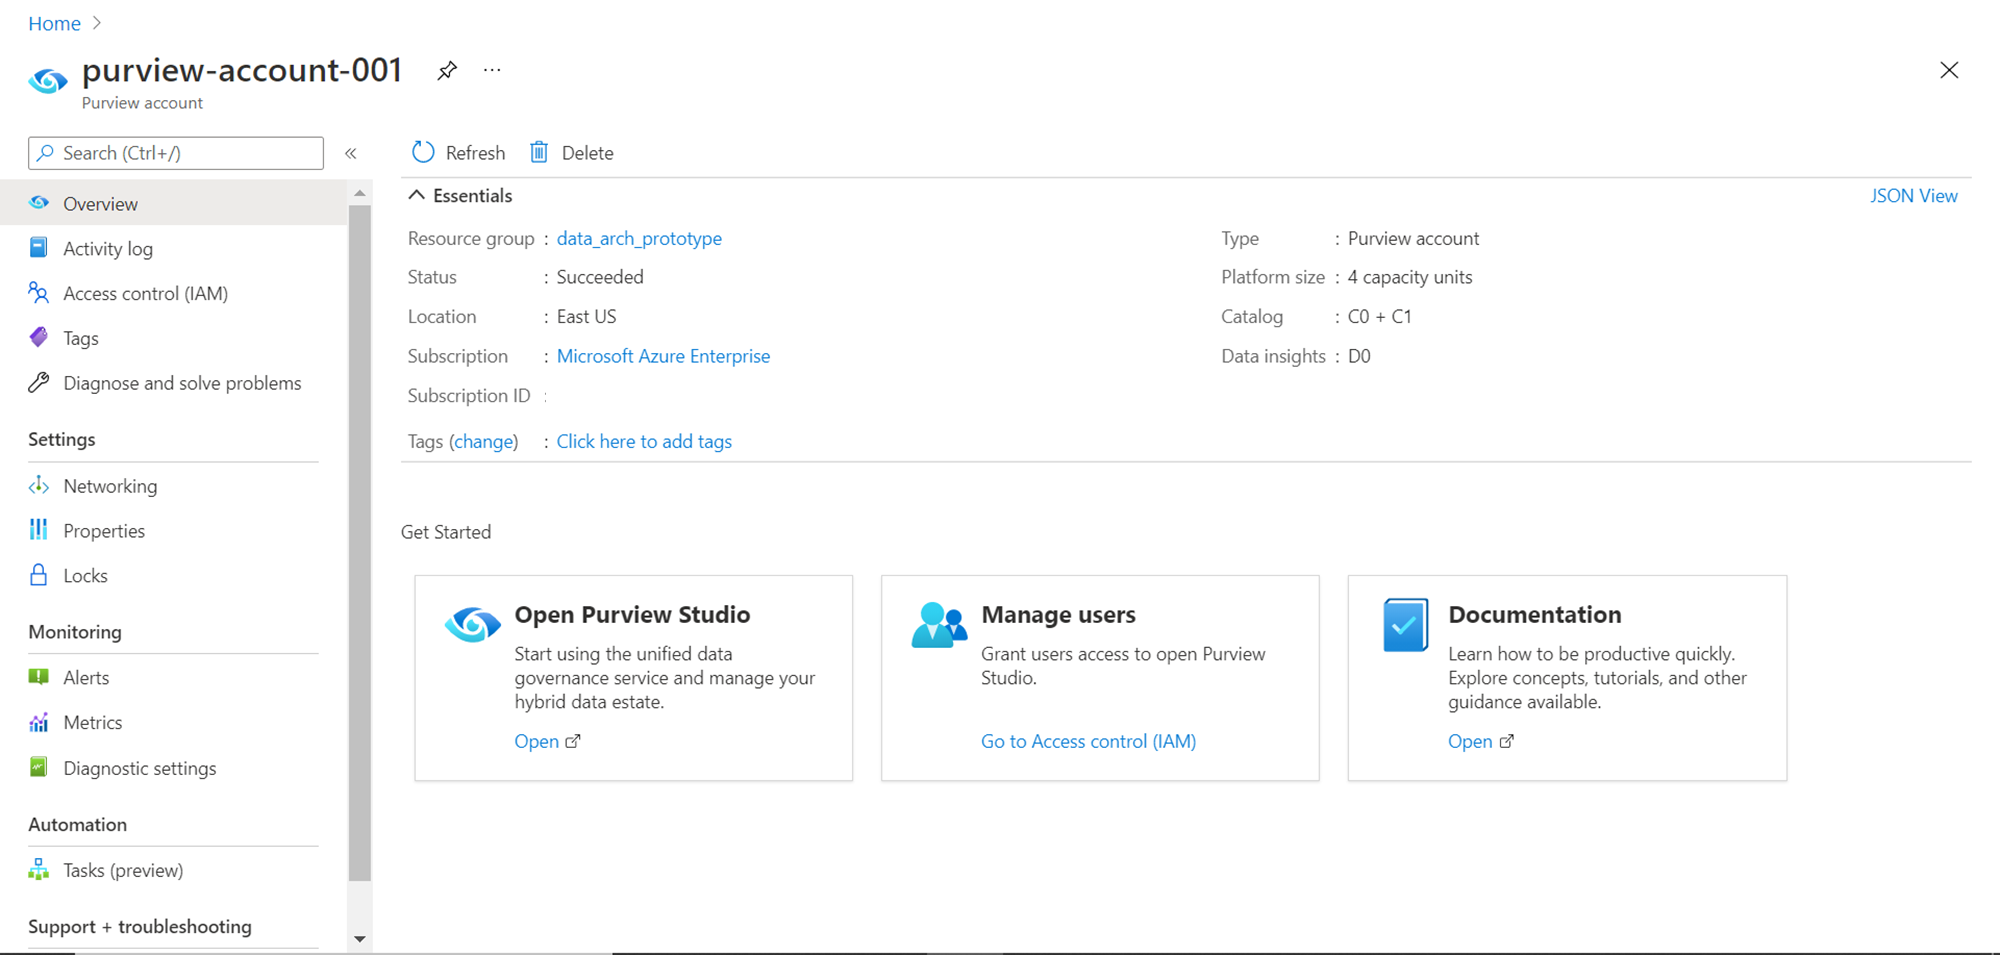
The first step in configuring Purview for the objective in question is by creating an instance of the Azure Purview service. Navigate to the Azure portal home page, search for Purview, open it to land on the dashboard page, and create a new instance. Once an instance is created, the home page of the instance would look as shown below. This is the point from where we can open the Azure Purview Studio and start configuring it.
Open the Azure Purview studio and you would land on the dashboard of the studio. By default, when you create a new instance, no data source would have got registered by itself. We need to register data sources that we need to catalog. Navigate to Purview studio and click on the Sources section, and we should be able to see a screen as shown below.
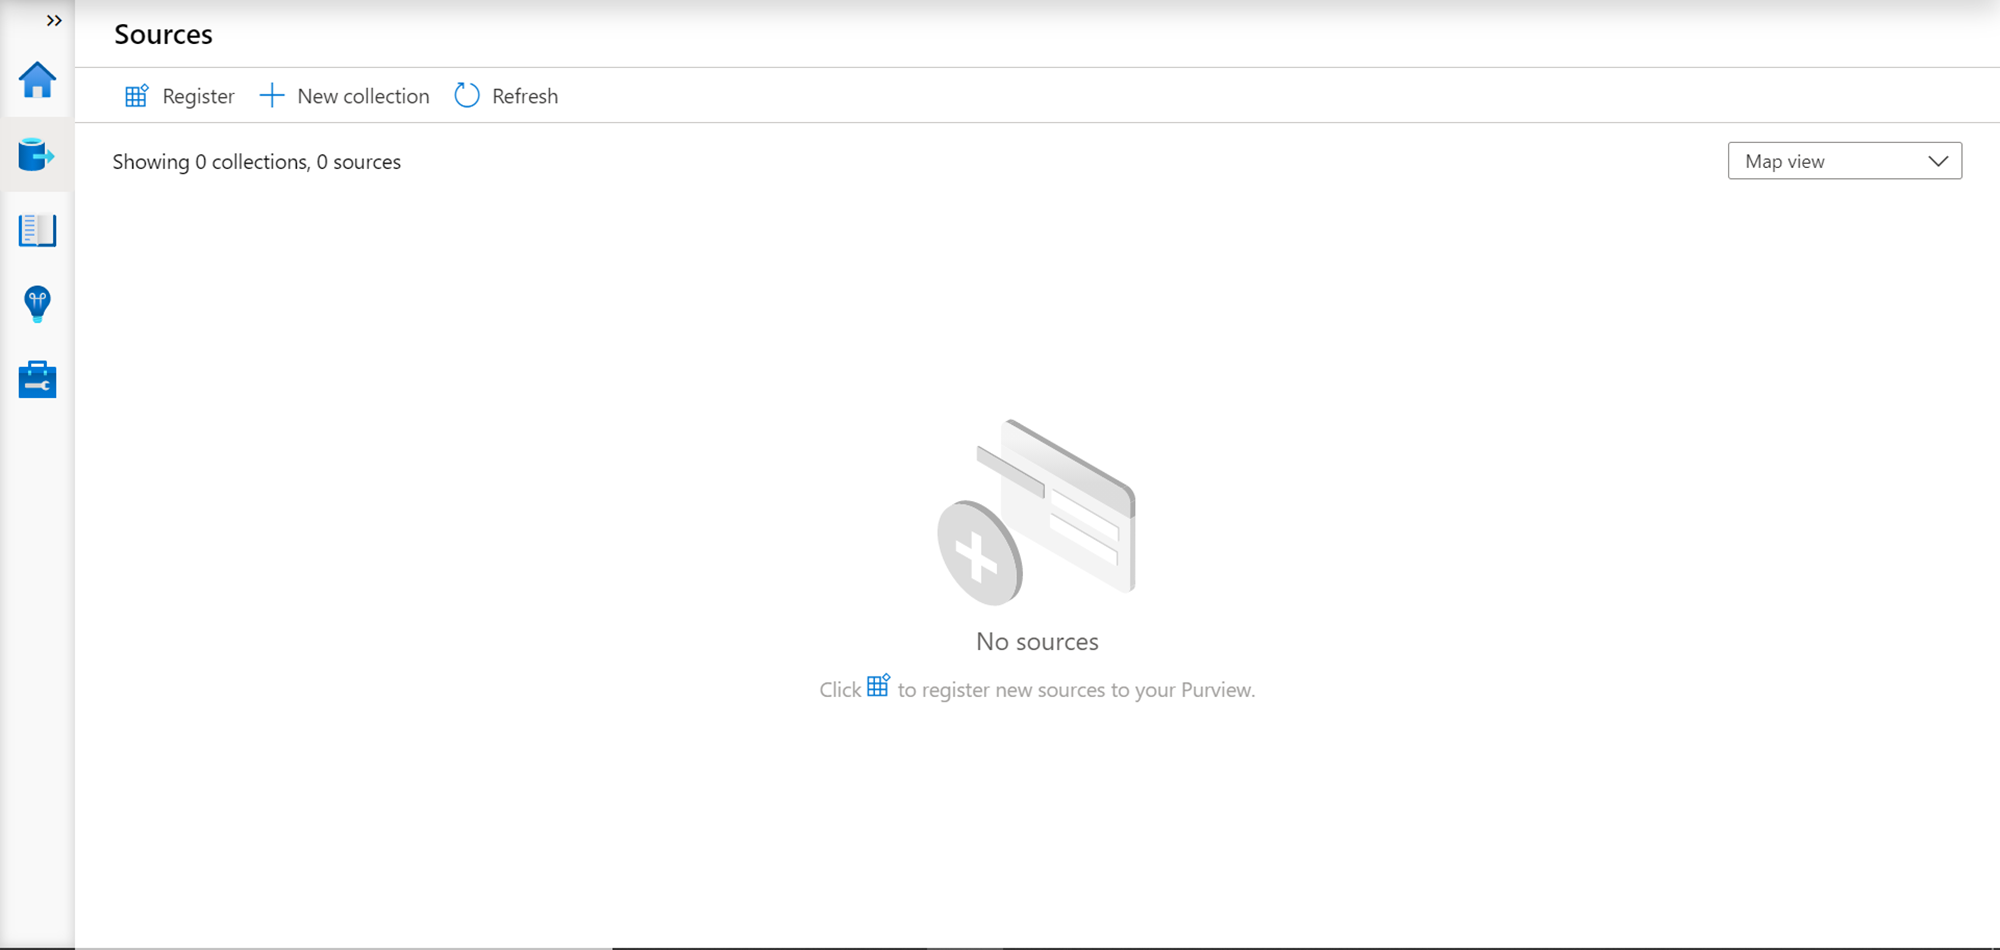
As we do not have any data sources registered yet, click on the Register button to invoke the data source registration wizard. There are two ways to catalog data hosted in S3 – by registering Amazon S3 as the source or AWS Account as the source which wraps multiple supported data sources.
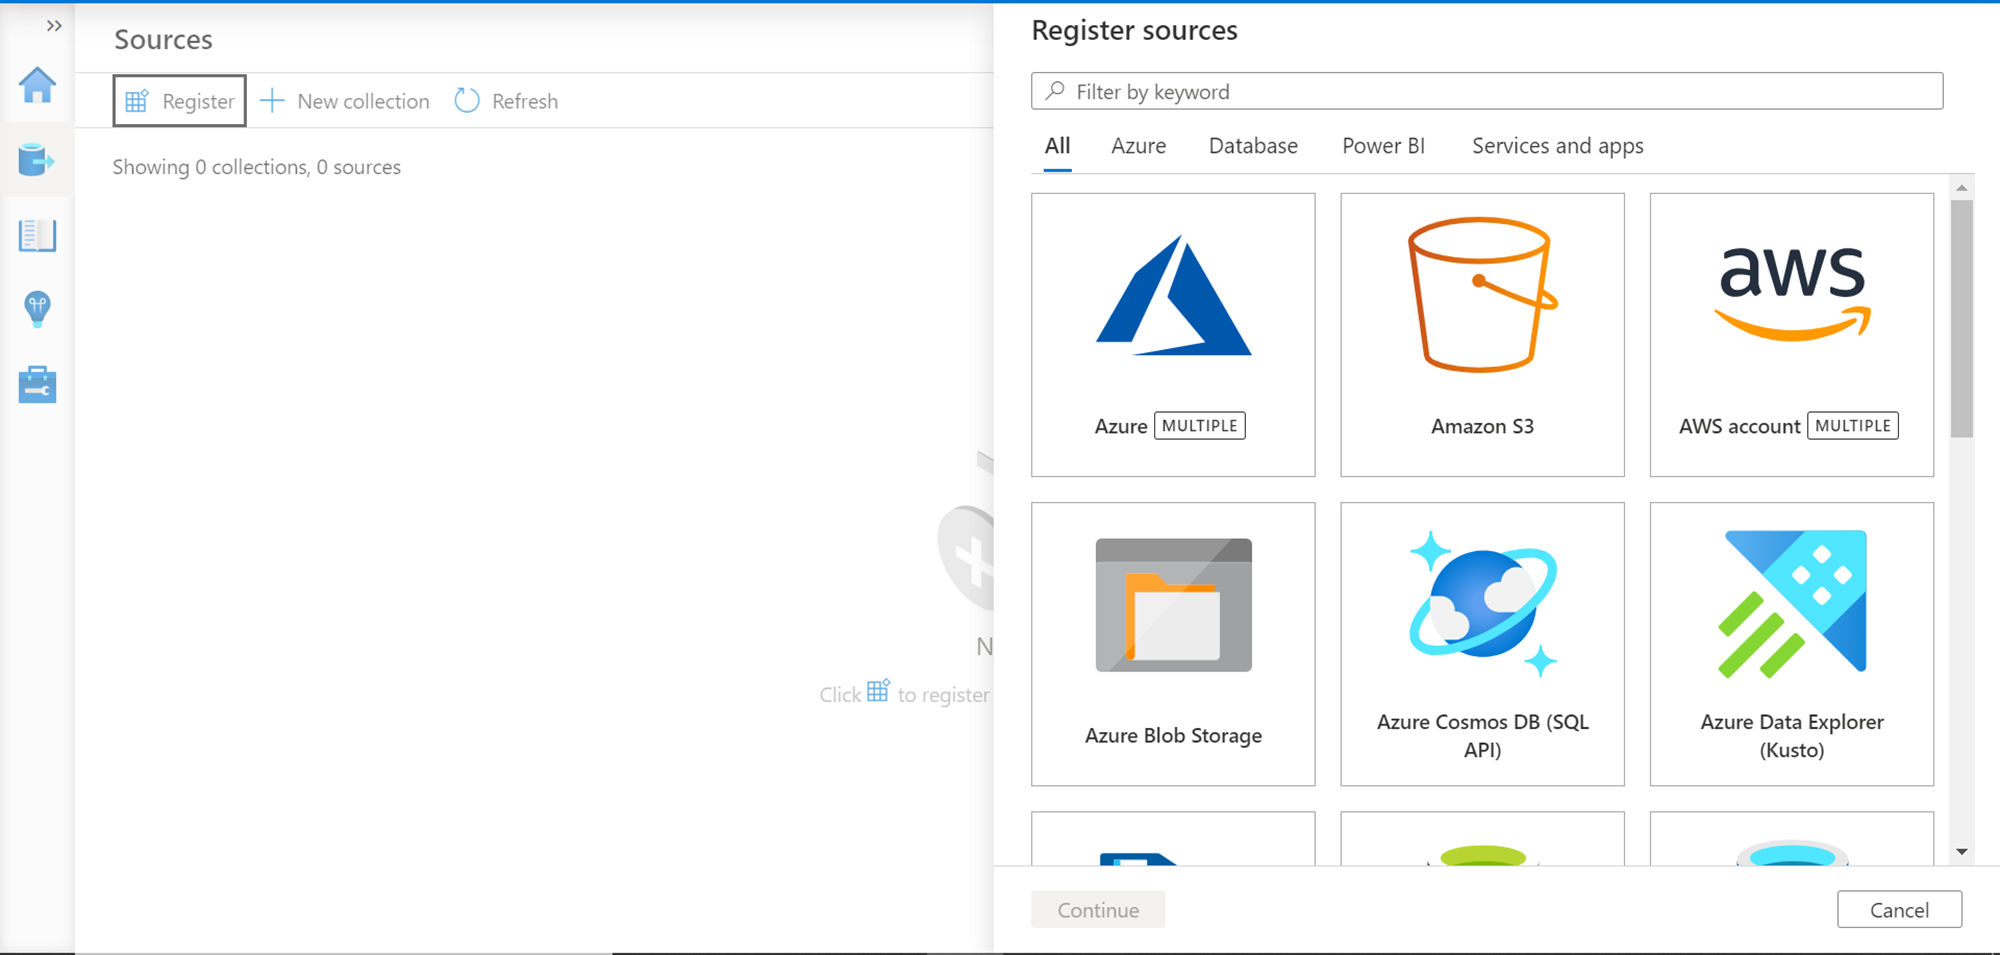
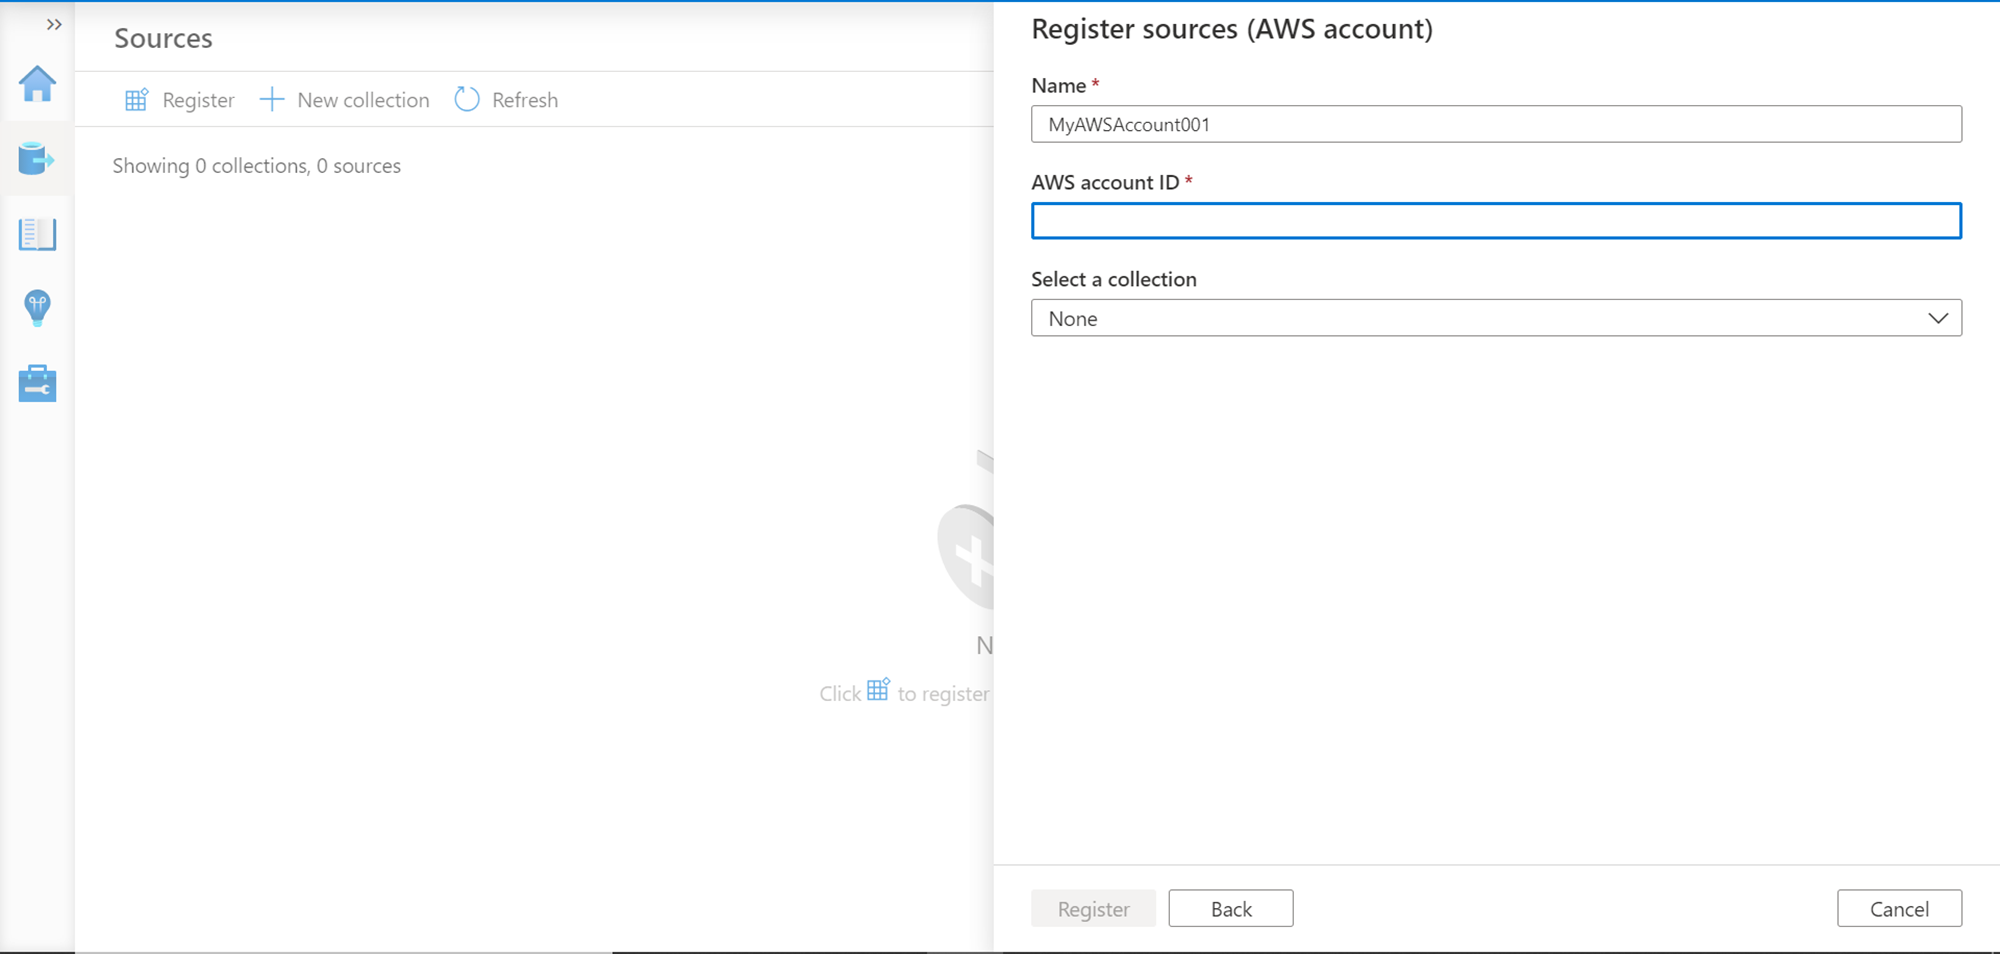
Select AWS Account as the data source and click on the Continue button. We need to provide a name for the data source being registered, AWS account ID that contains that data that we intend to catalog, and optionally a collection in which we intend to categorize the data source being registered. Provide these details and click on the Register button to complete the registration process.
Once the data source is registered, we should be able to see a screen like the one shown below. This layout shows all the data sources registered with the Azure Purview instance.
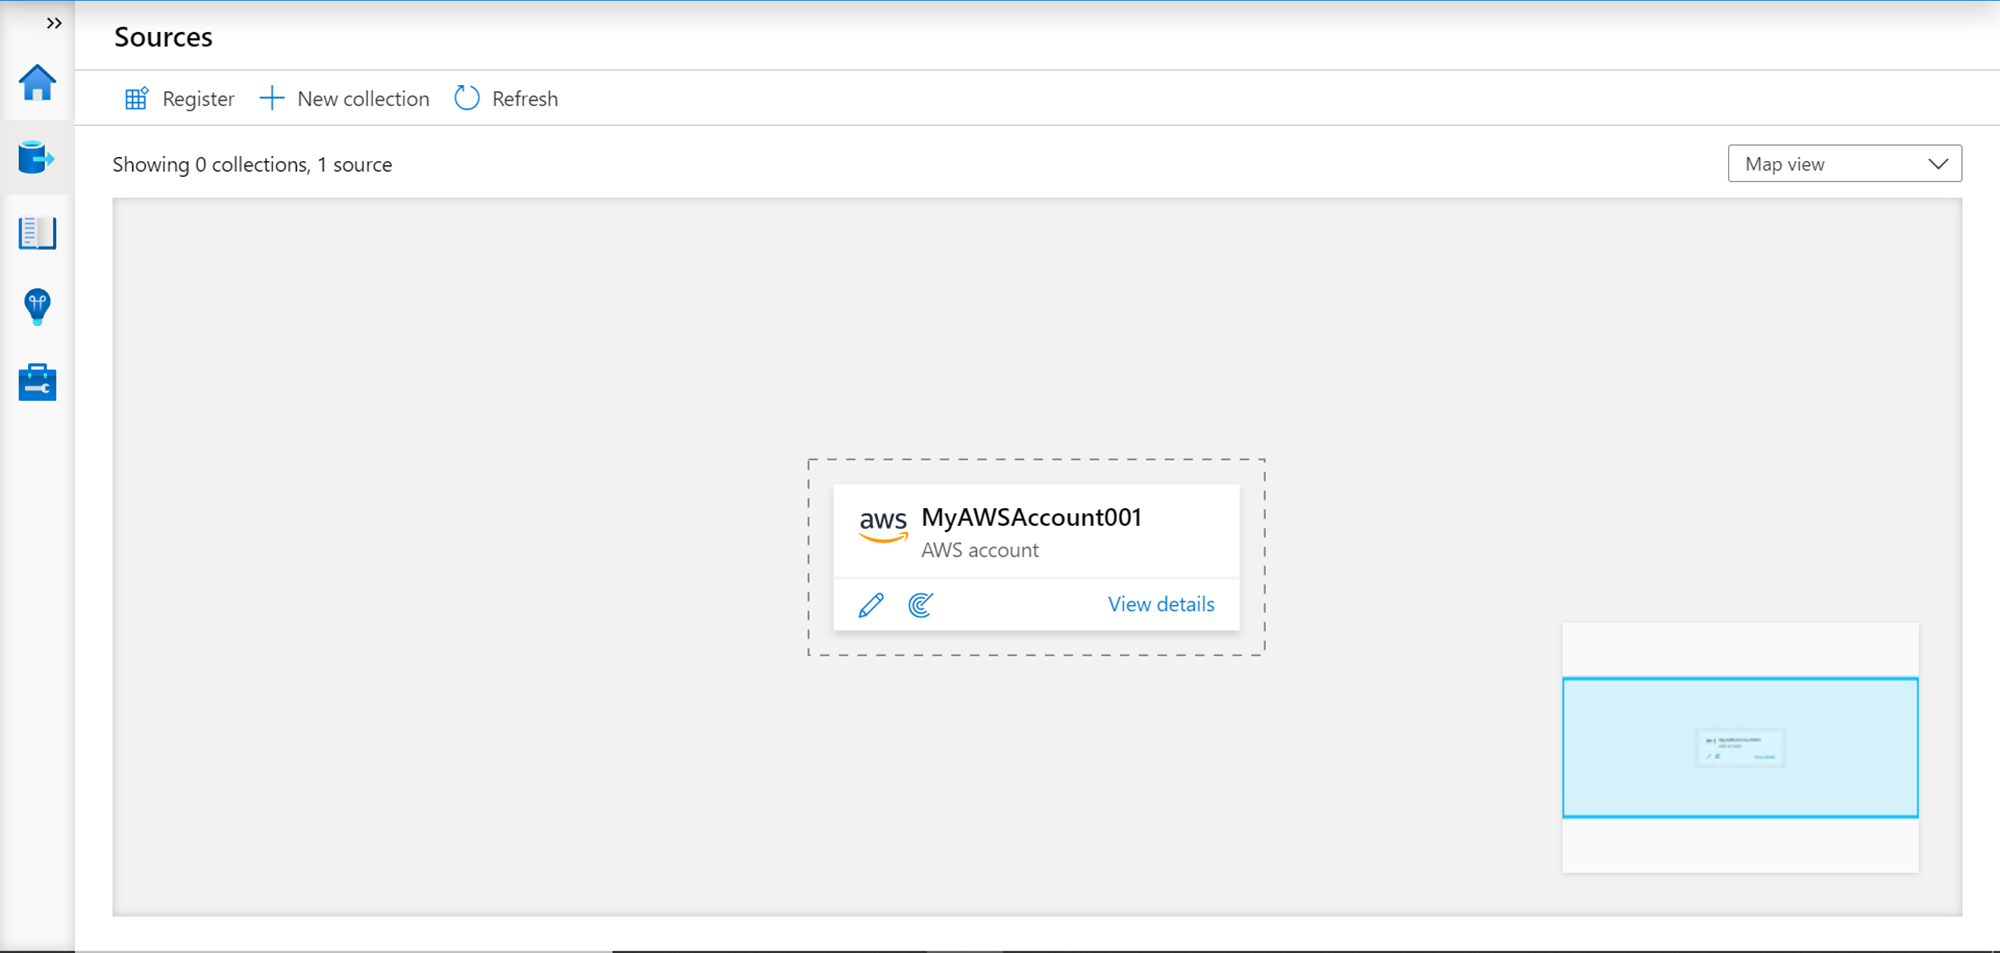
Now that the data source is registered, we need to scan the data to catalog it. We can click on the icon that looks like a semi-circle to schedule a new scan. Once we click this icon, a new pop-up would appear, as shown below. We need to provide a name for the scan. The integration runtime would be selected by default, so we don’t need to make any changes to this setting. As of the draft of this article, Amazon S3 is the only supported data source in the AWS account, so only that would appear. Under the credential drop-down, you won’t find any credentials as we have not created one yet.
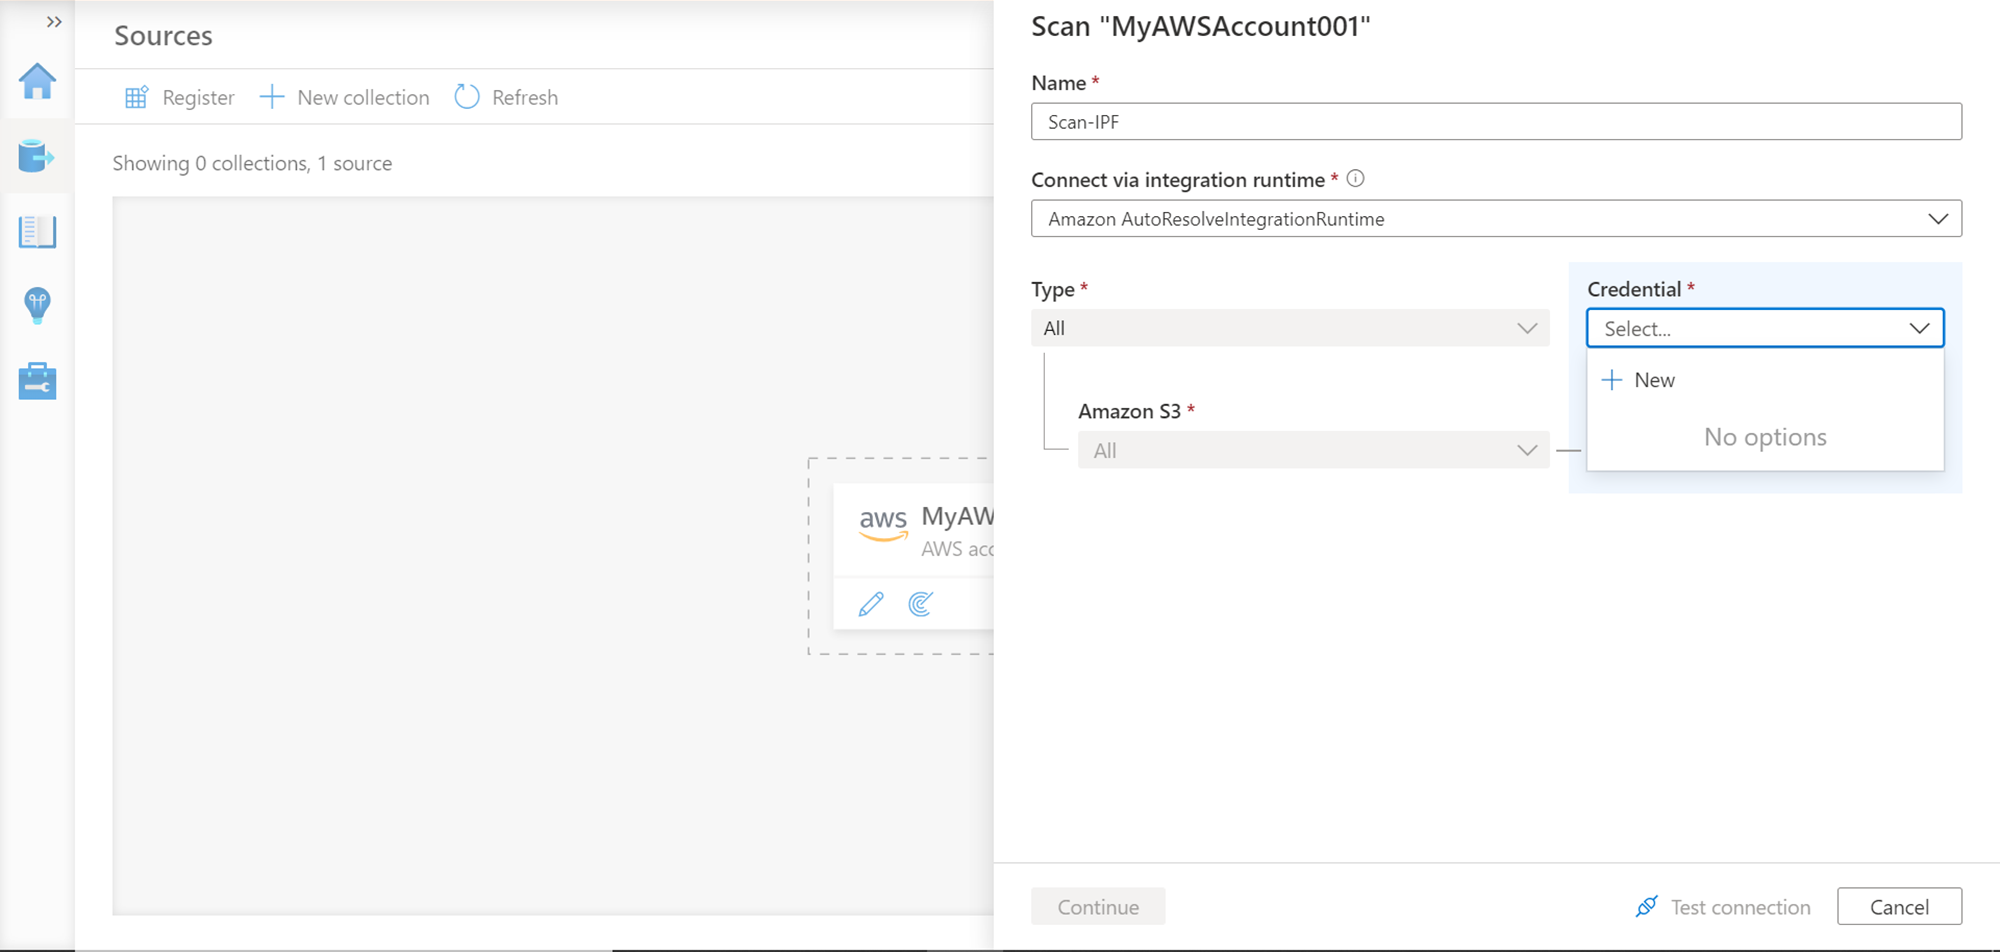
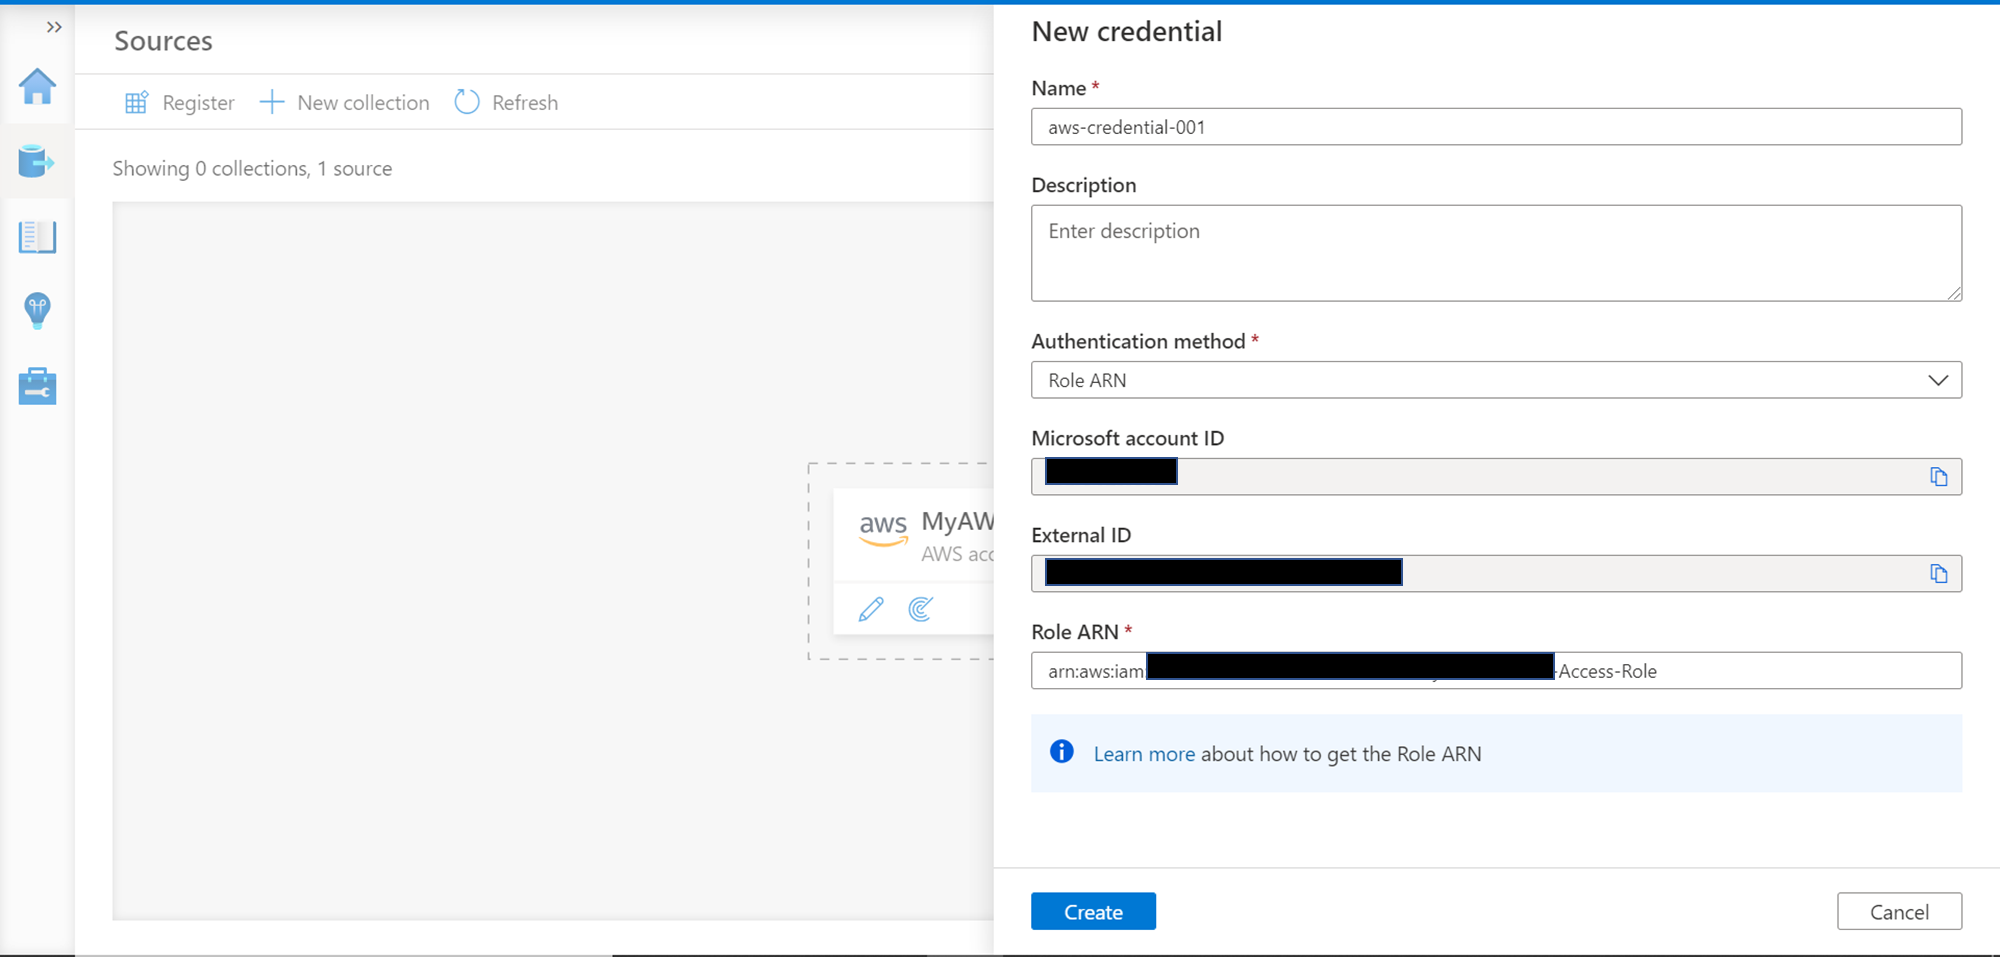
We need to create a new credential by clicking on the New option under the Credential dropdown. This would open a new wizard, as shown below. We need to provide a name for the new credential being created. The authentication method would be Role Amazon Resource Name (ARN). A Microsoft account ID, External ID would appear, which we need to use and configure on AWS Role, so the role allows this ID to account Amazon S3 service and data hosted on it. The role which will allow this has to be specified in the Role ARN field.
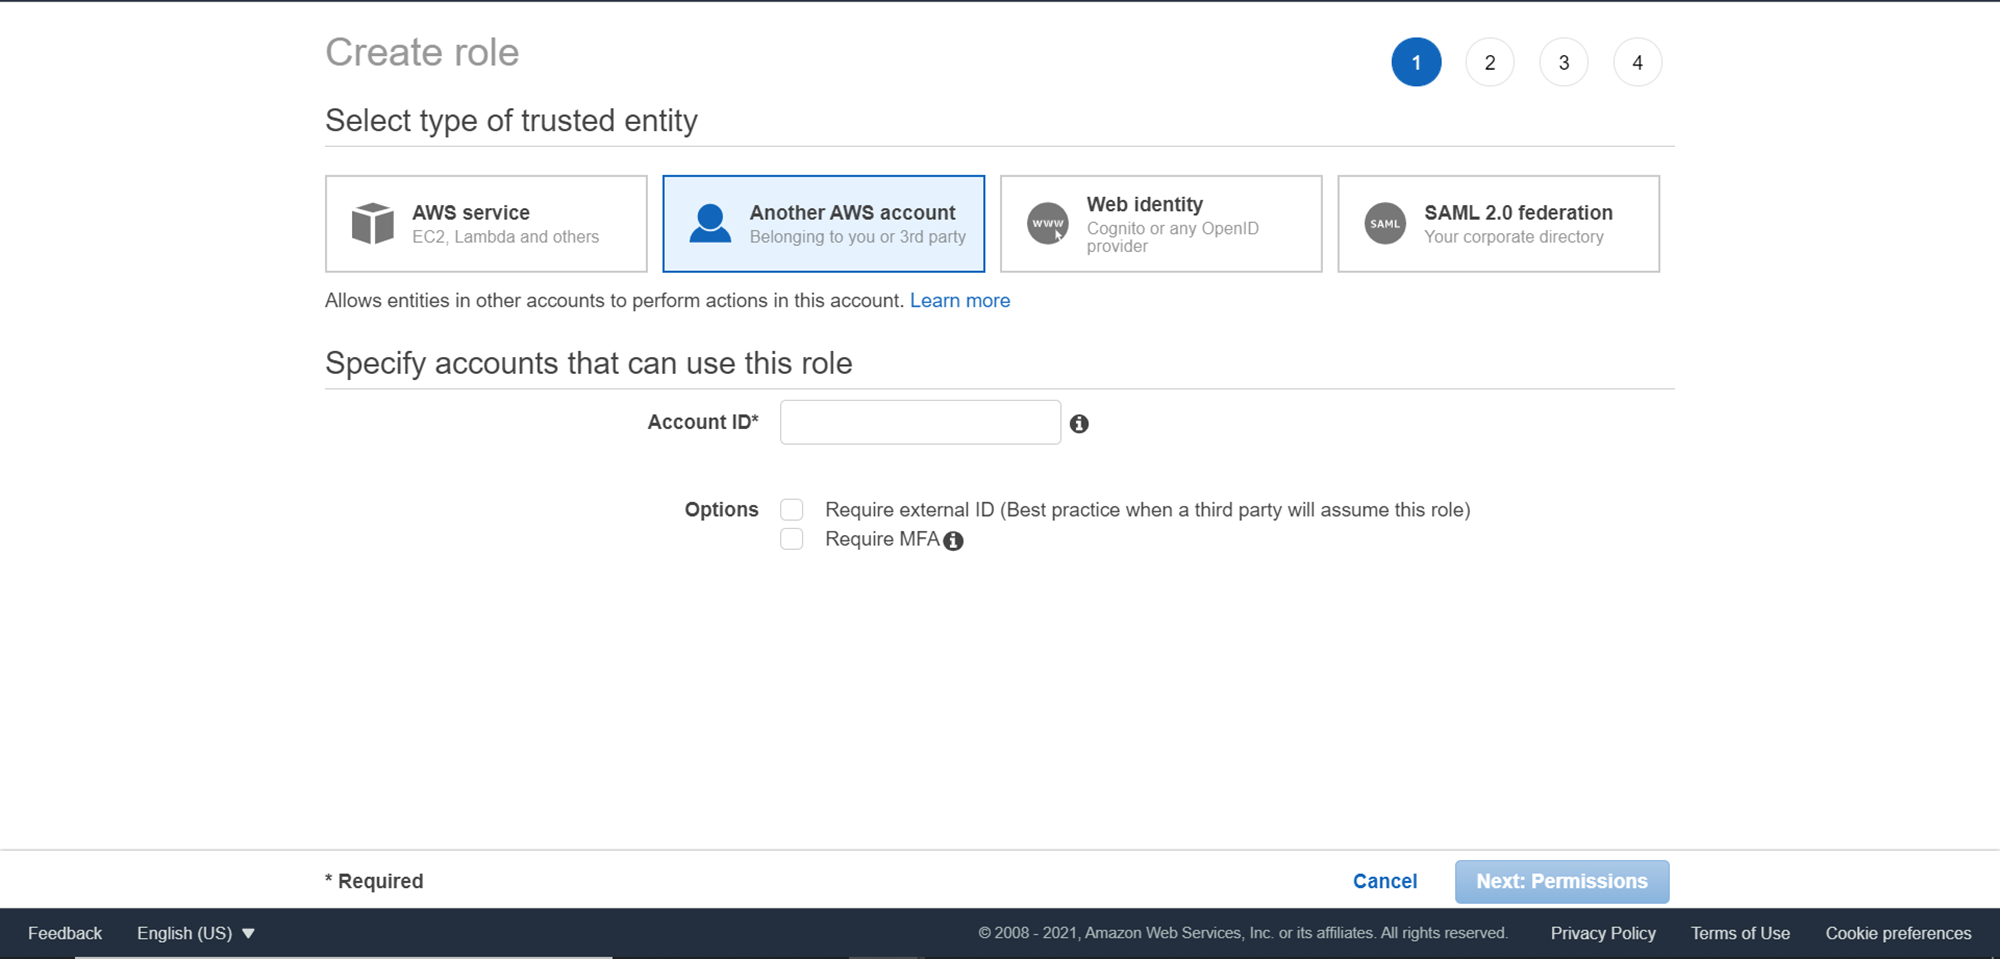
We have not configured the role in the AWS account yet. So, to do that, log on and navigate to the AWS Console, search for IAM service and open it to land on the dashboard page. Click on the Roles tab and click on the New Role button to create a new IAM Role. We would have the options as shown below. Select Another AWS account option, and it would show the option to specify the Account ID—key in the Account ID that we received in the previous step. Tick the checkbox that says Require external ID and specify the external ID that we got from the previous step. Once done, click on the Next: Permissions button.
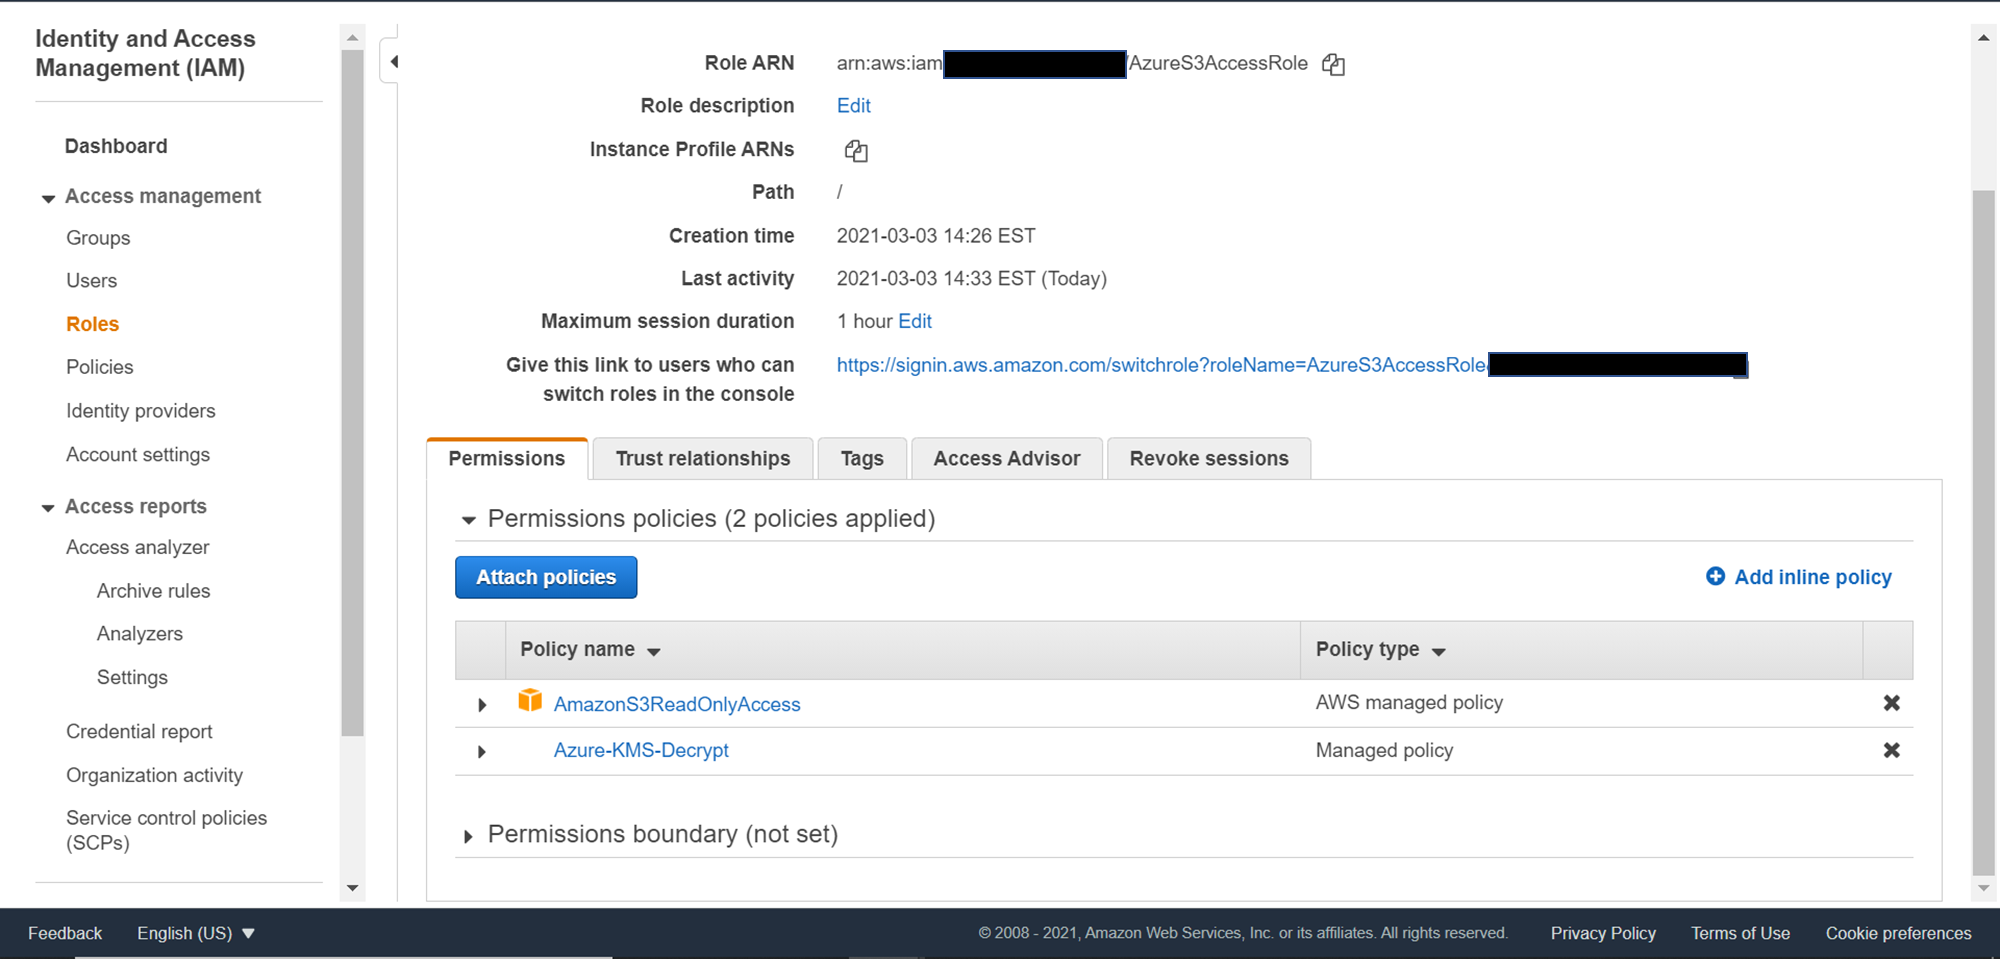
Provide Read-Only access to Amazon S3 service and optionally permission to Decrypt the data if the data is stored in an encrypted format and create the role. Once the role is created, it would look as shown below. Copy the Role ARN and key in the same in the scan wizard from where we got the account ID and external ID.
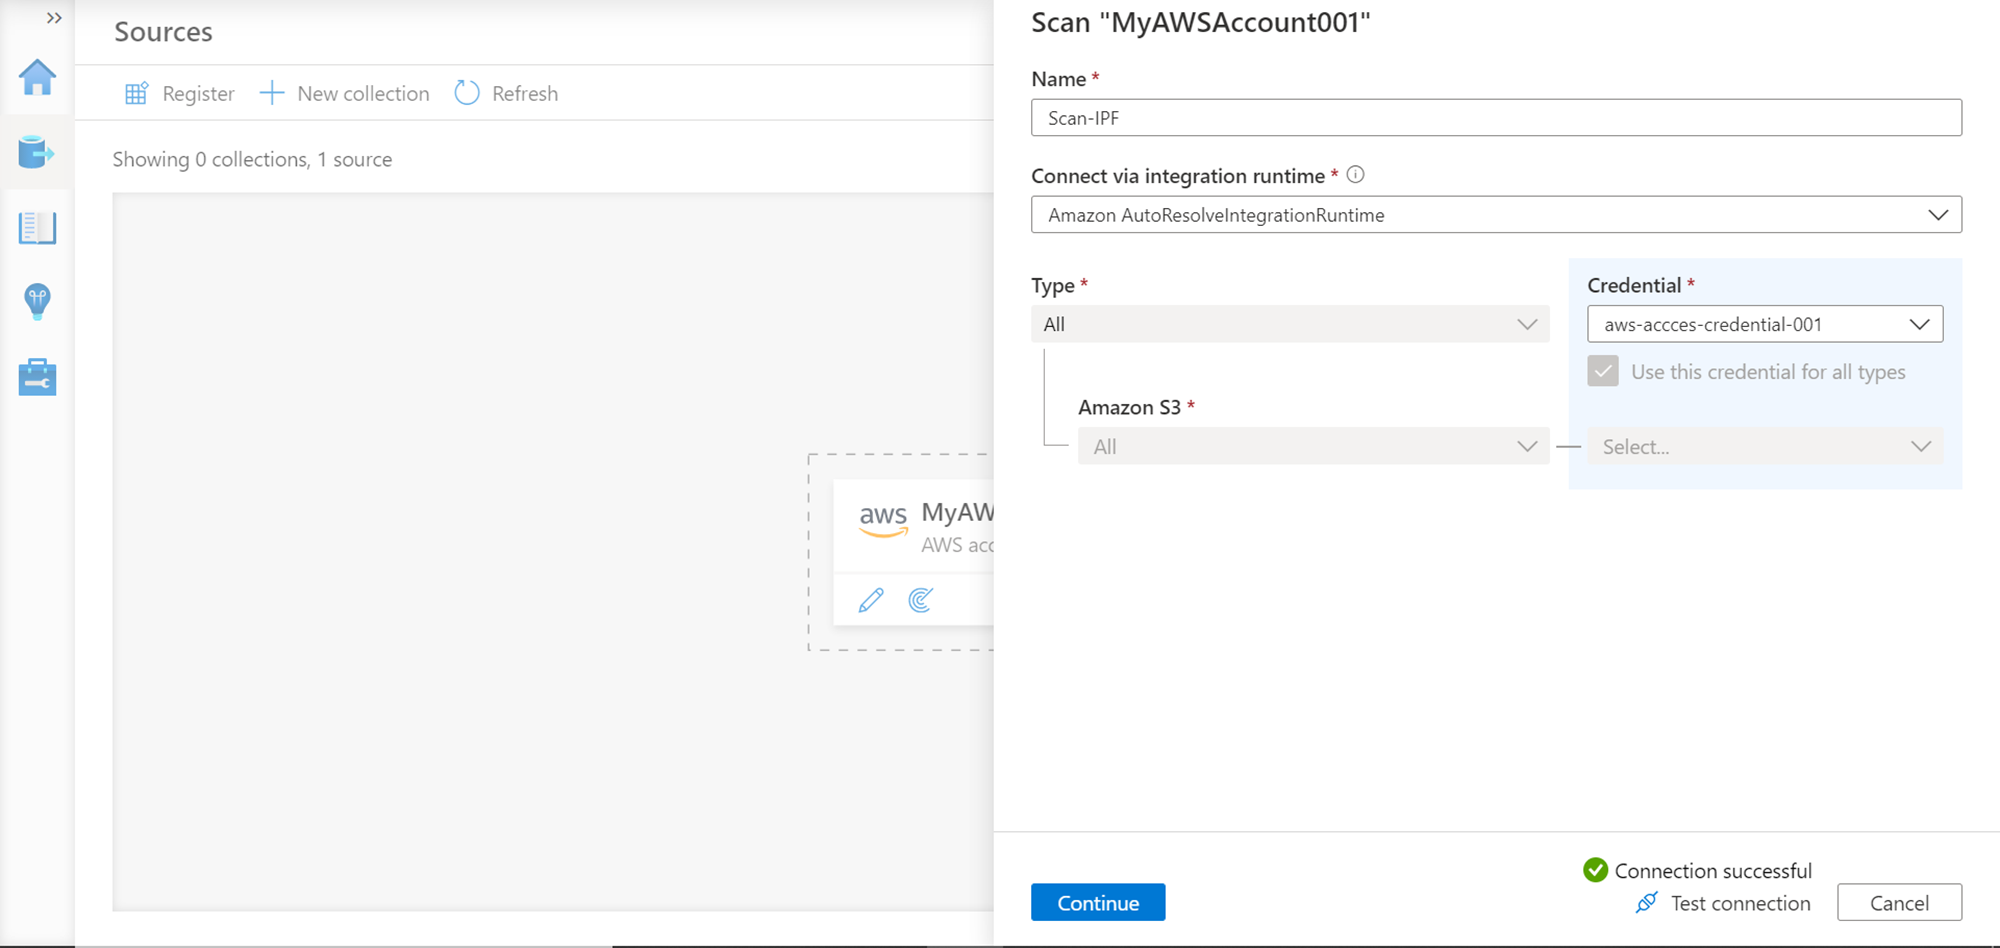
This will create the credential successfully. Once the credential is created, test the connectivity to the AWS account or the AWS S3 bucket, and you should be able to successfully connect to it as shown below.
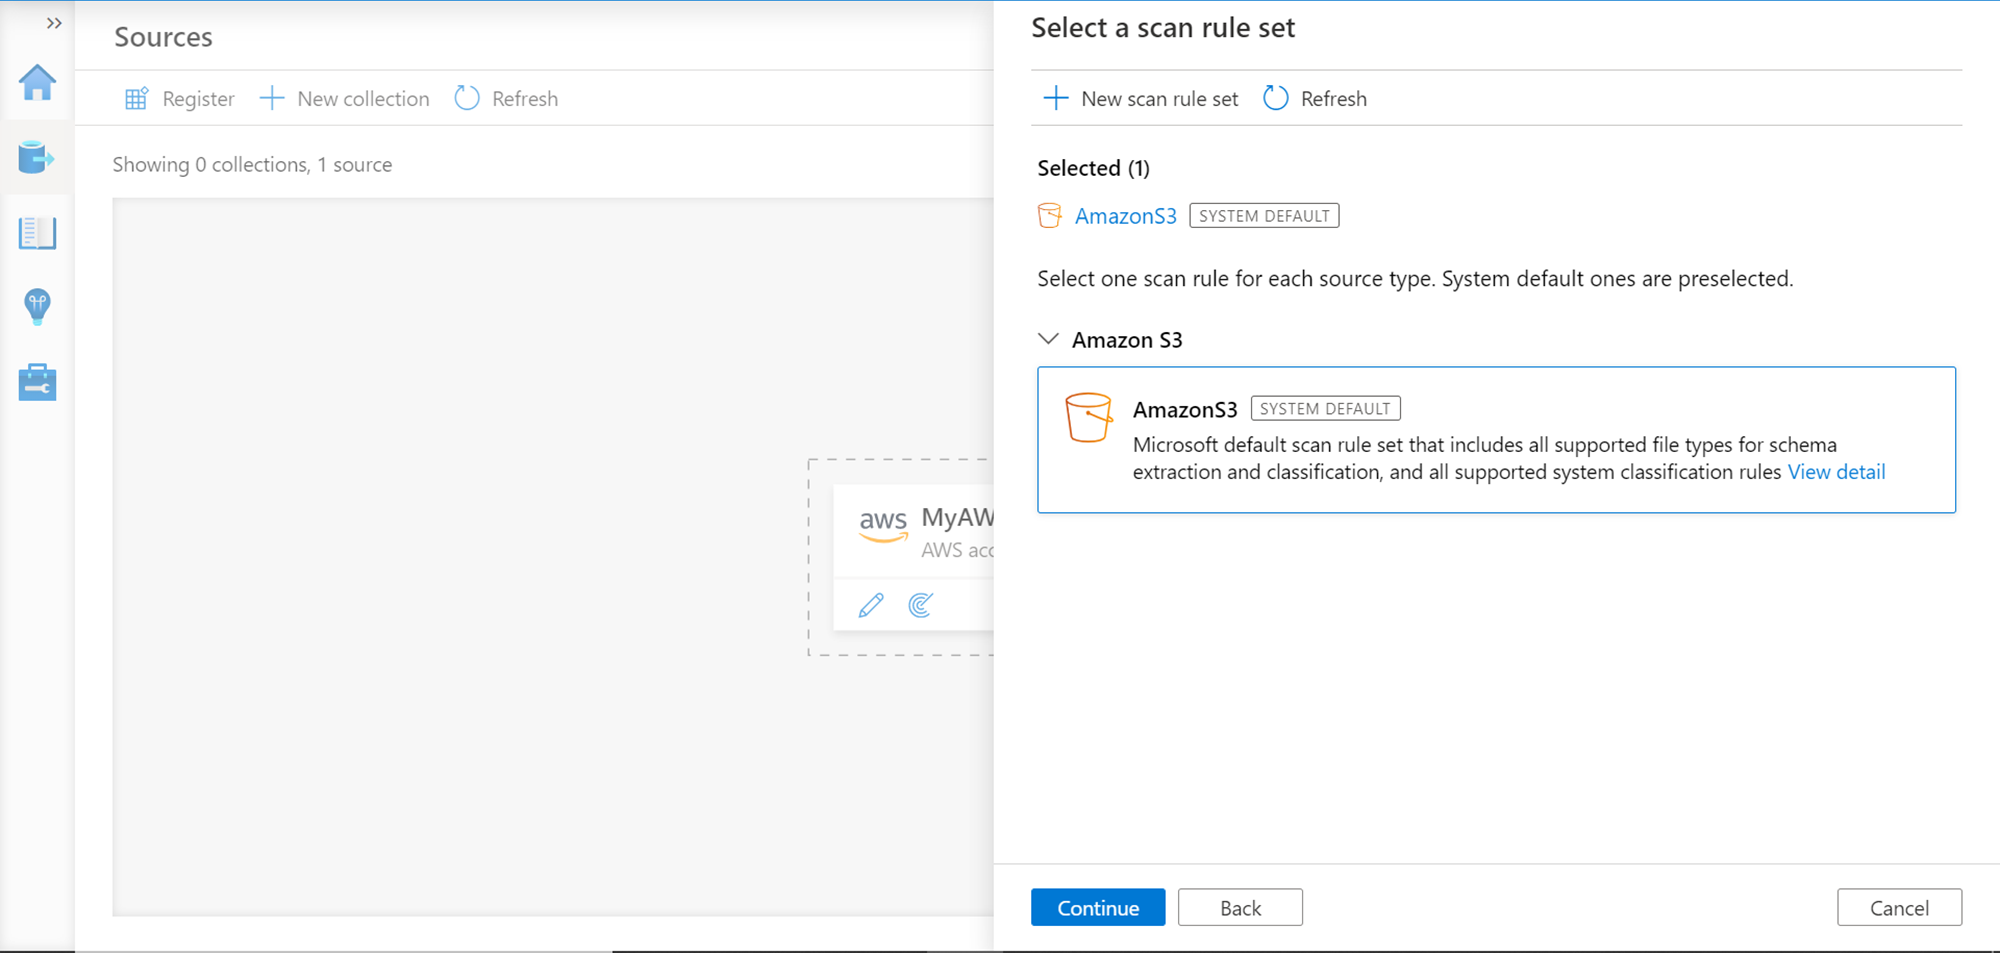
Once connectivity is successful, click on the Continue button. In this step, we need to select the scan rule set. By default, it would be the AmazonS3 set as shown below. Continue with the same.
We need to set a scan trigger. For now, we can select the “Once” option for the purpose of demonstration. In the production environment, one may want to set it to a recurring schedule.

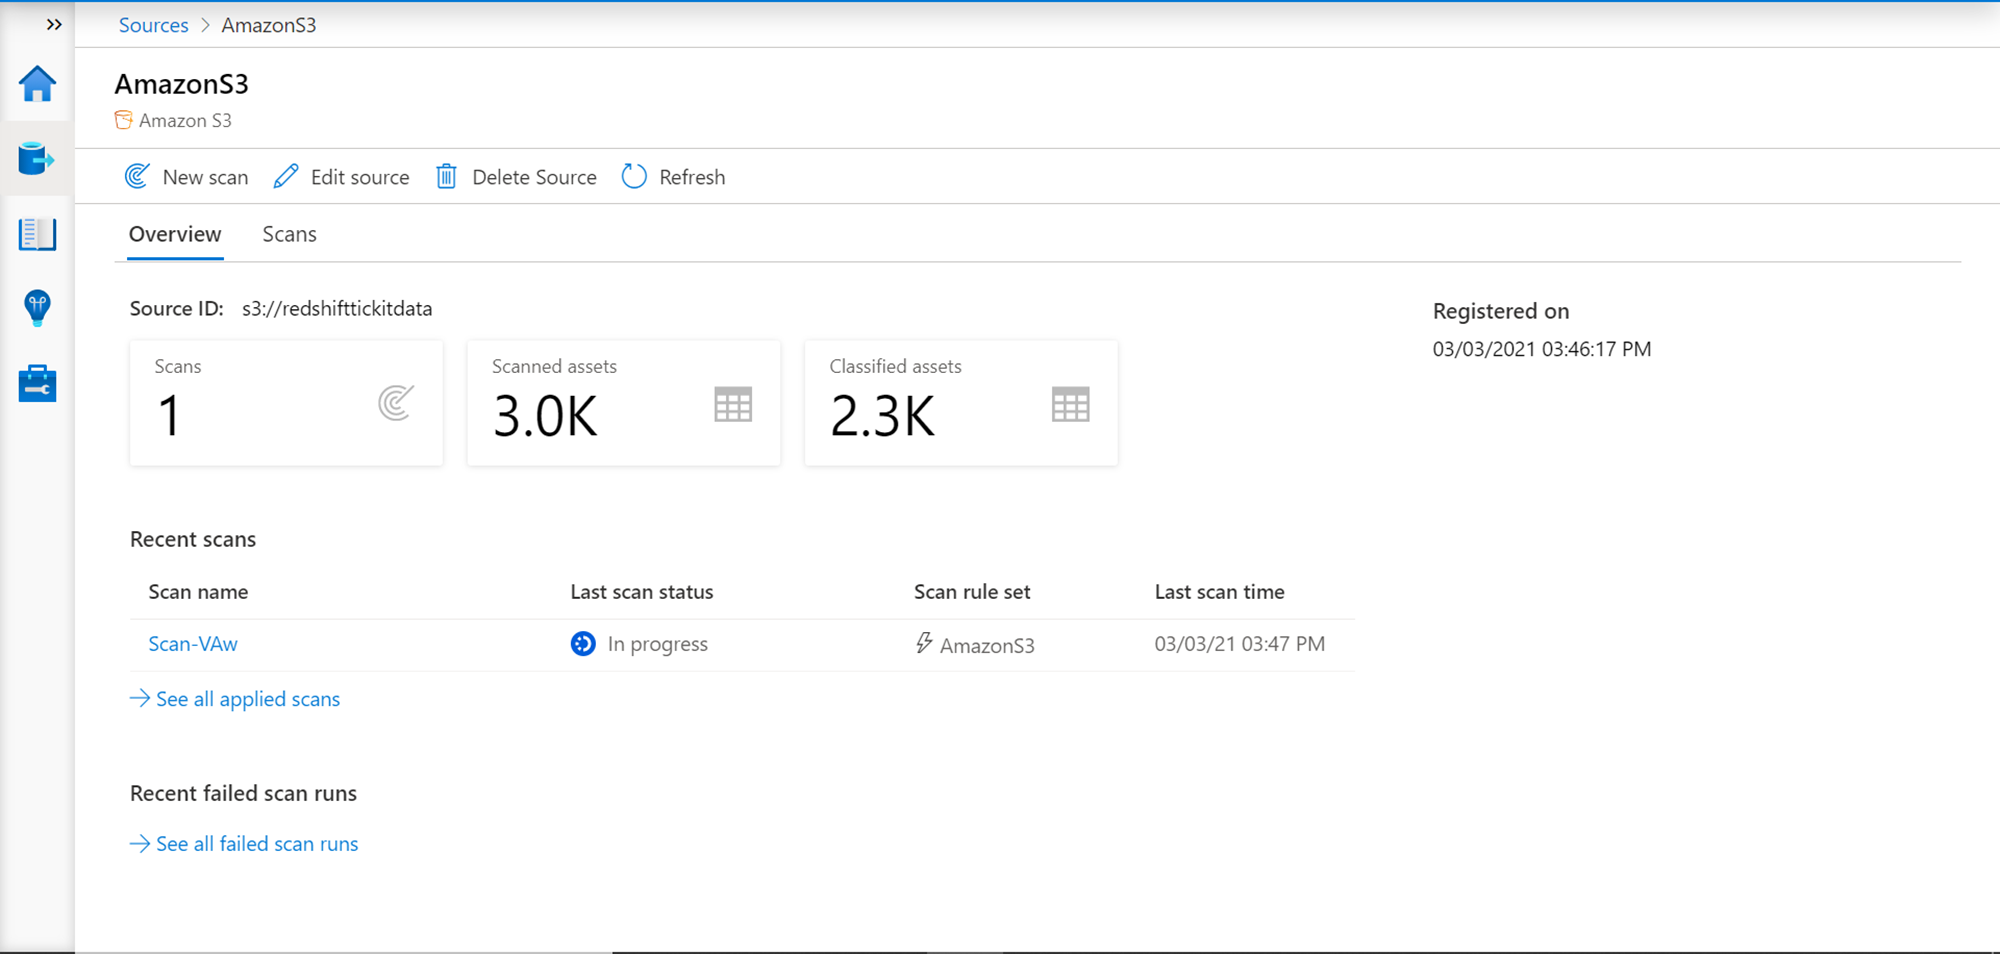
Once done, review the configuration details, create the scan, and execute it. Once the scan completes, it would catalog and classify data objects as shown below. Here we scanned an AWS S3 bucket that has thousands of files as reflected in the scan results.
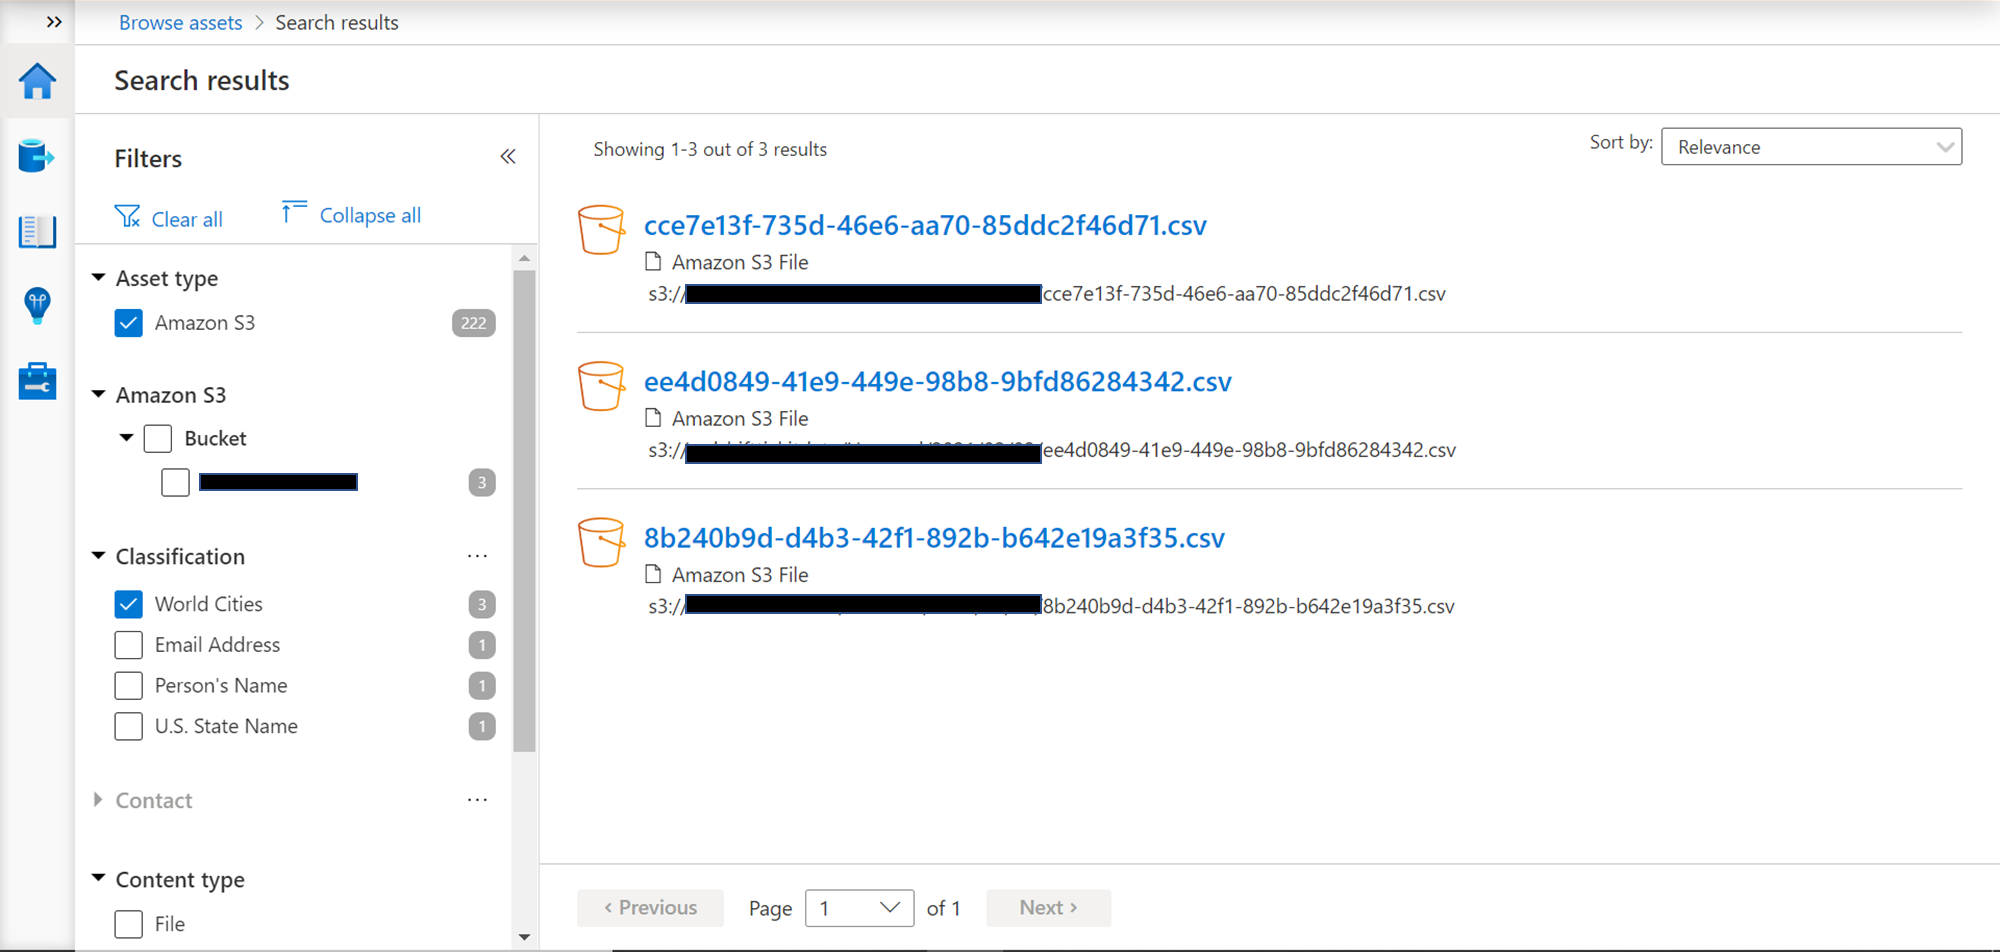
Consider exploring or searching the classified assets, and while browsing the results, you would be able to filter the assets based on data classification as shown below.
In this way, we can configure Azure Purview to catalog data assets on AWS S3 to create a centralized data catalog that provides a holistic view of data assets on the cloud.
Conclusion
In this article, we created an instance of Azure Purview and configured it to point to an AWS S3 location. We created an IAM role in AWS that allows incoming access requests from Azure to scan the data in S3. We scheduled a scan of the data in S3 and successfully cataloged this data using the Purview service.

She has a deep experience in designing data and analytics solutions and ensuring its stability, reliability, and performance. She is also certified in SQL Server and have passed certifications like 70-463: Implementing Data Warehouses with Microsoft SQL Server.
View all posts by Gauri Mahajan
- Oracle Substring function overview with examples - June 19, 2024
- Introduction to the SQL Standard Deviation function - April 21, 2023
- A quick overview of MySQL foreign key with examples - February 7, 2023