

In this article, we will learn how to explore the metadata registered in Azure Purview as well as learn how to analyze the metadata insights using the Purview Studio tool.
Introduction
In any large-scale IT ecosystem composed of tens of data sources and thousands of database objects, managing metadata becomes very vital for an organization to keep the structure of metadata as well as governance on data in check. In my previous articles, we learned about Azure Purview where we understood the overview, features, functionality, aspects, user-interface of the Purview Dashboard, and administration of Purview by different user-persons using Purview Studio, as well as registering data sources and scanning database objects using Purview to extract the metadata information from the data repositories and registering it with Azure Purview service. Once the metadata information starts flowing into Purview, the metadata catalog is created, and it keeps evolving. As the metadata catalog keeps evolving, Purview generates metadata insights that enable a data steward or similar personas to curate the metadata. At the same time using these insights, the end-user persona can also consume the metadata effectively, which is generally the first step before the end-user figures out the metadata objects from which one may want to consume the data. Let’s go ahead and explore metadata registered in purview and also analyze the metadata insights using the Purview Studio tool.
Pre-requisites
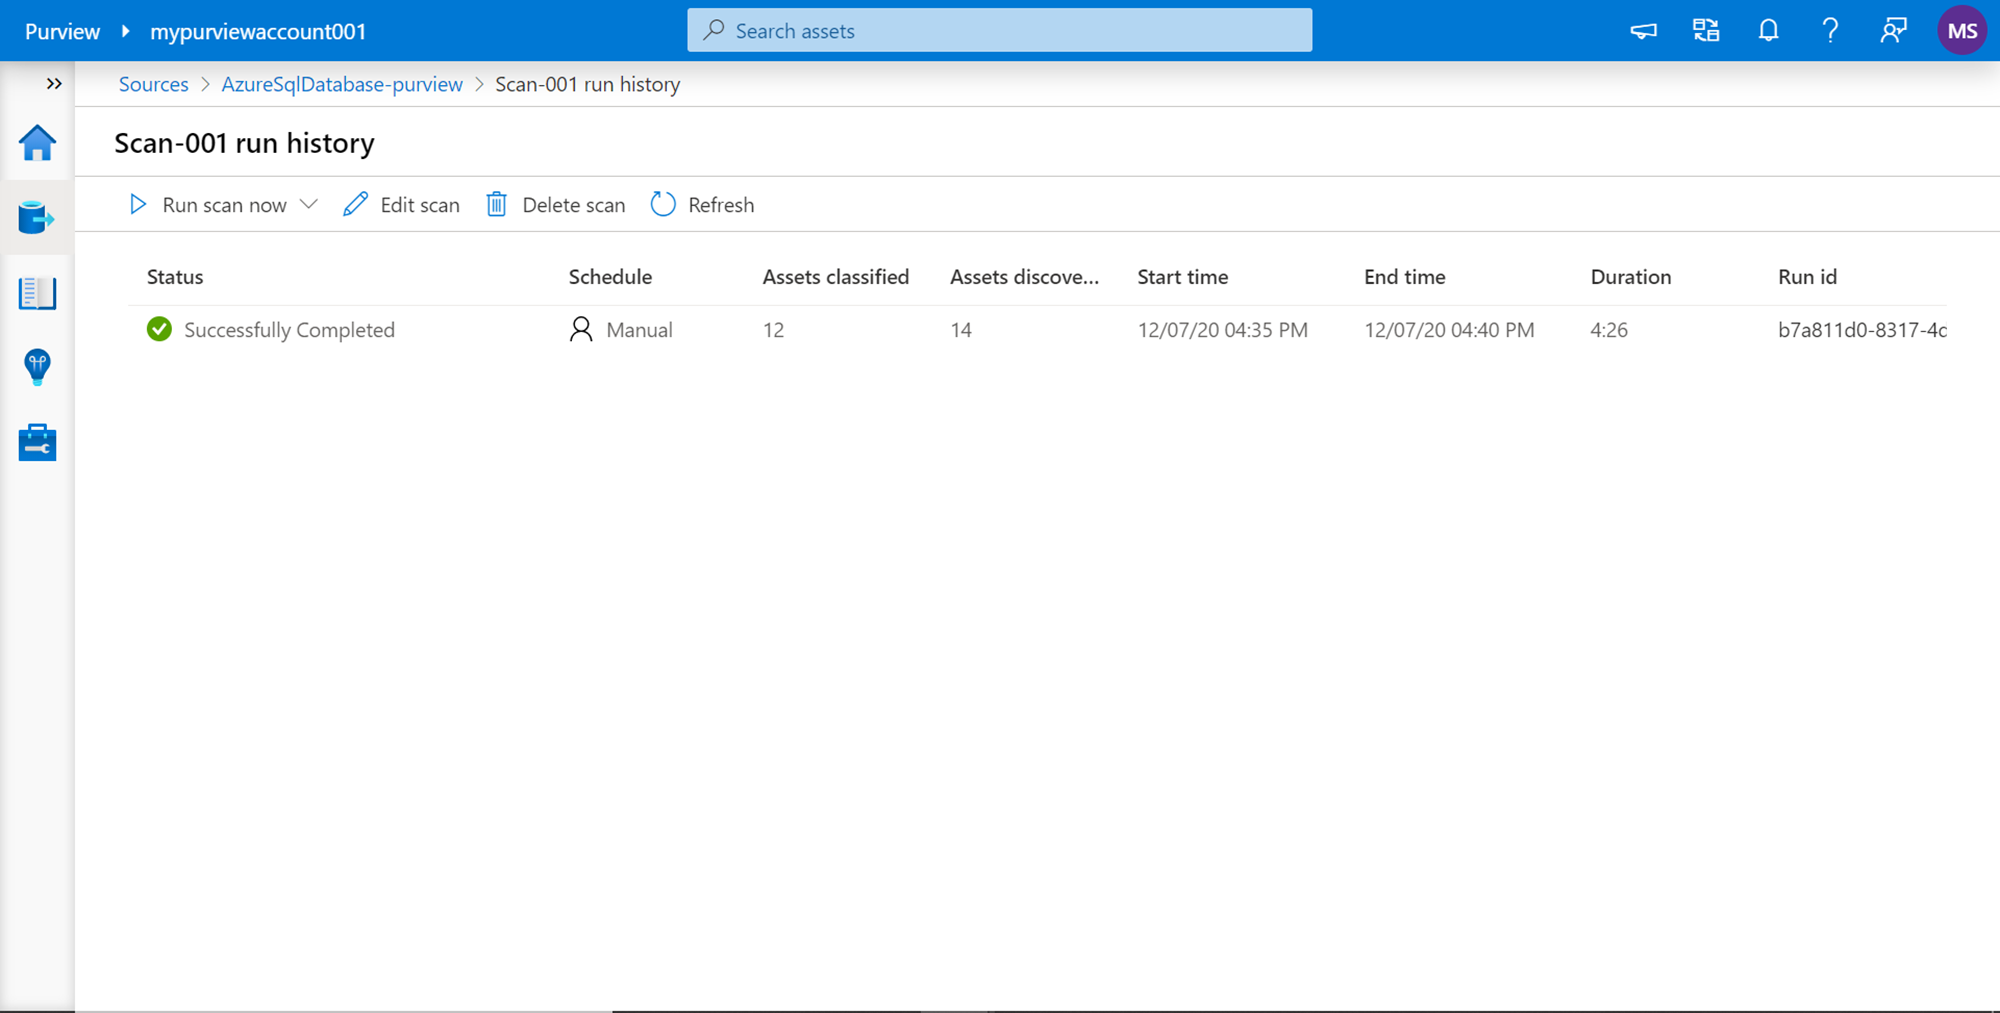
In the previous articles on Azure Purview, we covered how to create a new purview account, navigate the purview studio tool, register new data sources as well as scan these data sources, and extract metadata information that would be registered in purview. It is assumed that this setup is already in place and at least one scan has been performed on one registered data source. In this case, we have scanned an Azure SQL Database instance with the sample data that Azure provides out-of-box. A successful scan of any given data source registered with Azure purview would look as shown below.
Azure Purview Insights
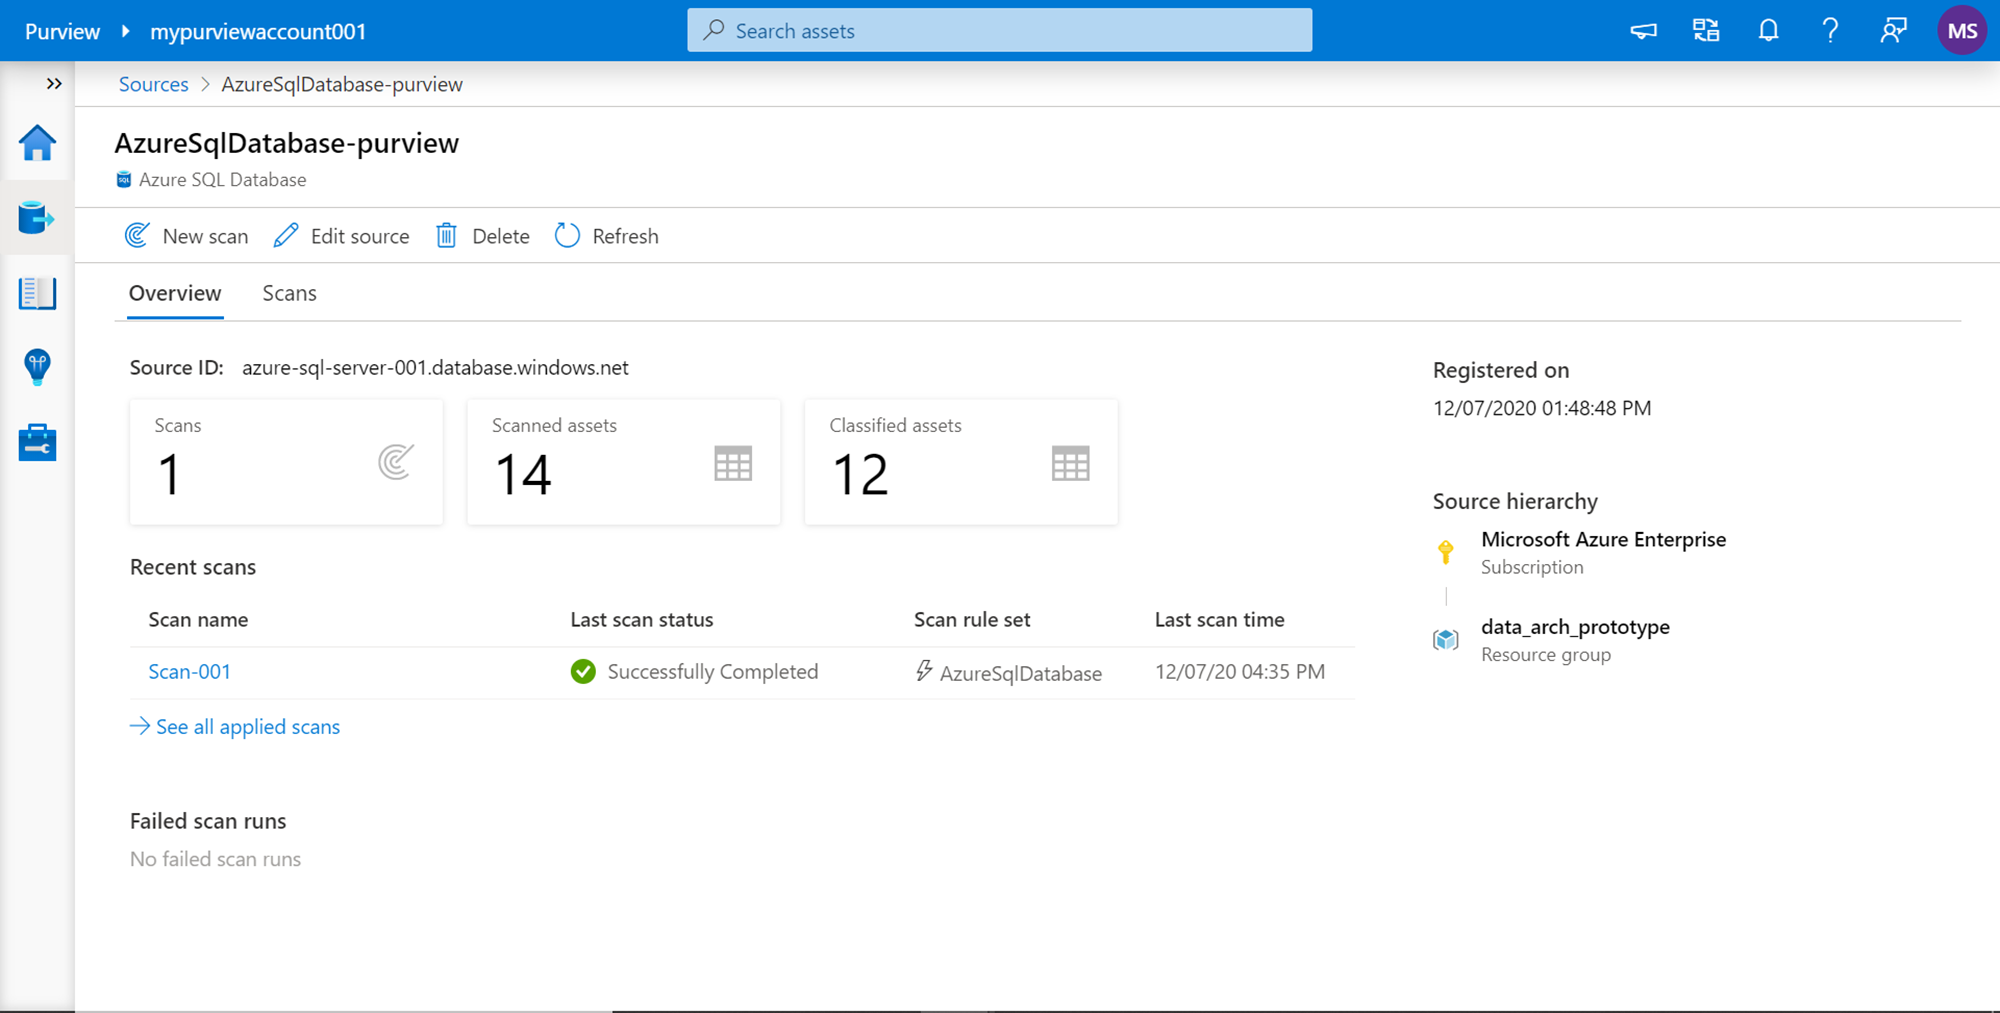
Once the metadata has been created, an easy way to get the first glimpse of the metadata summary is shown in the scan status where it shows the total number of classified assets as well as the total number of discovered assets. We intend to explore more details about the outcomes from the scan. Navigate back to the data source which we would have scanned, and it would look as shown below. It shows an overview of the data source where it details the number of scans performed on the data source, the status of each scan, and summary statistics of the assets that are part of this data source.
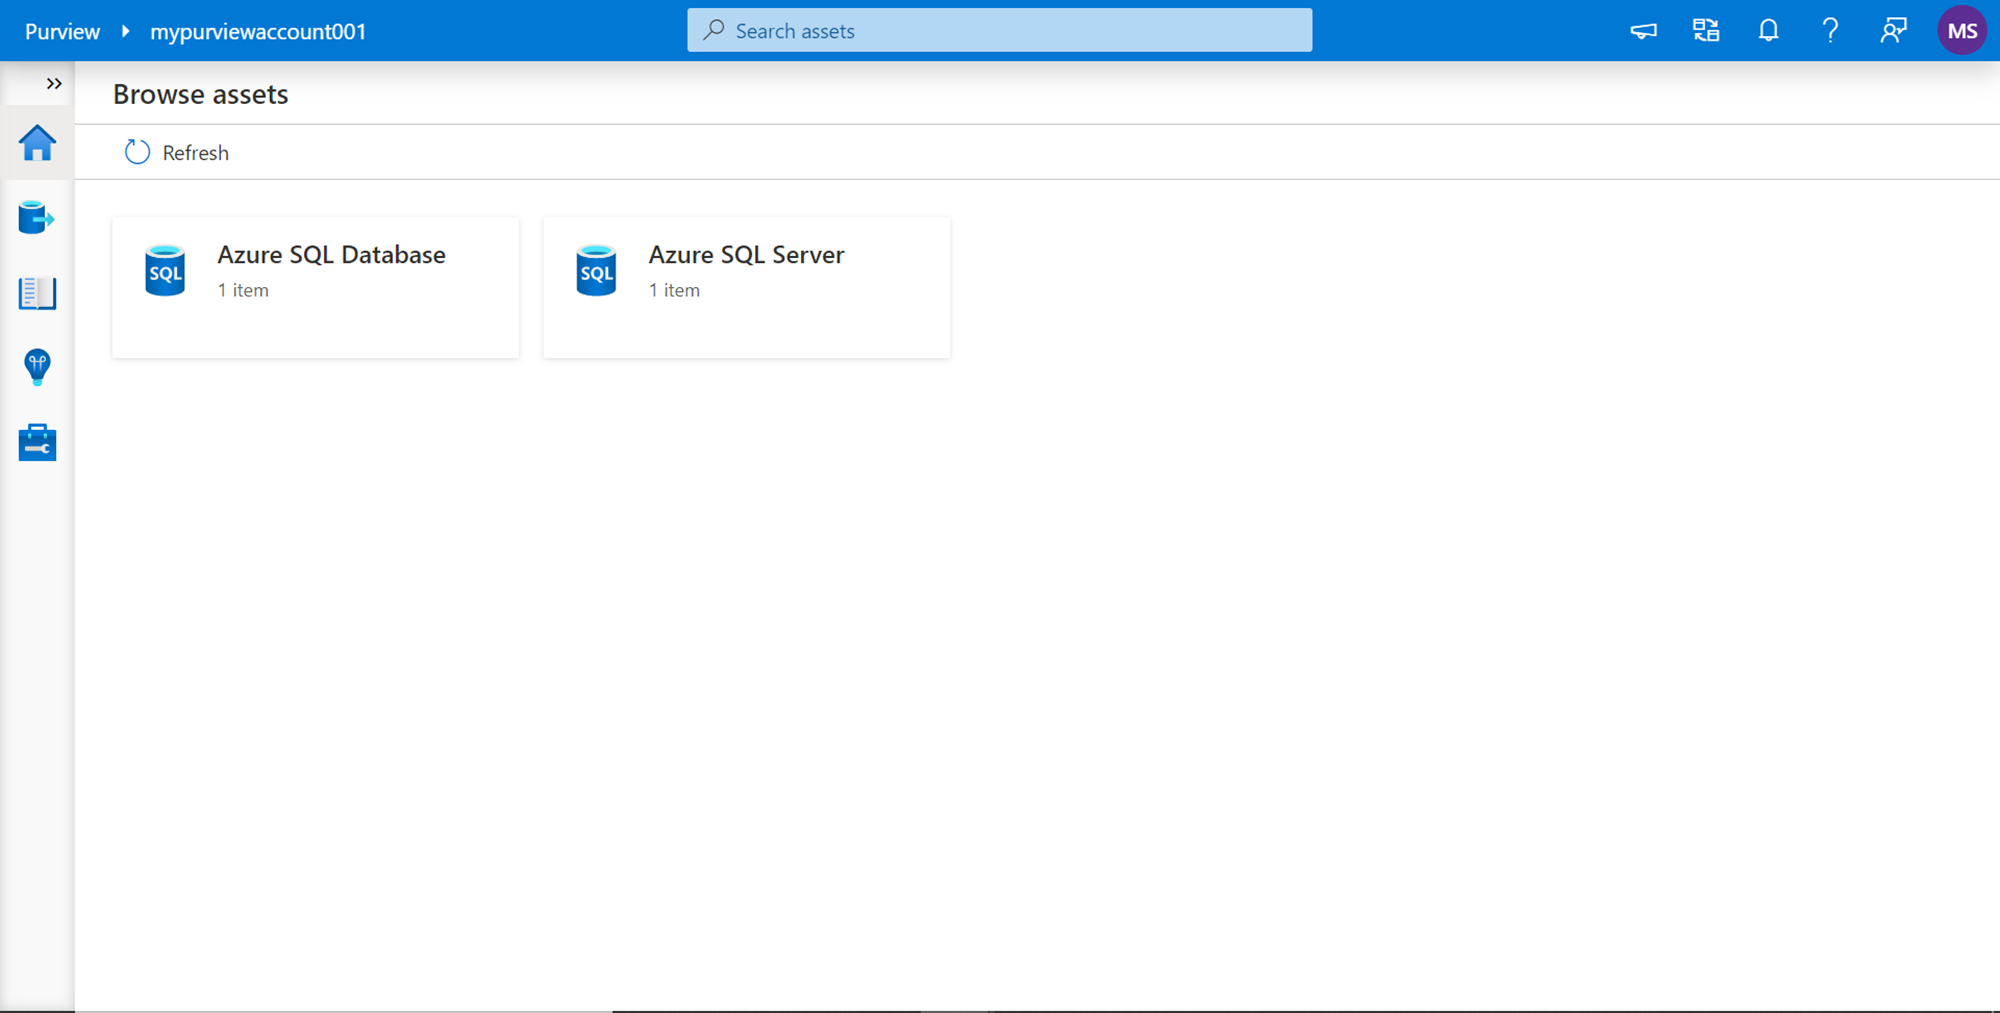
There can be multiple assets that may have different assets under them. To find all such data sources that may be registered and cataloged in Azure purview, one can navigate to the Assets section, where it would show all such data sources as shown below.
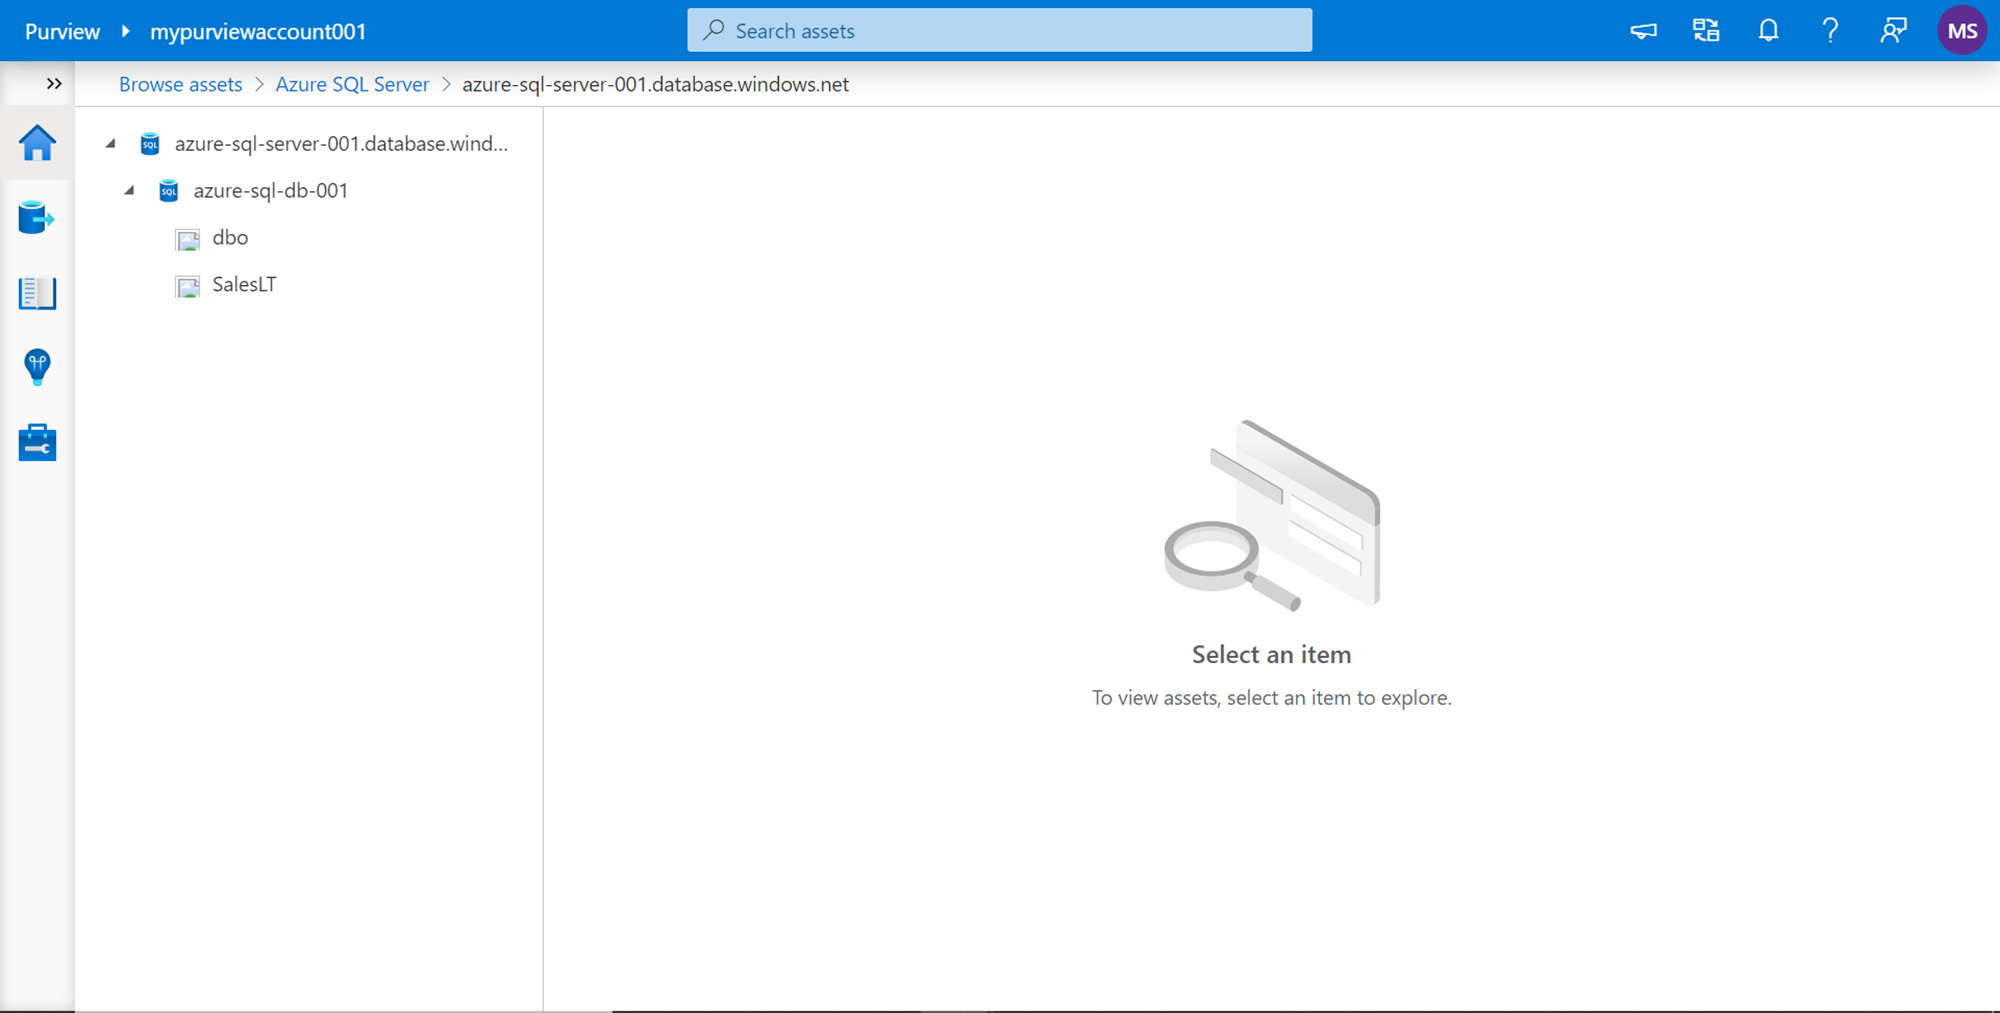
We are interested in the hierarchy of the data assets discovered in the Azure SQL Database instance. So, open the same, and we should be able to see the Azure SQL Database instance and underneath we should be able to see all the schemas that were scanned and registered as shown below. In this case, we have two schemas – dbo and SalesLT.
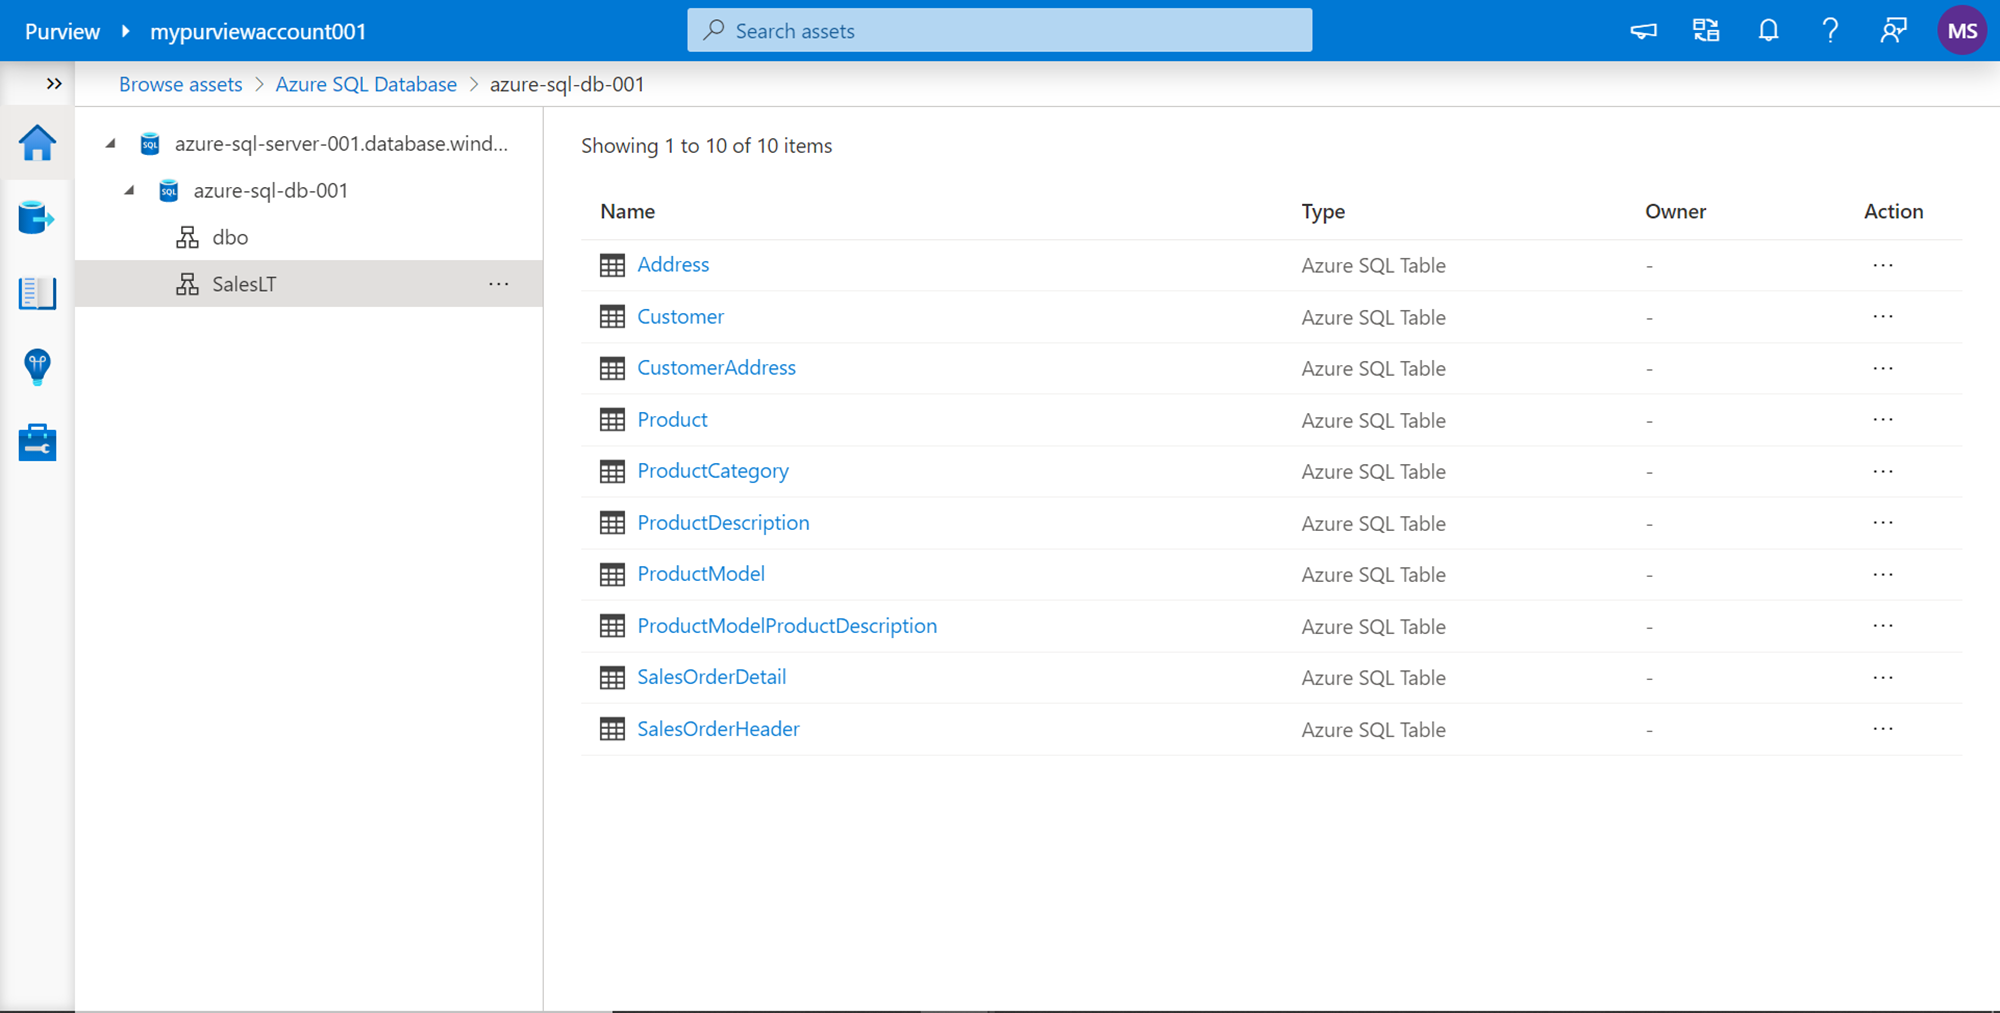
If you select the SalesLT schema, on the right-hand pane, it would show all the Azure SQL Tables that belong to this schema as shown below. The Owner field would be blank for all these tables as it was not found or extracted from the data source. This can be modified later. We can perform certain actions on each of the tables by clicking the ellipsis in the line item of each individual table. One thing to keep in view is that these are just metadata tables and do not contain any data in them.
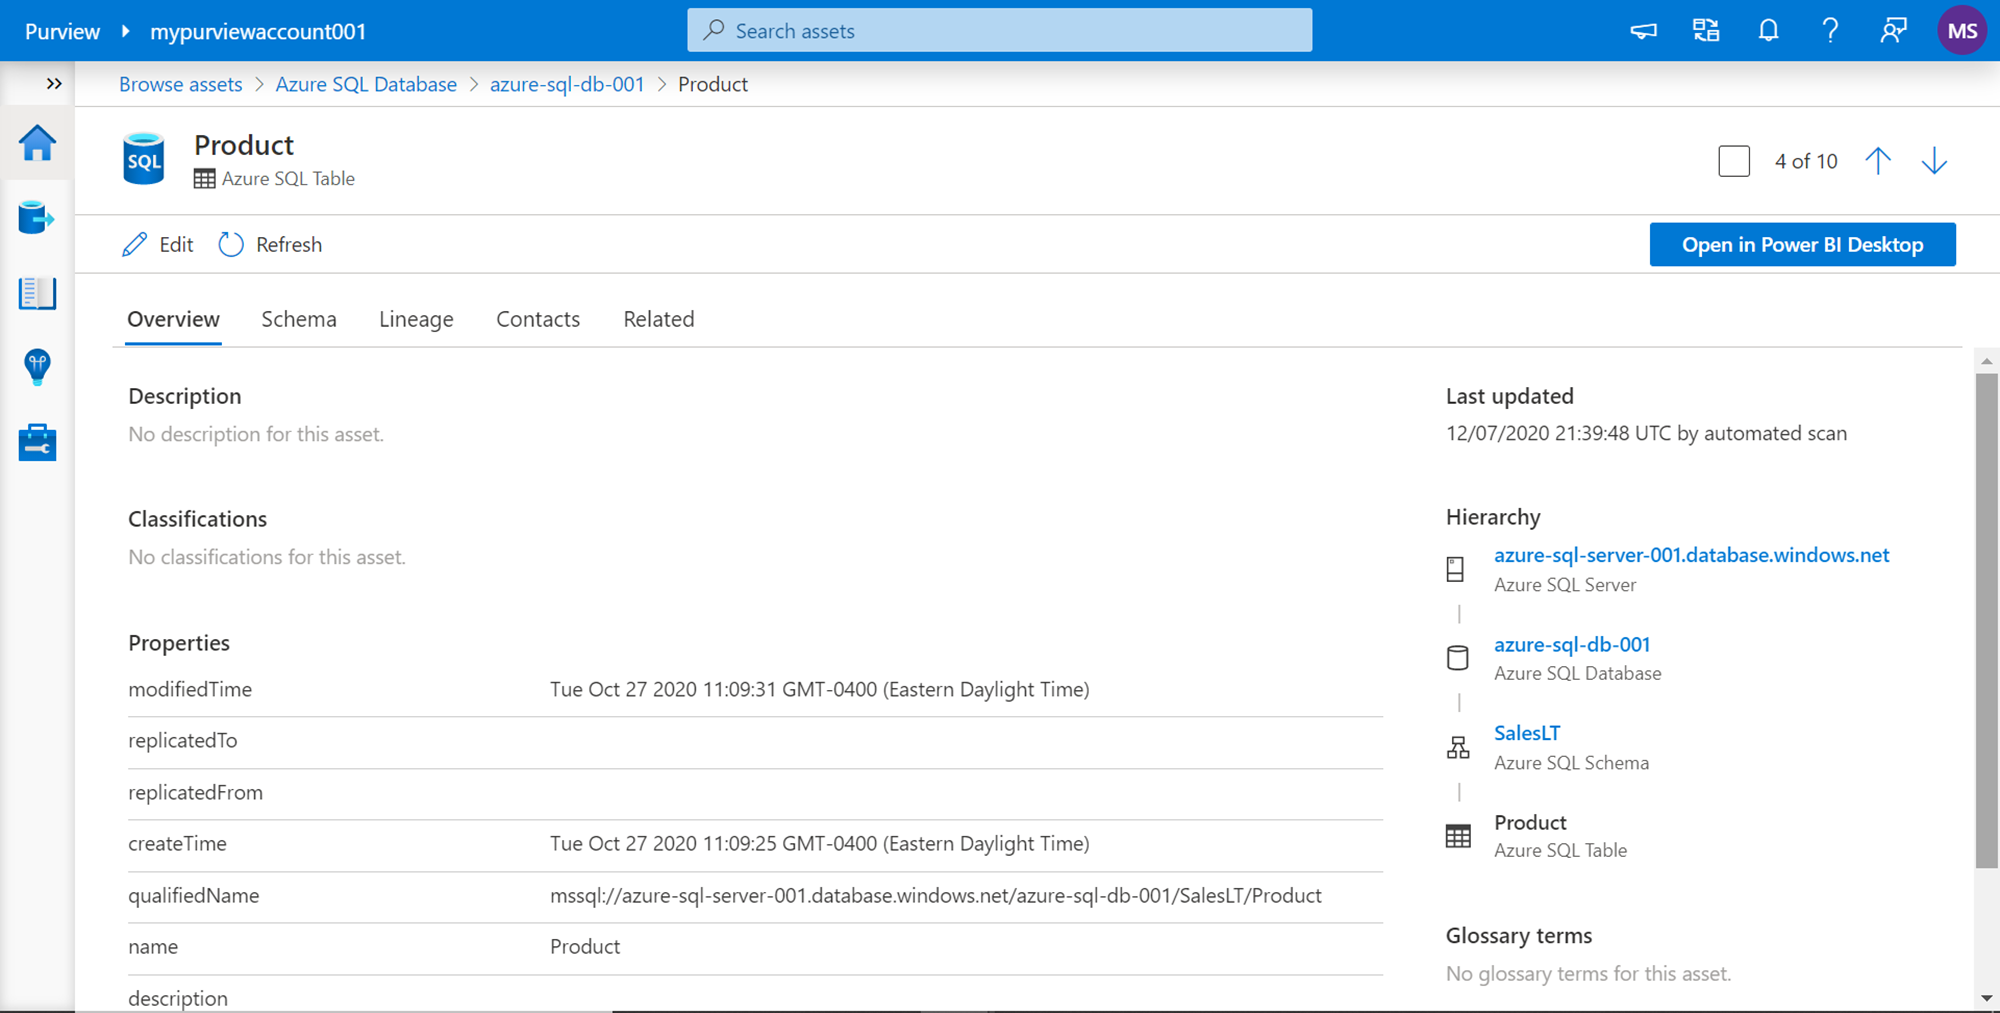
Click on any of the tables and it would open a detailed dashboard page that has all the extracted metadata and classifications for the database object in question. As shown below, we opened the Product table, and it shows the overview by default, which has all the properties like modifiedTime, qualifiedName etc. The hierarchy on the left side shows the entire object hierarchy right from the data source level until the object level.
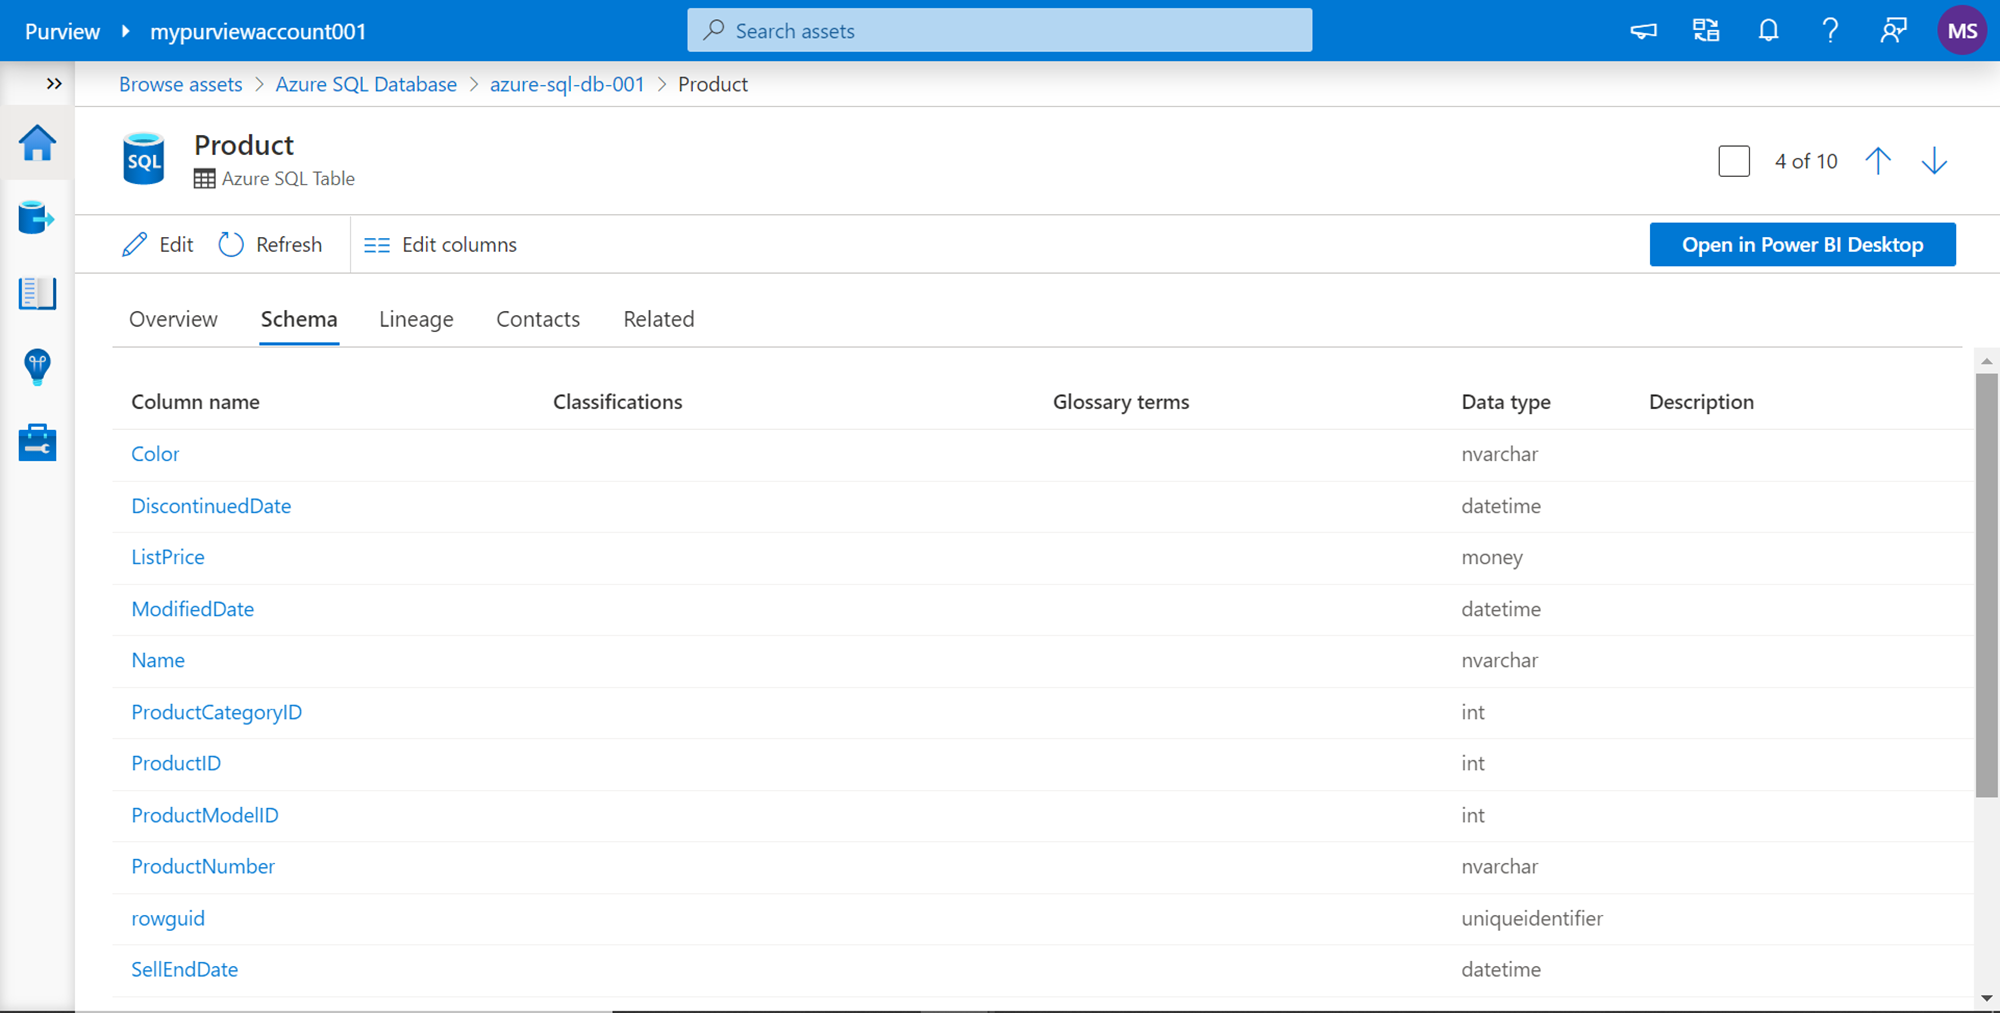
Click on the Schema tab and it would show the schema of the table i.e. the attributes of the table. Each attribute can have classifications based on the scan rule set selected when the data source was being scanned. If there any glossary terms defined, then the same would be shown based on mappings. The data type of the attribute that was extracted from the data source is listed as shown below. And if a description was provided in the definition of the table in the data source, that too would get extracted and would be listed here. These fields can be edited as well using the Edit button from the toolbar as shown below.
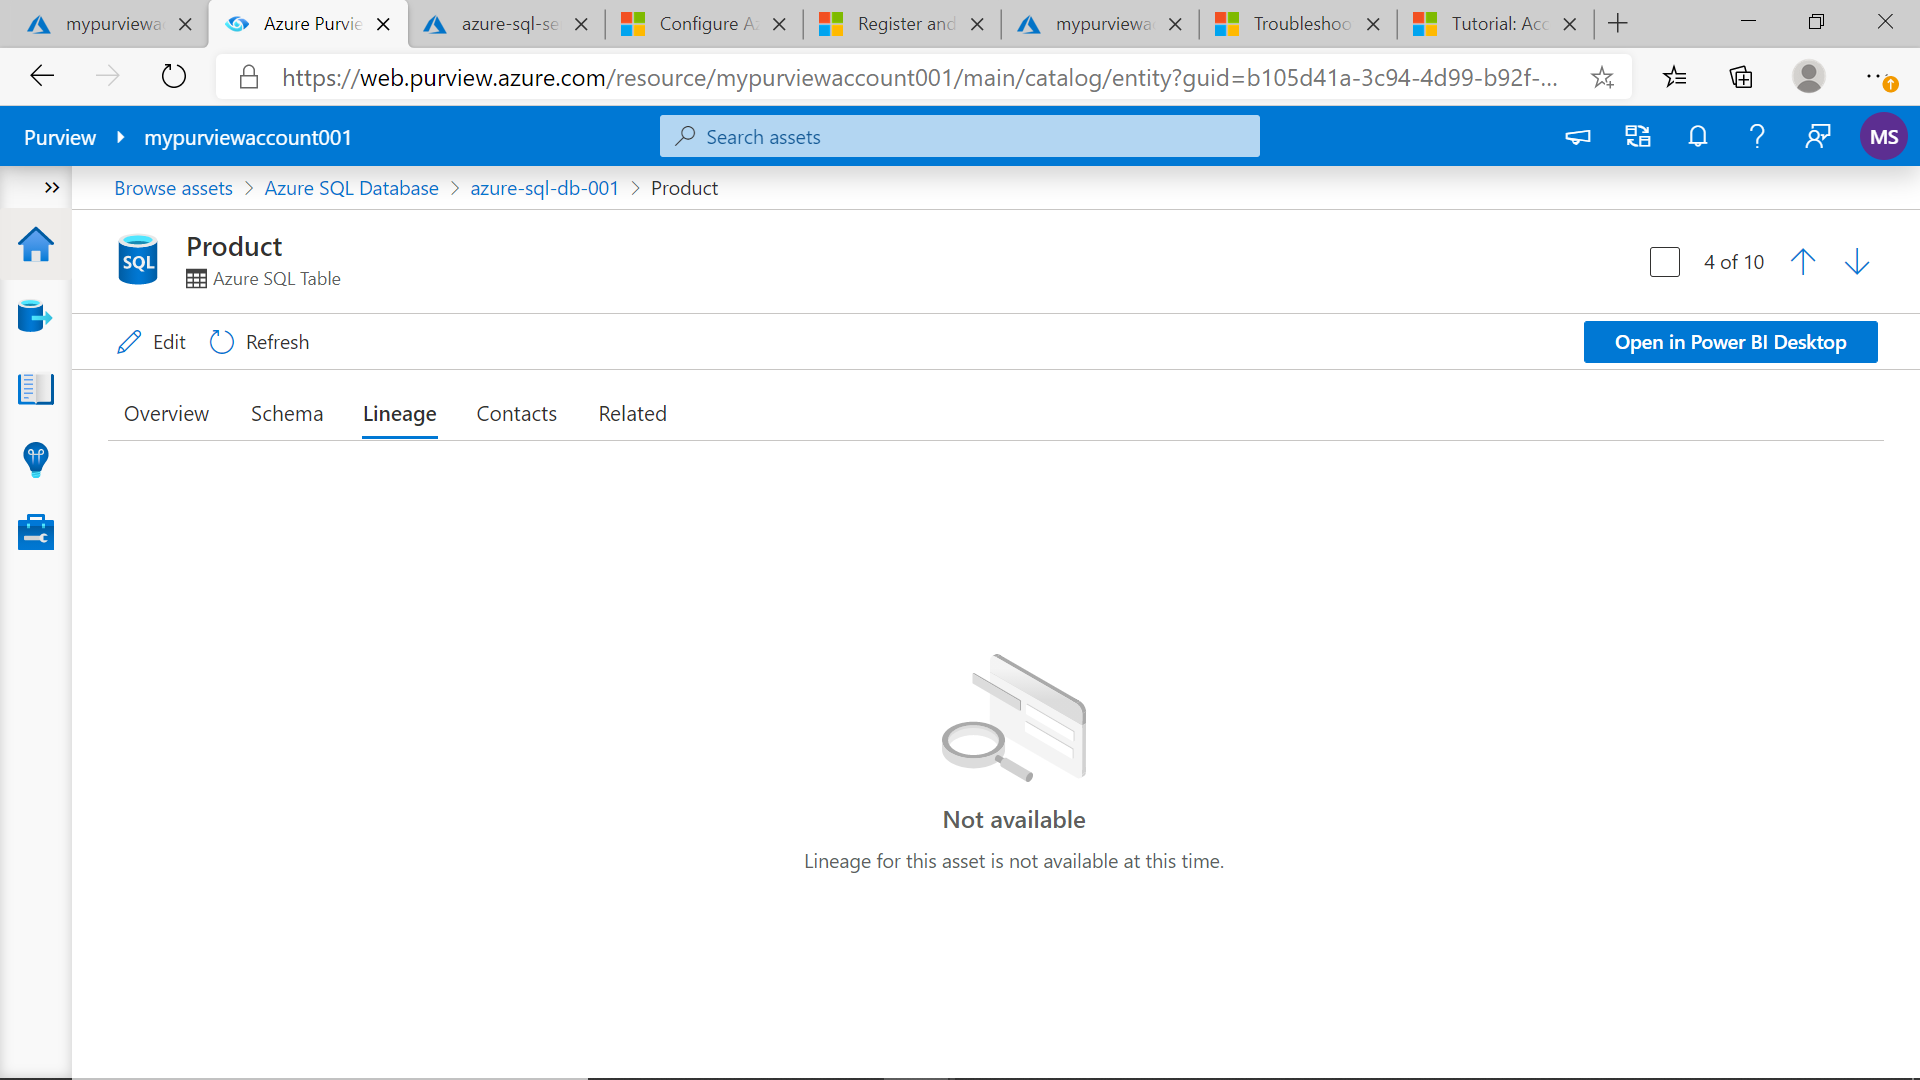
The next tab in line is the Lineage tab. As we have scanned just a single data source, there is no lineage information available. When we register multiple data sources and integrate them with tools that support building data pipelines like Azure Databricks, Azure purview can extract lineage information as well as associate it with the cataloged objects.
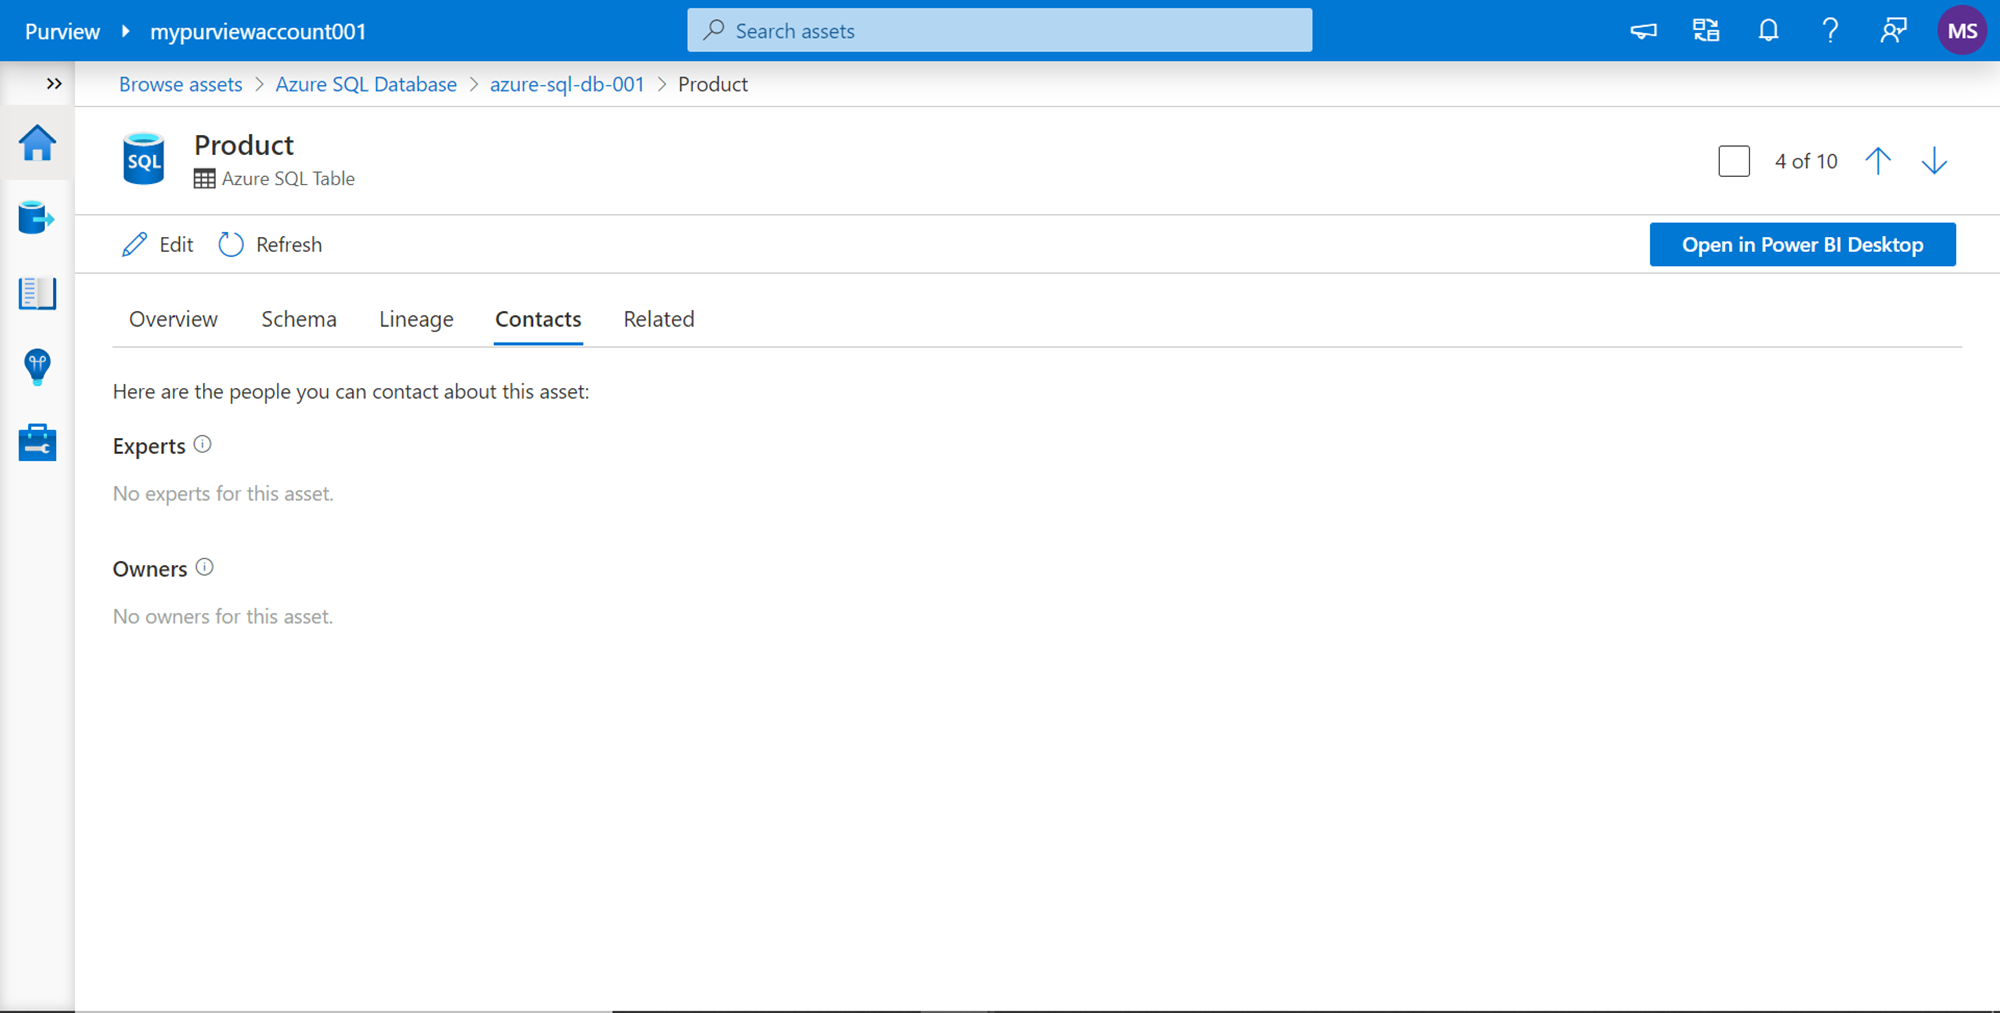
In the Contacts tab, by default, there won’t be any contacts listed. But it’s a very useful section where one can edit it and specify the associated contacts for this database object like any data expert or the owner of this data, so that anyone who is browsing this object can reach out to the associated contacts for the required assistance.
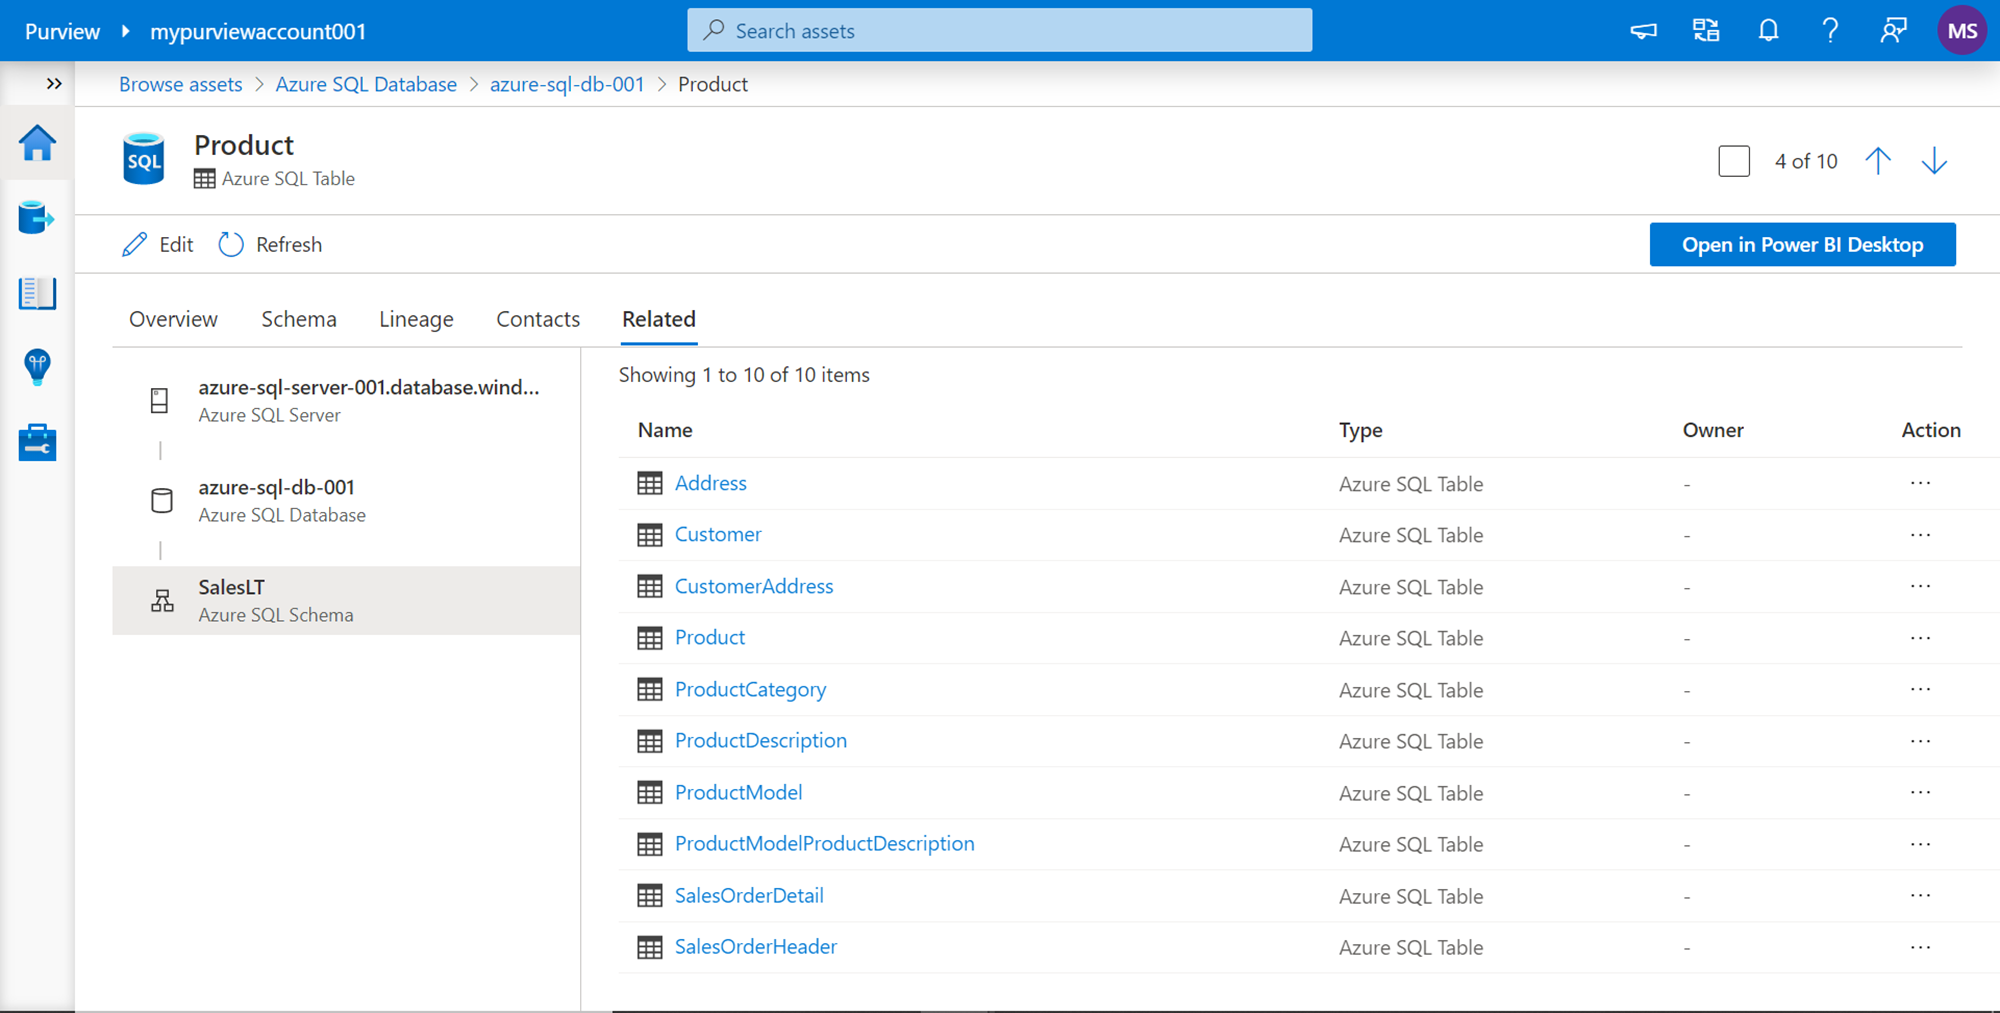
In the last tab, which is the Related tab, it shows a list of all the objects that are at the same hierarchy level as the Product table. As this table is part of the SalesLT schema, here it shows all other tables which are part of this schema, as these tables are related to each other by a common schema.
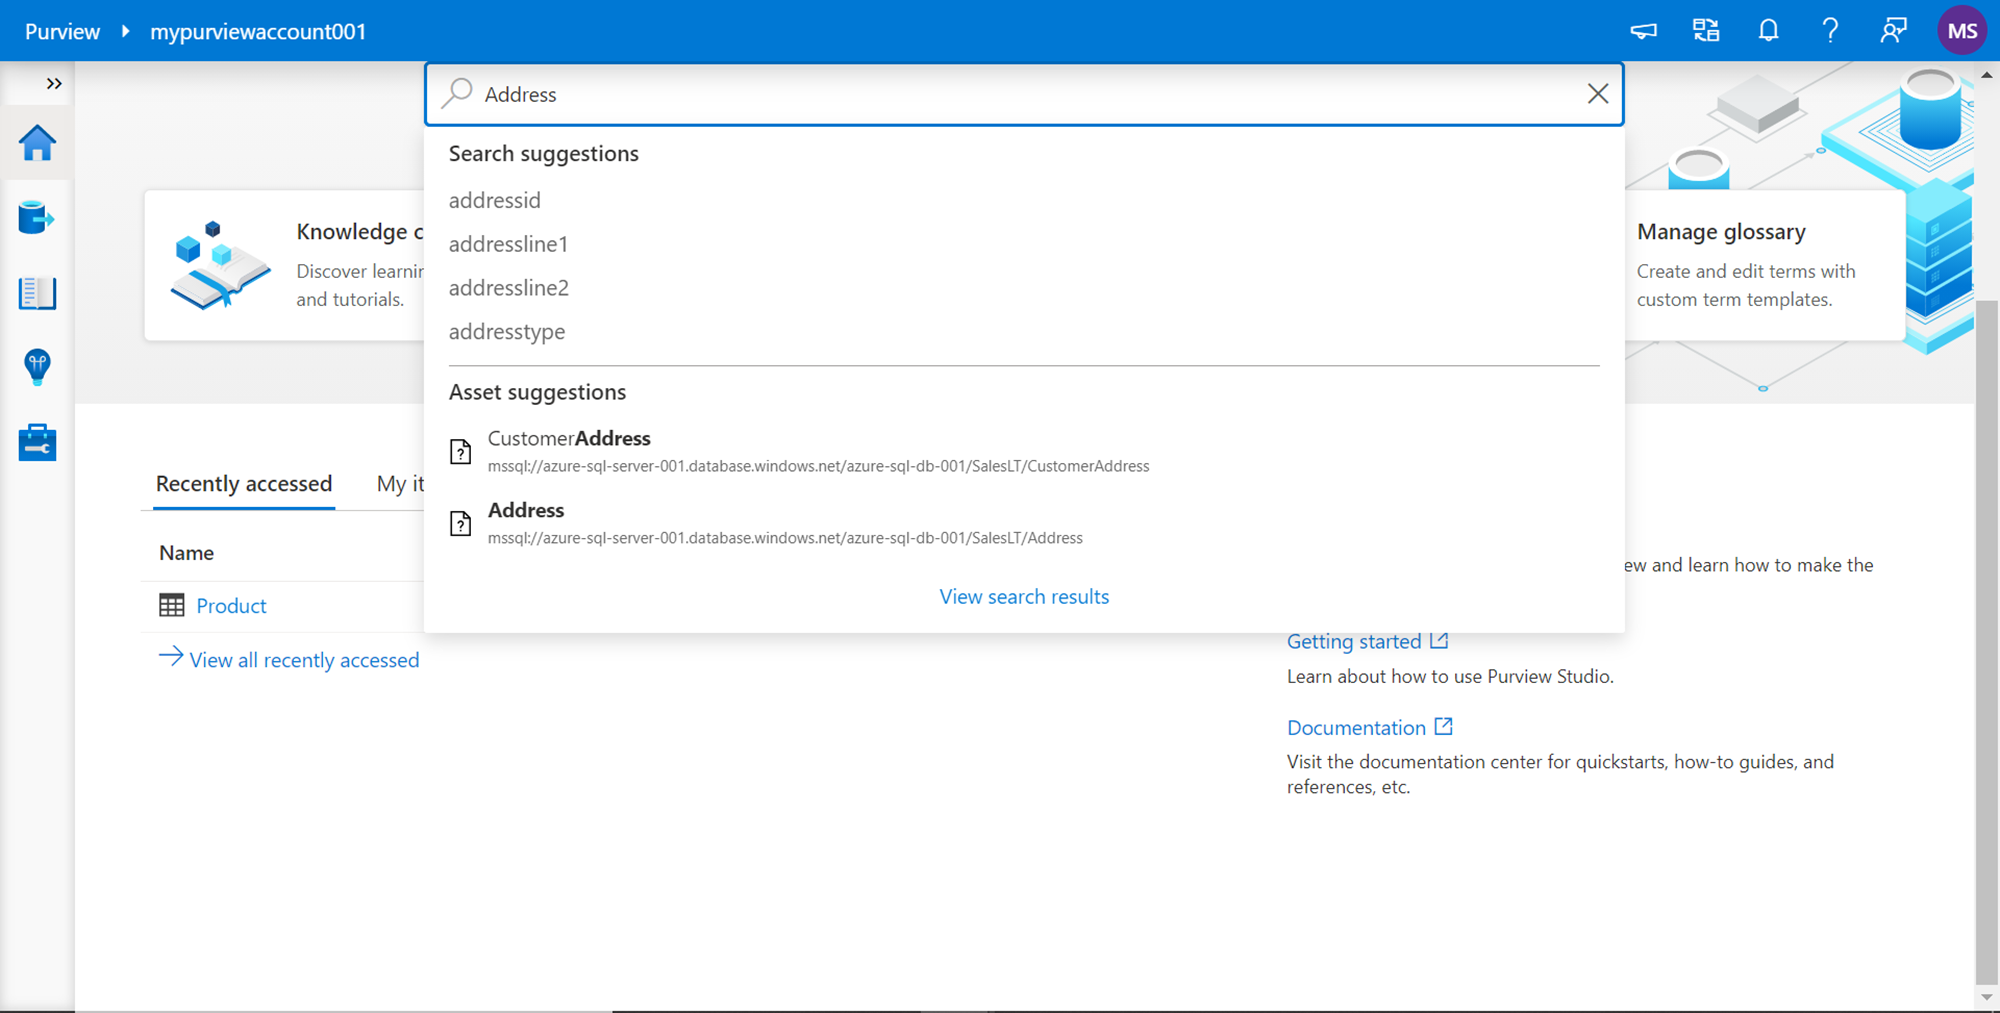
It can be a challenging task to find an attribute or asset when the catalog contains thousands of attributes or assets (i.e. database objects). In such scenarios, the need is to have the ability to search for an asset or attribute. If we navigate to the home page of the Azure Purview Studio, it provides a search interface. Type any keyword to search for an asset or attribute with a similar keyword. For example, here we typed “Address” in the search bar, and it automatically shows a type-ahead suggestion, as well as the list of attributes and assets that have the keyword “address” in it. This search is case insensitive as shown below.
Once we figure out the right keyword and hit Enter, the search results are displayed as shown below. On the left-hand pane, it automatically lists all the facets based on which the search results can be narrowed.

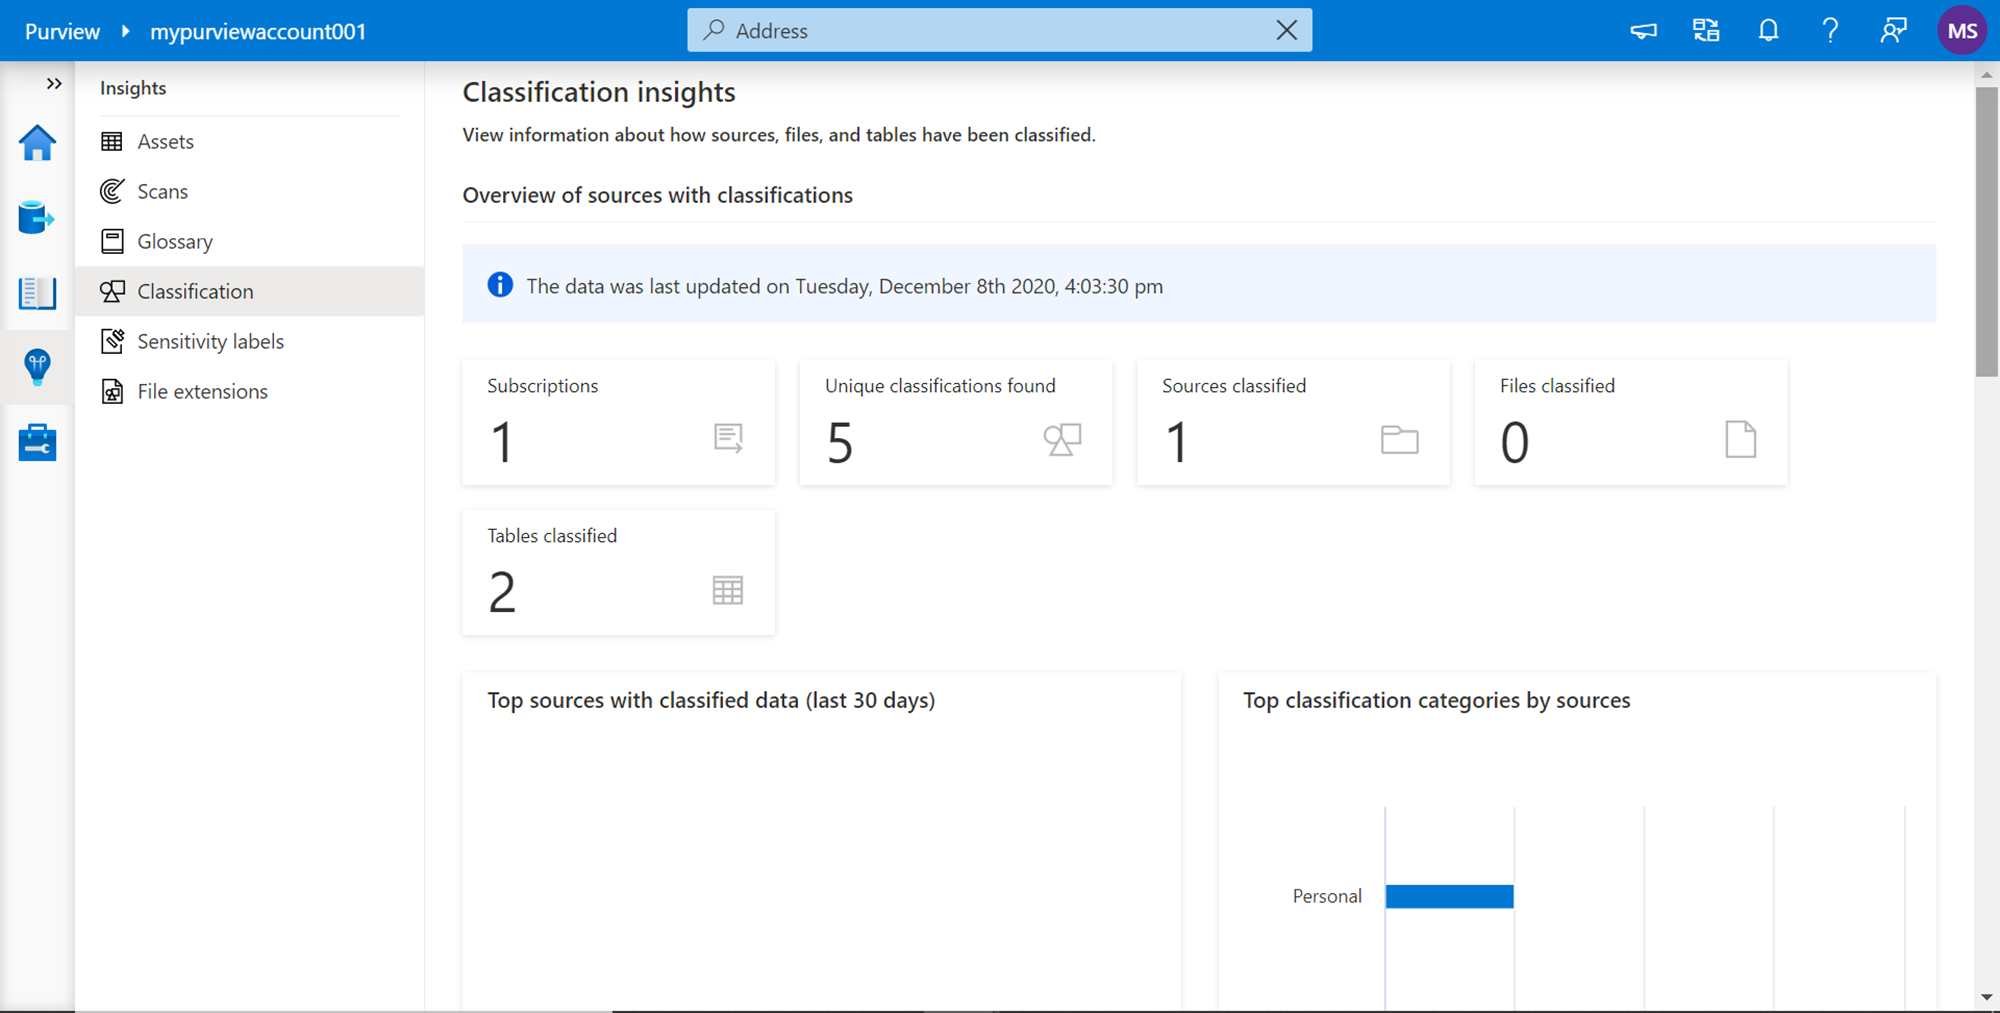
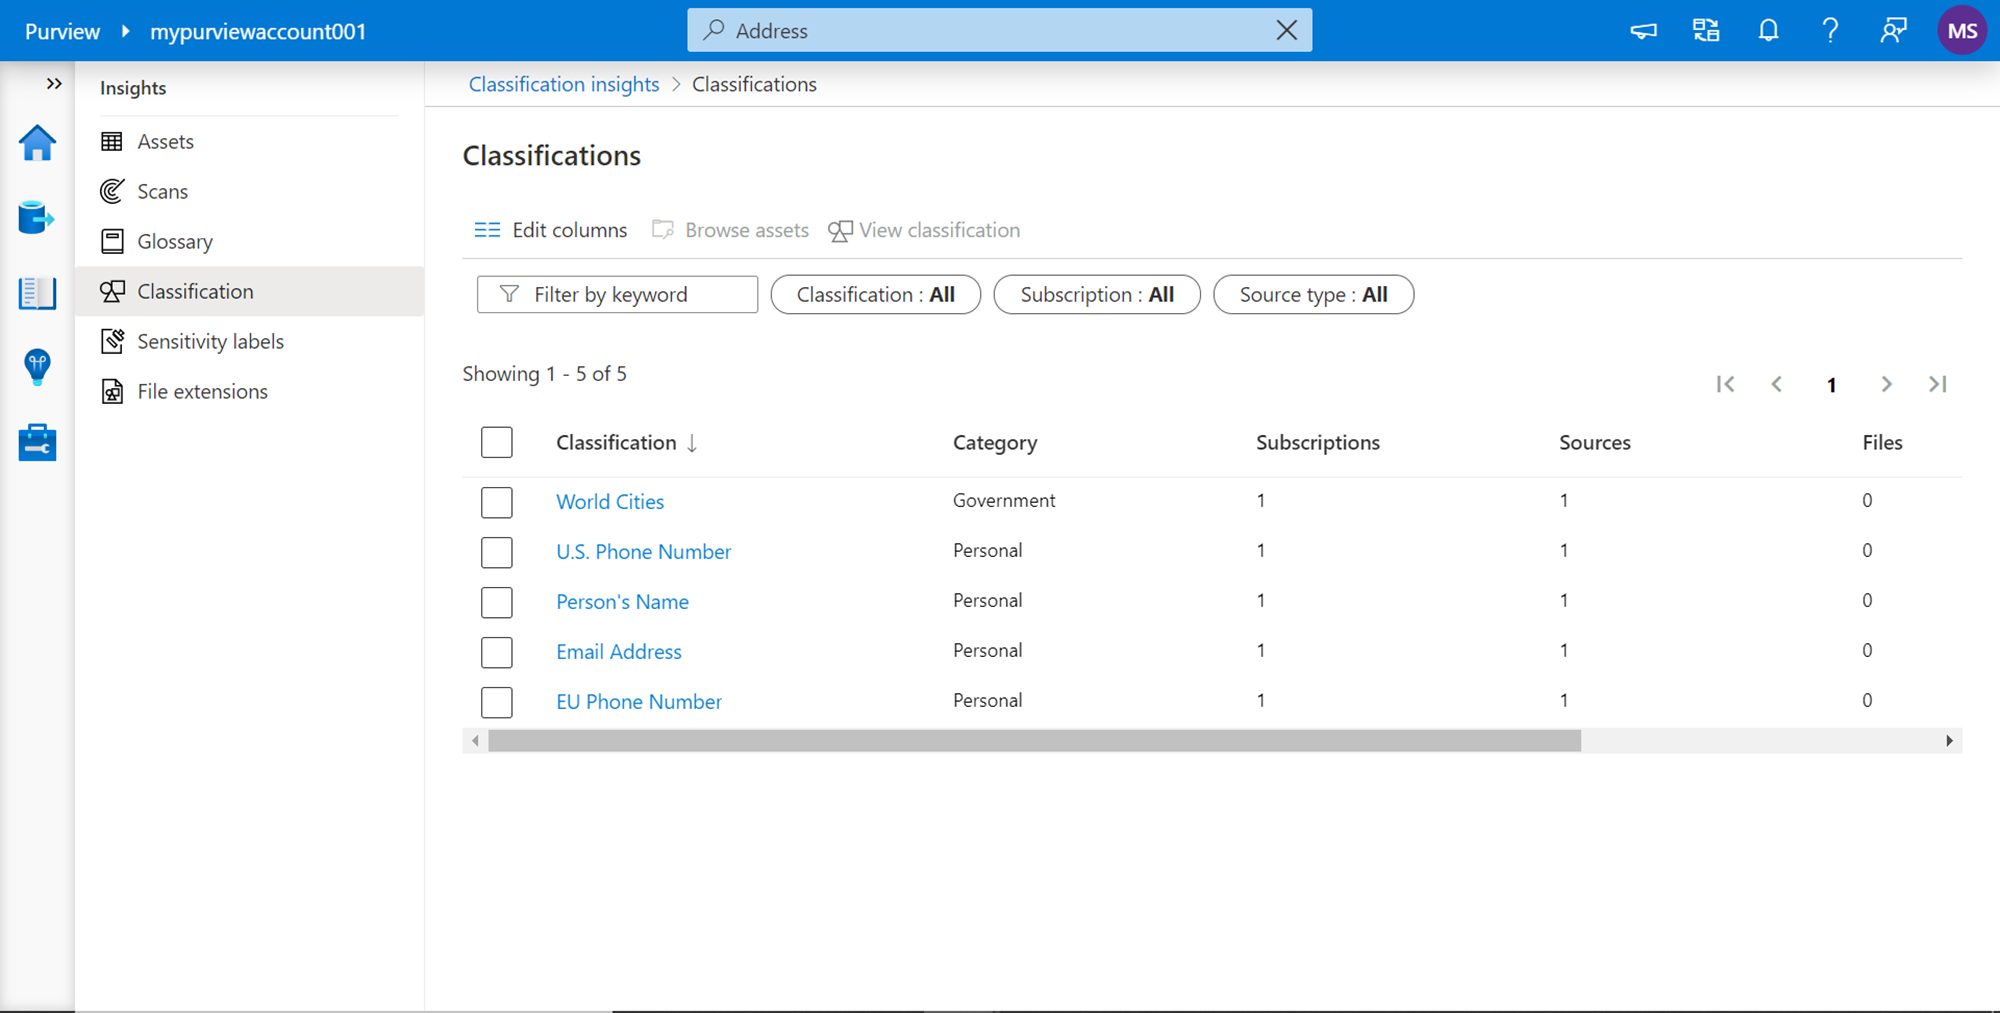
Azure Purview provides an Insights section where it shows automated insights for different features supported by it. Click on the Insights section and it would show the details as shown below. Let’s say that we are specifically interested in the classification that was done on the assets that were discovered, we can check this section. Here it shows that two tables and five unique classifications were found, which means five fields were totally classified which are spread in two tables.
To view the details, one can click on any of the statistics shown on this page, and it would open a details page as shown below. Here we can see the list of the fields that were classified automatically using the system scan rule set that was used while scanning the data source. Based on the category assigned to these attributes, one can just explore any given category and view all the fields listed under it for all the assets.
In this way, we can use Azure Purview to analyze metadata insights using different functionalities provided in the Purview Studio.
Conclusion
In this article, we started with a setup of Azure Purview account, purview studio, and a scanned data source. We navigated different sections of the purview studio and learned how we can explore and analyze the extracted metadata in Azure purview.
Table of contents
| Getting started with Azure Purview for Data Catalog and Governance |
| Getting started with Azure Purview Studio |
| Cataloging metadata with Azure Purview |
| Using Azure Purview to analyze Metadata Insights |

He has worked internationally with Fortune 500 clients in various sectors and is a passionate author.
View all posts by Rahul Mehta
- Finding Duplicates in SQL - February 7, 2024
- MySQL substring uses with examples - October 14, 2023
- MySQL group_concat() function overview - March 28, 2023