
In this article, we will learn how to catalog metadata using the Azure Purview service.
Introduction
An enterprise IT ecosystem may have tens to hundreds of data repositories which may be hosting tens of thousands of database objects and attributes. Data pipelines are engineered to move data between these data repositories and database objects as well. These data pipelines need to reference the address as well as the structure of these data repositories and data objects, which is generally catered to by a central metadata catalog. Azure introduced a service that deals with metadata cataloging and governance – Azure Purview. In my previous article, we learned how to create an Azure Purview account and get acquainted with Purview Studio. The next step is to use the studio tool, register the data repository and catalog the database objects of the registered data repository. This article will help you understand how to catalog metadata using the Azure Purview service.
Pre-requisites
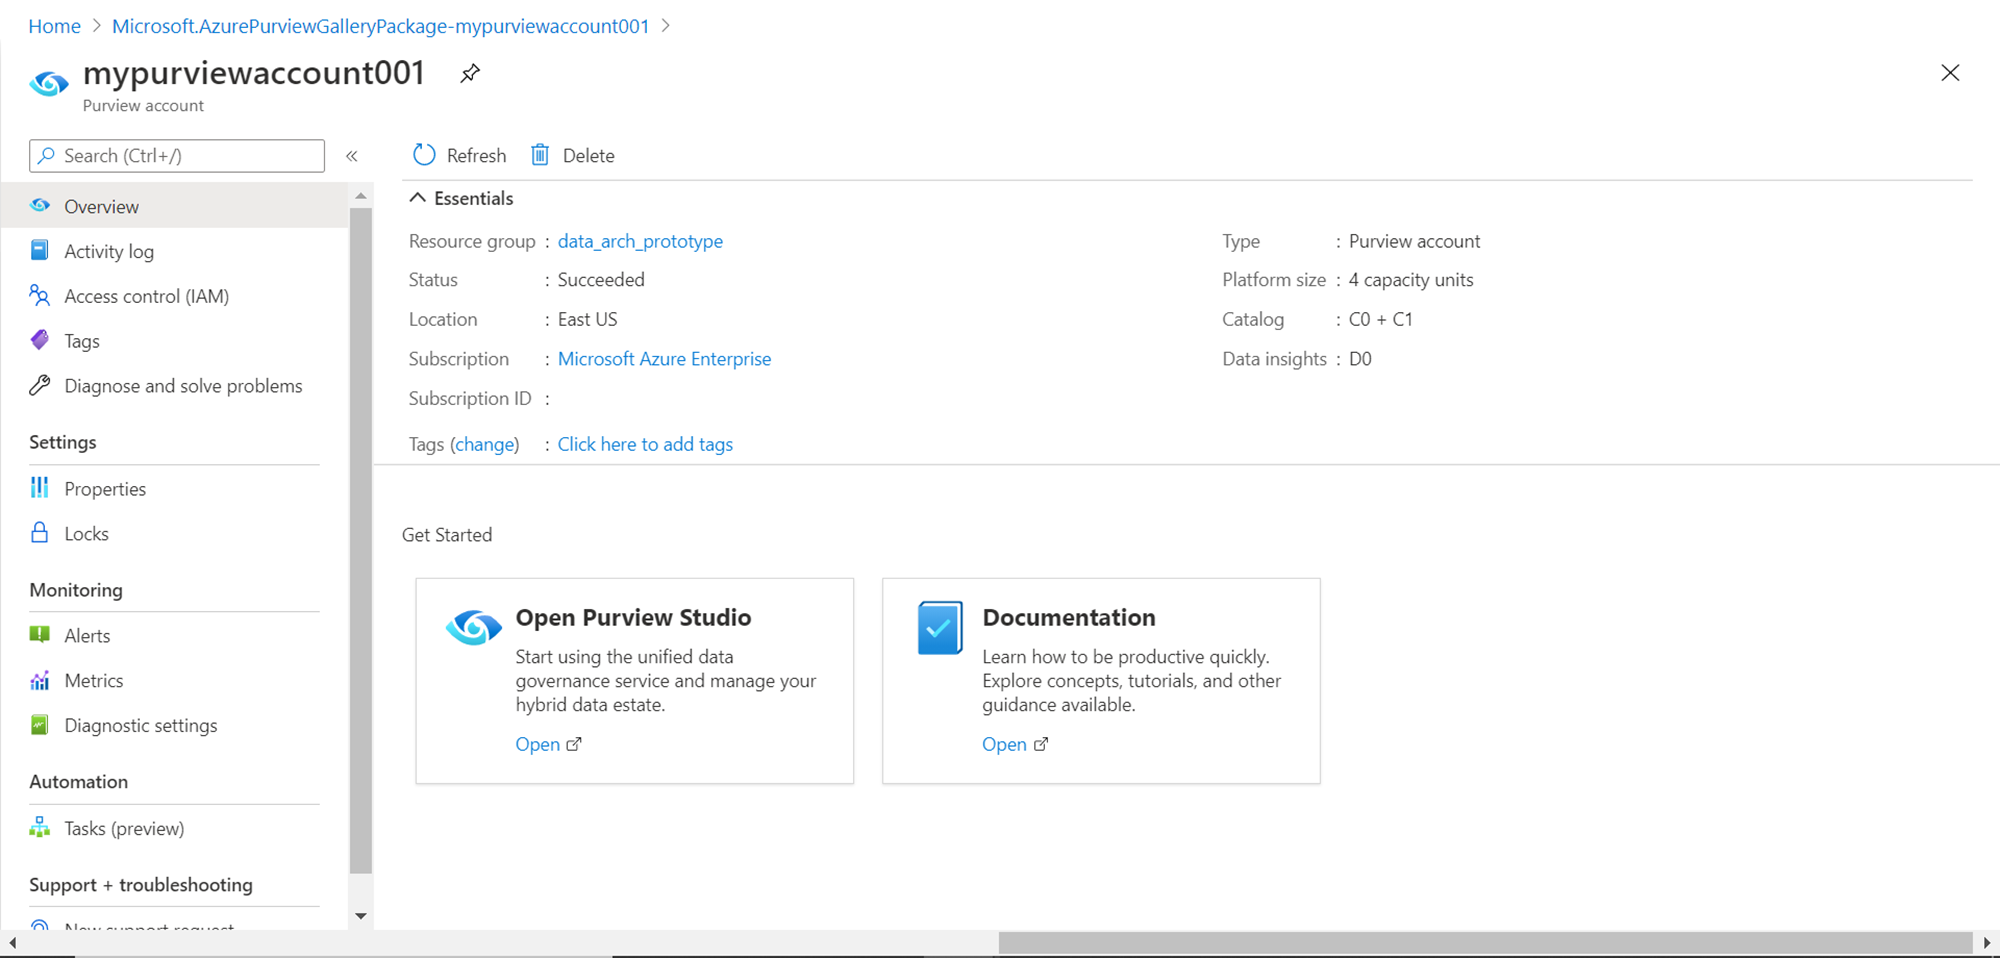
Before we perform the exercise of cataloging metadata in purview, we need certain pre-requisites in place. We need to have a purview account in place with administrative privileges. Once the account is in place, one should have enough privileges to operate the Purview Studio. Once the purview account is in place, the dashboard page would look as shown below, from where one can open Purview Studio.
Apart from setting up a Purview account, it is assumed that an Azure SQL Database instance with sample data that Azure offers is already created in the same account and region with Azure Purview is setup. We would be using this as the data repository and the sample database objects in it to catalog its metadata in purview.
Registering a Data Source
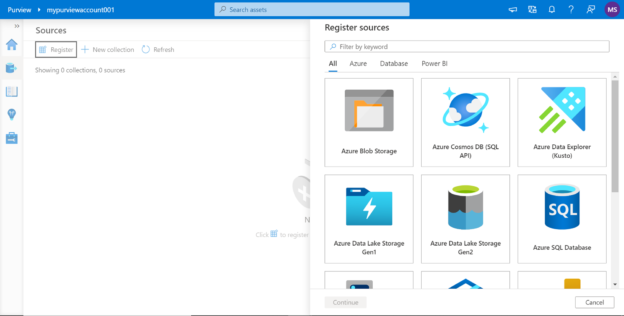
Assuming one is having access to Purview Studio, the next step is to register the Azure SQL Database that we mentioned above. To register the data source in Purview Studio, open the studio and click on the sources section, and click on the Register button as shown below. It would pop-up the supported data sources as shown below. In our case, we have an Azure SQL Database instance as our target repository. So select Azure SQL Database and click on the Continue button.

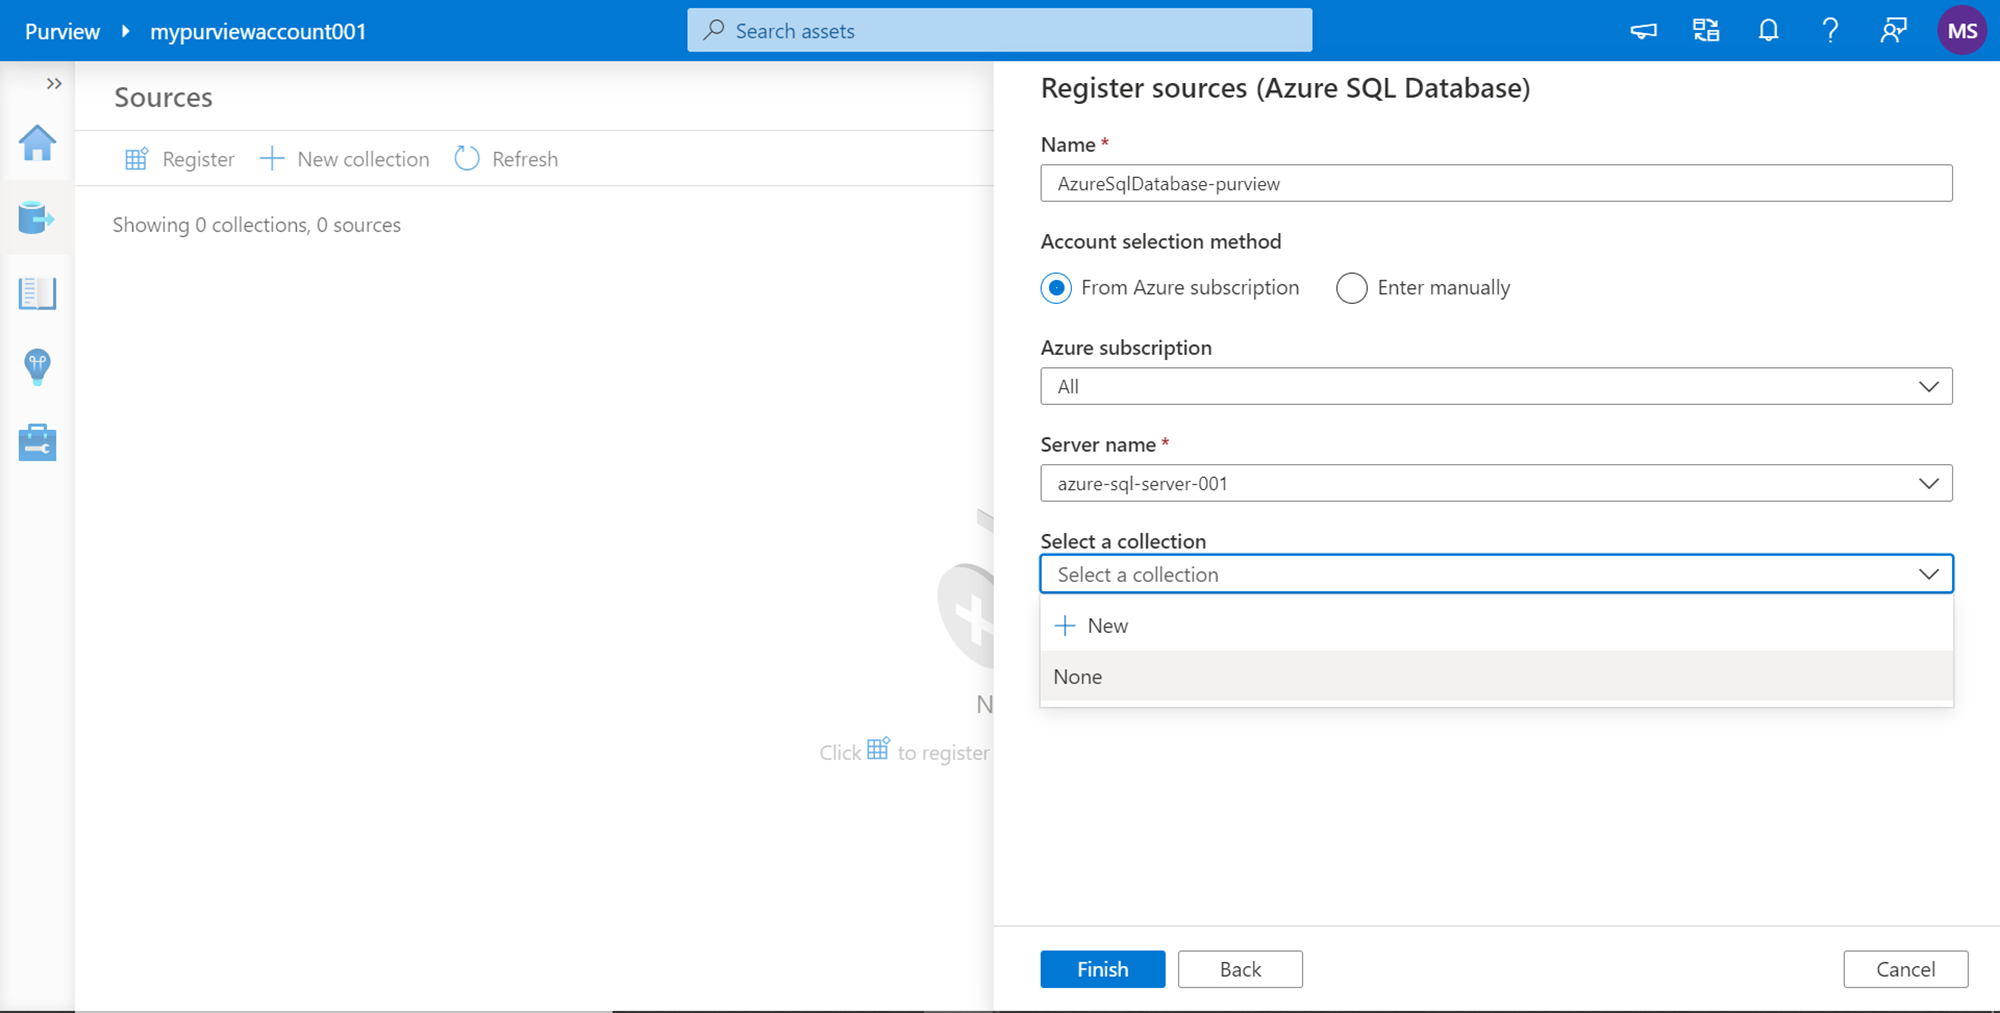
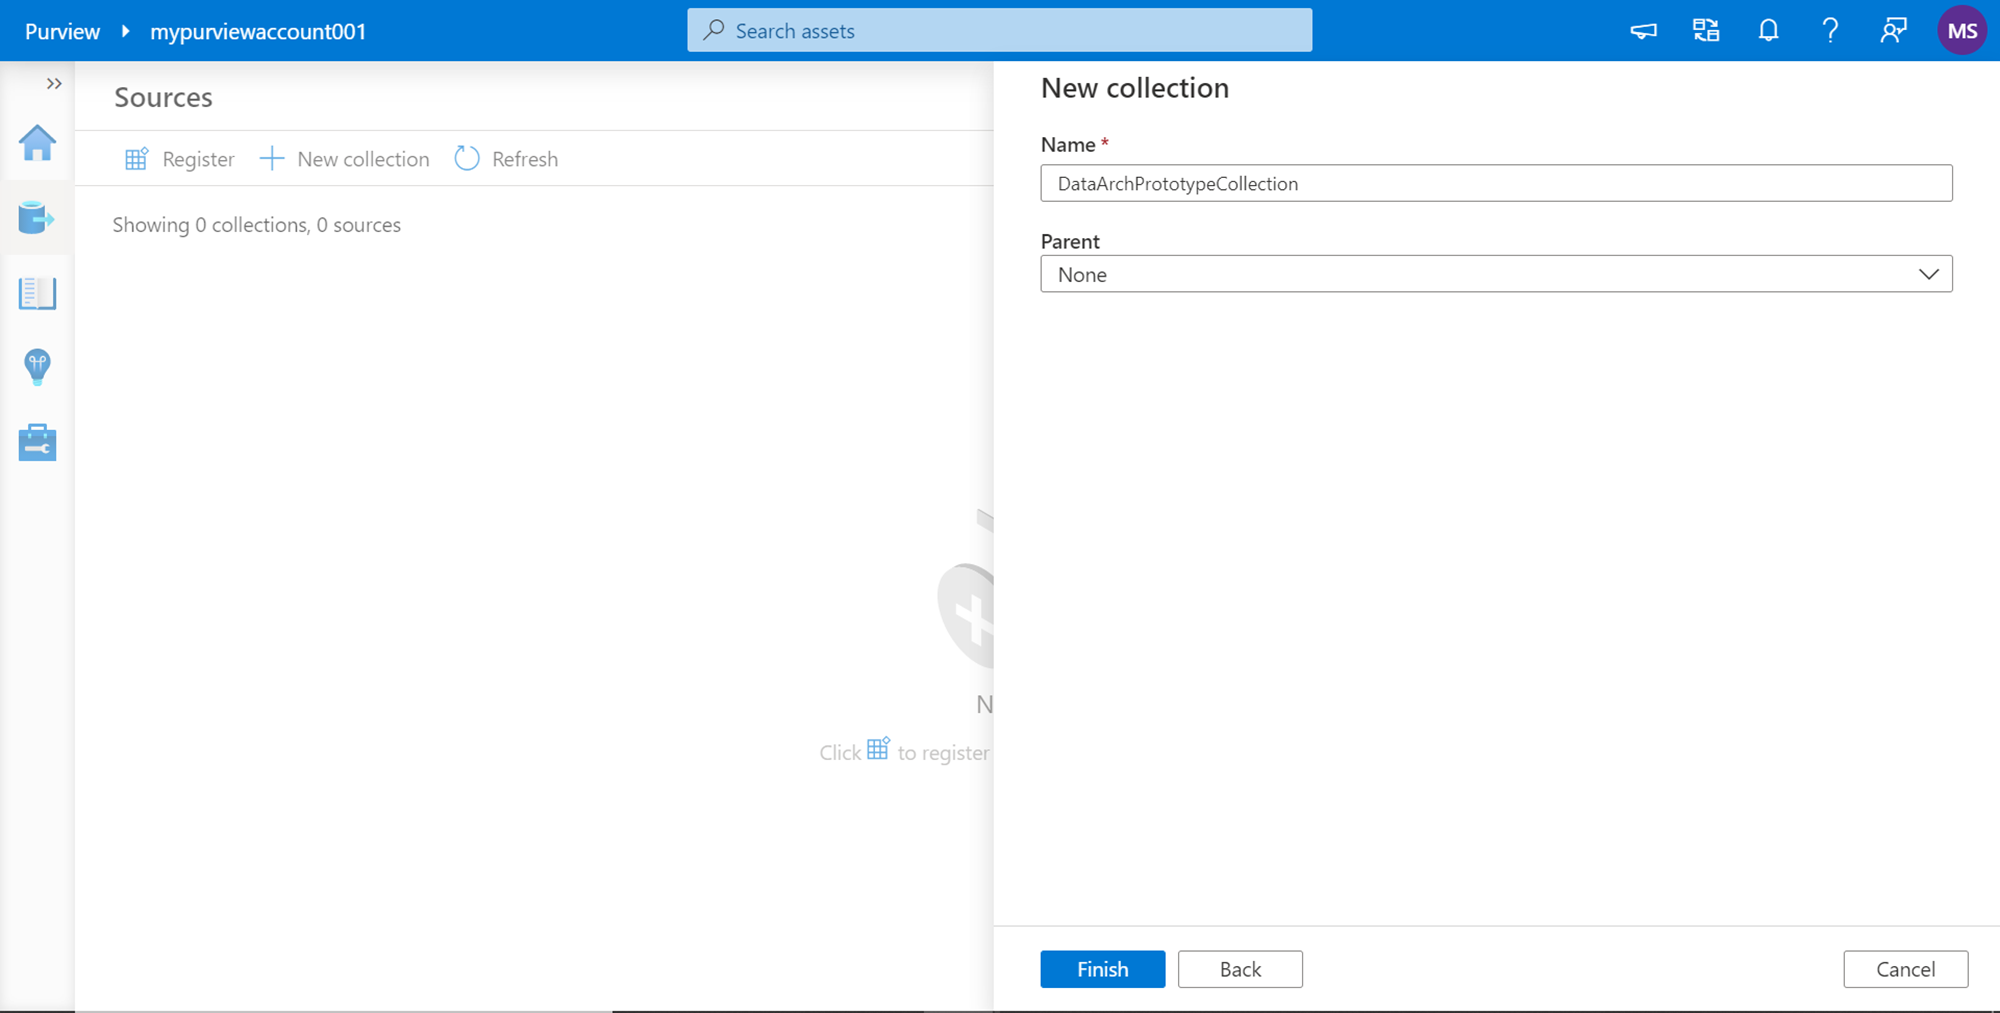
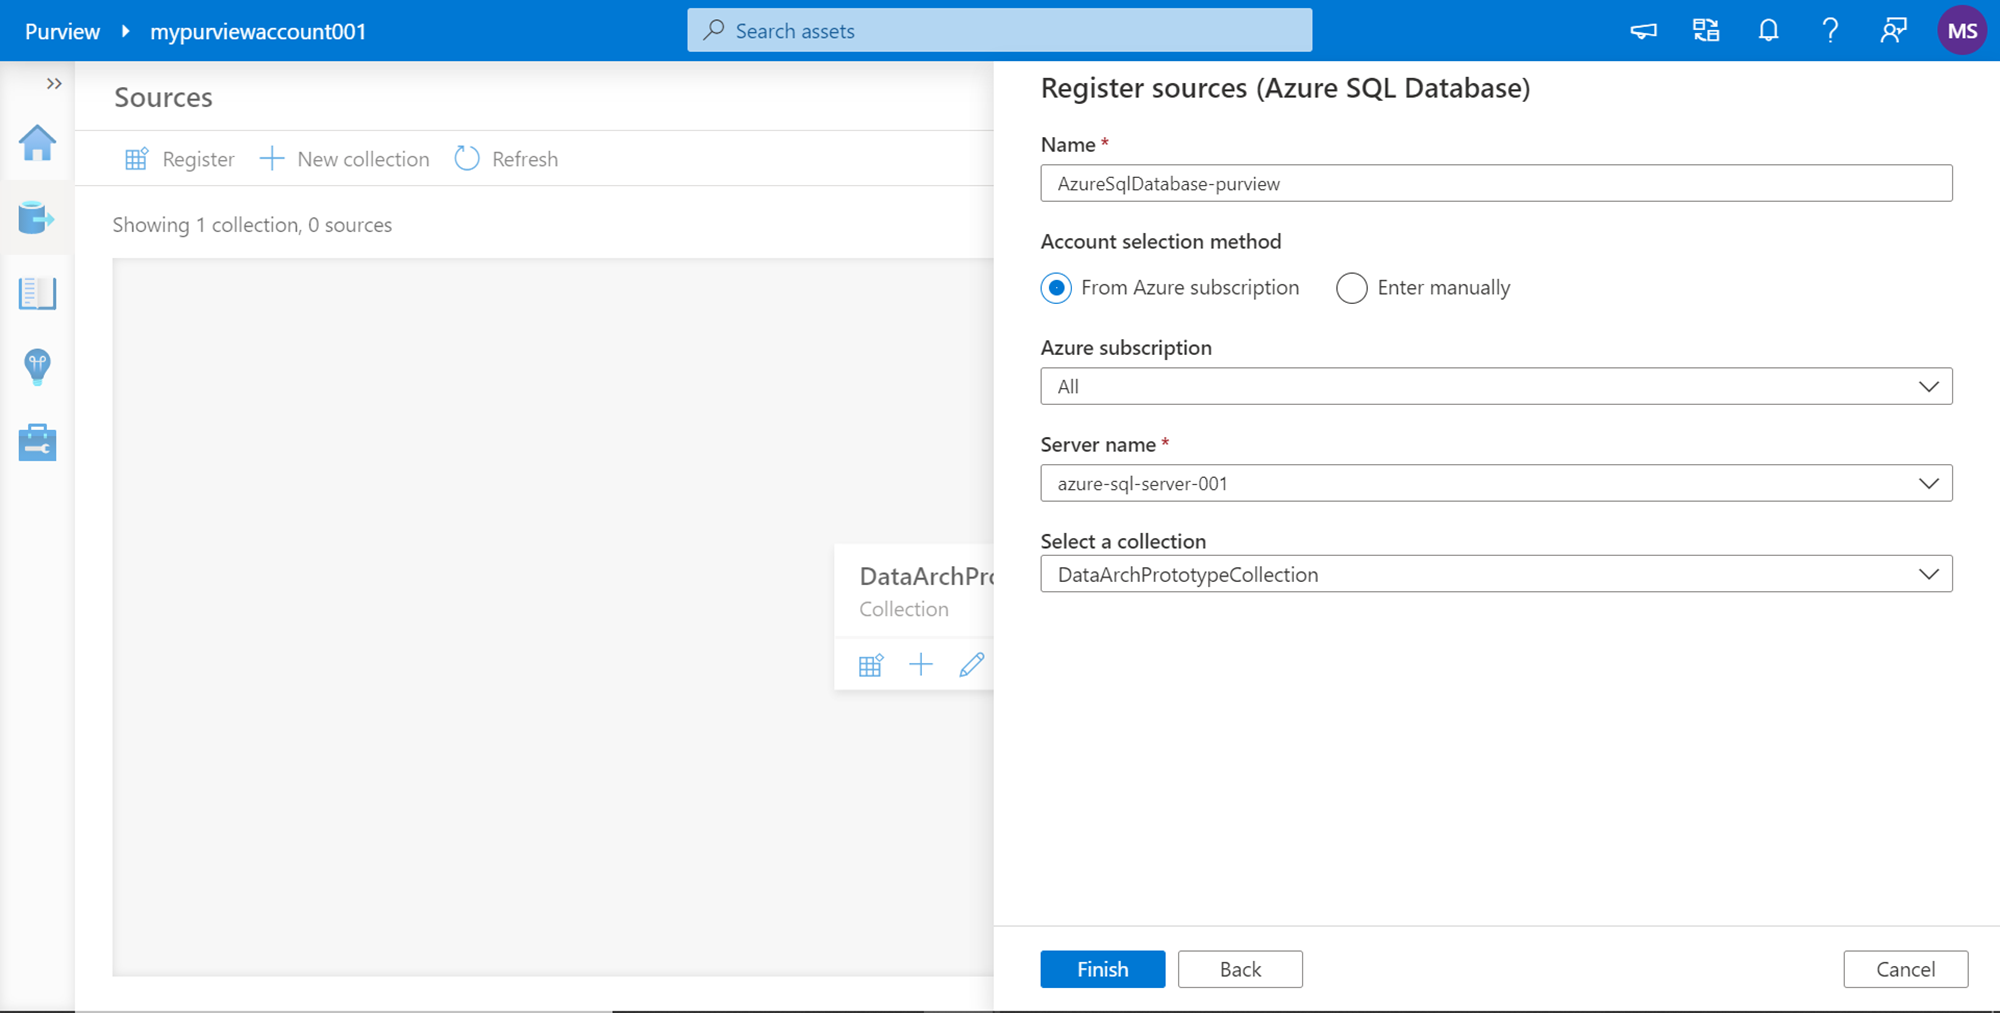
In the next step, we need to provide a new name for the data source connection. We already have an Azure SQL Database instance in-place, which we would register with purview. Select the instance that would appear in the drop-down list of data sources as shown below. One can register many data sources and eventually managing each of these data sources individually may start to become a challenge. So, to deal with this situation, one can add the data sources in collections. By default there won’t be any collection in purview, so we can create a new one by clicking on the New button in the Collection drop-down as shown below:
We can create a hierarchy of collections and data sources can be assigned to be part of any of this collection hierarchy. The top-level collection would not have any parent collection. The rest of the nested collection would have a parent collection. For now, we would just create a new collection and add our data source to this collection.
After the collection is created, it would appear in the drop-down list of the collection as shown below. Once all the details are added, click on the Finish button. This would register the data source and create the data map.
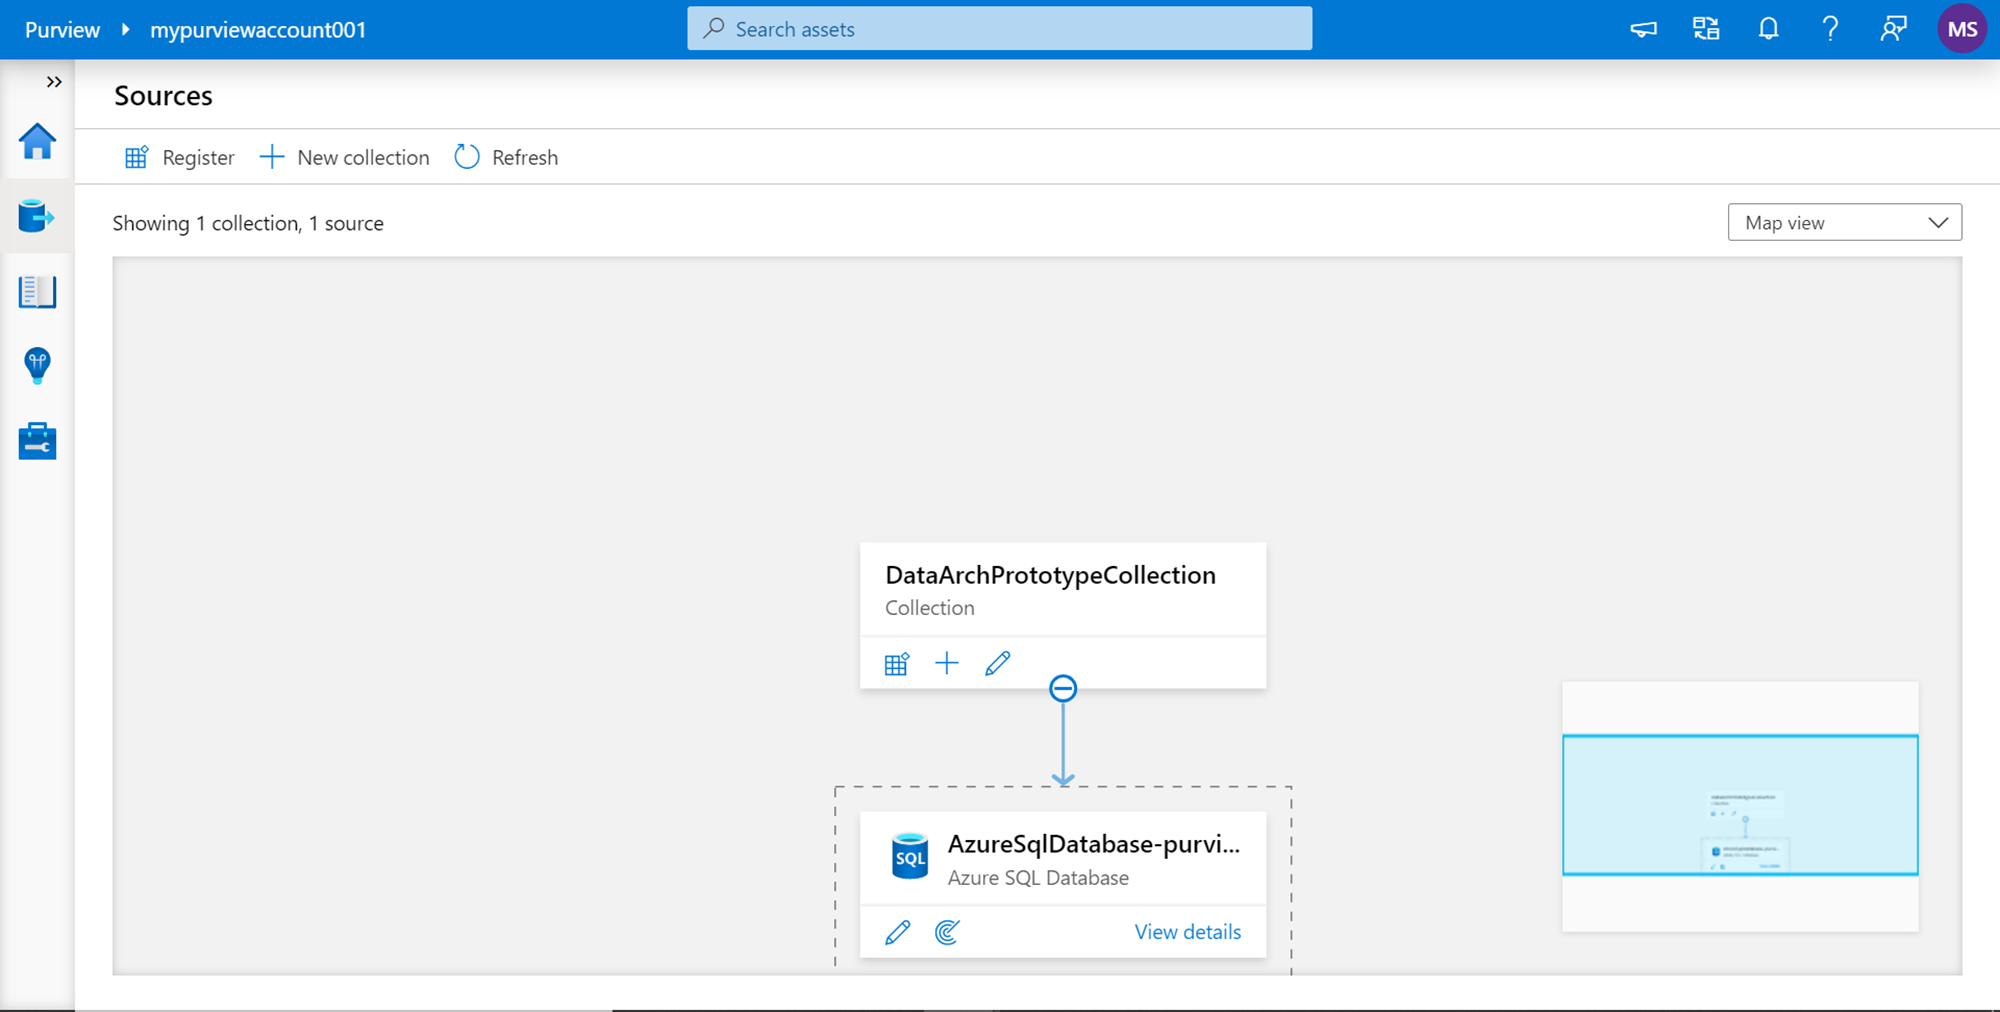
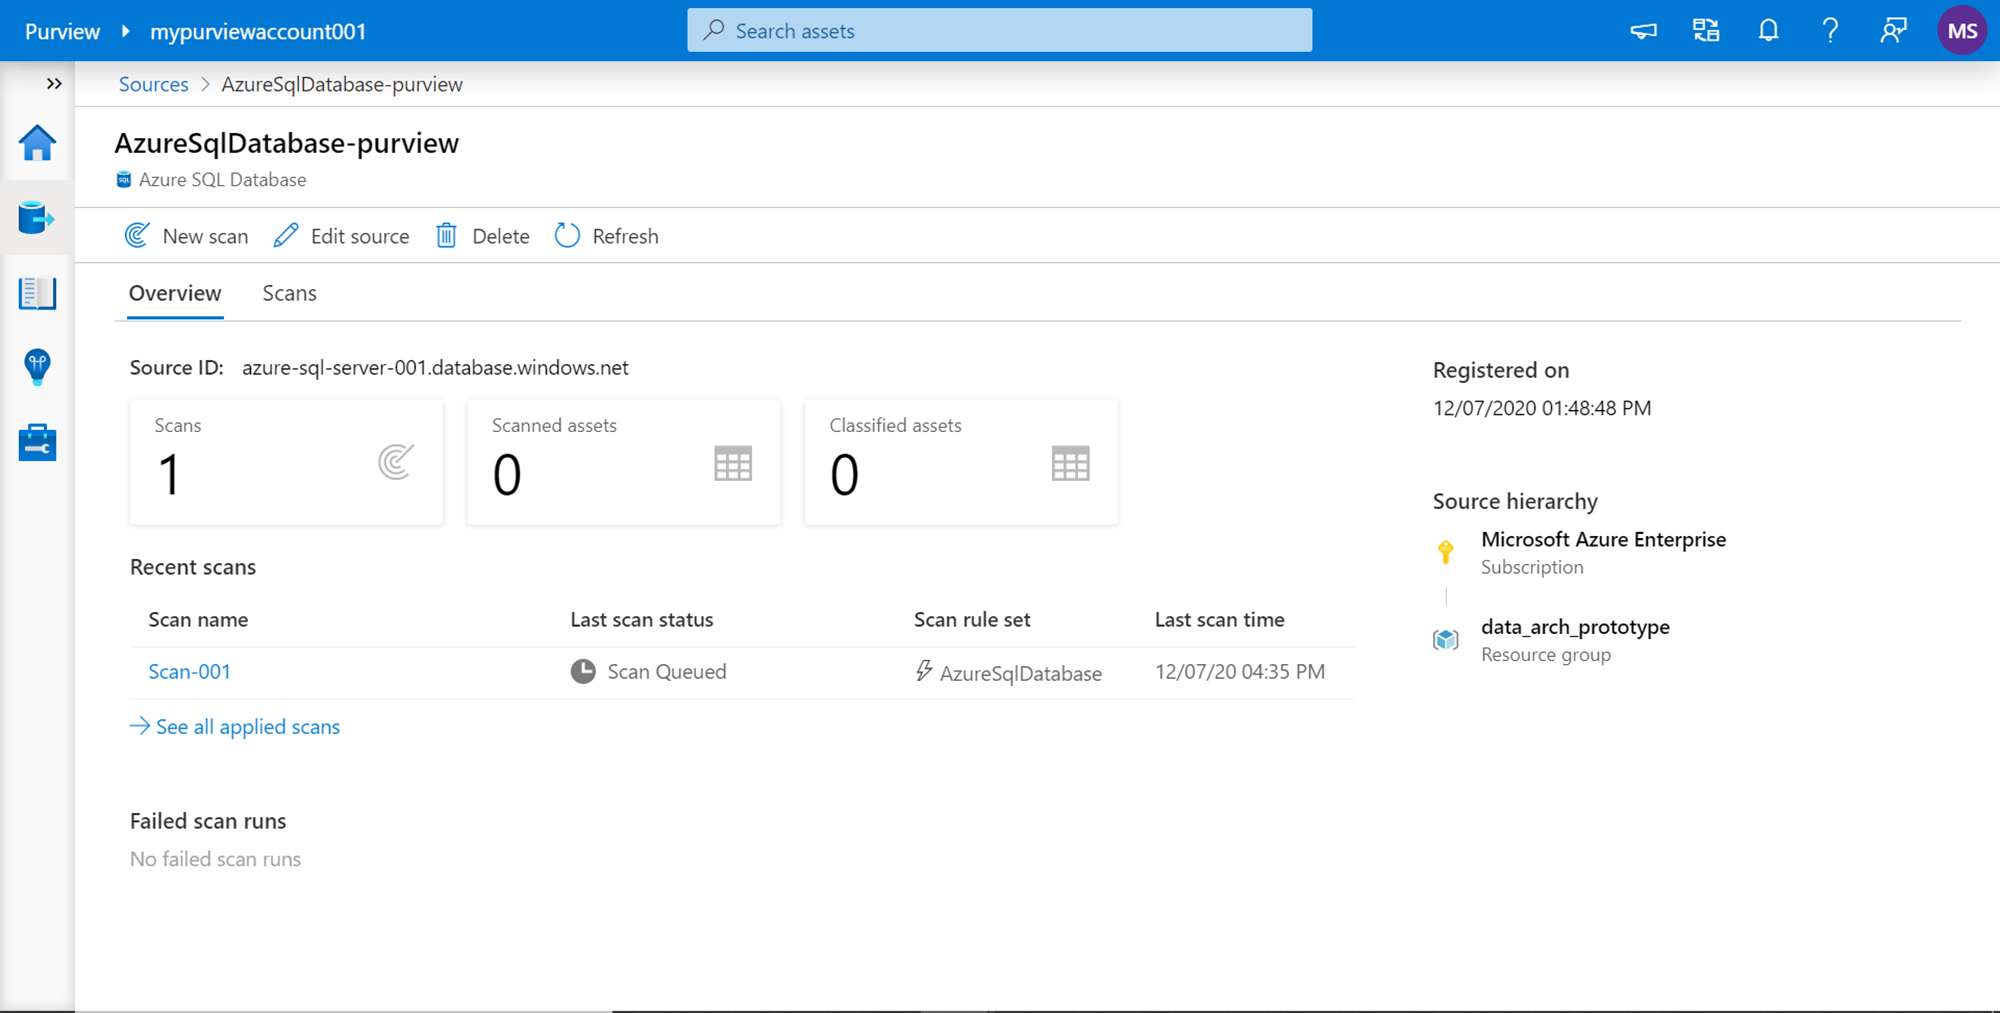
The data map once created would look as shown below. The collection can be modified and removed as well after it’s created. If we click on the “View Details” link in the data source, it would show all the details of the configured data repository.
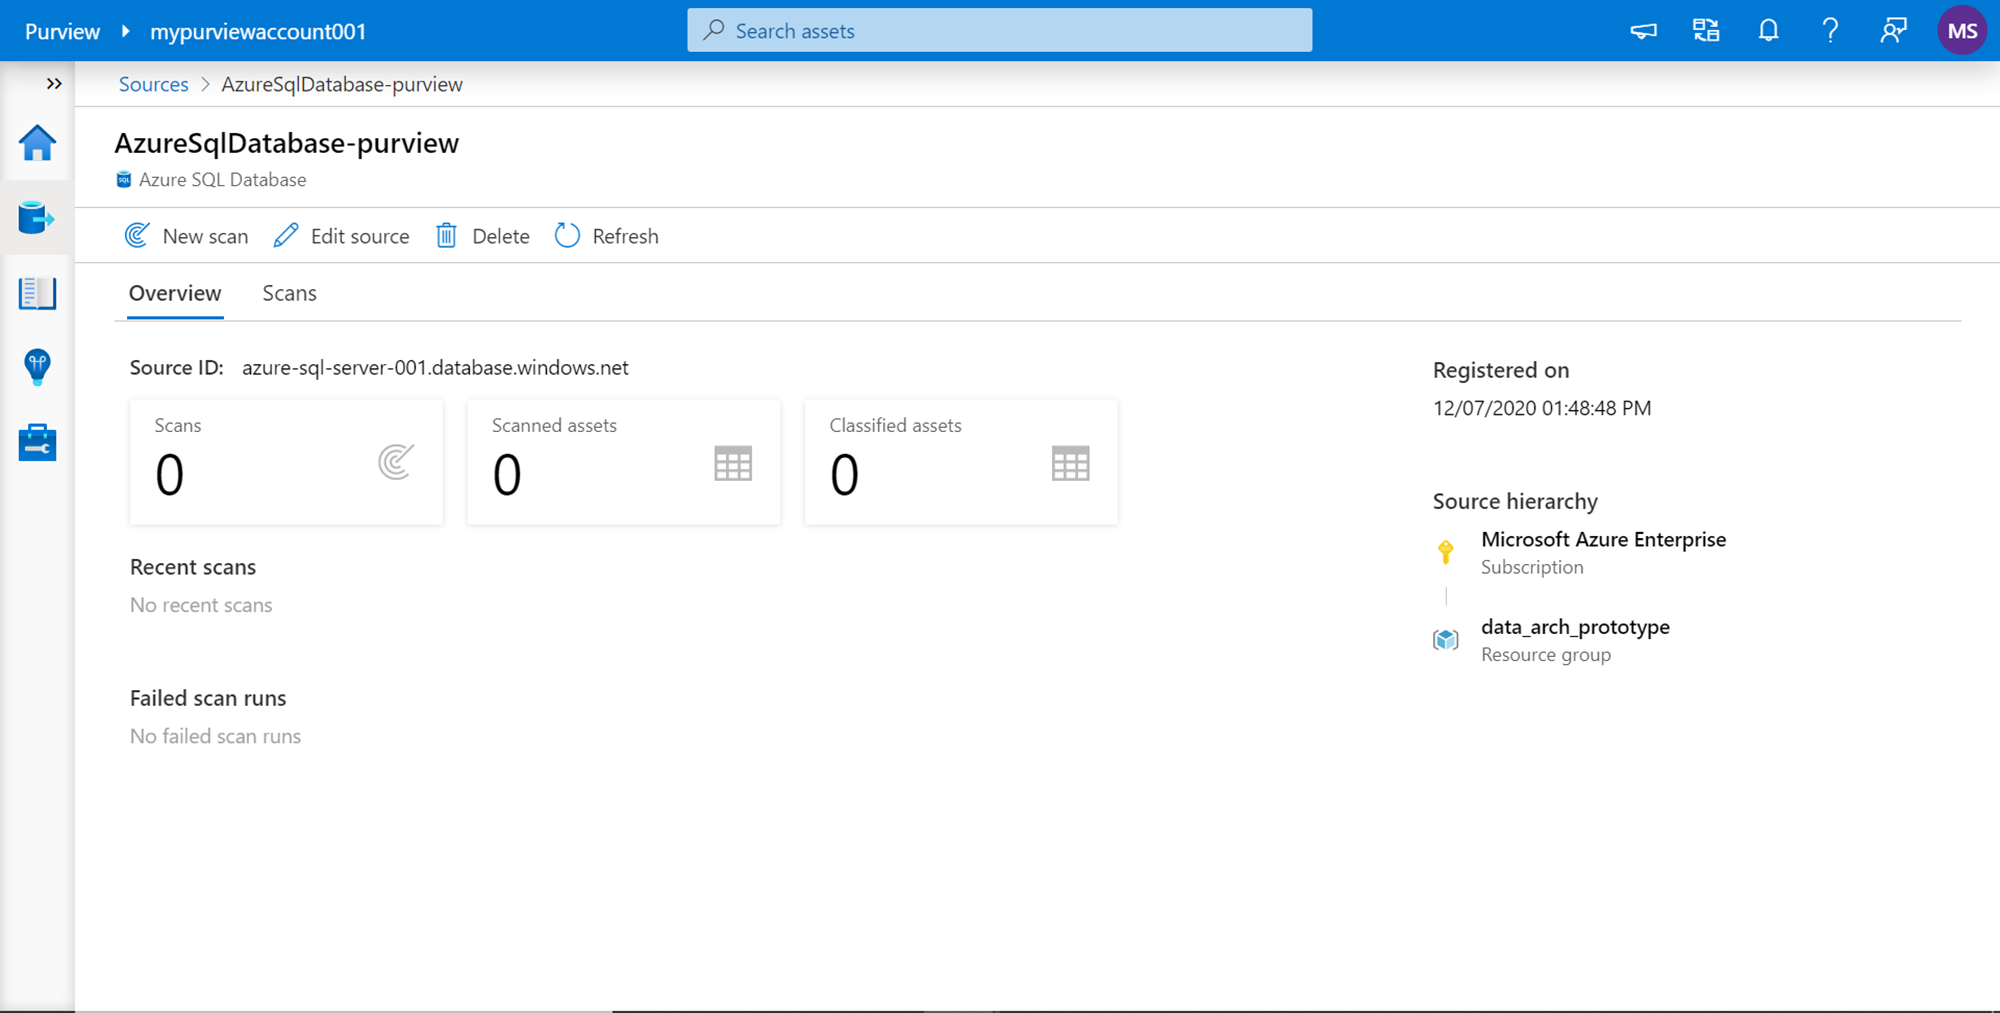
Click on this link, and a new details page would open as shown below. Here we can see the data source hierarchy under which the data source has been classified or configured by us. It also shows the date and time when this data source was registered with Azure Purview. To create the metadata in Azure Purview from the database objects hosted in the data repository, we need to configure a one-time or scheduled scan of the data repository so that the metadata can be created the first time as well as can be kept updated from time to time. As can be seen from the scan status that no scan has been created or scheduled. So, let’s create the first scan of this data repository.
Cataloging Metadata
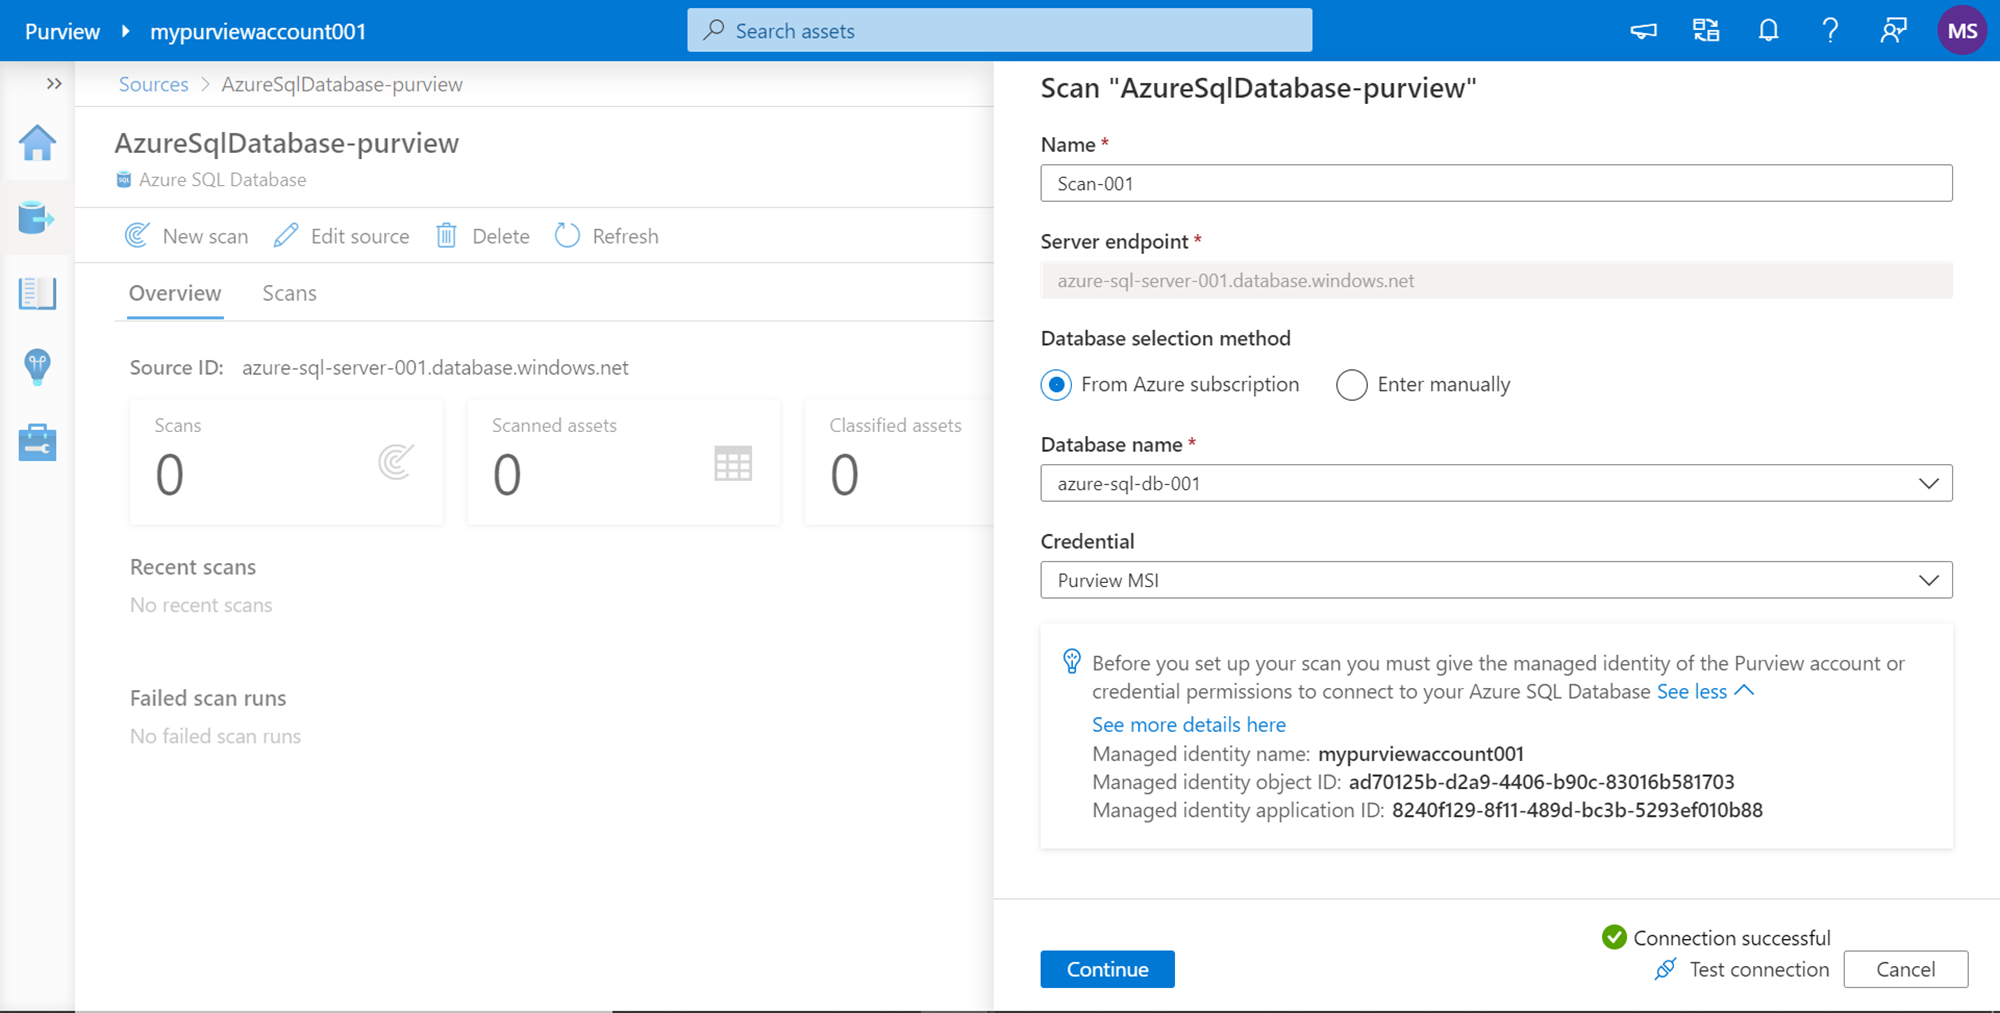
To create a new scan, click on the New scan button from the menu bar. This would open a new pop-up as shown below. We need to provide a name for the new scan. The server endpoint would be auto-selected and cannot be changed, and it’s the Azure SQL Server instance that hosts the Azure SQL Database instance. Next, we need to select the credential which would be used by Azure Purview to connect to the data source. We can create a new managed identity credential that allows Azure Purview to access Azure SQL Database. Alternatively, we can use Purview MSI (Managed Service Identity) which can be used to access the Azure SQL Database instance.
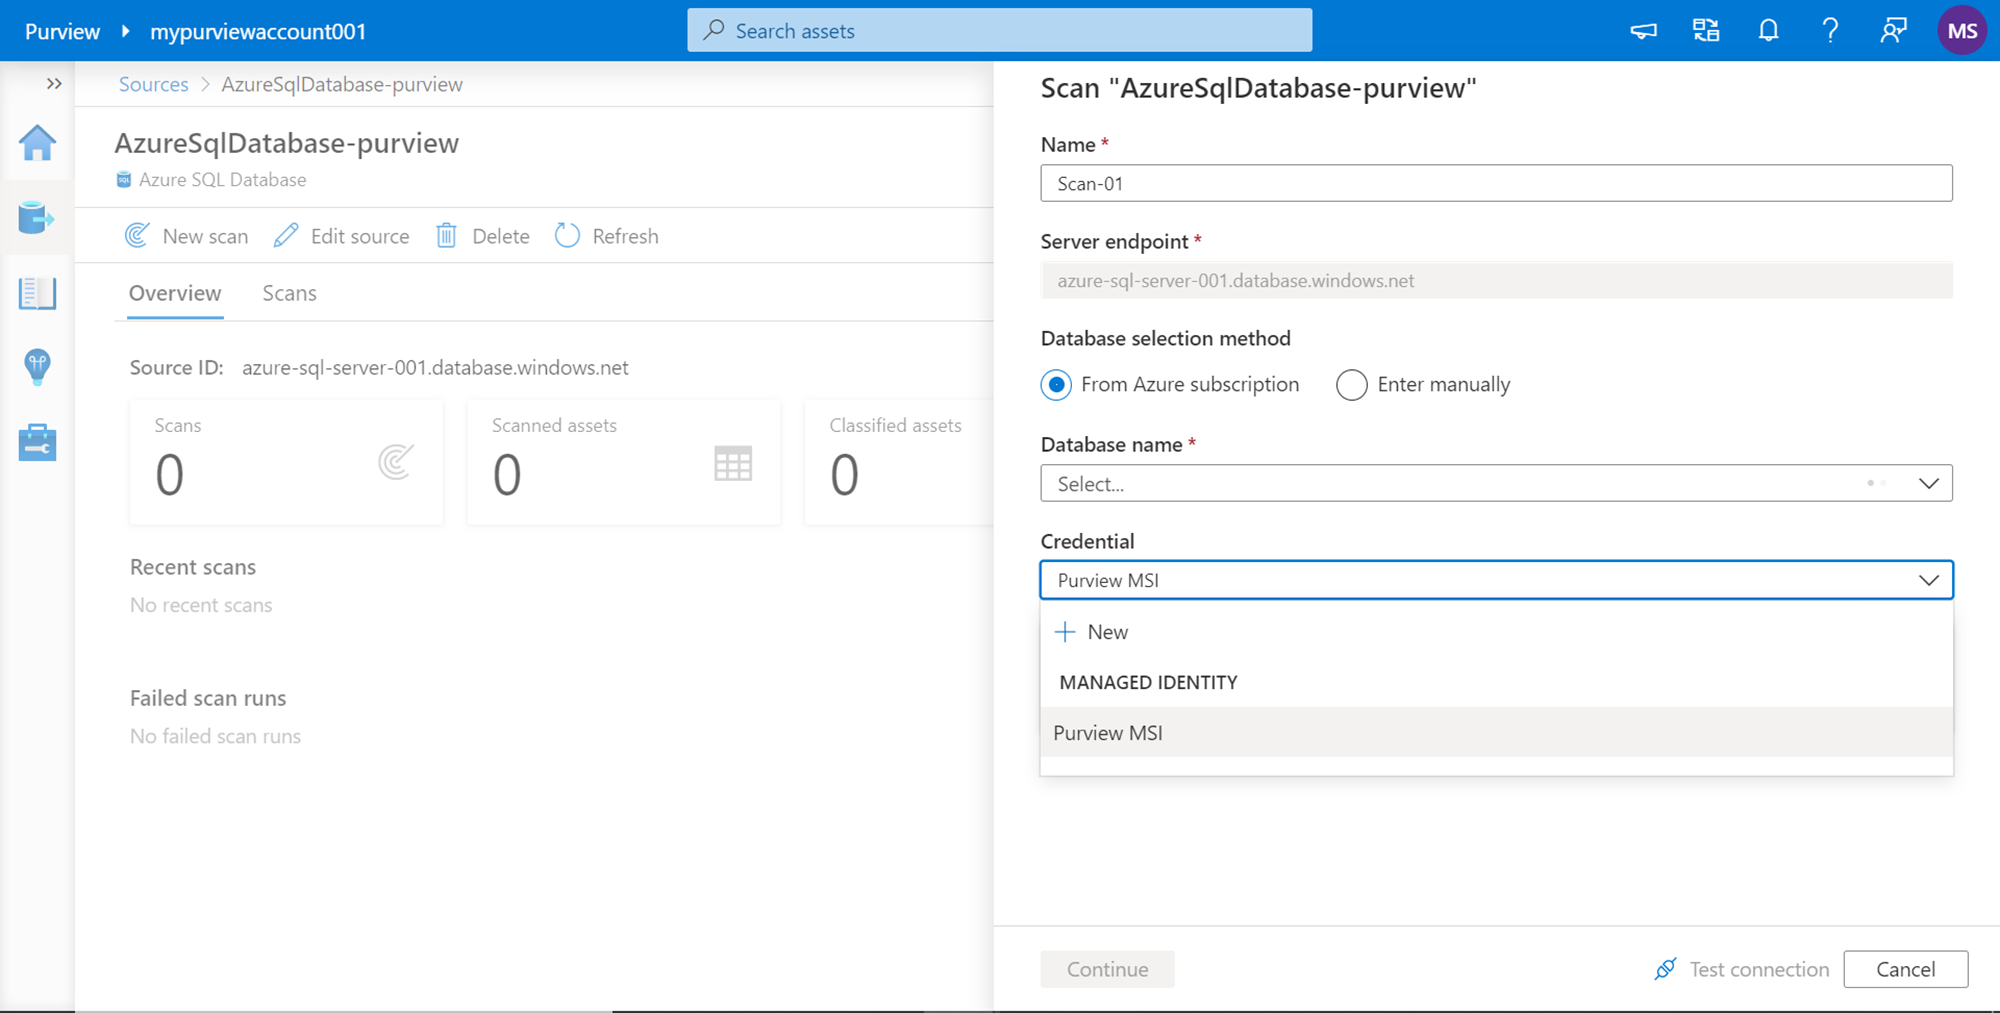
When we select this identity, it would show the name of the purview account, purview object ID, and purview application ID which need to be provisioned access to Azure SQL Database instance. Once you do the needful to provision necessary privileges to these objects, click on the “Test connection” button. If the connection is successful, then this means that Azure Purview can successfully access the Azure SQL Database instance. Once the connection is successful, click on the Continue button.
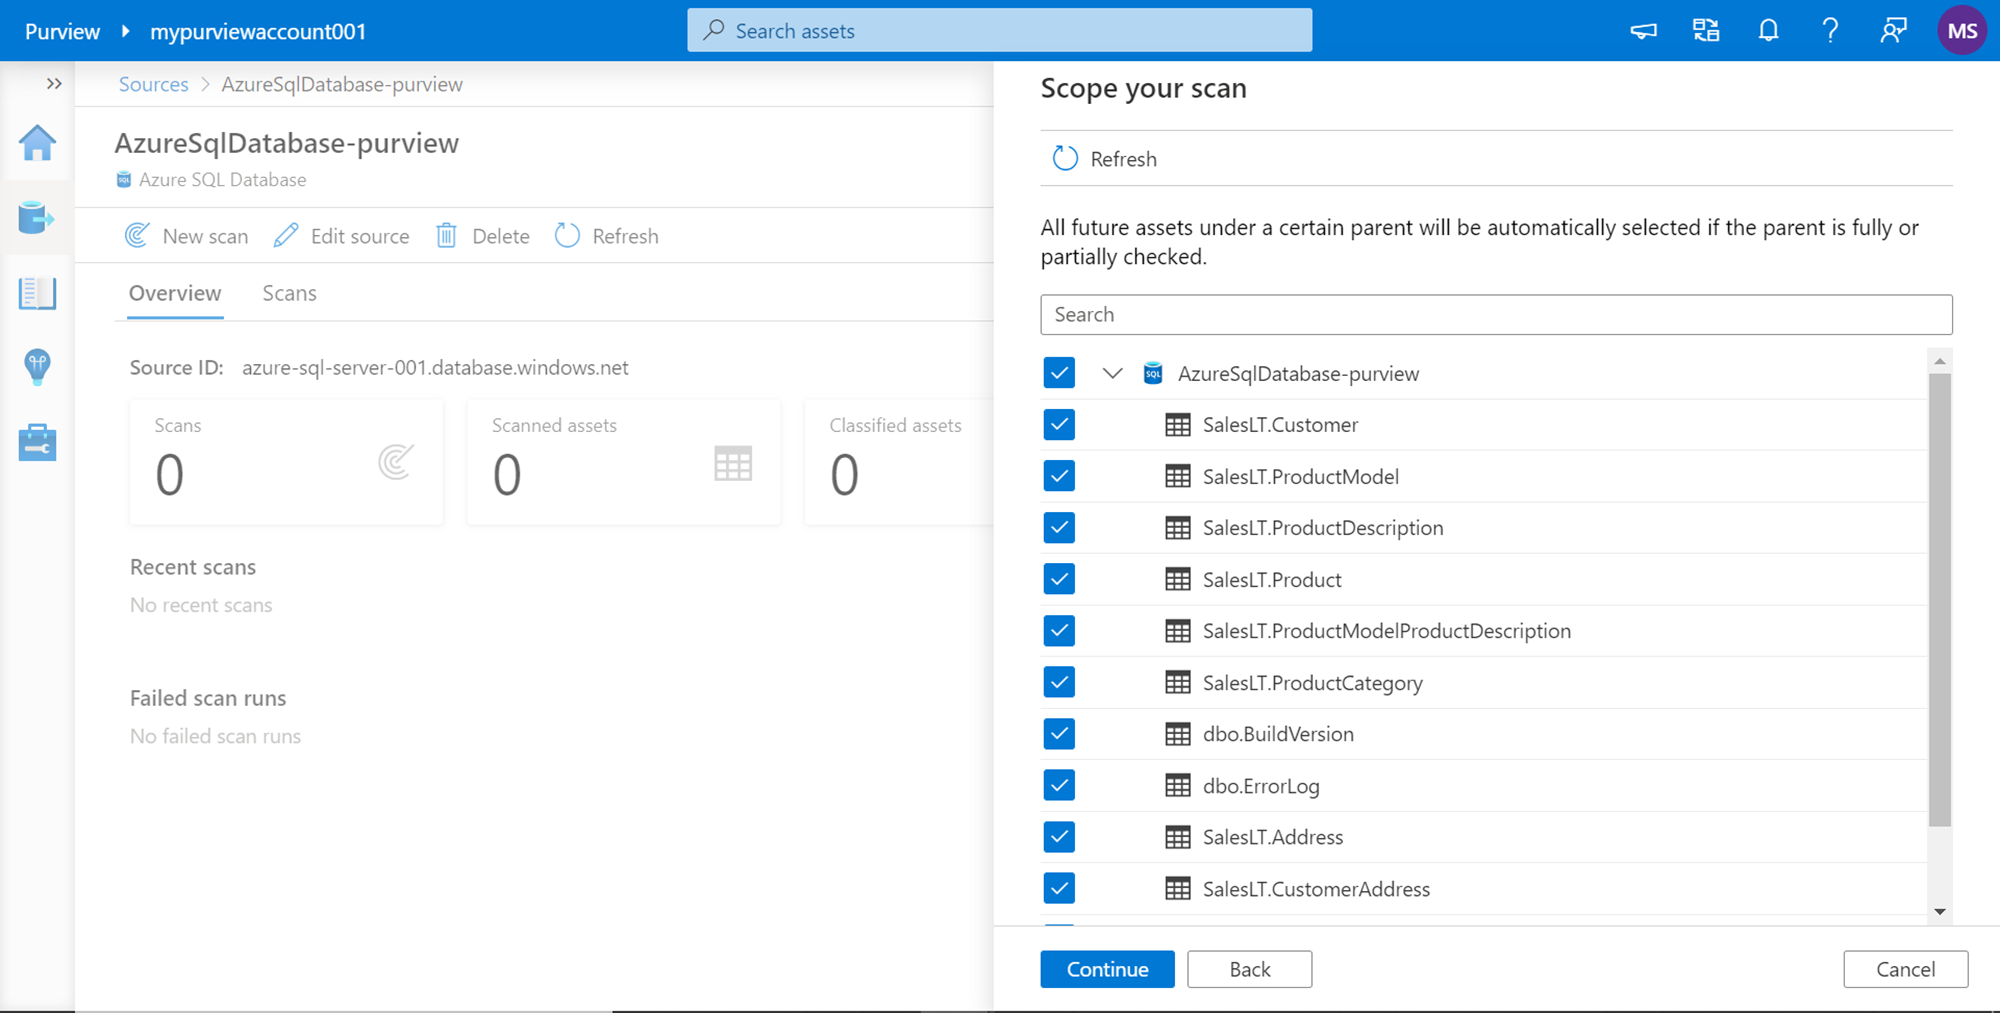
In the next step, we need to select the database objects that we intend to scan and catalog in purview. For now, we would select all the tables in all the schemas as shown below. Once the selection is done, click on the Continue button.
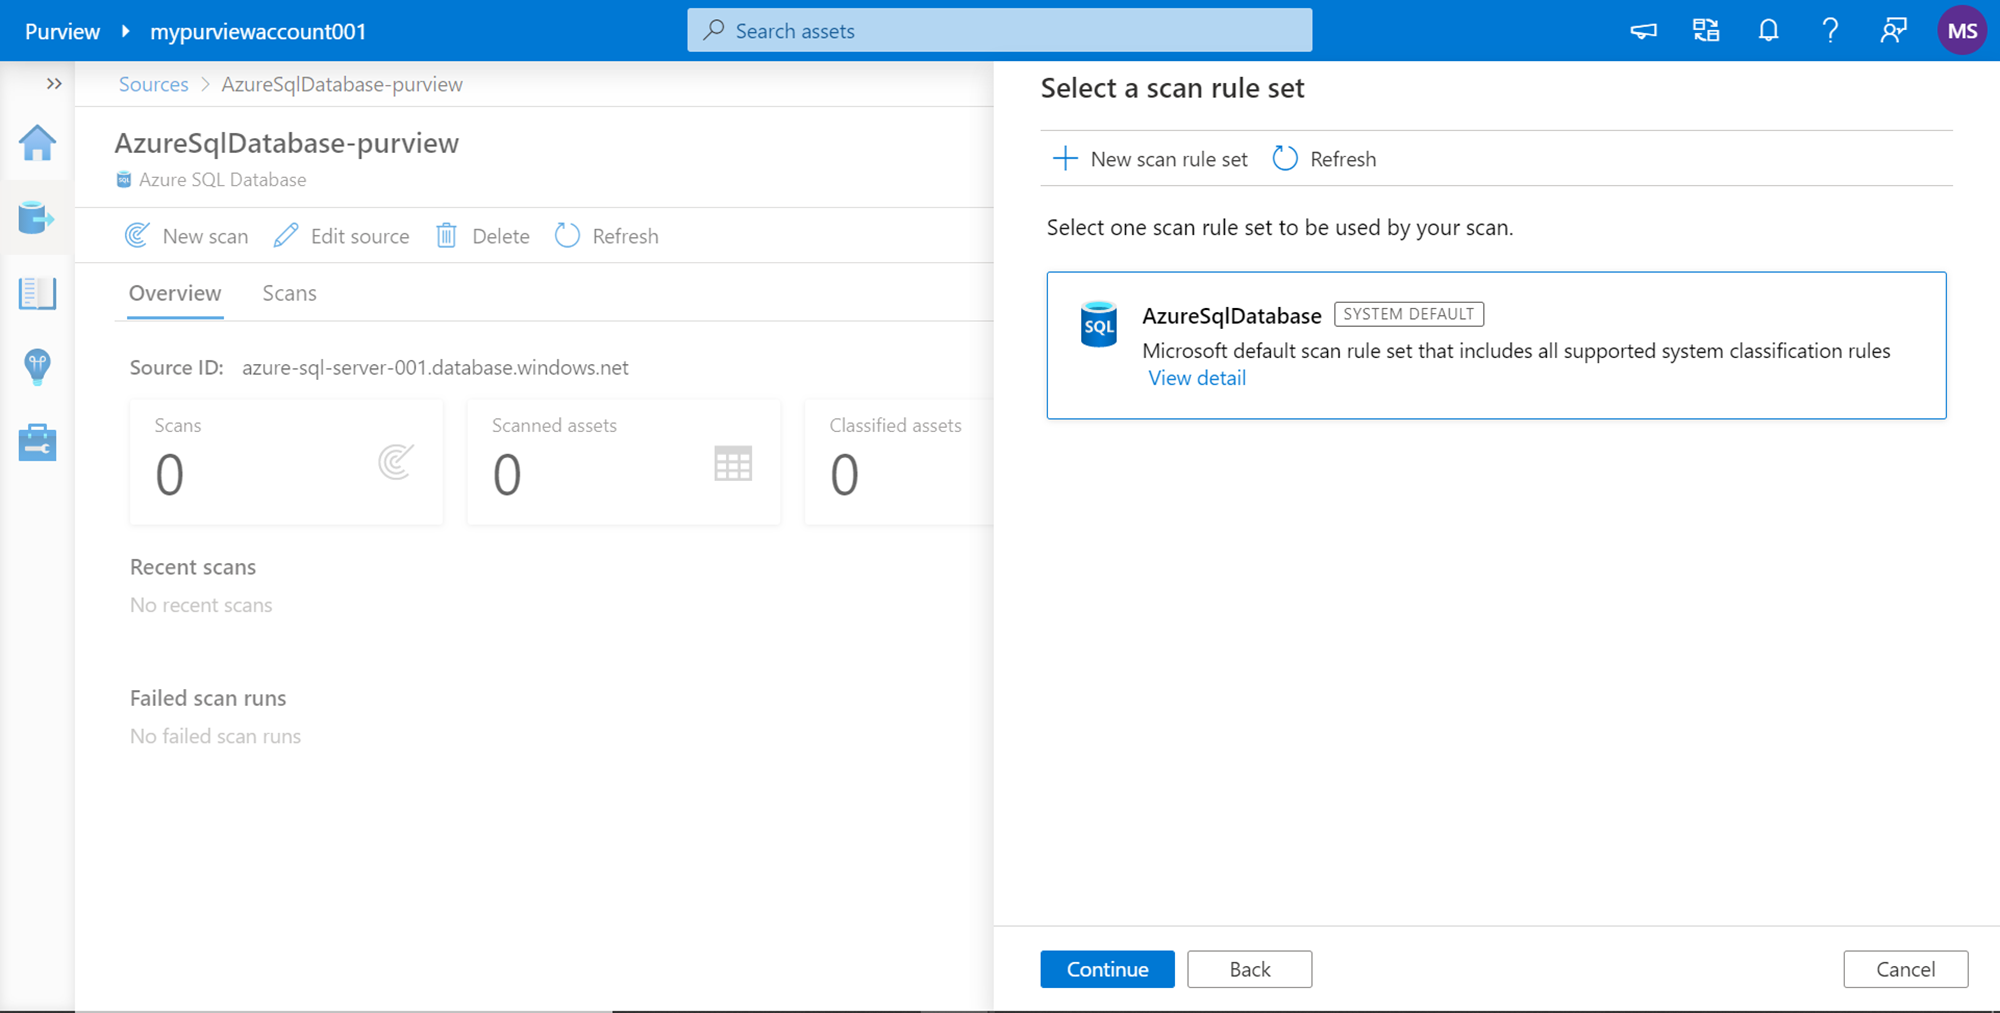
In this step, we need to select a scan rule set using which Azure Purview would classify the metadata. By default, purview provides a system default scan rule set as shown below. This helps to quickly get started with the scanning of the supported data repositories without defining any custom rules. One can also create a custom scan rule set using the New button as shown below. Once the rule set is selected, click on the Continue button.
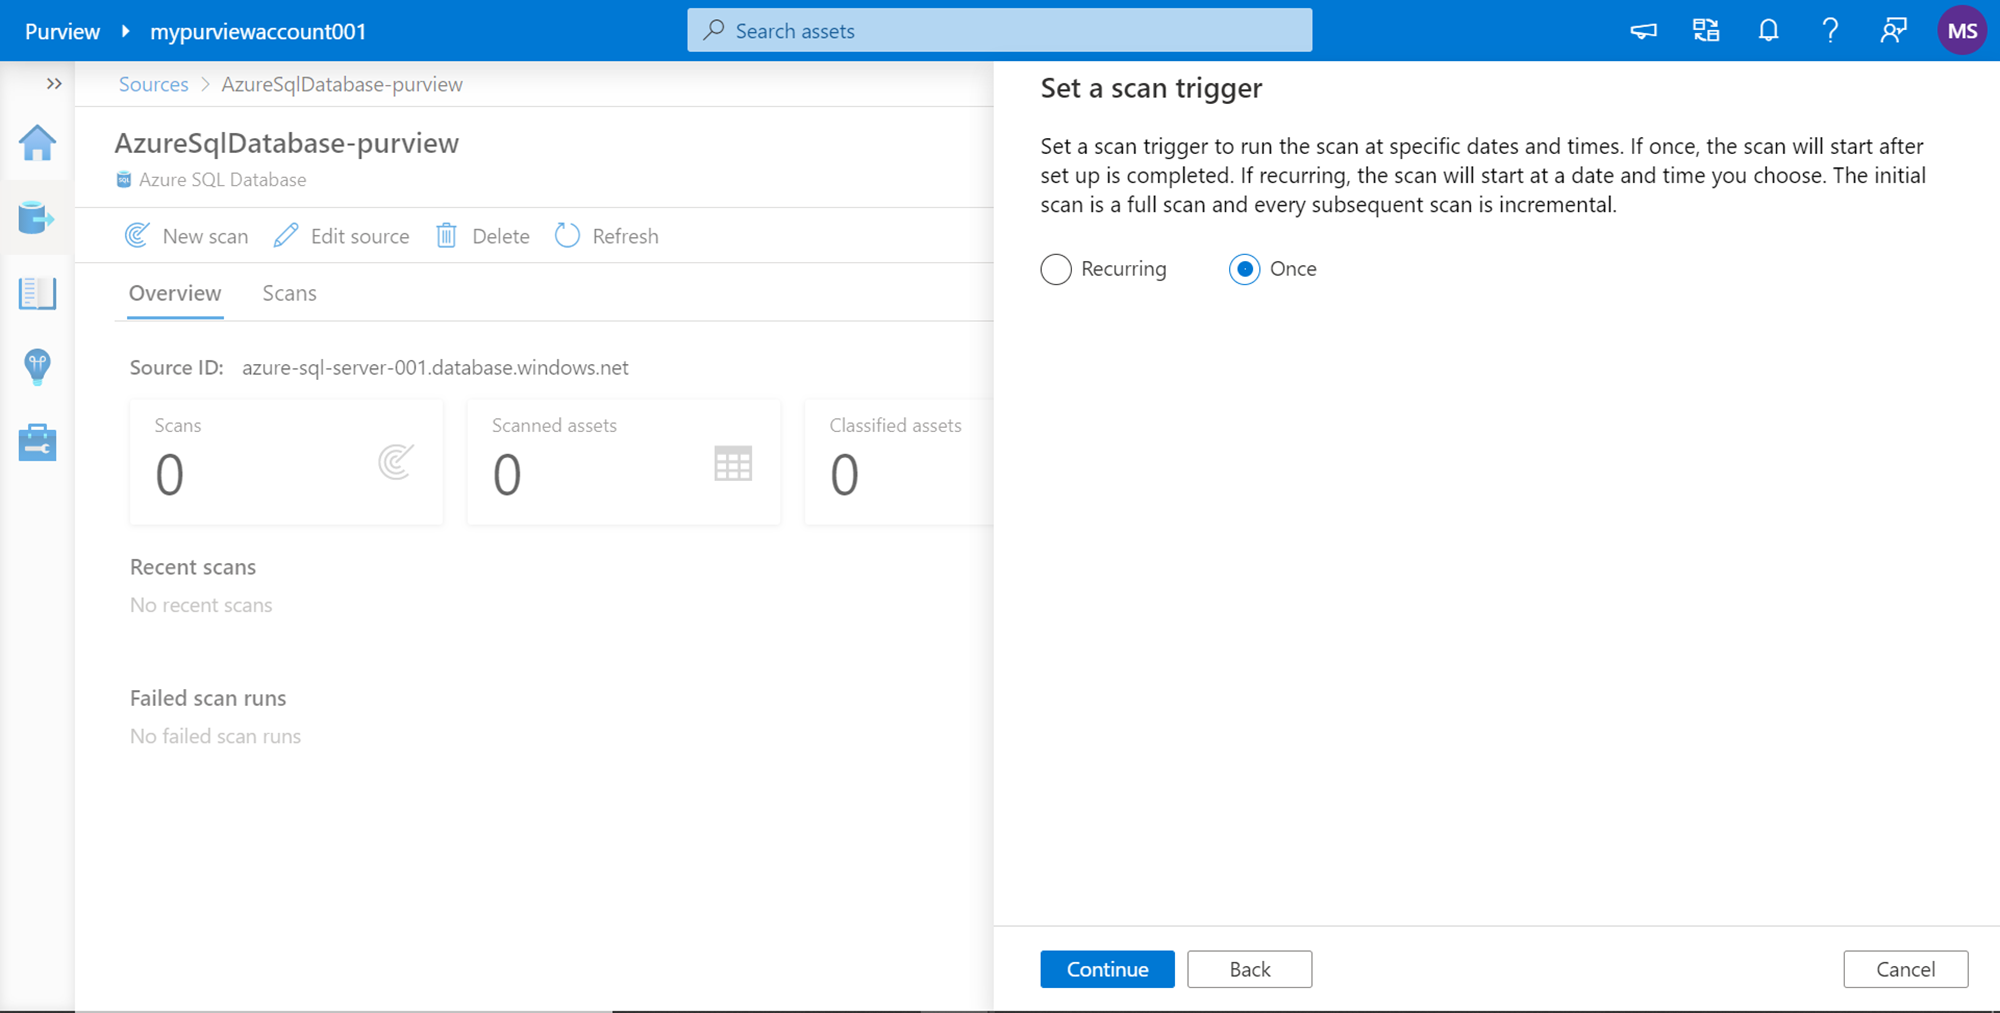
In this step, we need to select a scan trigger that defines when the scan should be performed on the data repository. There are two options – one is scanning on a recurring schedule and the other is scanning only once. For now, we can continue with the scan once option. Select this option as shown below and click on the Continue button.
In the final step, we need to review the configuration options and click on the Finish button. As soon as we finish the configuration, it would start scanning the data source and cataloging the selected database objects. It may take some time to catalog the database objects depending on the volume and complexity of the database objects. Once the scanning is in progress, you can see the status of the scans on the dashboard page as shown below.
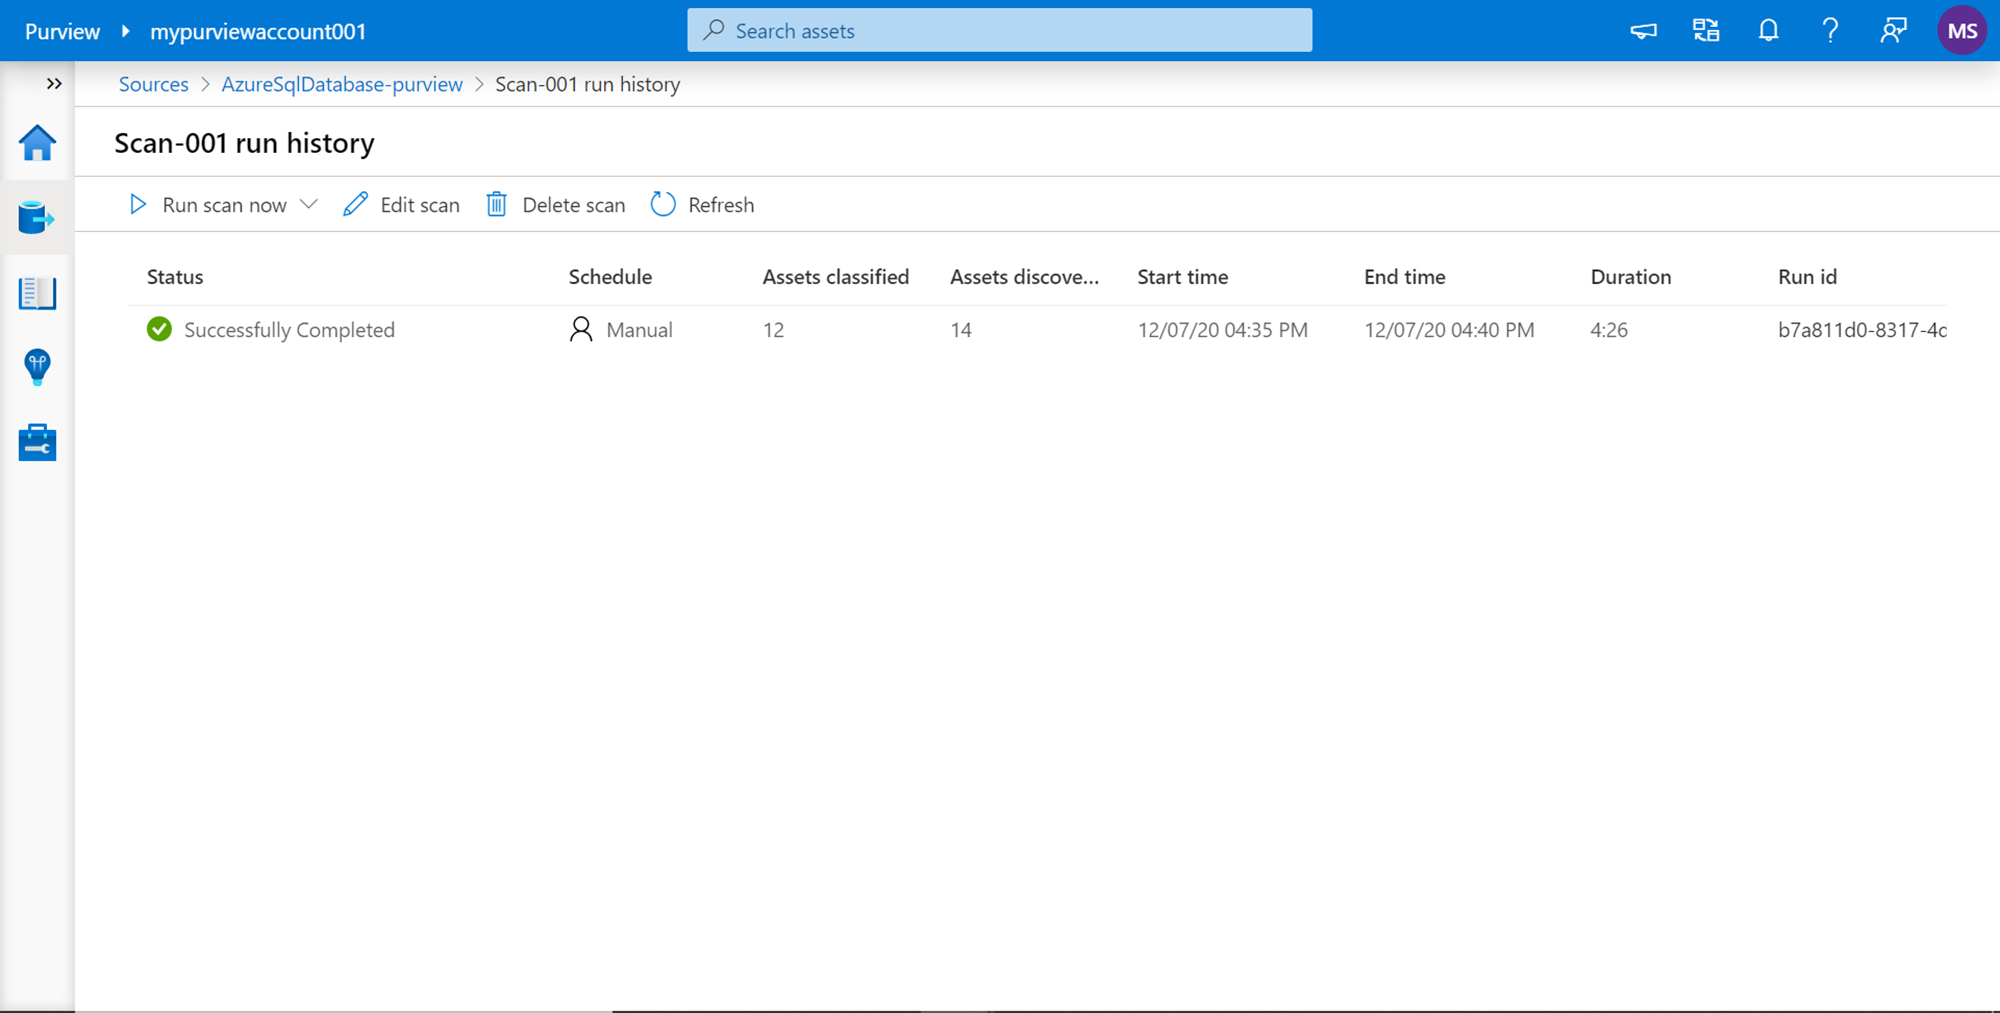
Once the scan has been completed successfully, you can view the status of the scan and the details of the outcomes. As seen below, it shows here that 14 assets were discovered, which means 14 database objects like tables or views have been discovered as selected during the configuration step. Out of those assets, 12 assets were classified depending on the defined scan rule set. Also, the details of the duration for which the scan was in execution are also shown.
In this way, we can use Azure Purview to register any supported data source and schedule a scan of the database objects to catalog metadata.
Conclusion
In this article, we started with a setup of the Azure Purview account and usage of Purview Studio. We registered a data repository and scheduled a scan of the database objects, and successfully cataloged metadata in Azure Purview which can be used for a variety of purposes.
Table of contents
| Getting started with Azure Purview for Data Catalog and Governance |
| Getting started with Azure Purview Studio |
| Cataloging metadata with Azure Purview |
| Using Azure Purview to analyze Metadata Insights |

He has worked internationally with Fortune 500 clients in various sectors and is a passionate author.
View all posts by Rahul Mehta
- Finding Duplicates in SQL - February 7, 2024
- MySQL substring uses with examples - October 14, 2023
- MySQL group_concat() function overview - March 28, 2023