
In the 2nd article of the series for Azure Data Lake Analytics, we will use Visual Studio for writing U-SQL scripts.
Introduction
Azure Data Lake stores the unstructured, structured, and semi-structured data in the Azure cloud infrastructure. You can use Azure portal, Azure Data Factory(ADF), Azure CLI, or various other tools. In the previous article, An overview of Azure Data Lake Analytics and U-SQL, we explored the Azure Data lake Analytics using the U-SQL script.
In this article, we will understand U-SQL scripts and executing them using Visual Studio.
U-SQL scripts execution in the Visual Studio
U-SQL is known as a big data query language, and it combines the syntax similar to t-SQL and the power of C# language. You can extract, transform data in the required format using the scripts. It has few predefined extractors for CSV, Text, TSV for extracting data from these formats. Similarly, it allows you to convert the output to your desired format. It offers big data processing from gigabyte to petabyte scale. You can combine data from Azure Data Lake Storage, Azure SQL DB Azure Blob Storage, Azure SQL Data Warehouse.
You can develop and execute the scripts locally using Visual Studio. Later, you can move your resources to the Azure cloud. This approach allows you to save the cost for Azure resources ( compute and storage) because in the Visual Studio, it does not cost you for the executions.
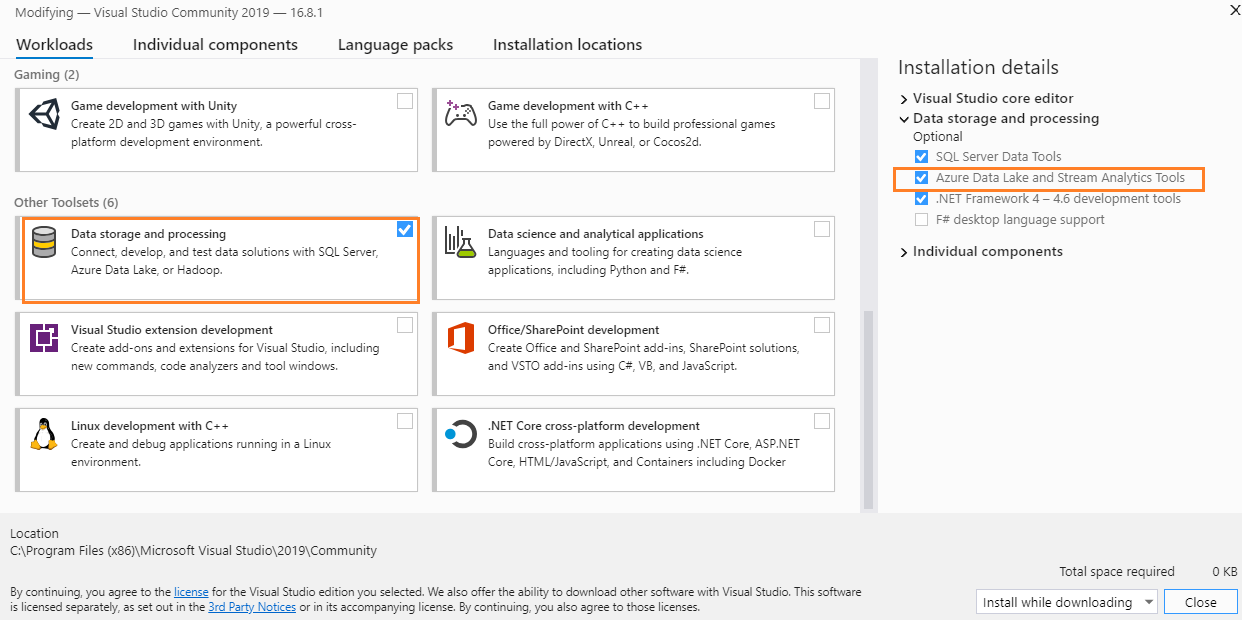
To use these scripts in the Visual Studio, you should have the Azure Data Lake and Stream Analytics Tools installed. You can navigate to Visual Studio installer -> Workloads-> Data Storage and processing -> Azure Data lake and Stream Analytics.
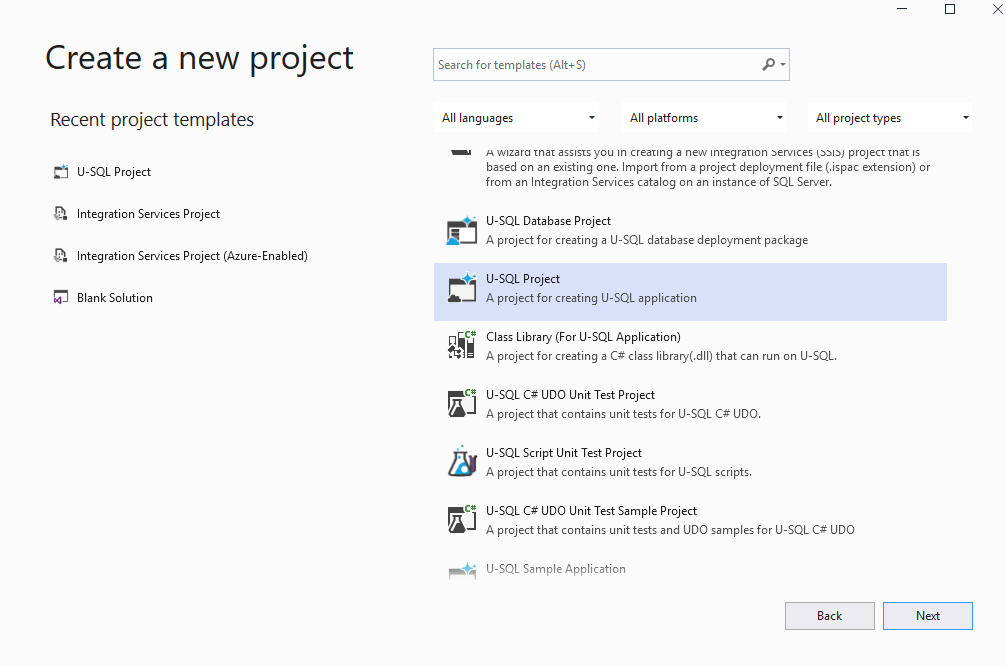
Launch the Visual Studio 2019 and create a new U-SQL project. You get a few other templates such as Class Library, Unit Test project and sample application as well. We will work with a project template that creates a project with your USQL scripts.
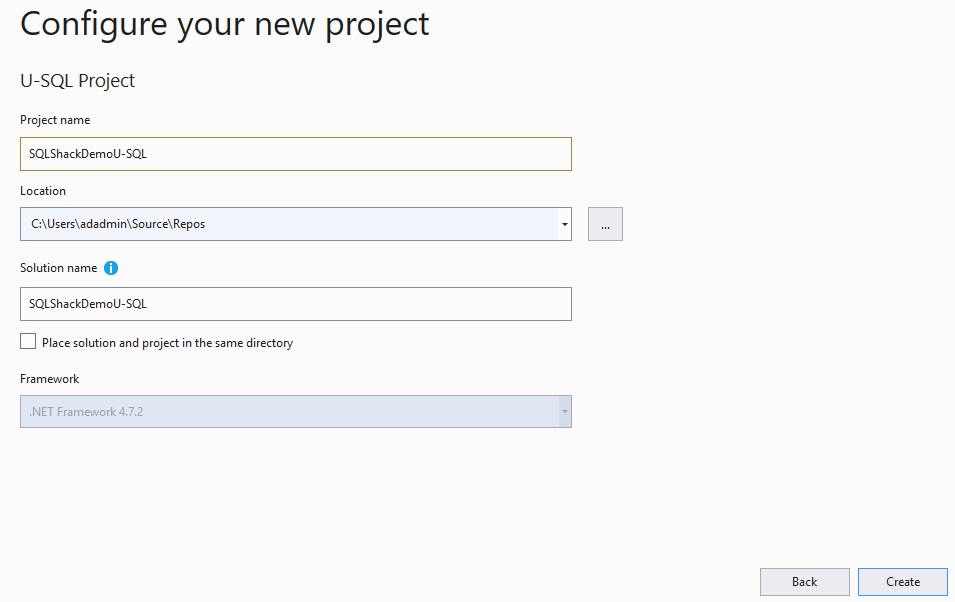
Specify the Visual Studio project name, location and solution.
It opens the following Script. usql. In the ADLA account ( Azure Data Lake Analytics), it shows a Local-Machine account because we are not connected to the Azure cloud. You get an option to submit the U-SQL for execution in the script itself.

Before we write the script, we need to set the input and output folders path in Visual Studio. Navigate to Tools -> Options -> Azure Data Lake. Here, it shows the default path for Data Root and runtime SDK directory.
It has a few additional configurations for Local Run Analytics Unit, File preview and Job graph.
- File Preview: Maximum number of rows displayed in file preview: By default, in the preview data page, Visual Studio shows 100 rows for output files. We can change this to a maximum of 1000 rows preview
Job Graph: Visual Studio shows a simplified graph if the number of nodes exceeds 800

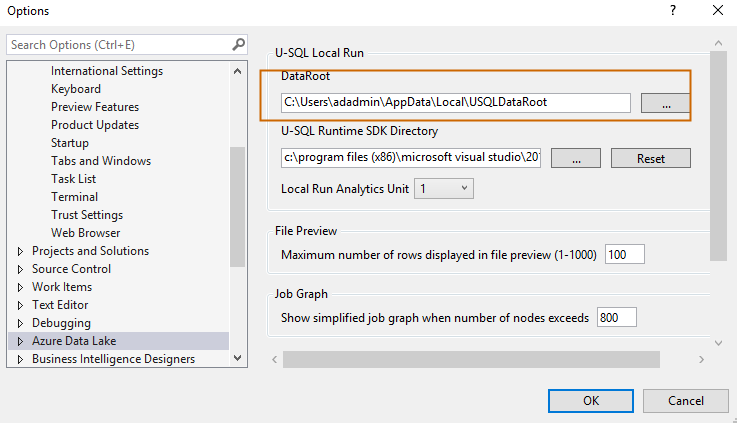
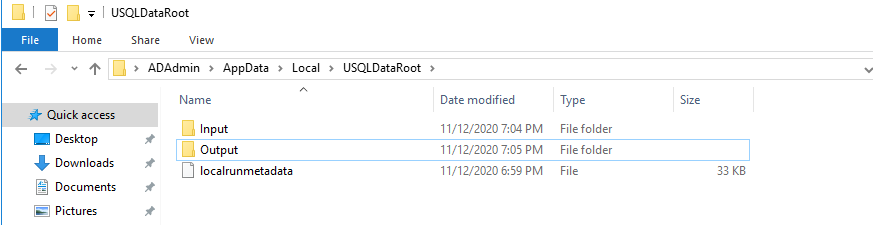
Now, browse to the data root directory and create two folders for input files and output files.
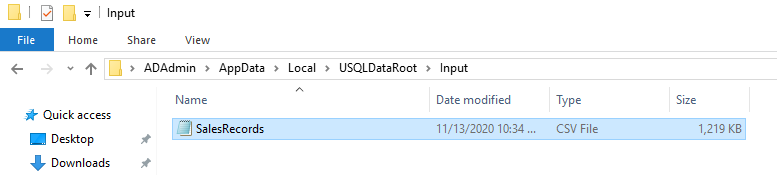
For this article, I download a sample CSV from the URL. It contains the 10,000 sales records in the CSV file. Store it in the Input folder in the USQLDataRoot folder.
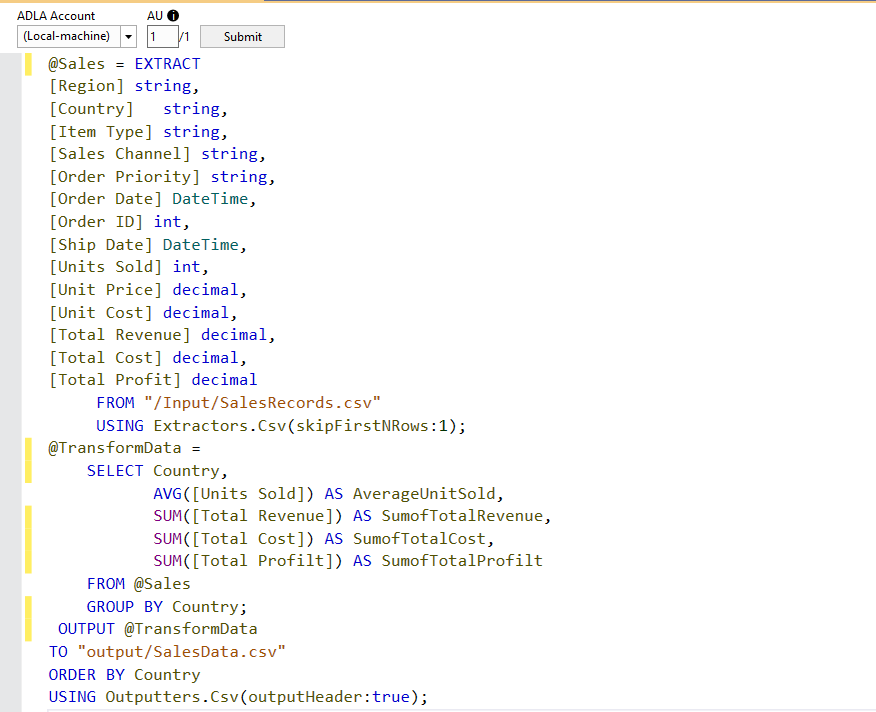
Write the following script in the Visual Studio script editor:
|
1 2 3 4 5 6 7 8 9 10 11 12 13 14 15 16 17 18 19 20 21 22 23 24 25 26 27 28 29 30 31 |
@Sales = EXTRACT [Region] string, [Country] string, [Item Type] string, [Sales Channel] string, [Order Priority] string, [Order Date] DateTime, [Order ID] int, [Ship Date] DateTime, [Units Sold] int, [Unit Price] decimal, [Unit Cost] decimal, [Total Revenue] decimal, [Total Cost] decimal, [Total Profit] decimal FROM "/Input/SalesRecords.csv" USING Extractors.Csv(skipFirstNRows:1); @TransformData = SELECT Country, AVG([Units Sold]) AS AverageUnitSold, SUM([Total Revenue]) AS SumofTotalRevenue, SUM([Total Cost]) AS SumofTotalCost, SUM([Total Profilt]) AS SumofTotalProfilt FROM @Sales GROUP BY Country; OUTPUT @TransformData TO "output/SalesData.csv" ORDER BY Country USING Outputters.Csv(outputHeader:true); |
Let’s understand the above script before executing it.
Define a row-set variable, columns, data types and extract data
In the beginning, we use a row-set variable @Sales and defines the input column names with their data types. It looks similar to define a table variable with appropriate columns.
In the from clause, we define the path of the input file. In my case, the source file is stored in the default path and input folder. Therefore, we specify the source path as /Input/SalesRecords.csv
We use the CSV extractor Extractor.Csv() for data retrieval. In the sample file, the first row has column headers; therefore, we set the skipFirstNRows to 1, and it ignores the first row.
|
1 2 3 4 5 6 7 8 9 10 11 12 13 14 15 16 17 |
@Sales = EXTRACT [Region] string, [Country] string, [Item Type] string, [Sales Channel] string, [Order Priority] string, [Order Date] DateTime, [Order ID] int, [Ship Date] DateTime, [Units Sold] int, [Unit Price] decimal, [Unit Cost] decimal, [Total Revenue] decimal, [Total Cost] decimal, [Total Profit] decimal FROM "/Input/SalesRecords.csv" USING Extractors.Csv(skipFirstNRows:1); |
Data Transformation
In the script, we can transform data after data extraction. In the below code, we calculate the following aggregations.
- Average of the units sold.
- Sum of the total revenue
- Sum of the total cost
- Sum of the total profile
It uses functions similar to the T-SQL for Average and Sum operations. We also use a GROUP BY clause on the [Country] column. It stores the transformed data into another variable @TransformData.
|
1 2 3 4 5 6 7 8 |
@TransformData = SELECT Country, AVG([Units Sold]) AS AverageUnitSold, SUM([Total Revenue]) AS SumofTotalRevenue, SUM([Total Cost]) AS SumofTotalCost, SUM([Total Profit]) AS SumofTotalProfilt FROM @Sales GROUP BY Country; |
Save the transformed data into a specified CSV file
In this section, we use the OUTPUT command to write the @TransformData into the SalesData.csv file. You might notice an ORDER BY clause that sorts data as per the country names while writing it the CSV file. The Outputter.Csv(outputHeader: true) formats the CSV file and puts the column header.
|
1 2 3 4 |
OUTPUT @TransformData TO "output/SalesData.csv" ORDER BY Country USING Outputters.Csv(outputHeader:true); |
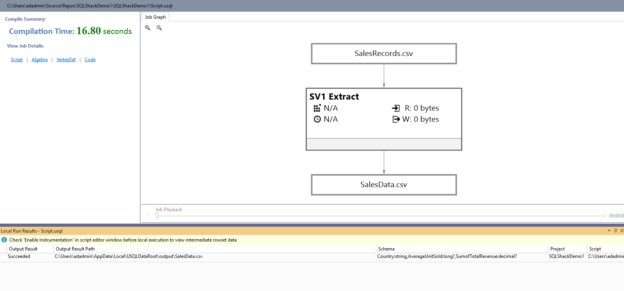
Click on Submit for U-SQL script execution. It opens a command prompt and gives brief information about its execution.
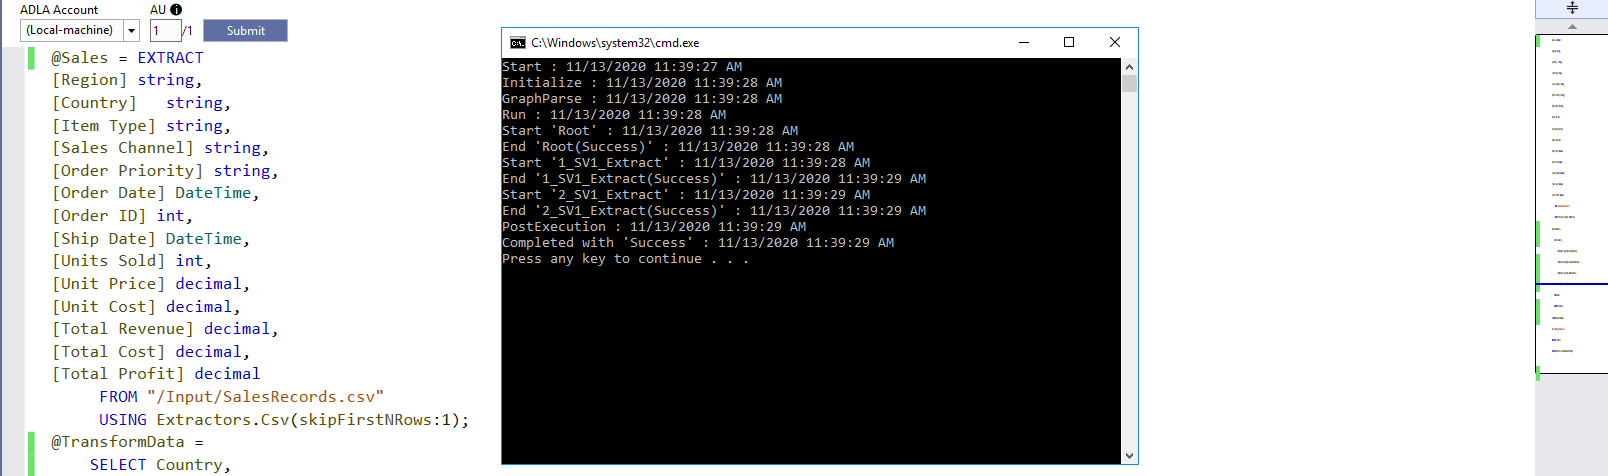
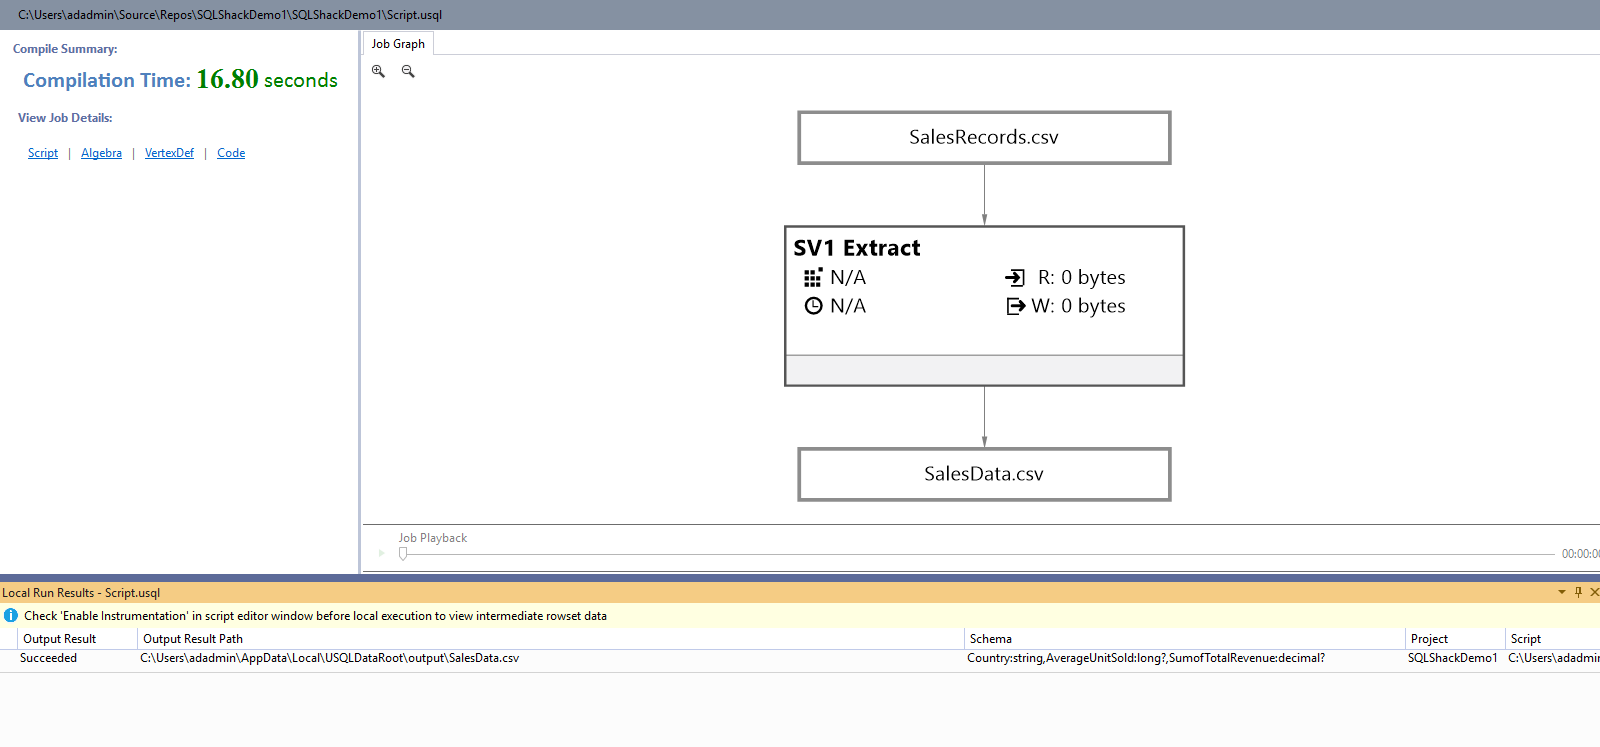
Click Enter, and it displays the job graph.
Click on SalesData.csv, and it gives the file information, data preview. Here, you get an option to download the file or preview it in Excel.
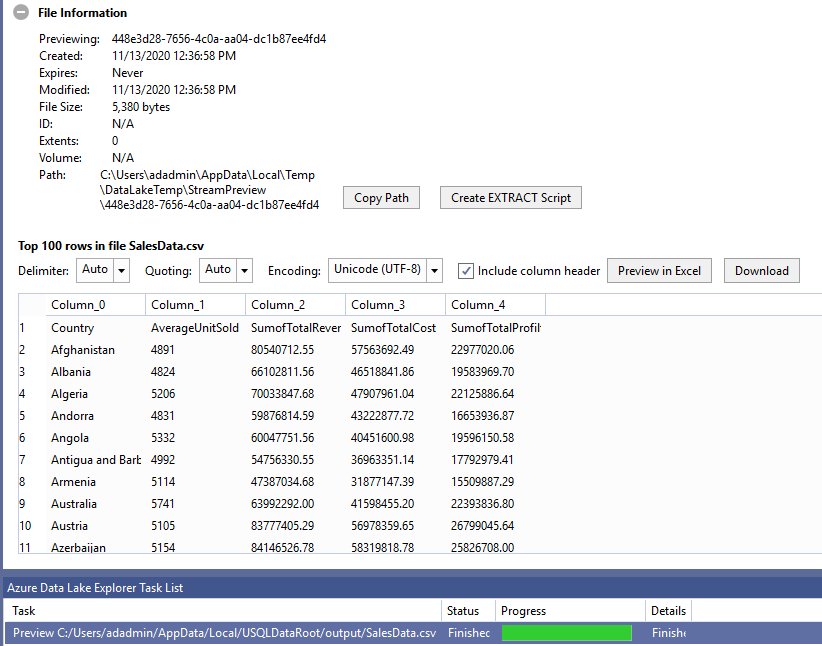
If you click on the Create Extract script, it generates the script with the appropriate data type for each column.

Process Multiple files together using U-SQL
Previously, we use a single file and extract data using the script. Suppose you want to import two files having a similar data structure. These two files are stored in different folders on the source machine.
For example, in this demo, we got two sales files.
- First file [Sales.csv] is stored on the /input/First folder
- Second file [Sales2.csv] is stored on the /input/Second folder
Both the CSV files have similar data columns; therefore, most of the script remains the same. In the from clause, we specify the multiple files in the following format.
|
1 2 |
FROM "/Input/First/Sales1.csv" , "/Input/Second/Sales2.csv" |
Now, execute the script in Visual Studio.
|
1 2 3 4 5 6 7 8 9 10 11 12 13 14 15 16 17 18 19 20 21 22 23 24 25 26 27 28 29 30 31 32 33 |
@Sales = EXTRACT [Region] string, [Country] string, [Item Type] string, [Sales Channel] string, [Order Priority] string, [Order Date] DateTime, [Order ID] int, [Ship Date] DateTime, [Units Sold] int, [Unit Price] decimal, [Unit Cost] decimal, [Total Revenue] decimal, [Total Cost] decimal, [Total Profit] decimal FROM "/Input/First/Sales1.csv" , "/Input/Second/Sales2.csv" USING Extractors.Csv(skipFirstNRows:1); @TransformData = SELECT Country, AVG([Units Sold]) AS AverageUnitSold, SUM([Total Revenue]) AS SumofTotalRevenue, SUM([Total Cost]) AS SumofTotalCost, SUM([Total Profit]) AS SumofTotalProfilt FROM @Sales GROUP BY Country; OUTPUT @TransformData TO "output/SalesData.csv" ORDER BY Country USING Outputters.Csv(outputHeader:true); |
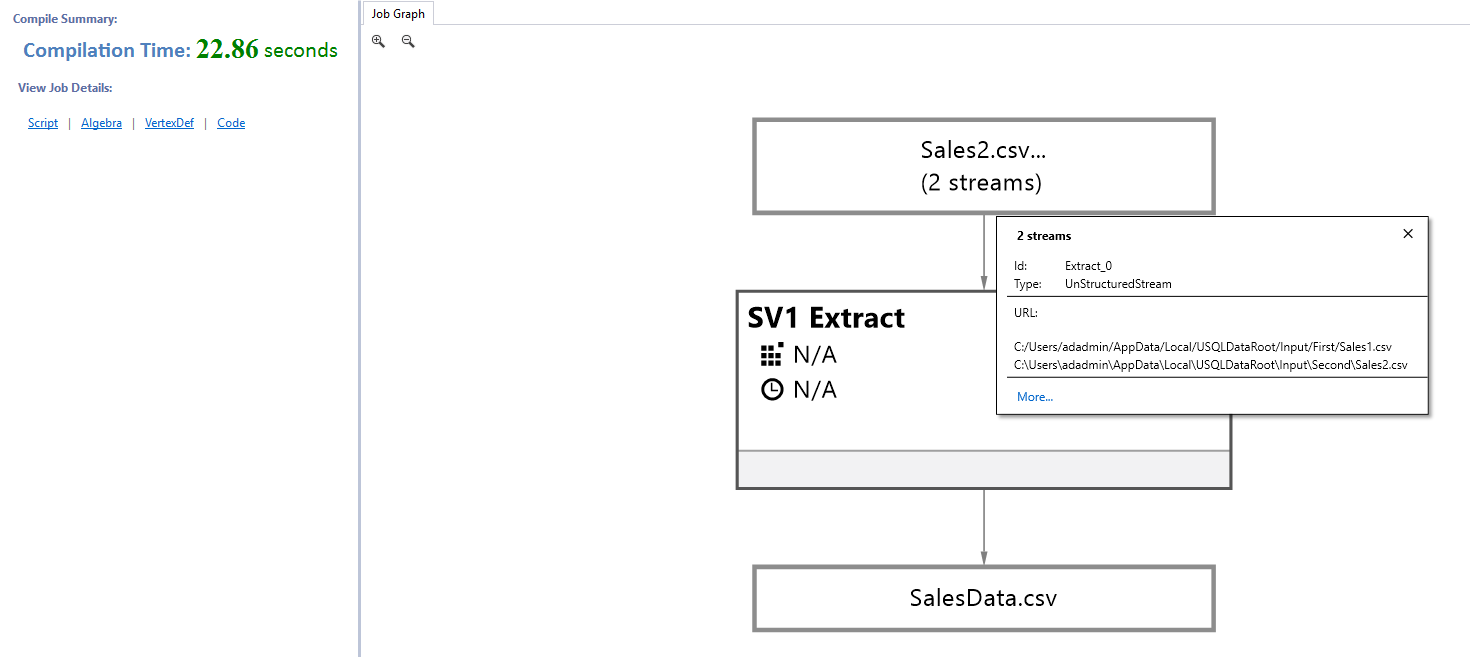
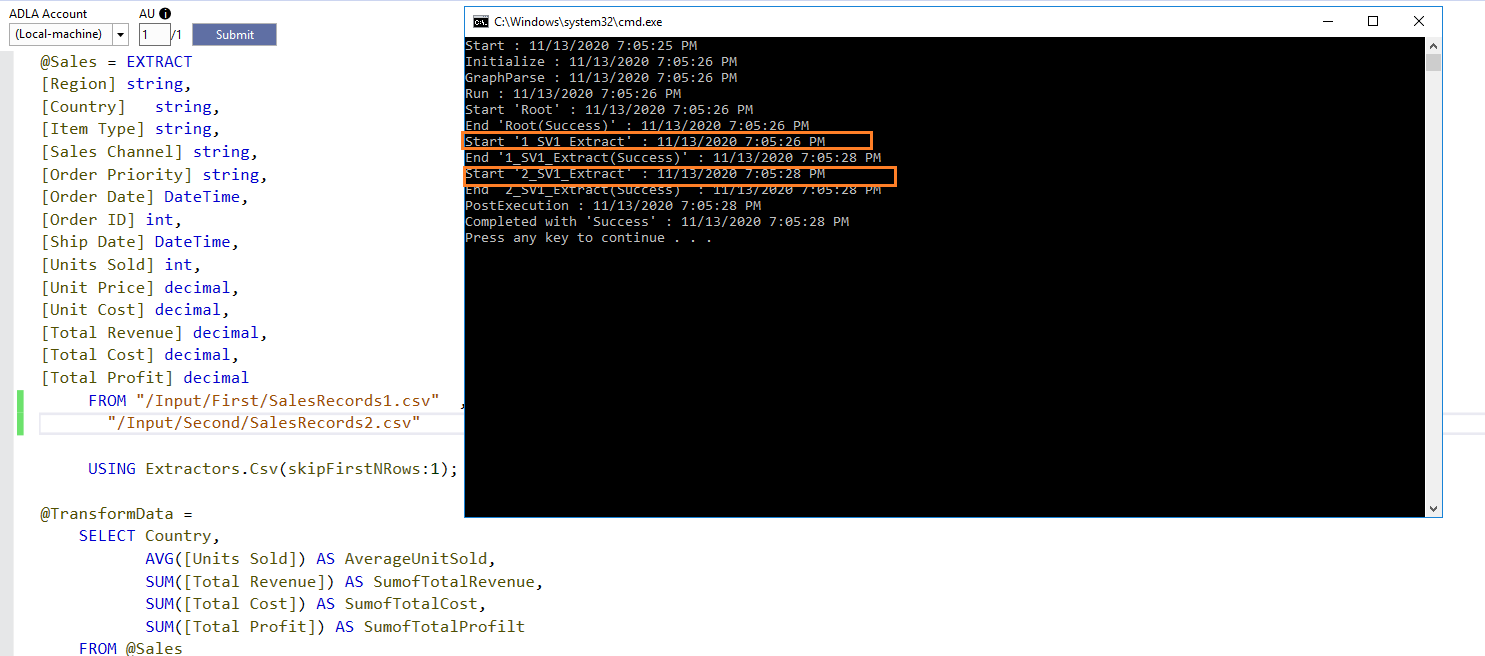
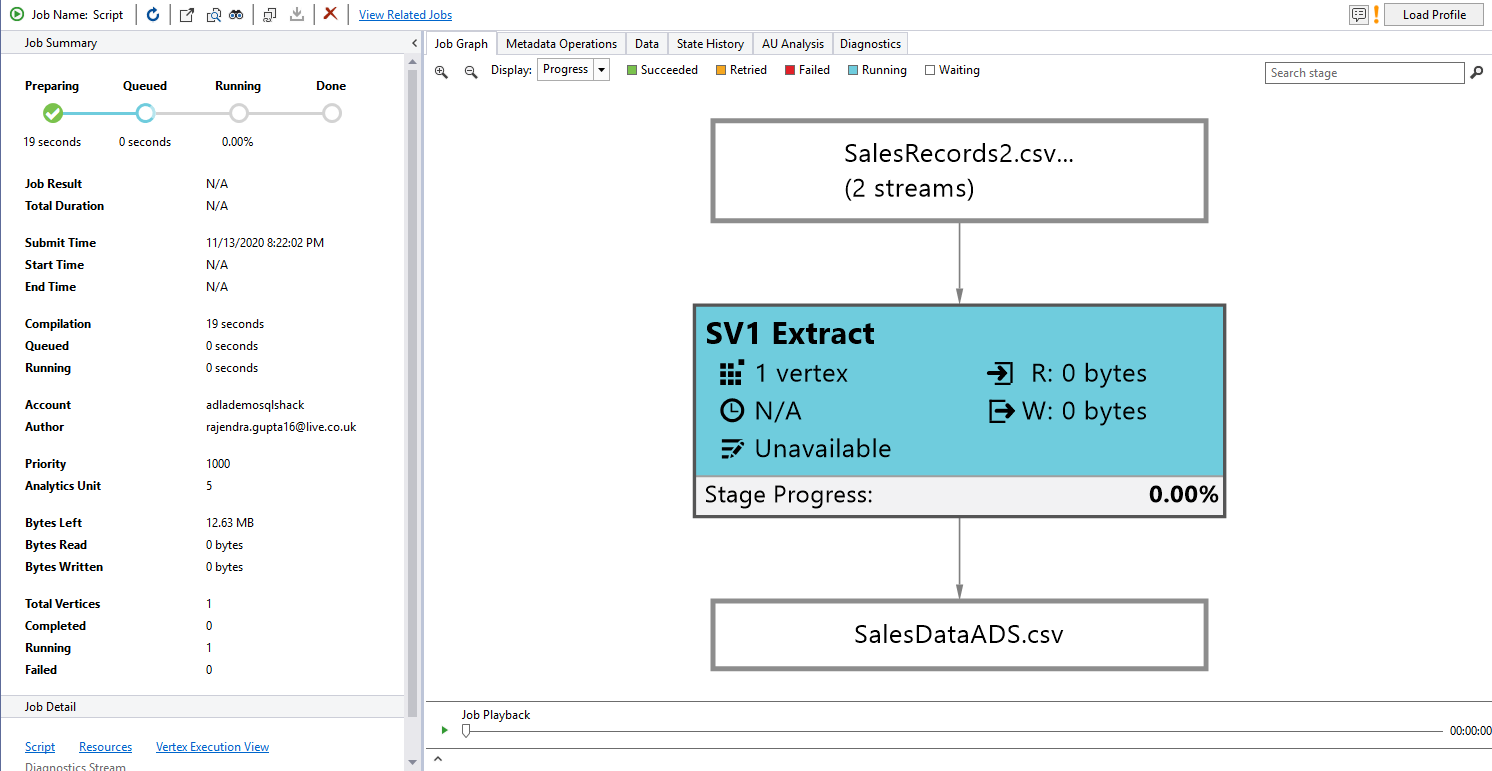
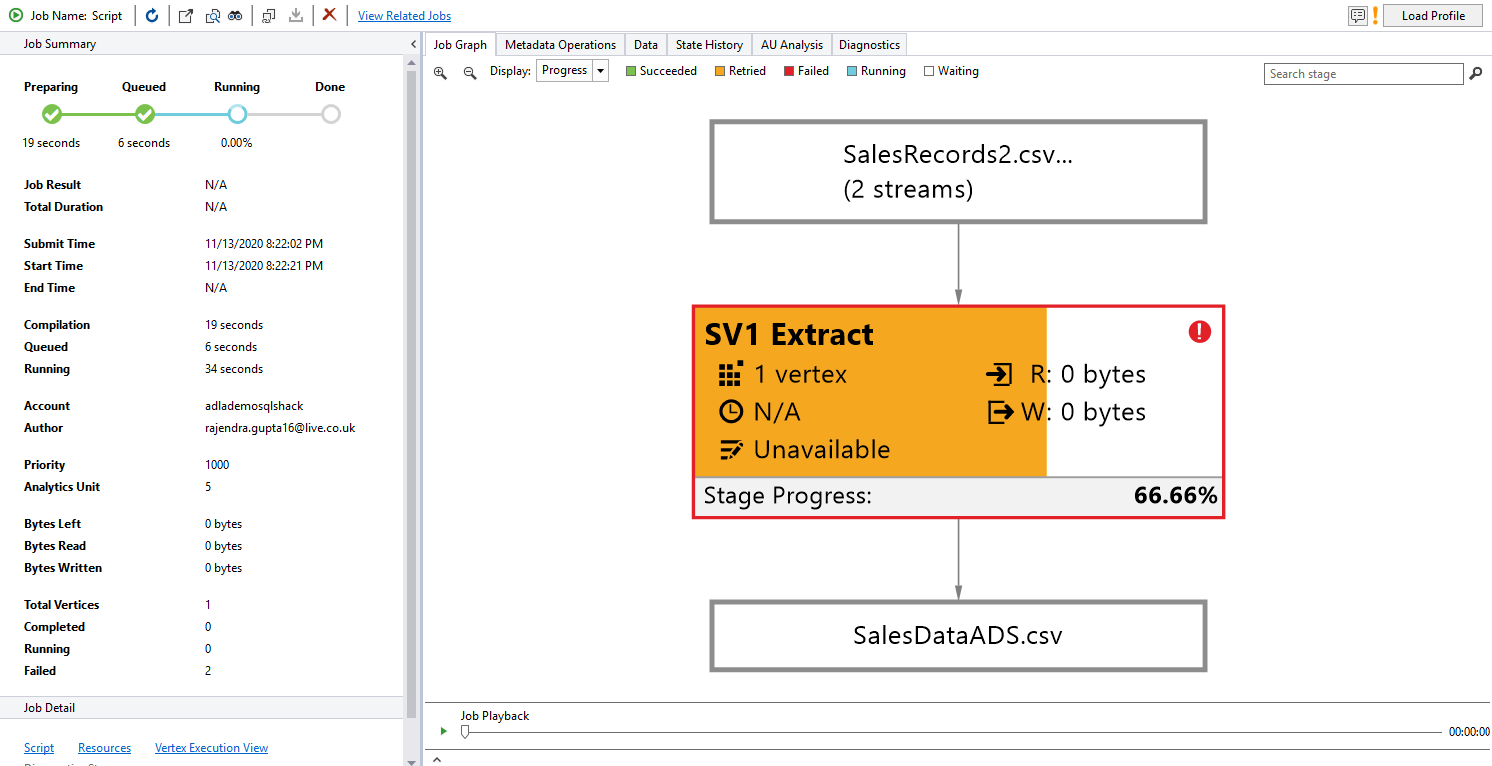
It took 22.86 seconds for compilations. You get a job graph as well. In the graph, the first box shows that it has two streams for input data.
In the submitted job, the command window shows data extract from both the CSV files.
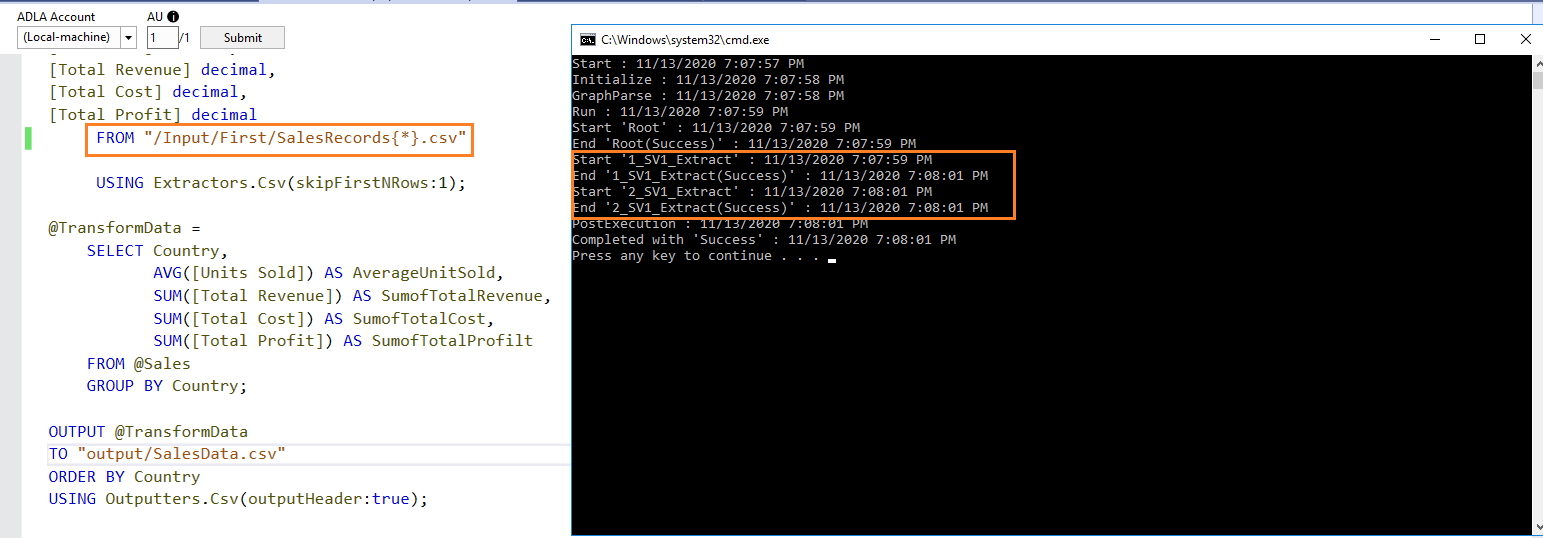
Let’s look at another example of processing multiple files using the script. This time we have multiple files in a folder. For example, in the following screenshot, you have [SalesRecords1.csv] and [SalesRecords2.csv] in the /Input/First folder.

To process these files, we use dynamic file names. It uses the Wildcards in the curly brackets along with the file names. For example, SalesRecords{*} searches for all files in the specified directory and processes them in the script. The multiple input files should have similar column structures.
|
1 |
FROM "/Input/First/SalesRecords{*}.csv" |
The complete script for data extraction is as below.
|
1 2 3 4 5 6 7 8 9 10 11 12 13 14 15 16 17 18 19 20 21 22 23 24 25 26 27 28 29 30 31 32 |
@Sales = EXTRACT [Region] string, [Country] string, [Item Type] string, [Sales Channel] string, [Order Priority] string, [Order Date] DateTime, [Order ID] int, [Ship Date] DateTime, [Units Sold] int, [Unit Price] decimal, [Unit Cost] decimal, [Total Revenue] decimal, [Total Cost] decimal, [Total Profit] decimal FROM "/Input/First/SalesRecords{*}.csv" USING Extractors.Csv(skipFirstNRows:1); @TransformData = SELECT Country, AVG([Units Sold]) AS AverageUnitSold, SUM([Total Revenue]) AS SumofTotalRevenue, SUM([Total Cost]) AS SumofTotalCost, SUM([Total Profit]) AS SumofTotalProfilt FROM @Sales GROUP BY Country; OUTPUT @TransformData TO "output/SalesData.csv" ORDER BY Country USING Outputters.Csv(outputHeader:true); |
You can verify the data extraction process for these multiple files in the below screenshot.
Visual Studio integration with the Azure account
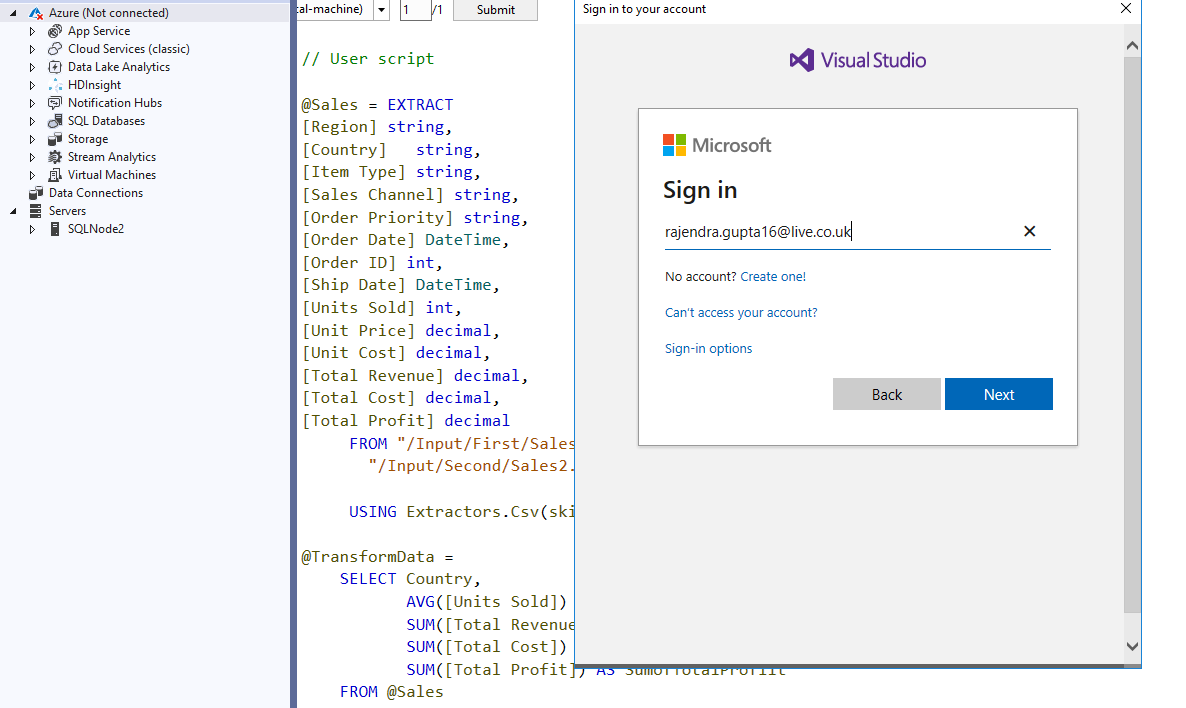
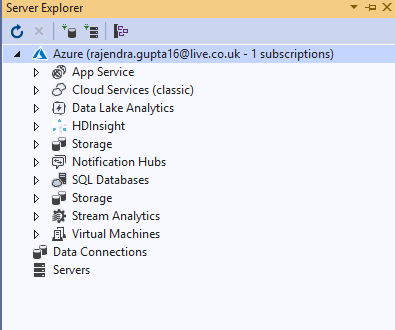
Till this point, we implemented the U-SQL script in the local environment of Visual Studio. Once your testing is completed, you can connect with your Azure Data Lake Analytics account in Visual Studio. Navigate to View-> Server Explorer in the Visual Studio. As shown below, currently Azure account is in the disconnected status.
Right-click on the Azure (Not disconnected) and specify your Azure credentials.
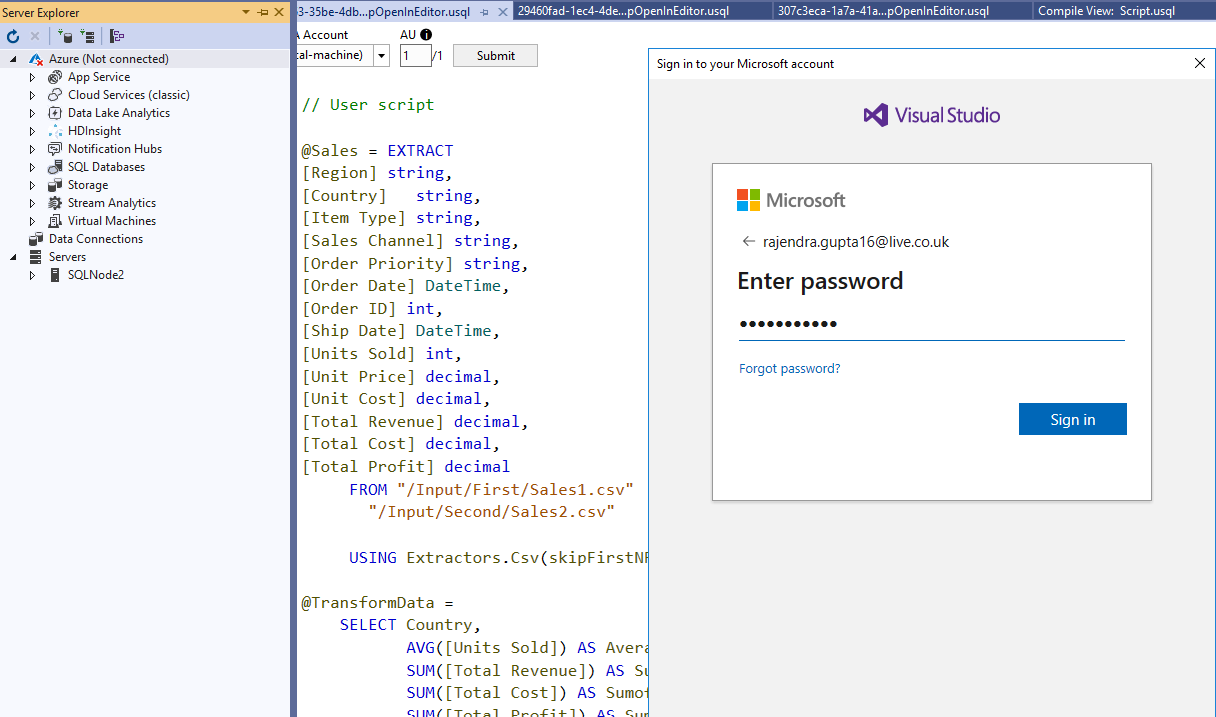
Now, Visual Studio is connected with the Azure subscription.
You should have an existing Azure Data Lake Analytics account to deploy the ADLA project in Azure. You can follow the article An Overview of the Azure Data Lake Analytics and U-SQL for it.
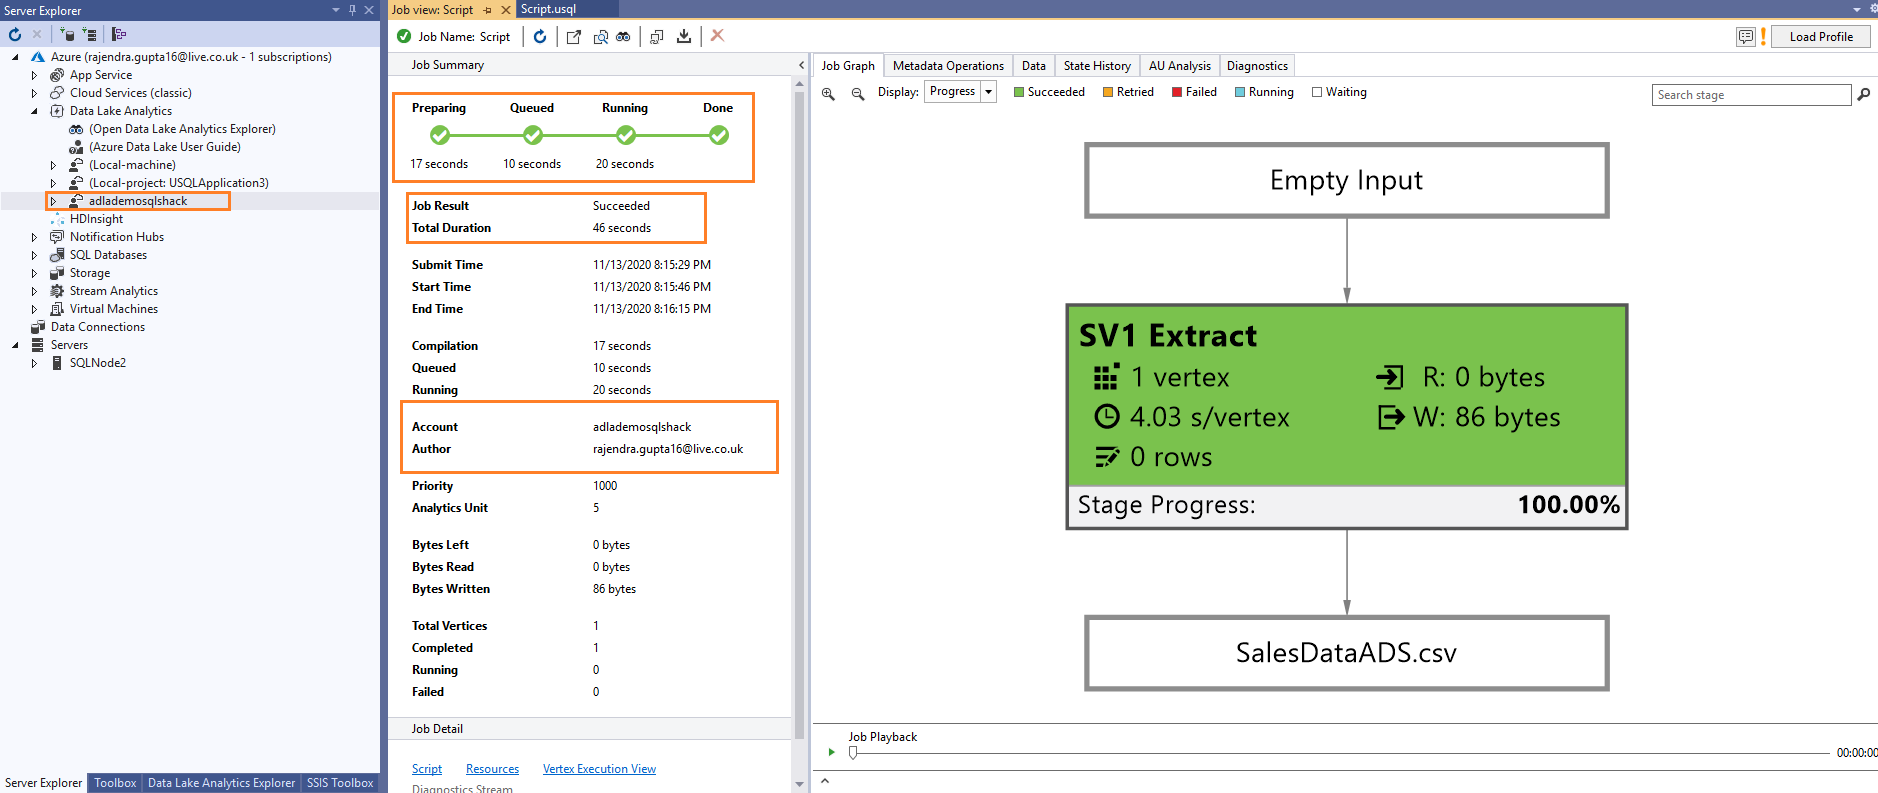
I have already an ADLA account [adlademosqlshack] as highlighted below. In the script, choose the ADLA account from the drop-down.
![ADLA account [adlademosqlshack]](/wp-content/uploads/2021/02/adla-account-adlademosqlshack.png)
Execute the U-SQL script, and in the job summary, you get a phase similar to executing a script in the Azure portal.
-
Preparing phase: blue color
-
Running (In-progress): Orange color
-
Completed phase: Green color
Once the job finishes successfully, go to your Storage Account and view the output Excel file.

Conclusion
In this article, we integrated Visual Studio to deploy a project for Azure Data Lake Analytics locally. Once we have tested the code, we can quickly deploy it on the Azure portal. We will continue exploring more on U-SQL and ADLA in the upcoming articles.
Table of contents
| An overview of Azure Data Lake Analytics and U-SQL |
| Writing U-SQL scripts using Visual Studio for Azure Data Lake Analytics |
| Deploy Azure Data Lake Analytics database using the U-SQL scripts |
| Join database tables using U-SQL scripts for Azure Data Lake Analytics |

I am the author of the book "DP-300 Administering Relational Database on Microsoft Azure". I published more than 650 technical articles on MSSQLTips, SQLShack, Quest, CodingSight, and SeveralNines.
I am the creator of one of the biggest free online collections of articles on a single topic, with his 50-part series on SQL Server Always On Availability Groups.
Based on my contribution to the SQL Server community, I have been recognized as the prestigious Best Author of the Year continuously in 2019, 2020, and 2021 (2nd Rank) at SQLShack and the MSSQLTIPS champions award in 2020.
Personal Blog: https://www.dbblogger.com
I am always interested in new challenges so if you need consulting help, reach me at rajendra.gupta16@gmail.com
View all posts by Rajendra Gupta
- Understanding PostgreSQL SUBSTRING function - September 21, 2024
- How to install PostgreSQL on Ubuntu - July 13, 2023
- How to use the CROSSTAB function in PostgreSQL - February 17, 2023