
This article aims to help you understand the concept of Azure Data Lake Analytics capability offered by Microsoft in the Azure cloud.
Data is generated by a variety of sources and gets hosted in a variety of data repositories. Large organizations typically have data on the petabyte scale. Azure Data Lake Storage provides the storage layer of the Data Lake for hosting such large volumes of data. Storage is generally the first step in the overall data lifecycle on the cloud. The real value of data is achieved by processing as well as analyzing the data from the data lake storage. As the volume of data can be extremely large, the traditional methods of ETL, Data Staging, Data Aggregation may not fare well in terms of cost and efficiency. That’s where services like Azure Data Lake Analytics comes into the picture. In this article, we will explore how to get started with Data Lake Analytics on Azure.
Introduction to Data Lake Analytics
Azure Data Lake Analytics is a fully serverless service, which means we do not need to create any infrastructure instance or clusters to use it. One just needs to submit jobs that are to be executed over massive data in a massively parallel processing fashion, and this service would provide the underlying resources to execute those jobs. It supports its native programming language – U-SQL, which may look like a mix of SQL and C# syntax-wise. It supports many programming languages extensions as well like .Net, R, and Python. The basic unit of processing in Azure data lake analytics is AU – Analytics Units. The pay-as-you-go pricing for this service is $2/hour/AU. With monthly commitment packages, these prices go even lower.
Creating Azure data lake analytics account
We will perform a step-by-step exercise to create an Azure Data Lake Analytics instance and execute a job using the same. For the same, it’s assumed that one has an Azure account with the required privileges on it.
Login to your Azure account, and from the All Services menu, click on Analytics and open the Data Lake Analytics option. It will navigate you to the home page as shown below.
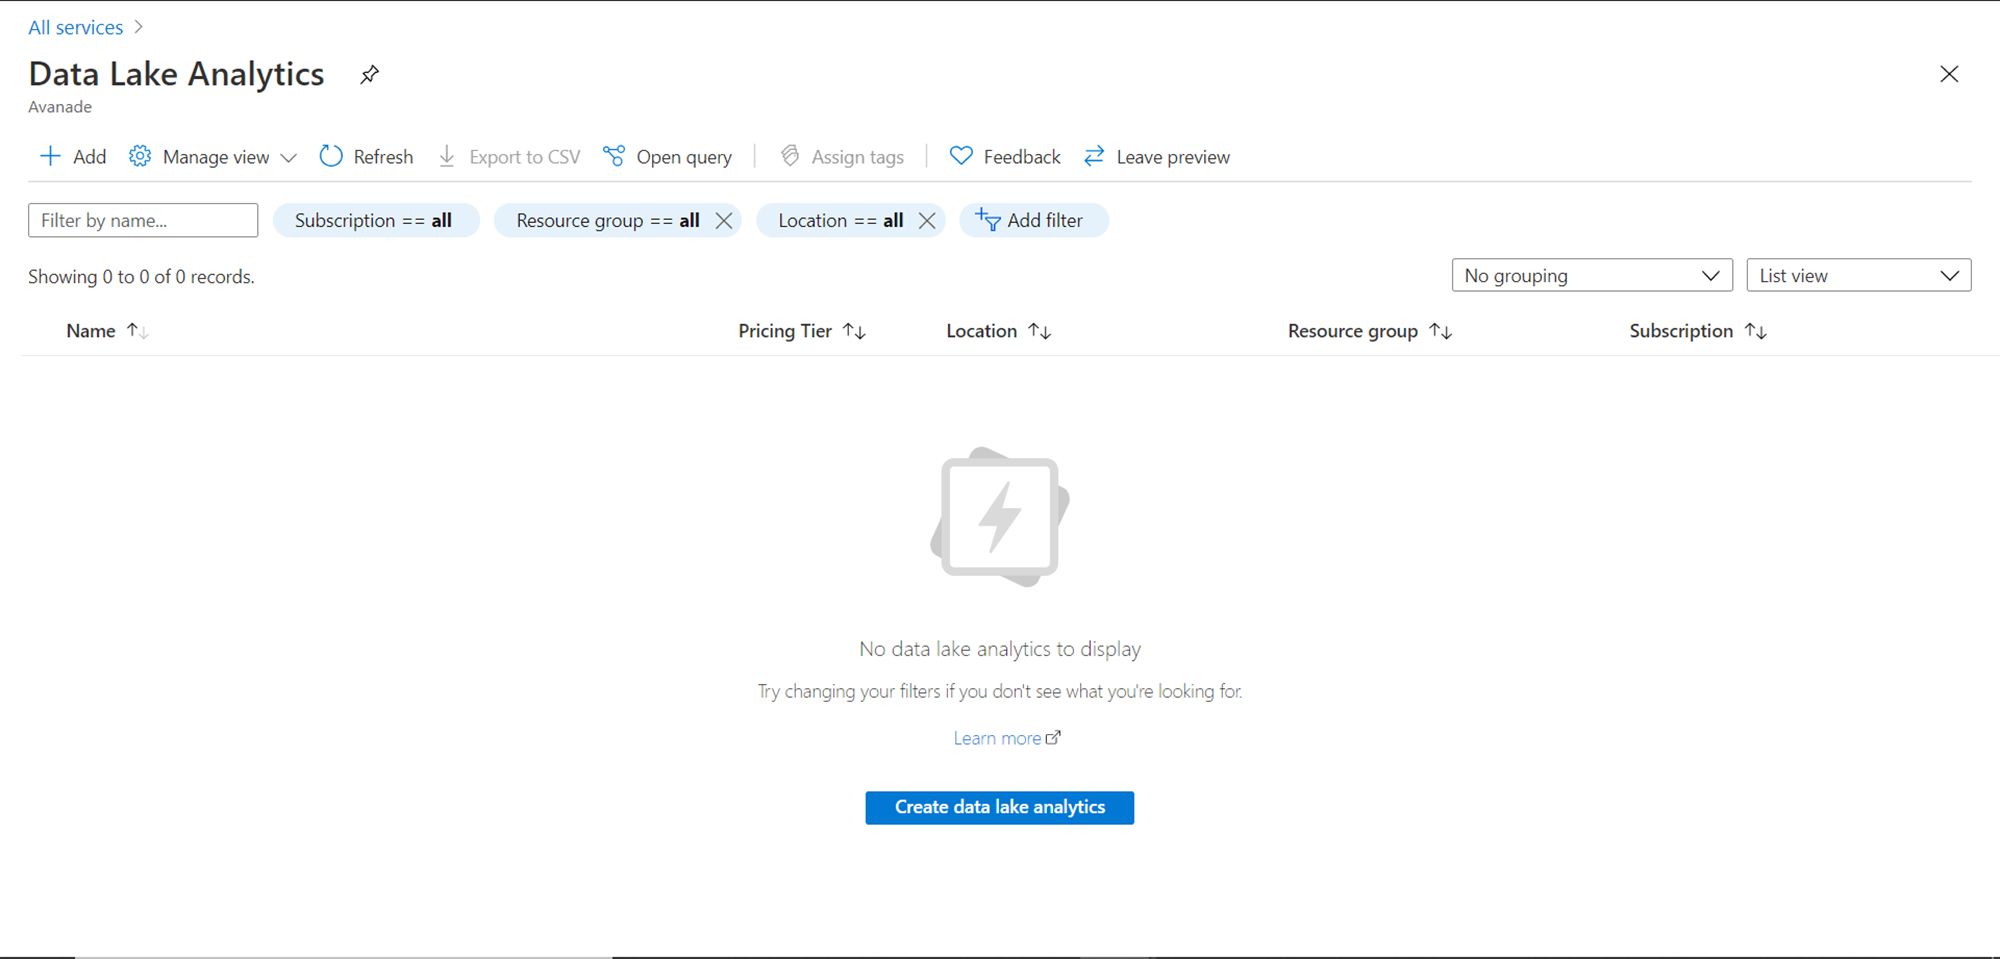
As we do not have any instance of this service created, you would see the list empty. Click on the Create data lake analytics button to invoke that wizard that will create a new account, using which we can perform different actions to analyze data in the data lake. Once the wizard is invoked, it would look as shown below.
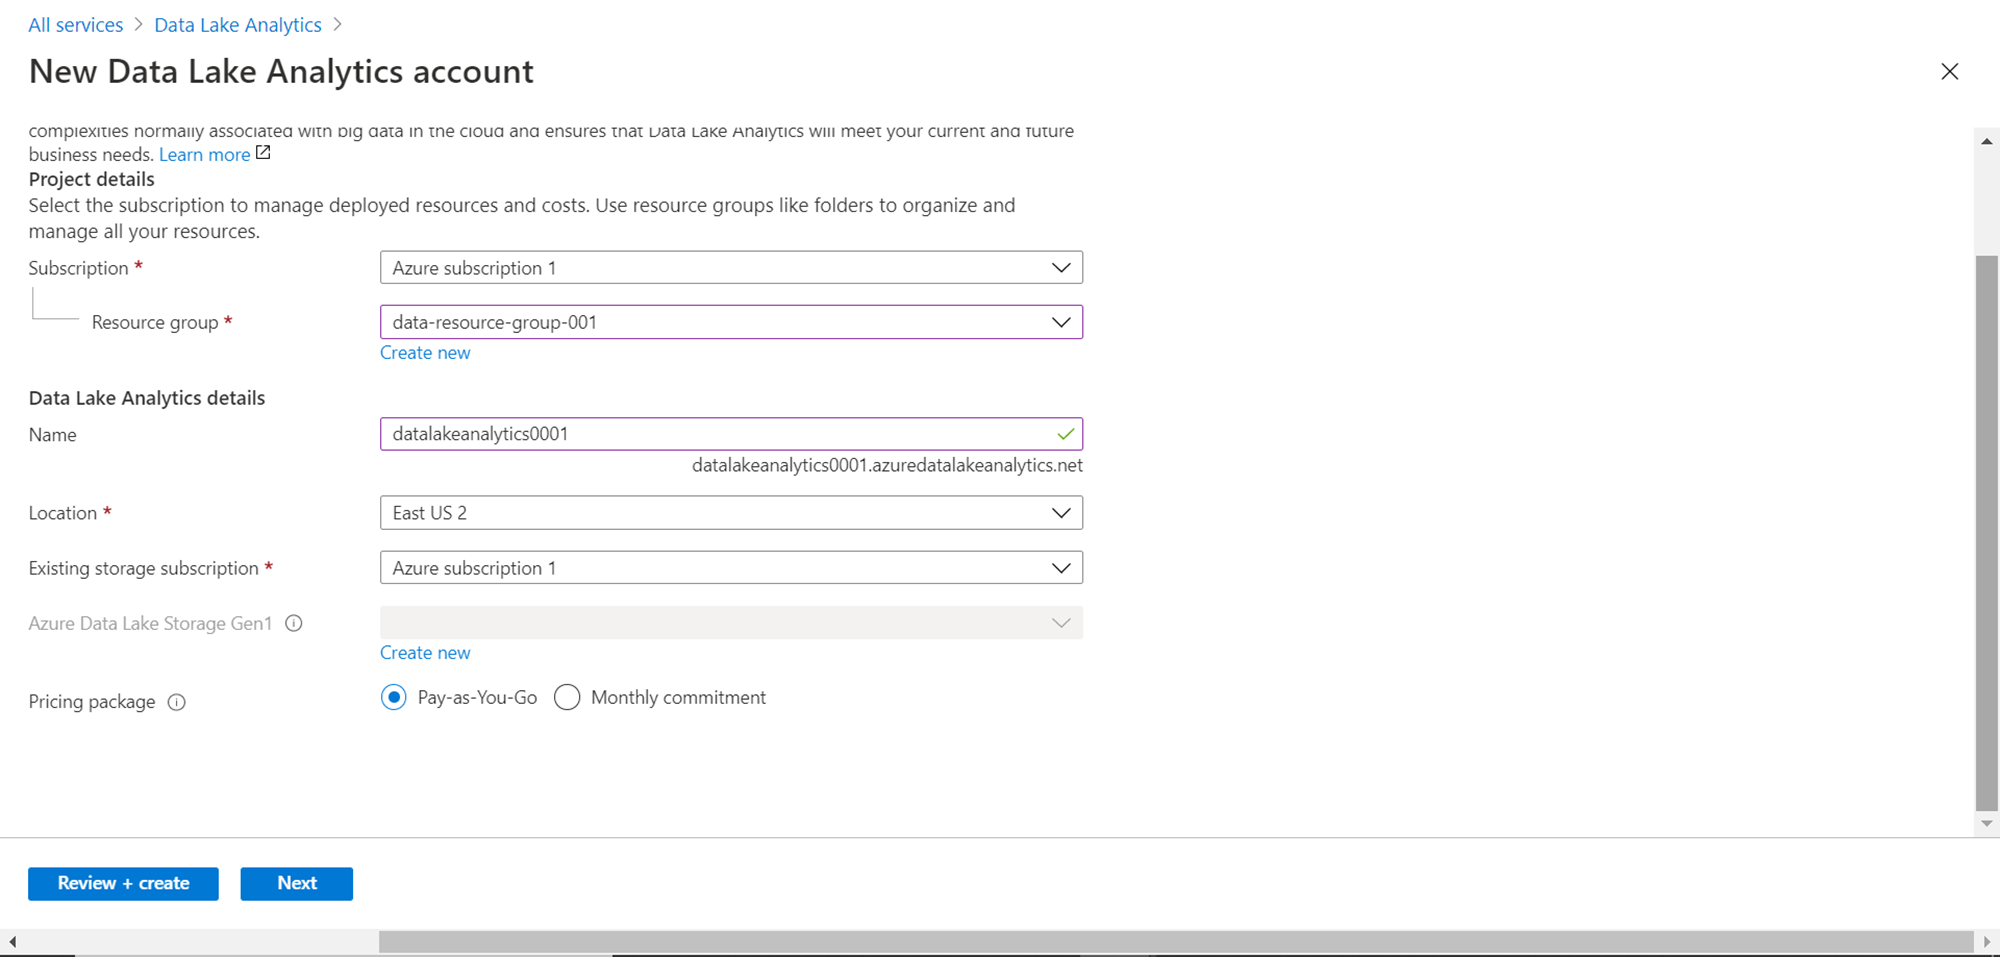
It is assumed that you have an Azure subscription as well as a resource group. So that would be auto-populated for you. In case, you do not have a resource group, you can create a new one right from the wizard by clicking on the Create a new button. Next, we need to provide details for the Azure data lake analytics account. Provide a relevant name for the account. The actual endpoint would be of the format: <accountname>.azuredatalakeanalytics.net. Select the region in which the account is to be created and the Azure storage subscription under which this account should be tied. If you just have a single subscription, you can select the same.
The latest version of Data Lake Storage is Gen2. But for some reason, if you need to create a Gen1 data lake storage, then that option too is available. Mostly, for legacy reasons, one may need to use it. Click on the Create new button under the Data Lake Storage Gen1 option, provide a new name and your account would get created as shown below.
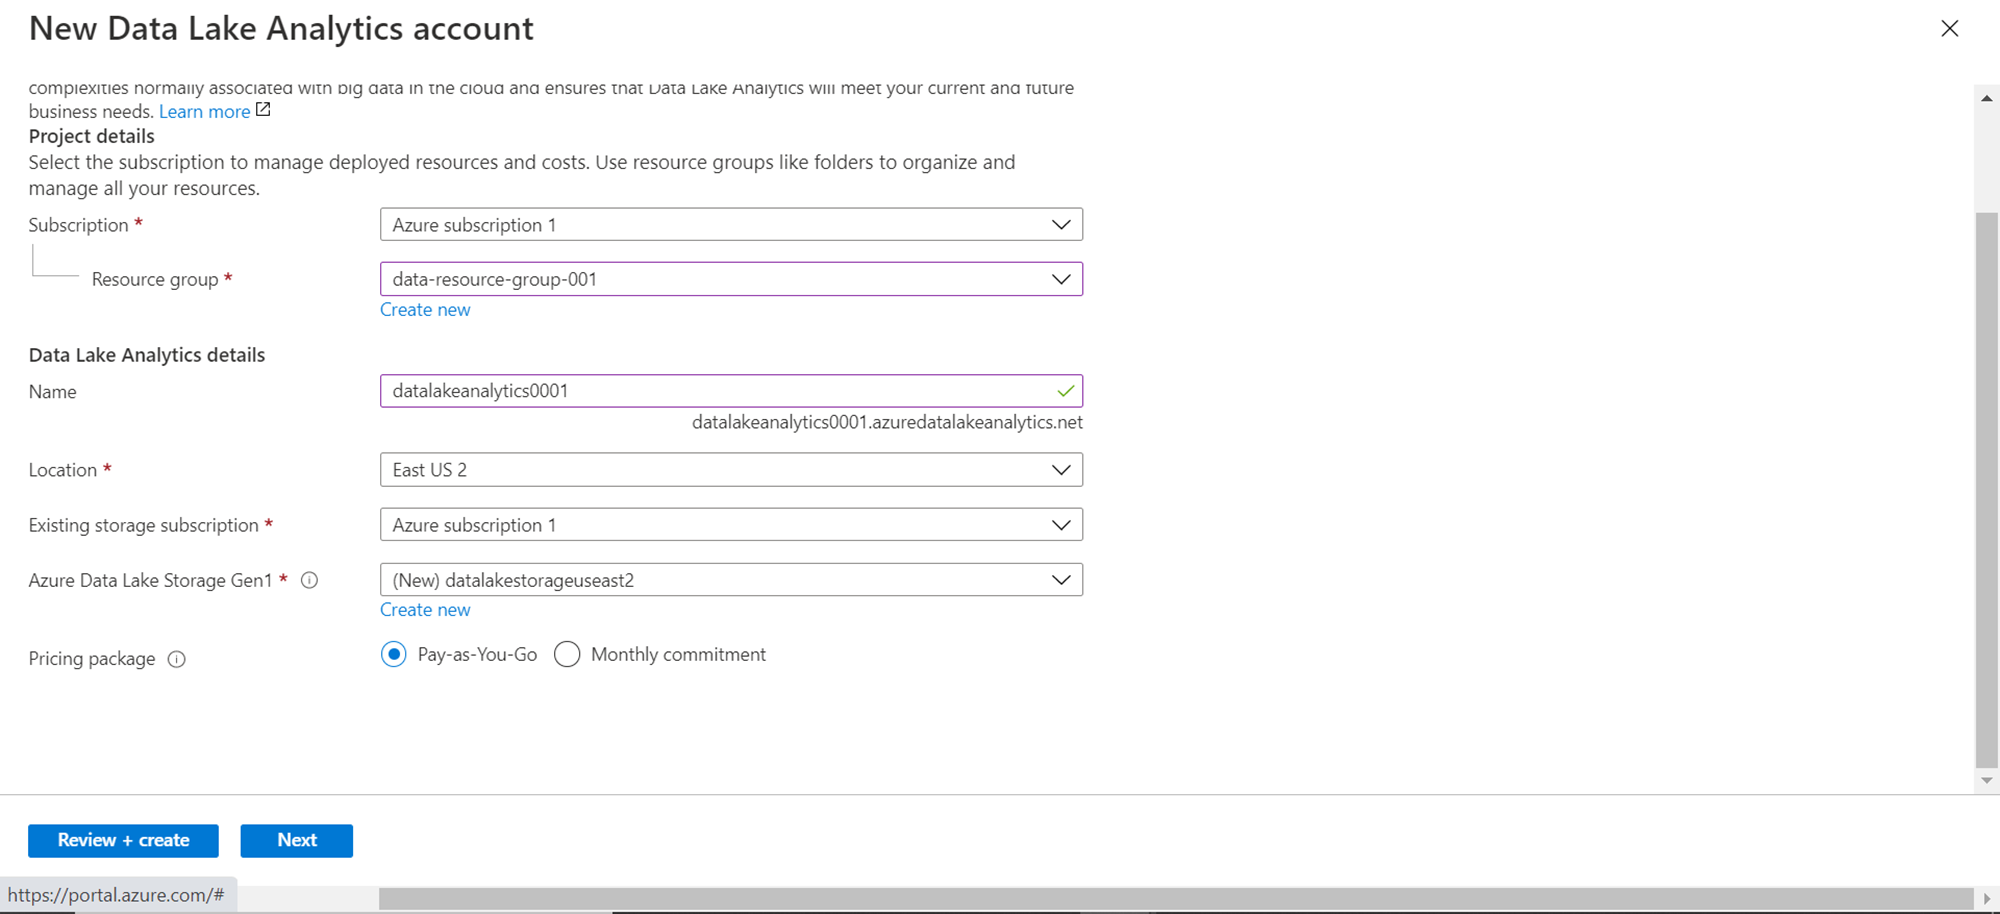
The default option for Pricing Package would be pay-as-you-go. If one plans to use it for a massive scale of data on a recurring basis, one should consider using the Monthly commitment option to lower the costs. Click on Next to Review the configuration that has been set. A screen should appear with the details as shown below.
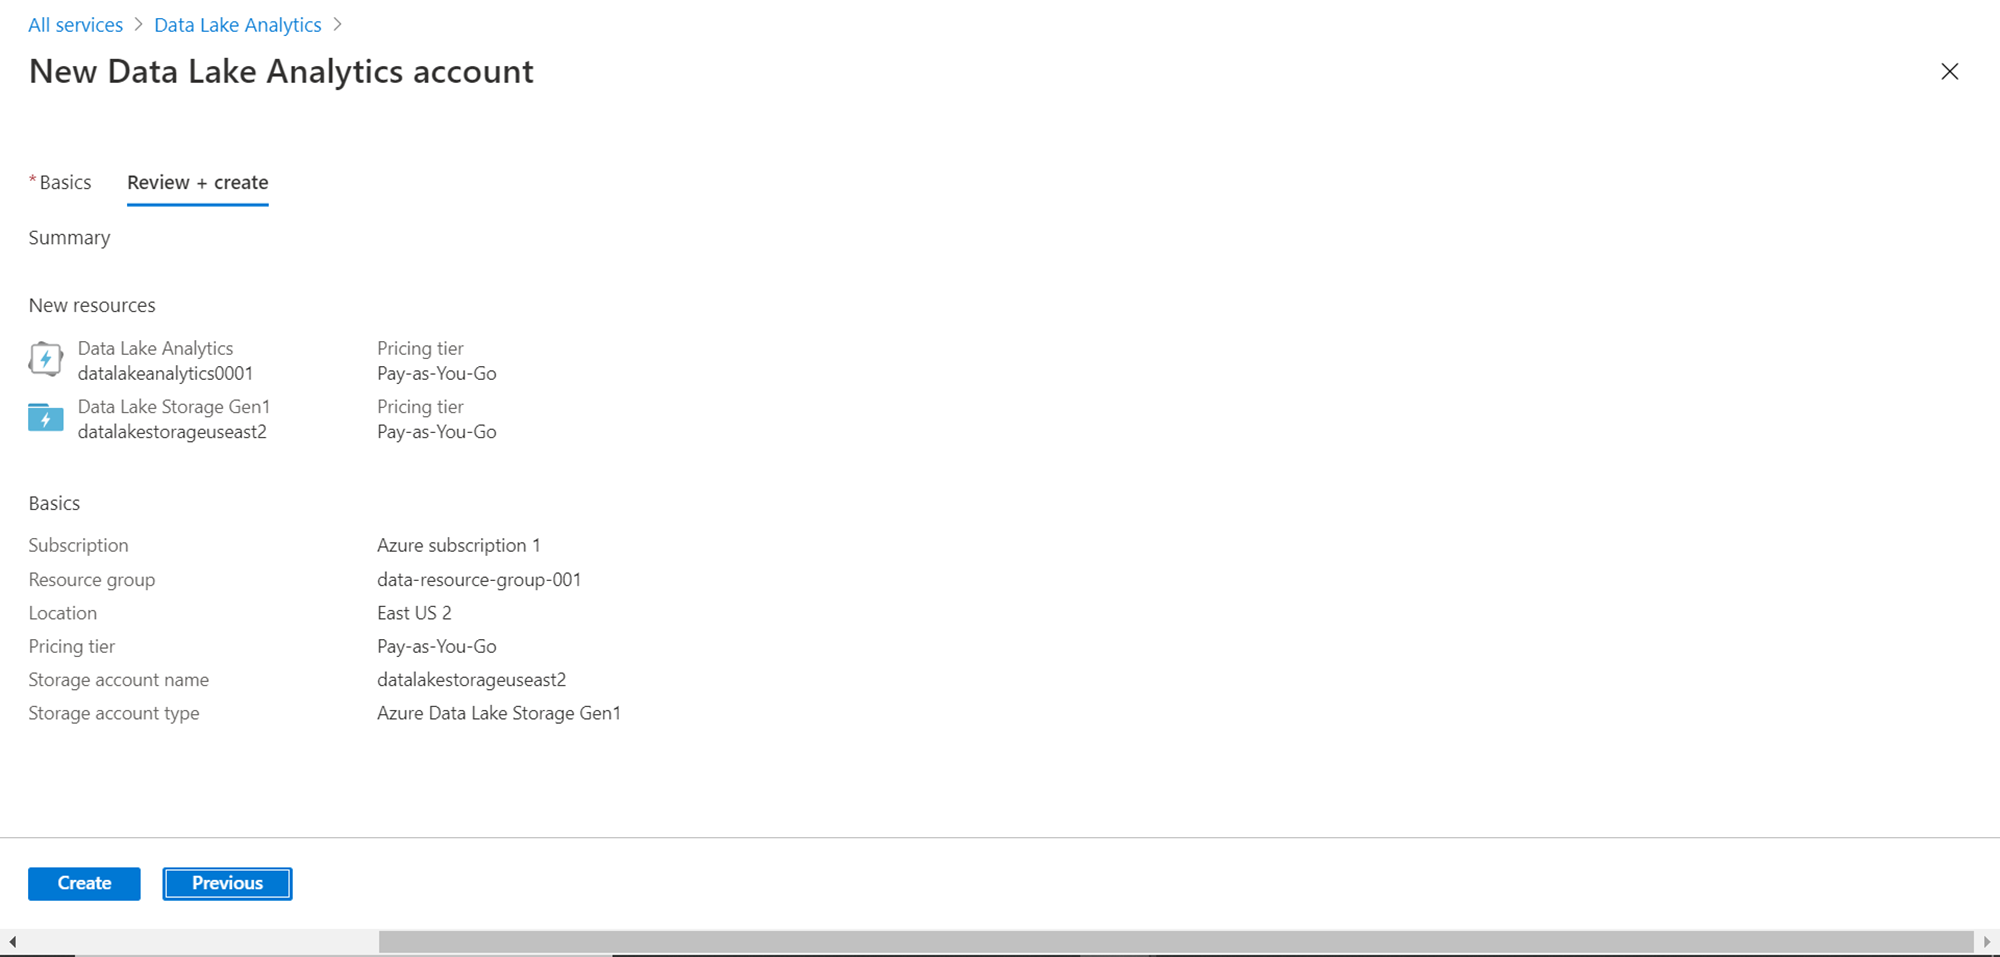
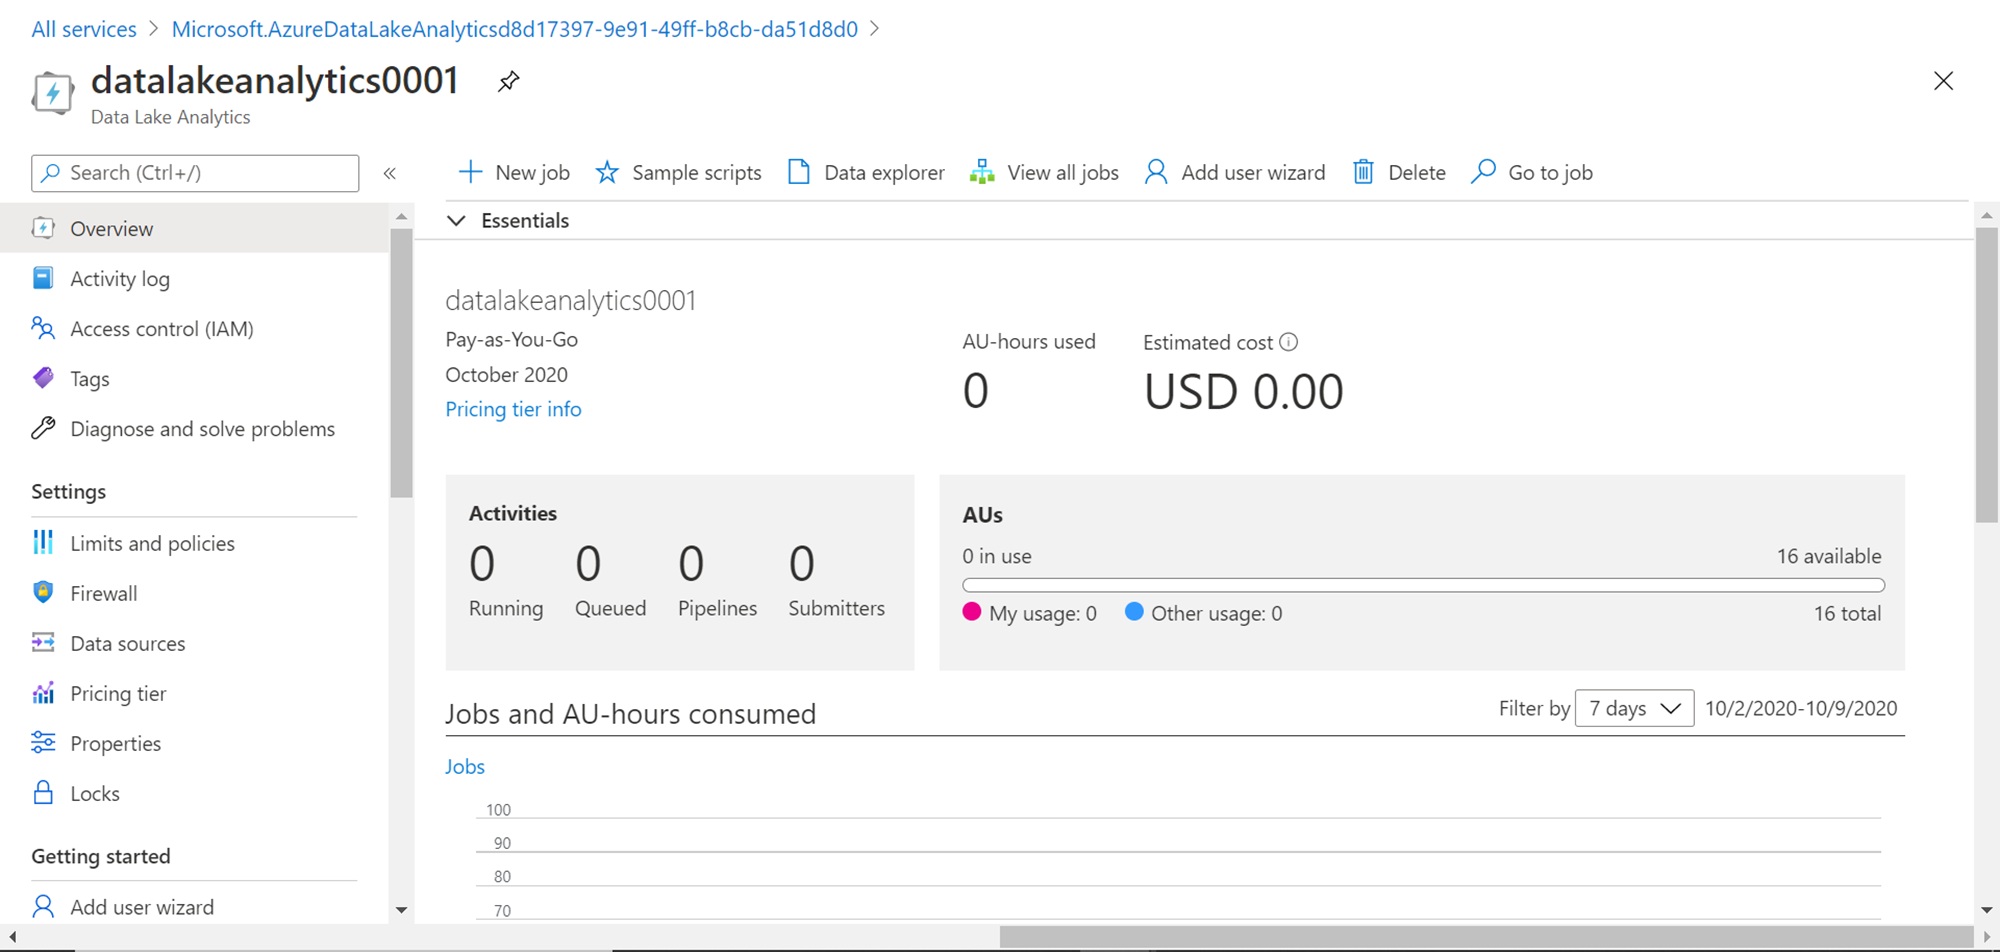
Click on the Create button to create the Data Lake Analytics account. Once the account is created is should look as shown below. Consider exploring the various options available in this dashboard view. The menu bar shows options to create new jobs, use some readily available sample scripts, open the Azure data explorer, view all the jobs, add users to the account, go to a specific job as well as delete the account itself. The same options are available on the left-hand menu as well. The settings section in the vertical menu provides options to configure account details. The activities pane shows the aggregated status of different jobs, and the AUs consumed so far as well as the cost incurred due to it.
Azure Data Lake Analytics Jobs
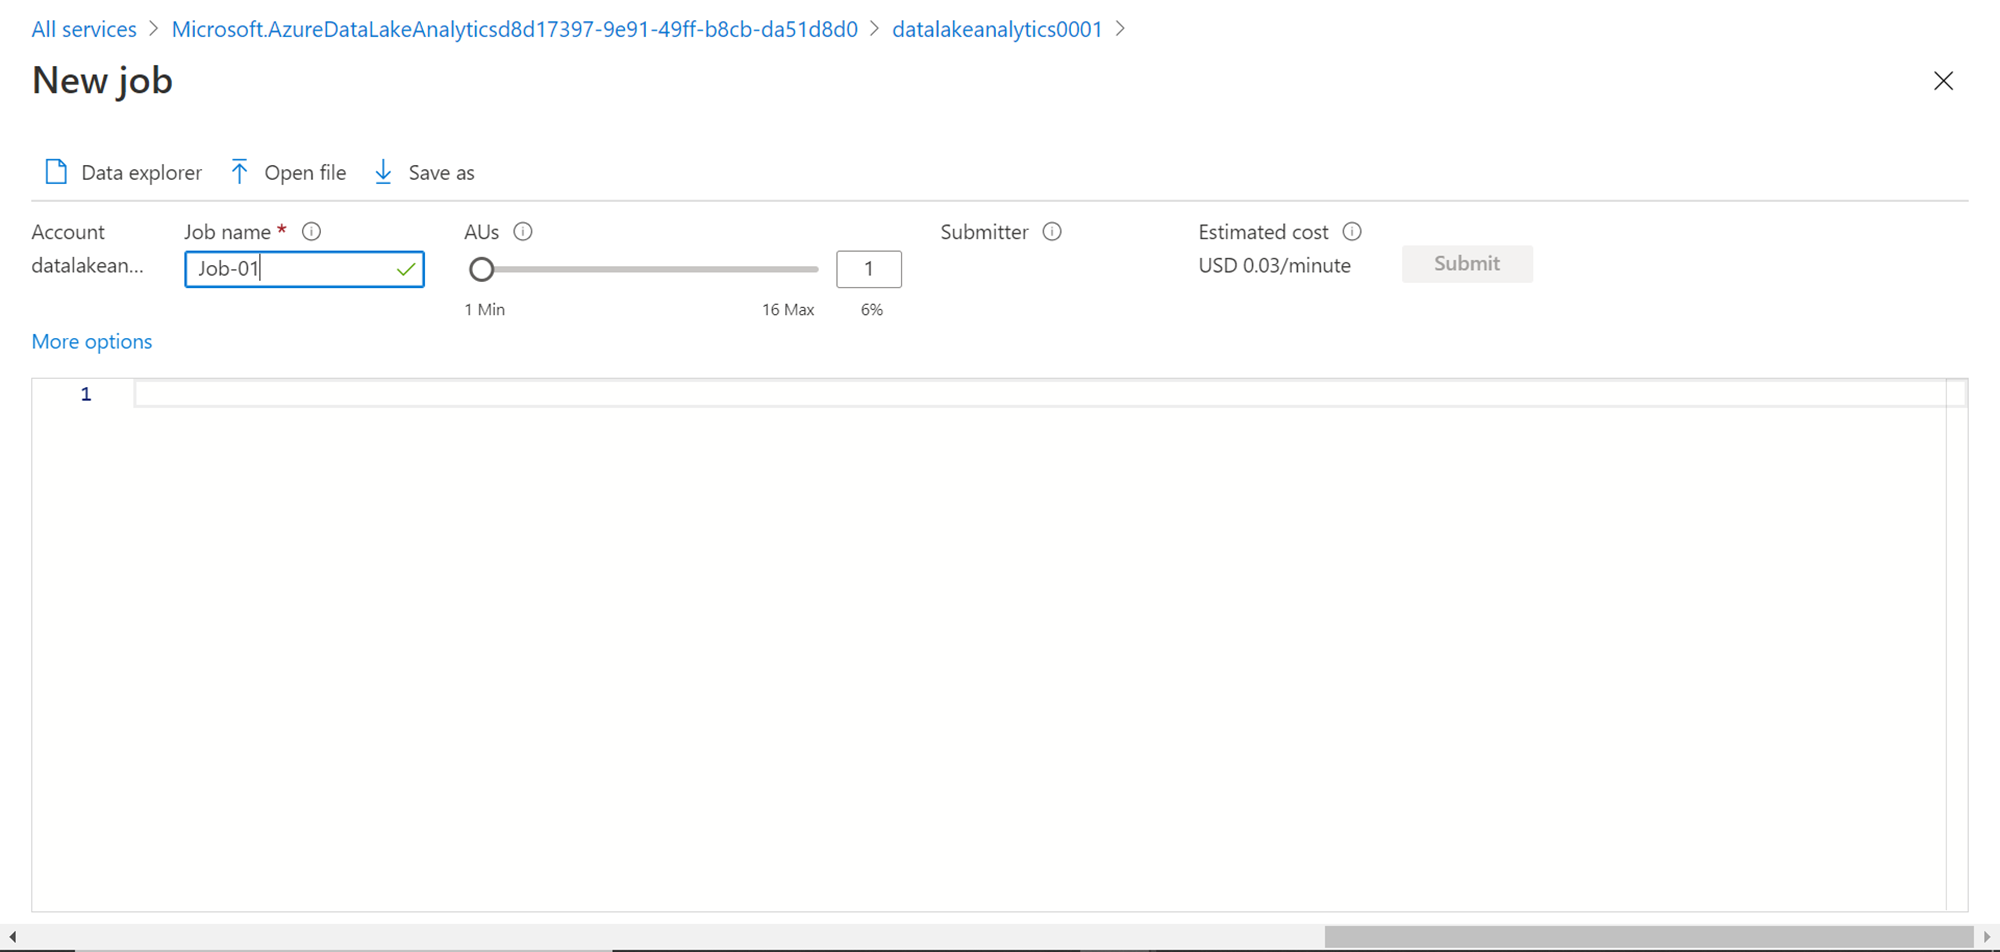
Now that we have the account created, we can test-run a small job to understand how jobs are executed using the Azure data lake analytics service. For now, to keep the job as simple as possible, we would not get into the details of creating data on the data lake storage. We can use some static data for now. The first step of creating a new job is by navigating to the job editor console. Click on the New Job button to open the editor. It should look as shown below.
Provide a job name and specify the AUs that we intend to let this job use. The estimated cost of 1 AU is $0.03 / minute. As we are just testing this job with very little static data, 1 AU should be enough for our job. On the menu bar, you have the option to explore different files in lake storage using the data explorer or open a specific file as well as save the job.
Now we need to specify the logic of the job which would be executed. For now, as we are focused on exploring how jobs are executed, we would specify a simple logic where we select some static values and write the output to a new file in CSV format. Type the script exactly as shown below, which creates two columns with four records, and writes the same to a file named citydata.csv on the data lake storage account that we created earlier.
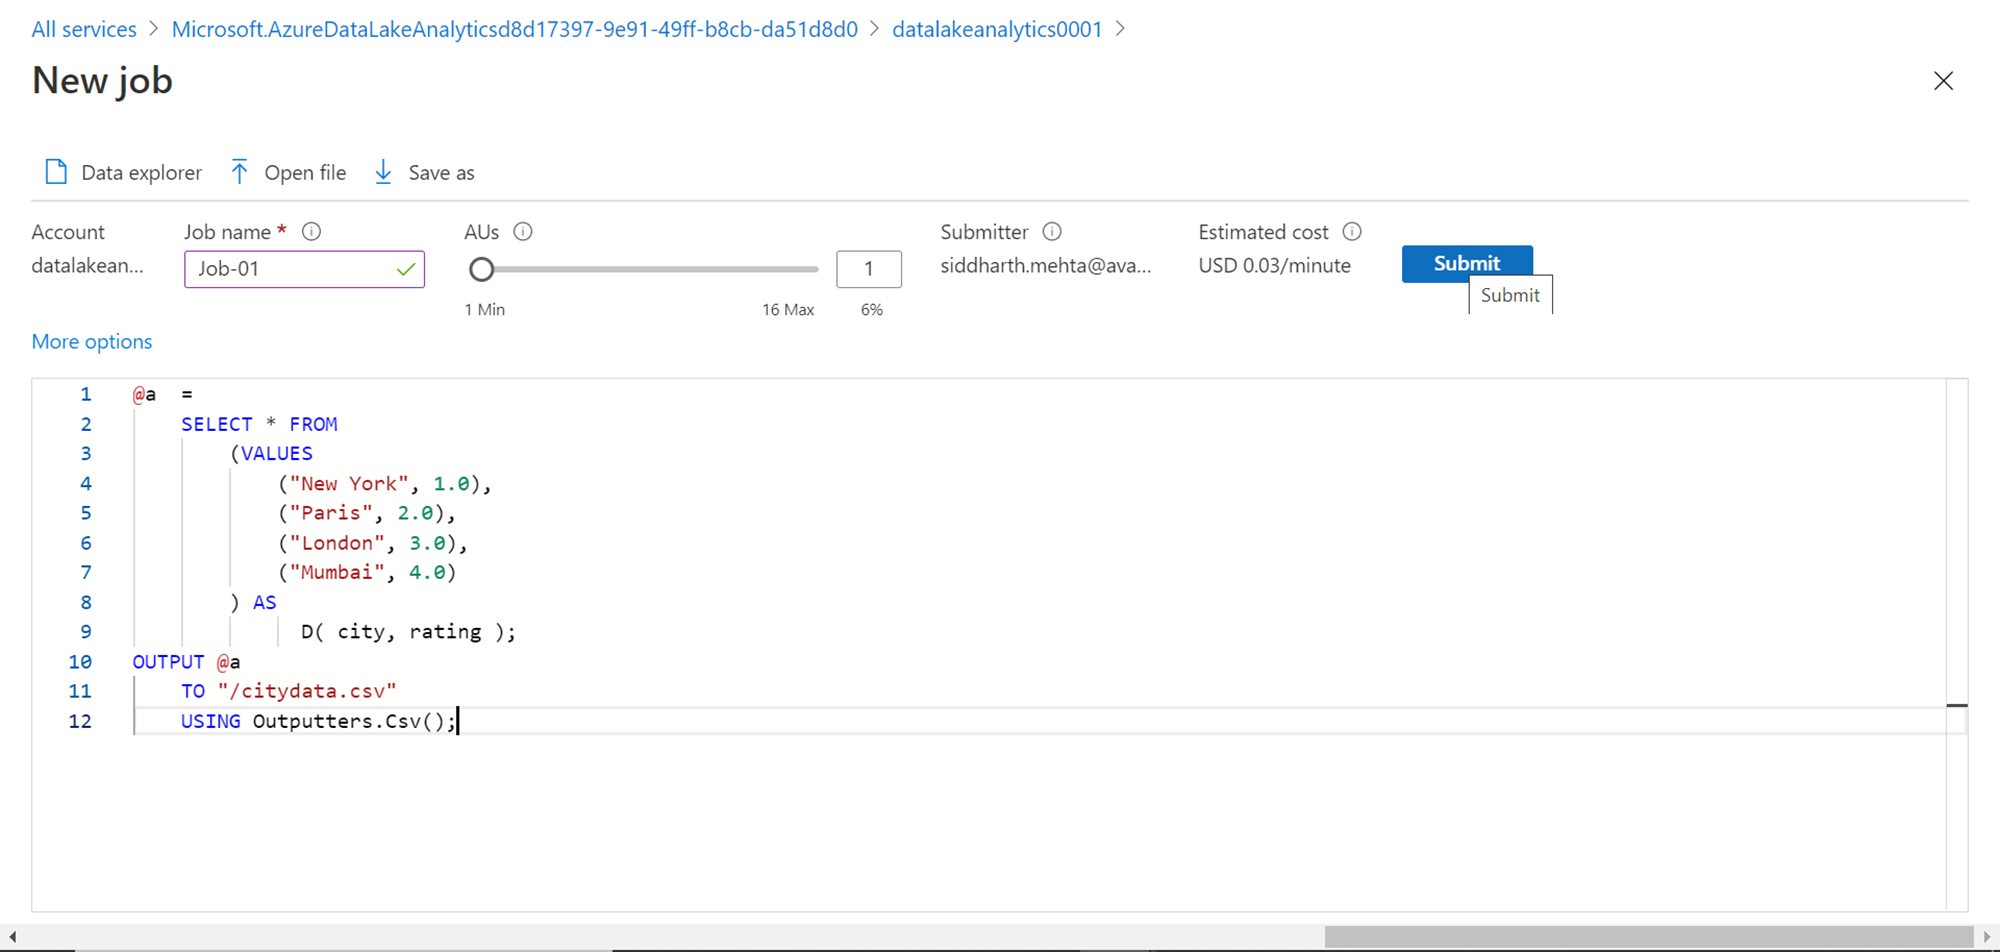
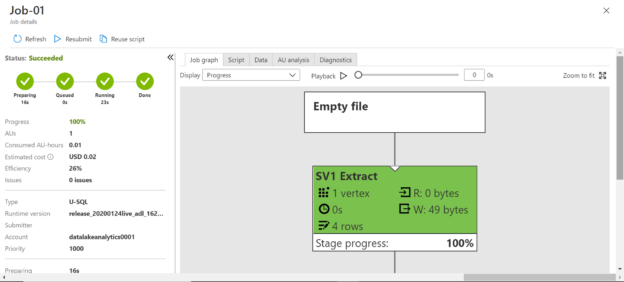
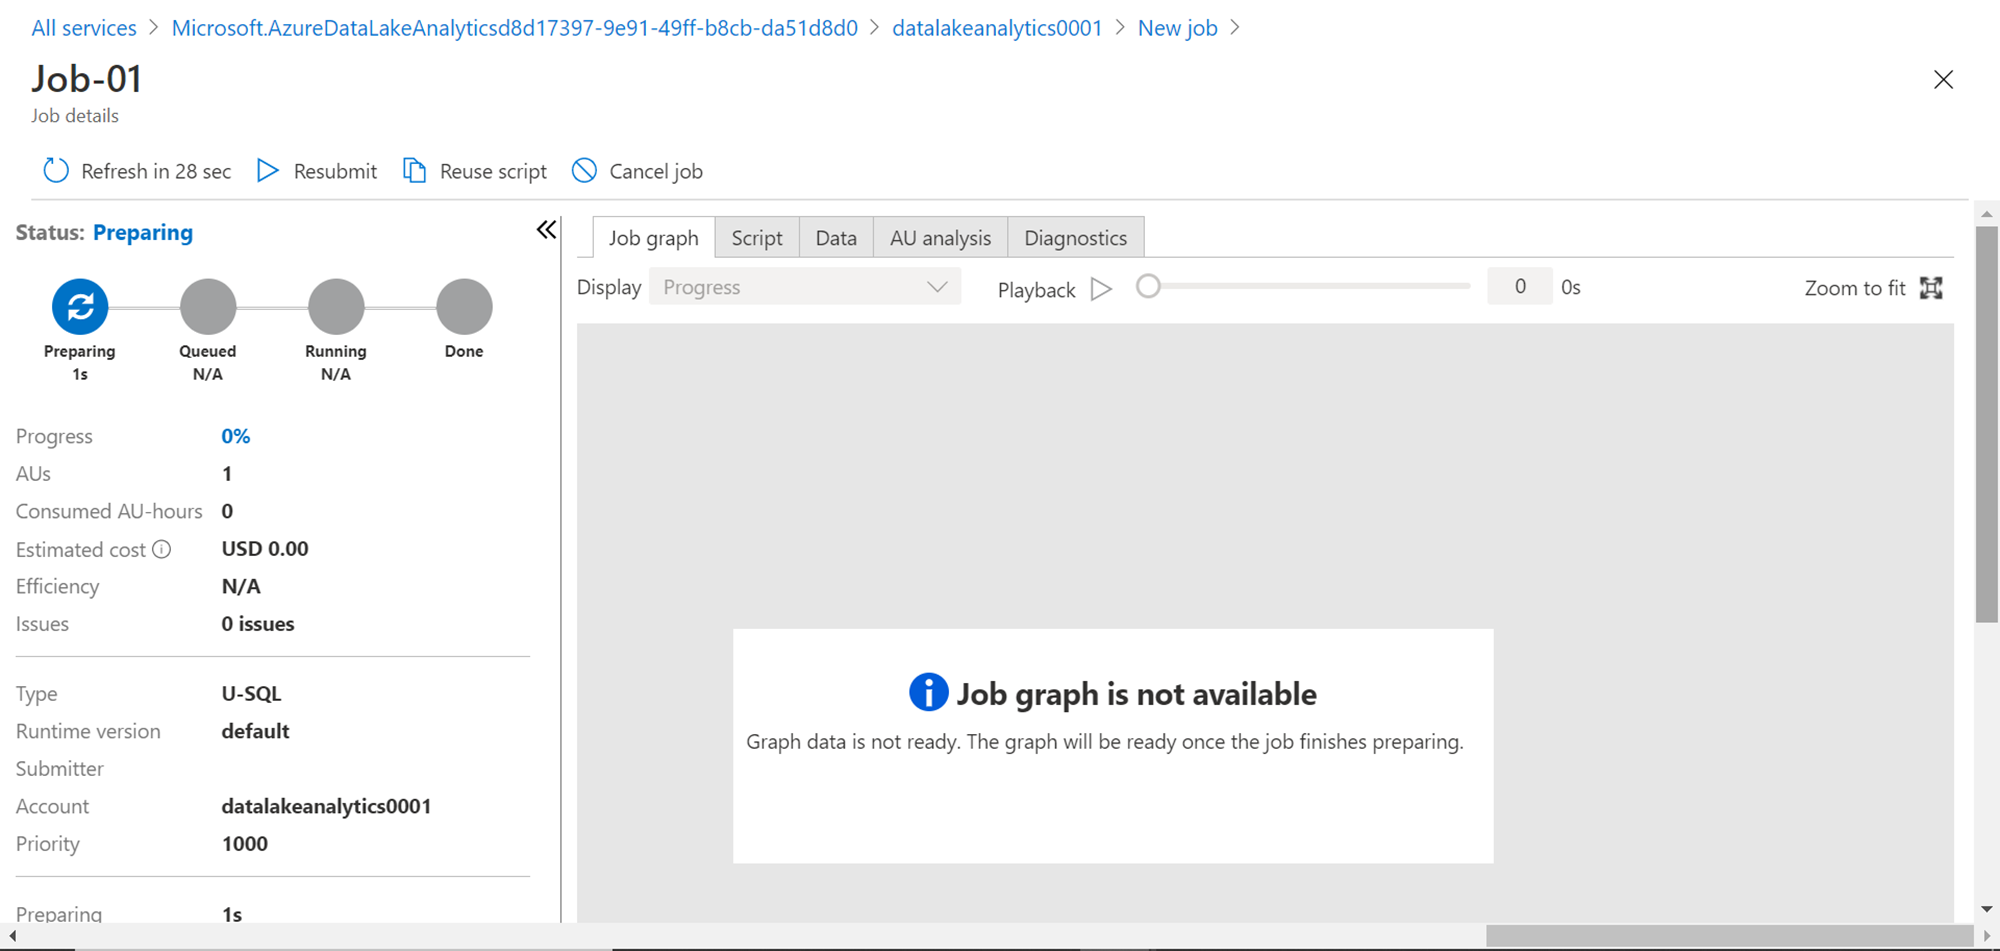
Click on the submit button once your script is ready to execute. Once the job starts, you would be navigated to the job execution view as shown below. When the job starts the job graph window may not show the graph. On the left-hand side, you would be able to see the various job-related details.
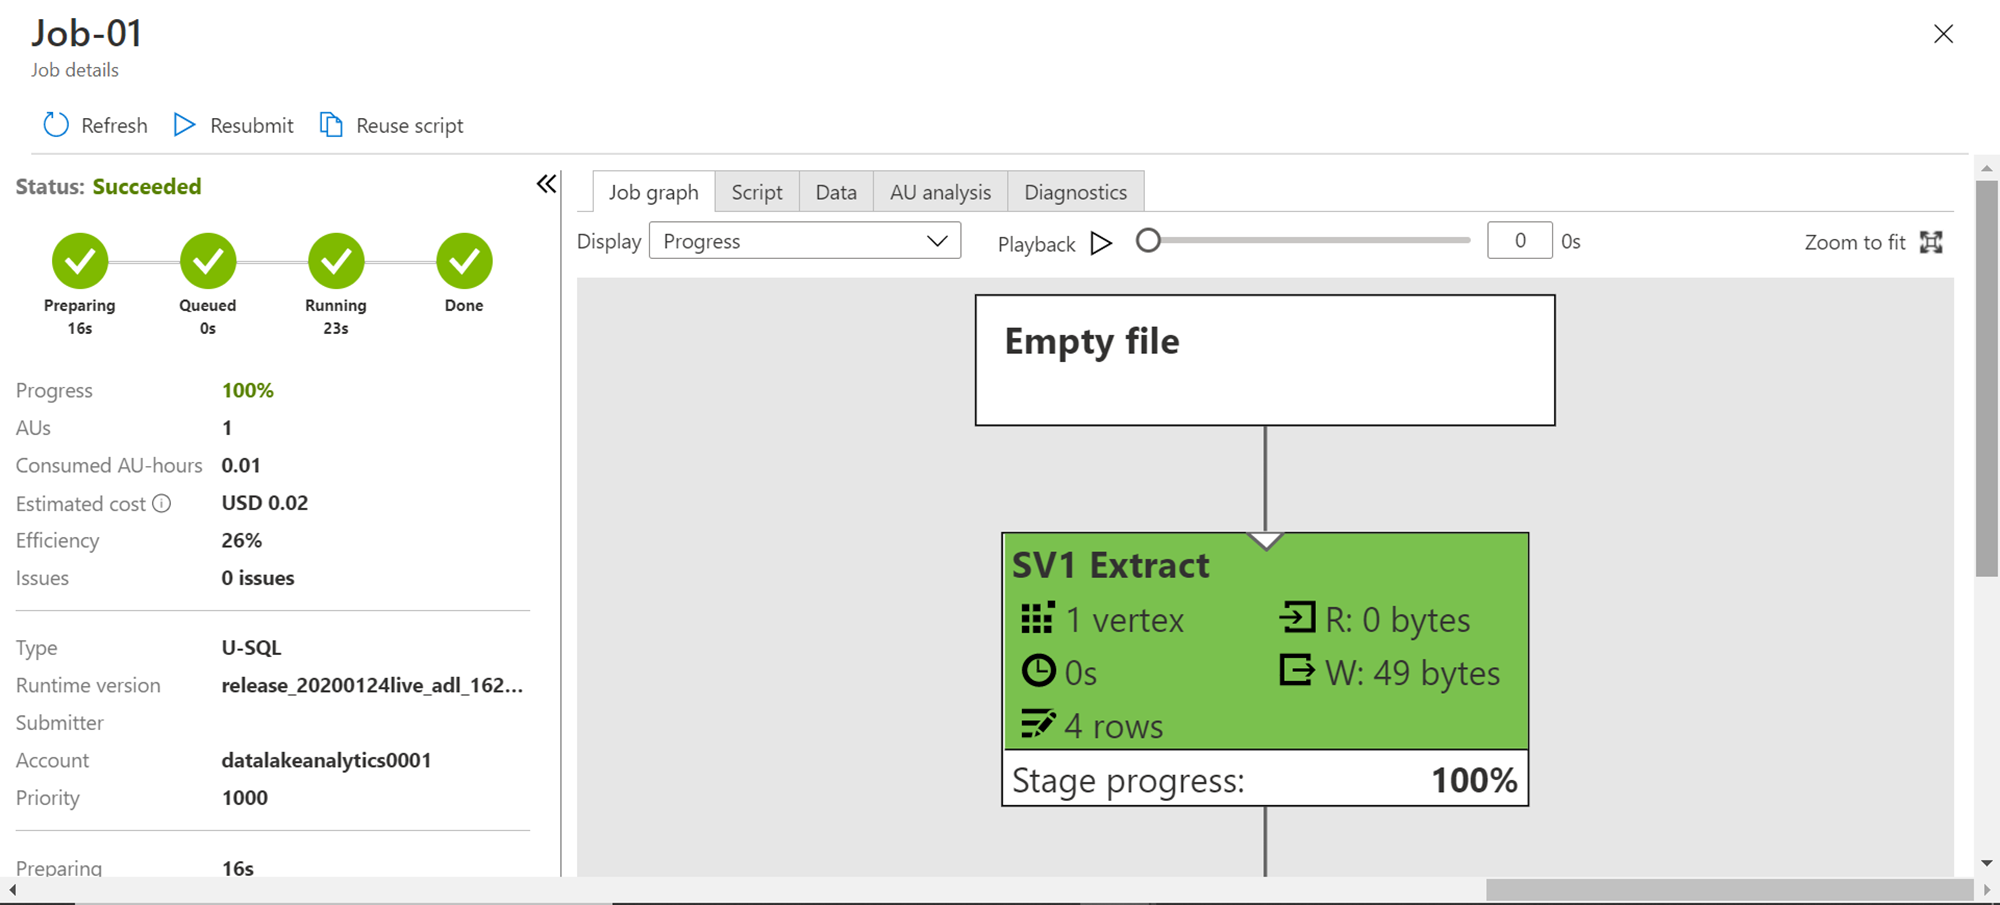
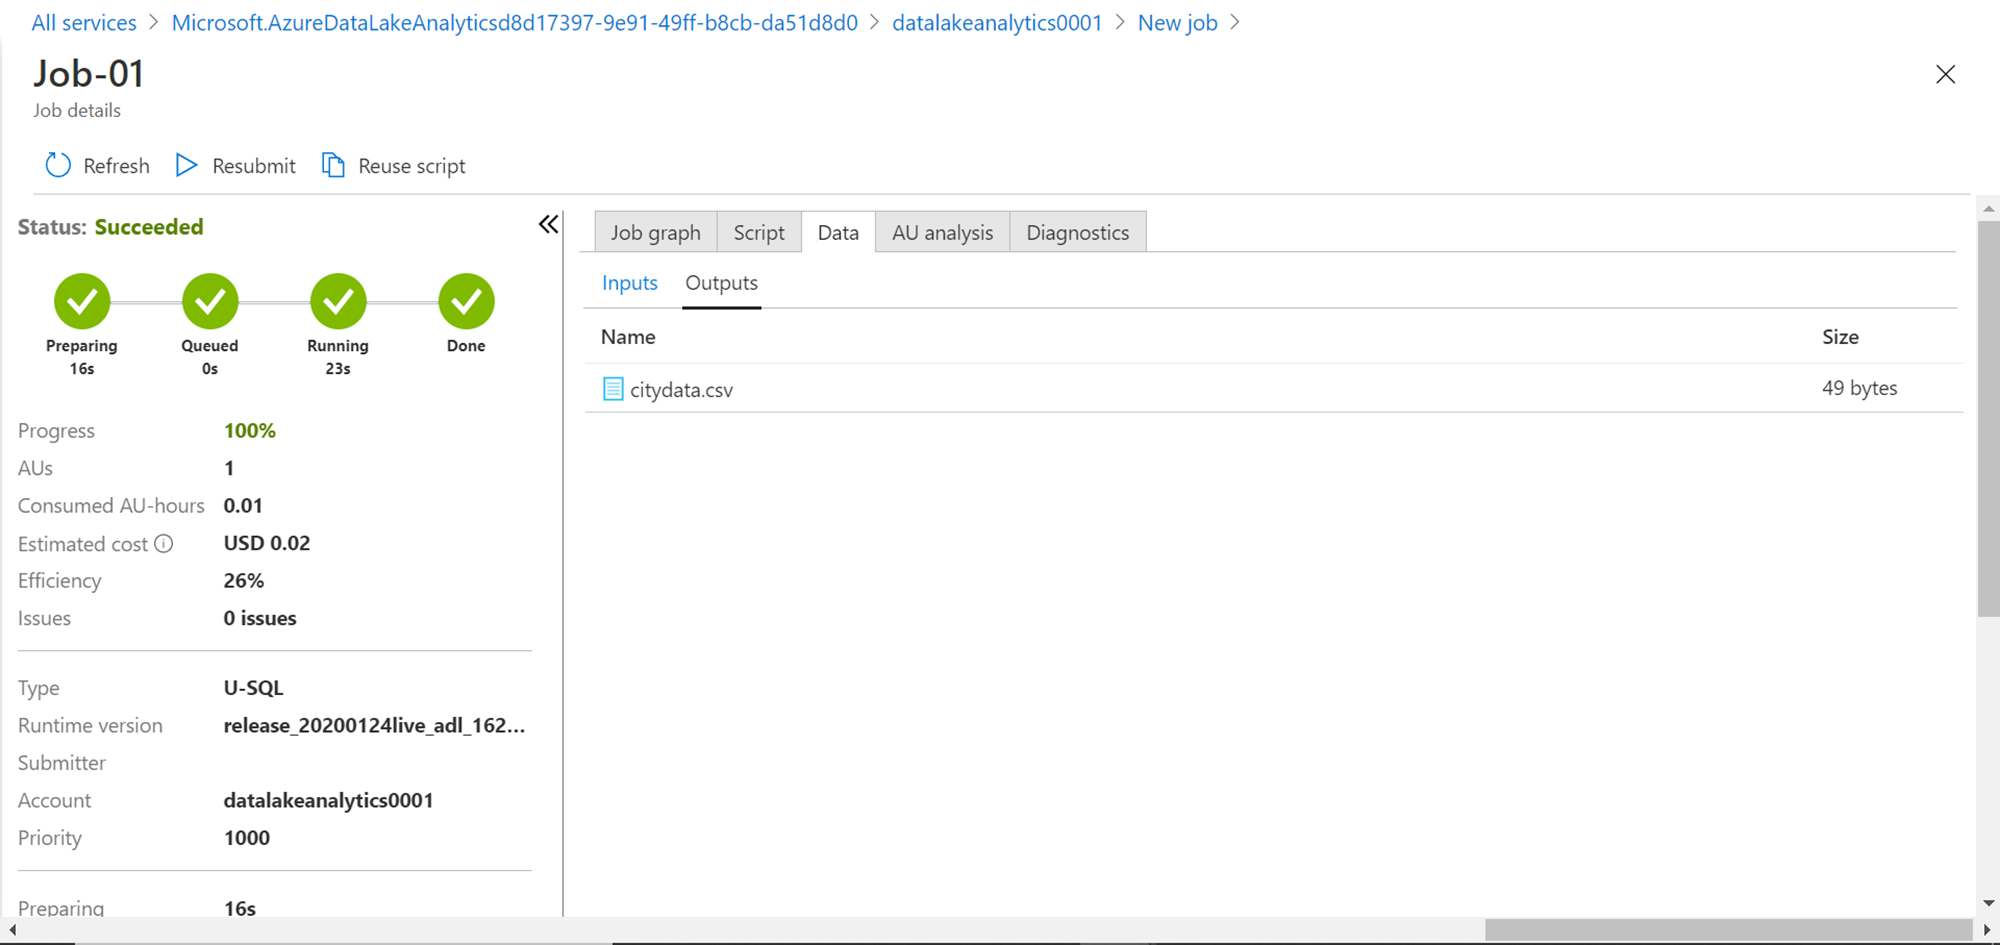
The job may go through various phases and finally complete the execution. Once the execution completes, you would be able to see a screen as shown below. The details on the left-hand side show that the job costs $0.02 and consumed 0.01 AU. Scroll down to explore the rest of the details. On the job graph pane, now you should be able to see the graph which shows different details including how many rows were generated and the size of the data as well.
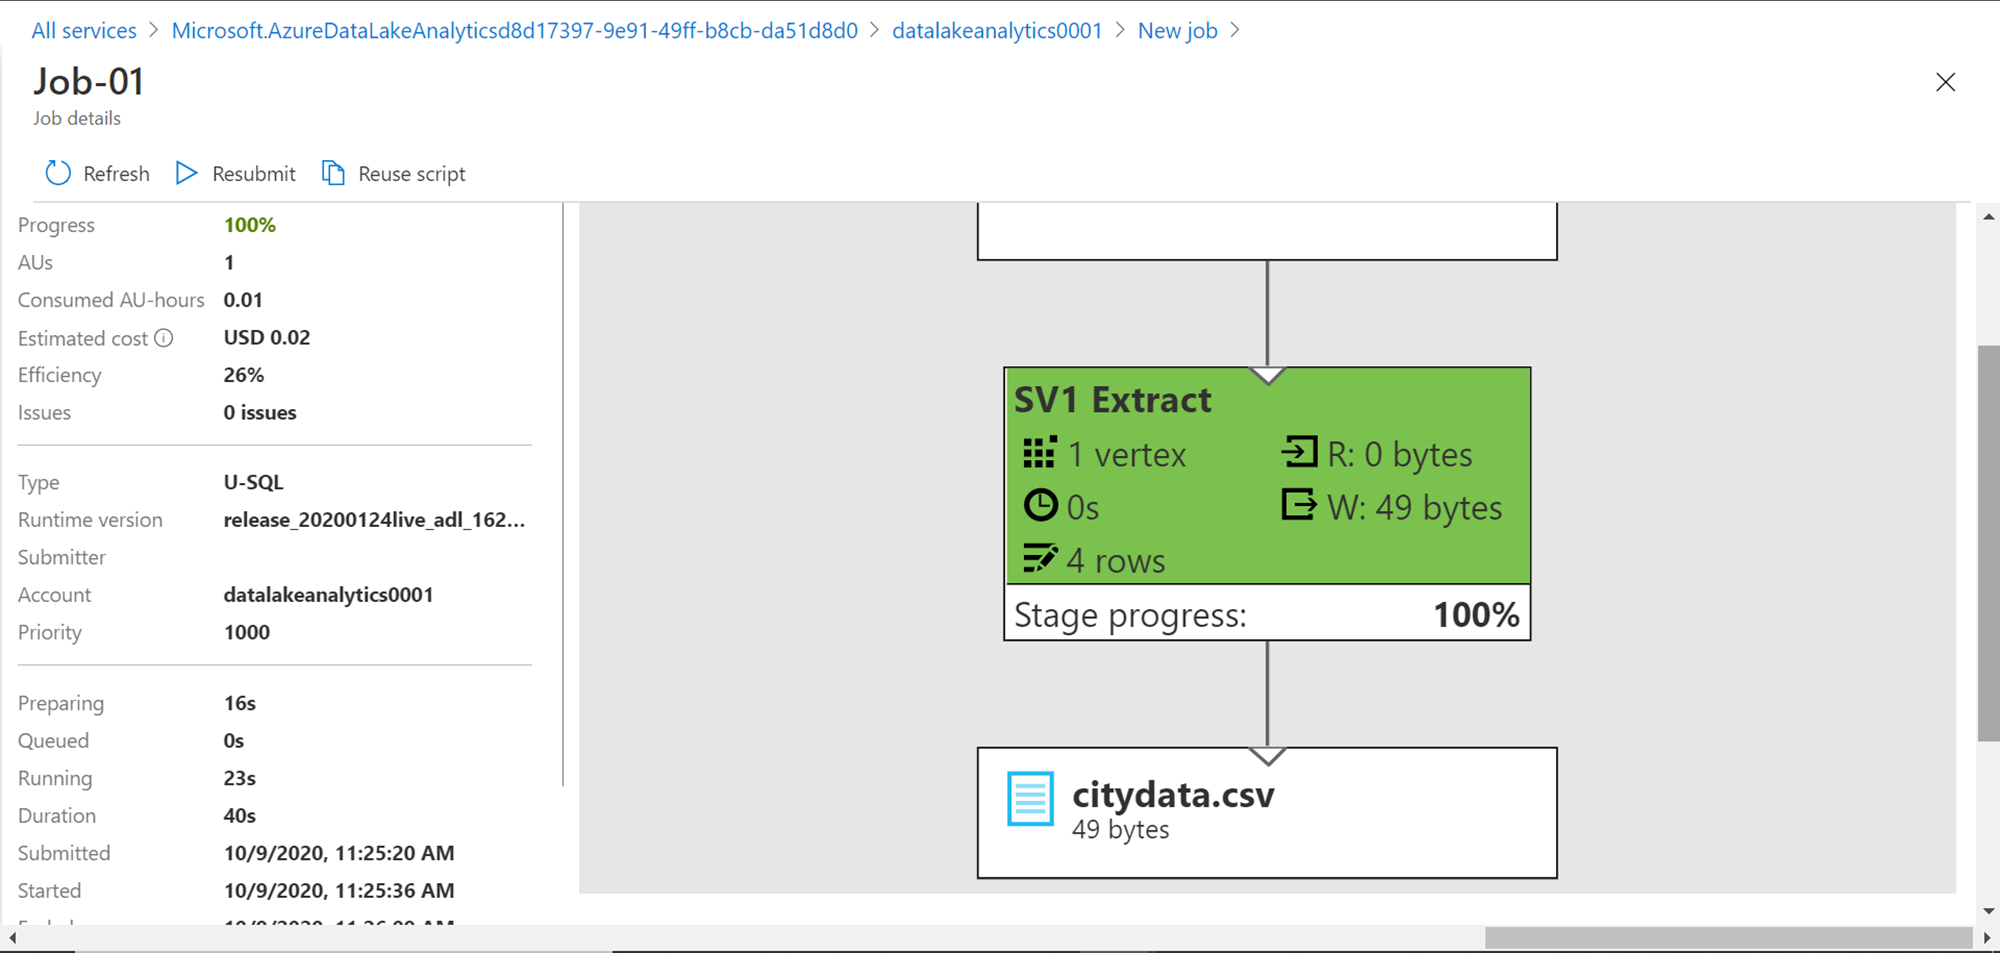
Scroll down the job graph pane, and at the bottom of the graph, you would be able to see the output file in which the data is written – citydata.csv.
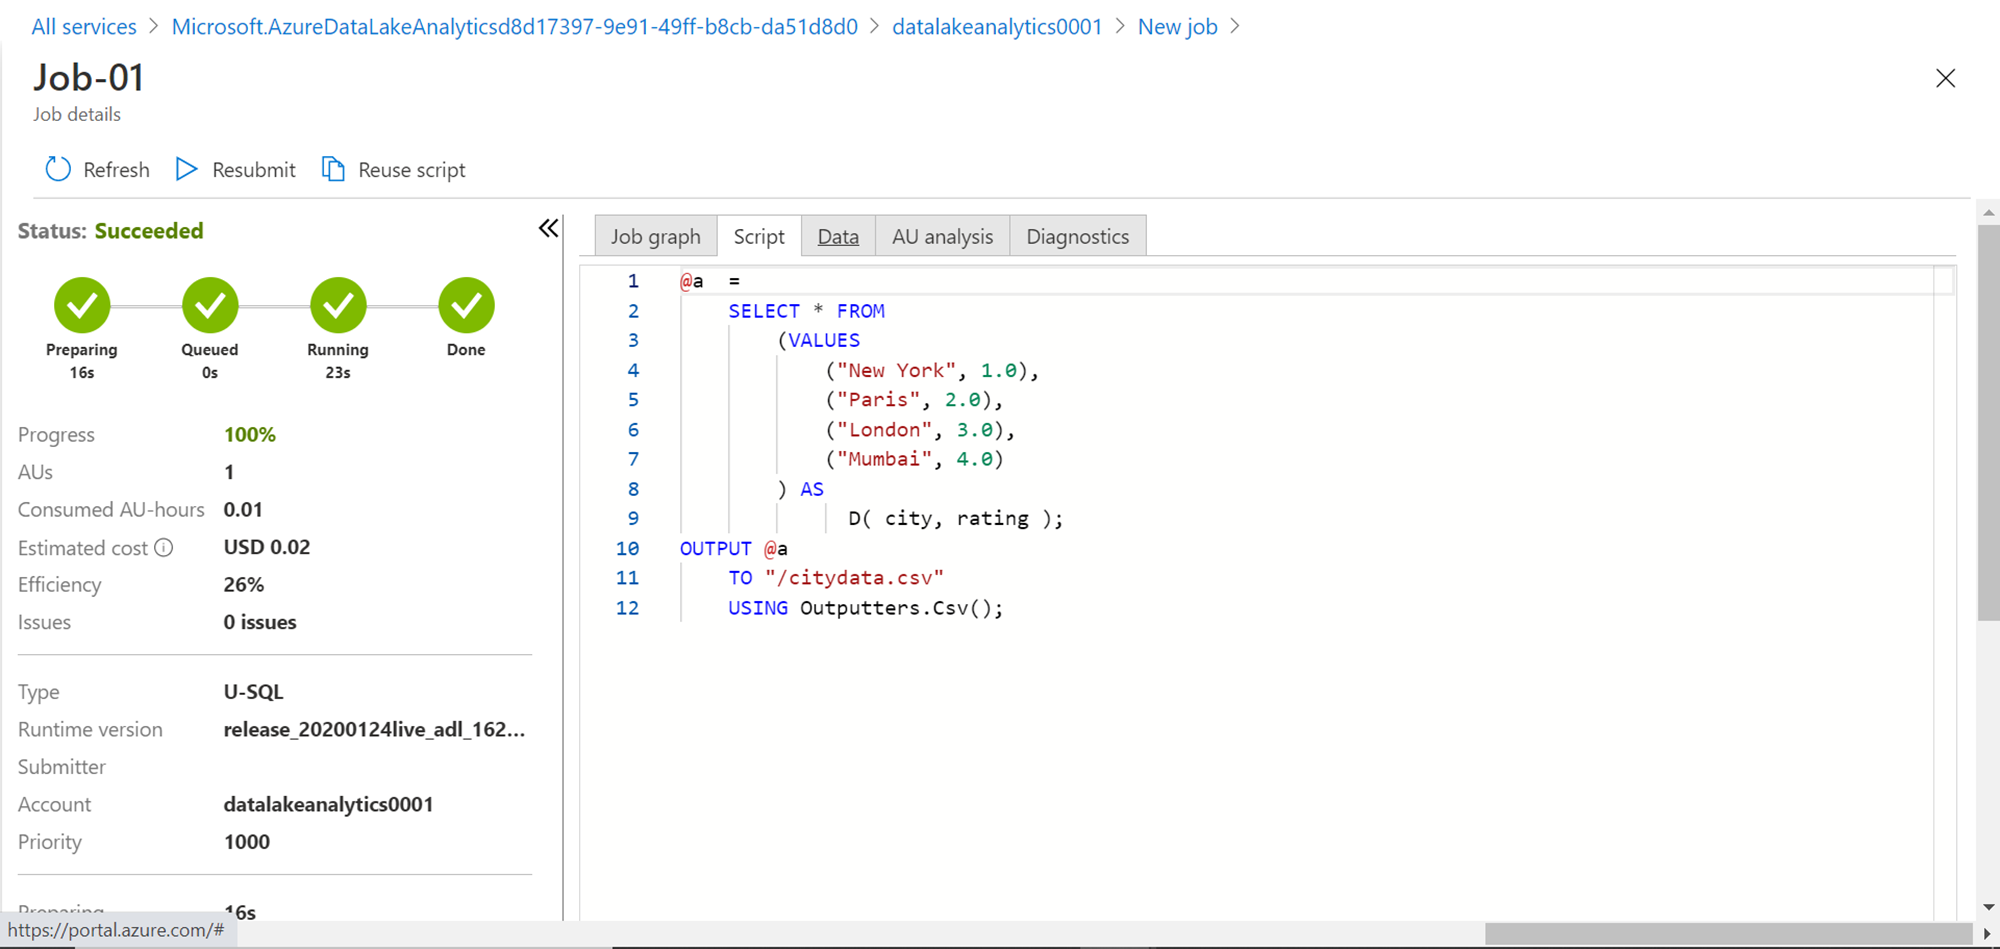
Scroll up and check different tabs that show different details. For example, clicking on the Script tab shows the script that was executed as a part of the job as shown below.
Click on the Data tab, which will show the output file that was generated in which we have written the output values as shown below.
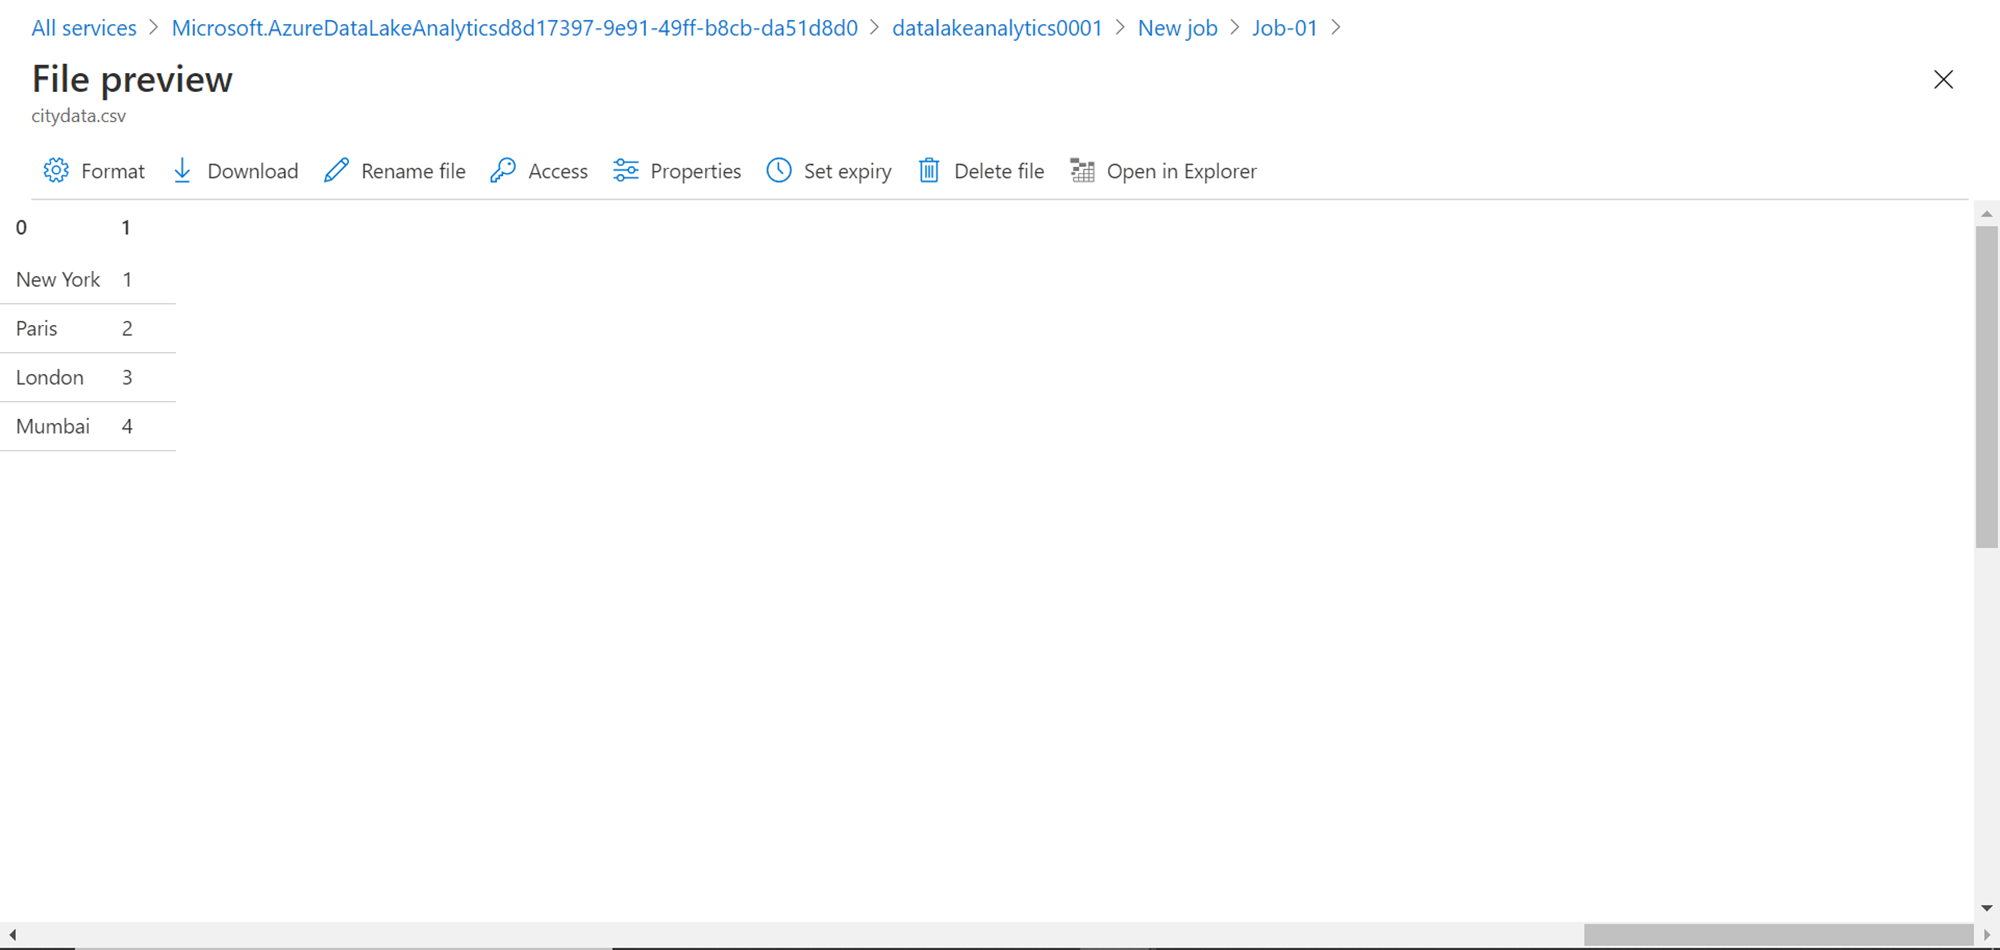
Open the file shown here, and you would be able to see the static values that we mentioned in our script saved in this output file as shown below. We can perform various actions on this file from the options available in the menu bar.
In this way, by creating an Azure Data Lake account and by creating a job, we can quickly get started and develop a practical understanding of the Azure Data Lake Analytics service.
Conclusion
In this article, we started with a basic introduction of Azure Data Lake Analytics features. Then we created an Azure Data Lake Analytics account, followed by the creation and execution of a job. We also looked at a sample script that selects a few static values and writes the output to an output file, which simulates reading data from massive data stored in data lake storage and writing the processed output to an output file.
Table of contents

He has worked internationally with Fortune 500 clients in various sectors and is a passionate author.
View all posts by Rahul Mehta
- Finding Duplicates in SQL - February 7, 2024
- MySQL substring uses with examples - October 14, 2023
- MySQL group_concat() function overview - March 28, 2023