

In the first part of the article, Explore SQL Server Integration Services (SSIS) on AWS RDS SQL Server, we understood that AWS RDS SQL Server supports SSIS functionality starting from May 19th, 2020.
In this article, we will create, deploy, and schedule SSIS packages using SQL Server Agent jobs. You should configure your environment with prerequisites and steps mentioned in the first article specified above.
Create and Deploy an SSIS project
We use Visual Studio 2019 SQL Server data tools to create an integration service project. Once we installed visual studio 2019 using Download SQL Server Data Tools (SSDT) for Visual Studio, we need to enable the integration service extension.
You should install it in the Amazon EC2 Windows instance. I have the following EC2 instance, and it is a member of the [SqlshackDemo] domain. It is the same domain that we used in the RDS instance.
Install SQL Server Integration Service Projects extension
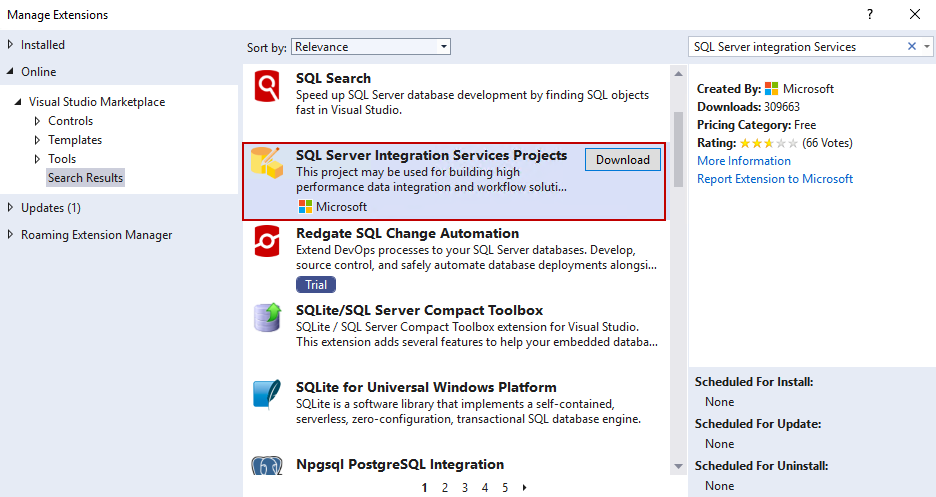
Open any project in Visual Studio and go to Extensions > Manage Extension from the menu bar. It opens the following market place to download extensions. Search for the SQL Server Integration Service Projects and download it.
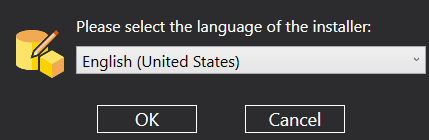
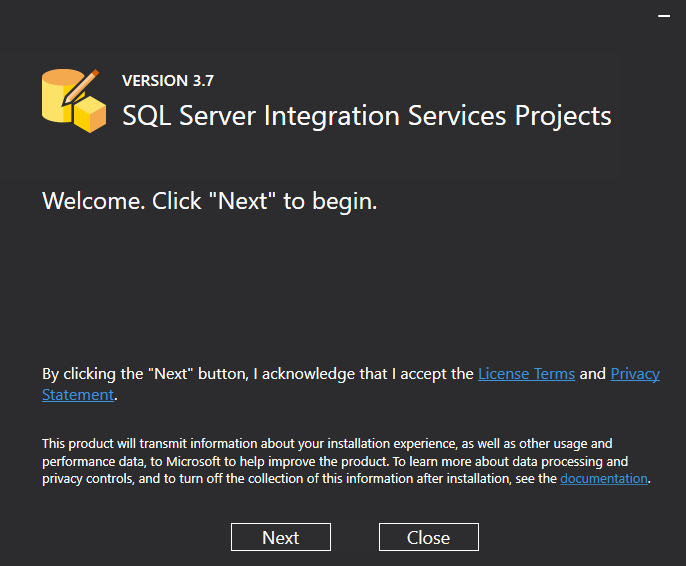
Launch the setup and select the language of the installer. By default, it chooses system language. You can change it if required.
Click Ok, and it starts the integration service project installation in the Visual Studio.
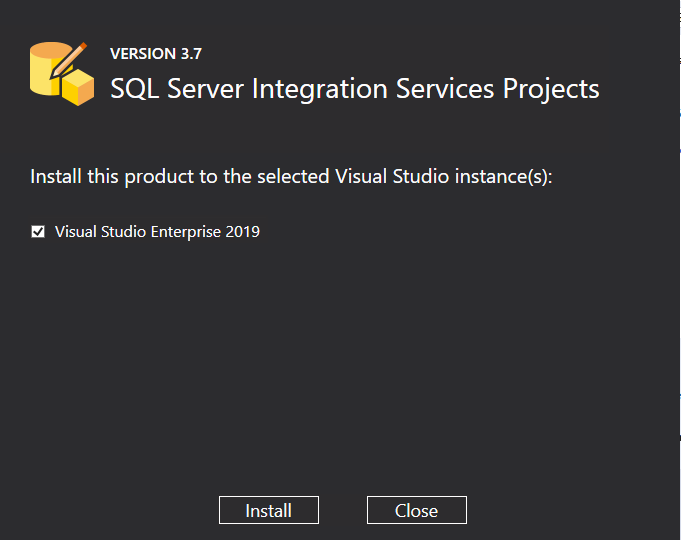
We have already installed Visual Studio 2019, so it integrates the integration service package with it. In case you have multiple versions, you can choose the required version.
As we can see below, SQL Server Integration Services Projects version 3.7 in the Visual Studio 2019 on Amazon EC2 instance.
Create an SSIS package using Visual Studio 2019 for AWS RDS SQL Server
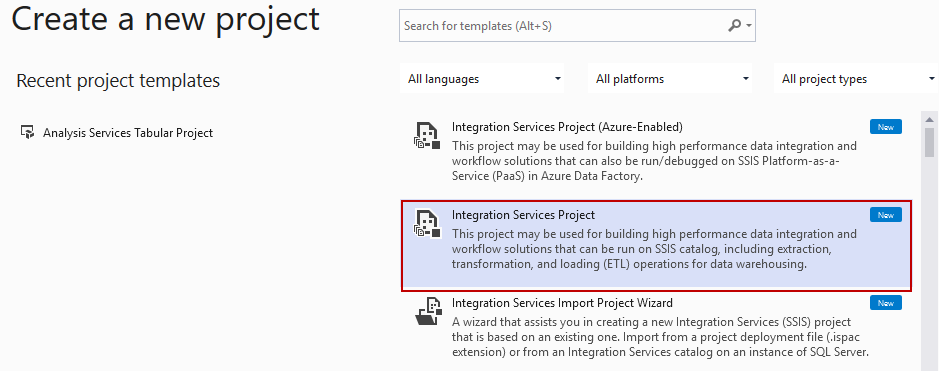
Launch Visual Studio in the EC2 instance, create a new project and select the category – Integration Service Project.
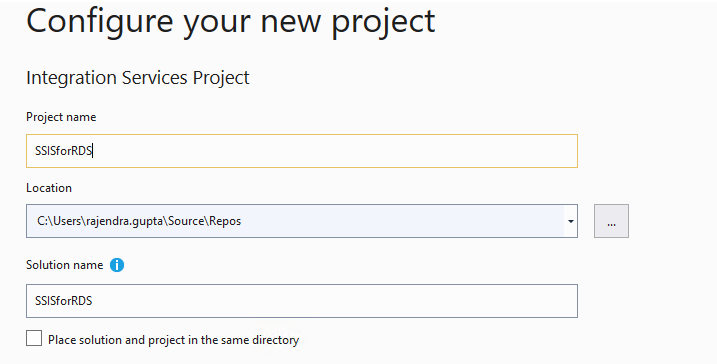
For configuration, specify the project name and location. I give the project name – SSISforRDS.
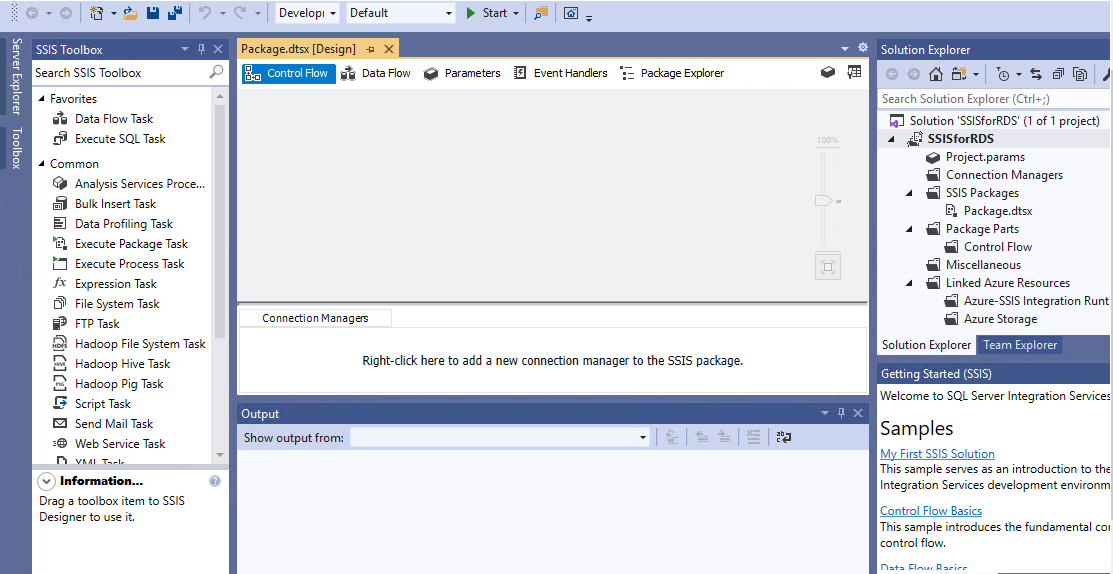
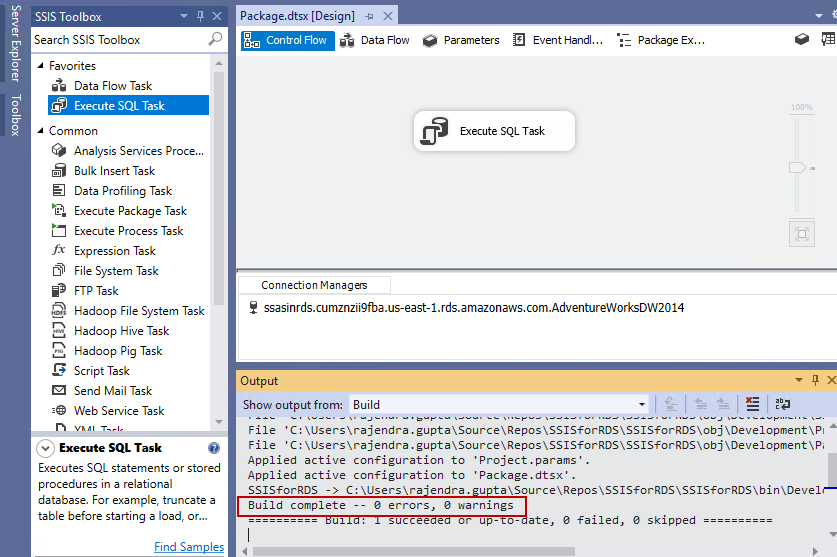
It opens the following SSIS project. You can see the SSIS toolbox in the left and SSIS packages along with its parts like control flow in the solution explorer ( right-side).
For this article, my primary intension is to guide you for creating an SSIS project that uses AWS RDS SQL Server integration service. We will create a basic SSIS package here.
My RDS SQL instance holds [AdventureWorksDW2014] database. You can download this sample database from Microsoft docs. You can follow the article Recover Data in AWS RDS SQL Server to restore it on the RDS instance using the S3 bucket.
Create the following stored procedure to select the records from a SQL view.
Create the following stored procedure to select the records from a SQL view.|
1 2 3 4 5 6 7 8 |
USE [AdventureWorksDW2014]; GO CREATE PROCEDURE [TempSP] AS BEGIN SELECT * FROM [dbo].[vDMPrep]; END; |
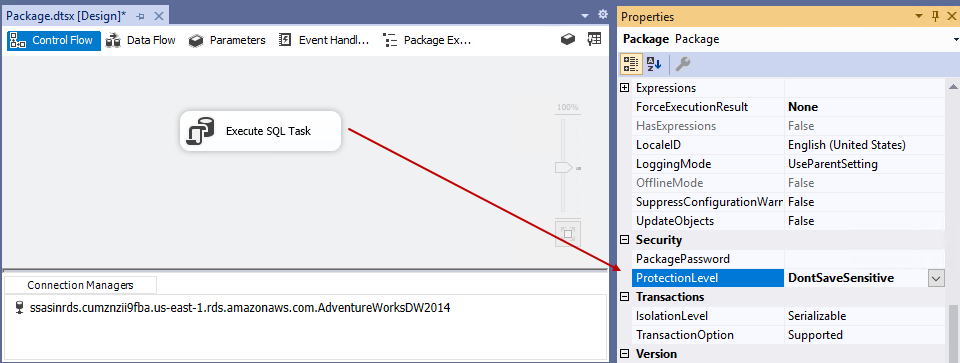
Now, drag an Execute SQL Task from the SSIS toolbox.
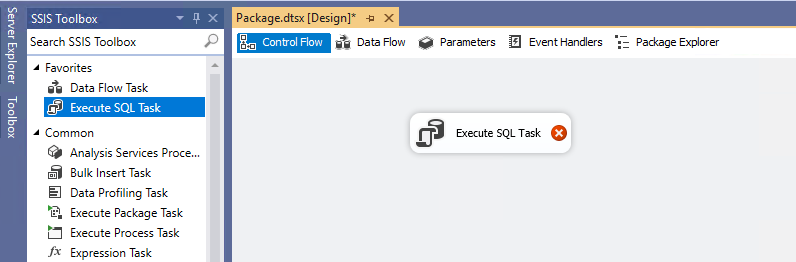
Double-click on the execute SQL task to open its configuration editor.
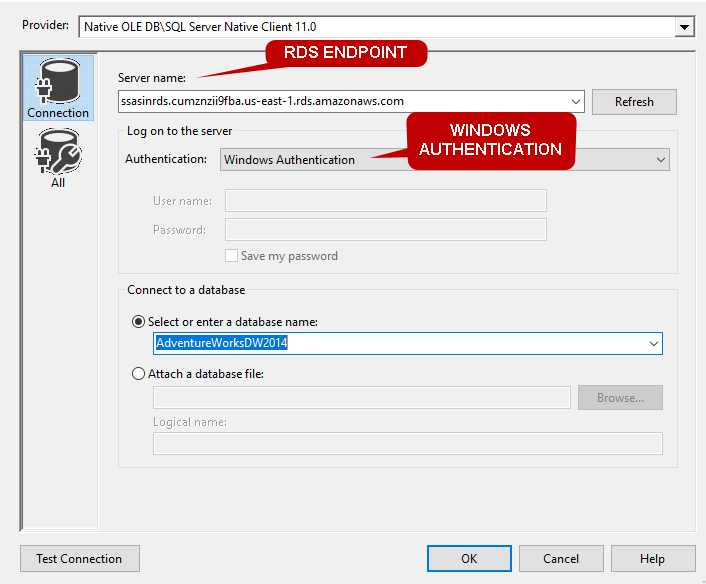
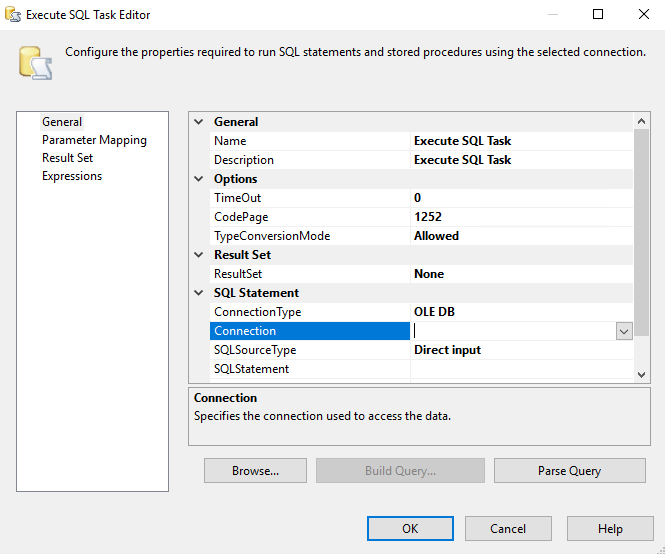 Click on the Connection-> New Connection. In the connection window, specify the RDS endpoint as the server name if you do not have an endpoint in handy, login to AWS console, and get it from the AWS RDS SQL Server dashboard.
In the authentication, always use Windows authentication. We cannot use SQL authentication for SSIS in the RDS environment.
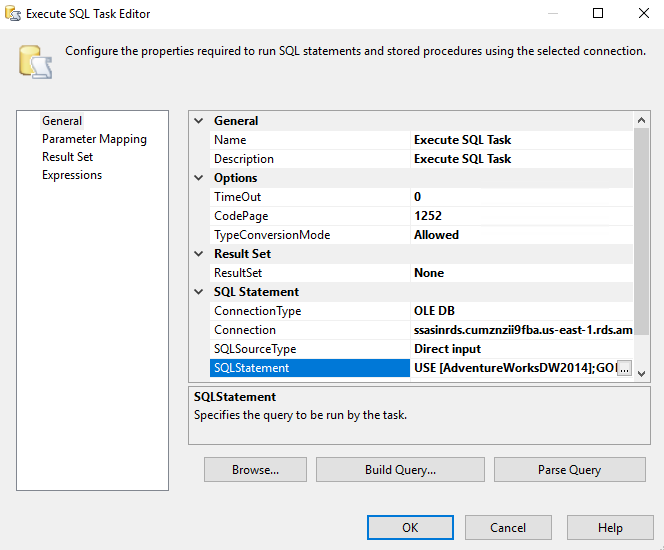
Click Ok and Specify the SQL statement to execute the stored procedure, we created earlier.
|
1 2 3 4 |
USE [AdventureWorksDW2014]; GO EXEC [TempSp]; GO |
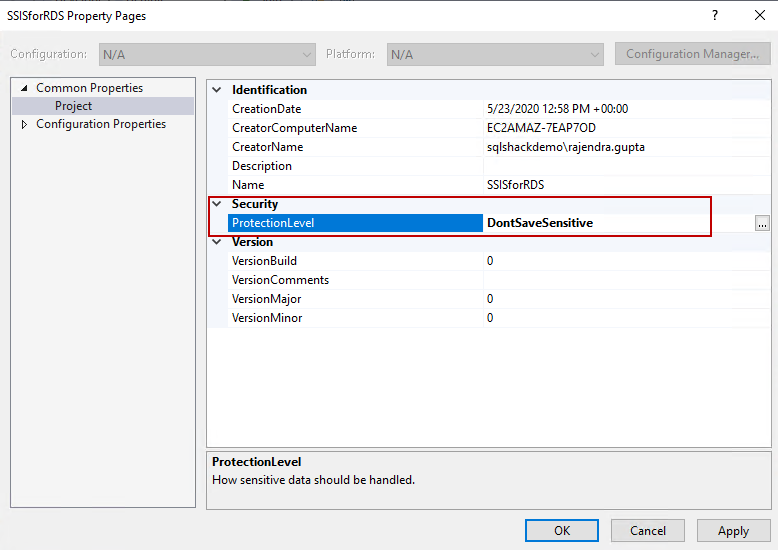
Click Ok. Now, right-click on the SSIS solution and go to its properties. Here, you can see the project creation date, the EC2 instance name, the Windows authenticated user, and the project name.

In security, it sets the default protection level as EncryptSensitiveWithUserKey. Change this Protection level to DonotSaveSensitive.
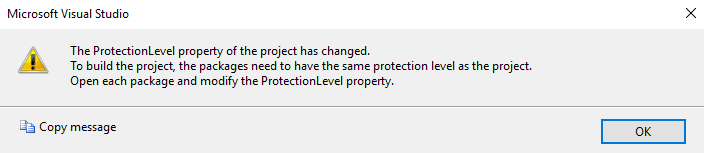
You get a warning message if you change the package protection level. Click Ok to accept the warning.
We also need to set the same protection level for the SSIS package. Right-click on the control flow area and go to properties. Change the protection level to DonotSaveSensitive, as shown in the below image.
Save the package and click on Build-> Build Solution.
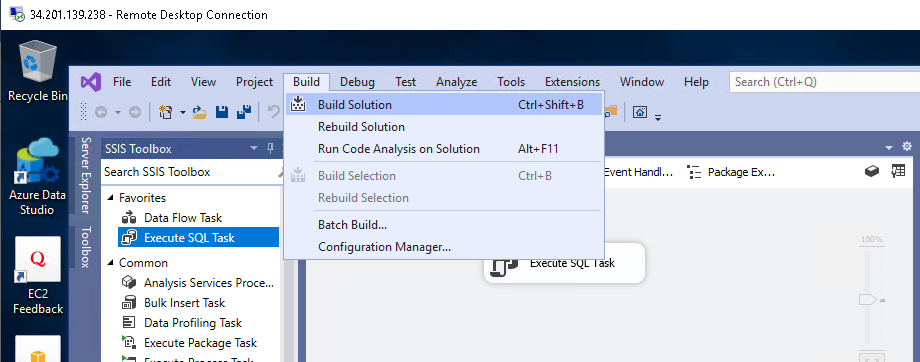
It builds the package for you, and you get the status in the output tab.
Download project ISPAC file from S3 bucket to AWS RDS SQL Server
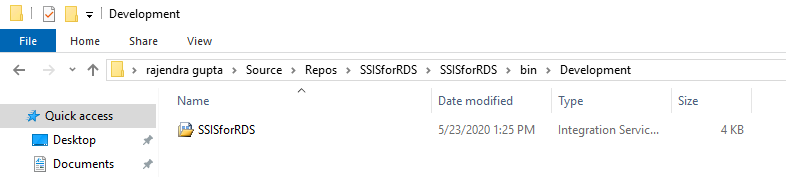
Browse the SSIS project directory in the EC2 instance. In the Bin-> Development folder, you can find a project file with .ispac Extension similar to the below file.
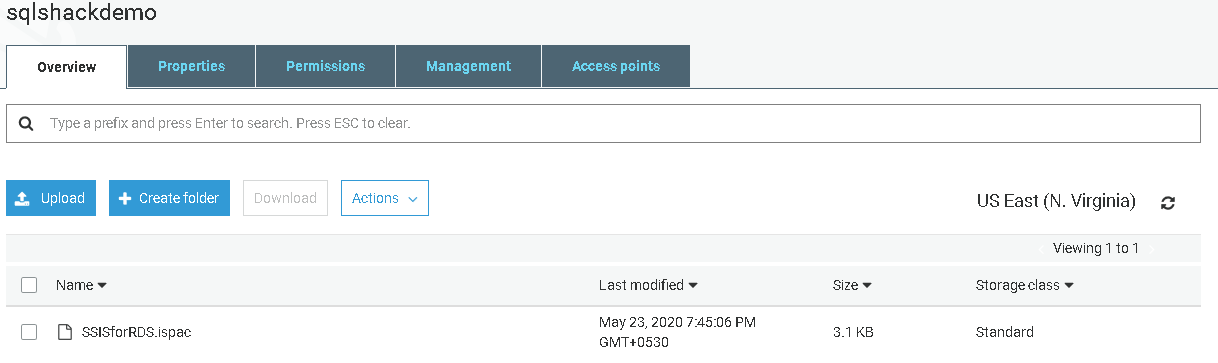
Login to AWS web console and upload this project.ispac file in the S3 bucket that is already integrated with AWS RDS SQL Server.
To download this file from the S3 bucket to the RDS directory ( D:\S3), we use the RDS stored procedure msdb.dbo.rds_download_from_s3 with the following arguments.
- @s3_arn_of_file: It is the Amazon resource name(ARN) of the S3 bucket .ispac file. Its format is arn:aws:s3:::<bucketname>/FilenameWithExtension
- @rds_file_path: It is the directory for the RDS instance. It is always D:\S3 for RDS SQL Server
You should run this procedure in SSMS connected using Windows authenticated AWS RDS SQL Server.
|
1 2 3 4 |
EXEC msdb.dbo.rds_download_from_s3 @s3_arn_of_file = 'arn:aws:s3:::sqlshackdemo/SSISforRDS.ispac', @rds_file_path = 'D:\S3\SSISforRDS.ispac', @overwrite_file = 1; |
It starts a task to execute the stored procedure. Note-down the task id and pass it in the msdb.dbo.rds_fn_task_status to check the status.

|
1 |
SELECT * FROM msdb.dbo.rds_fn_task_status(NULL,26) |
It shows success status that means RDS downloaded the ISPAC file in the RDS instance directory.

Create a folder in SSISDB integration Service catalog
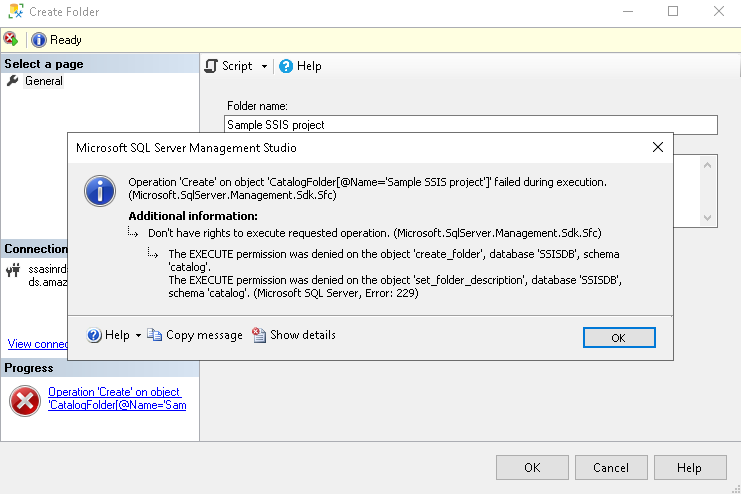
Before we move further, right-click on the SSISDB catalog and create a folder. In this case, we are connected with the RDS admin user.
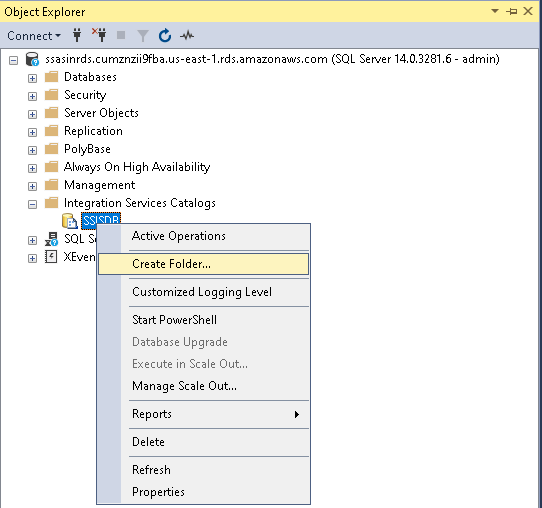
You get the following error message. We get this error because the ADMIN user does not have permission to create folders in the SSIS catalog.
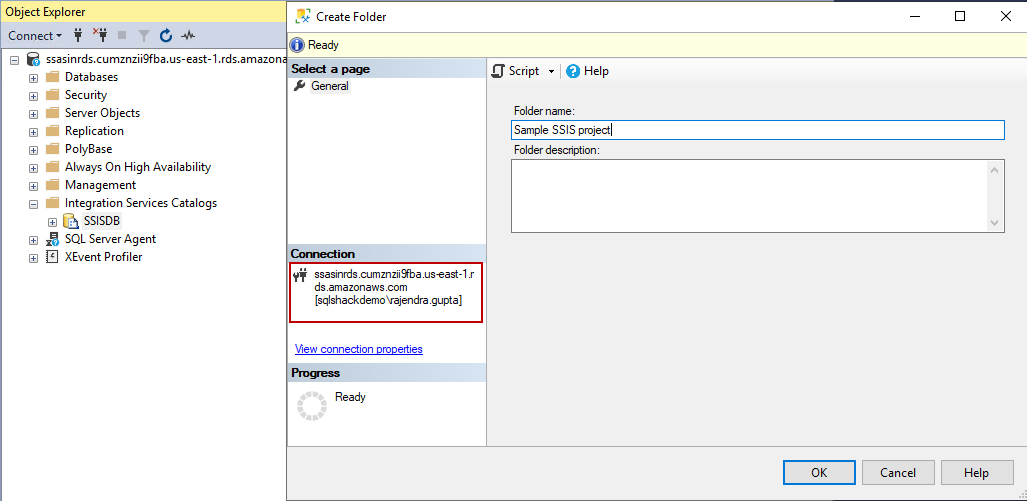
Let’s try the same operation with Windows authenticated users. We create a folder [Sample SSIS project] in the SSISDB catalog.
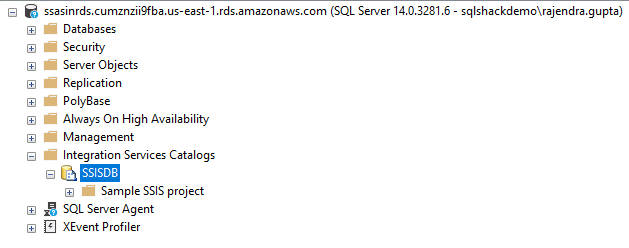
It created the folder, as shown below. We use this folder to deploy the project created earlier.
Deploy an SSIS project in the SSISDB catalog of AWS RDS SQL Server
We use the stored procedure msdb.dbo.rds_msdb_task to deploy an SSIS project.
|
1 2 3 4 5 |
EXEC msdb.dbo.rds_msbi_task @task_type = 'SSIS_DEPLOY_PROJECT', @file_path = 'd:\S3\SSISforRDS.ispac', @folder_name = 'Sample SSIS project', @project_name = 'SSISforRDS'; |
In the above query, we use the following arguments.
- @task_type: SSIS_DEPLOY_PROJECT
- @file_path: It is the file path of the project ispac file in the AWS RDS SQL Server
- @folder_name: It is the SSIS catalog folder in which we want to deploy the project. We already created the catalog folder as Sample SSIS Project
- @project_name: Specify the project name that we have selected earlier while creating the SSIS project in the Visual Studio

We have deployed a package successfully as it shows the SUCCESS status in the msdb.dbo.rds_fn_task_status.
|
1 |
SELECT * FROM msdb.dbo.rds_fn_task_status(NULL,29) |

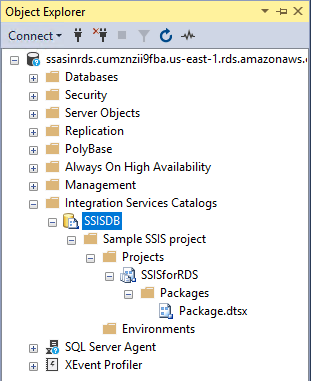
Now, refresh the SSMS connection, and you see the deploy SSIS package and project in the integration service project.
Execute an SSIS project from the SSISDB catalog manually
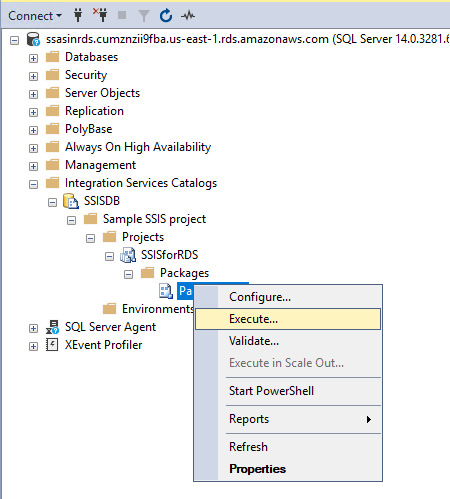
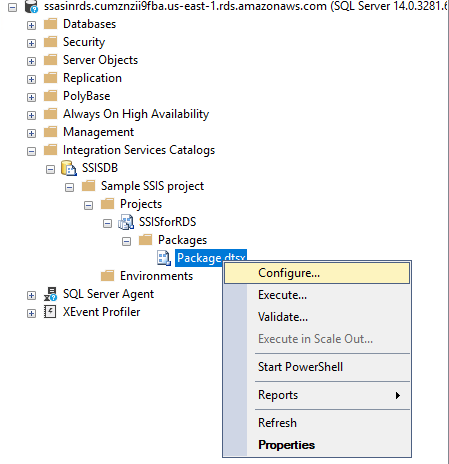
We can either manually execute the package from the SSISDB catalog or execute it using the SQL job. Right-click on the package and select Execute, as shown below.
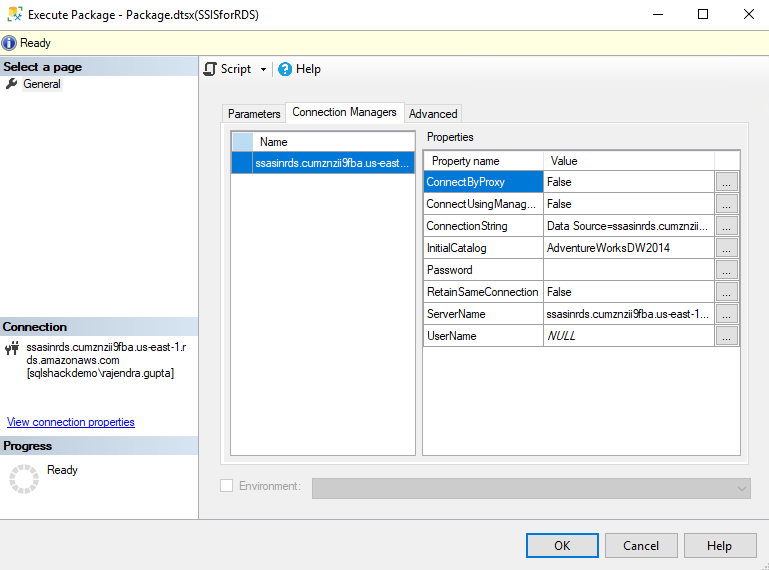
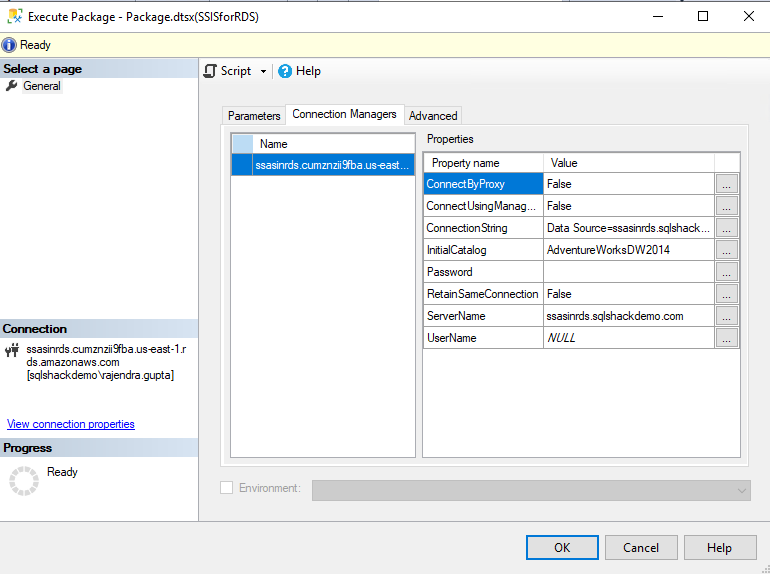
It opens the following execute package window. You can verify the RDS instance connection and package properties.
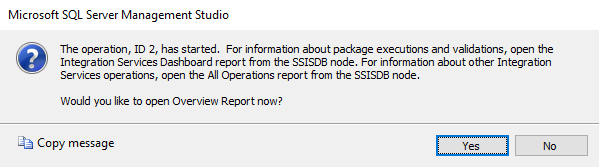
Click Ok, and it starts an operation ID for the package execution.
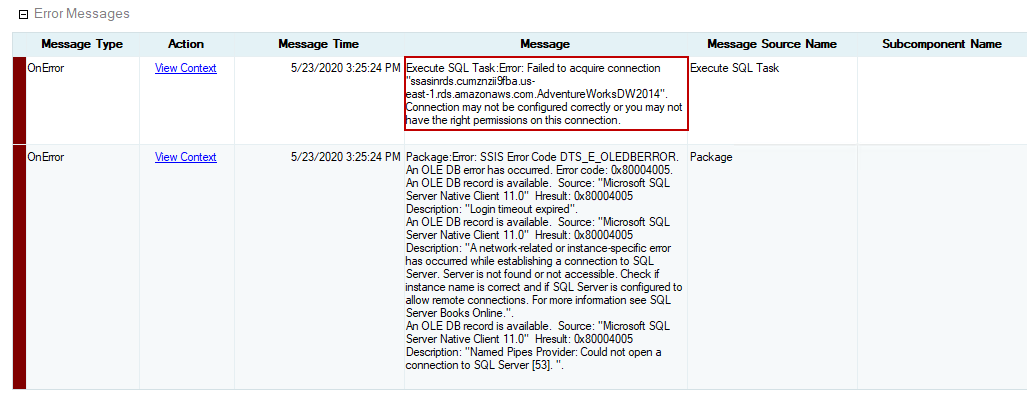
Click Ok, and it opens the package execution report. Oh! The package failed in execution. It is unable to open the connection to the RDS instance. It is surprising, right! We already connected to RDS using Windows authentication and it works fine, but in the package, it fails to acquire a connection.
To resolve this error, right-click on the package and select Configure.
In the SSIS package for AWS RDS SQL Server, we need to specify the server name in the following format: <RDS Instance Name>.<RDS Domain fully qualified domain name(FQDN)>
We have the following connection string in the package that uses the RDS endpoint.
Current Connection String:
Data Source=ssasinrds.cumznzii9fba.us-east-1.rds.amazonaws.com;Initial Catalog=AdventureWorksDW2014;Provider=SQLNCLI11.1;Integrated Security=SSPI;Auto Translate=False;
Replace this connection string that uses the server name in the format specified above.
- RDS instance: ssasinrds
- Domain: SQLshackdemo.com
New Connection String
New: Data Source=ssasinrds.sqlshackdemo.com;Initial Catalog=AdventureWorksDW2014;Provider=SQLNCLI11.1;Integrated Security=SSPI;Auto Translate=False;
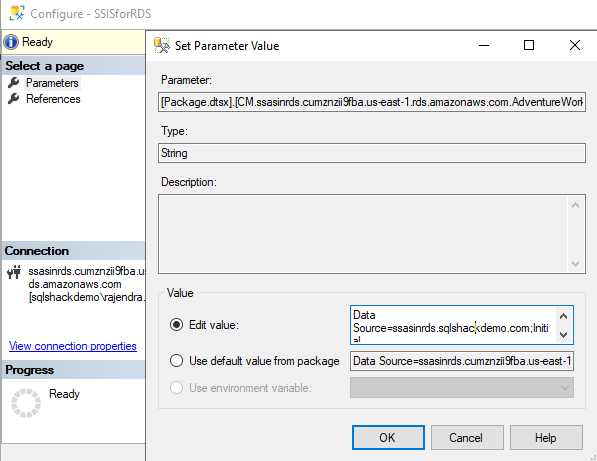
Click Ok and again open the configuration wizard. Now, replace the server name in the new format.

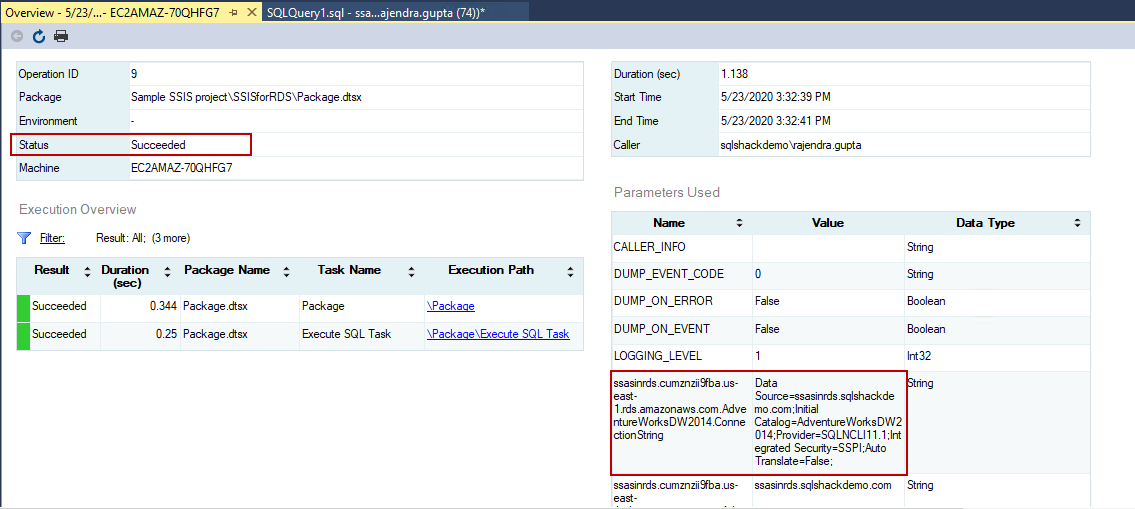
Once both the changes complete, execute the SSIS package. You can validate the connection string using the new server format.
We can see the package executes successfully after making the change for the RDS instance connection in the new format.
Execute an SSIS package using the SQL Server Agent job
Usually, we set up a SQL Server Agent job to execute the package at a scheduled time. We can set up a SQL agent job for package execution in the AWS RDS SQL Server as well.
It requires setting up a credential and proxy account for job execution.
Create a credential for proxy setup
It uses the CREATE CREDENTIAL command. Specify the Windows user (Identity argument) and password (Secret argument) in the query below.
|
1 2 3 4 |
USE [master] GO CREATE CREDENTIAL [SSIS_Credential_SQL] WITH IDENTITY = N'sqlshackdemo\rajendra.gupta', SECRET = N'India@123' GO |

Create a proxy account that uses the credential created above
In this step, we create a proxy with the credential created in the above step. We also need to give permissions to run the integration service package using the msdb.dbo.rds_sqlagent_proxy procedure.
|
1 2 3 4 5 6 7 8 9 10 11 12 13 14 |
USE [msdb]; GO EXEC msdb.dbo.sp_add_proxy @proxy_name = N'SSIS_Proxy', @credential_name = N'SSIS_Credential_SQL', @description = N''; EXEC msdb.dbo.sp_grant_login_to_proxy @proxy_name = N'SSIS_Proxy', @login_name = N'sqlshackdemo\rajendra.gupta'; EXEC msdb.dbo.rds_sqlagent_proxy @task_type = 'GRANT_SUBSYSTEM_ACCESS', @proxy_name = 'SSIS_Proxy', @proxy_subsystem = 'SSIS'; GO |

Set up a SQL agent job to run SSIS package in AWS RDS SQL Server
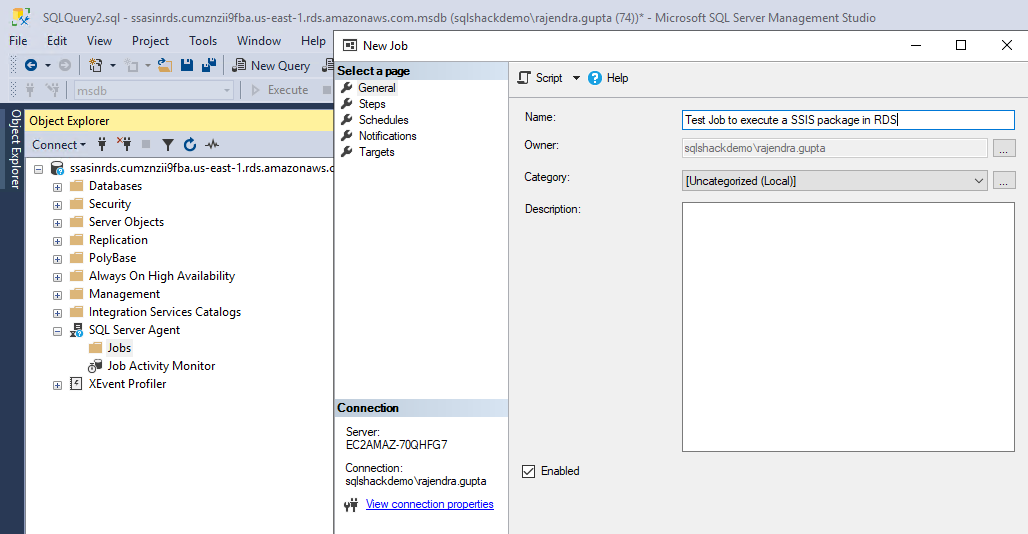
Expand SQL Server Agent, jobs, and create a new job. In this specify a job name, and you can specify a description as well.
Click on the Steps and add a new job step using the following inputs.
- Specify a job step name
- Change the type from the drop-down as SQL Server Integration Service Package
- Select the proxy account from the drop-down in the Run as section
- Specify the server name in the new format – <RDS Instance Name>.<RDS Domain fully qualified domain name(FQDN)>
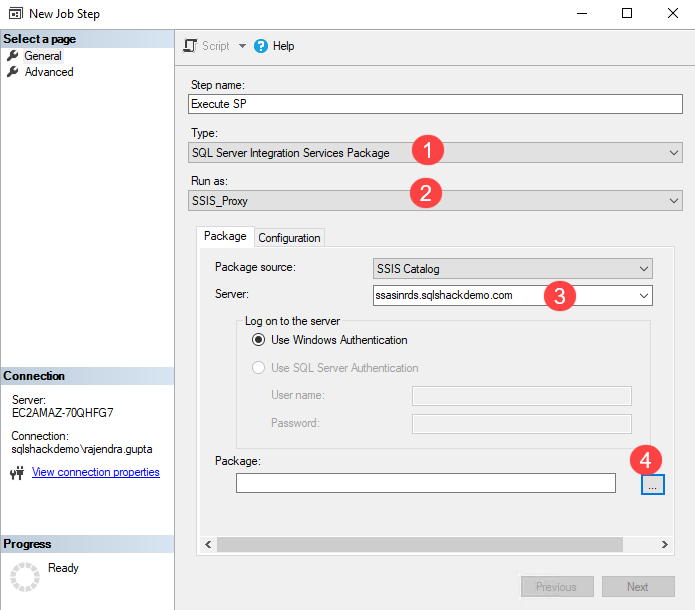
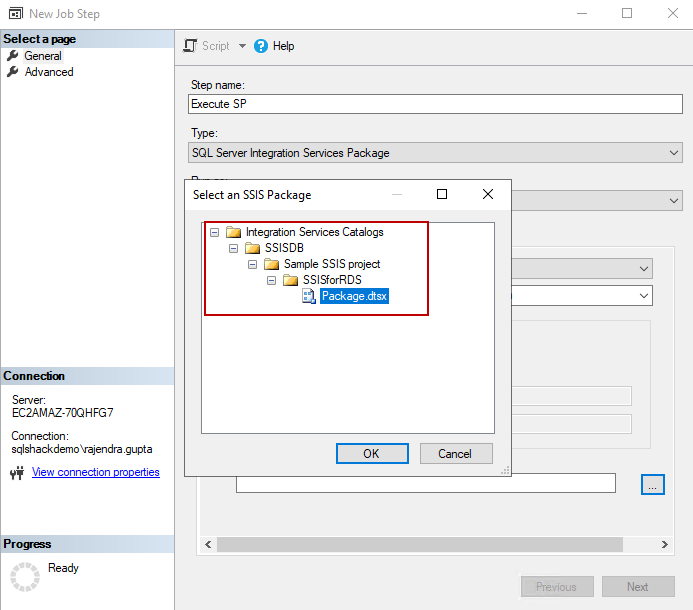
Click on the eclipse in the package and select the package that we wish to execute.
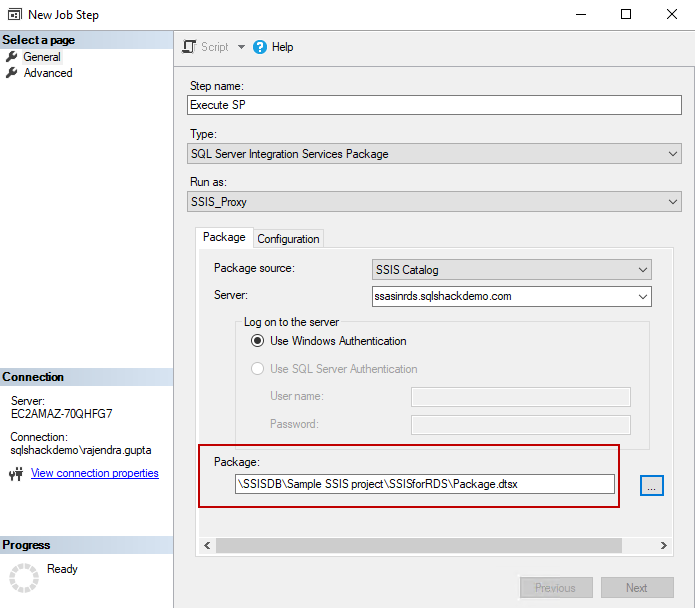
You can see the job step configuration, as shown below.
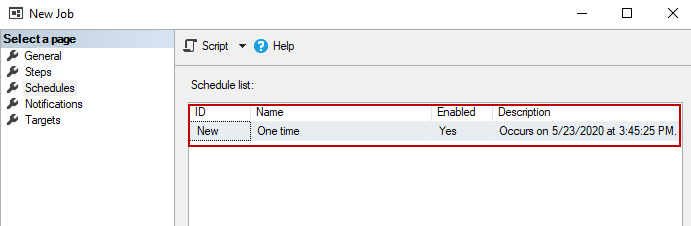
You can create a job schedule as per your requirement.
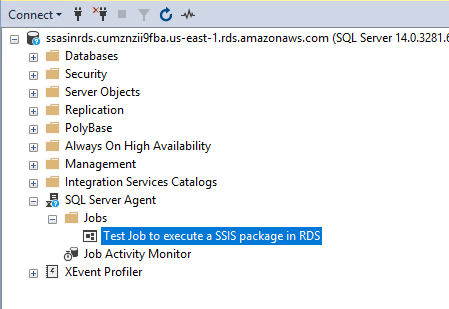
We can see the SQL agent job to run the package in the AWS RDS SQL Server.
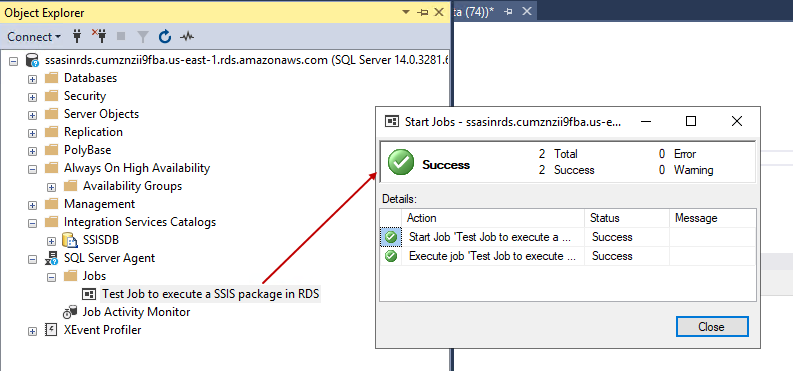
Right-click on the job to execute it or wait for its autorun in the scheduled time. We can see below job that holds the integration service package executed successfully
Conclusion
In the two series article, we explored the configuration of integration services for the AWS RDS SQL Server. We deployed an SSIS project, executed it manually, and using the SQL Server agent job as well. It is a useful enhancement to RDS SQL services, and I would recommend you to explore it.

I am the author of the book "DP-300 Administering Relational Database on Microsoft Azure". I published more than 650 technical articles on MSSQLTips, SQLShack, Quest, CodingSight, and SeveralNines.
I am the creator of one of the biggest free online collections of articles on a single topic, with his 50-part series on SQL Server Always On Availability Groups.
Based on my contribution to the SQL Server community, I have been recognized as the prestigious Best Author of the Year continuously in 2019, 2020, and 2021 (2nd Rank) at SQLShack and the MSSQLTIPS champions award in 2020.
Personal Blog: https://www.dbblogger.com
I am always interested in new challenges so if you need consulting help, reach me at rajendra.gupta16@gmail.com
View all posts by Rajendra Gupta
- Understanding PostgreSQL SUBSTRING function - September 21, 2024
- How to install PostgreSQL on Ubuntu - July 13, 2023
- How to use the CROSSTAB function in PostgreSQL - February 17, 2023