
In this article, I am going to talk about developing and deploying a database project, also known as a data-tier application using Visual Studio. In my previous article Getting started with Data-Tier Applications using Visual Studio, I have provided an overview of the data tier applications and how can we create one using Visual Studio. This article is a follow-up to the previous article. I’d advise you to have a look at it before proceeding forward with this as this is a continuation of the previous. For the article, I would be using Visual Studio 2019, however, you are free to use any other versions of Visual Studio.
In this article, I will mention how to create database objects like tables, stored procedures and use SQLCMD variables in the scripts. I will also demonstrate how to organize your code for the database projects using directory structures. Finally, we will build the database project and deploy it to a SQL Server instance.
Creating the Project Structure and Best Practices
Let us first begin by creating a directory structure for our project. This is not a comprehensive list; however, it is my recommendation to create a directory structure before starting with the development. It will be easier to manage your code later when you have a lot of files to manage. The main idea to create individual directories for each of the schemas that we will be using in the project. For example, if we intend to develop the code for two schemas – “dbo” and “stage“, then we should create parent level directories for the schemas and then organize the other objects under these.
In order to create a new directory in the database project, right-click on the project name and select Add and then select New Folder.
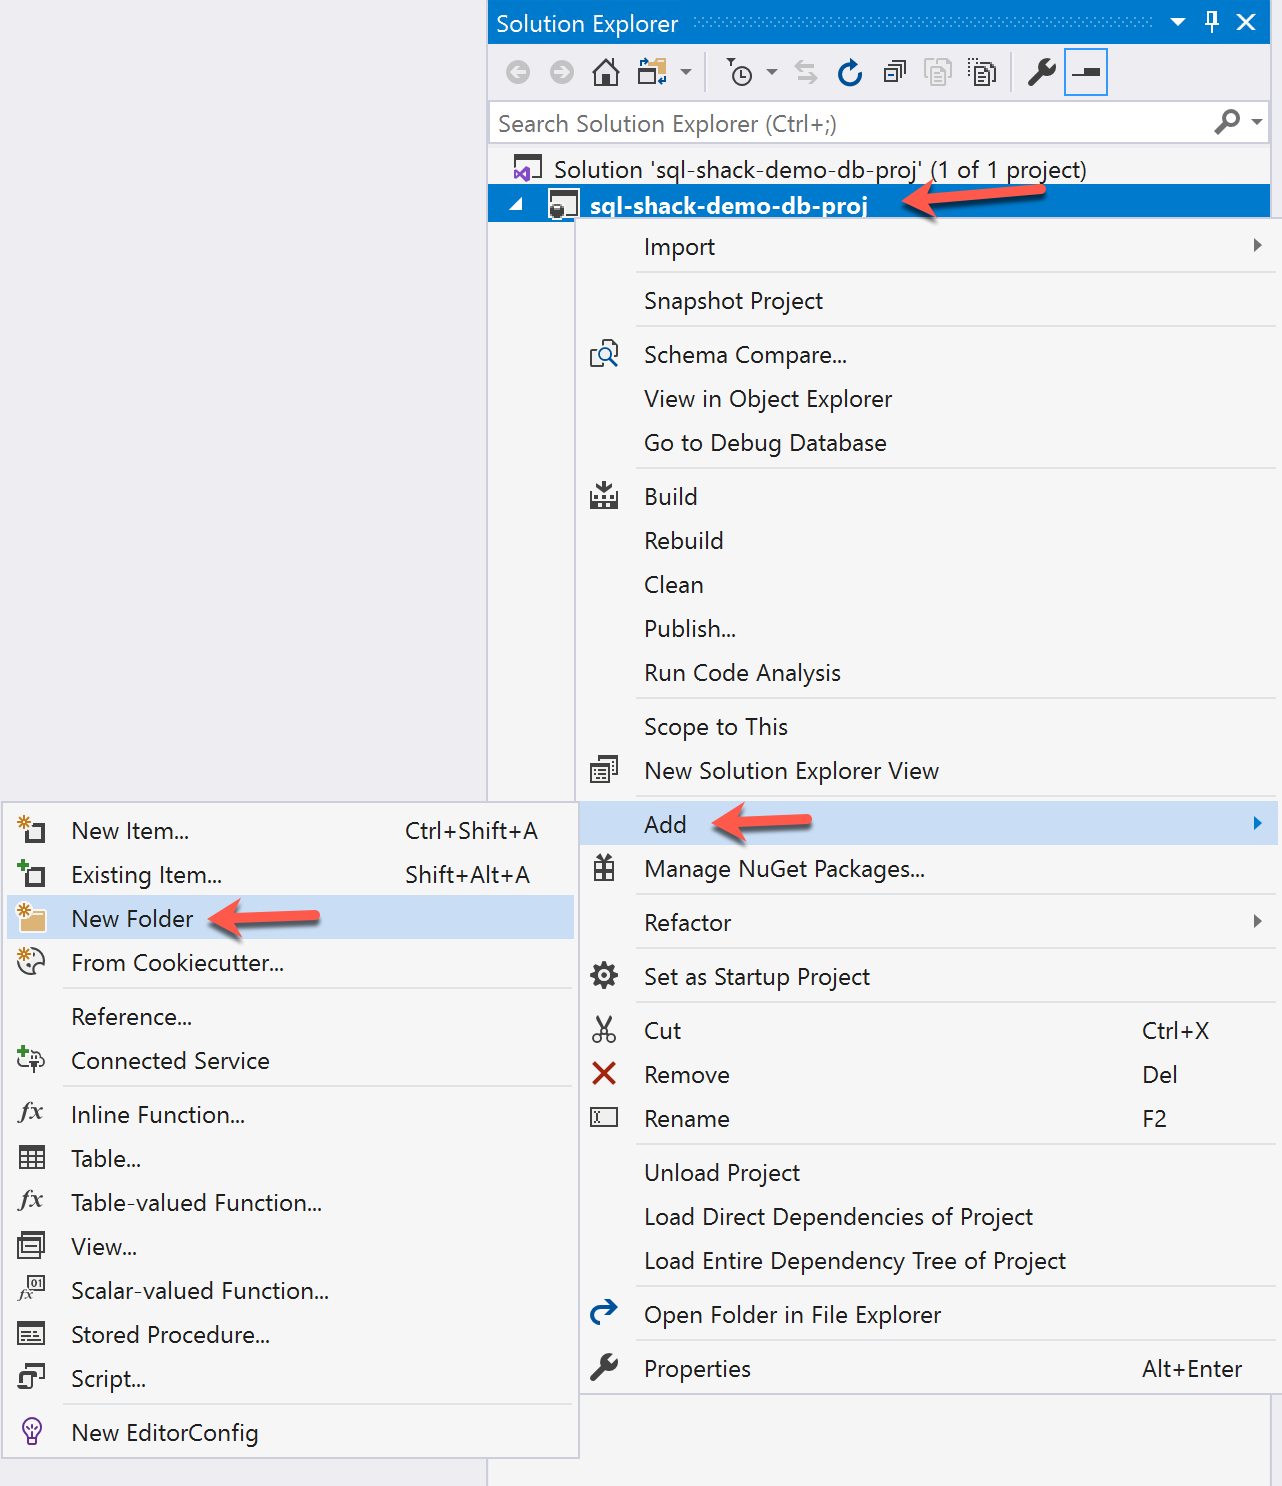
Figure 1 – Creating new directories for the schemas
Once you create the directories for your schemas, the next step is to create directories for each of the major database objects that you are going to develop. For example, we might need to create tables, stored procedures, functions and views under each of these schemas. So, we would create directories one for each of these under both the schemas. You can refer to the diagram below to understand how the directories should be created.
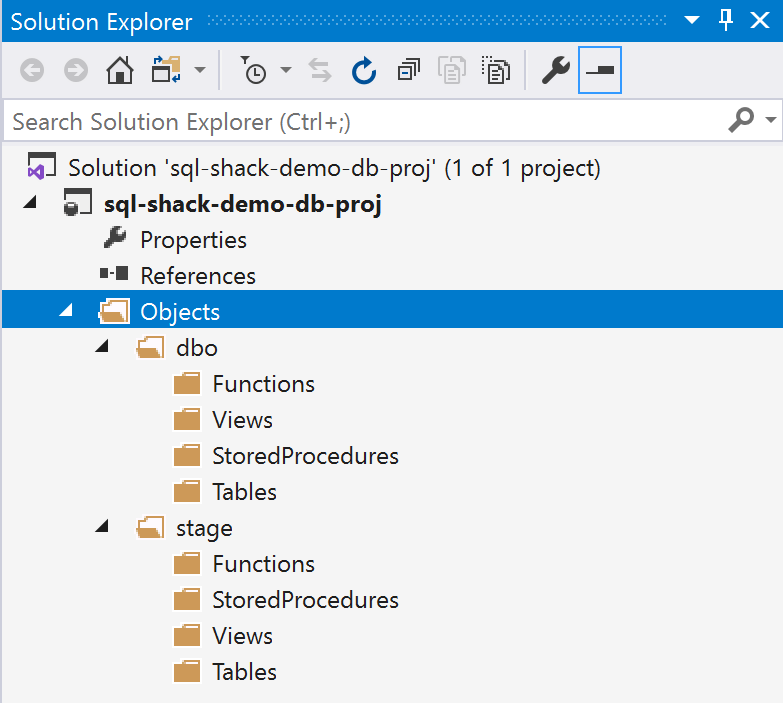
Figure 2 – Project directory structure
You can add directories as you feel comfortable to use. This is just to organize your code as these structures don’t matter while building or deploying the application.
Creating Database Objects
Now that we have created our directory structure, let us now create the individual database objects. Let us first create a table under the dbo schema.
Right-click on the Tables directory, select Add and then select Tables. Alternatively, you can also select New Item from the drop-down and then select Tables from the list.
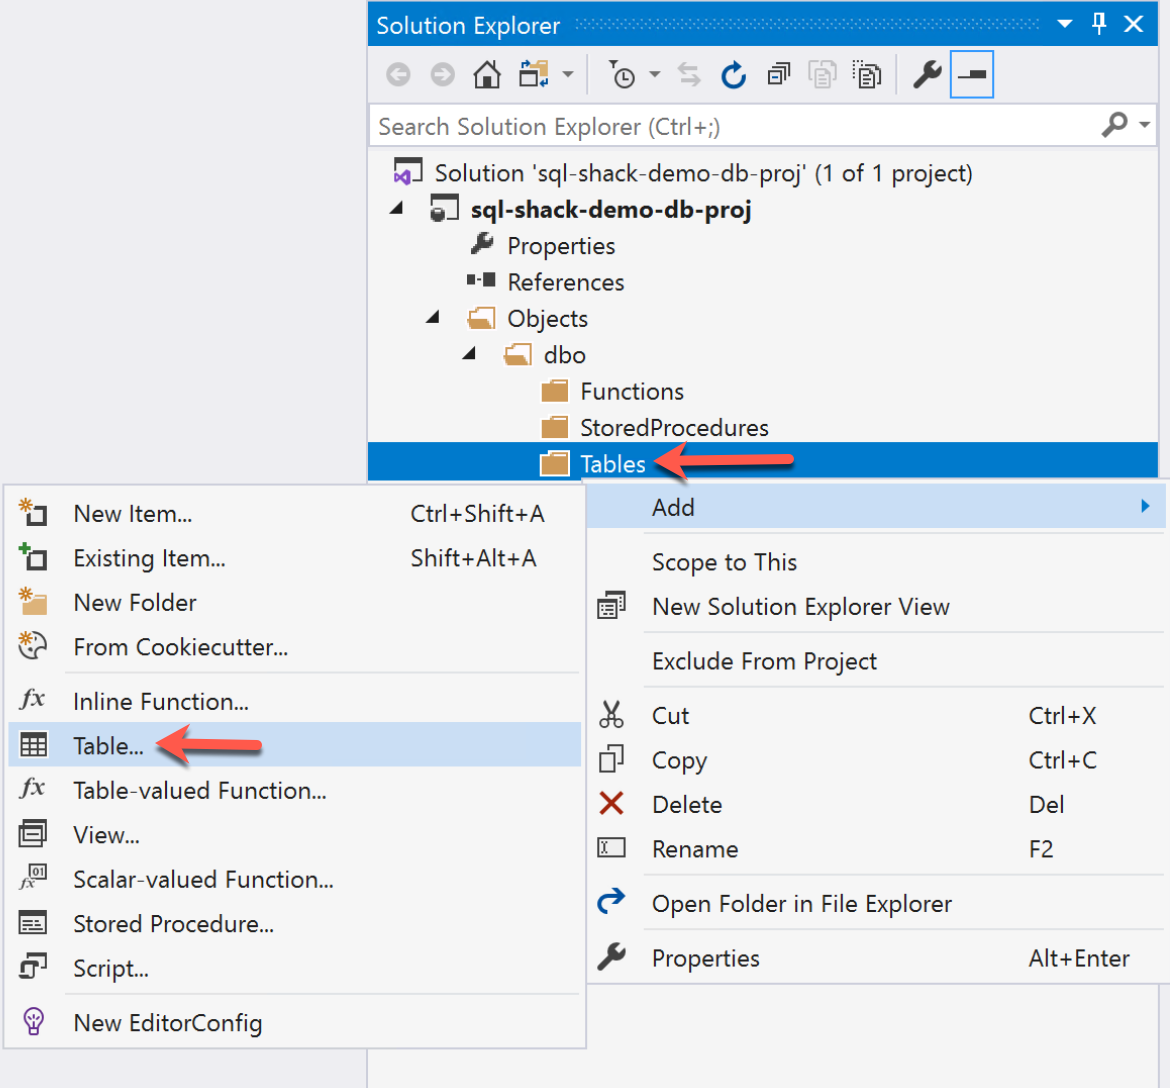
Figure 3 – Creating tables in the data tier application
In the New Item pane, select Tables and then provide a name to the table. You can follow the best practices while naming dimension and fact tables, however, to keep things simple we will keep the names simple as well.
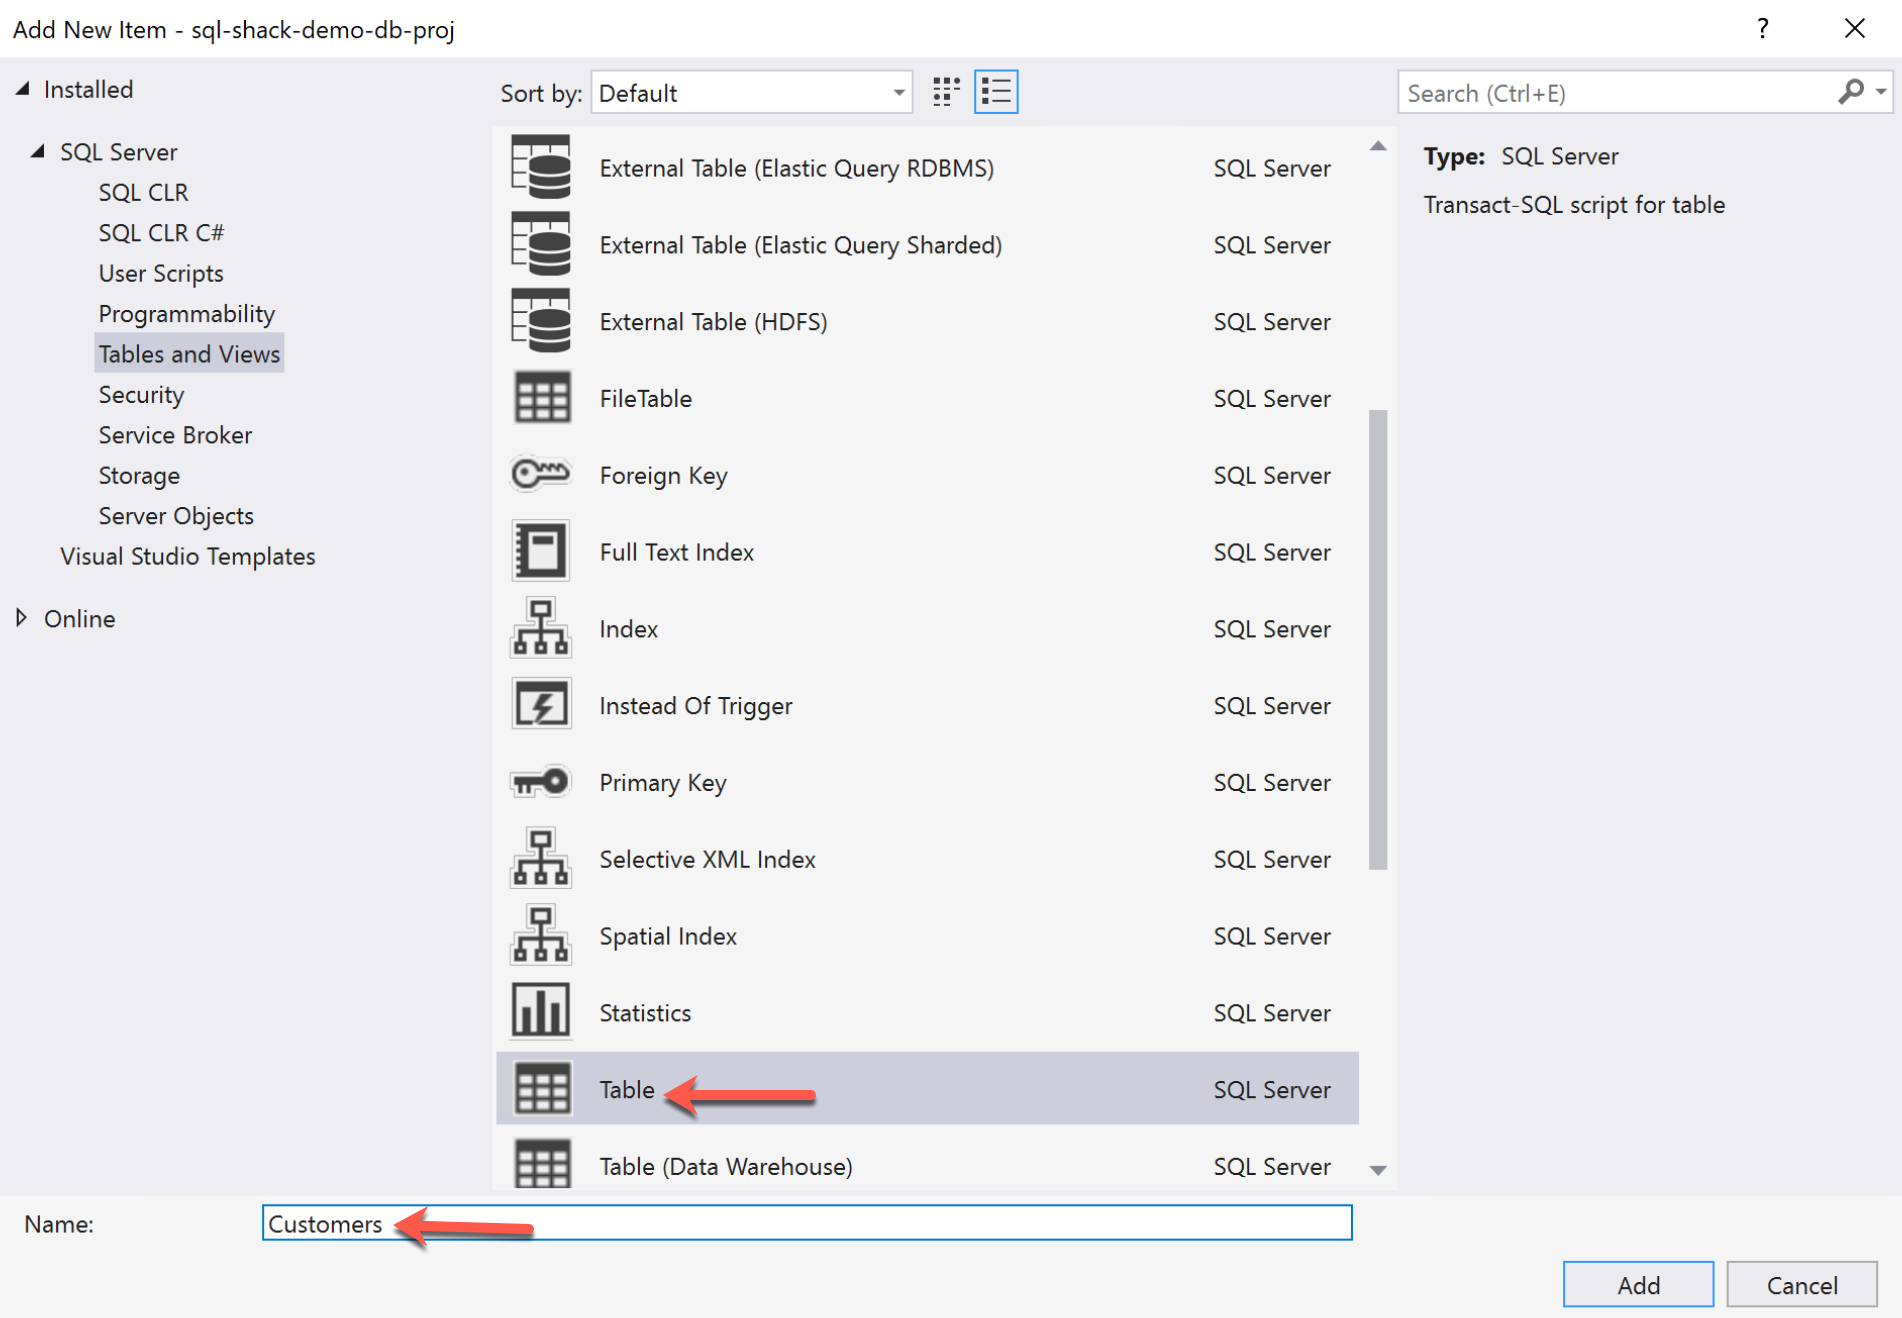
Figure 4 – Naming Tables in the project
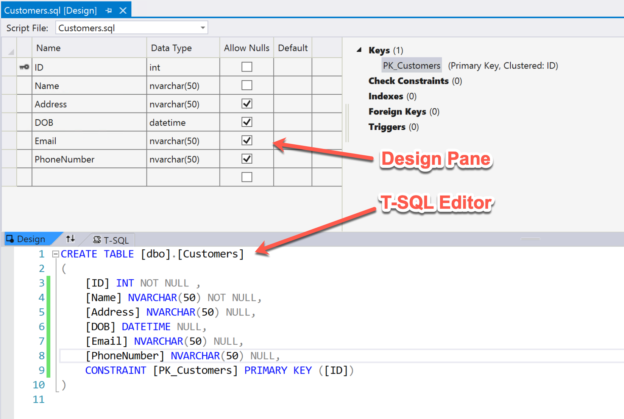
Once the name is provided, click Add and you will see the table designer pane open in Visual Studio. In this pane, there are two major components, the design pane and the T-SQL editor pane. Using the Design Pane, you can create the table structure without writing any T-SQL code. Simply enter the column names and select the datatype from the dropdown and you are good to go. It will automatically generate the column names for your application which you can see in the T-SQL editor below. This is a very useful feature and helps to develop tables quickly without having to worry about writing all the T-SQL manually. It is advisable to verify the SQL query once the table is completed.

Figure 5 – Create a table using Design Pane
Similarly, you can add tables and other objects like stored procedures under the other schemas as well. You can also add this project under source control like Git. It will help you maintain a version of the database as you continue with the development. Whenever you update your code, make sure to update the version number in the property of the DACPAC file. So, every time you can deploy a new version of your code into the database server.
Building and Deployment
Now that we have added our database objects into the project, we are good to start building the project and deploy it to the database server. Before that, we will need to make sure of the following two items.
- The build directory – The directory in which the build files will be placed
- The Target Database Connection – To which database server the database project will be deployed
You can view the build directory by viewing the Properties of the project and then select Build. By default, it should be under “bin\Debug\“.
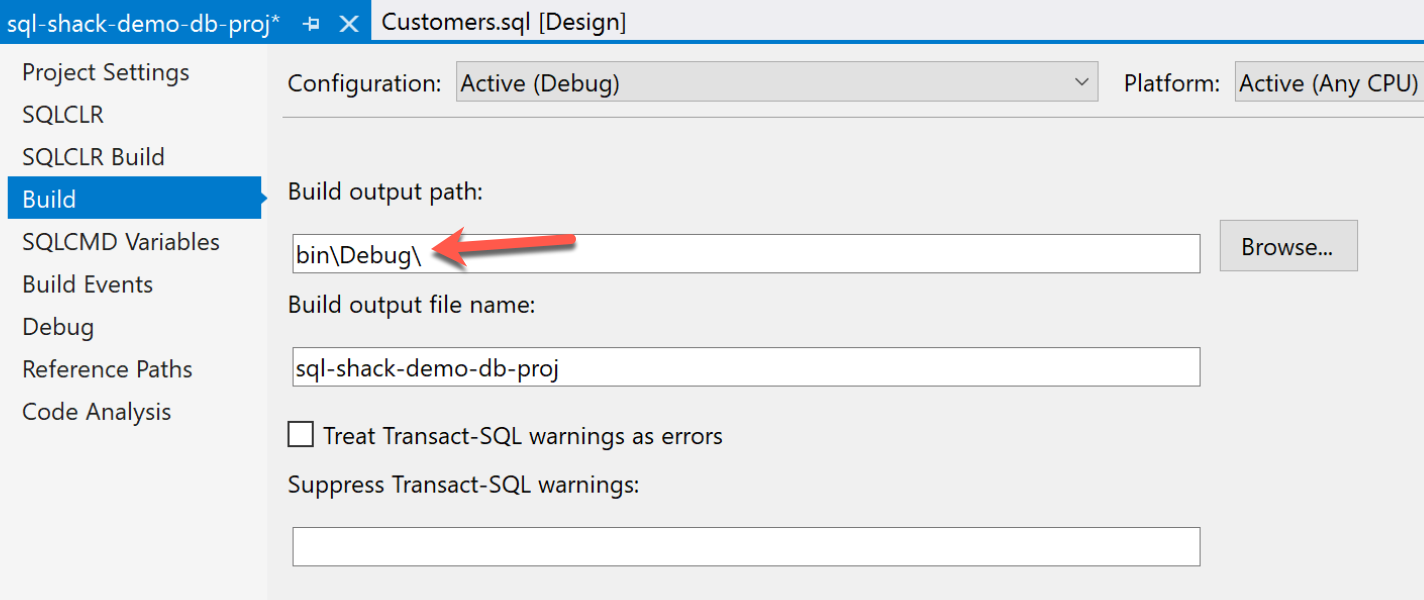
Figure 6 – Viewing the build directory for the project
For the Target Database Connection, click on Debug and Edit the Target Connection String. Make sure that you point towards the correct database server, otherwise, the database project will be deployed into some other server that is not intended.
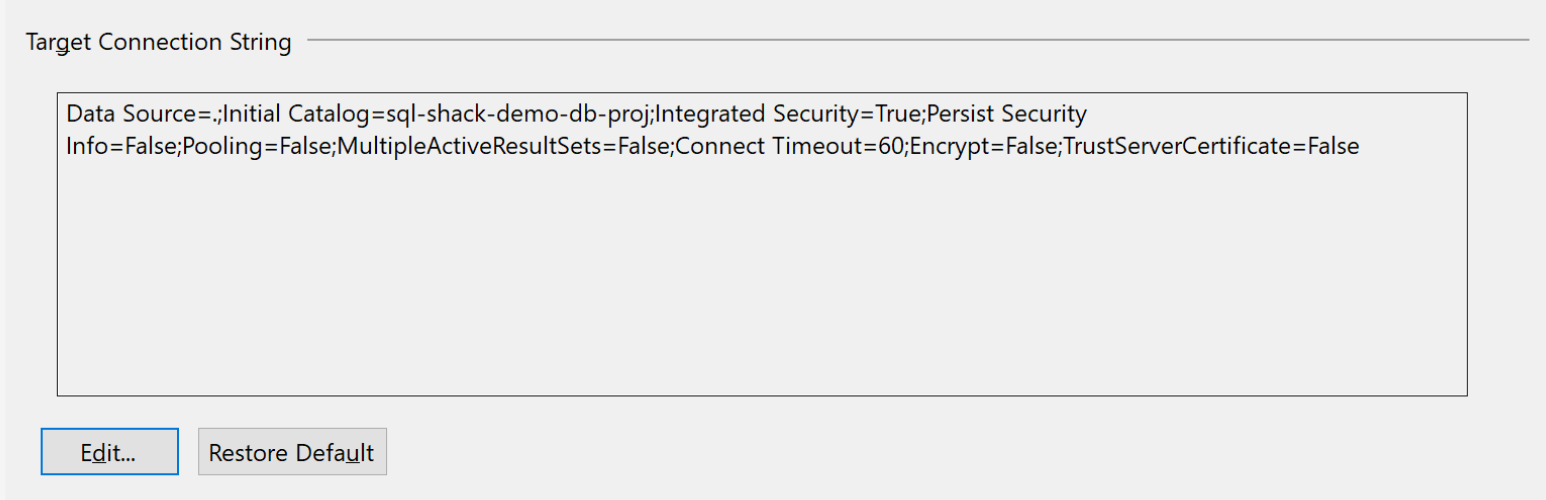
Figure 7 – Selecting Target Database String
Notice the target database name in the connection string. It is by this name that the database will be created on the server.
Now that we have verified both the details, let us go ahead and build the database project. In order to build the project, you can click on Build on the Menu bar and select Build Solution. Alternatively, you can also hit Ctrl + Shift + B to build your project.
As soon as you start building your database project, you will see the output from the window below which looks like the following figure.
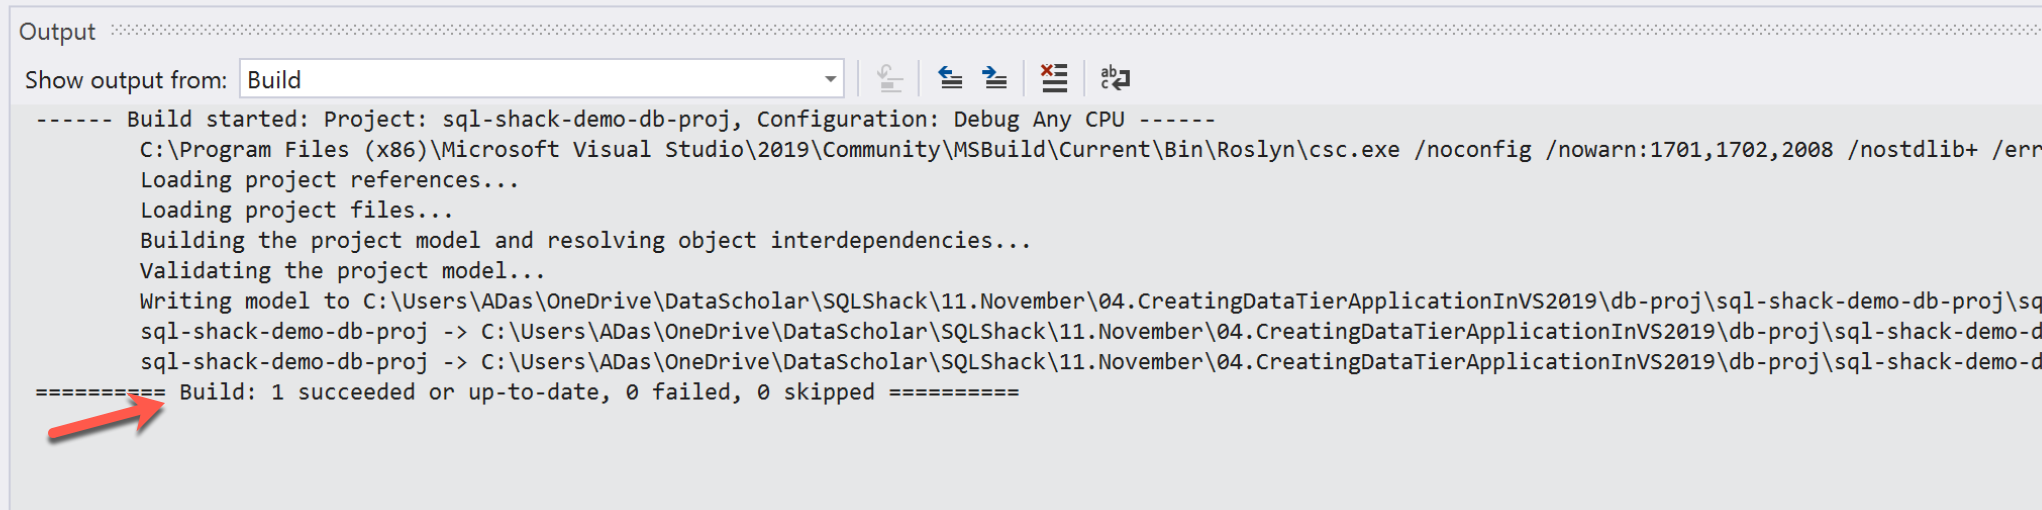
Figure 8 – Build output of the database project
You can also now verify the build files by navigating to the build directory that we verified in the above steps.
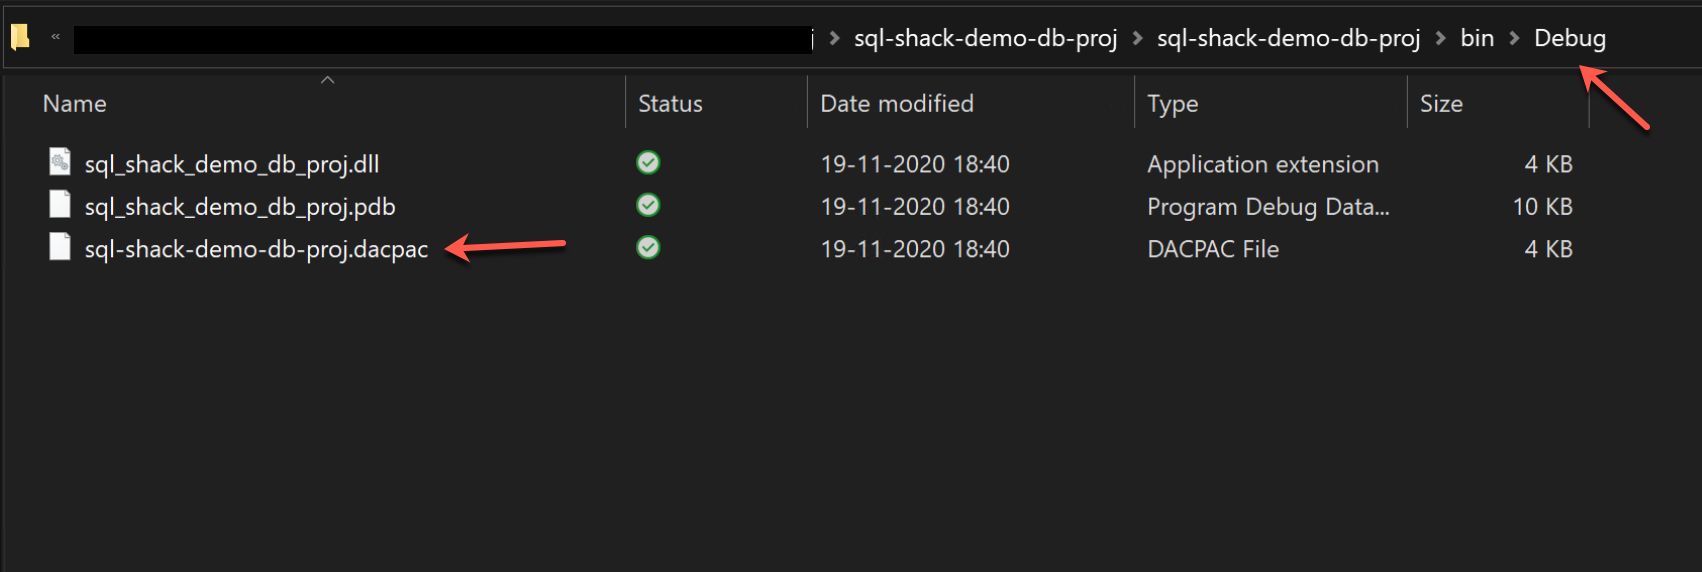
Figure 9 – Build Directory
In the build directory, there will be primarily three files available as follows.
- DACAPC File – The database project build file
- DLL File – This contains the application extension
- PDB – This contains the program debug database
Now let us deploy this database project to the Target Database location. Right-click on the project and select Publish. The Publish Database pane appears where you need to check the Target Database connection. Also, make sure that you check the checkboxes that say Register as a Data-tier Application.
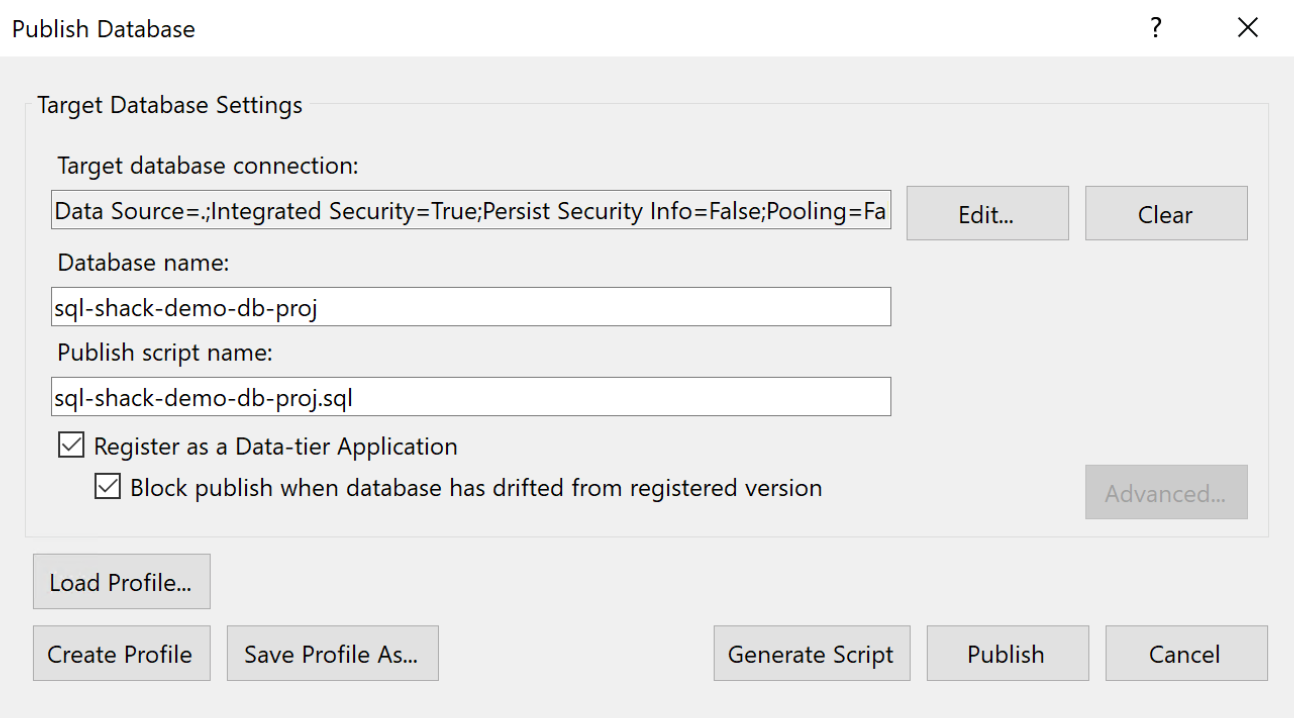
Figure 10 – Publish Database Pane
Once you have verified the details, you can hit the Publish button. You will notice that the Data Tools Operations pane shoots up and the progress is being displayed. The deployment will take some time depending on the number of objects in the database project.
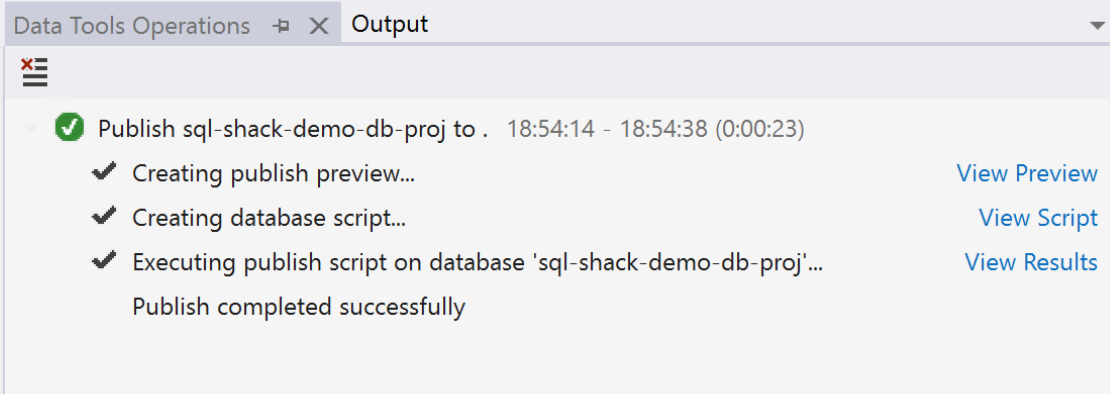
Figure 11 – Database Publish Successful
You can now go ahead and verify the database in the SQL Server Management Studio. As you can see in the figure below, the database has been created and it contains the columns that we have defined in the database project.
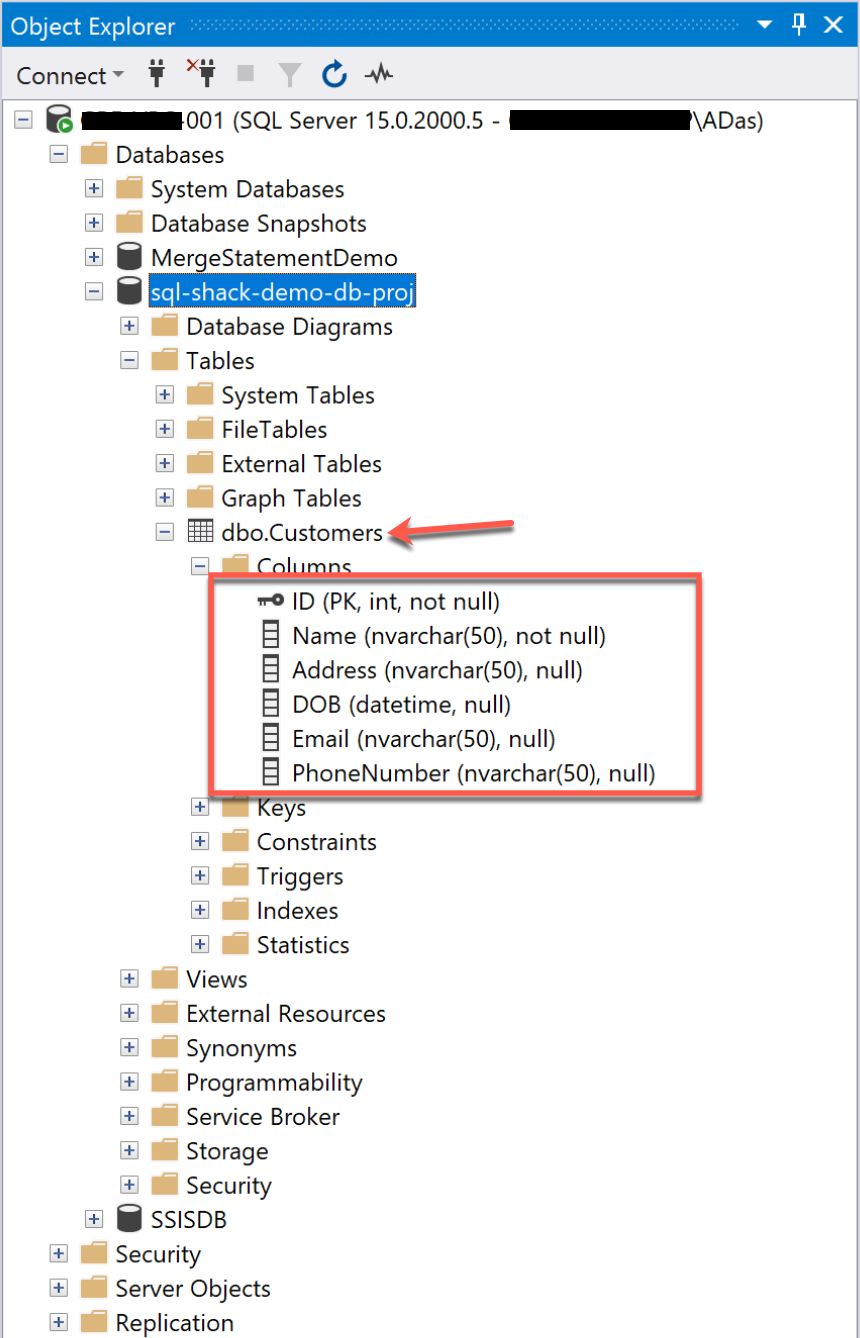
Figure 12 – Database created in SQL Server
Conclusion
In this article, I have demonstrated how to define a directory structure to organize your code. We have also understood how to create various database objects within the directory structure that we defined. Finally, we have built and deployed our project using Visual Studio and verified that database in SQL Server using the SQL Server Management Studio. In the following articles, I will demonstrate more advanced usages of the database applications.
Table of contents
| Getting started with Data-Tier applications in Visual Studio |
| Working with Database Projects |
| Advanced usages of Data-Tier applications |

He is a prolific author, with over 100 articles published on various technical blogs, including his own blog, and a frequent contributor to different technical forums.
In his leisure time, he enjoys amateur photography mostly street imagery and still life. Some glimpses of his work can be found on Instagram. You can also find him on LinkedIn
View all posts by Aveek Das
- Getting started with PostgreSQL on Docker - August 12, 2022
- Getting started with Spatial Data in PostgreSQL - January 13, 2022
- An overview of Power BI Incremental Refresh - December 6, 2021