
In this article, I am going to talk about creating a data-tier application using Visual Studio. In my previous article An introduction to Data-Tier applications in SQL Server, I have explained in detail what a data-tier application is all about. I have explained what the different types of data-tier applications are available and how can we create such applications from existing SQL Server databases. In this article, the primary focus would be to create data-tier applications from scratch using Visual Studio. For this article, I am going to use Visual Studio 2019, however, the technique will remain similar for other editions of SQL Server as well.
Creating the Application
I am assuming that most of the readers are already accustomed to using Visual Studio for application development. If you do not have Visual Studio installed, I would advise you to download and install it from the official website. It might take some time depending on the speed of your internet connection for Visual Studio to install completely. If you already have it installed, then you may proceed with it or install the latest version. Please note that the data-tier applications in Visual Studio can only be created on Windows. There are not versions in Mac that support the development of Data-Tier Applications on macOS.
Head over to Visual Studio 2019 and click on Create a new project. This will be similar for other versions of Visual Studio as well.
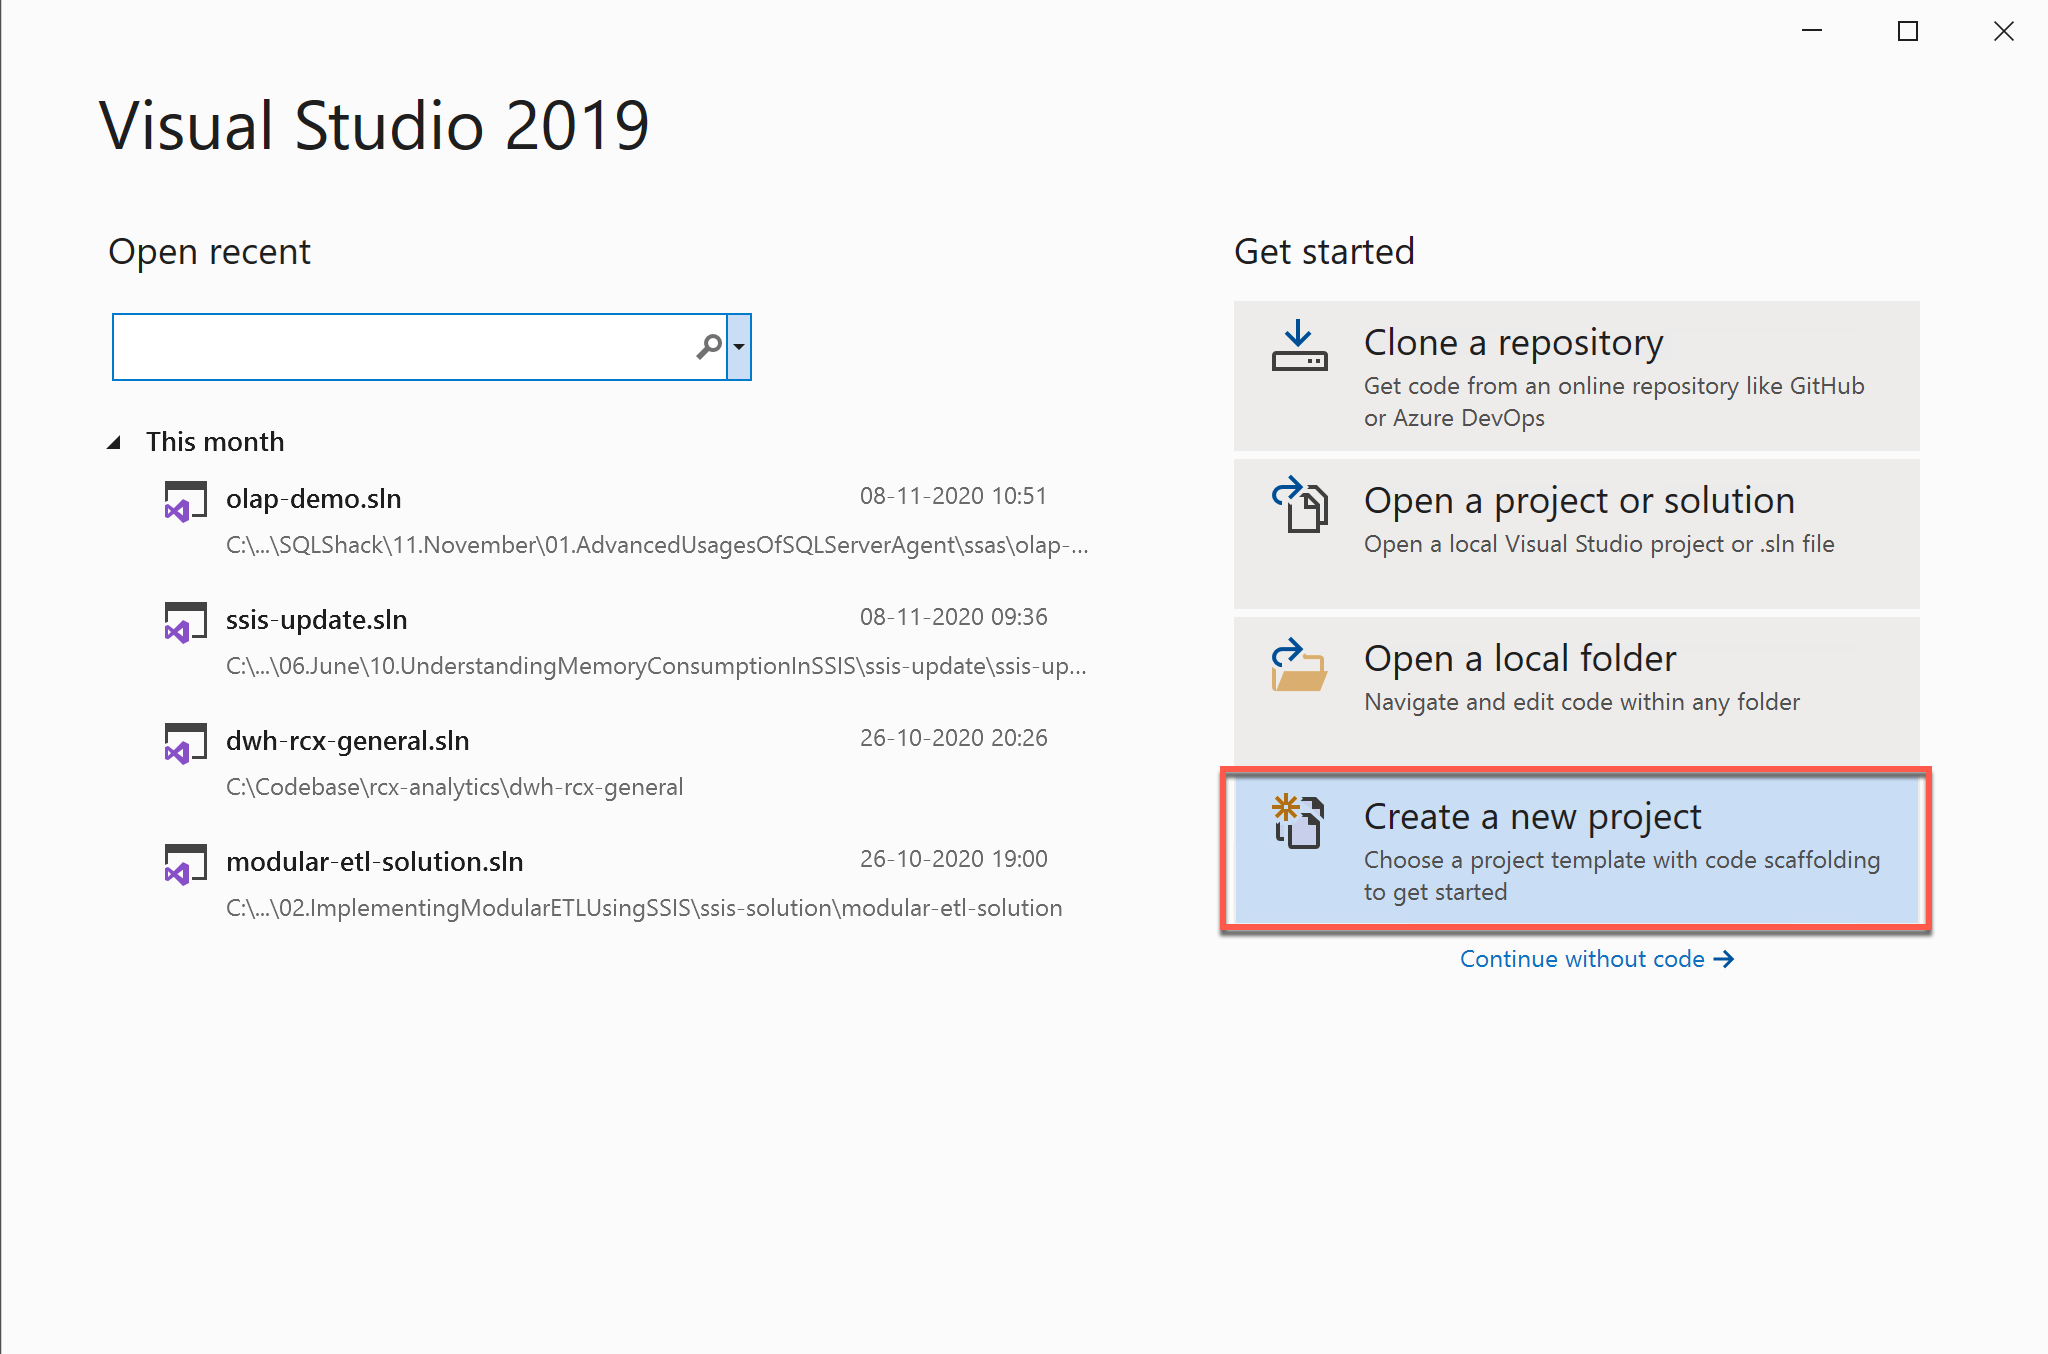
Figure 1 – Creating a new project in Visual Studio
Once you click on the new project, on the next screen you need to select the project template. Since we are going to develop a data-tier application, please search for “SQL Server Database Project” in the template and select the option from the panel below. Please refer to the figure for your proper understanding. Click on Next once done.

Figure 2 – Selecting SQL Server Database Project as the template
After choosing the template, you need to configure the project details. For this, you need to specify the name of the project that you are going to develop along with the directory location. Click Create once done.
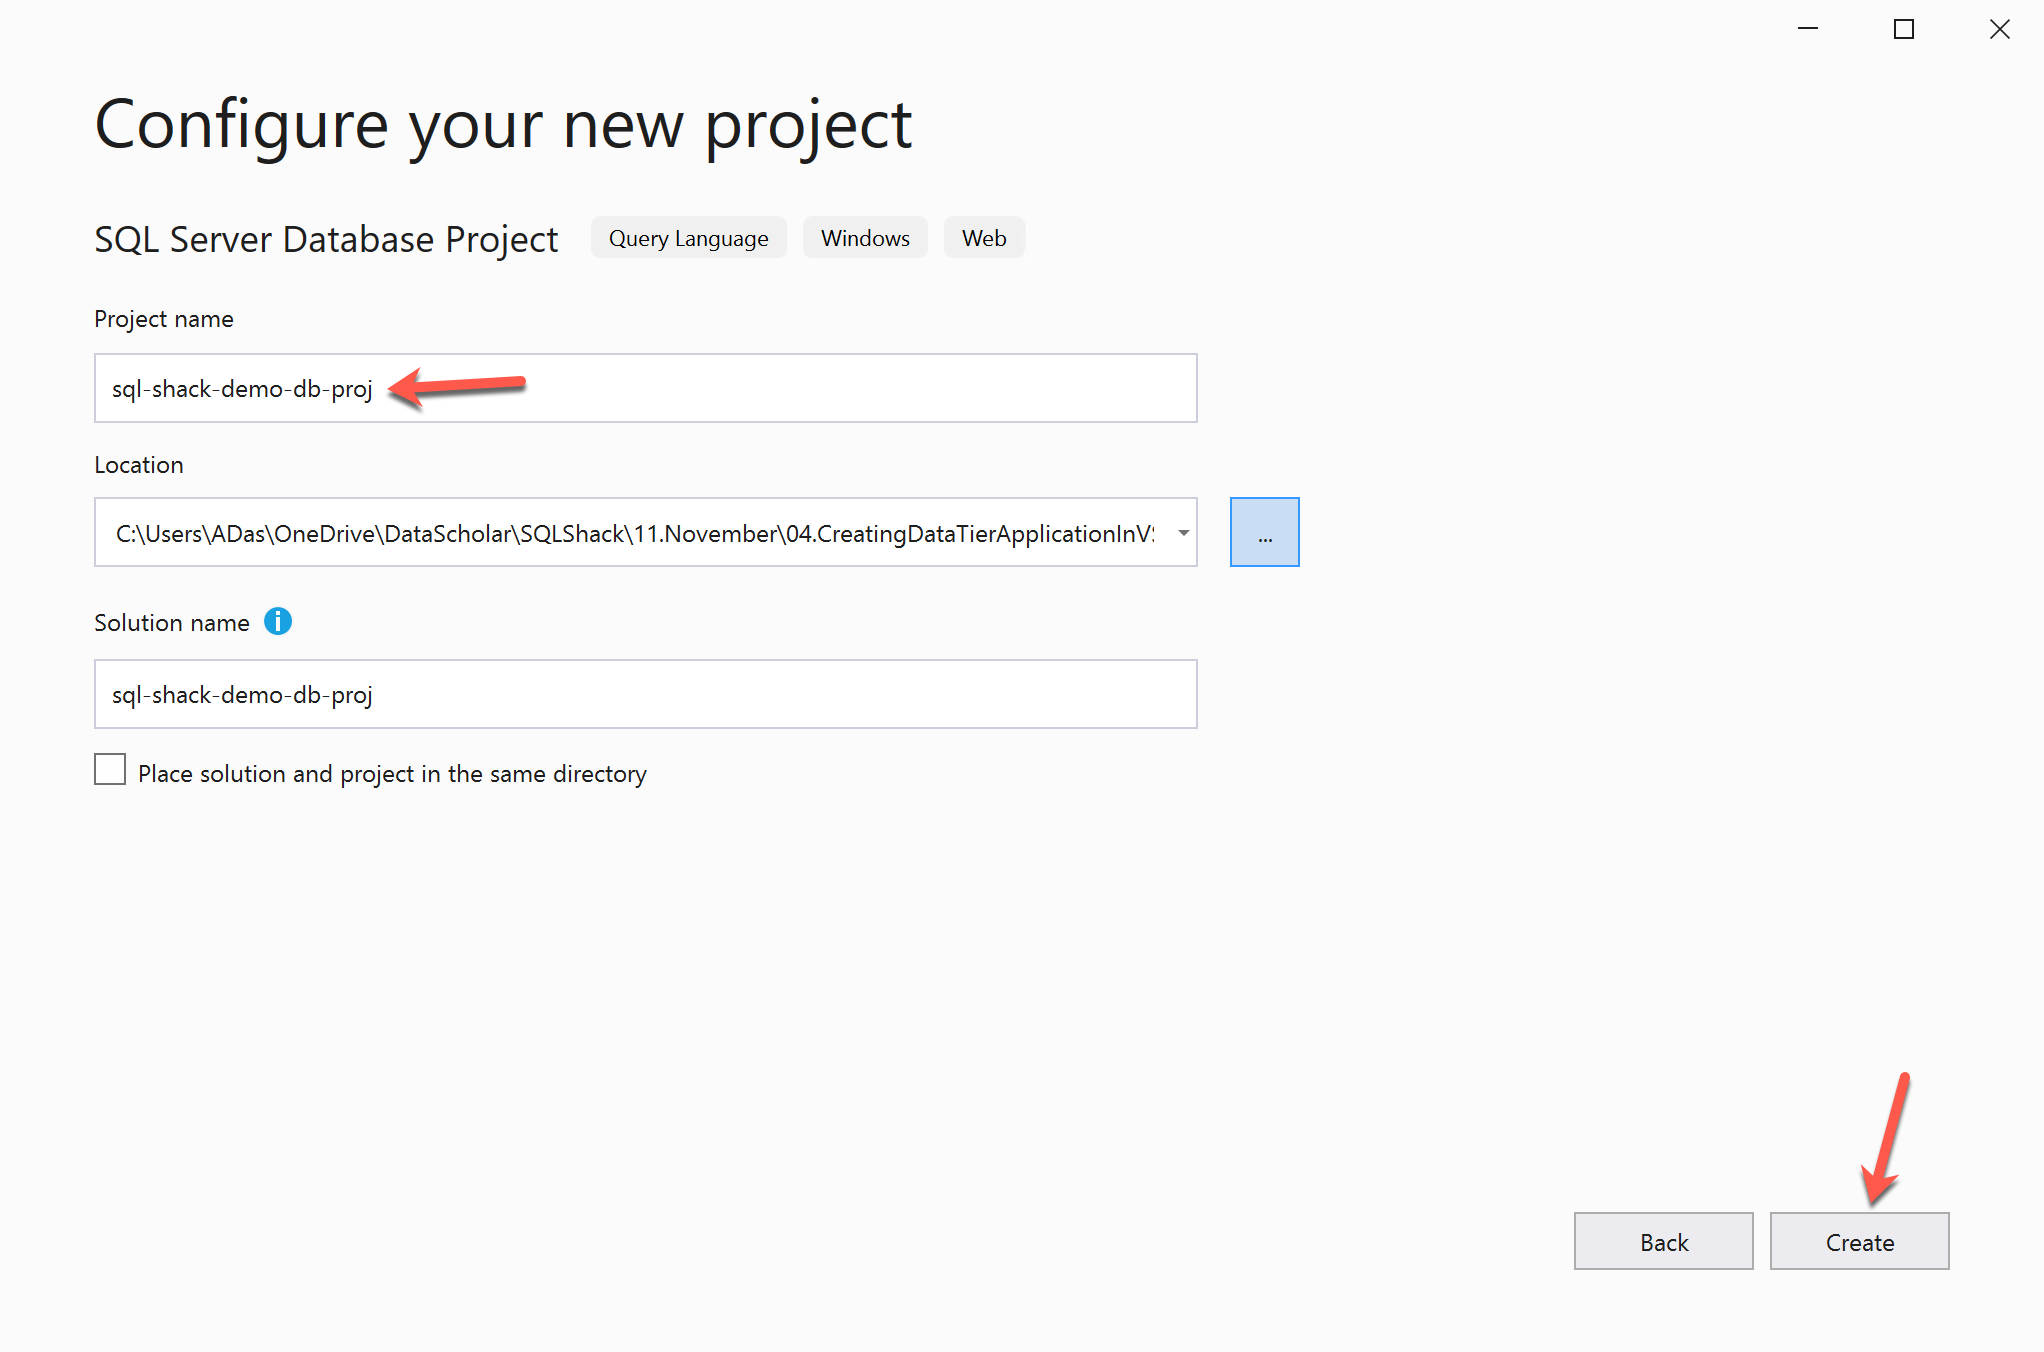
Figure 3 – Configuring the new project
This might take some time depending on the speed of your machine. Once the project is created, you can see it on a new Visual Studio window. On the Solution Explorer pane, you can see the name of the project and the solution. In addition to that, you can also see the Properties and References for the specific project.
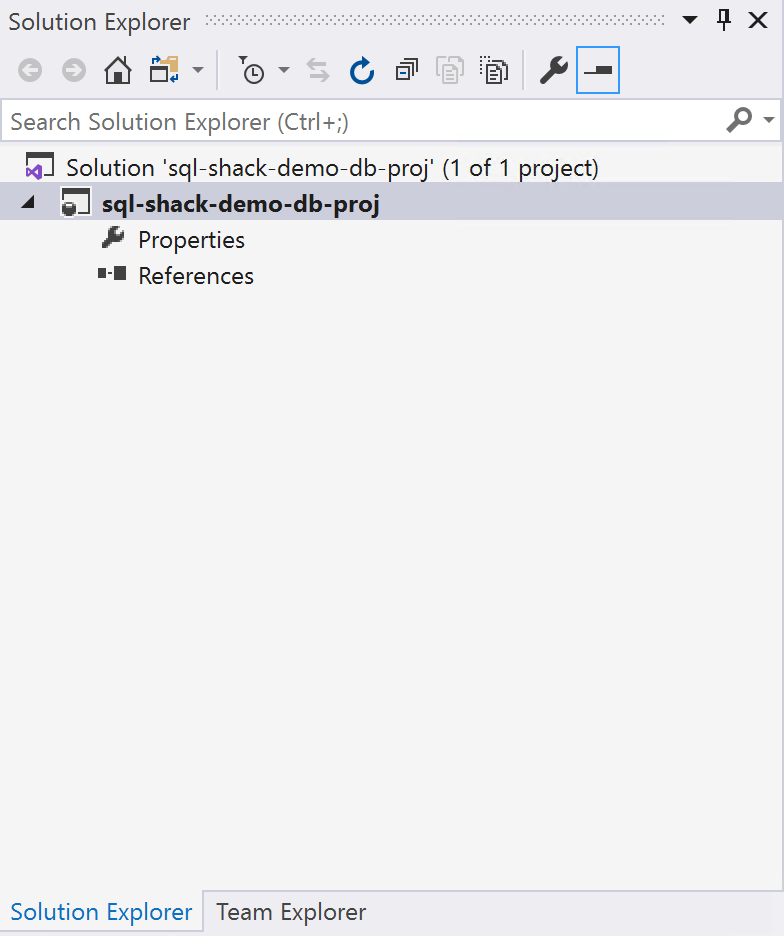
Figure 4 – Visual Studio Solution Explorer pane
Exploring Properties of a Database Project
In the previous section of the article, we have seen how to create a database project in Visual Studio from scratch. Now, let us explore the properties of the database project in detail. Double-click on the Properties from the Solution Explorer. The Properties window appears.
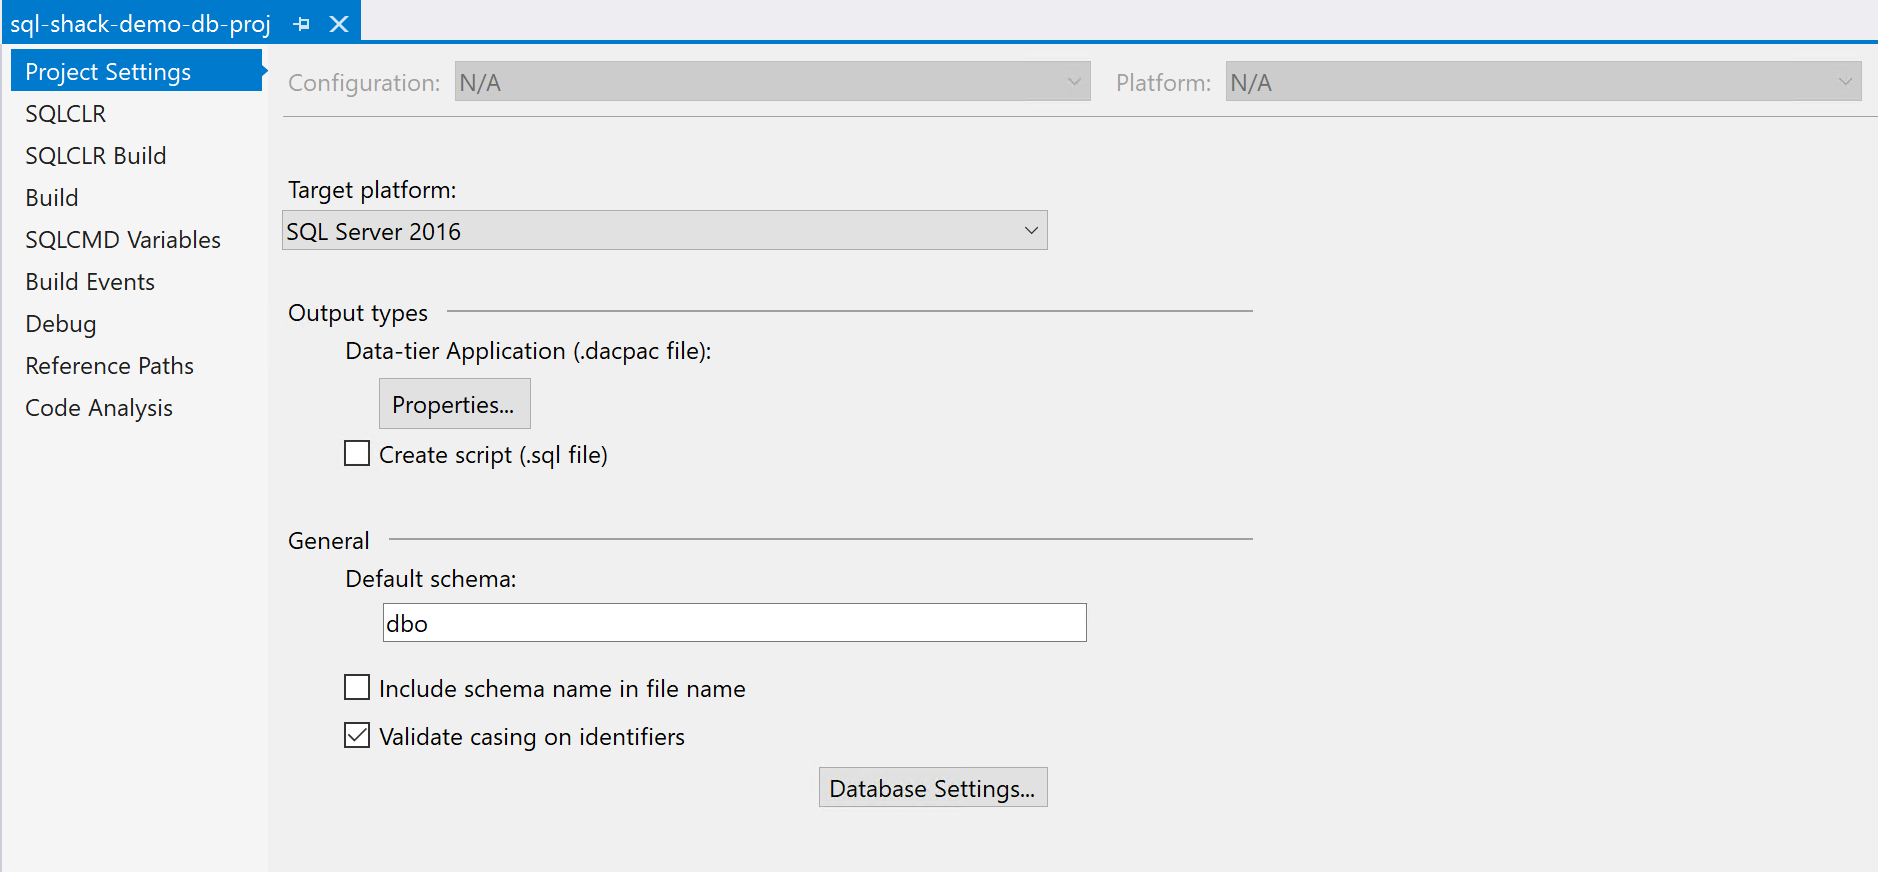
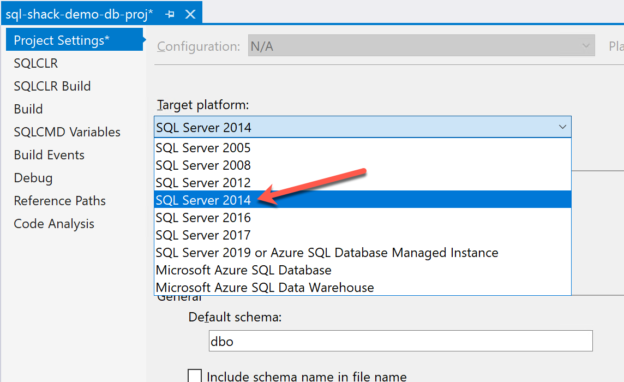
Figure 5 – Properties in Visual Studio Database Project
As you can see in the above, there are options to select the Target Platform. This defines to which database platform are we going to deploy our data-tier application. We should choose the minimum version that we want to target. For example, if we want to target all versions of SQL Server 2014 and above, we need to select SQL Server 2014 from the dropdown.
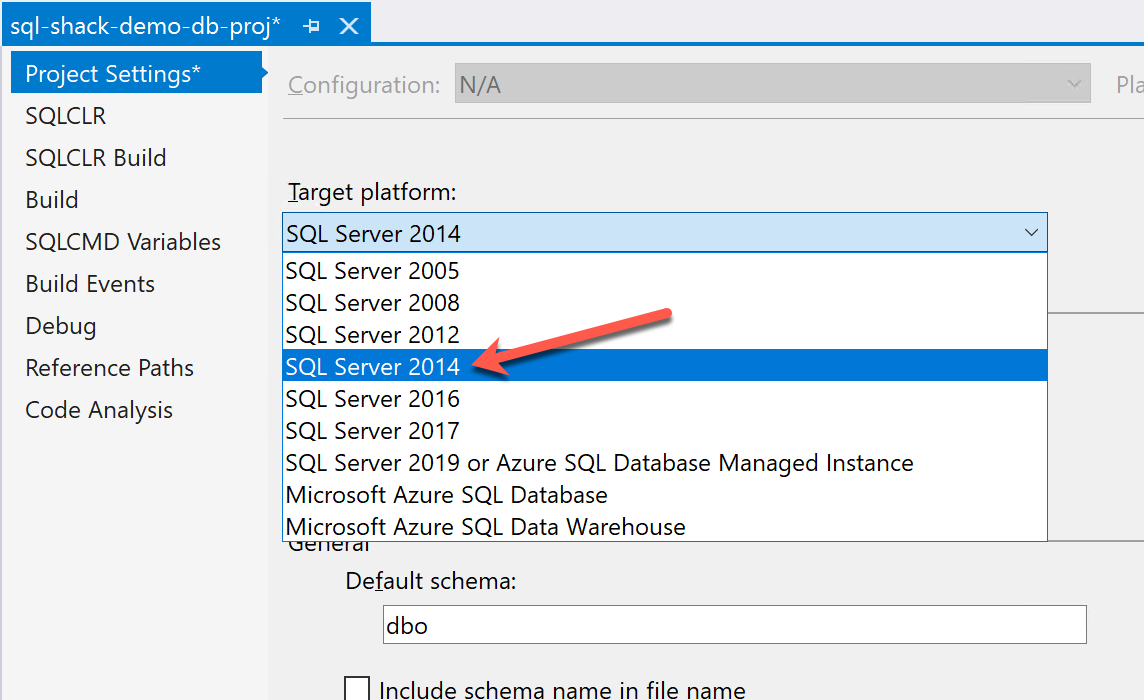
Figure 6 – Selecting Target Platform
After selecting the target platform, the next is the property of the build output file. This is separate from the property of the project as this is for the output DACPAC file. You can set a name for the file and assign a version number to it. Additionally, you can also add a description.
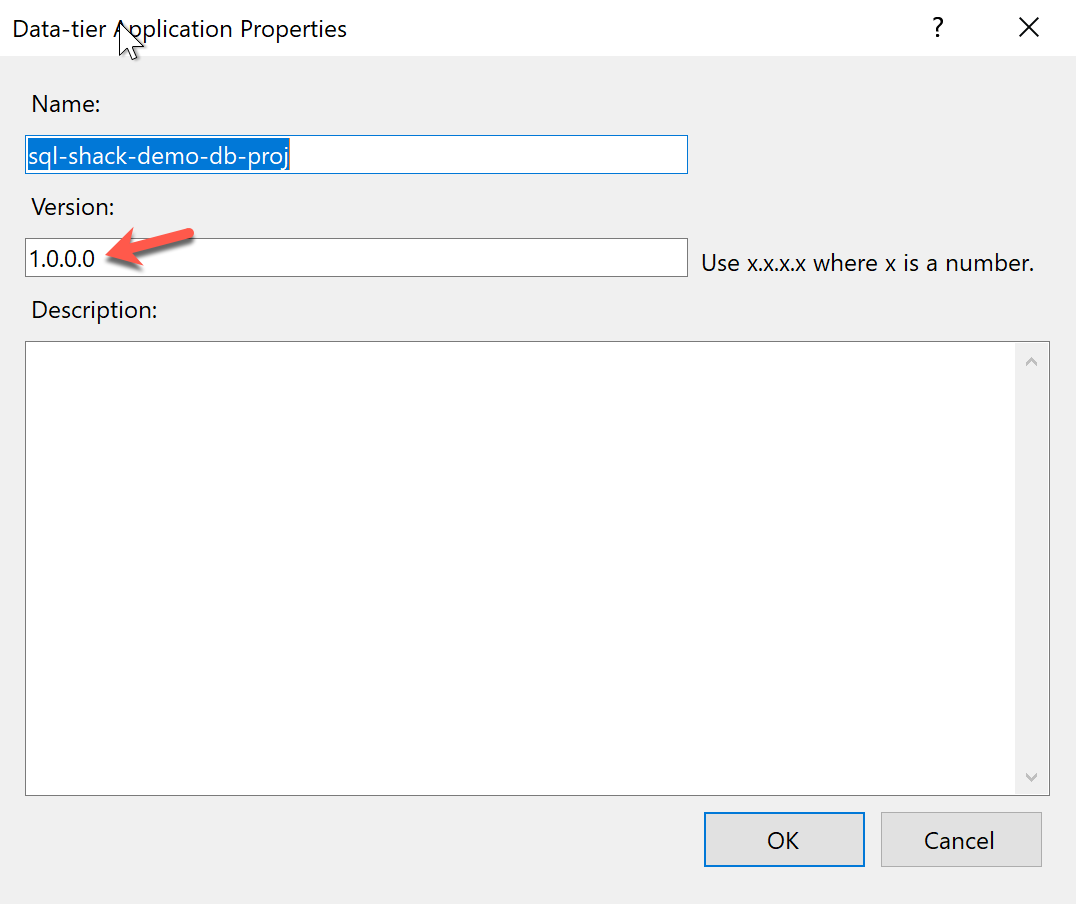
Figure 7 – Properties of the build file
Every time you build your project, the build file or the DACPAC file is going to be replaced with your latest code. Optionally, you can also generate an SQL script each time you build your project. This SQL script file can be used to provide DBAs for manually running the database scripts instead of automated deployment.

Figure 8 – Default Schema Selection
By default, the schema name in which the database objects are created is “dbo“. However, if you would like to change it to something else, you can specify the schema name here.
Further, when you click on Database Settings, under the Common panel, it allows you to choose the database collation to be used for the database project and some other properties with respect to the data tier application. The database collations are an important feature that you need to decide on at an early level in the development phase. If you happen to choose an incorrect collation for your project, it is difficult to alter the database collation, however, not impossible.
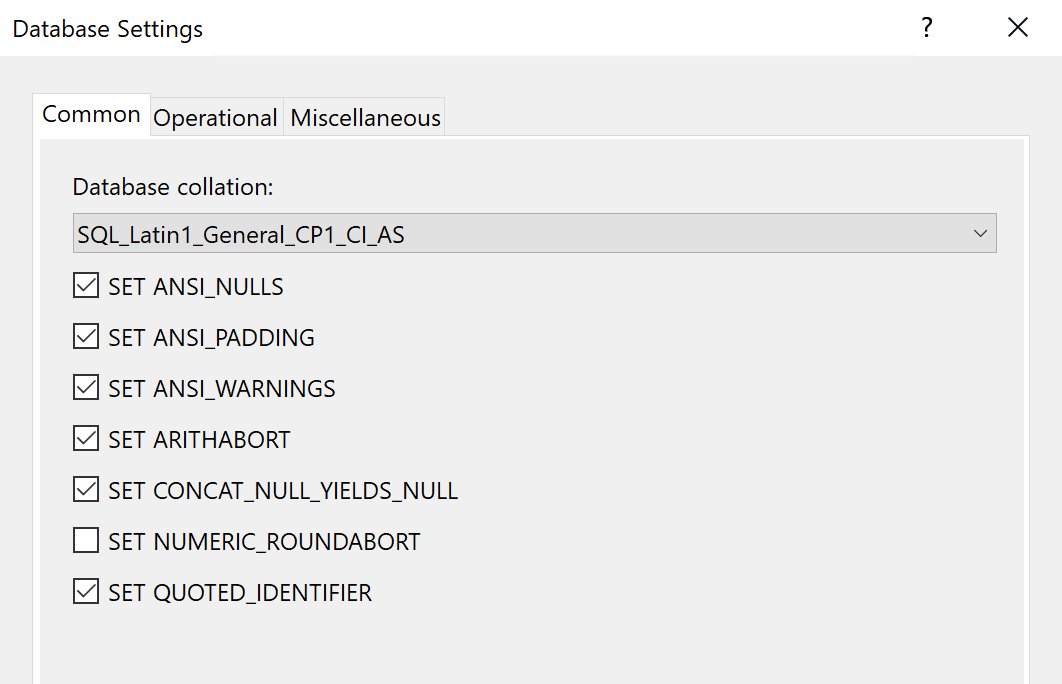
Figure 9 – Database Settings
In the Operational pane, there are options to define the primary filegroup that you would want your database project to be created when the data-tier application is deployed. You can also set the recovery model for your database in this section. There are three types of recovery systems, like FULL, BULK LOGGED and SIMPLE. By default, the FULL recovery system will be selected, however, it is possible to change it to the SIMPLE recovery model.
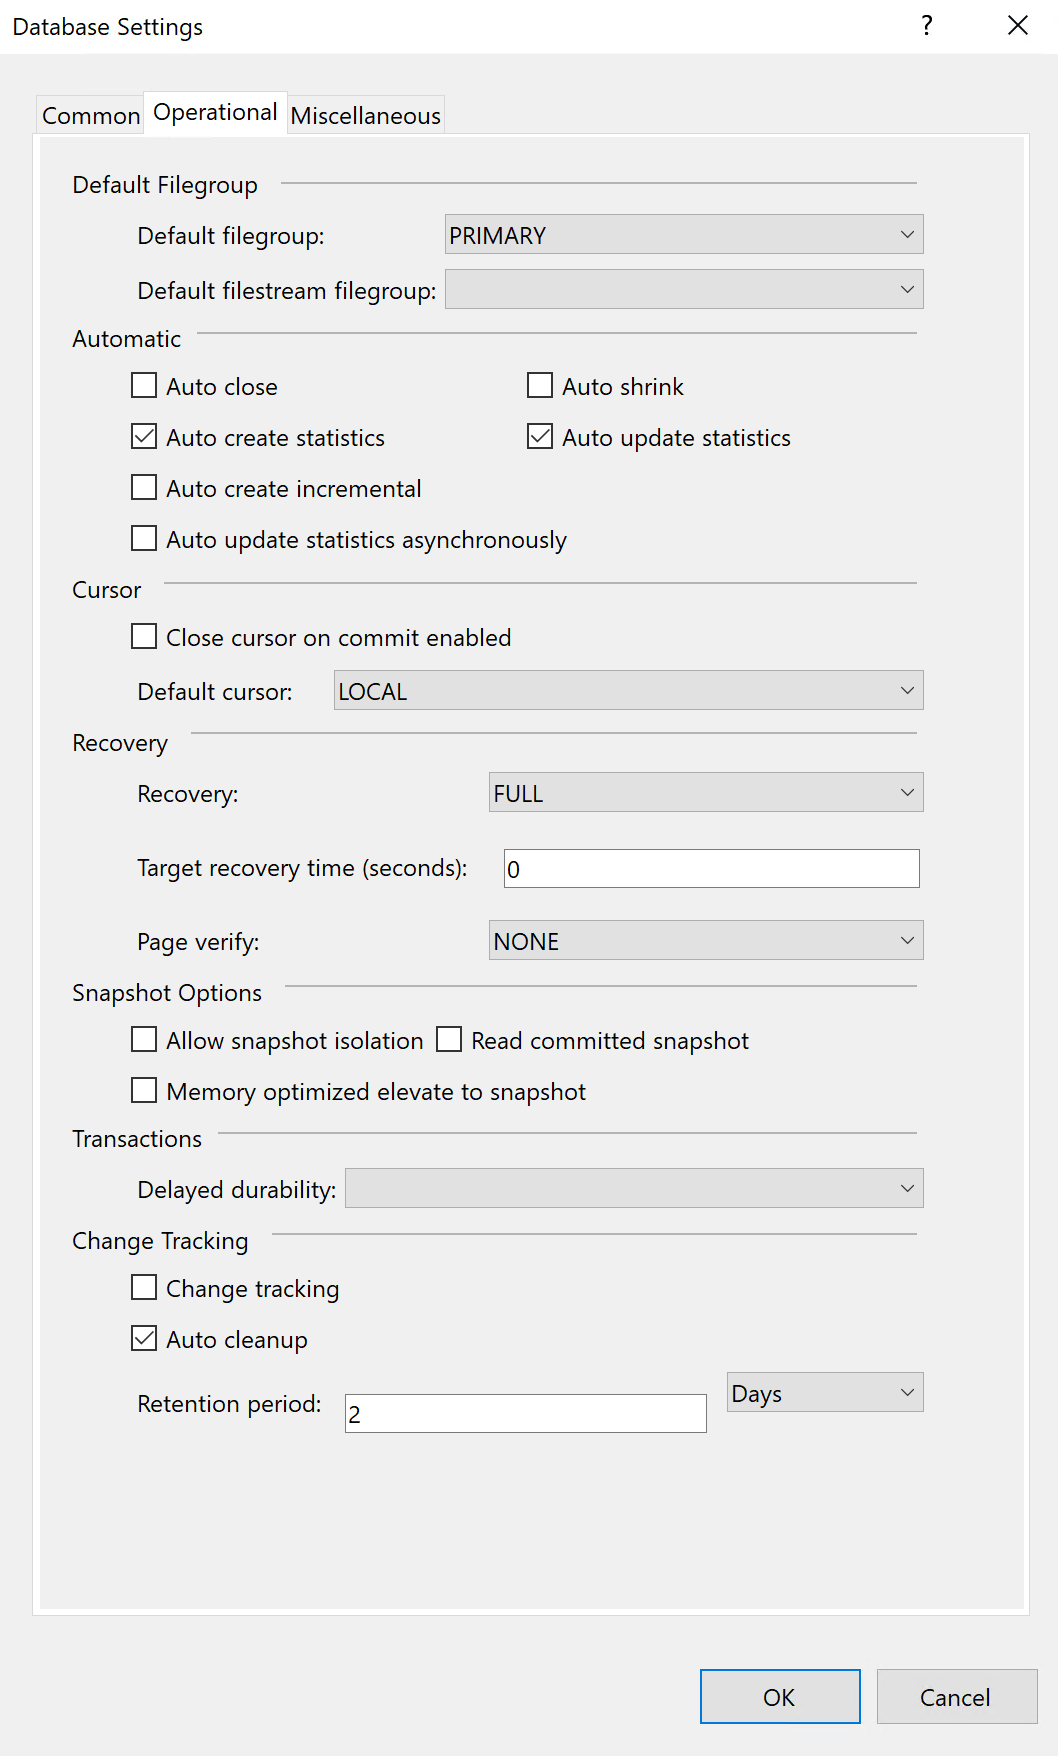
Figure 10 – Database Settings Common Panel
Further, in the Miscellaneous panel, you get to set a few other properties of the database project. All these are set to default values and should be proceeded with as is. If you need any sort of customizations in these properties, feel free to change the settings here.
There are other properties that you can review before starting with the development, such as the Build, Debug and SQLCMD Variables. In the Build property, you set the path of the build output directory. This is the path in which all the scripts and the DACPAC files will be stored when you build the project.
In the Debug property, you can set a start-up action if there’s one. The default is set to none. You can also set how the output database should be deployed by defining the Target Connection String. You can either define the database as a local db or a valid SQL Server database connection. When you deploy your project, the engine will connect to the target database and build the modified script accordingly.
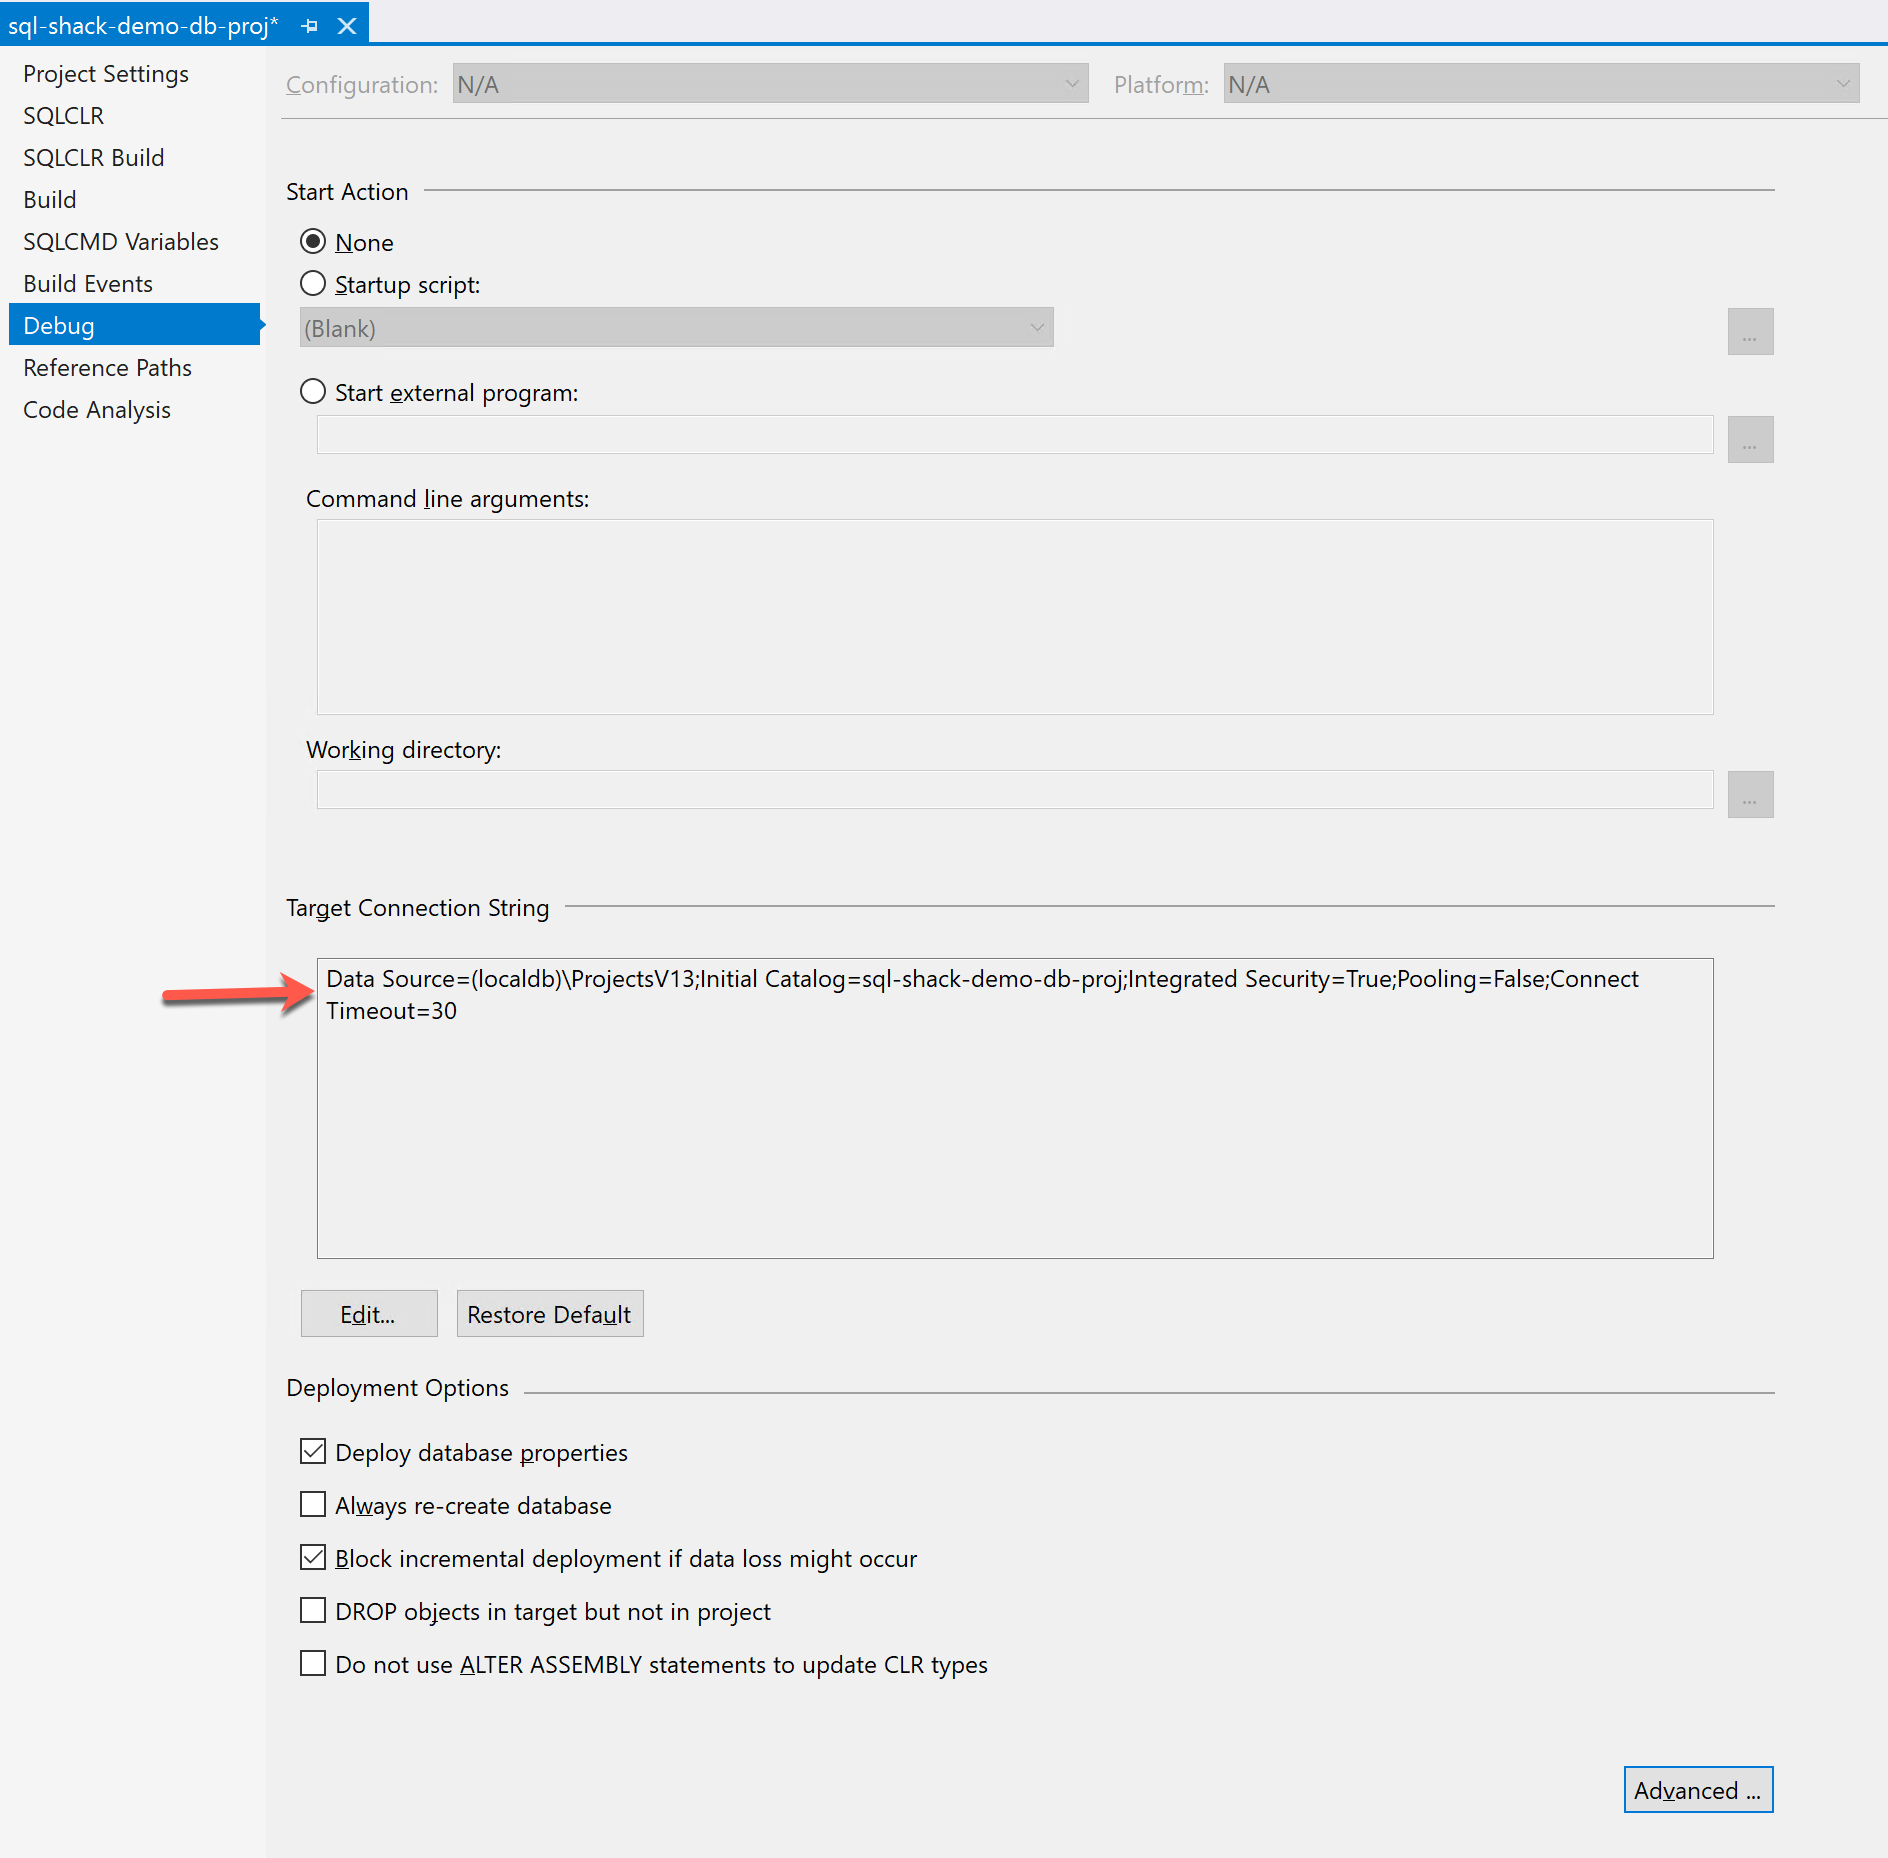
Figure 11 – Target Connection String in the Database Project
You can also see that you have an option to set some advanced debug settings. But it is recommended to leave it to the default settings for the time being. In more advanced scenarios where you need to modify these settings, you may feel free to do so.
Another important property is to set the SQLCMD variable for the data tier application. These variables are used to define values in the database that can be set at runtime. In a later article, I will explain in detail about using the SQLCMD Variable and how to dynamically assign values using these variables while deploying the database project.

Figure 13 – SQLCMD Variables in Database Project
Creating the Project Structure and Best Practices
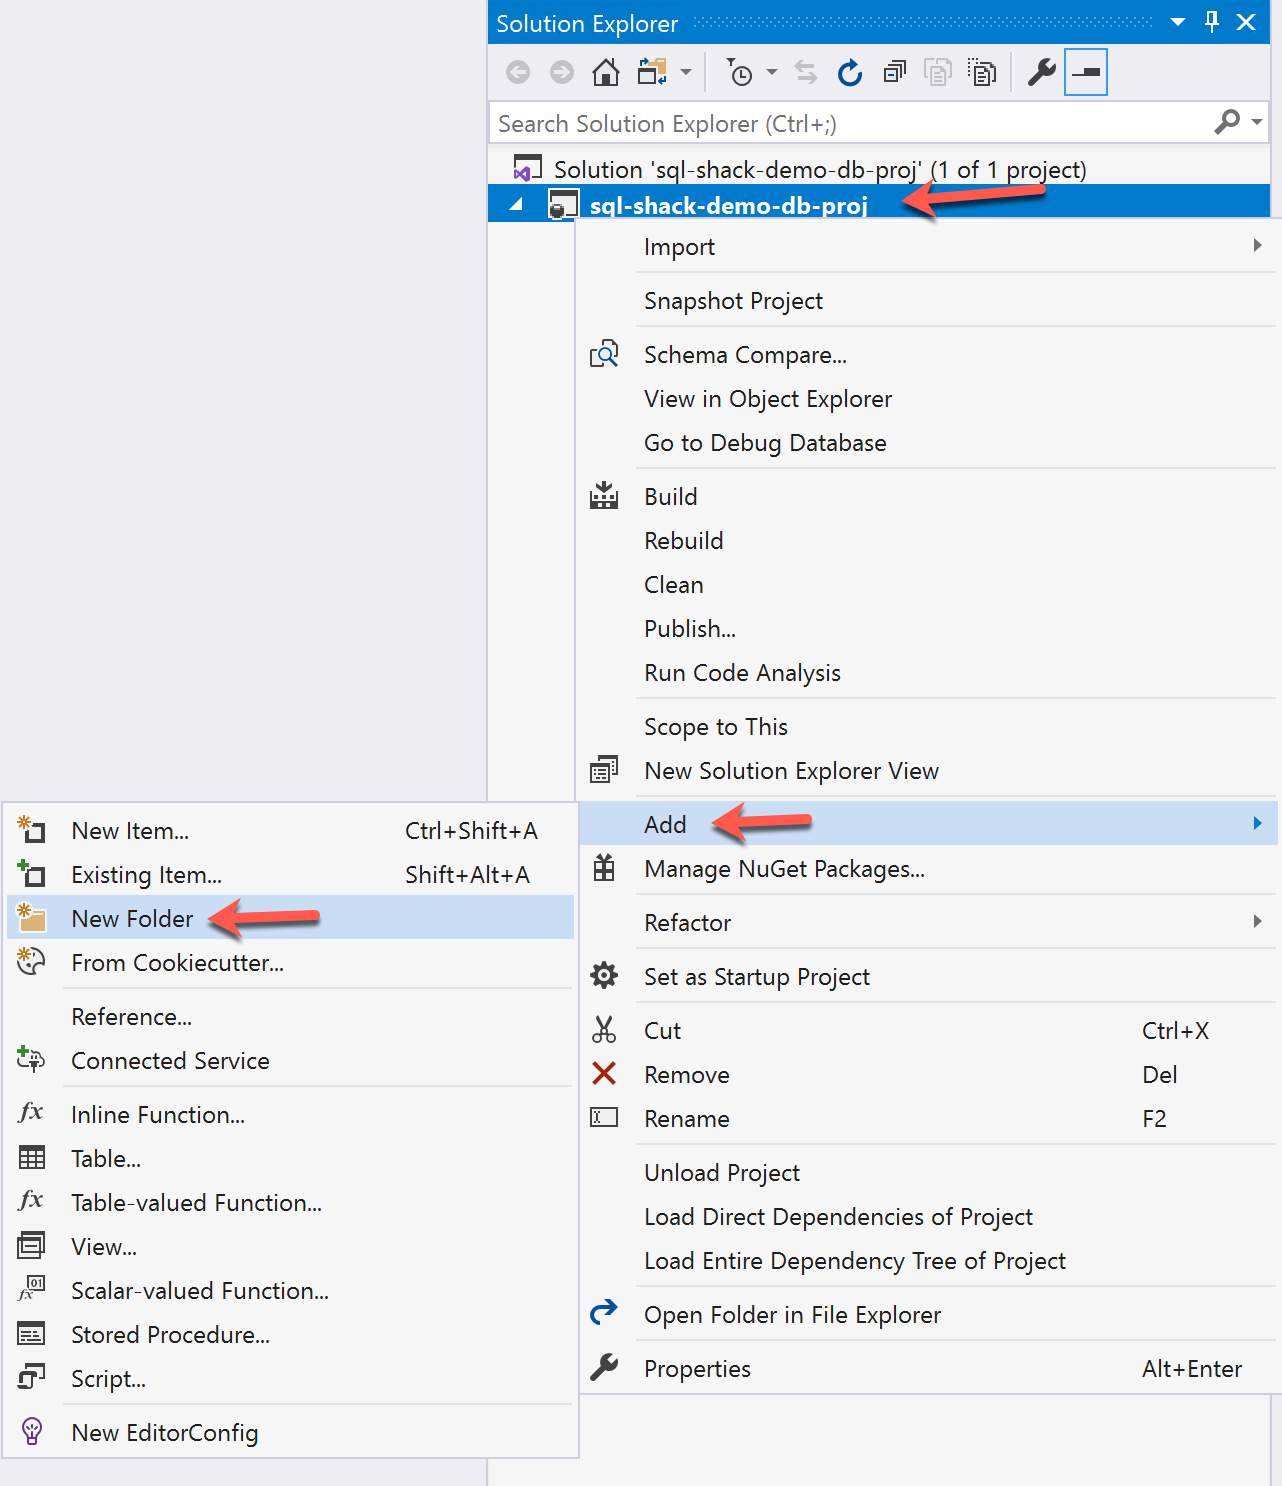
Figure 12 – the Project Structure
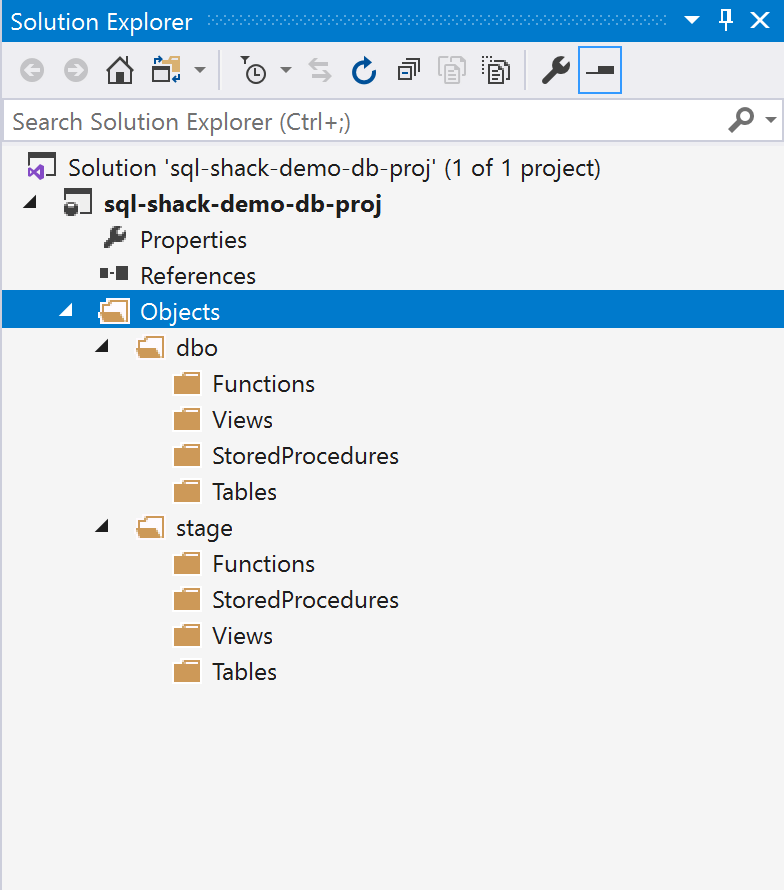
Figure 14 – the Project Structure
Conclusion
In this article, I have explained about creating data-tier applications from scratch using Visual Studio. These applications are very easy to develop and maintain, however, you should have a good understanding of how the entire application package works under the hood. Once you develop your applications using Visual Studio, you can then build the DACPAC file and deploy it to a SQL Server instance or send it to the DBA to take further actions upon it. Usually, all the changes in the schema are automatically tracked by the database engine and there is no need for any manual intervention.
Table of contents
| Getting started with Data-Tier applications in Visual Studio |
| Working with Database Projects |
| Advanced usages of Data-Tier applications |

He is a prolific author, with over 100 articles published on various technical blogs, including his own blog, and a frequent contributor to different technical forums.
In his leisure time, he enjoys amateur photography mostly street imagery and still life. Some glimpses of his work can be found on Instagram. You can also find him on LinkedIn
View all posts by Aveek Das
- Getting started with PostgreSQL on Docker - August 12, 2022
- Getting started with Spatial Data in PostgreSQL - January 13, 2022
- An overview of Power BI Incremental Refresh - December 6, 2021