
This article provides a step by step explanation of how to work with AWS Neptune Graph database. We will understand the basic concept and use-case of graph databases and then create a graph database instance as well as access it with Jupyter notebooks.
Introduction to Graph Databases
A graph database is a specialized type of NoSQL database that stores data in the form of nodes (vertex) and relationships (edges). Graph database models are majorly of two types – Labeled Property Graph (LPG) and Resource Description Framework (RDF). These models are queried using the Gremlin and SPARQL query languages. Graph databases are generally used when the value in the complexity of relationships between data is extremely complex and of maximum value. AWS provides a graph database service in the form of a managed service named AWS Neptune that supports LPG as well as RDF models, and Gremlin as well as SPARQL query languages. In this article, we will learn how to create an Amazon Neptune database instance and access it with the Jupyter Notebook instance connected to it.
AWS Neptune Database Setup
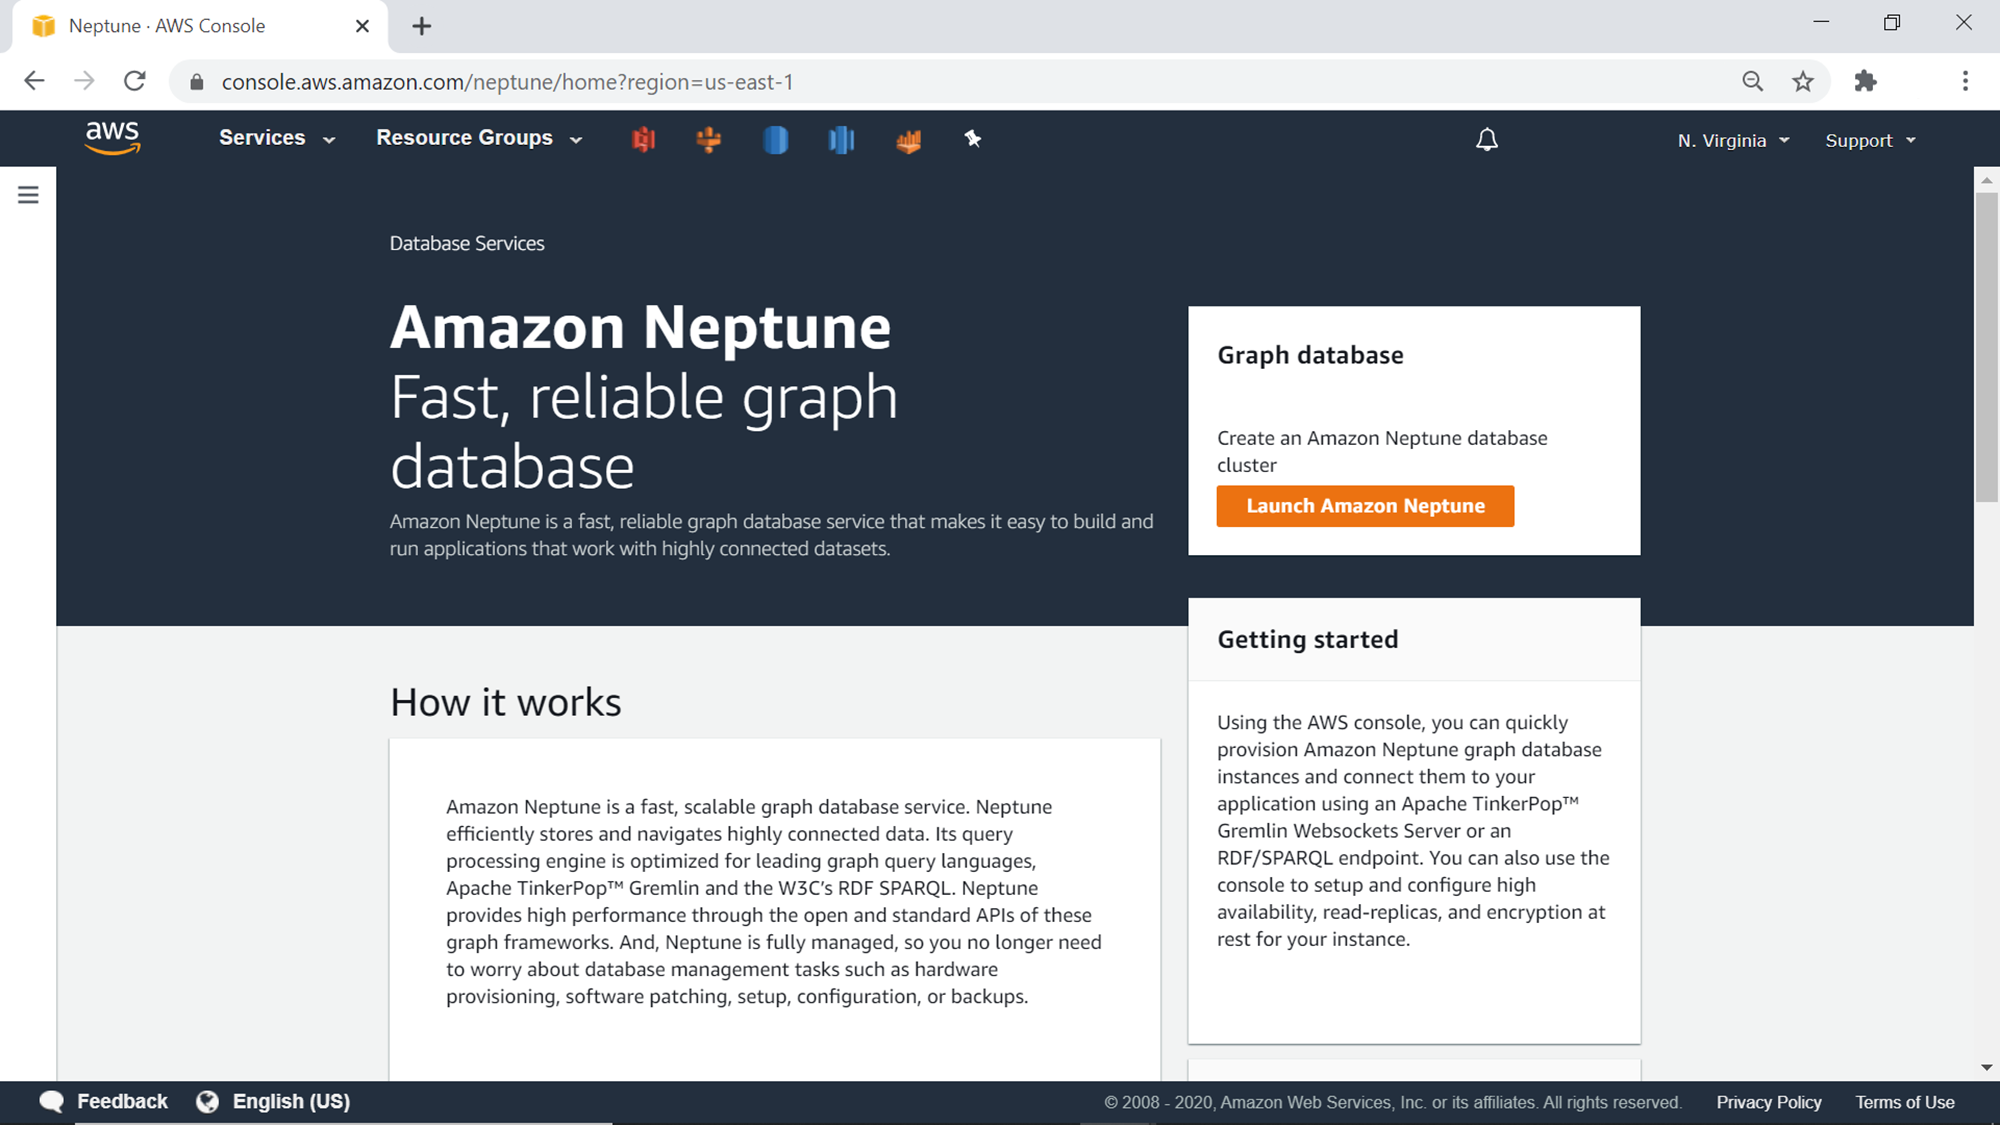
It is assumed that an AWS account is already in place and one has required privileges on AWS Neptune. Log on to the AWS Console and type Neptune. A menu item will appear in the search result, click on it and that would navigate to Neptune home page as shown below.
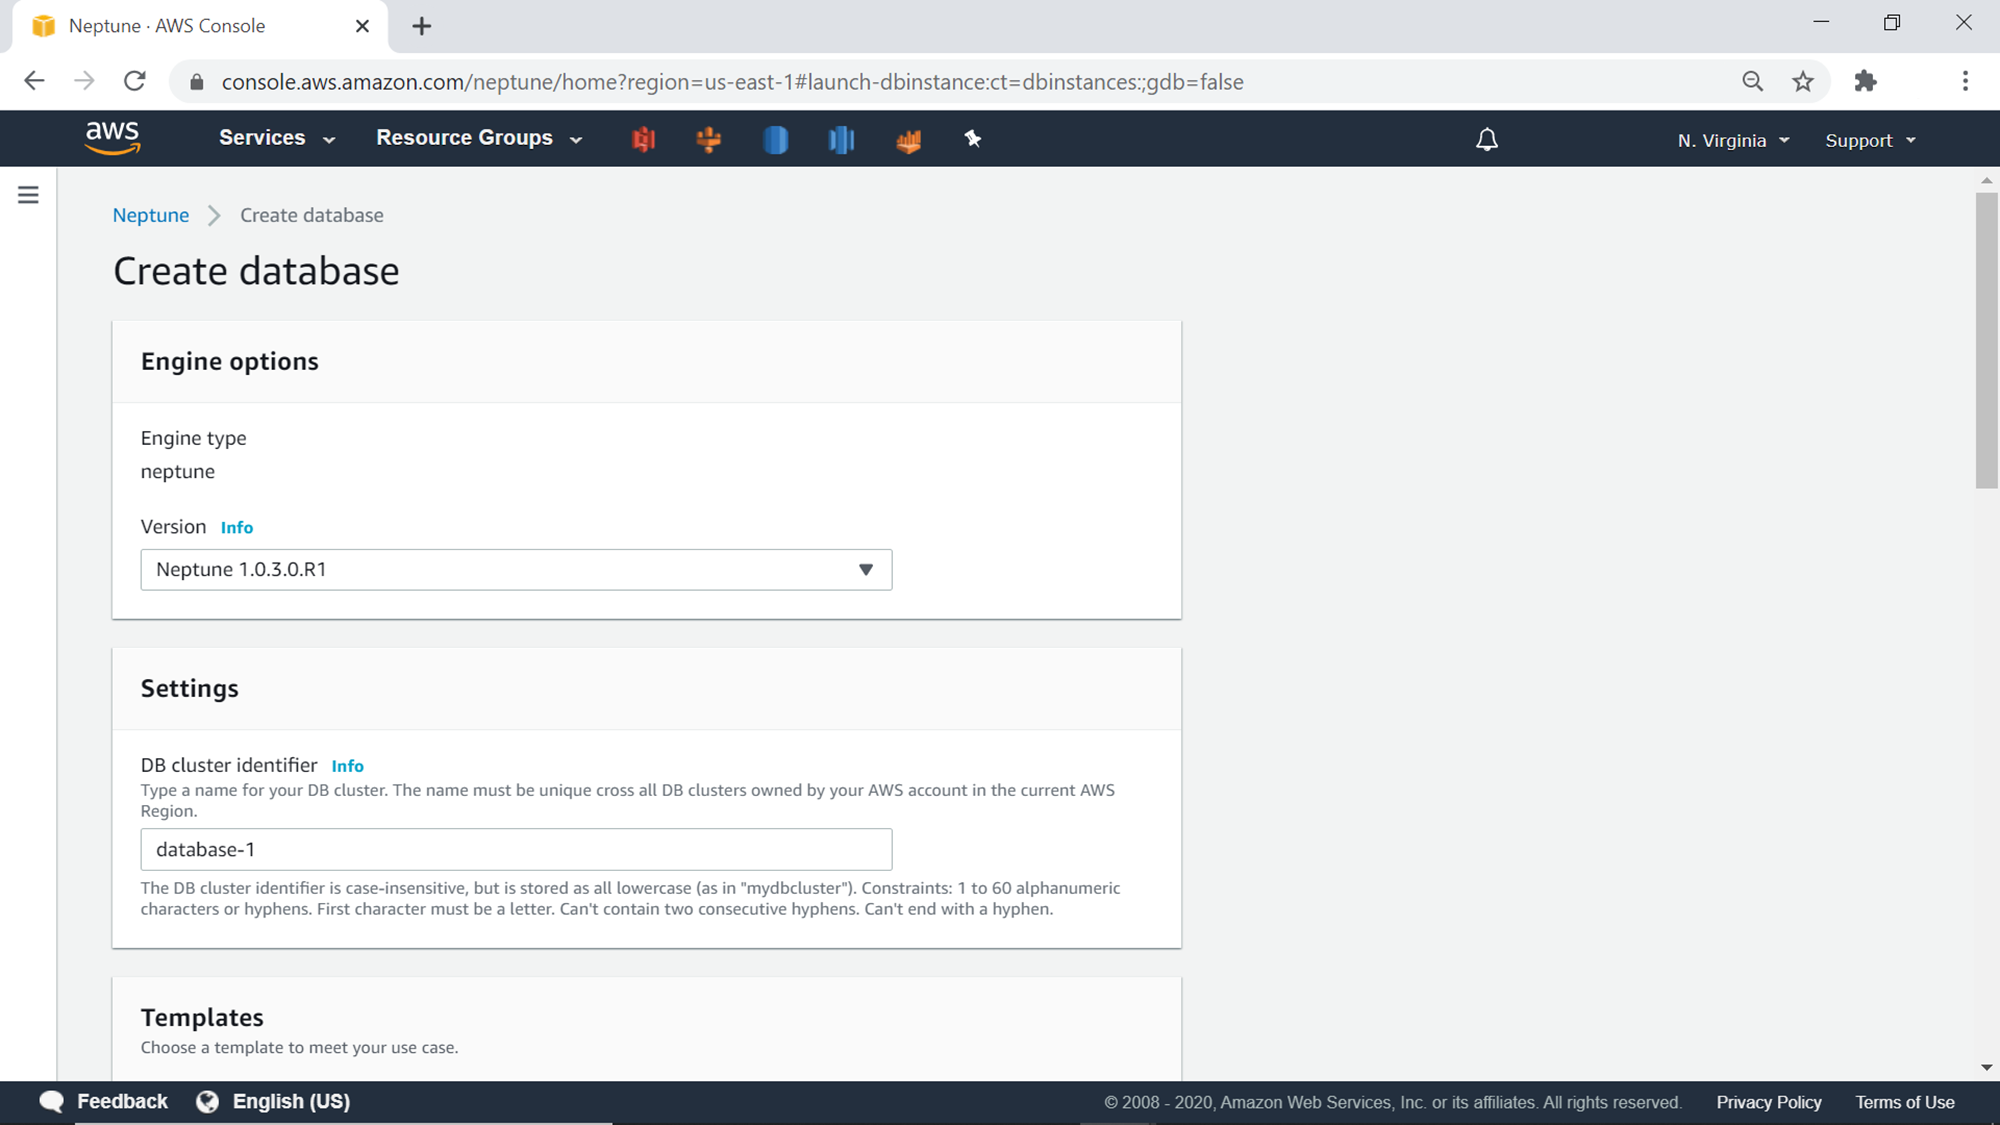
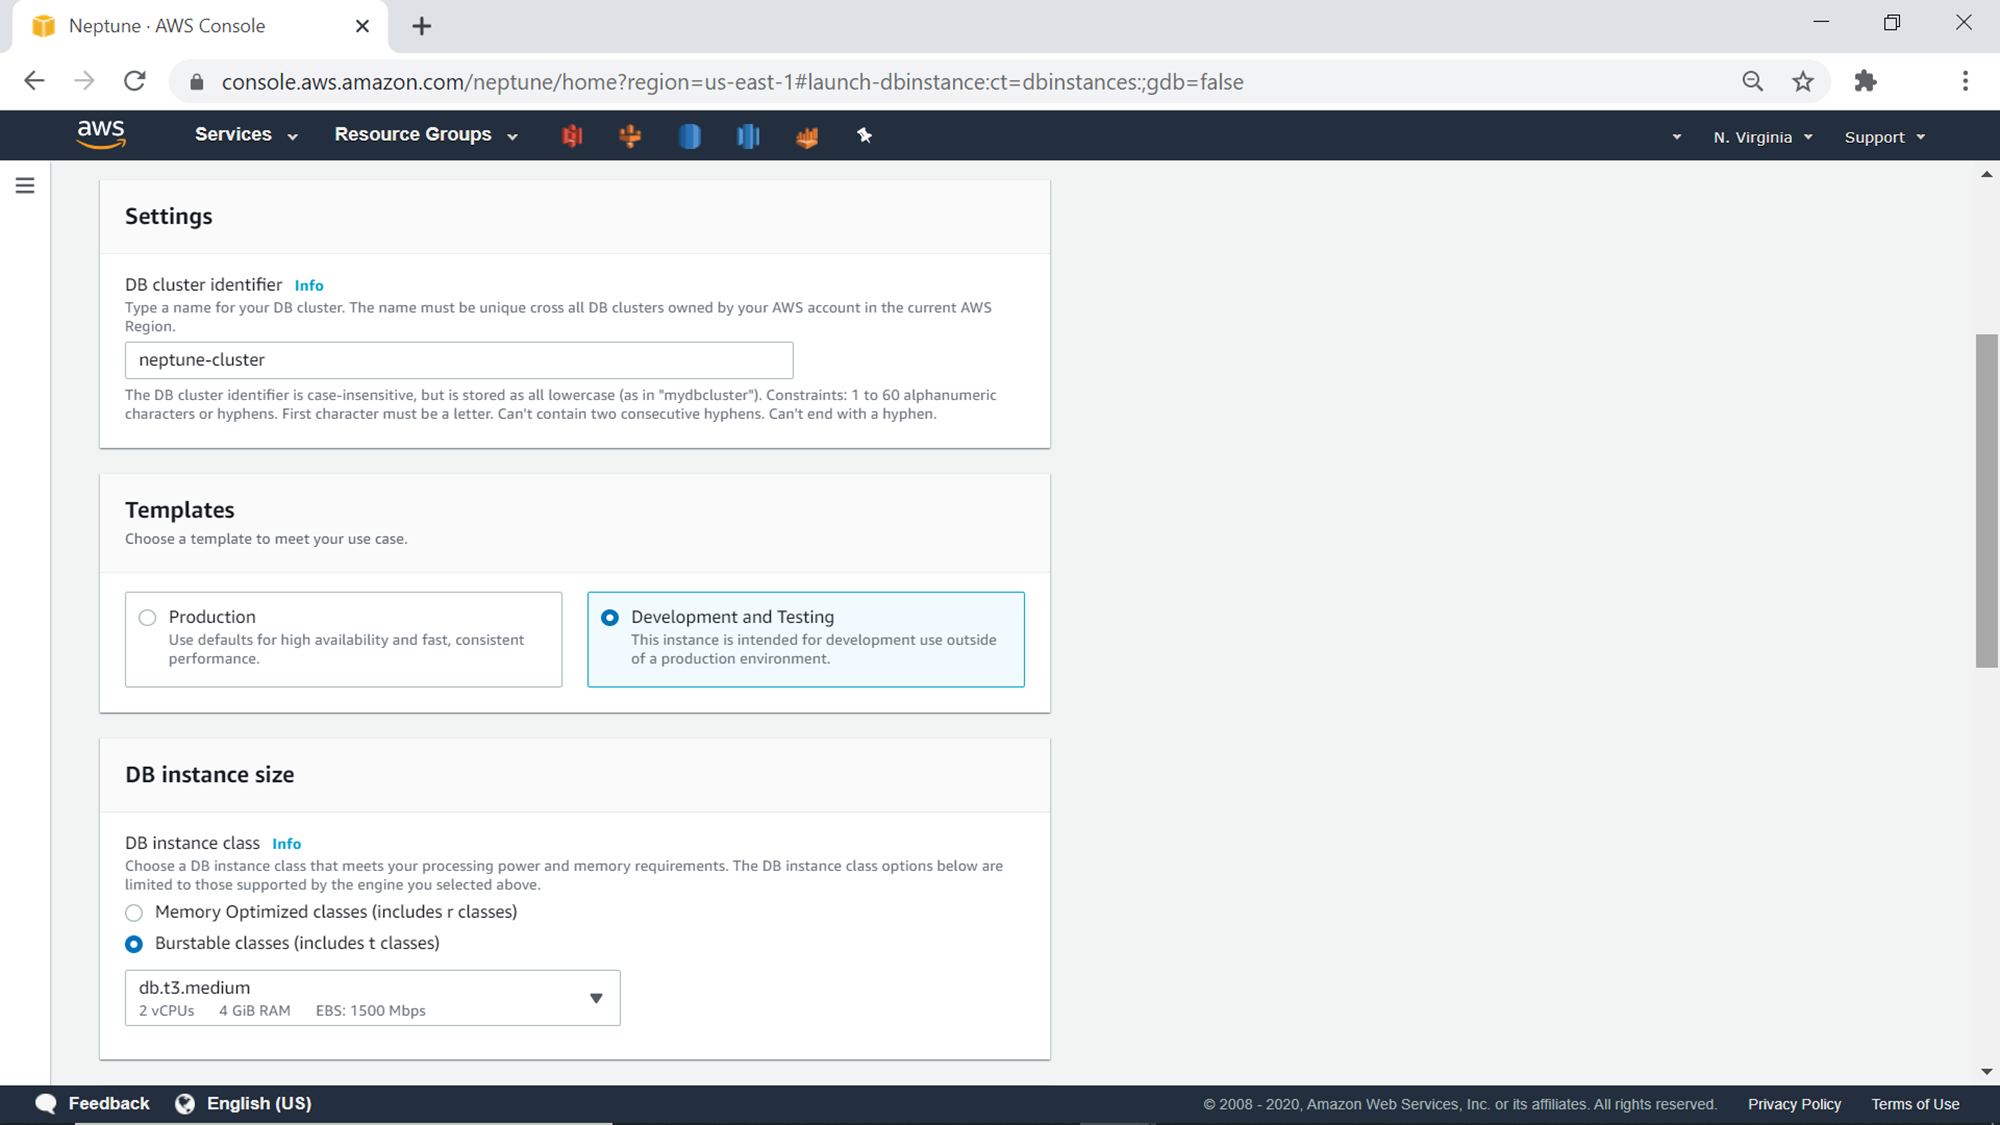
Click on Launch Amazon Neptune button to initiate the creation of the Neptune graph database. Shown below is how the database creation wizard would look. The first step is to select the engine version. The default value is the latest version of the database engine. The next step is to provide the database cluster identifier. Provide a suitable identifier for the database.
The next setting is to select the template. For this exercise, we can select the development and testing option as it will result in default settings suitable for a lower non-production environment. The database instance size selected by default is db.t3.medium, which is good enough for this exercise.
Generally, production databases are deployed in more than one availability zones. But lower environment databases do not need multi availability zones. So we would continue with No as the option, as shown below. The database must be hosted inside a VPC, so select a VPC. The default selection is the default VPC as shown below.
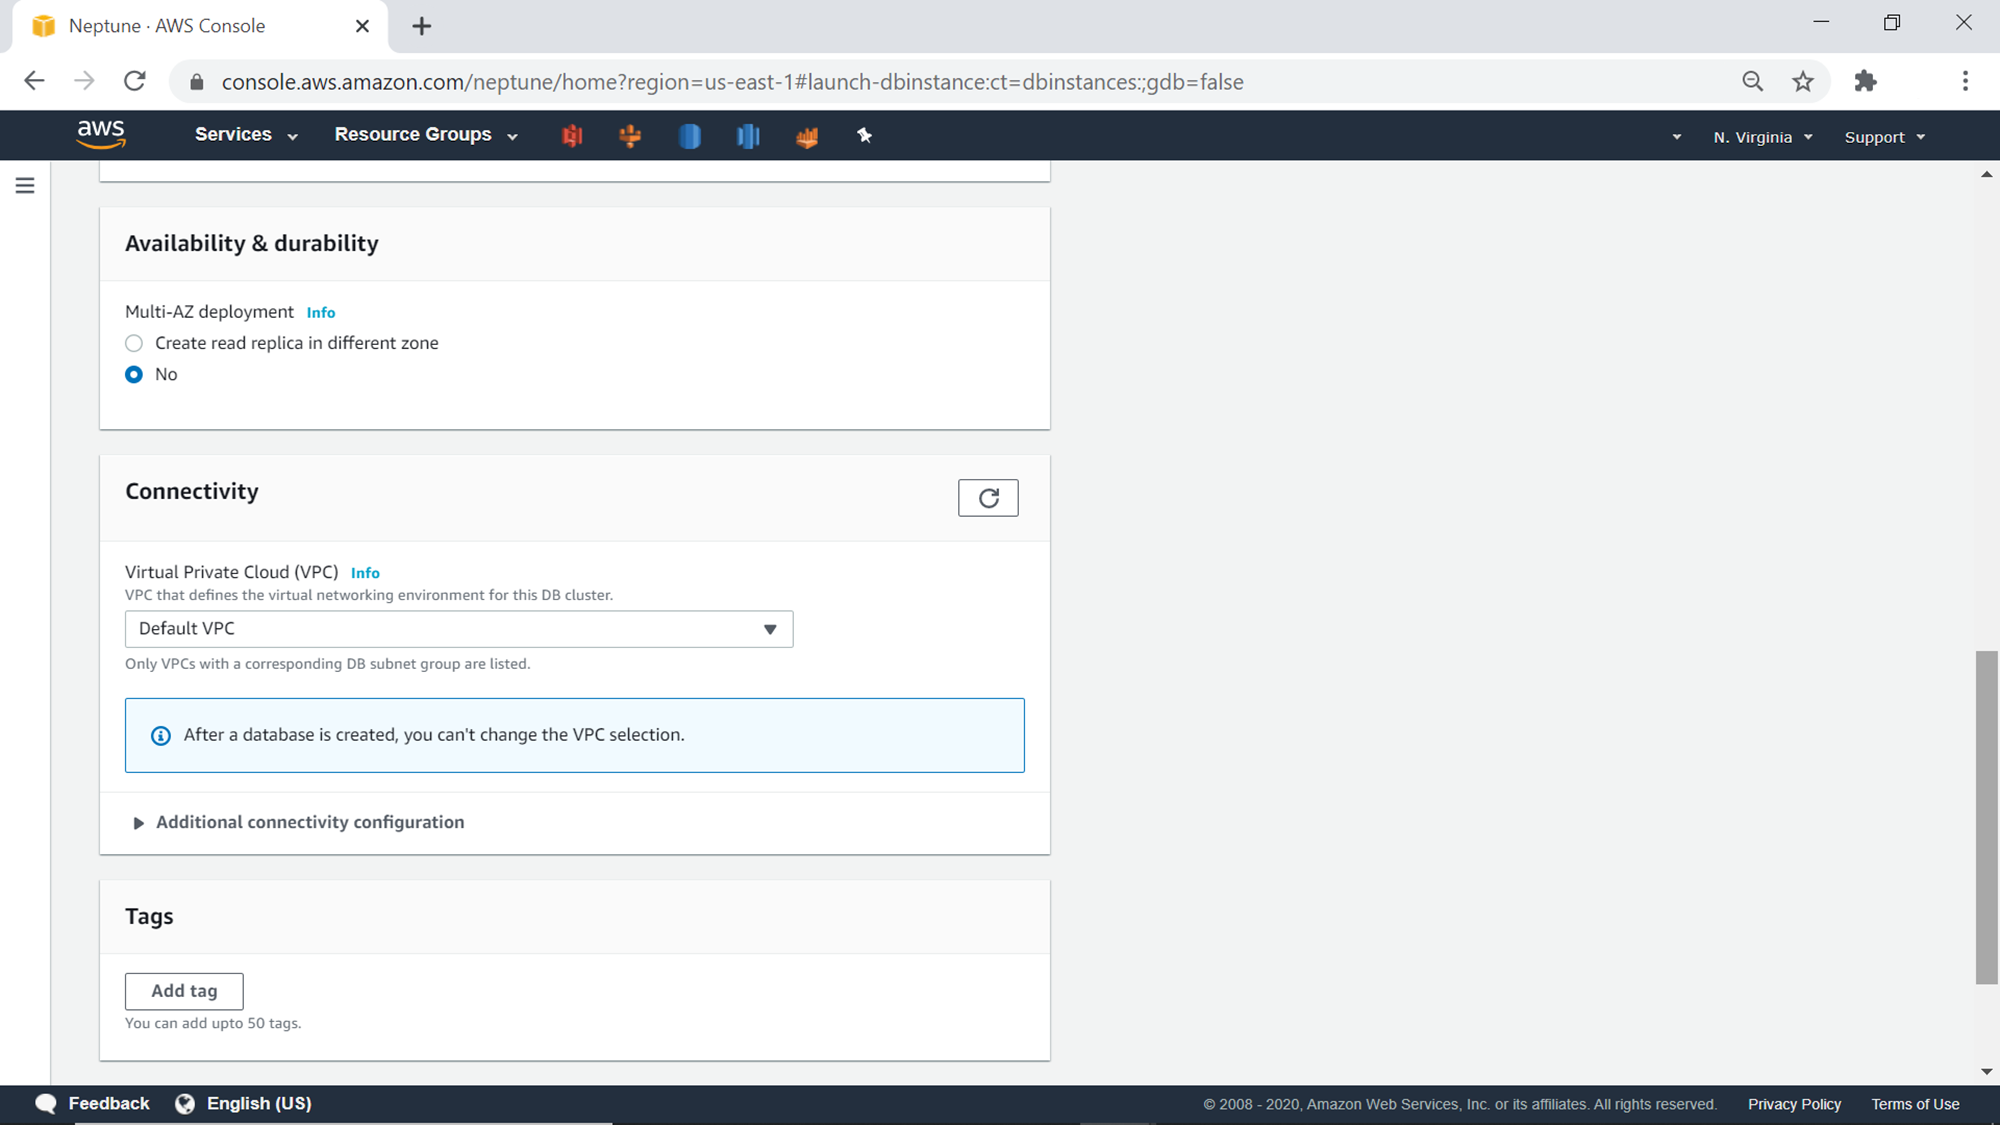
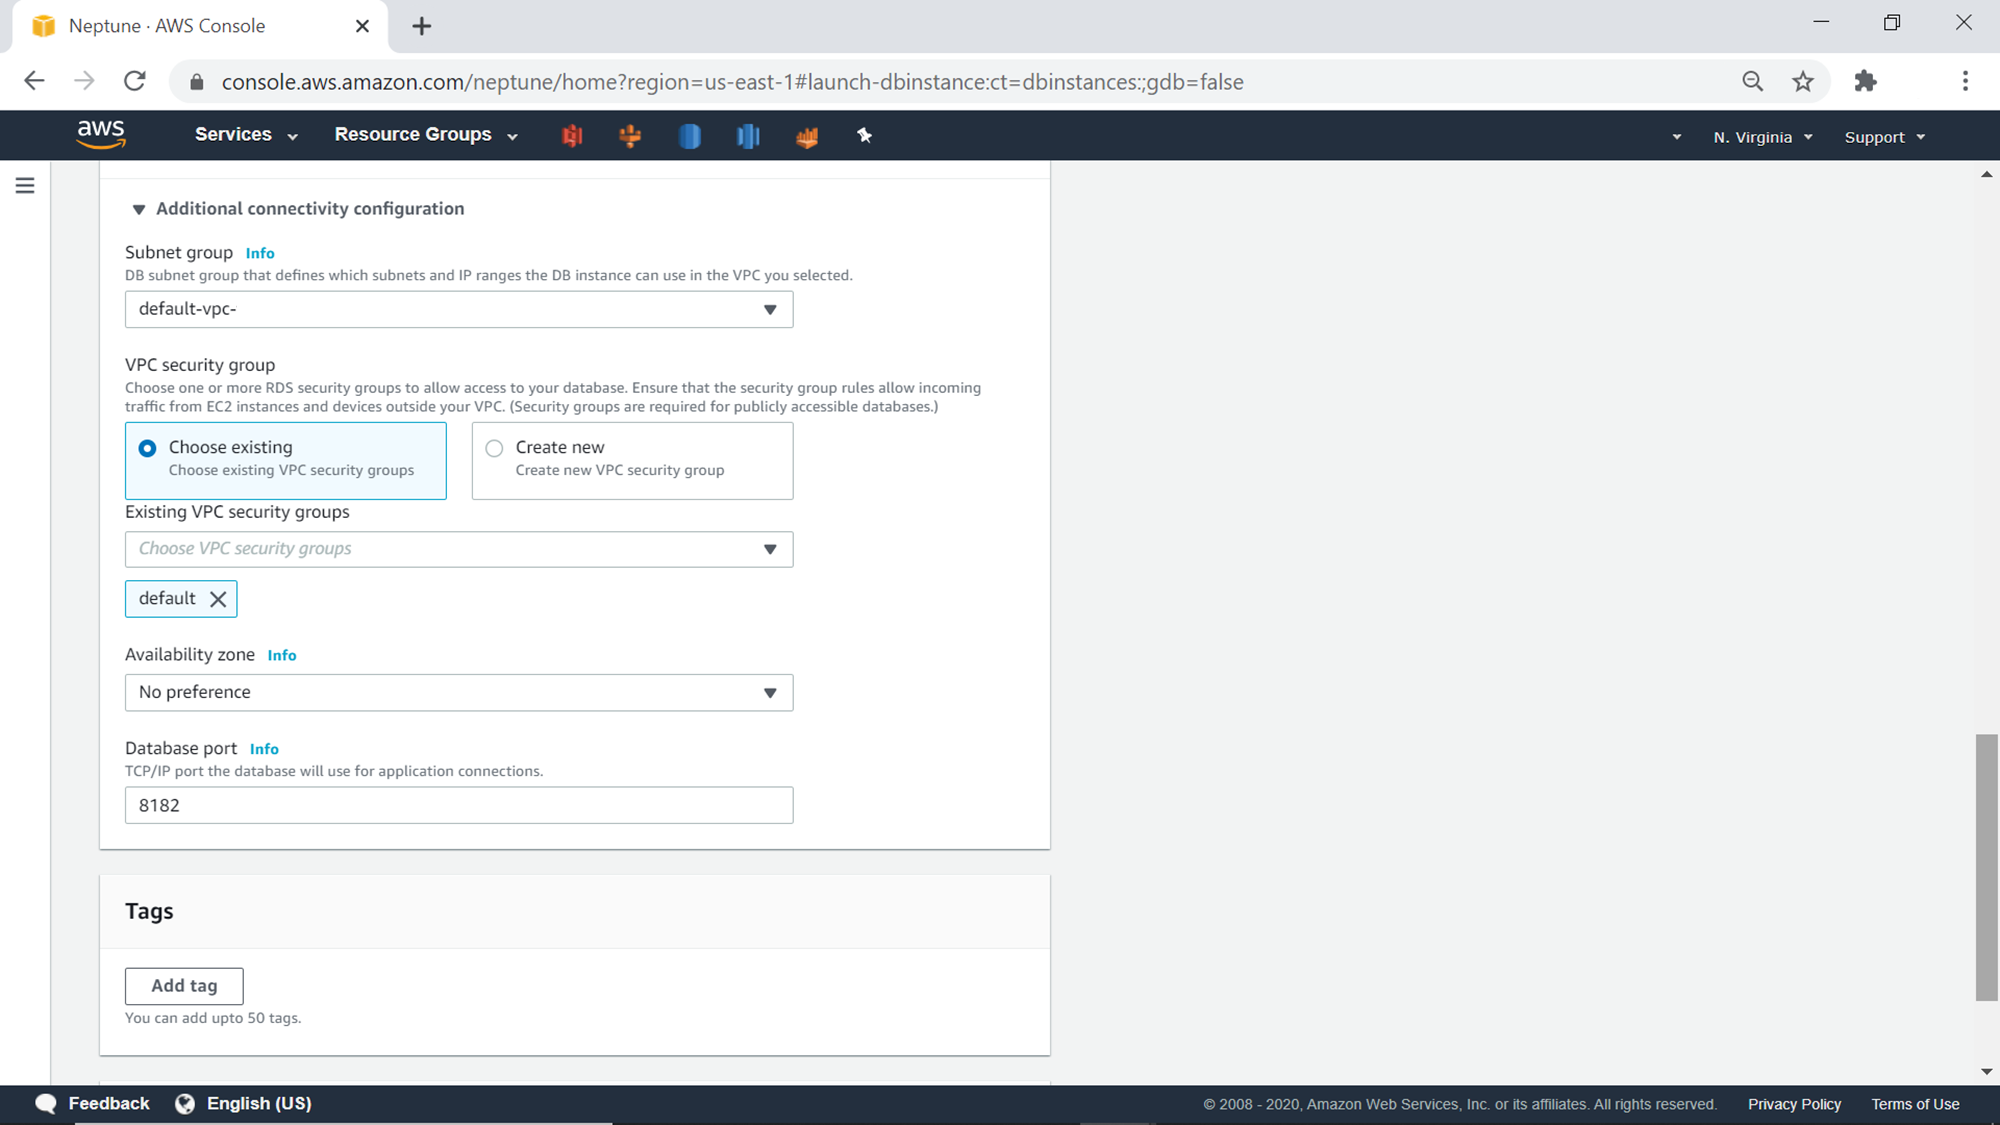
Click on the Additional connectivity configuration section to expand it. This section provides options to configure the network and port related settings for the database. The default port for the AWS Neptune database is 8182. We can continue with the default options for now. The next section is to add Tags optionally, if required.
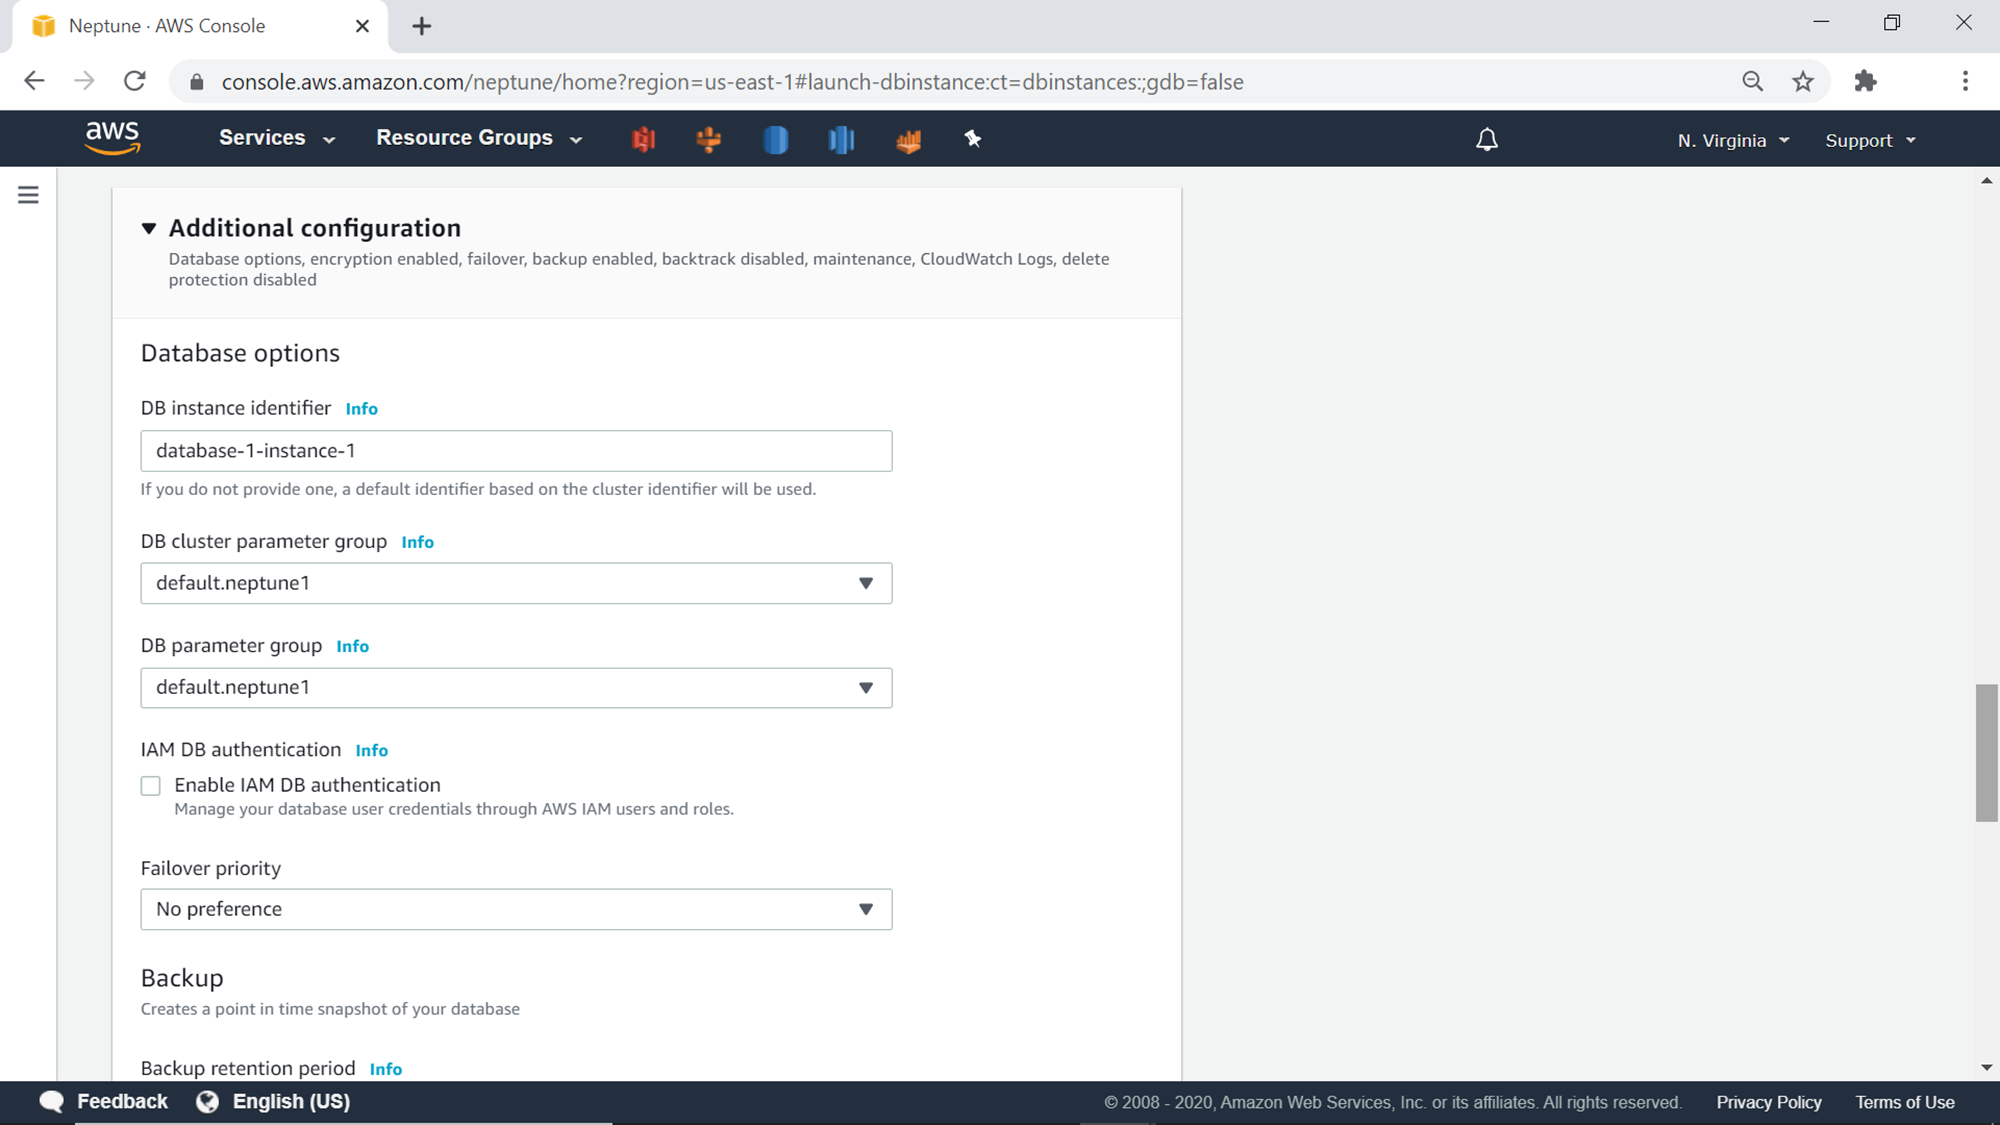
Click on the Additional configuration section below the Tags section, and it should look as shown below. This section provides options to configure the database related options like parameter group, IAM authentication settings, backups etc. We can continue with the default options here as well.
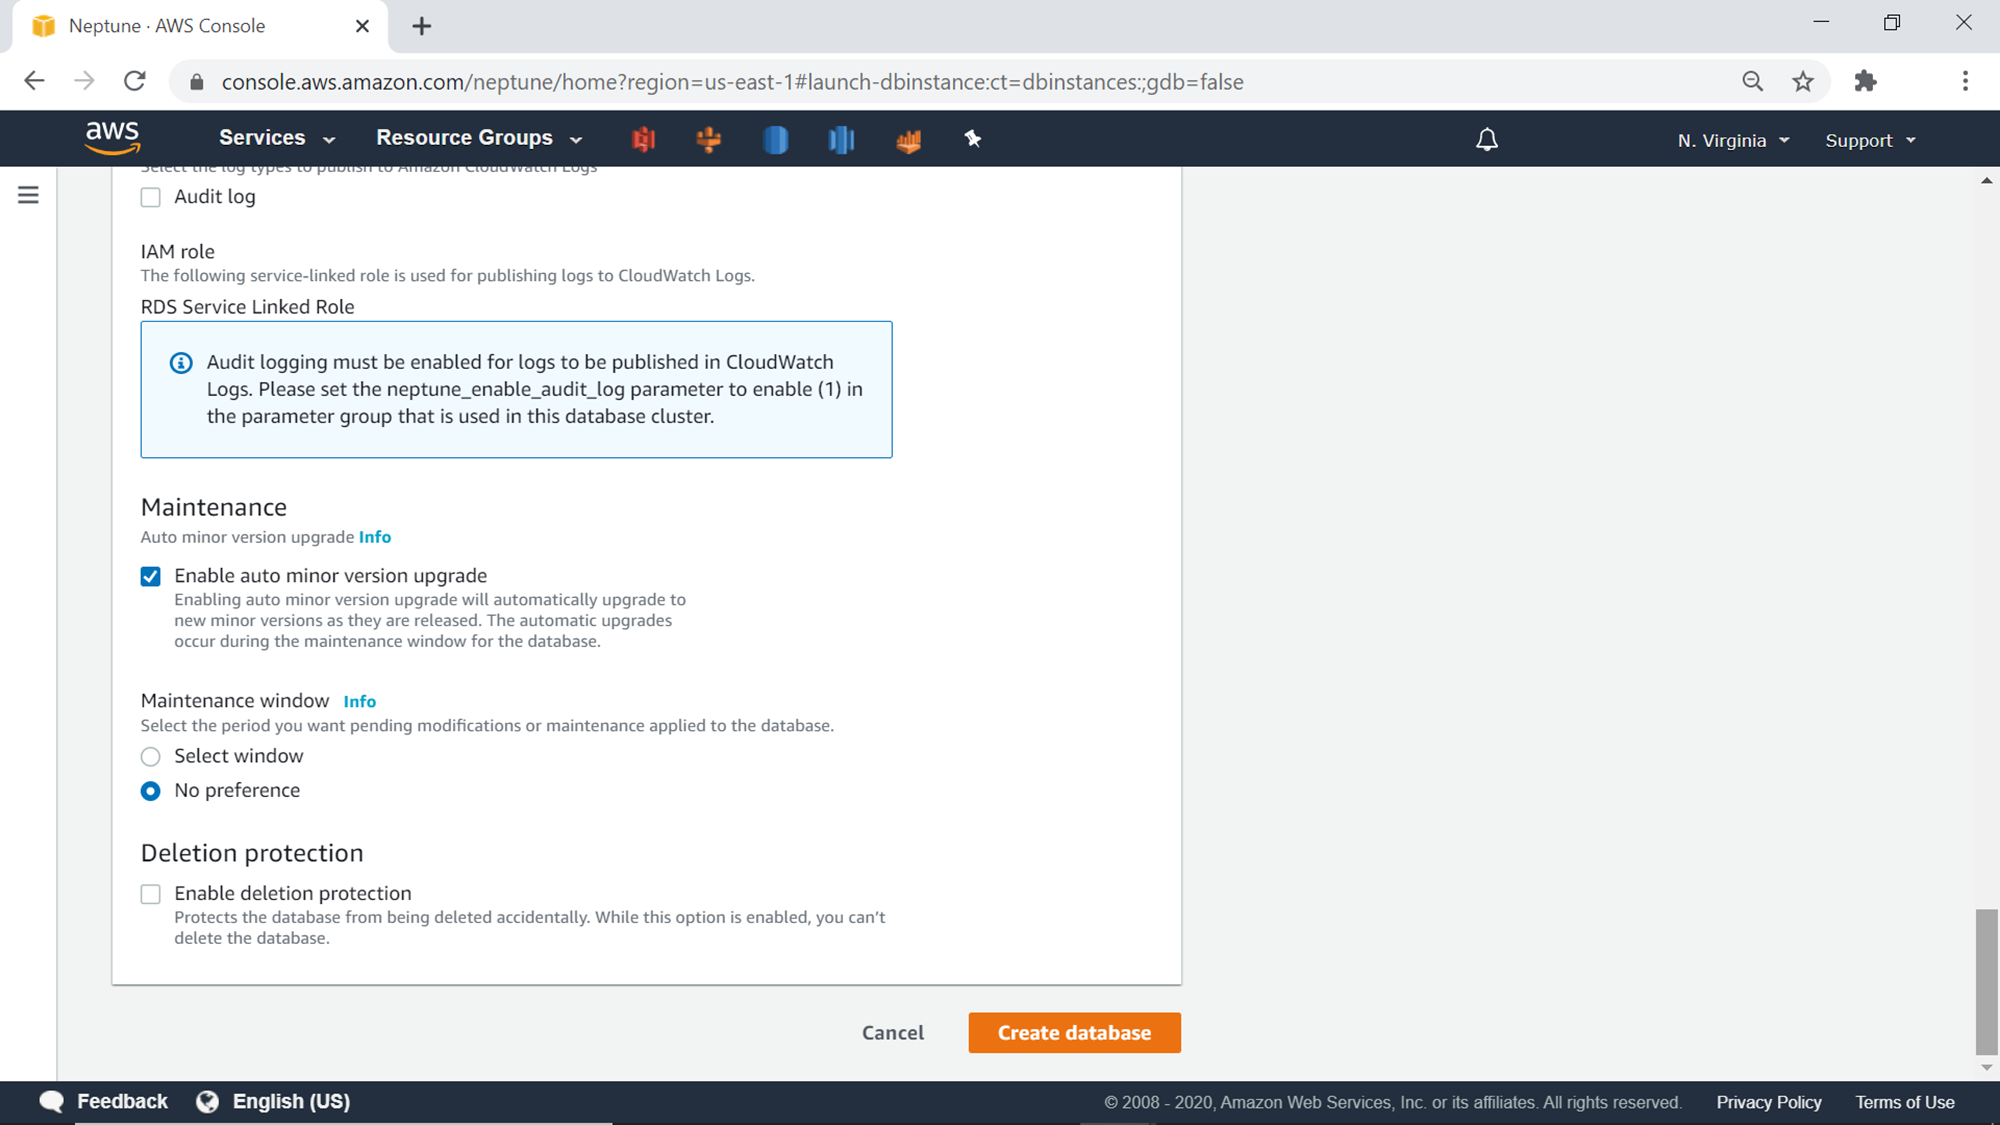
The next set of options are related to encryption, logs, and maintenance options. Check the Enable Encryption option as well as the Audit Log option to encrypt the data that would be hosted in the database as well as to generate audit logs.
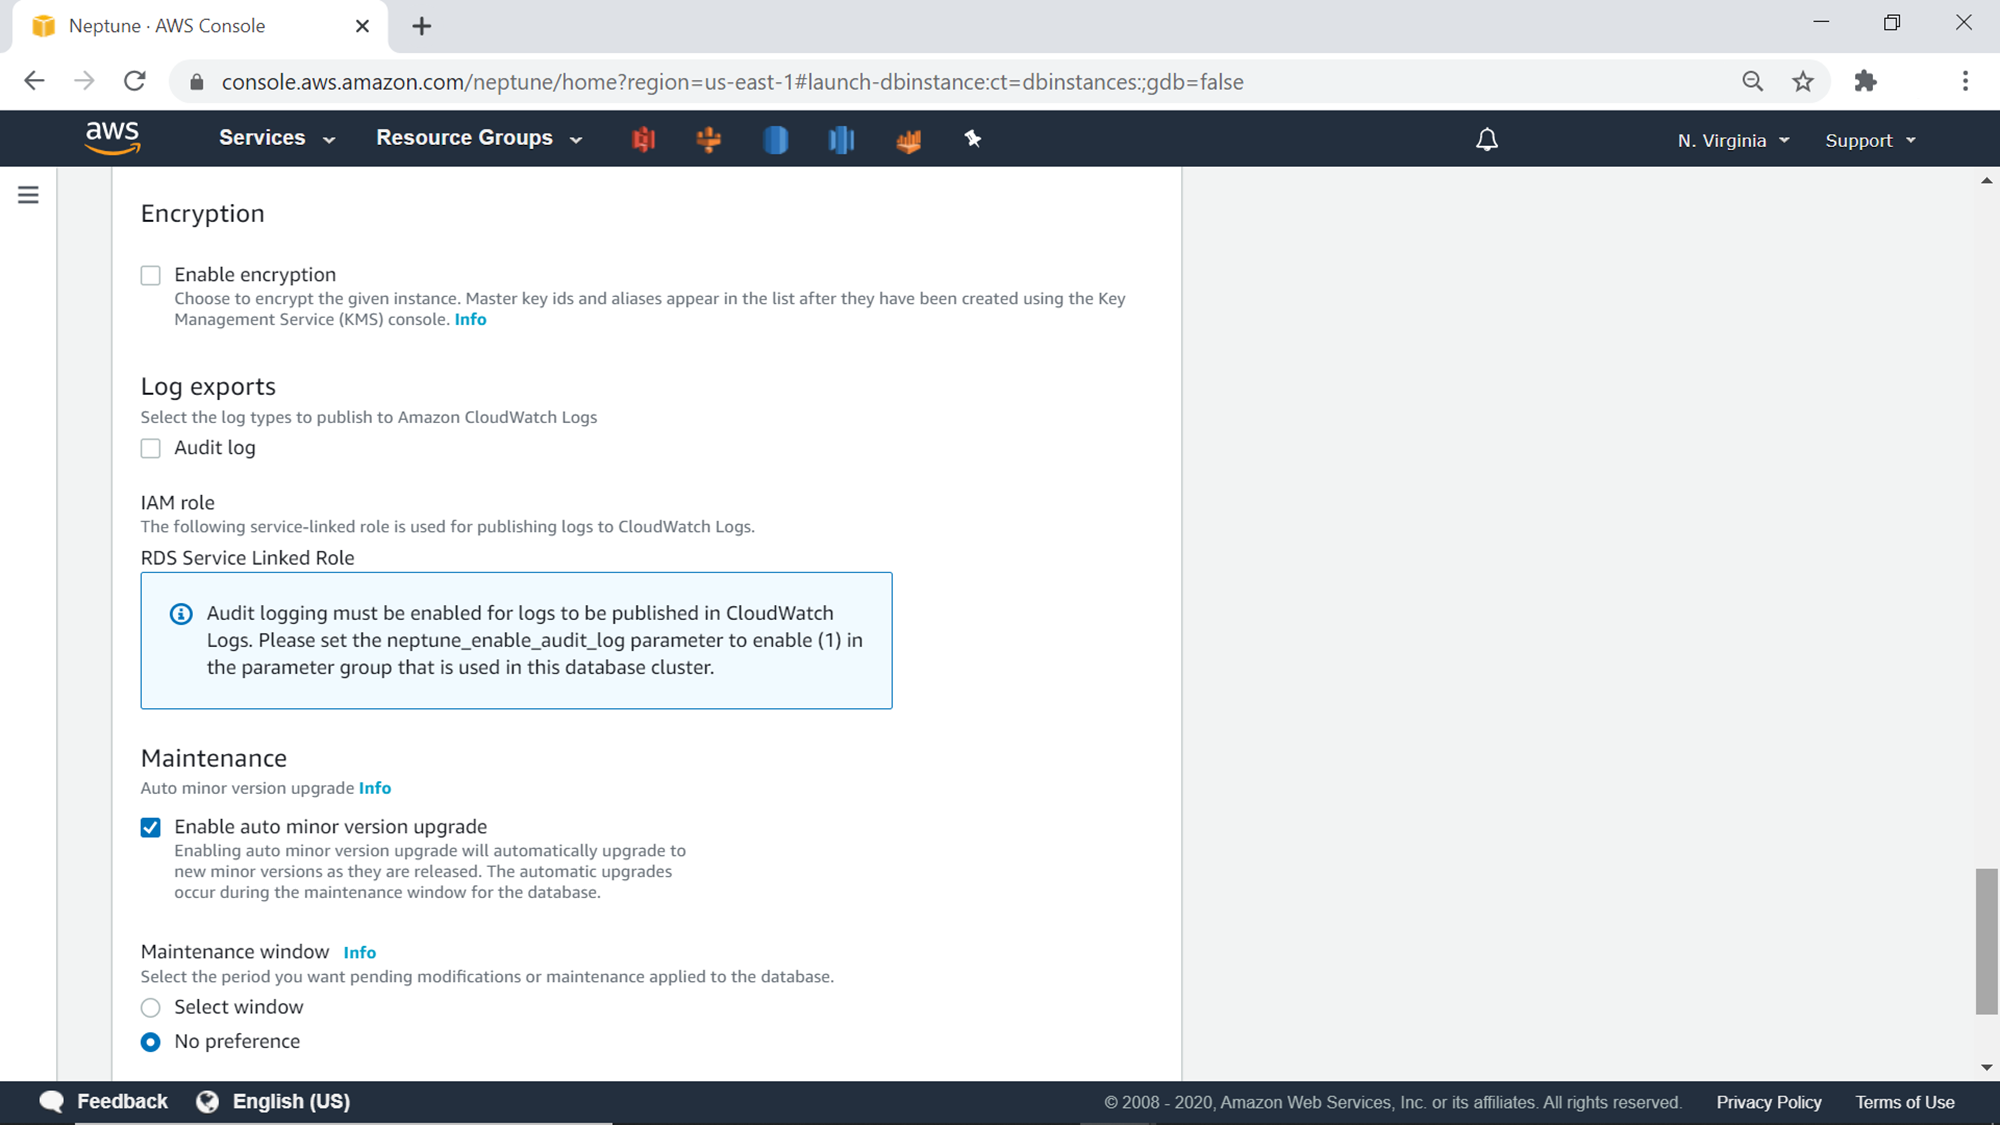
Finally, the last property to configure is related to the maintenance of the database. The default setting is No preference. Ideally, it is advisable to select and specify a window when the maintenance should be performed on the database. Click on the Create database button to start the database creation process.
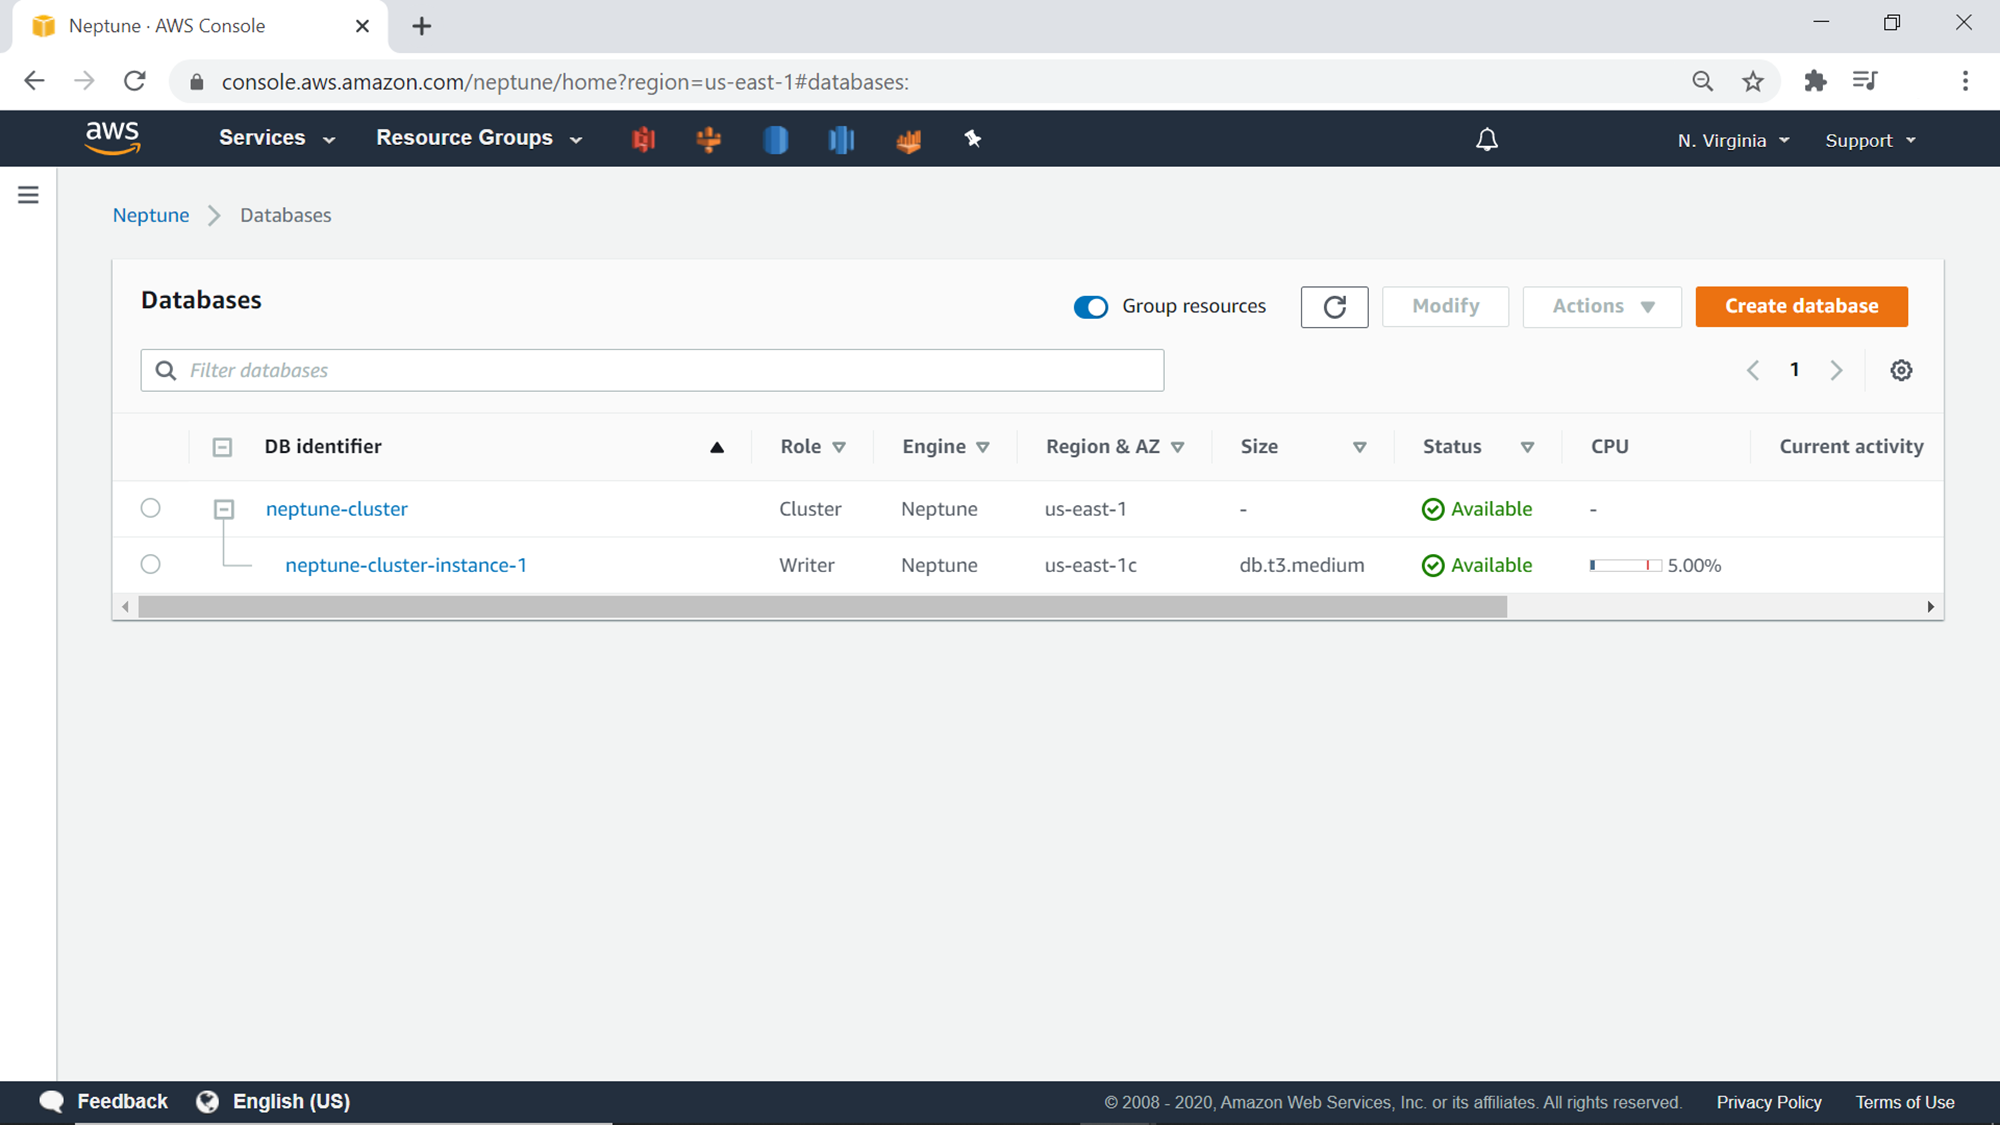
Once the database creation process starts, it will be in creating state and will move to Available status. Neptune cluster by default will have one writer node under the Neptune cluster as shown below.
AWS Neptune Notebook Setup
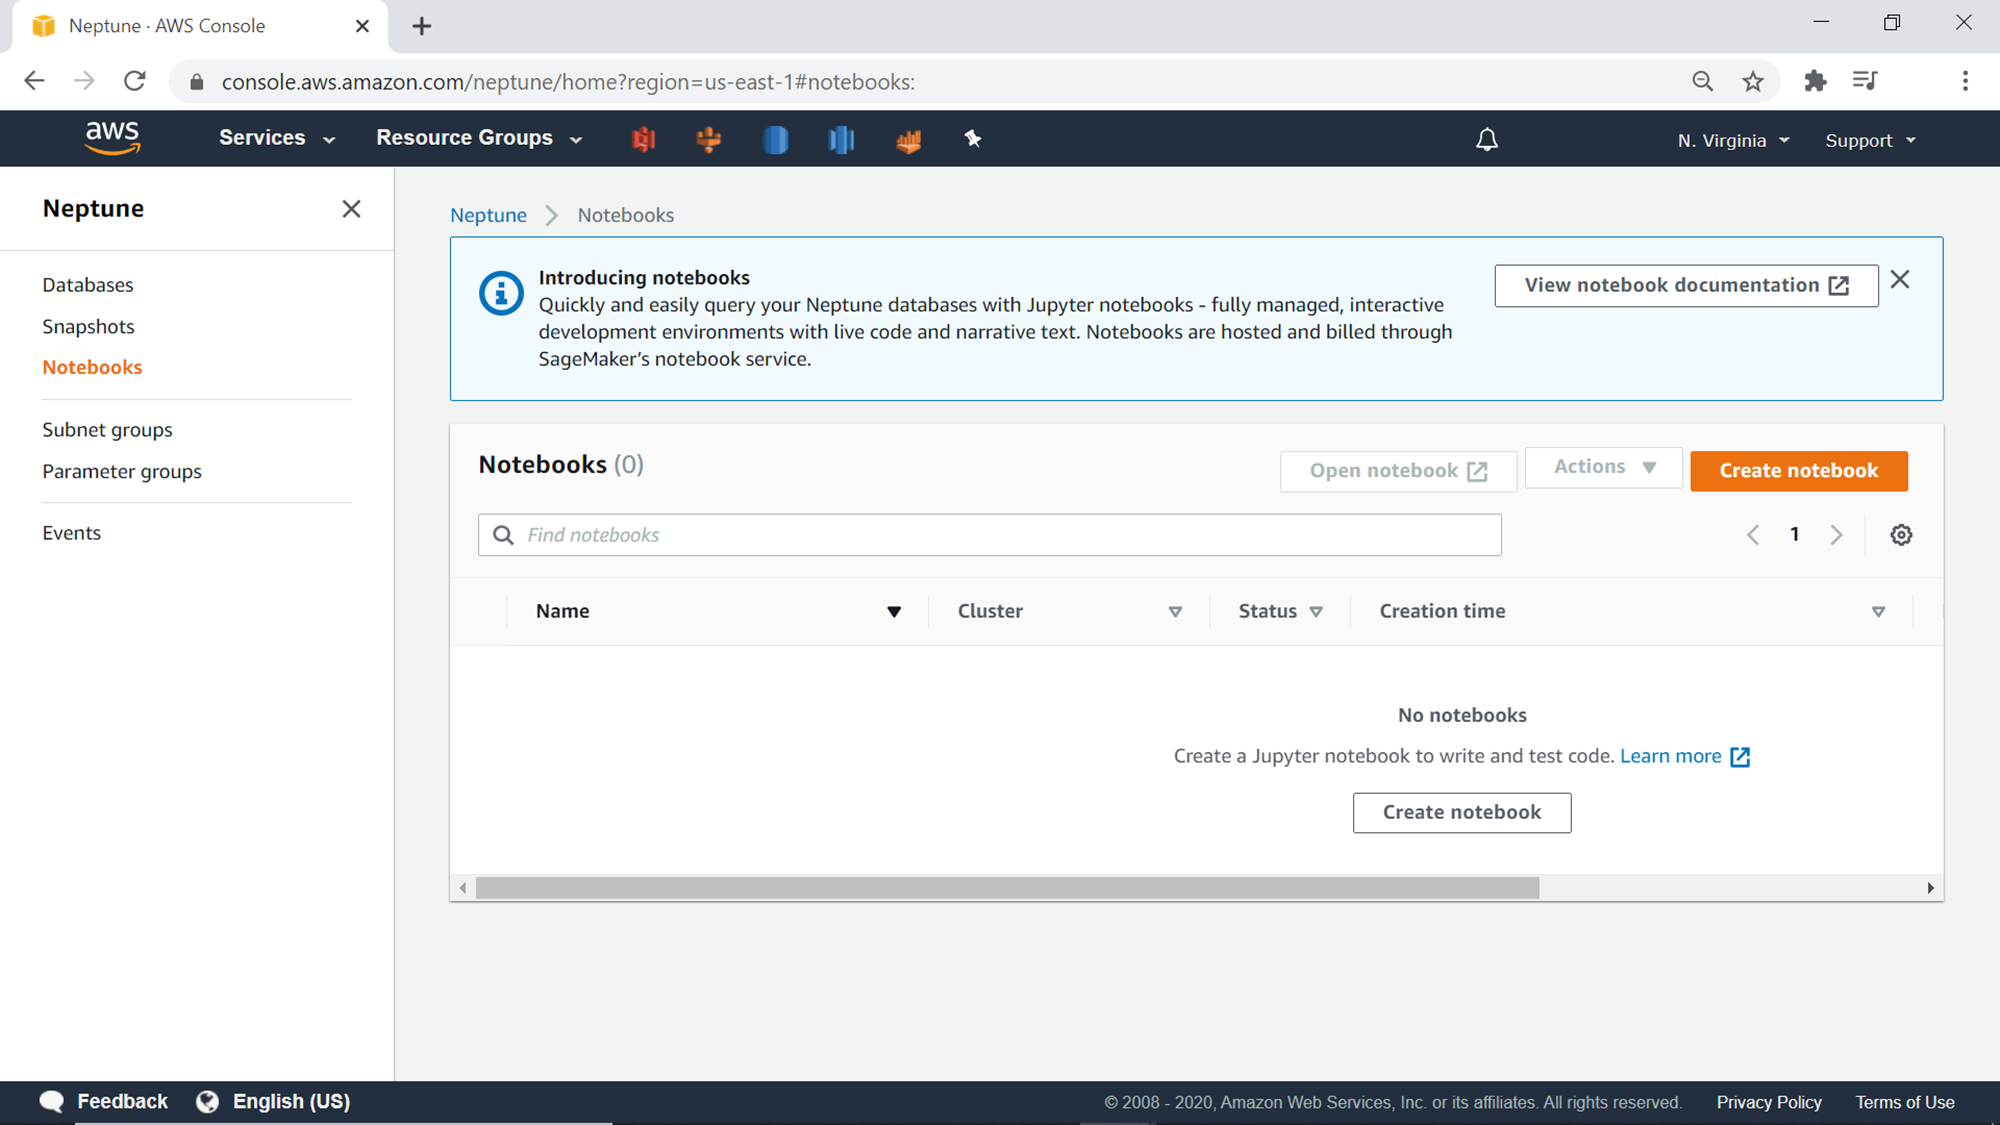
The next step is to access the newly created Amazon Neptune database. One can directly connect to the database using the endpoint and the port. Another recommended option is to access the database by creating a notebook instance. We would now create a notebook instance that would connect to the Neptune database. Click on the Notebooks link on the left pane, to open the Notebooks section as shown below.
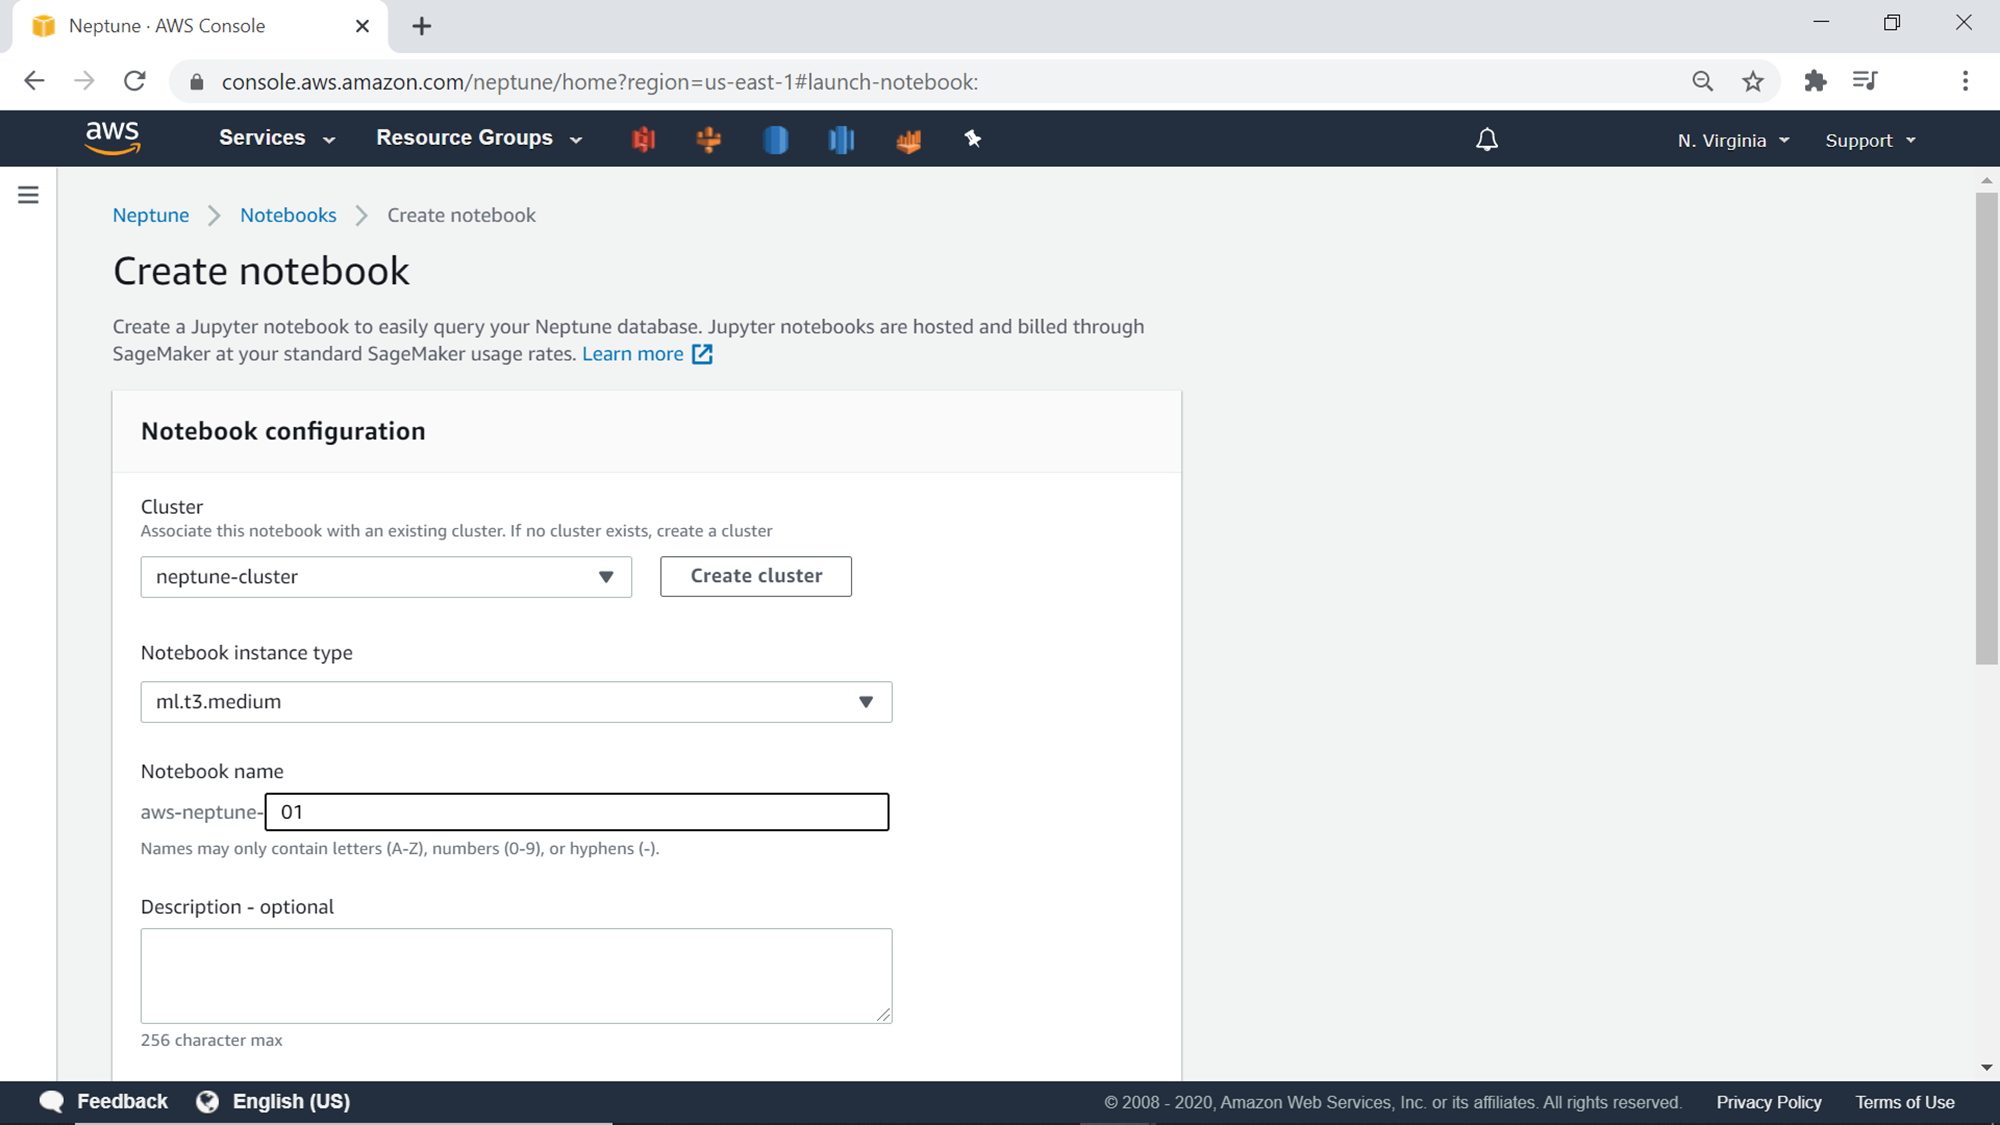
Click on the Create Notebook button to initiate the notebook instance creation wizard, which would look as shown below. One can select a pre-existing cluster or create a new cluster from here itself. As we have already created a cluster, we will just select the existing cluster here. The next step is to select the instance size of the notebook, which is ml.t3.medium by default. This instance size should be enough for this exercise as we just intend to execute a few commands from the notebook. After instance size selection, provide a relevant name and description for the notebook instance as shown below.
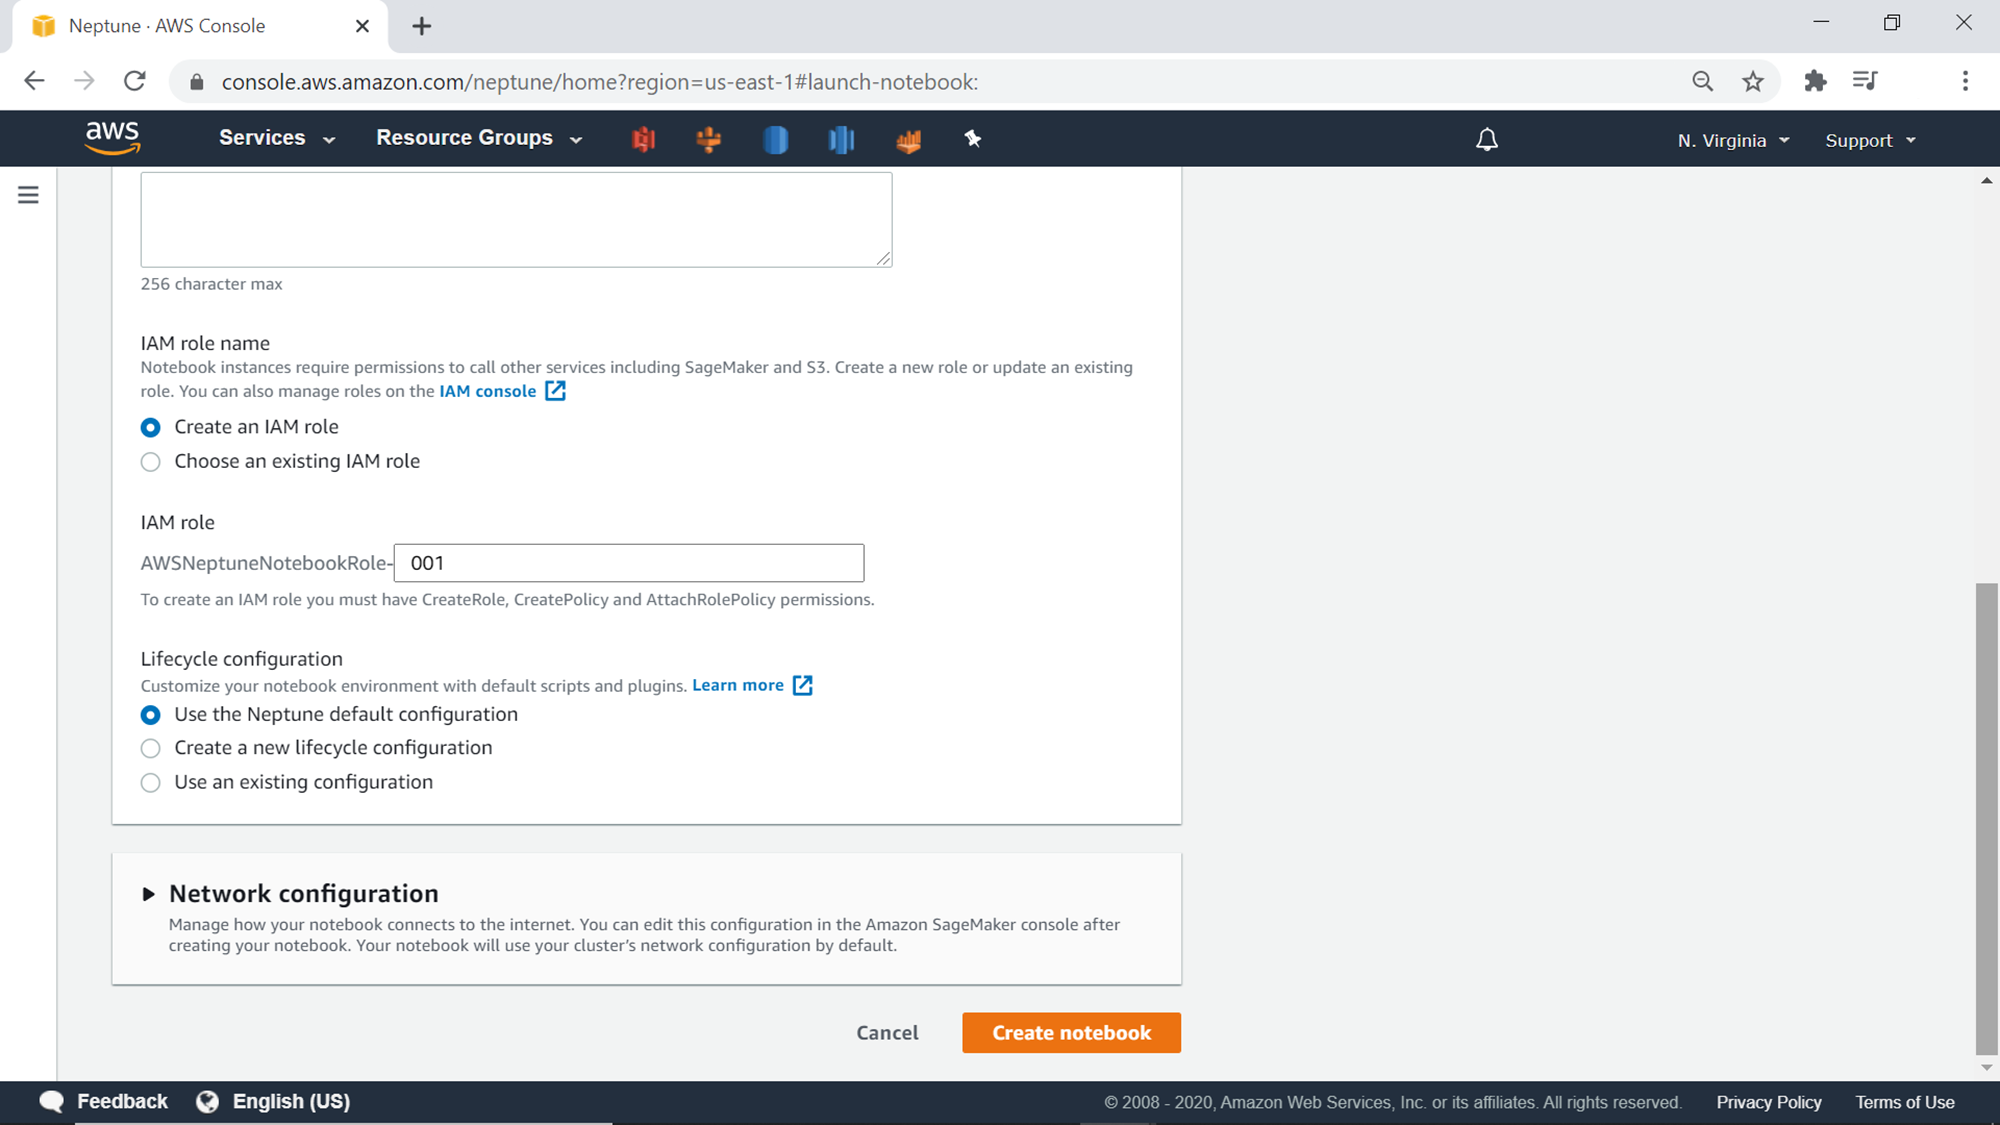
The next step is to select an IAM role for the instance, so that the instance can connect to the AWS Neptune cluster and the service and execute commands on the database. Lifecycle configuration allows to execute scripts and setting to prepare the instance. One has the option to use the default configuration or create a new one as well. For this exercise, we can continue with the default Neptune configuration. One can optionally configure the network-related settings for the instance by expanding the Network configuration section. Once all the configuration is done, click on the Create notebook button to start the Notebook instance creation process.
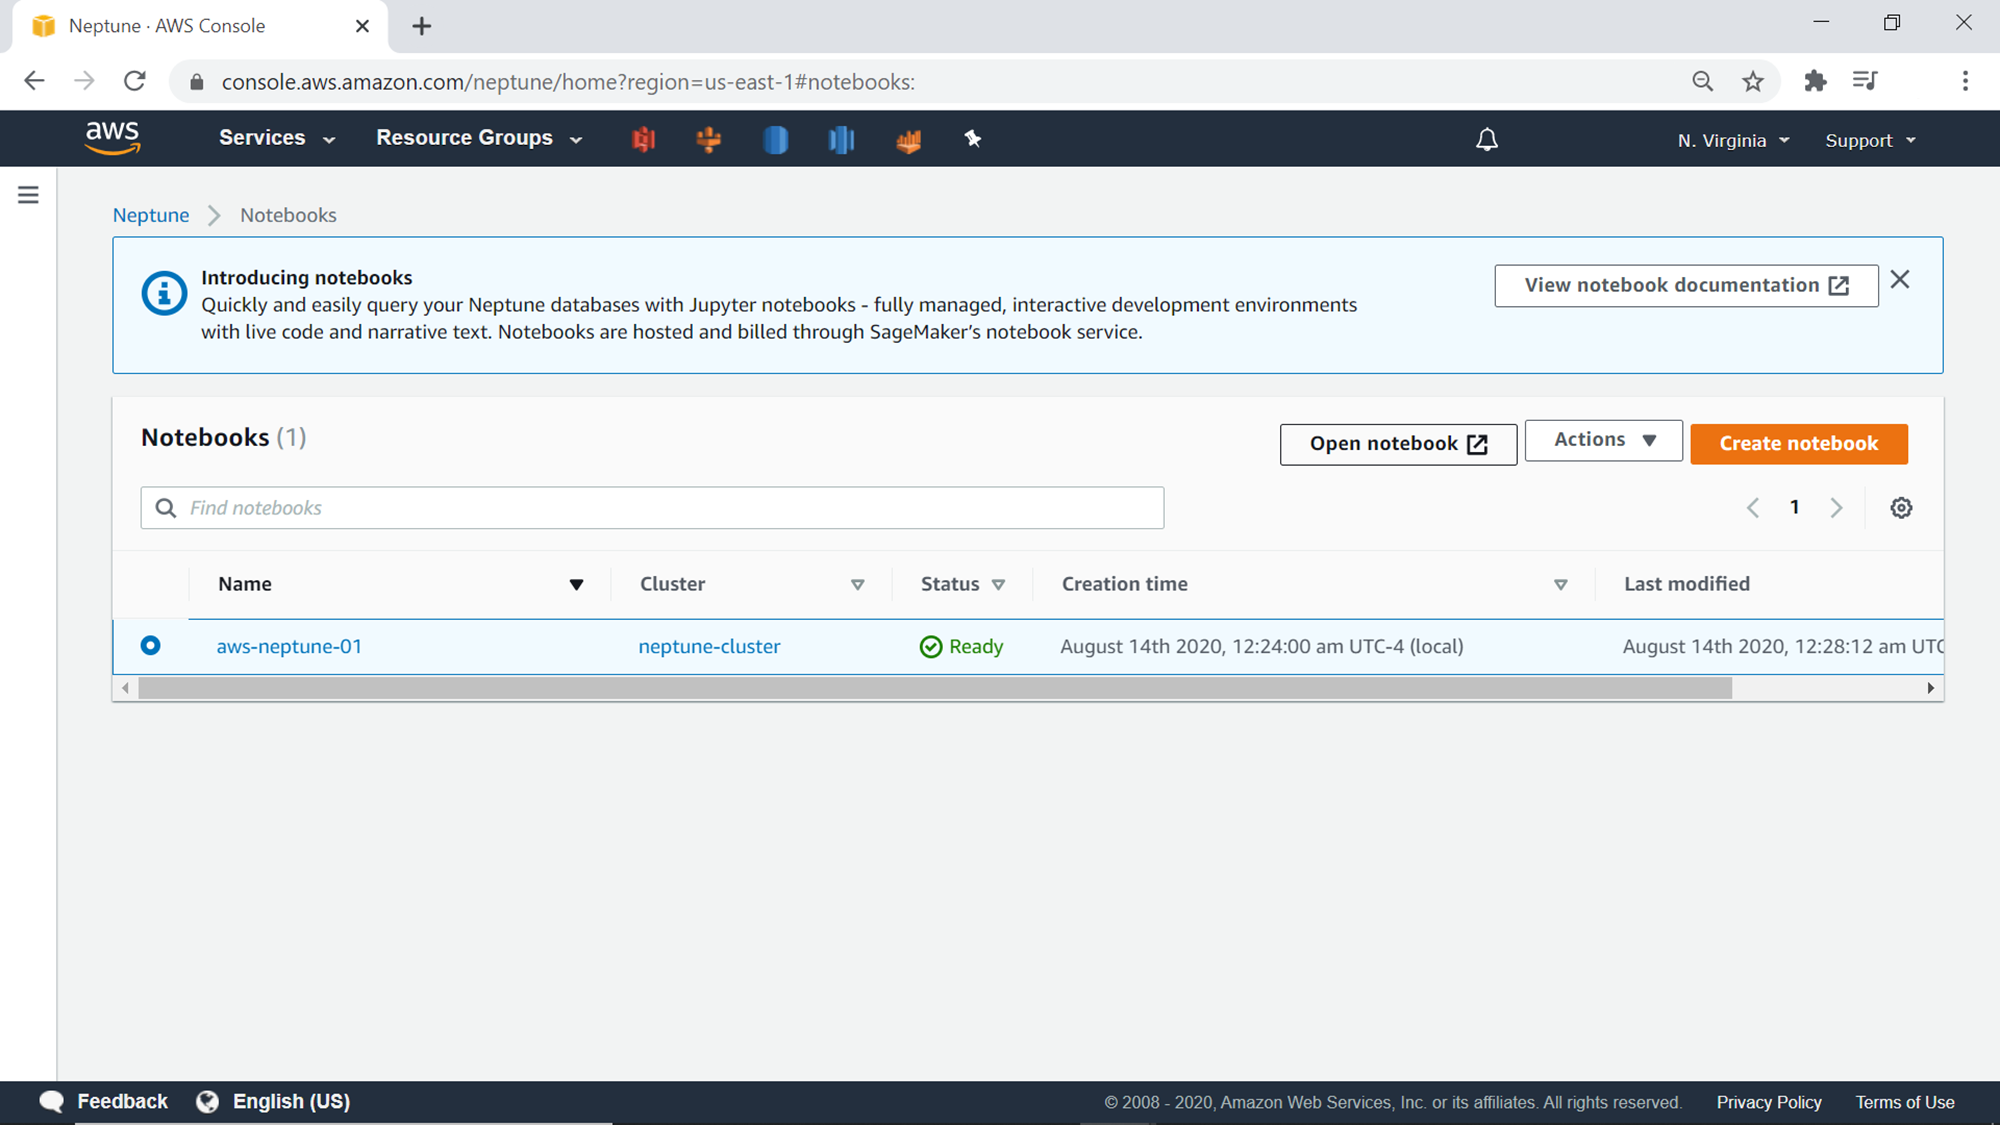
Once the notebook instance is ready, it would look as shown below in Ready status. This instance is already configured to connect with the AWS Neptune cluster that we created earlier. Select the cluster and click on the Open notebook button to open the Jupyter notebook.
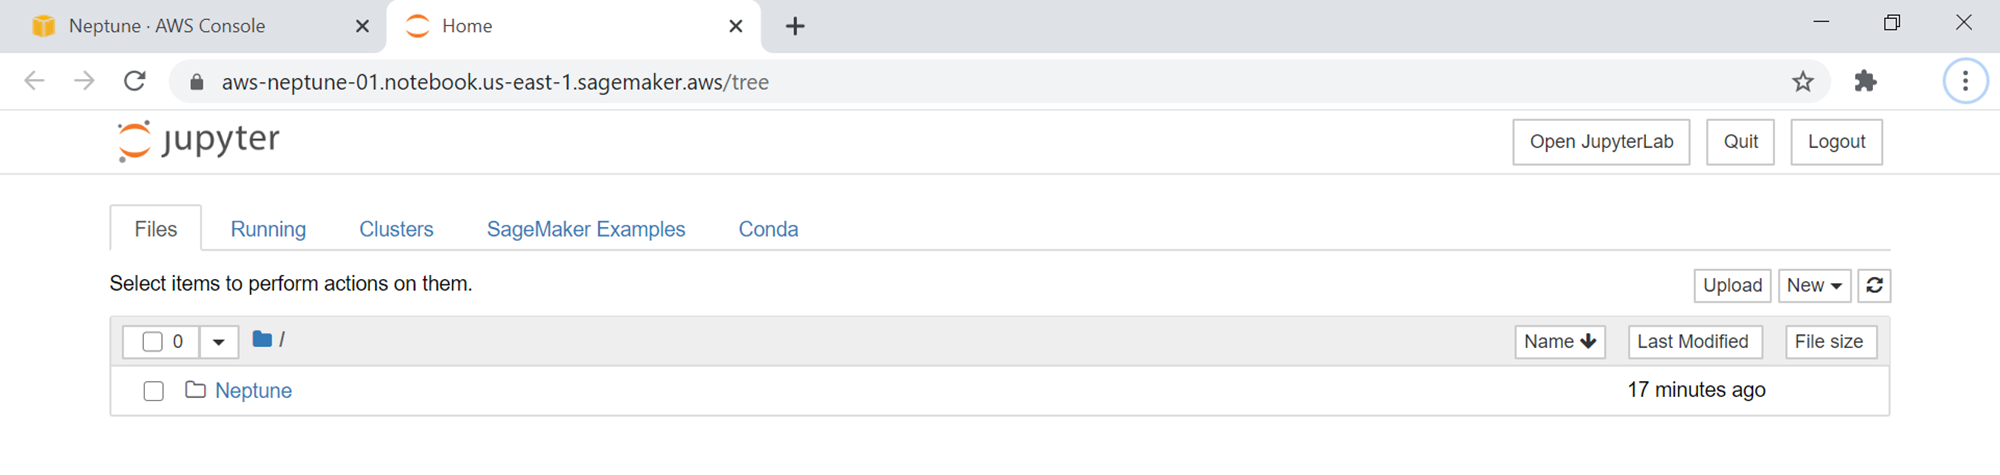
Once the Open Notebook button is clicked, the Jupyter notebook interface would show up in a new tab as shown below. It would contain a folder named Neptune, which would have subfolders and notebooks containing tutorials on executing commands on the AWS Neptune graph database.
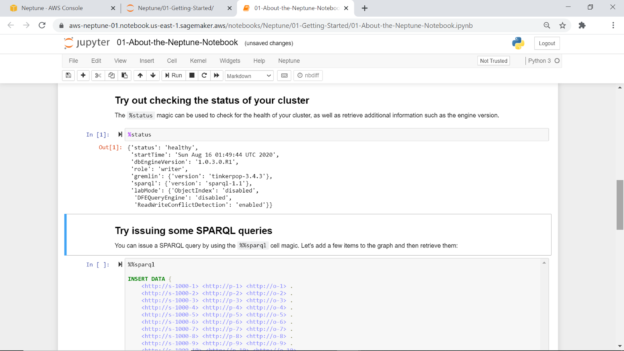
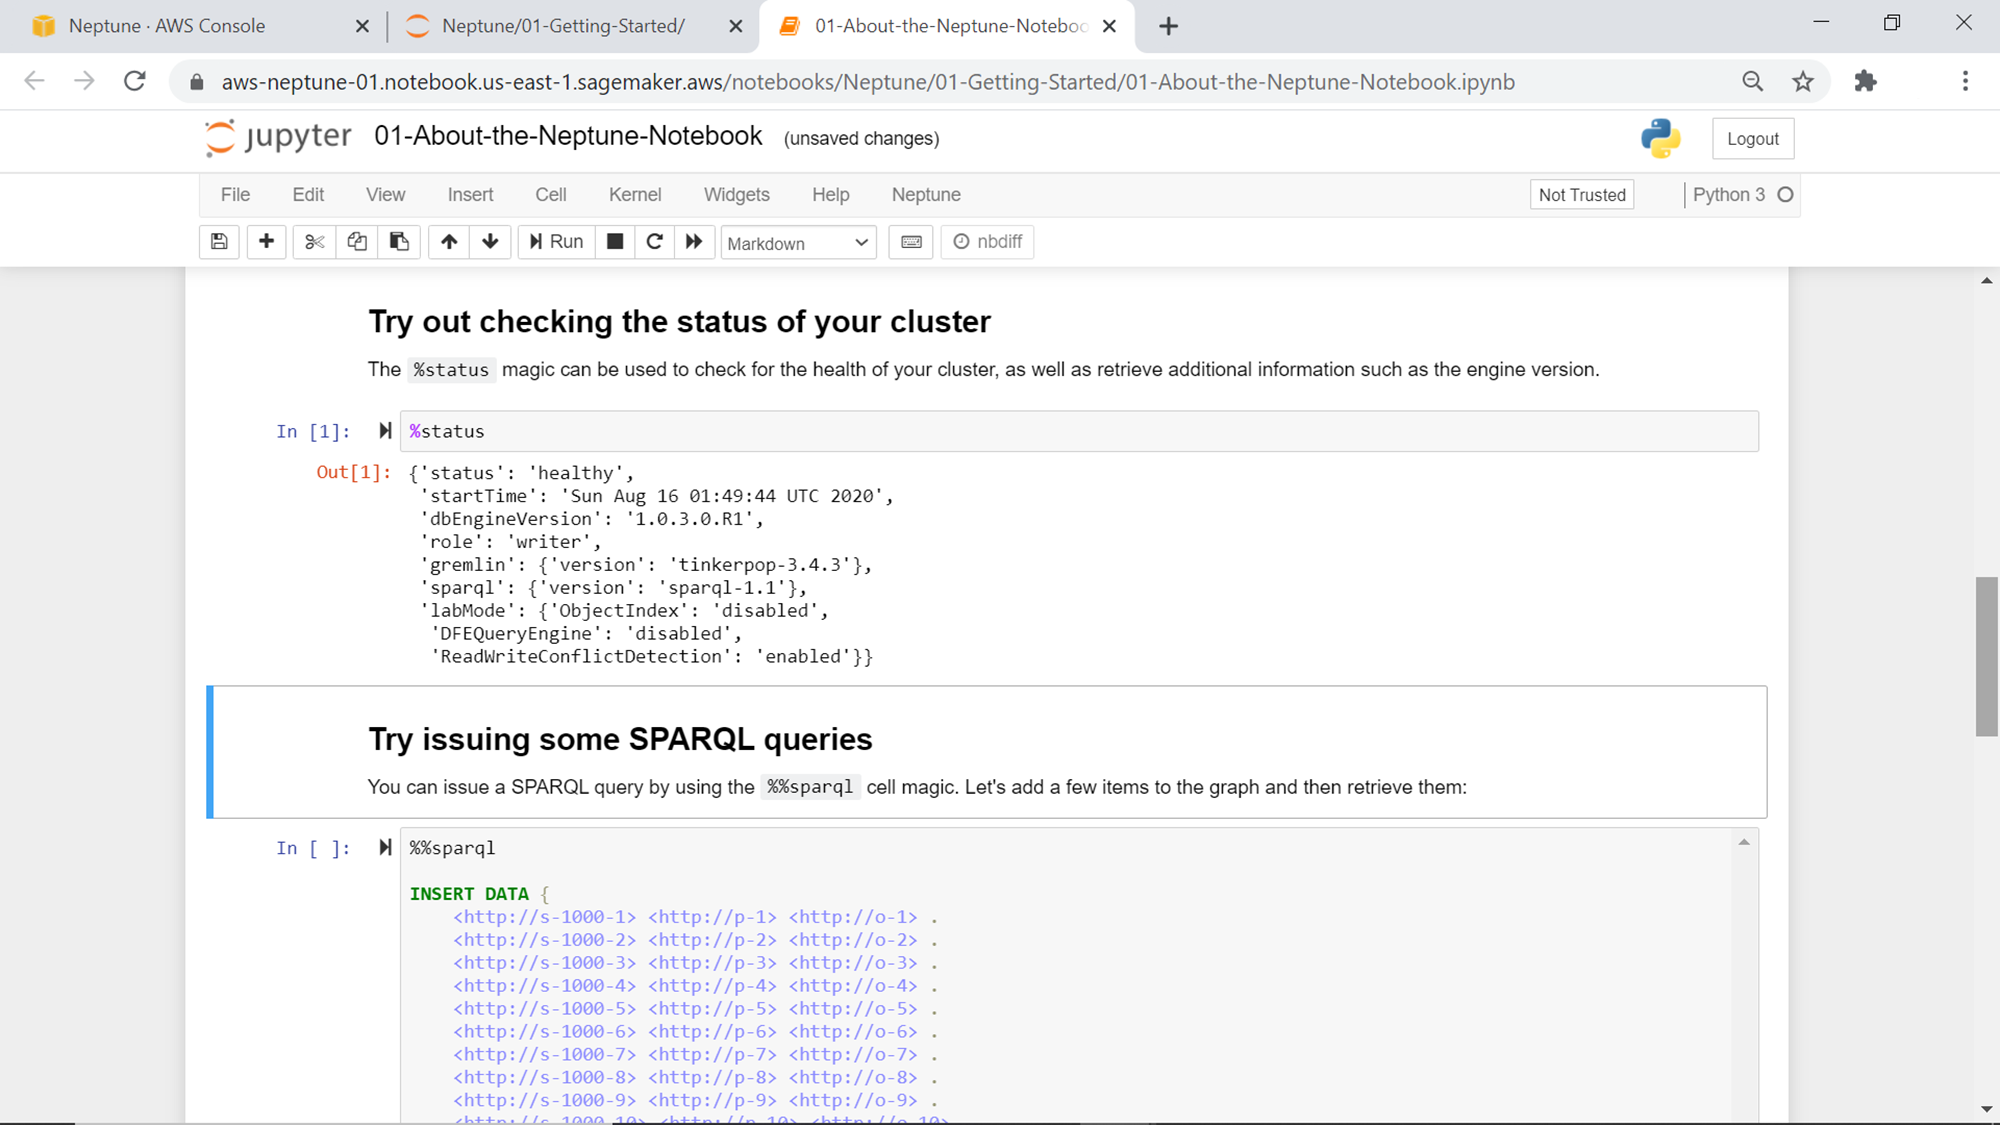
Show below is one such notebook, which contains basic commands to test the cluster and add as well as modify data in the jupyter notebook instance. Execute the %status command to check the health of the cluster. Click on the cell that has this command listed and click on the Run button from the toolbar. This will execute the command against the Amazon Neptune cluster, and the output would look as shown below.
The result shows that the cluster state is healthy. It will list the database engine version, gremlin version, sparql version, and other details as listed below. The rest of the notebook contains commands to enter data in the database and perform different data manipulation operations on the same.
Consider trying out the different notebooks to learn about how to use Gremlin as well as SPARQL to work with the AWS Neptune graph database. Once the exercise is over and if there is no further need of the database instance as well as notebook instance, consider stopping the notebook instance and then deleting it from the same page from where the notebook instance was created. After the instance is deleted, consider deleting the Amazon Neptune database cluster as well, to avoid incurring any further charges.
In this way, by creating an Amazon Neptune cluster as well as a Jupyter notebook instance, one can get quickly started working with the graph database on AWS.
Conclusion
In this article, we learned how to create an AWS Neptune graph database cluster. We created a Jupyter notebook instance connected with the database instance. We learned how to configure these instances as well as operating on the database by executing queries from the notebook, to get started with the Amazon Neptune graph database.

He has worked internationally with Fortune 500 clients in various sectors and is a passionate author.
View all posts by Rahul Mehta
- Finding Duplicates in SQL - February 7, 2024
- MySQL substring uses with examples - October 14, 2023
- MySQL group_concat() function overview - March 28, 2023