
The easiest way to import the data into the SQL database is using the Import Data wizard from SQL Server Management Studio. Following the steps through the wizard, user can choose the source file, and the destination table to import the data. However, importing the data this way narrows the process and won’t allow user to execute more complex tasks with different kind of the data, and multiple files. The SSIS packages offer solution for this kind of problem. The SSIS package represents tool for the ETL (Extract-Transform-Load) processing, and it can be used not just to import the data into the database, but to transform, filter, group the data and many other tasks. This article will give explanation how to import the simple Excel worksheet into the SQL database
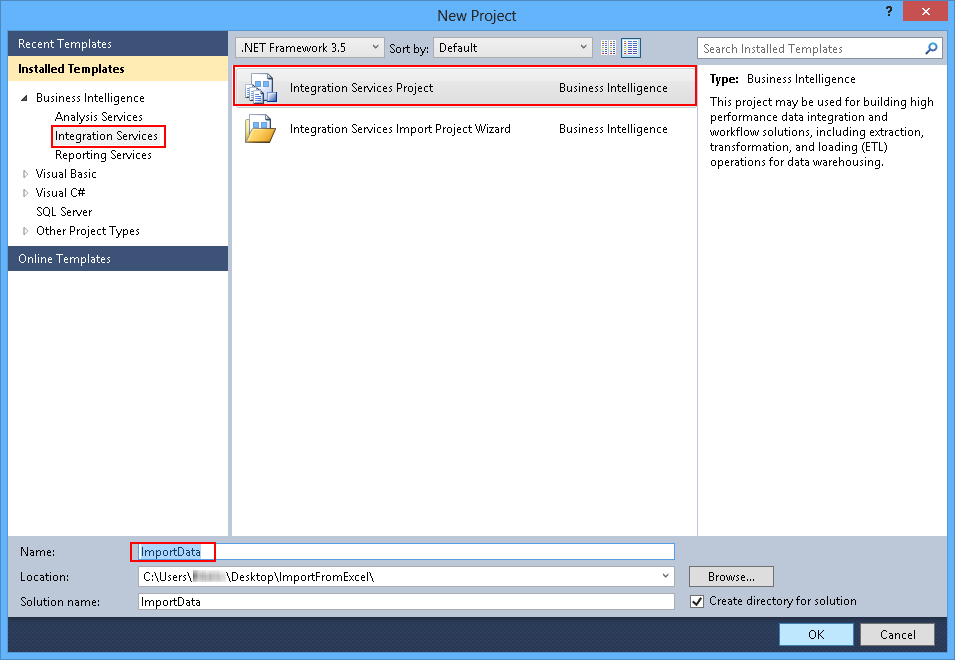
Before creating an SSIS package, the user needs to create new project in BIDS by choosing the Integration Services from the Business Intelligence list from the left, navigate to the Integration Services project , and define name for the project like shown in the image below
Importing from an MS Excel worksheet
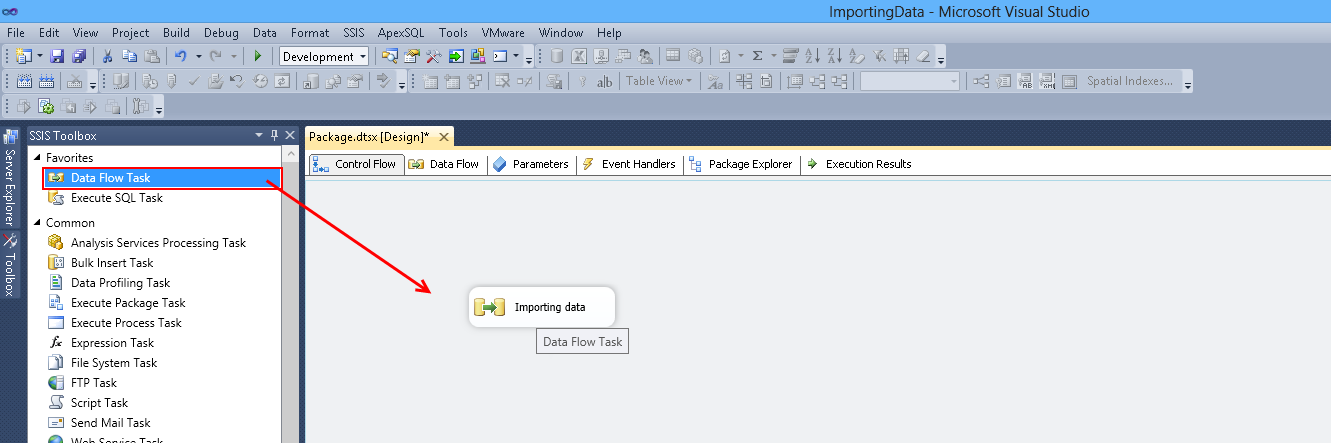
To be able to import the data from the Excel worksheet into the SQL database, the user first needs to define the Data Flow Task, dragging from the SSIS Toolbox into the Control Flow area like shown in the image below
Double-clicking the Data Flow Task will open the Data Flow tab. Before selecting and configuring the source and the destination, connections for both of them must be created. Since the Excel worksheet is the source, the Excel Connection will be created, and for the destination, the OLE DB connection. Both of these connections can be created by right click on the Connection Manager in the Solution Explorer, and choosing the New Connection Manager from the drop down list, like shown in the image below

From the list of the connections in the New Connection Manager dialog, the Excel connection will be used to connect the external Excel worksheet with the project. Clicking the Browse button, Excel file can be connected with the task like shown in the image below

Note: The external Excel worksheet must have the “xls” extension.
Connection with the destination, in this case SQL Server database, can be established through the OLE DB connection, choosing it from the list in the New Connection Manager window.
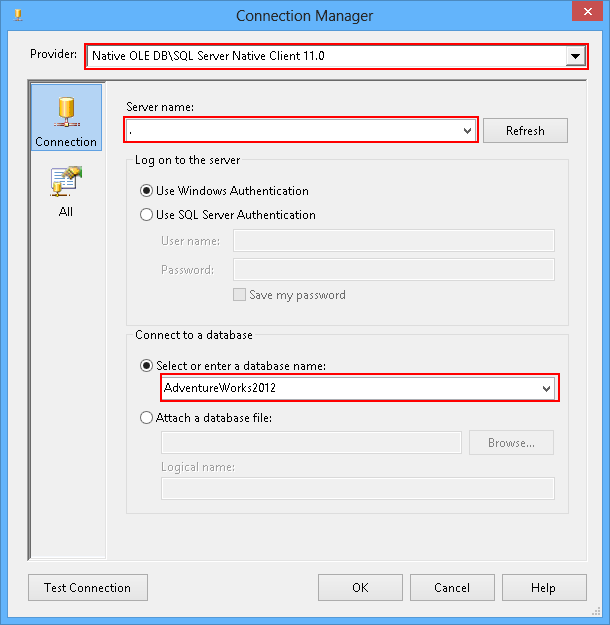
In the Connection Manager window, Native OLE DB\SQL Server Native Client 11.0 must be selected from the Provider drop down list. In the Server Name filed, if the server is local, it can be defined by entering “.” (without quotes). Otherwise, proper server name must be typed
If the server name is correct, the user will be able to choose one of the databases from the server, where the data from the Excel worksheet will be imported, like shown in the image below
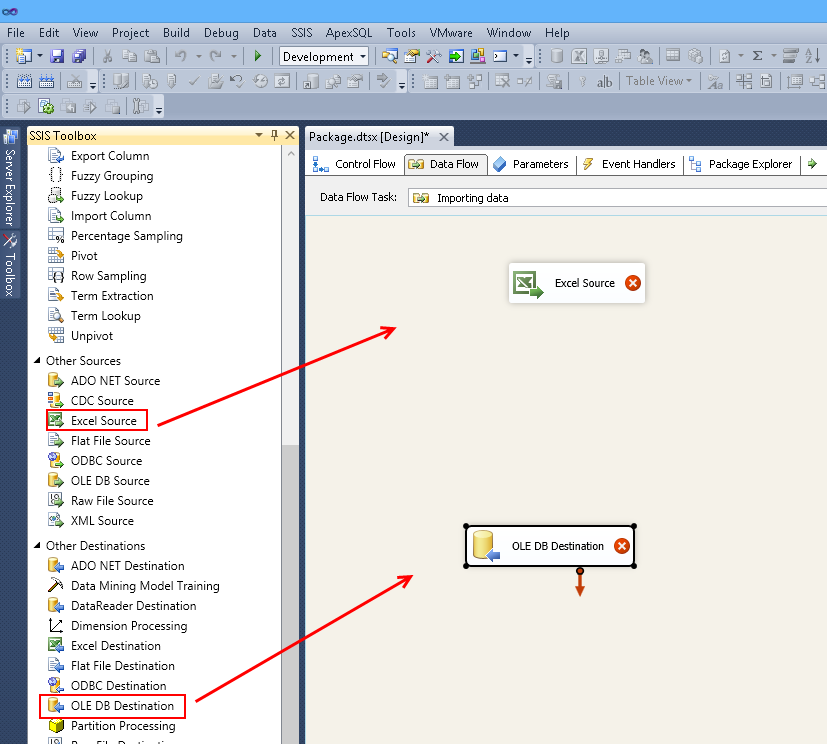
When the connections with the source and the destination is created, the Data Flow Tasks can be defined and configured in the Data Flow window. From the SSIS Toolbox, the Excel Source, and the OLE DB Destination tasks must be imported into the Data flow window, as shown in the image below
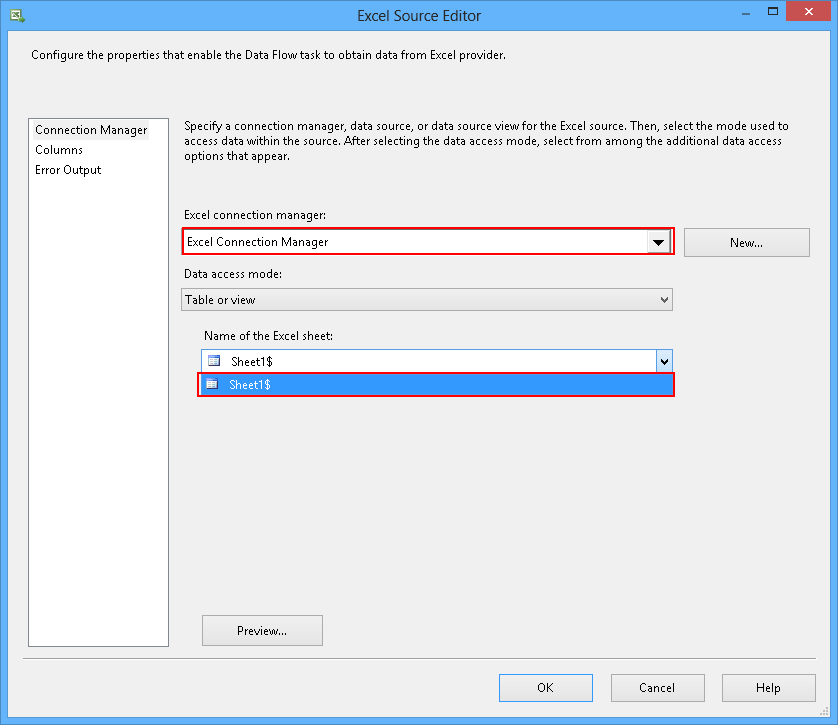
Double click on the Excel Source task will open the Excel Source Editor. Selecting the Excel connection from the Connection manager list allows user to choose the Name of the Excel sheet from the list, like shown in the image below
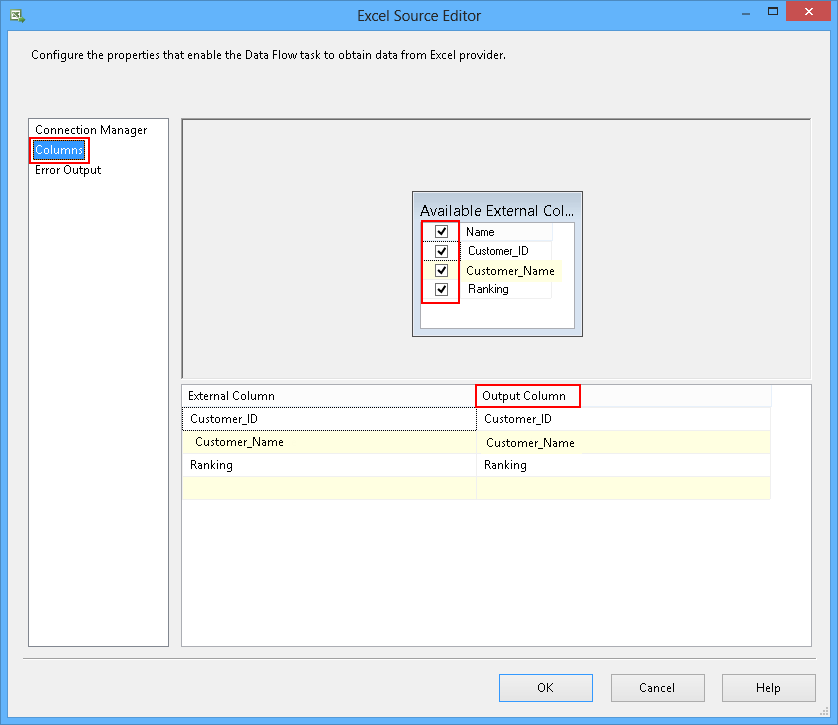
In the Column tab, the user can choose what columns from the excel file will be imported by checking the boxes for desired columns, and rename output columns, as shown in the image below
To configure the OLE DB Destination it must be connected to the Excel Source first. Double click on the OLE DB Destination will open the editor shown below
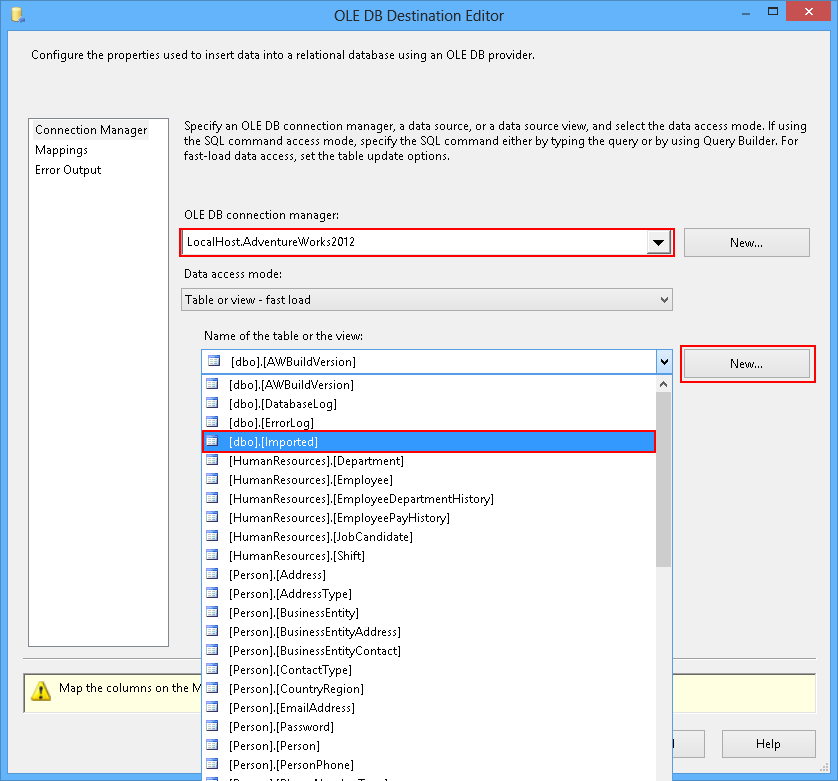
In the OLE DB connection manager list, previously defined connection must be selected, in this case, connection is established with the AdventureWorks2012 database on the local server. From the table list, desired destination table can be chose, or new table can be created clicking the New button and entering the SQL syntax
After the destination database table is selected, the columns must be mapped before importing the data. That could be done from the Mappings tab like shown in the image below
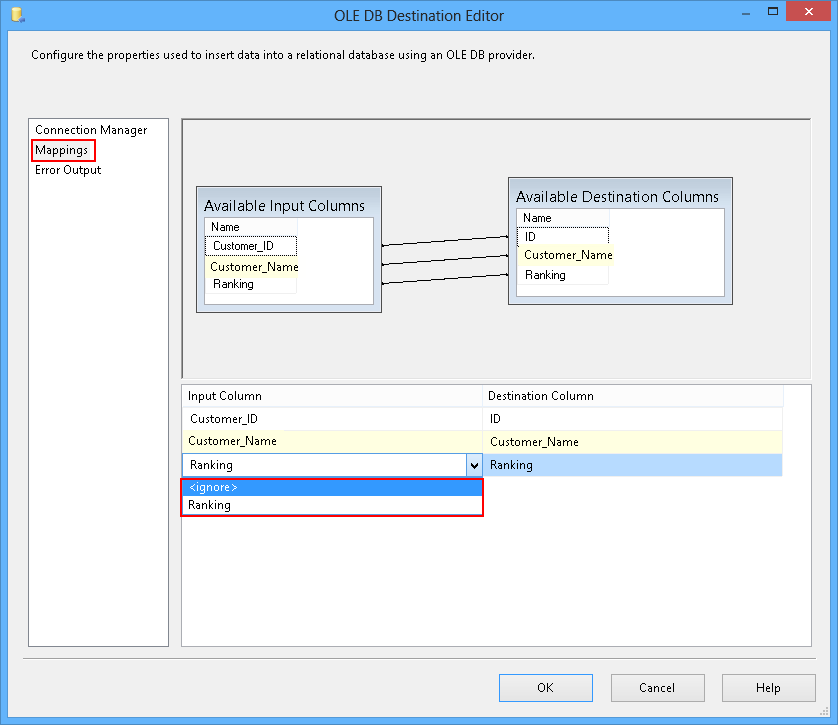
Not all the columns from the source need to be imported. Mapping is a way of filtering the input data, and pointing to the specific columns in the database table, where the column from the source will be imported. Choosing the <ignore> from the input column list will exclude it from importing
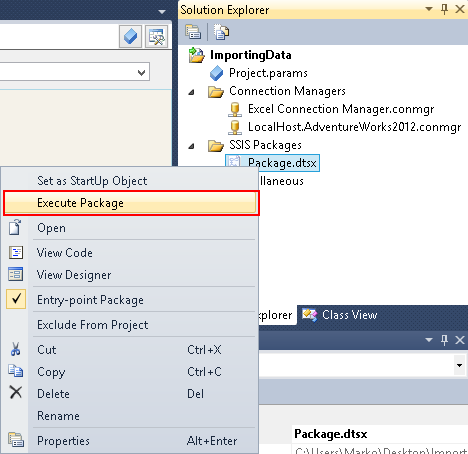
After the columns are mapped, the SSIS package can be executed by right click on it from the Solution Explorer, and choosing the Execute Package option from the drop down list like shown in the image below
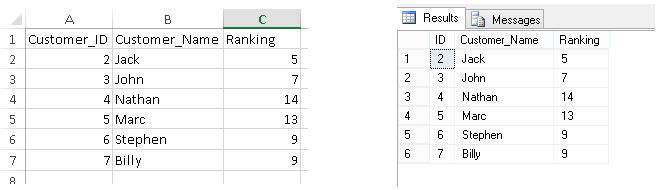
After executing the package all the data from the Excel worksheet will be imported in selected database table. The image on the right side represents imported data into the SQL database, from the Excel worksheet to the left
Using this method, data from the same excel sheet can be imported in the selected table until there is no modifications in excel with data types. If the data is inserted or overwritten with new ones, importing process will be successfully accomplished, and the data will be added to the table in SQL database
Useful resources

He uses his spare time to play guitar, ride a bike and hang out with his friends. During winter, he likes skiing the most, but all other snow activities, too.
He is also author of various SQL Shack articles about SSIS packages and knowledgebase articles about ApexSQL Doc.
View all posts by Marko Radakovic