In this article, we will use Python scripts for data formatting in Microsoft Excel sheet with various examples.
Introduction
Python is an object-oriented, high-level programming language popular among the data scientists. SQL Server also supports executing Python code from Azure data studio and SQL Server Management Studio. We have many useful publications on SQLShack for the Python, along with its use-cases, especially for DBAs and developers.
Before you go further, I would recommend you to go through the following articles for the basic understanding of it:
- Python in SQL Server: The Basics
- The importance of Python in SQL Server Administration
- Why would a SQL Server DBA be interested in Python?
- Using Python SQL scripts for Importing Data from Compressed files
Usually, DBAs share export required data in an Excel sheet, do the formatting, and share it with the concerned authorities. It is a regular practice. Python integrates with Microsoft Excel very well.
This article covers the following topics:
- Create a sample excel file using the Python
- Import data from an excel file using Python
- Format data in excel sheet using Python
- Prepare excel charts using Python
Pre-requisites
- In this article, we use SQL Notebooks of Azure Data Studio. Refer to SQL Notebooks introduction and overview for detailed information on it
-
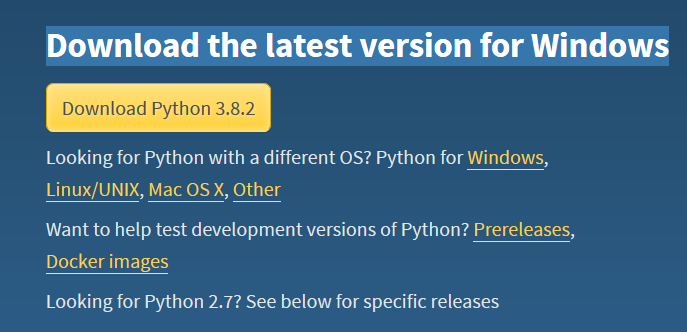
Download the Python latest version 3.8.2 for Windows from this URL

- Configure SQL Notebook for Python kernel. Refer to the article Use Python SQL scripts in SQL Notebooks of Azure Data Studio for it
-
Install XlsxWriter and xlrd Python module using pip utility
XlsxWriter: We use the XlsxWriter Python module to write the Microsoft Excel files in XLSX format. It provides various formatting options, charts, textboxes, Rich multi-format strings, Macros for excel files
For the installation of XlsxWrite, use the following command in Python3 kernel of the SQL Notebook:
1pip install XlsxWriterIt downloads the package and installs it as shown in the following screenshot:
Xlrd: It is also a Python library and useful to read data from the excel files. It supports both XLS and XLSX extension for reading data and formatting information from Excel files. It gives many formatting features as well for excel files
Use the following command for installing the xlrd Python module:
1pip install xlrd
Work with excel files using Python scripts and libraries
In the previous step, we installed the Python libraries XlsxWriter and xlrd using SQL Notebooks of Azure Data Studio.
Create a basic excel file
Let’s create a sample excel file without any formatting. Run the following code in Python:
12345import xlsxwriterworkbook = xlsxwriter.Workbook('c:\\temp\\Welocme.xlsx')worksheet = workbook.add_worksheet()worksheet.write('A1', 'Welcome to Python')workbook.close()- Import Xlsxwrite module
- Creates a workbook Welcome.xlsx in the C:\temp folder
- Add a new worksheet in this workbook
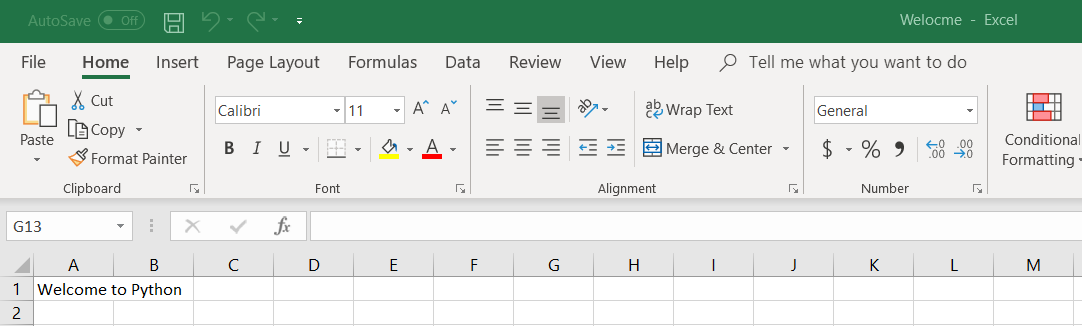
- Writes the text ‘Welcome to Python’ in the A1 column
- Closes the workbook
You can browse the directory and open the Welcome.xlsx excel workbook. It shows the data entered by the Python code:
Split the words into multiple columns
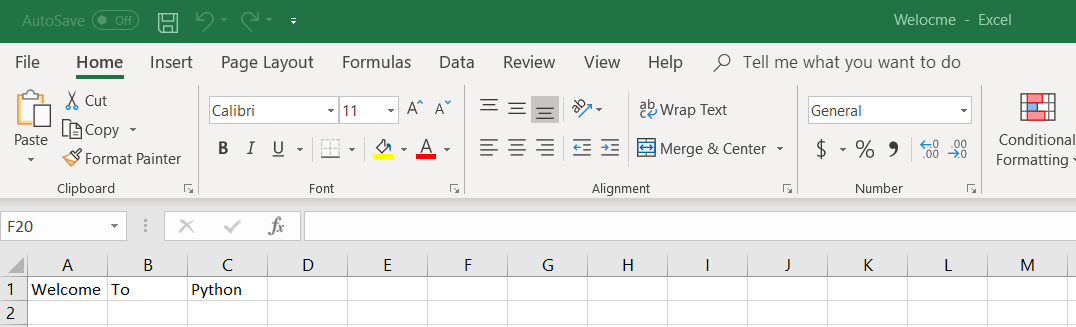
Let’s modify the above code and split the words into different columns A1, B1, and C1:
1234567import xlsxwriterworkbook = xlsxwriter.Workbook('c:\\temp\\Welocme.xlsx')worksheet = workbook.add_worksheet()worksheet.write('A1', 'Welcome')worksheet.write('B1', 'To')worksheet.write('C1', 'Python')workbook.close()Once we execute the above code, it overwrites the existing Welcome.xlsx file. Open it, and you see words in different columns A1, B1, and C1:
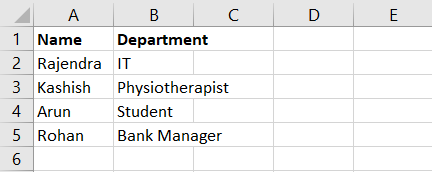
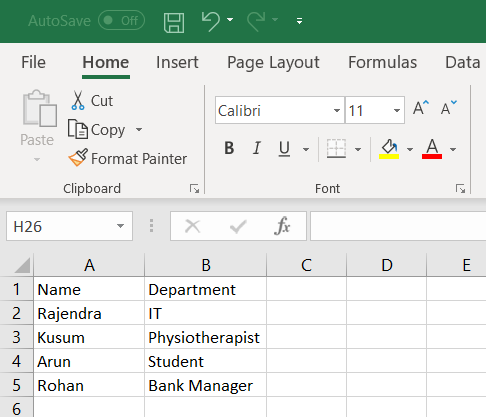
Data in multiple rows and columns along with column headers
Suppose we want to create an excel sheet with the following data using Python scripts. It includes multiple columns and rows:
We use the following Python scripts for preparing this kind of excel sheet:
-
We defined column names using worksheet.write()
12worksheet.write('A1', 'Name')worksheet.write('B1', 'Department') - We start index for rows and columns. For the first row and first column, it uses a zero indexing counter. We specified column names in the previous step, so my counter starts from row=1 and col=0
-
We write the required data in an array format in the data variable. It contains the data that we wish to display in the excel:
123456data = (['Rajendra', 'IT'],['Kashish','Physiotherapist'],['Arun', 'Student'],['Rohan','Bank Manager'],) -
The code contains a FOR interaction loop to go through each row and column. It writes in the respective row and column for the worksheet:
1234for name, score in (data):worksheet.write(row, col, name)worksheet.write(row, col + 1, score)row += 1
The complete Python scripts for preparing this excel is as follows:
123456789101112131415161718192021import xlsxwriterworkbook = xlsxwriter.Workbook('c:\\temp\\Welocme.xlsx')worksheet = workbook.add_worksheet()worksheet.write('A1', 'Name')worksheet.write('B1', 'Department')row = 1col = 0data = (['Rajendra', 'IT'],['Kashish','Physiotherapist'],['Arun', 'Student'],['Rohan','Bank Manager'],)for name, score in (data):worksheet.write(row, col, name)worksheet.write(row, col + 1, score)row += 1workbook.close()Bold characters using Python Scripts
In many cases, we make column names in bold characters so that users can differentiate column with the actual data. In Python, we enable the bold property, as shown below:
123456789101112131415161718192021222324252627282930bold = workbook.add_format({'bold': True})</p><p>Later, we use this variable in the worksheet.write() function. It changes the respective column font in the bold color.</p><p>Execute the following code to create an excel sheet similar to the previous one except columns are in bold font:</p><pre lang="python">import xlsxwriterworkbook = xlsxwriter.Workbook('c:\\temp\\Welocme1.xlsx')worksheet = workbook.add_worksheet()bold = workbook.add_format({'bold': True})worksheet.write('A1', 'Name', bold)worksheet.write('B1', 'Department', bold)row = 1col = 0data = (['Rajendra', 'IT'],['Kashish','Physiotherapist'],['Arun', 'Student'],['Rohan','Bank Manager'],)for name, score in (data):worksheet.write(row, col, name)worksheet.write(row, col + 1, score)row += 1workbook.close()In the excel, you can view columns Name and Department in bold letters:
Modify a column width of Microsoft Excel columns
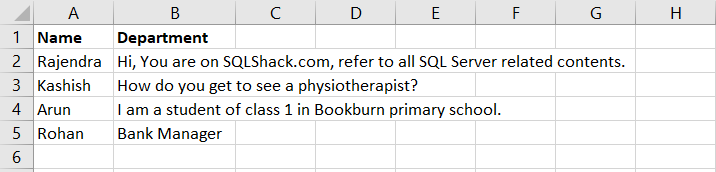
Look at the following excel sheet. In this, text written in column B is span across multiple columns. Usually, in excel, we change the column width to display it appropriately. It does not conflict with text written in other columns:
We can define the row and column width for excel cells in Python as well. For this we use worksheet.set_column function along with column width. We specify column in format of [column:column].
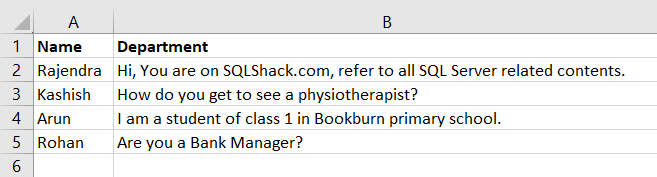
1234567891011121314151617181920212223242526272829worksheet.set_column('B:B', 60)</p><p>In the code above, we added the column width 60 so that it does not conflict with text in column C:</p><pre lang="python">import xlsxwriterworkbook = xlsxwriter.Workbook('c:\\temp\\Welocme1.xlsx')worksheet = workbook.add_worksheet()bold = workbook.add_format({'bold': True})worksheet.write('A1', 'Name', bold)worksheet.write('B1', 'Department', bold)row = 1col = 0data = (['Rajendra', 'Hi, You are on SQLShack.com, refer to all SQL Server related contents.'],['Kashish','How do you get to see a physiotherapist?'],['Arun', 'I am a student of class 1 in Bookburn primary school.'],['Rohan','Are you a Bank Manager?'],)worksheet.set_column('B:B', 60)for name, score in (data):worksheet.write(row, col, name)worksheet.write(row, col + 1, score)row += 1workbook.close()Look at the difference in the output. It changed the column width to the appropriate size.
Change font color and size
Now, let’s look at changing font color and size for the column headers.
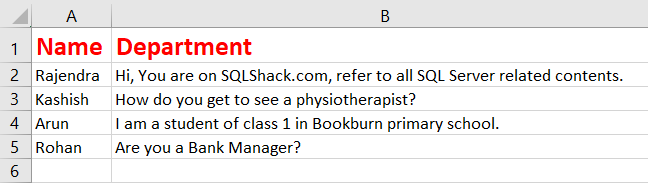
We define font color using font_color and font size using set_font_size variables in Python scripts. For this demonstration, let’s add red color for the column header with font size 16:
123456789101112131415161718192021222324252627import xlsxwriterworkbook = xlsxwriter.Workbook('c:\\temp\\Welocme1.xlsx')worksheet = workbook.add_worksheet()cell_format = workbook.add_format({'bold': True, 'font_color': 'red'})cell_format.set_font_size(16)worksheet.write('A1', 'Name', cell_format)worksheet.write('B1', 'Department', cell_format)row = 1col = 0data = (['Rajendra', 'Hi, You are on SQLShack.com, refer to all SQL Server related contents.'],['Kashish','How do you get to see a physiotherapist?'],['Arun', 'I am a student of class 1 in Bookburn primary school.'],['Rohan','Are you a Bank Manager?'],)worksheet.set_column('B:B', 60)worksheet.set_column('B:B', 60)for name, score in (data):worksheet.write(row, col, name)worksheet.write(row, col + 1, score)row += 1workbook.close()Executing the code gives the following output:
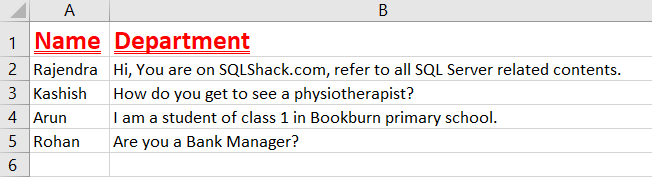
Add an underline for the column header
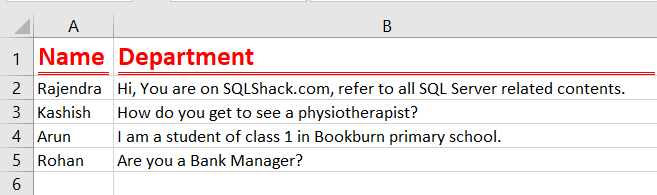
We can add a column header using the cell format function set_underline(). Add the following line in the code, and it generates column headers with an underline:
1cell_format.set_underline()Let’s execute the following code for the column header underline:
123456789101112131415161718192021222324252627import xlsxwriterworkbook = xlsxwriter.Workbook('c:\\temp\\Welocme1.xlsx')worksheet = workbook.add_worksheet()cell_format = workbook.add_format({'bold': True, 'font_color': 'red'})cell_format.set_font_size(16)cell_format.set_underline()worksheet.write('A1', 'Name', cell_format)worksheet.write('B1', 'Department', cell_format)row = 1col = 0data = (['Rajendra', 'Hi, You are on SQLShack.com, refer to all SQL Server related contents.'],['Kashish','How do you get to see a physiotherapist?'],['Arun', 'I am a student of class 1 in Bookburn primary school.'],['Rohan','Are you a Bank Manager?'],)worksheet.set_column('B:B', 60)worksheet.set_column('B:B', 60)for name, score in (data):worksheet.write(row, col, name)worksheet.write(row, col + 1, score)row += 1workbook.close()It gives the following output:
We have few underline options available as below:
- 1 = Default format
- 2 = Double underline
- 33 = Single accounting underline
- 34 = Double accounting underline
We can format data for double accounting underline using the below code:
1cell_format.set_underline(34)
If we change the format to double underline, you get the following output:
1cell_format.set_underline(2)
Text Alignments
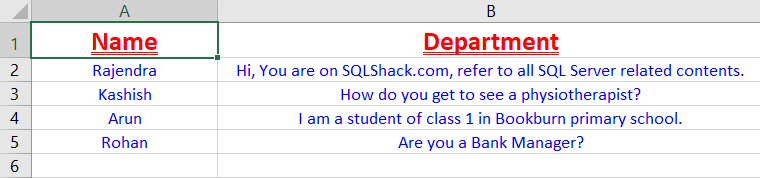
In a Microsoft Excel worksheet, we can arrange a text in the left, right, center in respective columns. In the following screenshot, we applied formatting options:
- The header should be center-aligned
- Other rows of data color should be in blue and center-aligned
In this case, we have two formats – one for the column header and another for the rest of the columns. In the following Python scripts, we defined cell_format and cell_format1:
In the Cell_format, we add another line for font alignment.
1cell_format.set_align('center')In another format, we defined font color using property font_color and set the alignment to center.
123cell_format1 = workbook.add_format({'font_color': 'blue'})cell_format1.set_align('center')We have two kinds of text format now. We need to apply them to appropriate columns only. For example, column headers look the same as in the previous example with a difference that it is aligned center. We use cell_format for the column headers:
1234cell_format = workbook.add_format({'bold': True, 'font_color': 'red'})cell_format.set_font_size(16)cell_format.set_underline(2)cell_format.set_align('center')For the rest of the data, we require center alignment and font in blue color. We define another cell format for this:
123cell_format1 = workbook.add_format({'font_color': 'blue'})cell_format1.set_align('center')Later, we apply this new cell format for data from B2 to B5 and A1 to A5 using the worksheet.set_column function:
12worksheet.set_column('B2:B5',60,cell_format1)worksheet.set_column('A1:A5', 20,cell_format1)We can view the complete code below and execute it to get the required results:
123456789101112131415161718192021222324252627282930313233import xlsxwriterworkbook = xlsxwriter.Workbook('c:\\temp\\Welocme1.xlsx')worksheet = workbook.add_worksheet()cell_format = workbook.add_format({'bold': True, 'font_color': 'red'})cell_format.set_font_size(16)cell_format.set_underline(2)cell_format.set_align('center')cell_format1 = workbook.add_format({'font_color': 'blue'})cell_format1.set_align('center')worksheet.write('A1', 'Name', cell_format)worksheet.write('B1', 'Department', cell_format)row = 1col = 0data = (['Rajendra', 'Hi, You are on SQLShack.com, refer to all SQL Server related contents.'],['Kashish','How do you get to see a physiotherapist?'],['Arun', 'I am a student of class 1 in Bookburn primary school.'],['Rohan','Are you a Bank Manager?'],)worksheet.set_column('B1:B1', 60)worksheet.set_column('B2:B5',60,cell_format1)worksheet.set_column('A1:A5', 20,cell_format1)for name, score in (data):worksheet.write(row, col, name)worksheet.write(row, col + 1, score)row += 1workbook.close()Conclusion
In this article, we explored Python scripts for data formatting in Microsoft Excel. Python is a powerful language, and we can do much work with a few lines of code. SQL Server 2017 onwards, we can execute Python code inside SQL Server. This article will help you in working with data in Python itself without doing formatting in Excel.
Hi! I am Rajendra Gupta, Database Specialist and Architect, helping organizations implement Microsoft SQL Server, Azure, Couchbase, AWS solutions fast and efficiently, fix related issues, and Performance Tuning with over 14 years of experience.
I am the author of the book "DP-300 Administering Relational Database on Microsoft Azure". I published more than 650 technical articles on MSSQLTips, SQLShack, Quest, CodingSight, and SeveralNines.
I am the creator of one of the biggest free online collections of articles on a single topic, with his 50-part series on SQL Server Always On Availability Groups.
Based on my contribution to the SQL Server community, I have been recognized as the prestigious Best Author of the Year continuously in 2019, 2020, and 2021 (2nd Rank) at SQLShack and the MSSQLTIPS champions award in 2020.
Personal Blog: https://www.dbblogger.com
I am always interested in new challenges so if you need consulting help, reach me at rajendra.gupta16@gmail.com
View all posts by Rajendra GuptaLatest posts by Rajendra Gupta (see all)- Understanding PostgreSQL SUBSTRING function - September 21, 2024
- How to install PostgreSQL on Ubuntu - July 13, 2023
- How to use the CROSSTAB function in PostgreSQL - February 17, 2023