
This is the fourth article in the series of Migrating SQL Server Objects using SSDT 2017. In the third article, we learned how we could transfer SQL logins between the servers. In this article, we will learn how to copy error messages to another instance using the Transfer Error Messages Task of SSDT 2017.
Demo Setup
For demonstration, I have created three user-defined error messages on Nisarg-PC\SQL01. The script to create them is following:
|
1 2 3 4 5 6 7 8 9 10 11 12 13 14 15 16 17 18 19 20 21 22 23 24 |
USE [master] go EXEC Sp_addmessage @msgnum= 70001, @severity=16, @msgtext='Please enter the numeric value', @lang=NULL, @with_log='TRUE'; go EXEC Sp_addmessage @msgnum= 70002, @severity=16, @msgtext='Product Quantity must be between 20 and 100', @lang=NULL, @with_log='TRUE'; go EXEC Sp_addmessage @msgnum= 70003, @severity=16, @msgtext='Cannot add more than 100 products in cart.!!', @lang=NULL, @with_log='TRUE'; |
You can view the error messages by executing the following query:
|
1 2 3 |
USE master; go SELECT * FROM sys.messages WHERE message_id > 70000 |

Now let us create a package with the Transfer error messages task.
Create SSIS Package
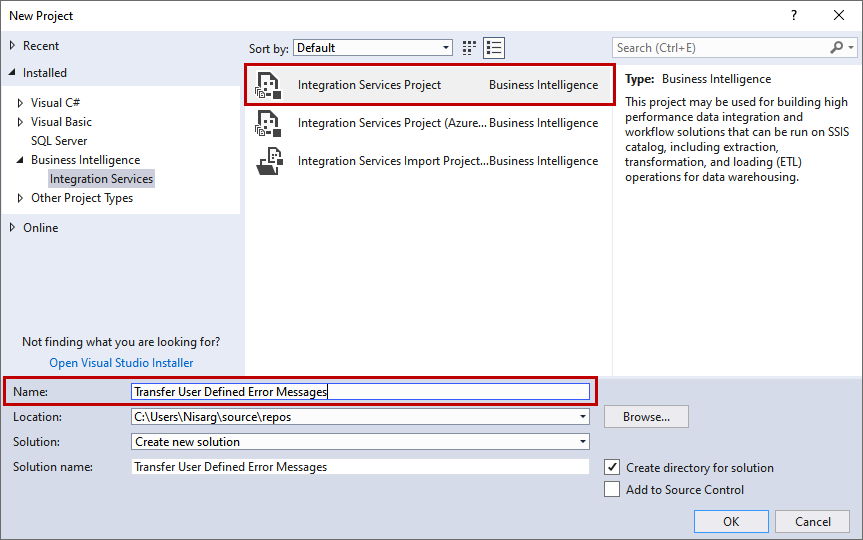
First, let us create a new SSIS project. Launch SQL Server Data tools. (SSDT 2017) 🡪 Crete New Project 🡪 Select Integration service project. The name of the project is Transfer User Defined Error Messages.
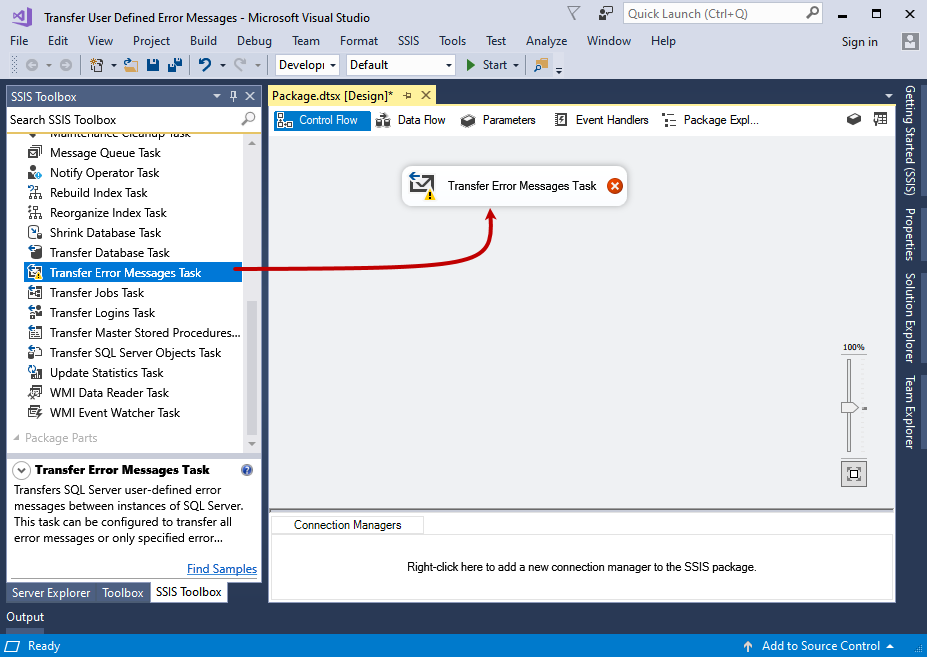
To transfer the error messages, we are using the Transfer Error messages Task. Drag Transfer Error messages task from SSIS toolbox and drop it on Control Flow window.
Now, let us configure it.
Configure Transfer Error Messages Task
To configure, double-click on Transfer Error Messages Task. A dialog box named Transfer Error Messages Task editor opens. Click on Messages. You can see the following configuration.
- Source and Destination connections
- Messages
Let us configure the source and destination connection.
Configure Source and Destination Connection
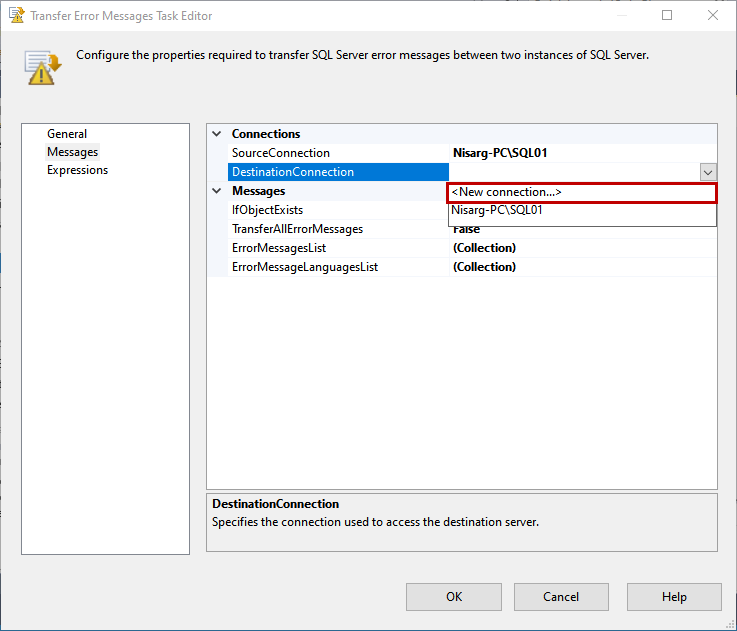
To configure the source connection, click on SourceConnection and select New Connection.

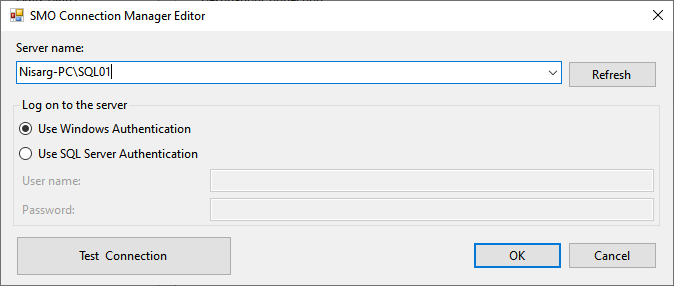
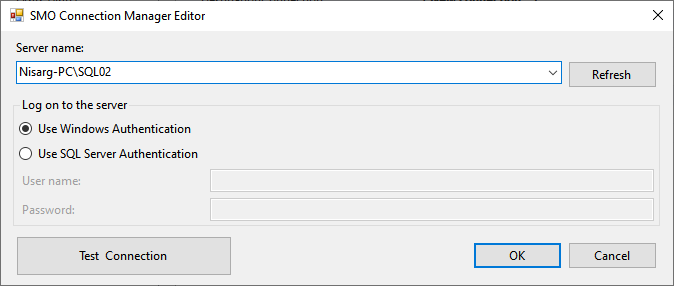
In the SMO connection manager editor, specify the Nisarg-PC\SQL01 in the Server name and select windows authentication to log on to the server.
Click OK to save the connection and close the dialog box. To configure the destination connection, click on DestinationConnection and select New Connection.
Similarly, for destination connection, specify the Nisarg-PC\SQL02 in the Server name and select windows authentication to log on to the server.
The Connection section looks like the following image:

Select error messages
Under the Messages section, there are four options.
- IfObjectExists: You choose the action when the error messages already exist on the destination server. You can select any of the following:
- FailTask: If the message exists, the task execution will be terminated; report the status of the task as failed
- Overwrite: If the message exists, the task will overwrite the definition of the error message
- Skip: If the message exists, the task will ignore those messages
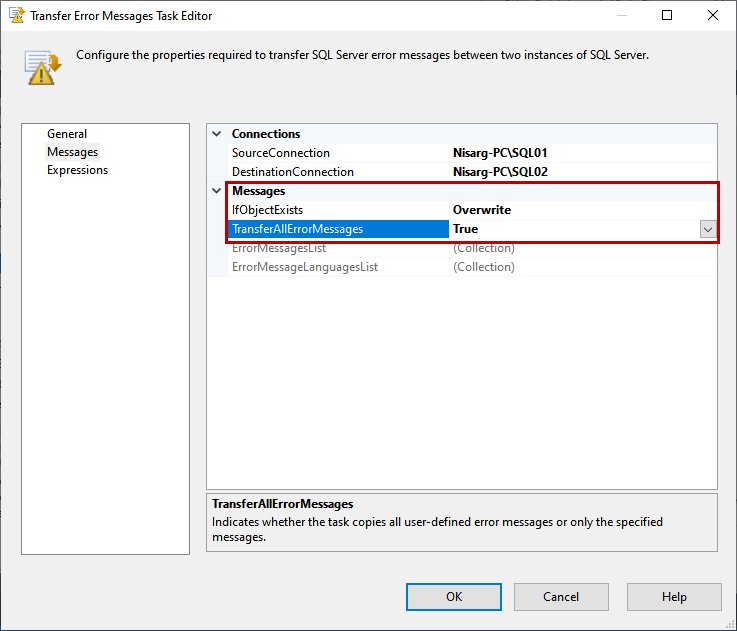
- TransferAllErrorMessages: If you want to transfer all error messages, select True. If you want to transfer specific messages, then select False
- ErrorMessageList: When we select True in TransferAllErrorMessages drop-down box, this option enables. To select the specific messages, click on ErrorMessageList. A list will be open in a dialog box. You can select the messages that you want to transfer
- ErrorMessageLanguageList: If the error messages are in a different language, you must choose the language of the message
In our case, we are transferring all error messages, so select True from TransferAllErrorMessages drop-down box. If the message exists on the destination server, the task will overwrite them, so I have selected Overwrite in IfObjectExists drop-down box.
Click OK to save the configuration and close the dialog box.
Let us configure the Notify Operator task.
Configure Notify Operator Task
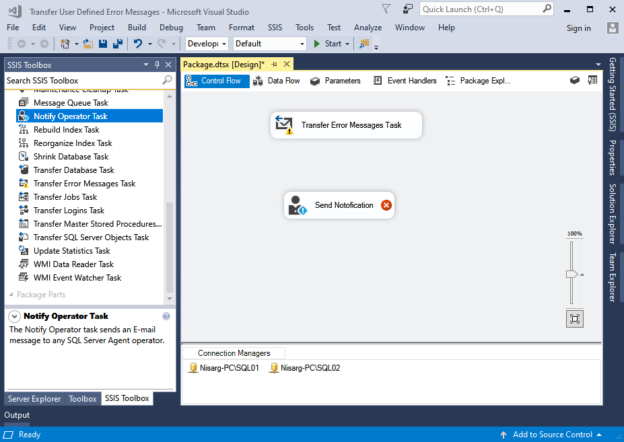
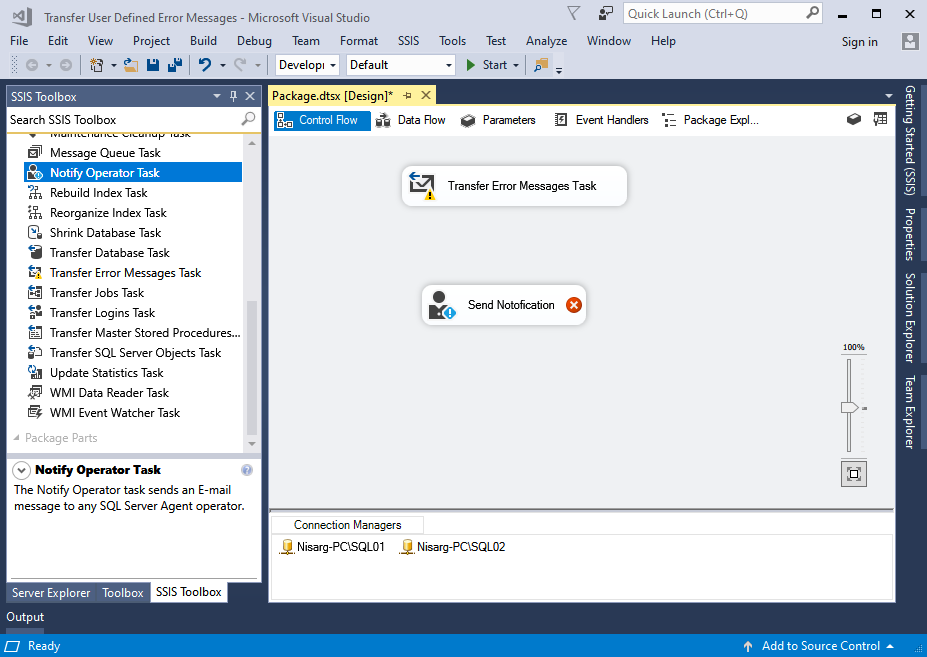
First, drag the Notify operator task from the SSIS toolbox, drop it in the Control flow surface, rename it to Send Notification, and double-click on it to configure.
A dialog box named opens. You must specify the values that are used to send notifications.
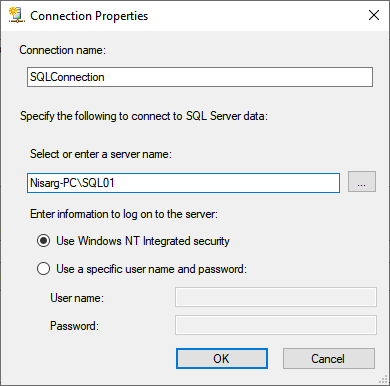
First, we must configure the connection between the server on which the SQL Server operator has been created. To do that, click on the New in Notify Operator task dialog box. Another dialog box named Connection Properties opens. Specify the appropriate values of the following parameters.
- Connection Name: Specify the desired connection name. In our demo, I have named it as SQLConnection
- Server Name: Specify the hostname on which the operator has been created. I have created an operator named DBASupport on Nisarg-PC\SQL01
- Logon Information: Specify the authentication method that is used to connect to the SQL Server. In this demo, we are using windows authentication
Click OK to close the dialog box.
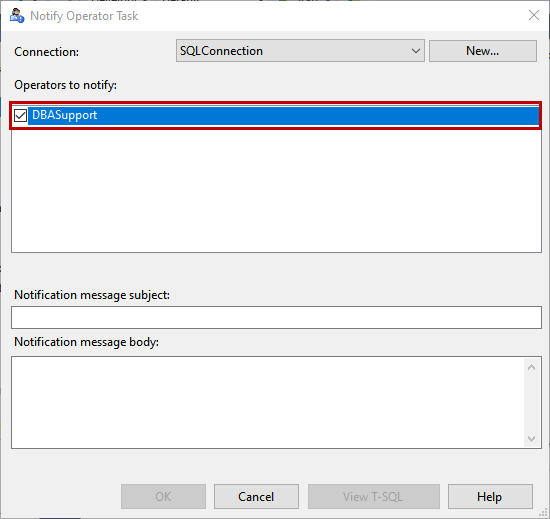
Close the dialog box to save the connection properties. As you can see, the operator named DBASupport is populated in Operators to notify list box.
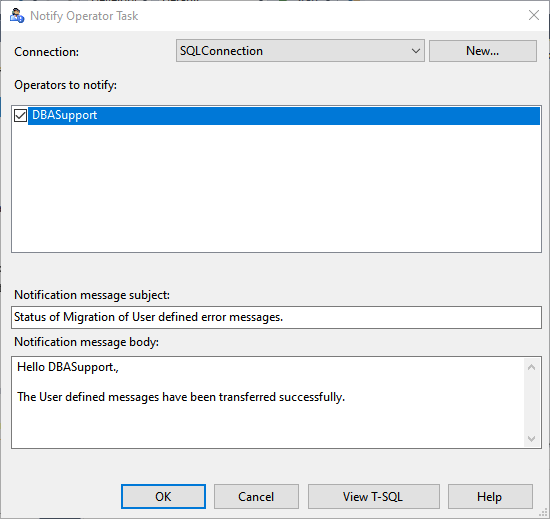
Specify the email subject in the Notification message subject textbox. In our demo, the subject line is the Status of Migration of User-defined error messages.
Specify the email body in the notification message body. In our demo, the email body is following:
Hello DBASupport.,
The User-defined messages have been transferred successfully.
Finally, the Notify operator task looks like the following image:
The email must be sent after error messages are transferred successfully. So, we must connect both tasks using a connector.

The Transfer Error Messages Task has been configured successfully.
Summary
In this article of this series, we learned about the Transfer Error Messages Task of SSDT 2017. I have explained how we can configure it to transfer user-defined error messages between Nisarg-PC\SQL01 and Nisarg-PC\SQL02. In the next article, we will deploy the SSIS packages using SSDT 2017. We will also learn how to automate the SSIS packages’ execution using SQL Server Agent Job.
Table of contents
| Transfer SQL Jobs between SQL Server instances using SSDT 2017 |
| Transfer Stored Procedures between master databases on SQL Server instances using SSDT 2017 |
| Transfer SQL Logins between SQL Server instances using SSDT 2017 |
| Transfer error messages between SQL Server instances using SSDT 2017 |

He has expertise in database design, performance tuning, backup and recovery, HA and DR setup, database migrations and upgrades. He has completed the B.Tech from Ganpat University. He can be reached on nisargupadhyay87@outlook.com
- Different ways to identify and change compatibility levels in SQL Server - July 22, 2024
- Copy SQL Databases between Windows 10 and CentOS using SQL Server data tools - October 19, 2022
- Changing the location of FILESTREAM data files in SQL Database - October 14, 2022