
In this article, we will learn how to configure Blob Inventory in an Azure Blob Storage account.
Introduction
Data has been one of the ever-growing commodities in any enterprise’s IT landscape. With the advent of the cloud, the challenges of infrastructure to host data have been addressed and it has become extremely easy to host enormous volumes of data on the cloud on-demand without any upfront capital expenditure costs or lead time. One of the basic venues where data starts to grow directly as well indirectly is the blob stores where users, as well as applications, read and write data. Considering blob stores are at the center of the data ecosystem, the volumes of data can grow tremendously in terms of volumes at an incredible speed. Azure provides Azure Blob Storage as its blob storage offering on Azure cloud. Depending on use-cases, many industries require close tracking of the inventory of data for a variety of reasons ranging from simple data tracking to sophisticated compliance management. To facilitate this need, Azure Blob Storage provides options to configure features that automatically track the inventory of data on Blob Storage and generated relevant reports to help in inventory tracking.
Configuring Blob Inventory
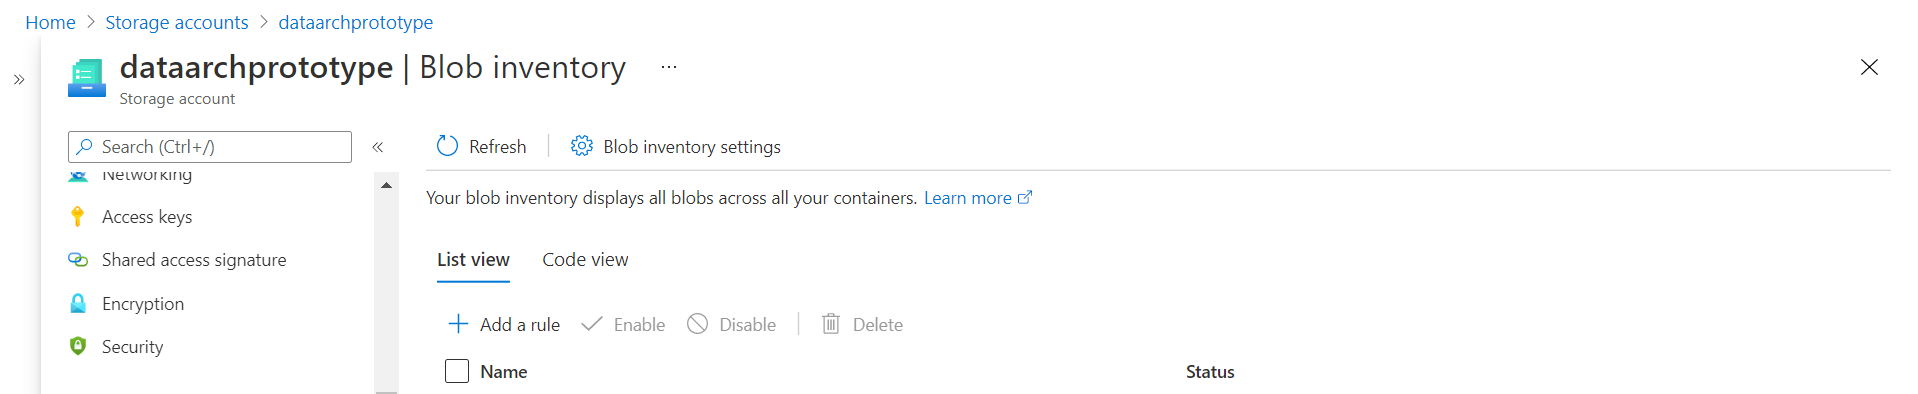
To start with the below exercise, we would need an Azure Account with at least one Azure Blob Storage account created in it. One would need administrative privileges to operate this service to perform the below-mentioned exercise. It is assumed that this account, configuration, and setup are already in place. Log on to the Azure portal and navigate to the dashboard of the storage account. Before we start with the inventory management, we would need to have at least some containers or one container with some files in it so that we would have some inventory to track and report. It is assumed that one has such a setup in place already. Once this setup exists, click on the Blob Inventory menu item from the left pane of the Azure Blob Storage account and it would open a page as shown below.
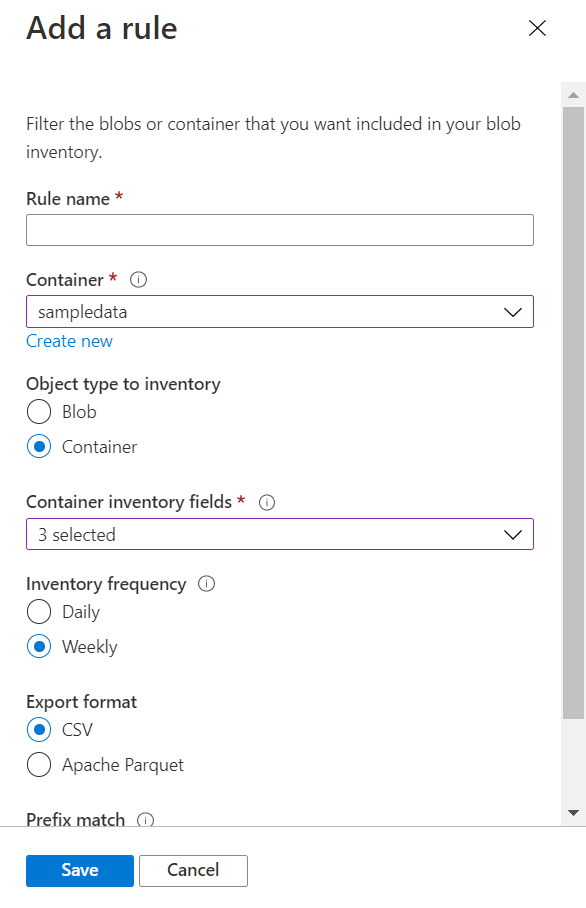
We need to create an inventory rule where we would specify the scope of inventory to be tracked in one of the supported formats. Click on the Add a rule button and it would open a pop-up screen as shown below. Firstly, we need to provide a rule name and then select the container where we want the inventory filed to be created. Then we need to select whether we want to tracking blobs or containers. Let’s say we want to track containers, so select object type as a container. By default, three fields would be selected which will be included in the report that would be created for inventory tracking. We have the option to select the fields that we need from the list of supported fields. If the inventory changes drastically on a daily basis or if some compliance required inventory tracking on a daily basis, we could select the daily option or in other cases we can select the weekly option. Finally, we need to select the format of the file that would be created which would have a list of the inventory. By default, the CSV export format is selected. We can also select Parquet as the format. This can be useful if we intend to load this as data in some data warehouse repository for analytics.
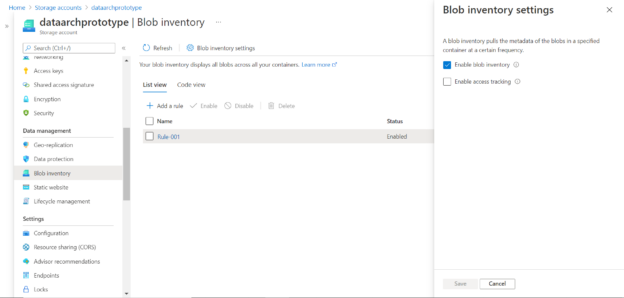
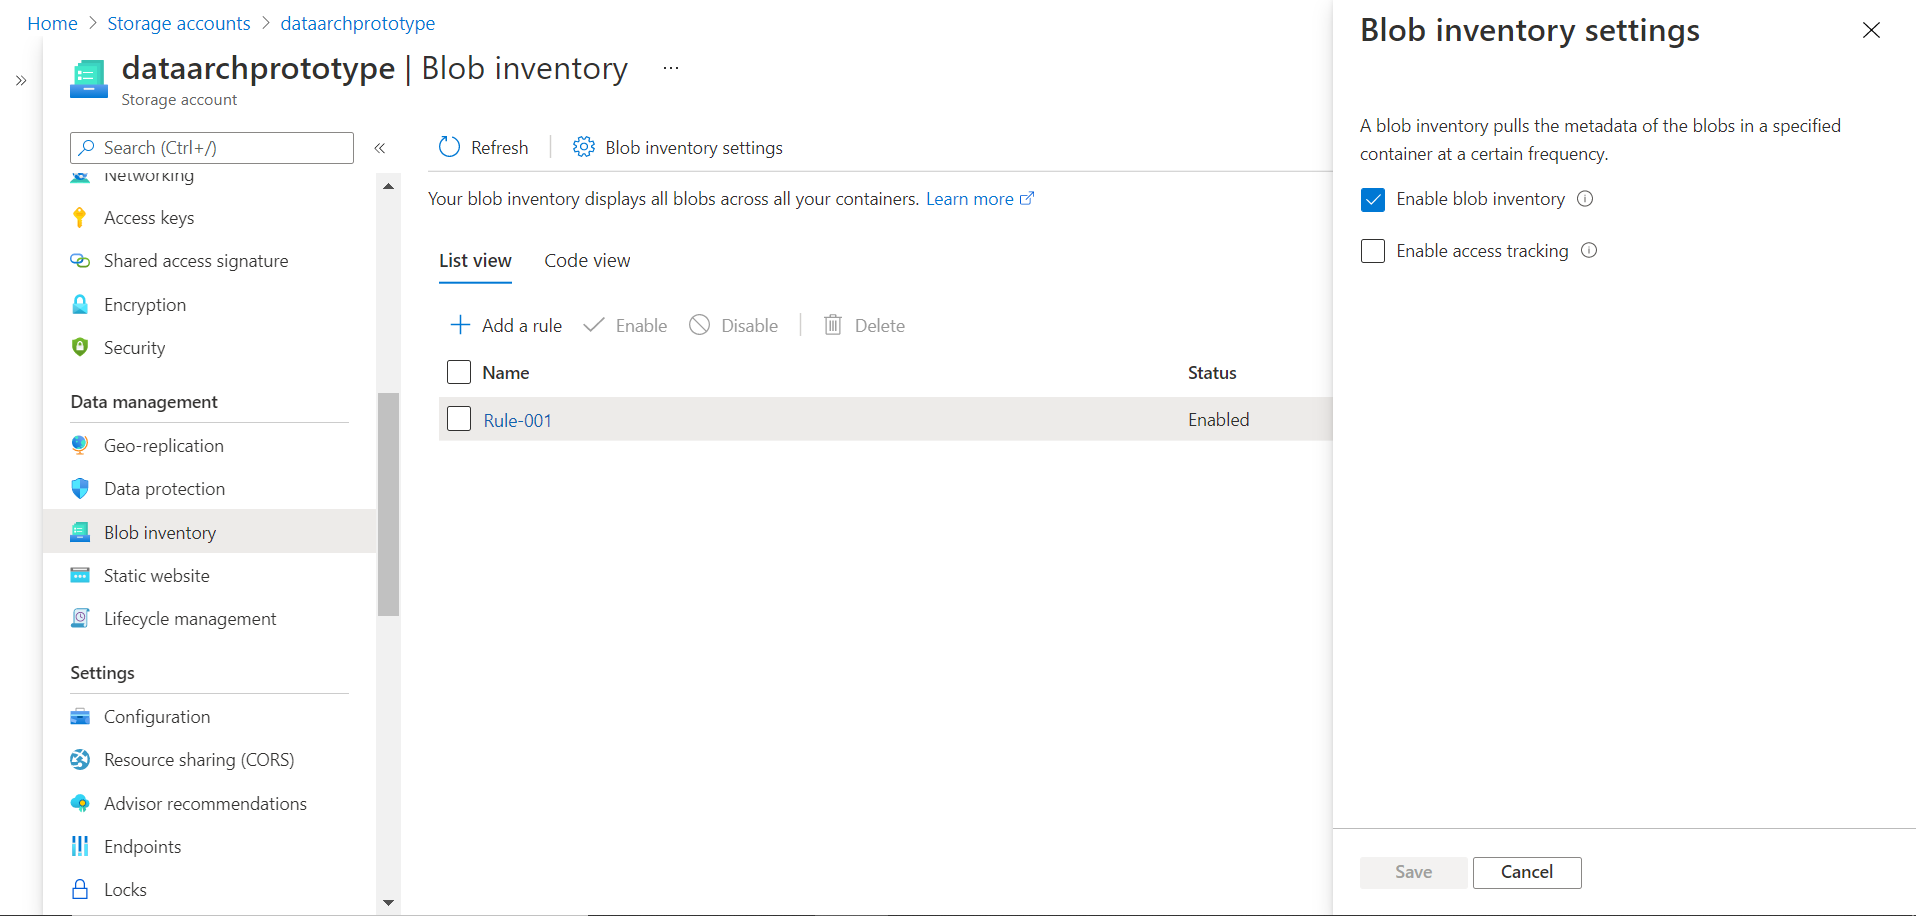
Once done, click on the Save button to create a new rule. Once the rule is created, it would look as shown below. If we click on the Blob inventory settings, it will show the settings in a pop-up window as shown below. The enable blob inventory setting would be enabled. We can optionally enable the access tracking option as well to track the usage of blobs as part of inventory tracking. For highly sensitive data, this is a very important setting that should be enabled.
The inventory rule takes time to come into effect. As we have configured the frequency daily, it may take a day to generate the inventory tracking report. Once the rule executes, it would create a folder structure in the selected container as shown below. Open the folder which has the same name as the name of the rule.

Under this folder, there would be a hierarchy of year, month, and date and in that, we would be able to see the files as shown below. One is a checksum file for validation of the integrity of the file, one is a manifest file that has the configuration and detail of the inventory tracked, and the CSV file has the actual inventory tracked in it.
![]()
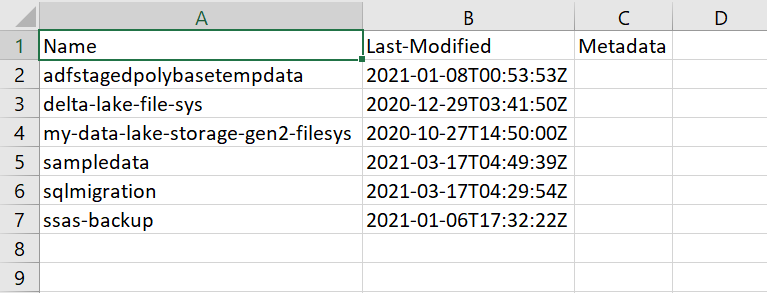
Click on the CSV file and we would get the option to download the file. Download it and open the file, and it would look as shown below. Here it shows the list of containers as well as the three fields that we configured while creating the rule. If we would have instead selected blobs, this list would be much longer as typically one would have many files compared to containers.
In this way, by using the Blob Inventory features of the Azure Blob Storage account, we can easily manage, and track the inventory of blobs hosted in Azure Blob Storage accounts.
Conclusion
In this article, we learned how to create rules in the Azure Blob Storage account, use the Blob inventory feature to track inventory as well as access to the inventory, and finally created an automated inventory report at the desired frequency.

She has a deep experience in designing data and analytics solutions and ensuring its stability, reliability, and performance. She is also certified in SQL Server and have passed certifications like 70-463: Implementing Data Warehouses with Microsoft SQL Server.
View all posts by Gauri Mahajan
- Oracle Substring function overview with examples - June 19, 2024
- Introduction to the SQL Standard Deviation function - April 21, 2023
- A quick overview of MySQL foreign key with examples - February 7, 2023