

Azure SQL Database does not support native database backups. Therefore, you cannot use it to move from the Azure cloud to on-premises SQL Server. You can use the data-tier application BACPAC file format for exporting database schema and data from the Azure database. This BACPAC file is helpful to deploy on an Azure SQL Database, Managed Instance, and on-premises SQL Server.
To export and import a database using a BACPAC format file, you can use SQL Server Management Studio (SSMS) graphical wizard. We have covered DACPAC and BACPAC packages in the article Importing a BACPAC file for a SQL database using SSMS.
Suppose you have a production Azure SQL Database that you want to regular export into BACPAC format and import into SQL instance (on-prem). Is there any way to do so?
Similarly, suppose we use Linux or macOS where you cannot install SQL Server Management Studio? How do we export or import databases in that situation?
This article explores the SQLPackage utility for exporting Azure database that answers both questions raised above.
Introduction to SQLPackage utility
Sqlpackage utility is a flexible option available to export Azure SQL database to a BACPAC file. This utility is available with the SQL Server Management Studio (SSMS), SQL Server Data Tools (SSDT) for Visual Studio, and we can also download it separately using the Microsoft download center. The latest SqlPackage version is 18.8, released on Oct 4, 2021.
<
I installed the latest SQLPackage utility using MSI installer on Windows on my system. You can navigate to the installed SqlPackage.exe and confirm the version using command /version.

Note: You should install the latest SqlPackage utility as a separate installer as well. SSMS uses the 32-bit version, and therefore, you can install 64-bit for higher memory requirements.
Install SqlPackage utility on Linux
As stated earlier, we can download the Sqlpackage utility on Linux as well. To install it, use the following steps.
- Download Linux archive package for SqlPackage utility
- Launch the terminal and run the following scripts.
-
123456789$ cd ~$ mkdir sqlpackage$ unzip ~/Downloads/sqlpackage-linux-<version string>.zip -d ~/sqlpackage$ echo "export PATH=\"\$PATH:$HOME/sqlpackage\"" >> ~/.bashrc$ chmod a+x ~/sqlpackage/sqlpackage$ source ~/.bashrc$ sqlpackage
Export Azure SQL Database using SqlPackage utility
To export an Azure database using the SqlPackage utility, we require the value of the following parameters.
- /Action or /a: It refers to the action you want to perform using the SqlPackage utility. Specify value Export for database export.
- /SourceServerName or /ssn: It is the Azure SQL Server name (FQDN). You can get the Azure server FQDN using the Azure portal SQL database dashboard. It follows the suffix .database.windows.net
- /SourceDatabaseName or /sdn: Specify the Azure database that you wish to export into BACPAC format.
- /SourceUser or /su: We will use SQL authentication to connect with the Azure database. Therefore, specify the user name with this parameter.
- /SourcePassword or /sp: We need to specify the password for the user-defined with the /su parameter.
- /TargetFile: In this parameter, we specify the target file and its local directory path. For example, C:\Temp\database.dacpac
- /p: In this parameter, specify the backing storage type for the schema model. For export, specify the value Storage=File.
Note: By default, the SqlPackage utility exports all tables of the Azure database in BACPAC format.
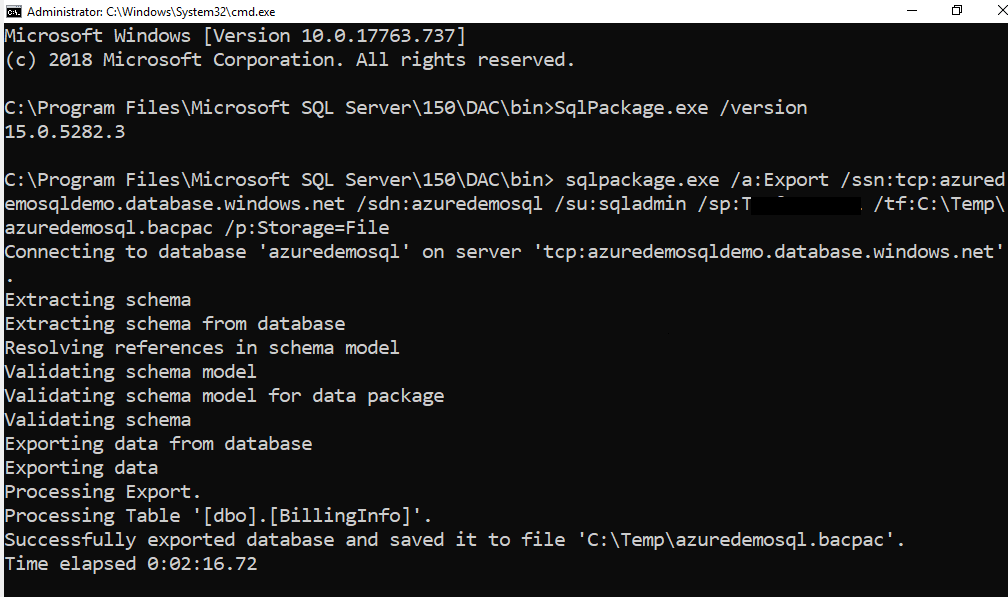
Go to Start and launch the command prompt and run the following script for database export.
>sqlpackage.exe /a:Export /ssn:tcp:azuredemosqldemo.database.windows.net /sdn:azuredemosql /su:sqladmin /sp:India@123 /tf:C:\Temp\azuredemosql.bacpac /p:Storage=File
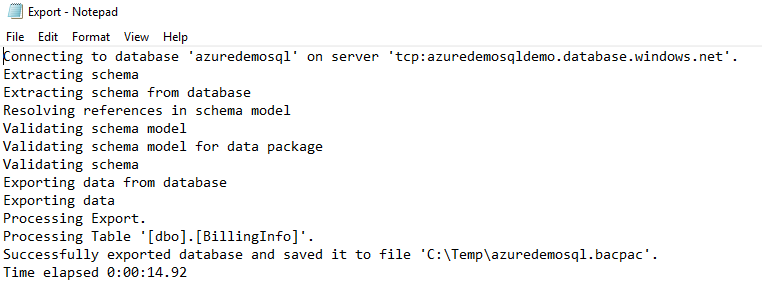
The SqlPackage validates and exports data into BACPAC format. It prints logs message for individual tables so that you can track the export process. I have only one table [dbo].[BillingInfo] in my Azure SQL Database. Therefore, it prints the message – Processing table [dbo].[BillingInfo].
The export database time depends on the number of tables, their record counts, network bandwidth.
You can browse the local directory and view the file.BACPAC extension, as shown below.

Import Azure SQL Database BACPAC in an On-premises SQL Server Instance
Once we have the BACPAC export of the Azure database, we can import it using the SqlPackage utility as well. The script will require a few changes as below.
- /Action: Specify keyword IMPORT for database import from BACPAC file
- /TargetServerName or /tsn: It defines the SQL instance name where we want to import the BACPAC file.
- /TargetDatabaseName or /tdn: Specify the target database name using this parameter. You are not required to create this database in advance of the import operation. SqlPackage utility creates it on the destination SQL instance and imports data into it. For this example, I specified value – Import
- /TargetUser or /tu: It defines the target SQL instance SQL authentication user.
- /TargetPassword: It defines the password of the SQL authentication user.
- /SourceFile or /sf: It specifies the source BACPAC file location for database import.
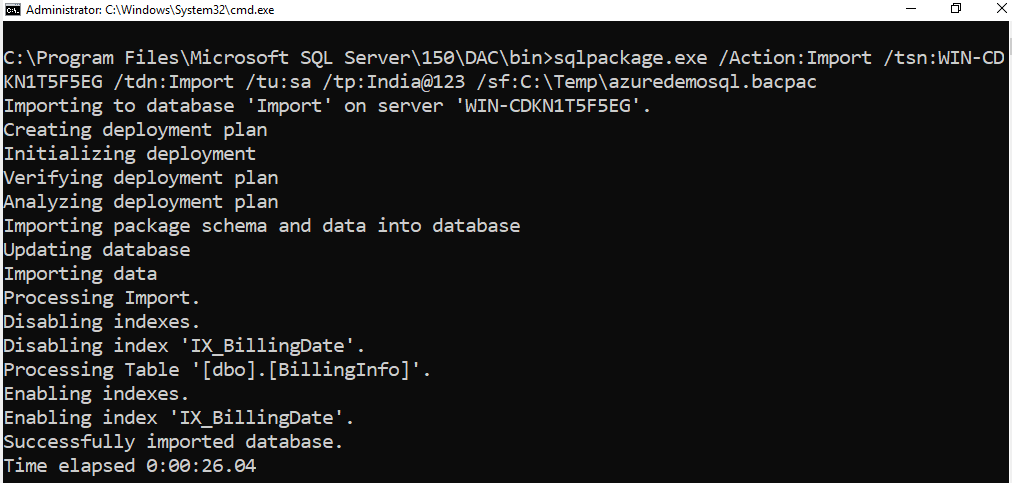
Execute the following script in the command prompt and view the database import progress.
>sqlpackage.exe /Action:Import /tsn:WIN-CDKN1T5F5EG /tdn:Import /tu:sa /tp:India@123 /sf:C:\Temp\azuredemosql.bacpac
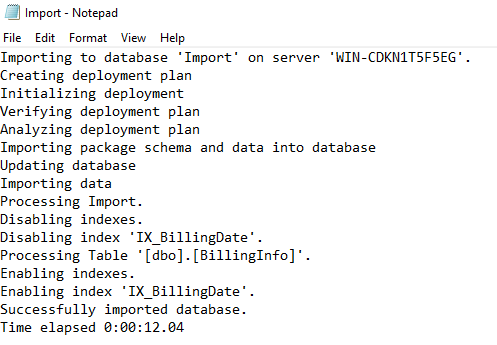
During the import operation, It performs the following steps.
- Creates a deployment plan
- Import package schema into the database
- Disables Index
- Import data
- Enables Index
Connect to the destination SQL instance, and we have a database Import as specified in the connection string. Expand tables, and it has a table [dbo].[BillingInfo] as shown below.

Automate backup import and Export process using SqlPackage utility
Suppose you need frequent Azure SQL Database export and import into local (on-prem) SQL Server instances. If we do it manually using the SSMS console or SqlPackage utility, it would not be the best use of repetitive work. The SQL Server Agent can help you automate the overall database import operations and configure the job on the on-prem SQL instance.
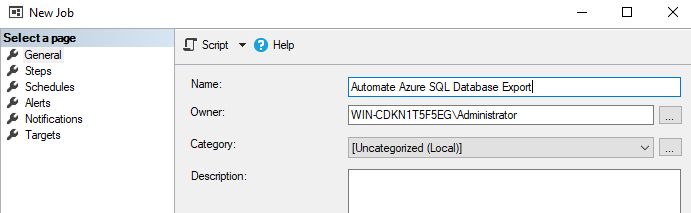
Connect to target SQL instance in SSMS, expand SQL Server Agent, right-click on Jobs, and create a new job.
- On the general page, specify a name for the SQL Server job and add an optional description.
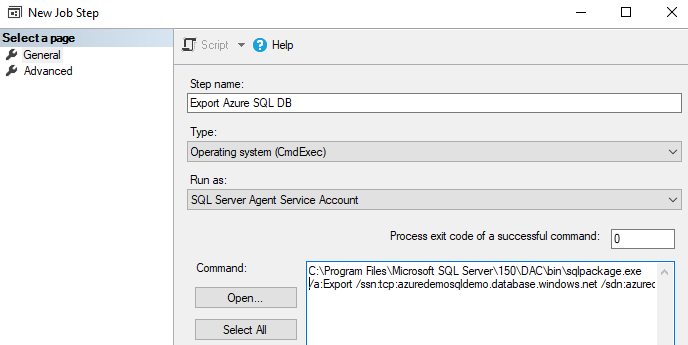
- Click on Steps and add a new job step. In the new job step, specify a name and specify the type – Operating System (CmdExec).
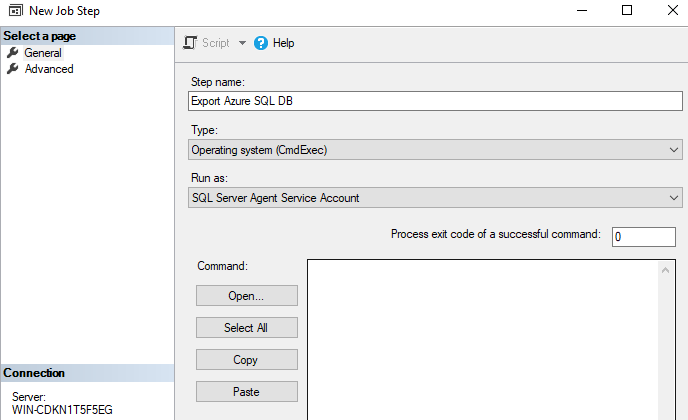
In the command section, enter the SqlPackage script to create an export of the Azure database. You specify the full path of the SqlPackage utility, and you can also add the path into the environment variable to avoid the full path for the Sqlpackage.
>C:\Program Files\Microsoft SQL Server\150\DAC\bin\sqlpackage.exe /a:Export /ssn:tcp:azuredemosqldemo.database.windows.net /sdn:azuredemosql /su:sqladmin /sp:India@123 /tf:C:\Temp\azuredemosql.bacpac /p:Storage=File
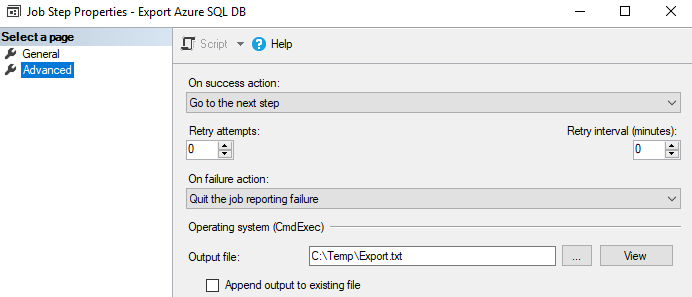
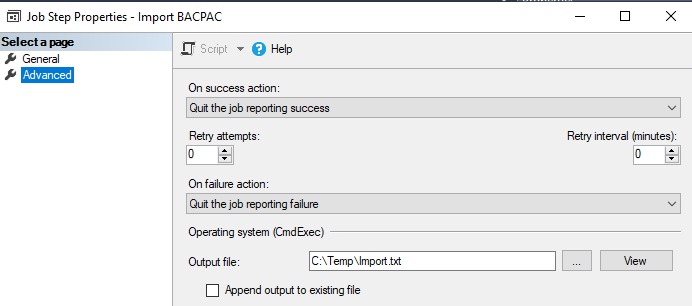
To capture the job steps execution details, click on Advanced and add an output file.
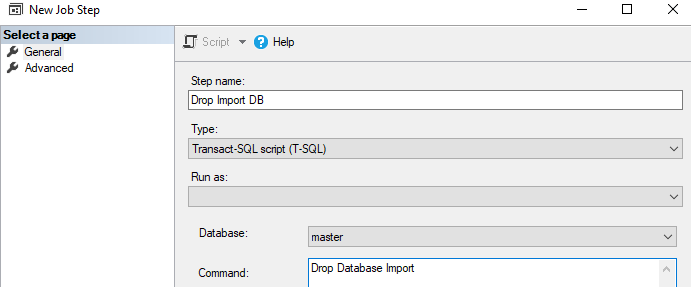
Click on and add a new step to drop the existing database. Previously, we imported the BACPAC file into the Import database. Therefore, in step 2, we drop the Import database with the following script –
Drop Database Import
Step 2 uses Transact-SQL script(T-SQL) type for executing SQL script.
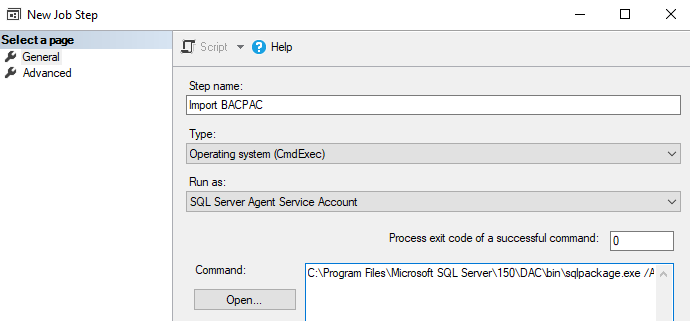
In the next step, we will import the BACPAC file into an on-prem SQL database. For this step also, we require type- Operating System (CmdExec).
C:\Program Files\Microsoft SQL Server\150\DAC\bin\sqlpackage.exe /Action:Import /tsn:WIN-CDKN1T5F5EG /tdn:Import /tu:sa /tp:India@123 /sf:C:\Temp\azuredemosql.bacpac
Add an output file in the advanced section to capture import execution logs as well.
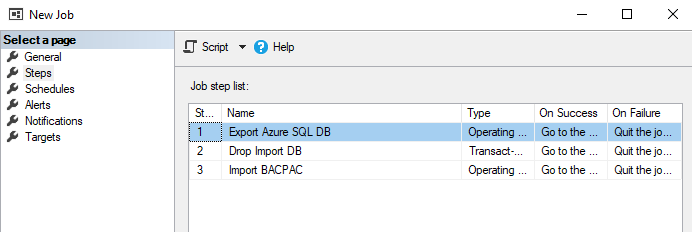
The SQL agent job is configured with the following job’s steps.
- Export Azure SQL DB
- Drop Import DB
- Import BACPAC
You can add a schedule for running the SQL agent job on a fixed schedule. For now, let’s run it manually and verify that Azure SQL Database export and import into on-prem SQL instance.
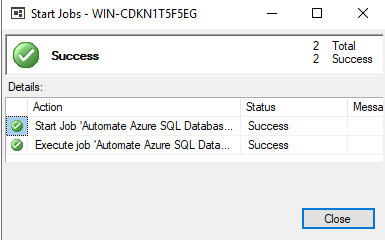
Now, view the export and import operation step output to validate the expected results. As shown below, we did not have any error message in both the log files.
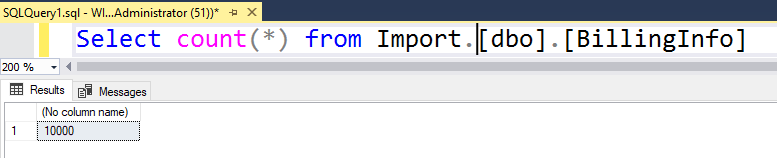
Connect to SQL database and validate the table and record count.
Conclusion
This article explored the SqlPackage utility for automating Azure SQL Database export and import into the on-premises SQL instance. The SqlPackage utility is available on Windows, Linux, and macOS and provides additional configurations such as Timeouts, Parallelism, AD authentications.

I am the author of the book "DP-300 Administering Relational Database on Microsoft Azure". I published more than 650 technical articles on MSSQLTips, SQLShack, Quest, CodingSight, and SeveralNines.
I am the creator of one of the biggest free online collections of articles on a single topic, with his 50-part series on SQL Server Always On Availability Groups.
Based on my contribution to the SQL Server community, I have been recognized as the prestigious Best Author of the Year continuously in 2019, 2020, and 2021 (2nd Rank) at SQLShack and the MSSQLTIPS champions award in 2020.
Personal Blog: https://www.dbblogger.com
I am always interested in new challenges so if you need consulting help, reach me at rajendra.gupta16@gmail.com
View all posts by Rajendra Gupta
- Understanding PostgreSQL SUBSTRING function - September 21, 2024
- How to install PostgreSQL on Ubuntu - July 13, 2023
- How to use the CROSSTAB function in PostgreSQL - February 17, 2023