
In this article, we will learn how to report data from Azure Cosmos DB using Power BI which is one of the most popular reporting tools in the industry.
Introduction
Data can be hosted in a variety of formats and repositories. Data is also consumed in a variety of ways by a variety of applications. One of the most fundamental ways of consuming data is by the means of a report. Reporting relational data is a very well-known and frequent practice, but it is a relatively less known fact that even non-relational data that may be hosted in no-SQL flavor data repositories may need to be reported for data sampling, data exploration and a variety of other purposes. The Azure cloud platform provides a variety of data repositories to host data. Cosmos DB is one of the data repositories that support hosting data in a variety of formats including storing data in a key-value format.
Reporting Azure Cosmos DB data
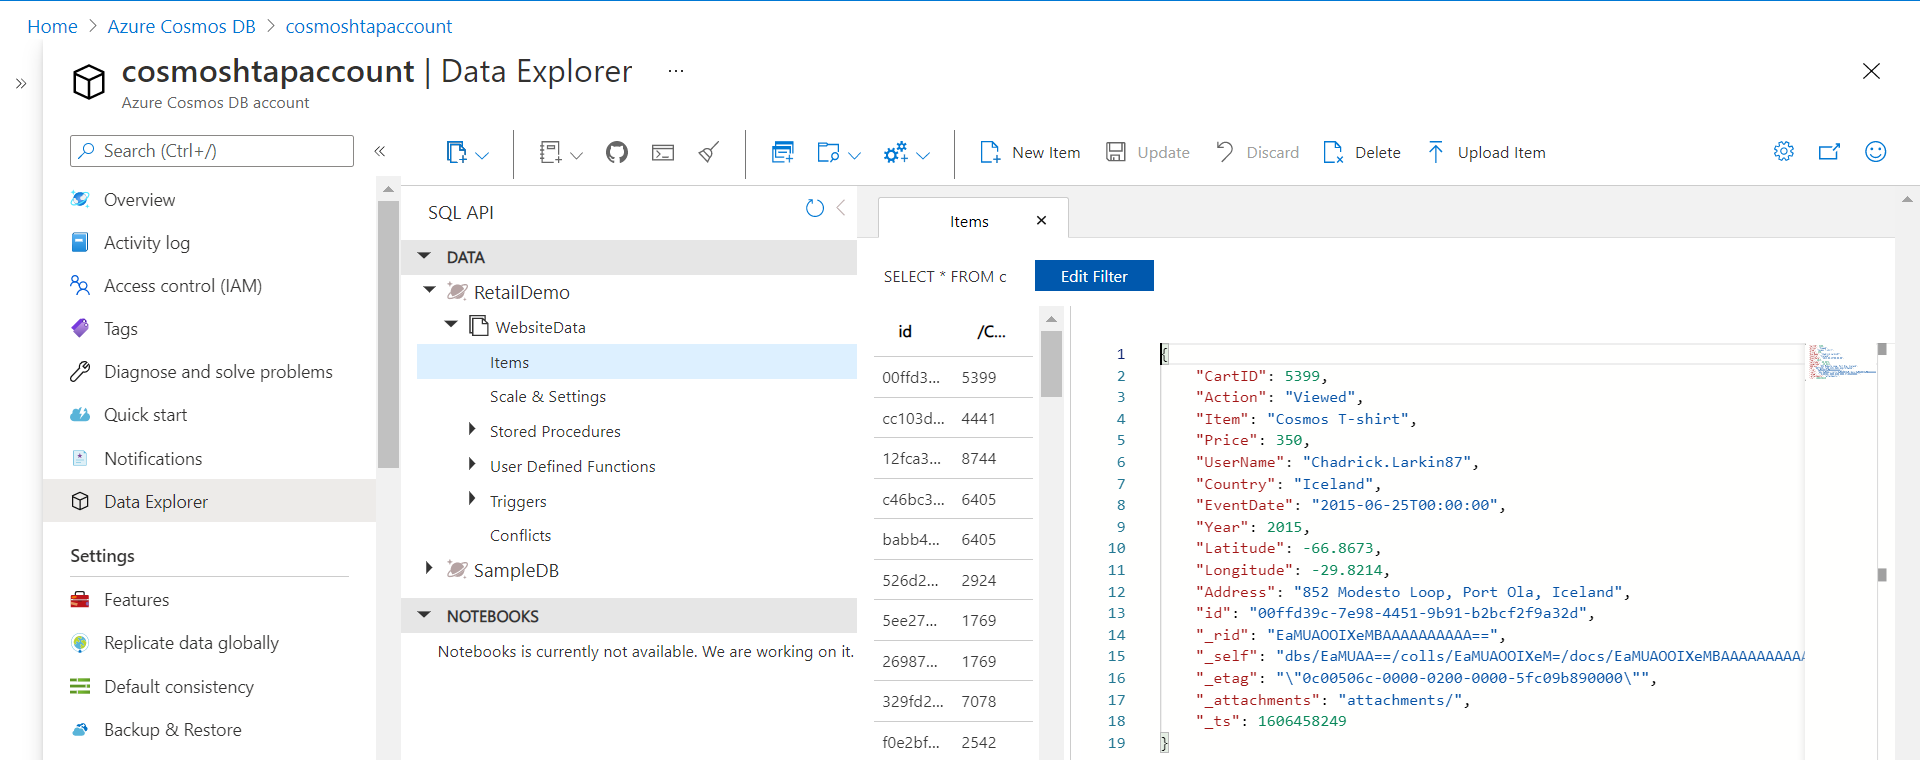
As we are going to report Cosmos DB data with Power BI, the two items we need in place are a Cosmos DB instance and well as an installation of Power BI. It is assumed that an instance of Cosmos DB – SQL API is already created with some sample data. It is also assumed that the latest version of Power BI Desktop is already installed on the local machine. One can create some sample data using the built-in scripts in a Cosmos DB instance. One can explore the data using the Data Explorer on the dashboard of the Cosmos DB instance as shown below.
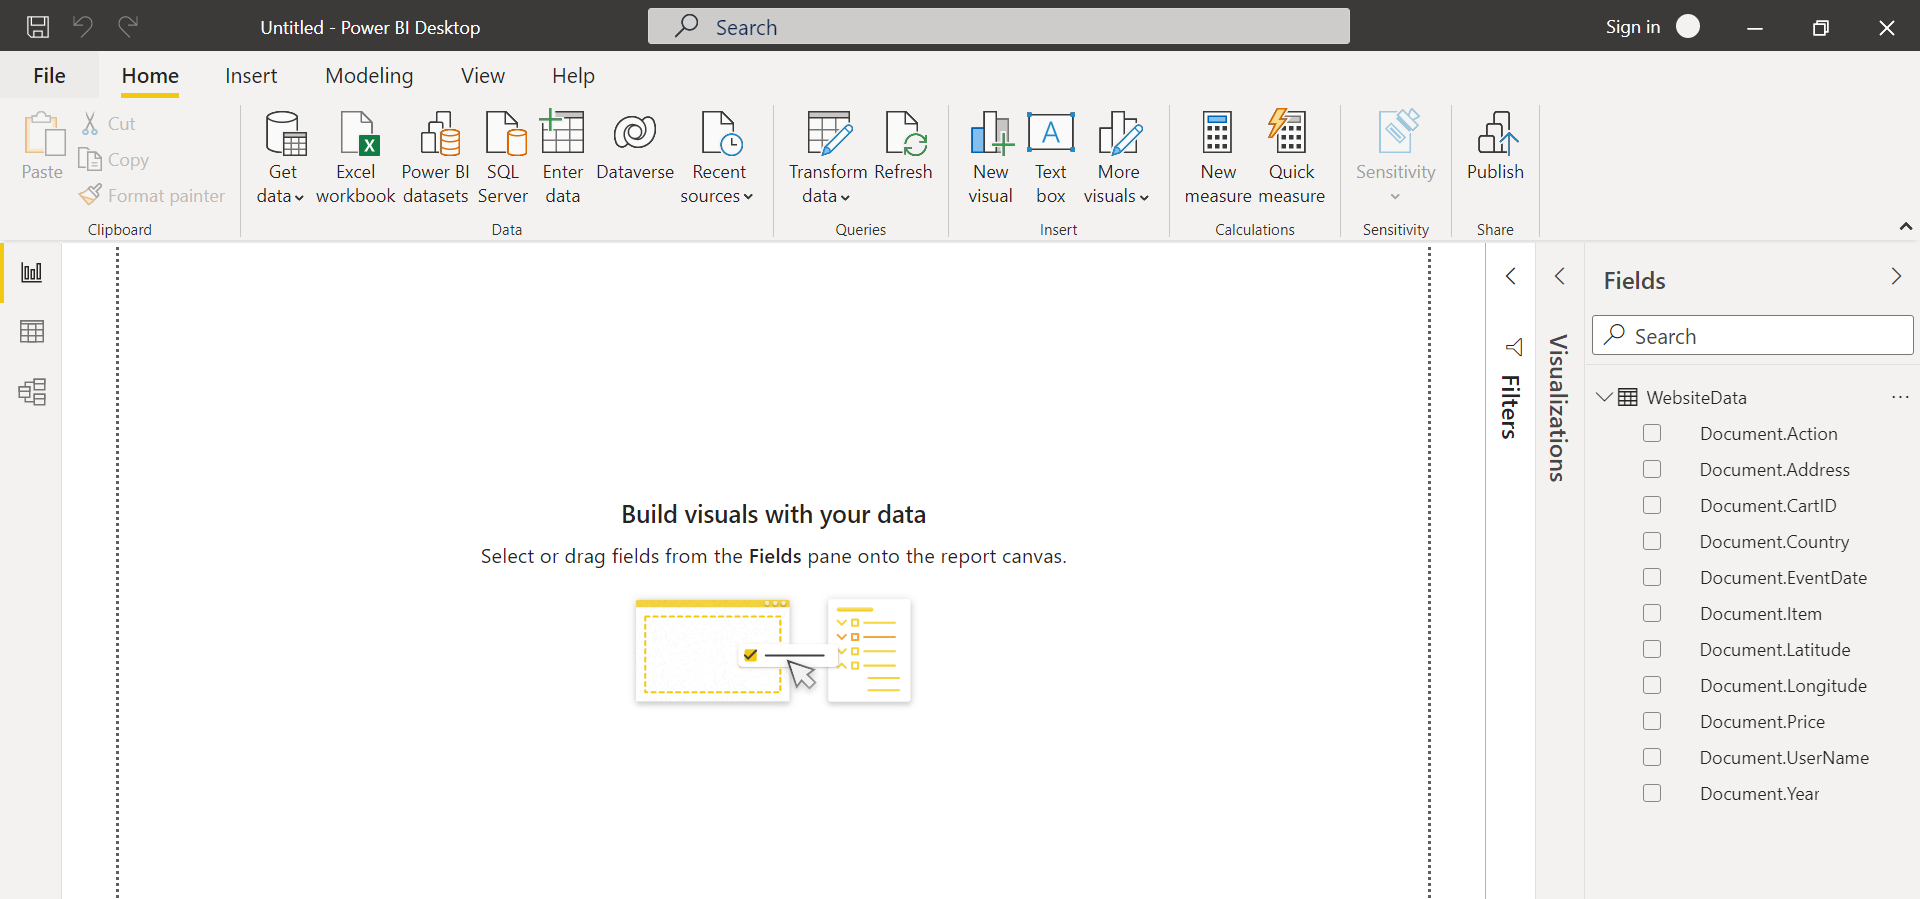
Assuming that the Cosmos DB instance is set up, open Power BI Desktop and the home page would look as shown below. To report data using Power BI, we need to connect it to the data source which in our case is the Azure Cosmos DB Instance.

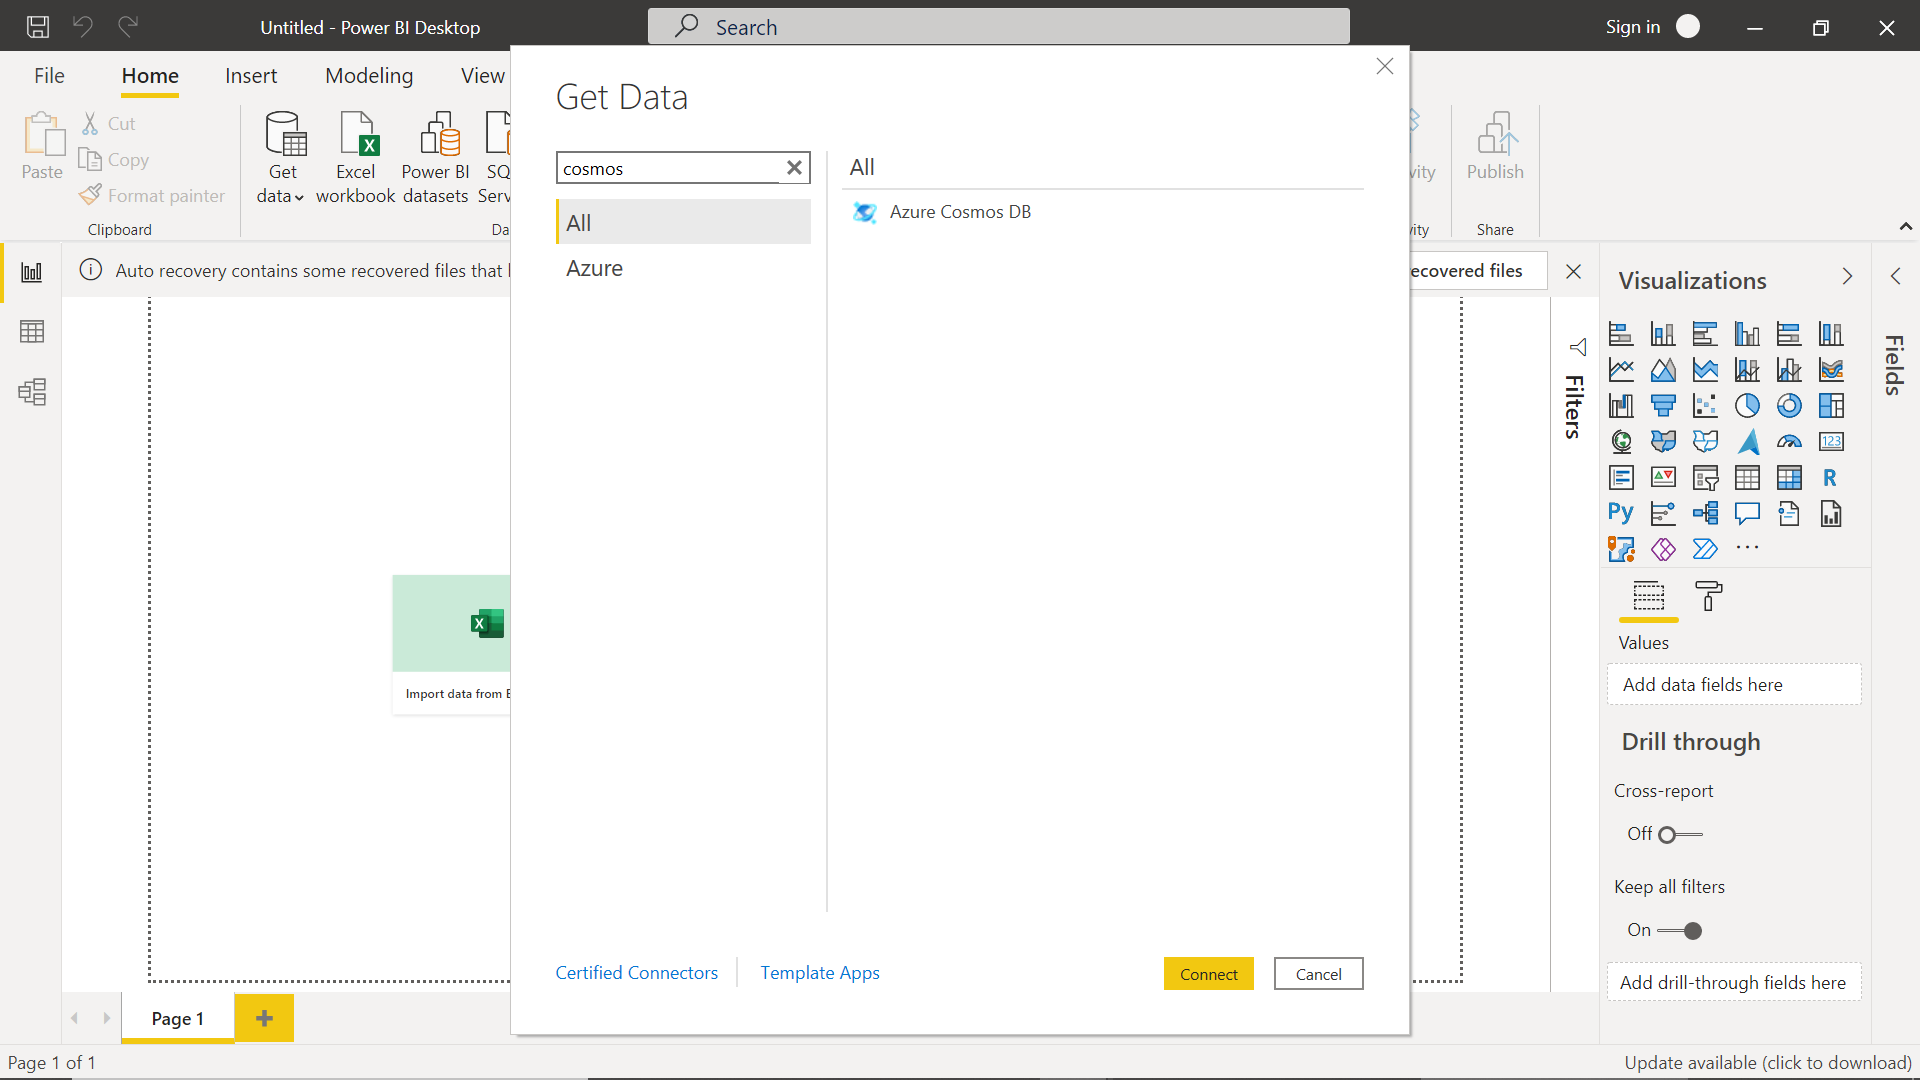
Click on the Get Data menu and we would be able to see the most frequently used data connectors. Click on the menu option to see more data connectors, type Azure Cosmos DB to find the connector for it, and select it as shown below.
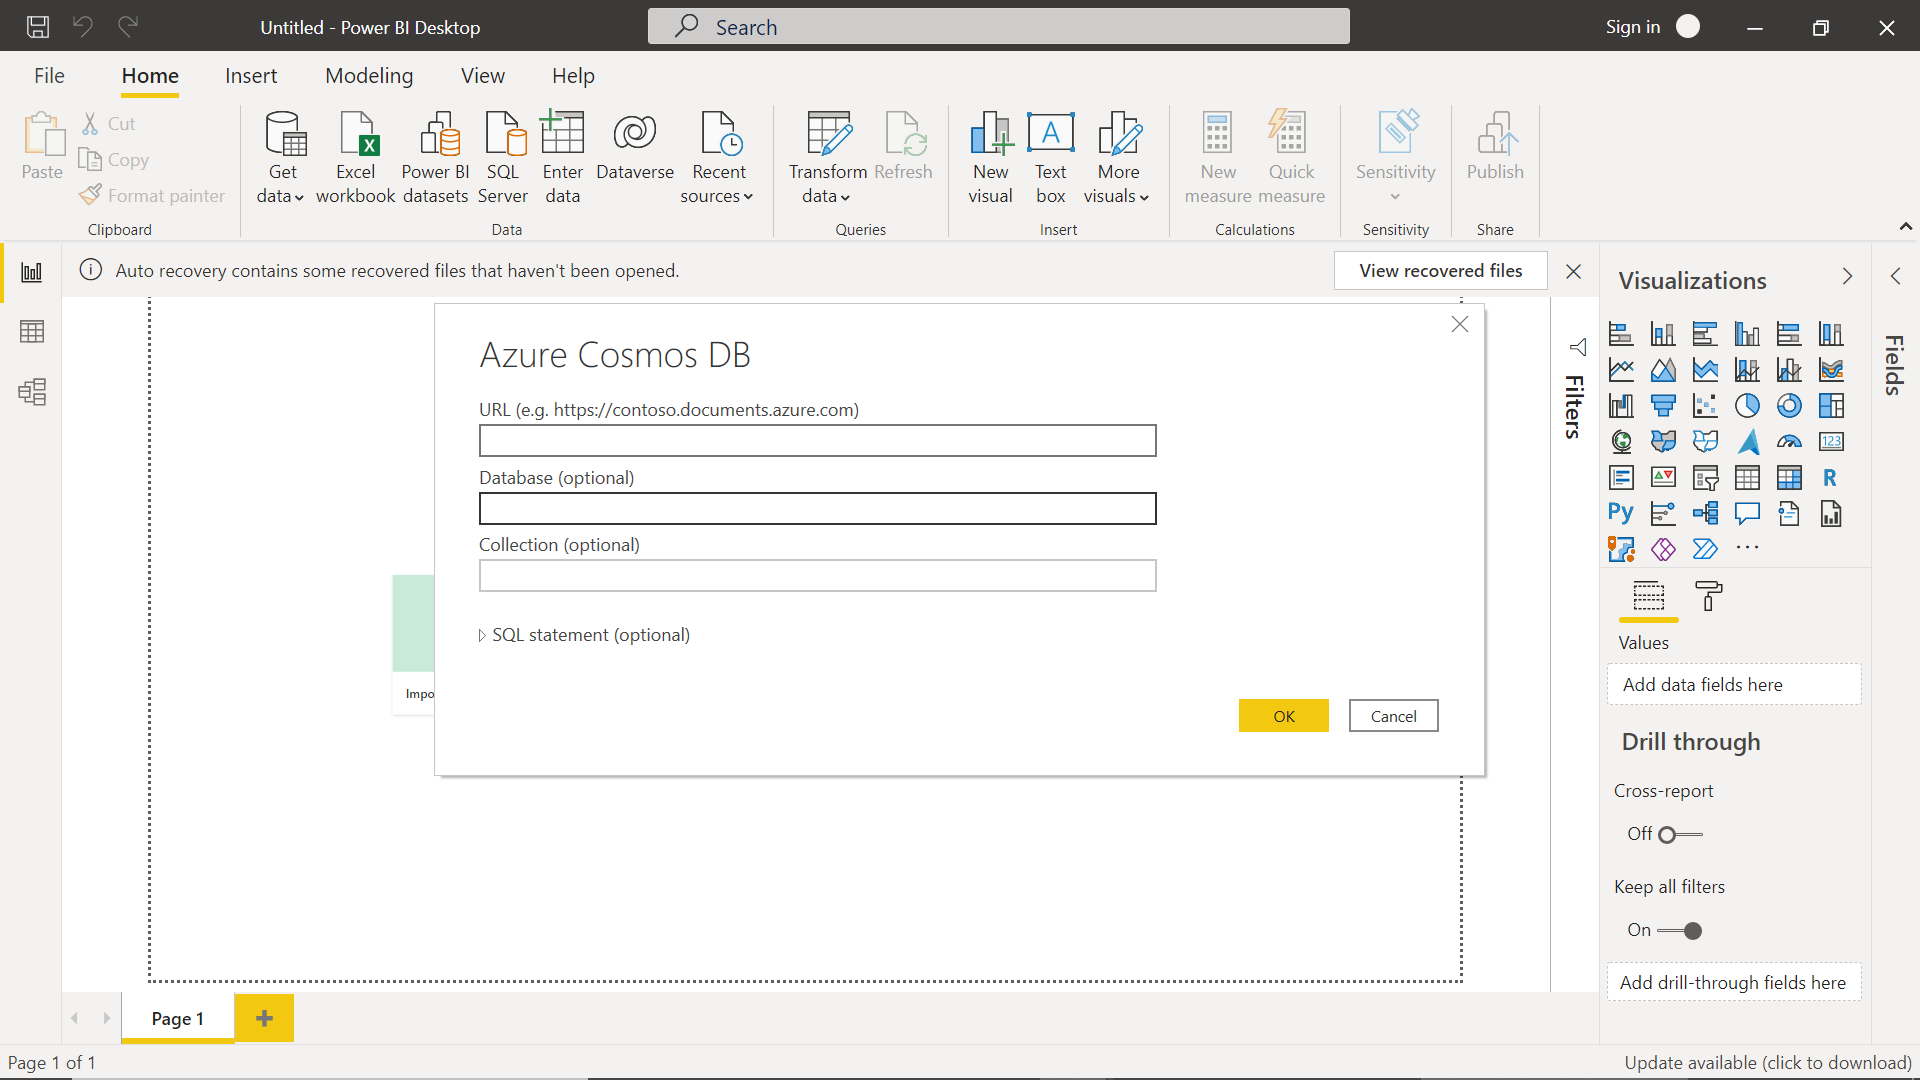
After selecting it, a wizard would pop-up as shown below. We need to provide the URL i.e., the endpoint of the Azure Cosmos DB instance. We can optionally provide the database name as well as the collection name. Provide the required details and click on the Ok button.
In the next step, we would be required to provide the key for instance. This key can be fetched from the dashboard of the database instance. After providing the key, if the authentication went successful, we would be able to see the list of items in the collections as shown below.
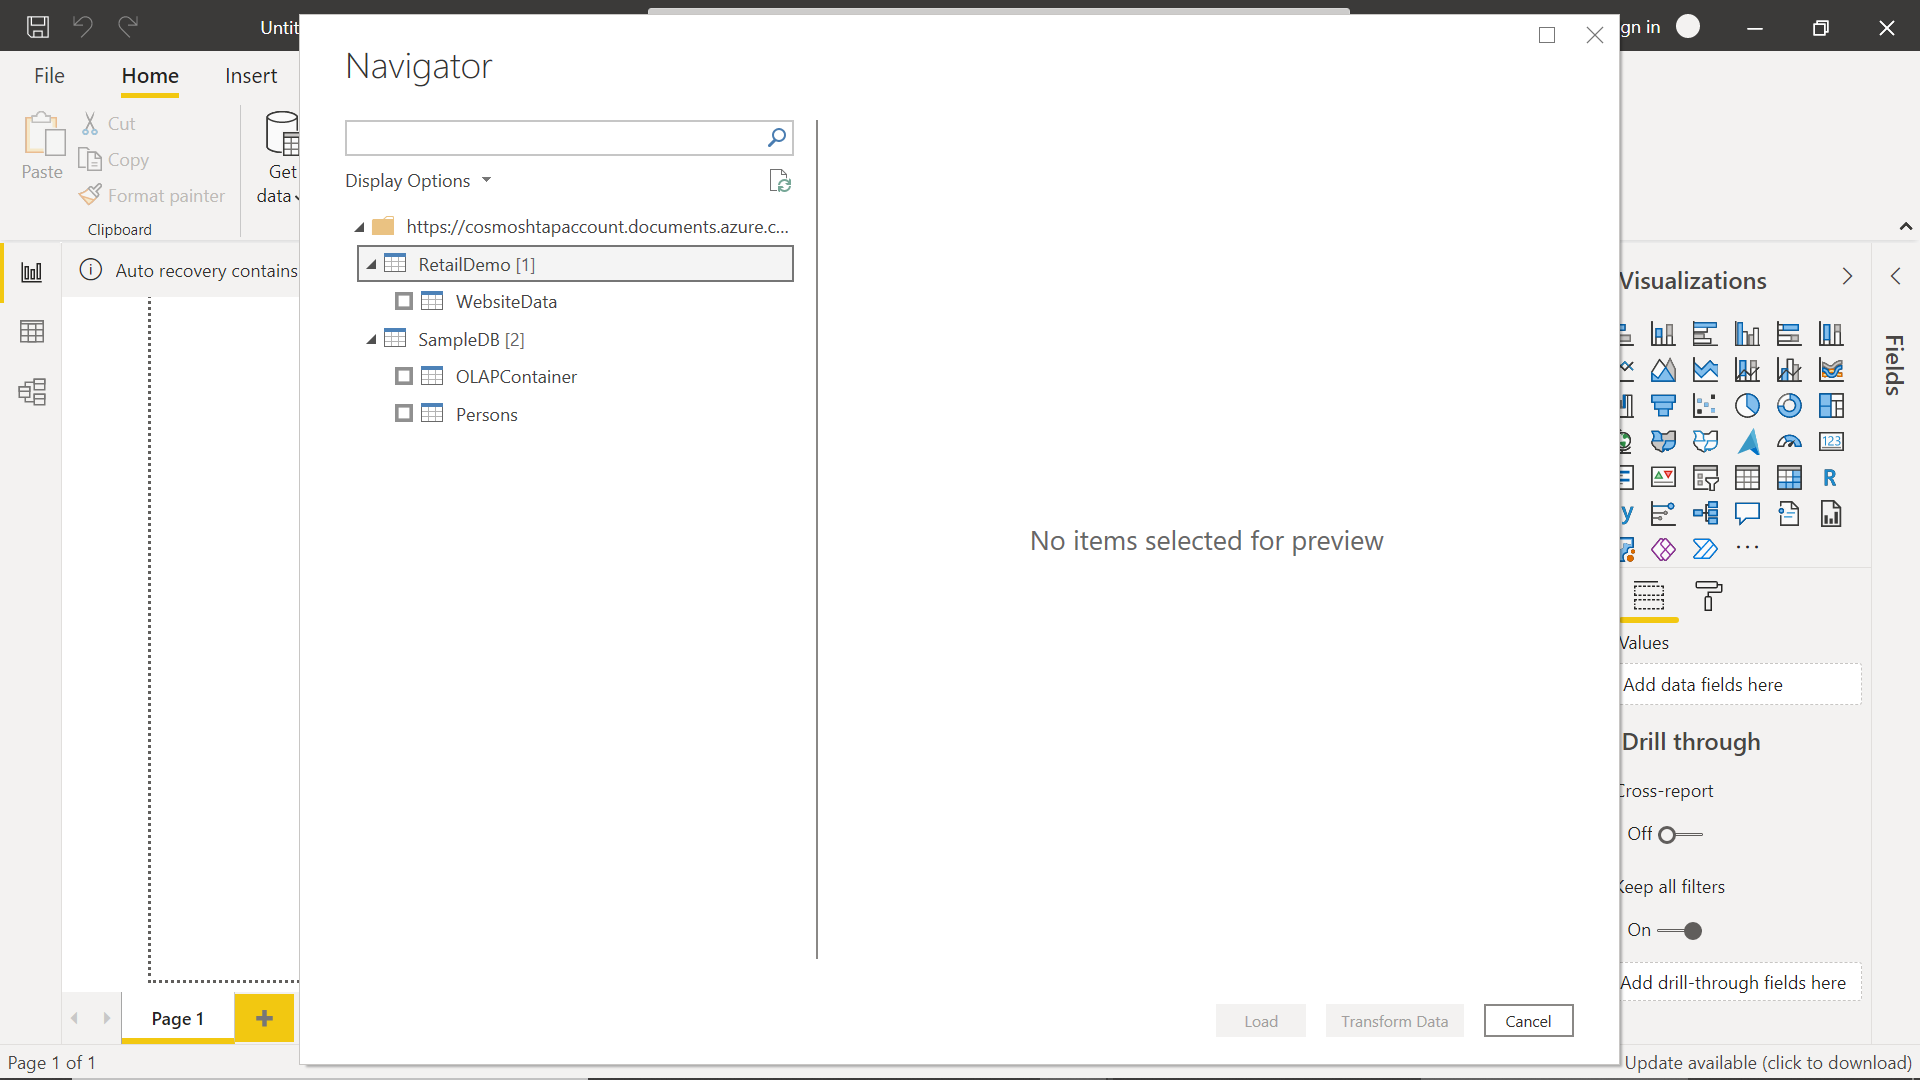
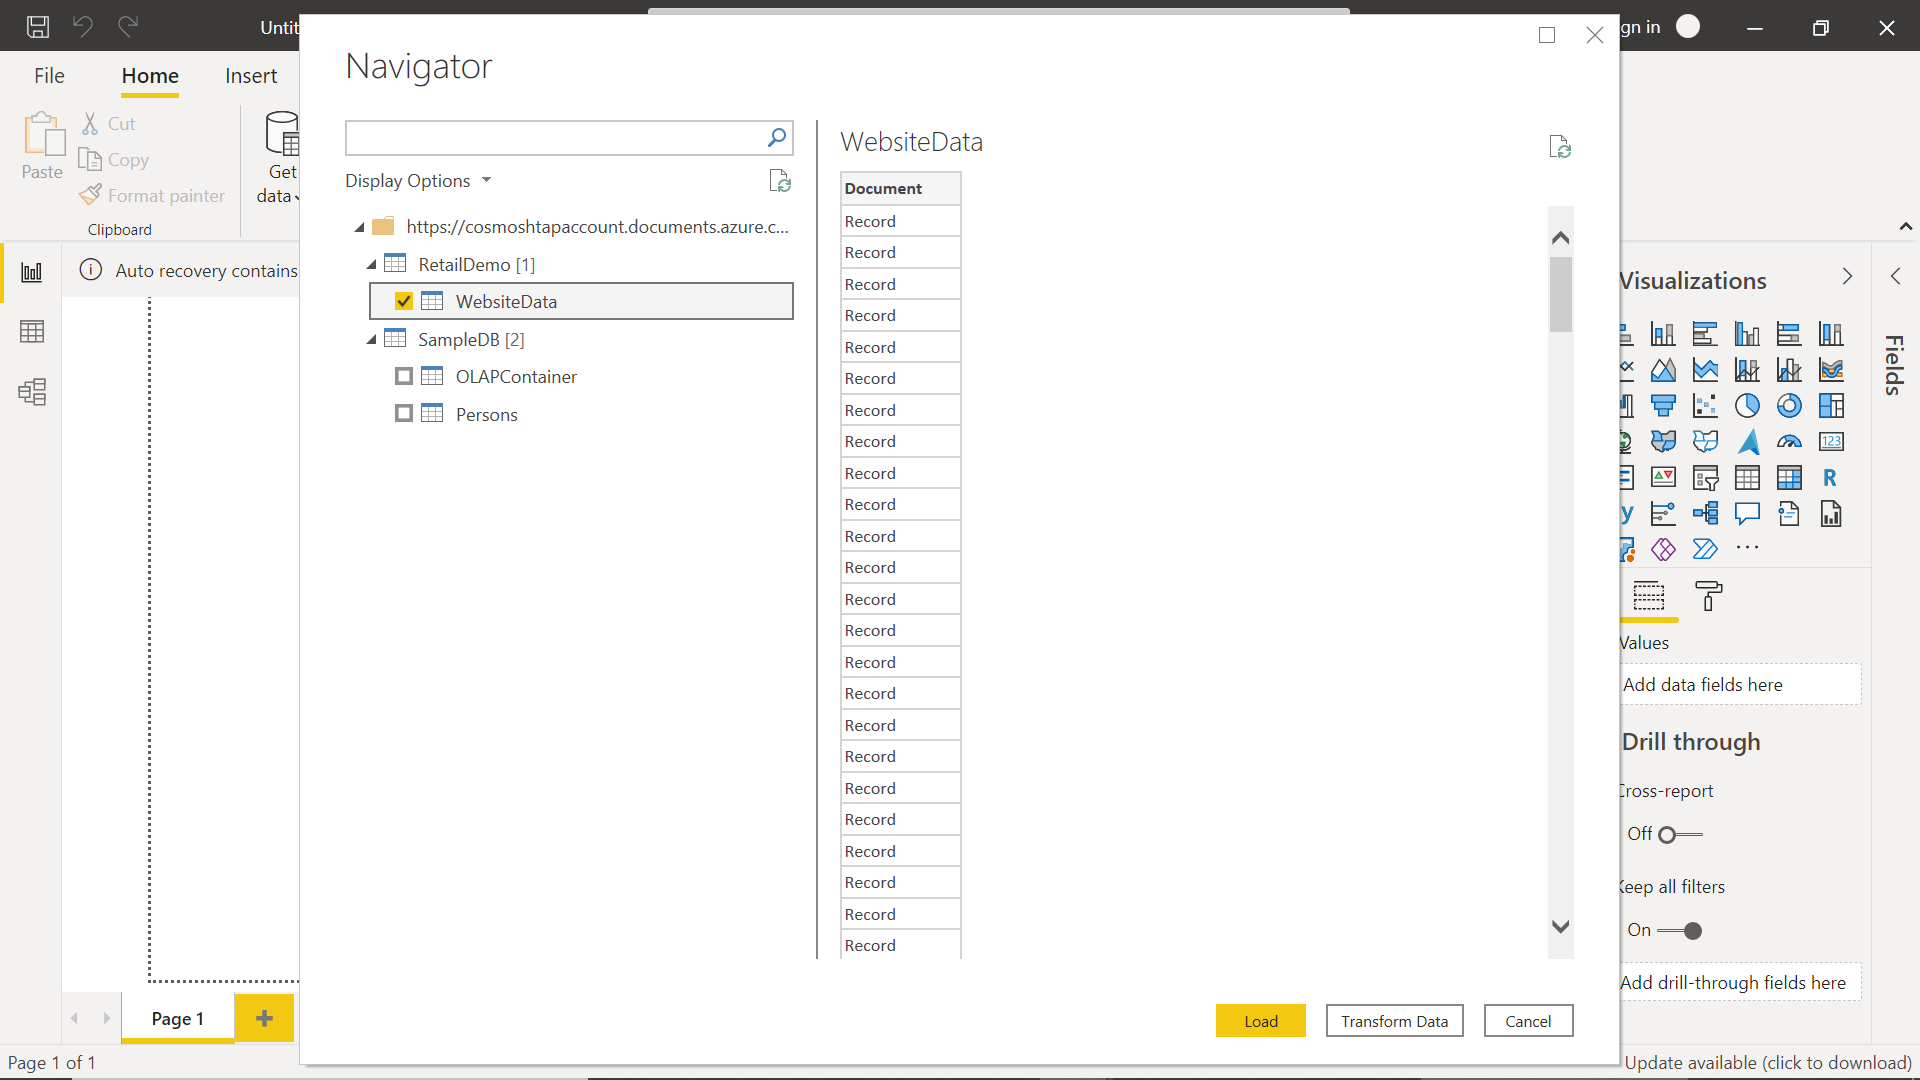
Select the desired collection and we would be able to see the data as shown below. As the data is not coming from a relational store, every record would be shown as seen below. Each record contains multiple keys and values, where each key is a field, and the values of the keys are the actual data.
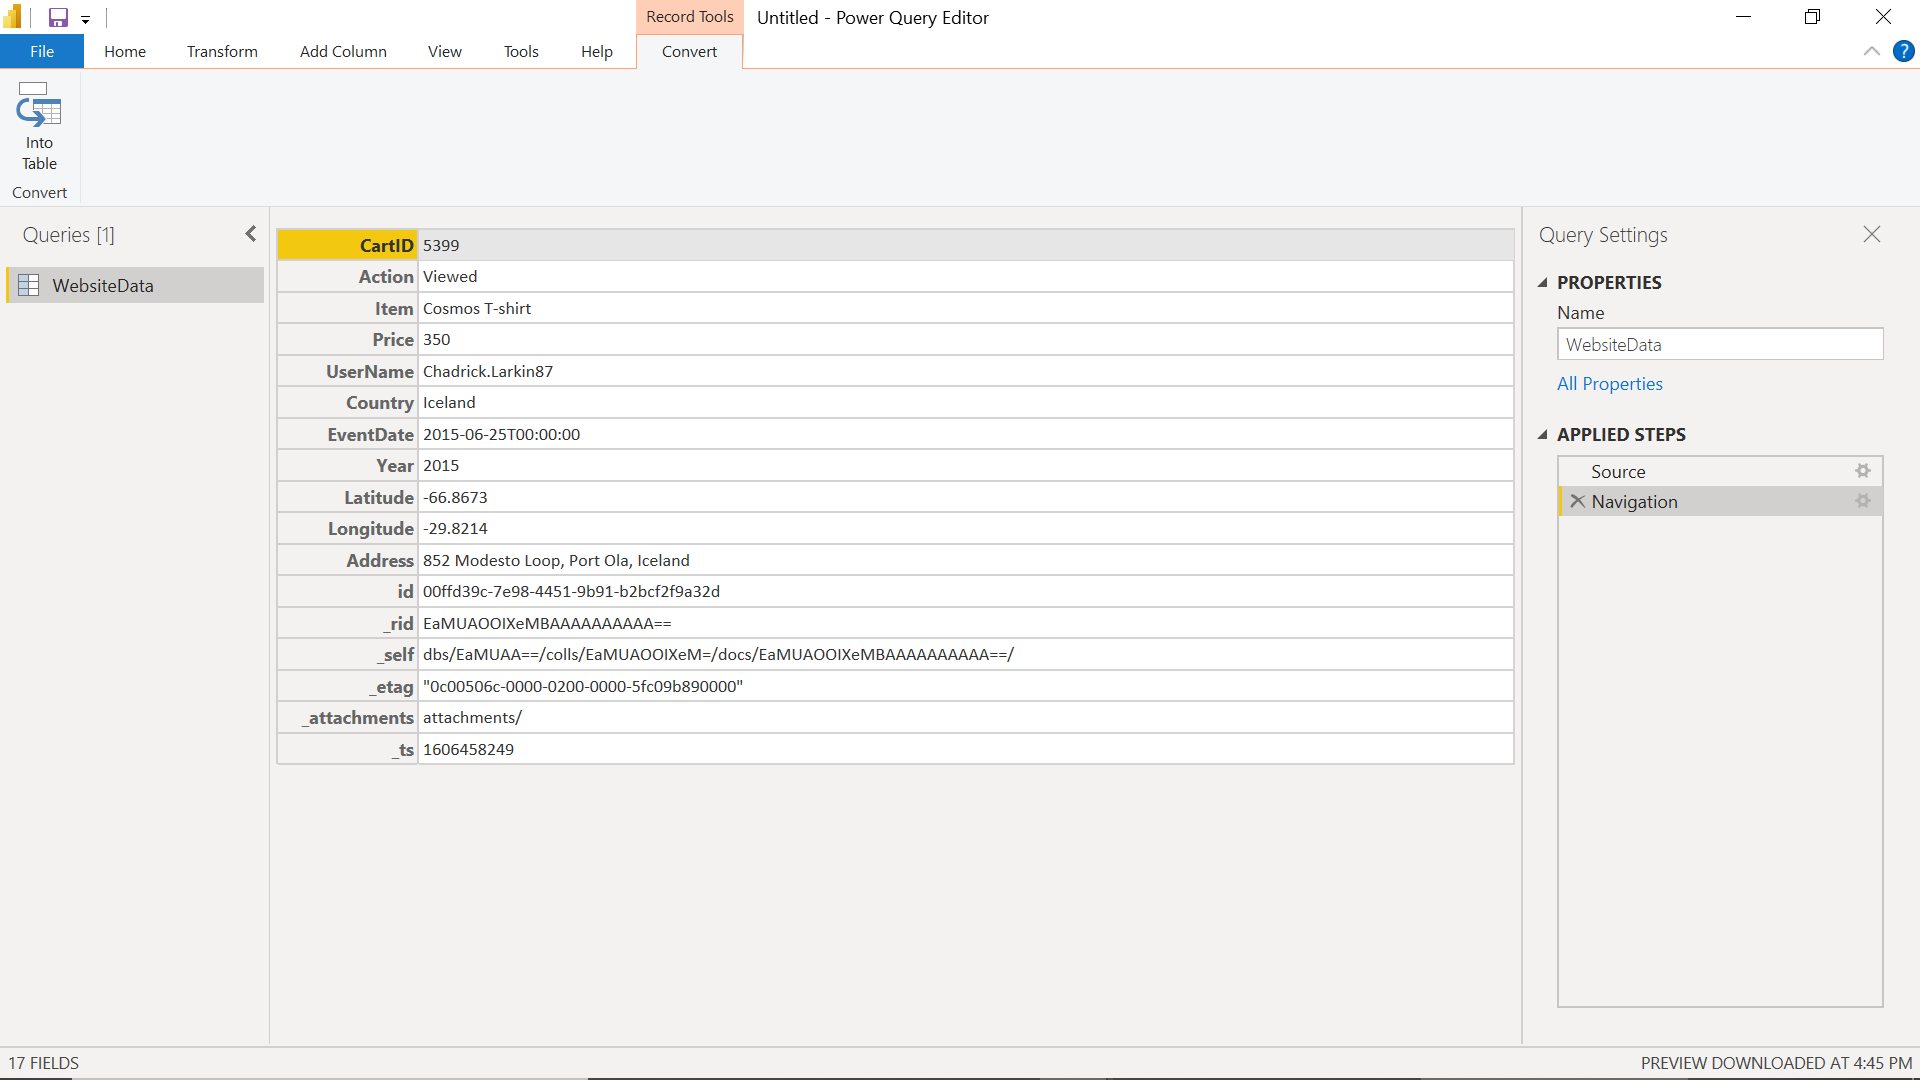
If we transform the data and investigate any of the records, it will look as shown below. Here we can see the different fields in each record with its values.
Click on the Transform Data button, and we would see a list of records. Click on the column header and we would see the key names embedded in each record. We can select or de-select the fields as desired and click on the OK button.

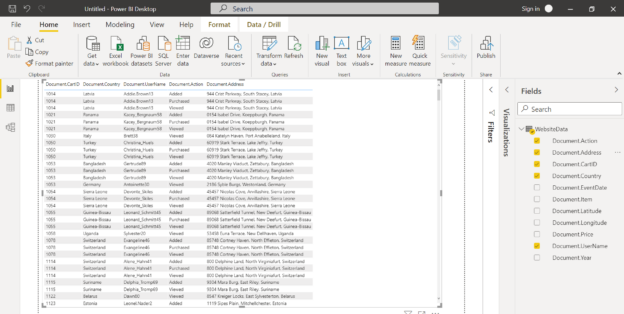
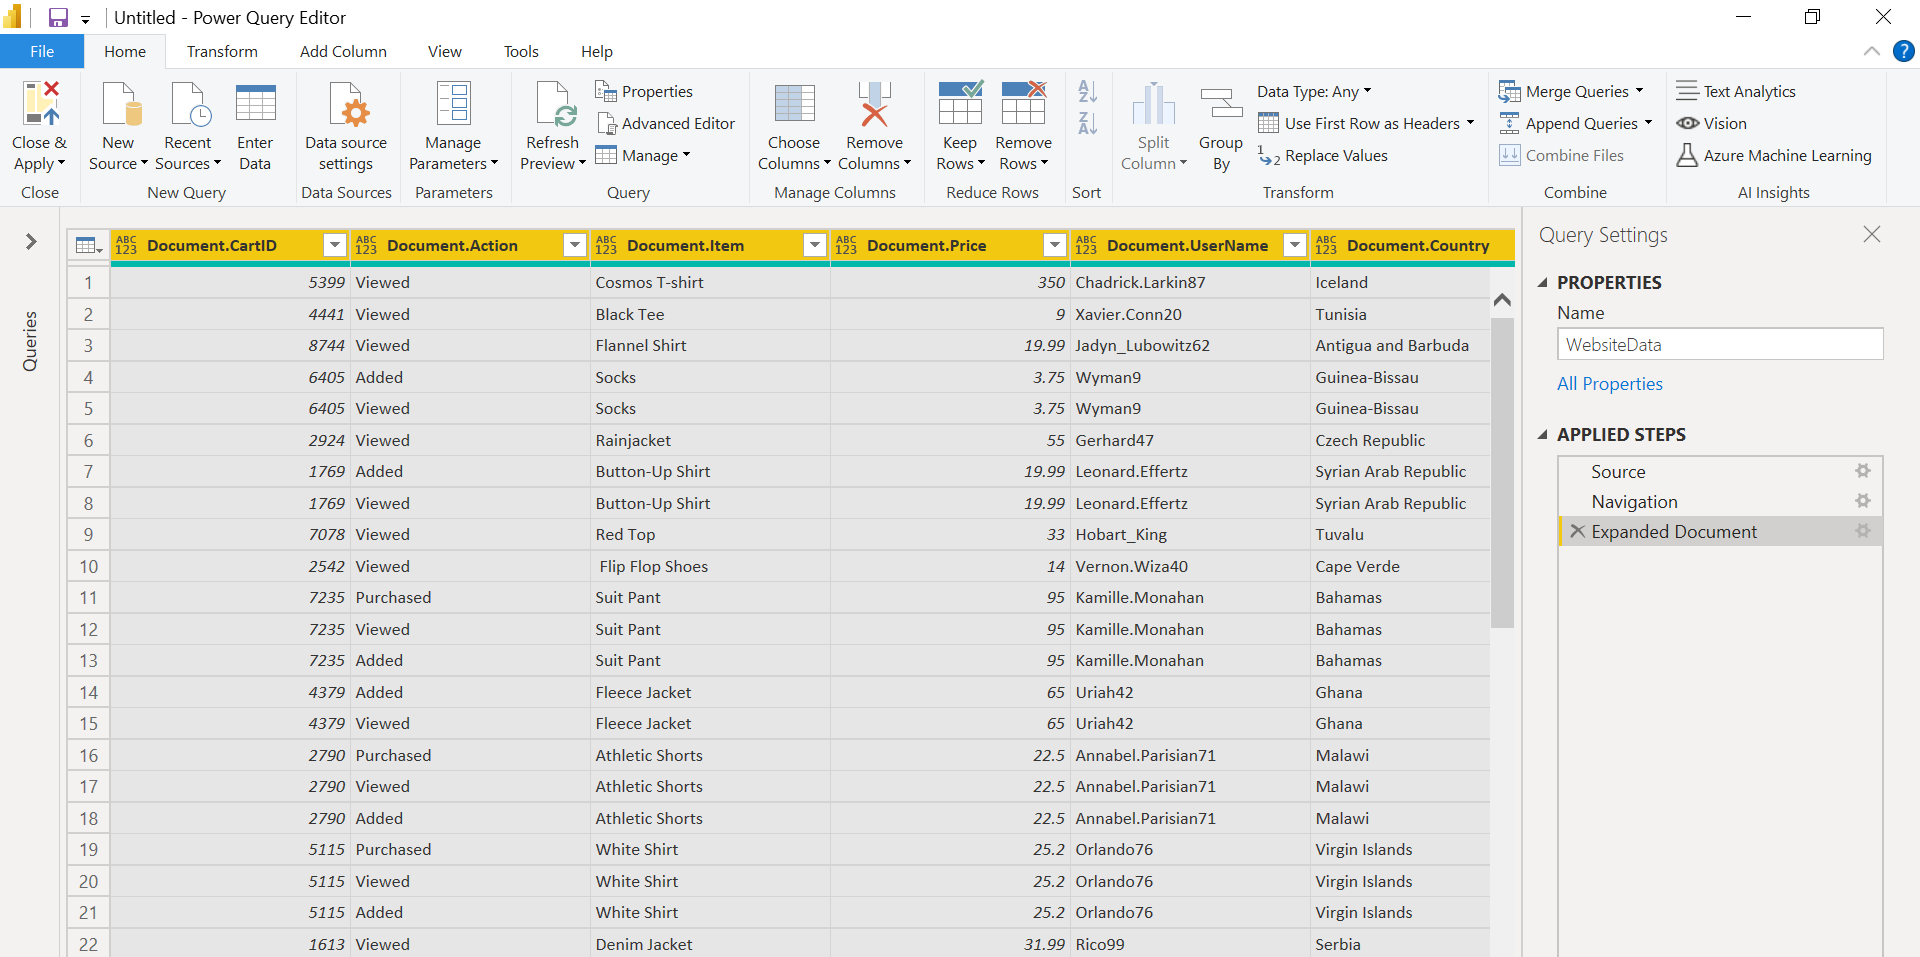
Once the selection is done, the data would be displayed in a tabular manner as shown below. The data embedded in the form of the key-value collection in each item is transposed in a flattened tabular structure as shown below.
Once we have confirmed that the data, as well as the schema, is as desired, click on the Apply and Close button. It would import the data and schema of the Azure Cosmos DB instance into the Power BI Desktop tool as shown below.
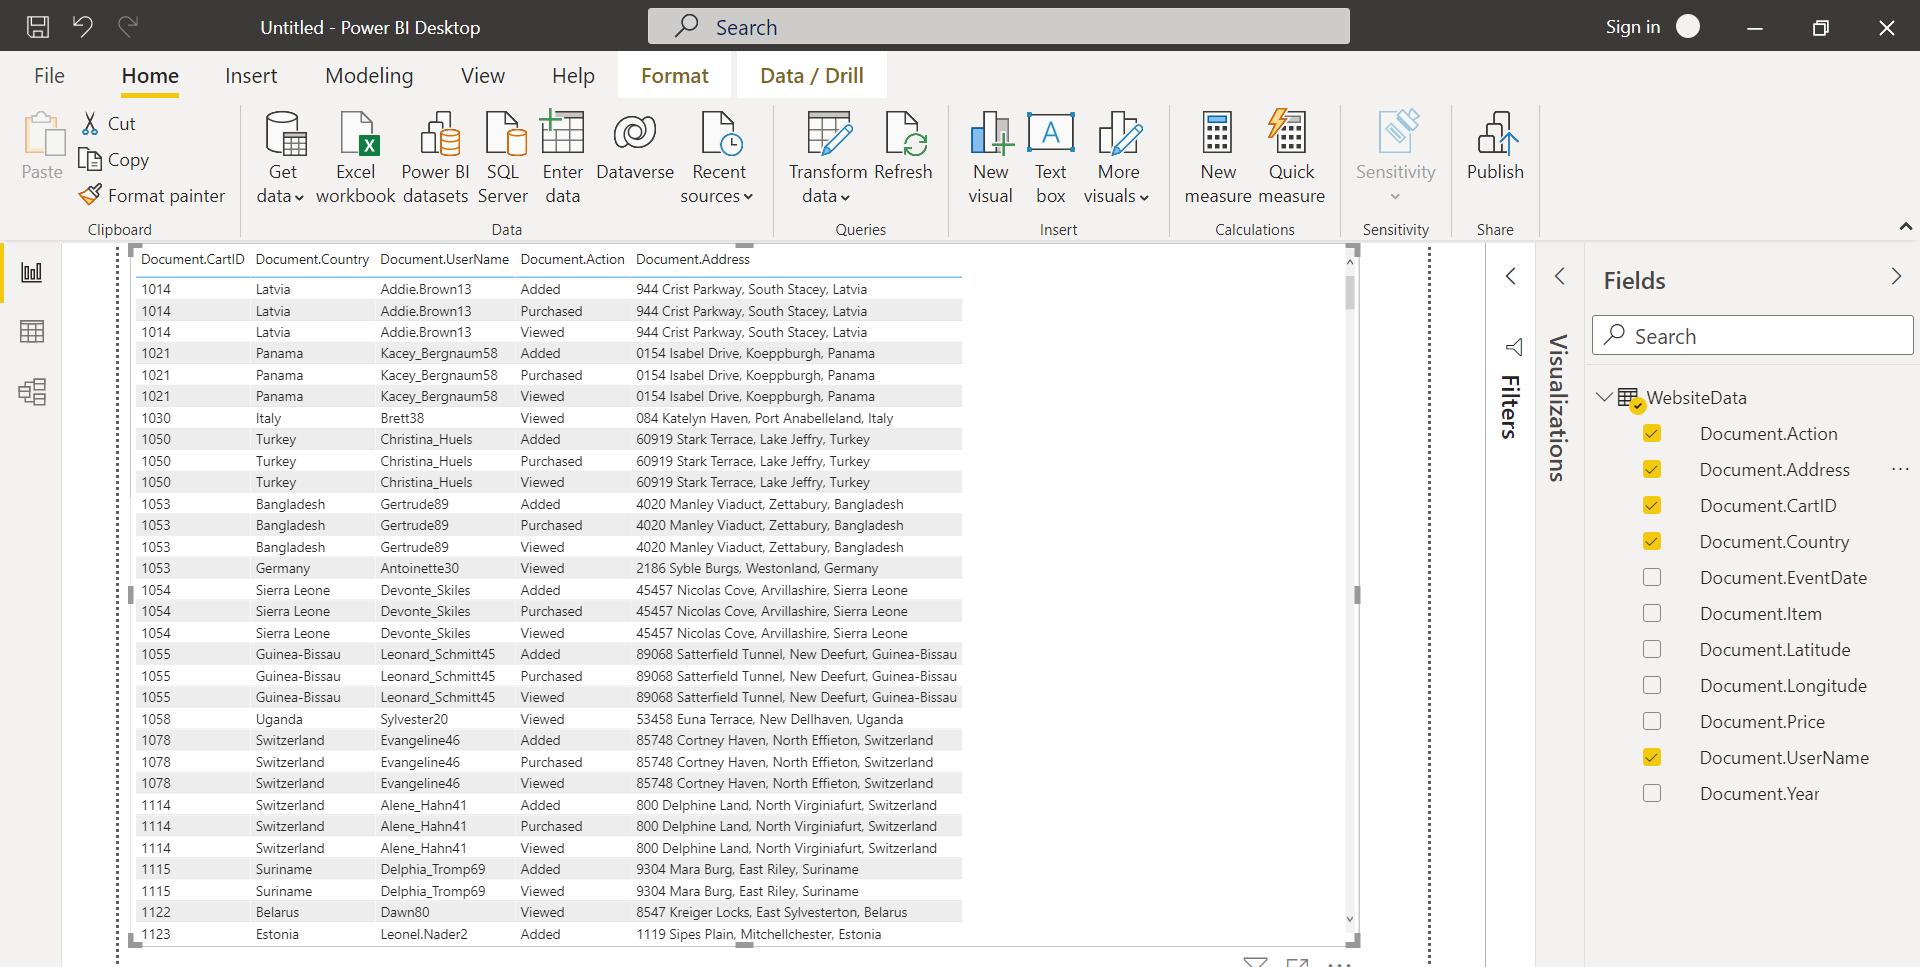
Select fields from the Fields pane and we would be able to see the data on the report layout as shown below.
In this way, we can report data from a Cosmos DB instance using the Cosmos DB connector in Power BI Desktop as shown below.
Conclusion
In this article, we started with the creation of a new Azure Cosmos DB instance with sample data as well as the installation of the Power BI Desktop. We used the Cosmos DB connector in Power BI Desktop to connect to the Cosmos DB instance and source data out of it. Before the data is populated in Power BI Desktop, we transformed the schema to convert it into the tabular structure and imported the data in the tool and finally reported it on the report layout.

She has a deep experience in designing data and analytics solutions and ensuring its stability, reliability, and performance. She is also certified in SQL Server and have passed certifications like 70-463: Implementing Data Warehouses with Microsoft SQL Server.
View all posts by Gauri Mahajan
- Oracle Substring function overview with examples - June 19, 2024
- Introduction to the SQL Standard Deviation function - April 21, 2023
- A quick overview of MySQL foreign key with examples - February 7, 2023