

In the previous article, Start your journey with Azure Cosmos DB, we provided you with the backpack that helps you to start your journey with Azure Cosmos DB and filled it with detailed information about the Cosmos DB usage benefits, how to create your first Cosmos DB account, create a new database, container, and items and finally how to query the data stored in that container.
In this article, we will show how to migrate a SQL Server database table’s data into an Azure Cosmos DB container using the Cosmos DB Data Migration tool and query the migrated data.
Azure Cosmos DB Data Migration Tool
When planning to migrate your data into an Azure Cosmos DB, you need to use the suitable migration tool that supports your Cosmos DB API type. For example, the Cosmos DB Data Migration tool can be used to migrate the data from the SQL API and the Table API, but it does not support migrating data into Mongo DB API and Gremlin API.
Before using the Cosmos DB Data Migration tool, you need to make sure that the Microsoft .NET Framework 4.51 or higher is installed on the machine where you will run the migration tool. Also, if you plan to migrate a huge amount of data into the Cosmos DB container, make sure to increase the throughput in order to migrate the data faster, as the data migration speed depends highly on the throughput amount. You can easily decrease the throughput after completing the data migration operation to eliminate any high costs issue.
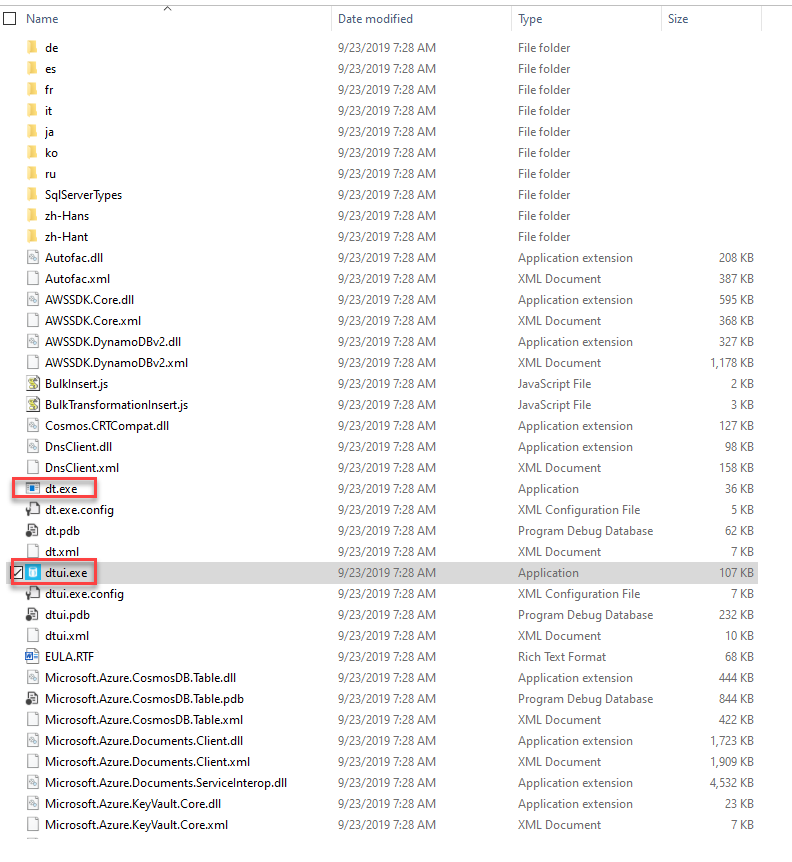
A precompiled copy of the Cosmos DB Data Migration tool can be downloaded directly from this page. The downloaded package contains both a command-line version of the data migration tool, as Dt.exe, and a graphical user interface version of that tool, as Dtui.exe, as shown below:
Migrate SQL Data
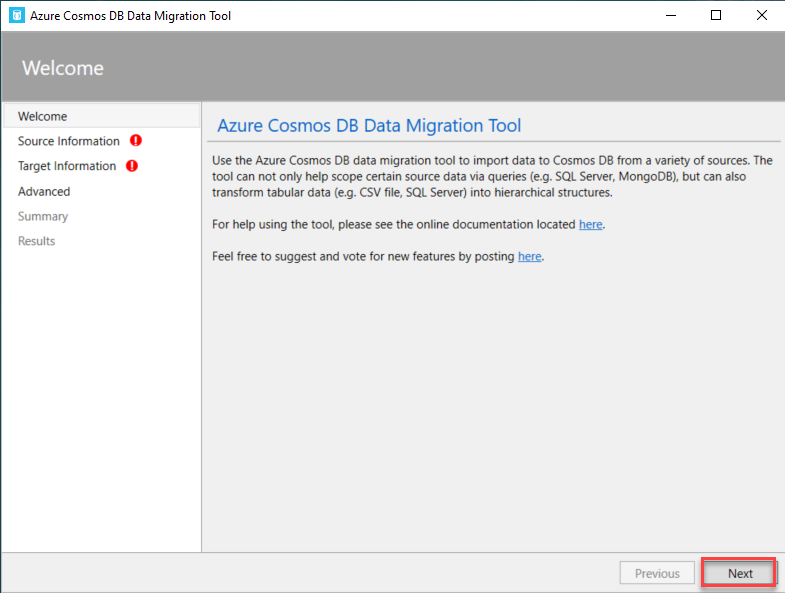
The Cosmos DB Data Migration tool is an executable tool, which requires no installation to start the migration process. So, to launch the Data Migration tool, double-click on the executable file of the tool, and it will start directly.
When the Data Migration tool launches, the Welcome page will display a piece of introductory information about that tool, providing external links for the tool documentation and for suggesting new features for that tool, as shown below:
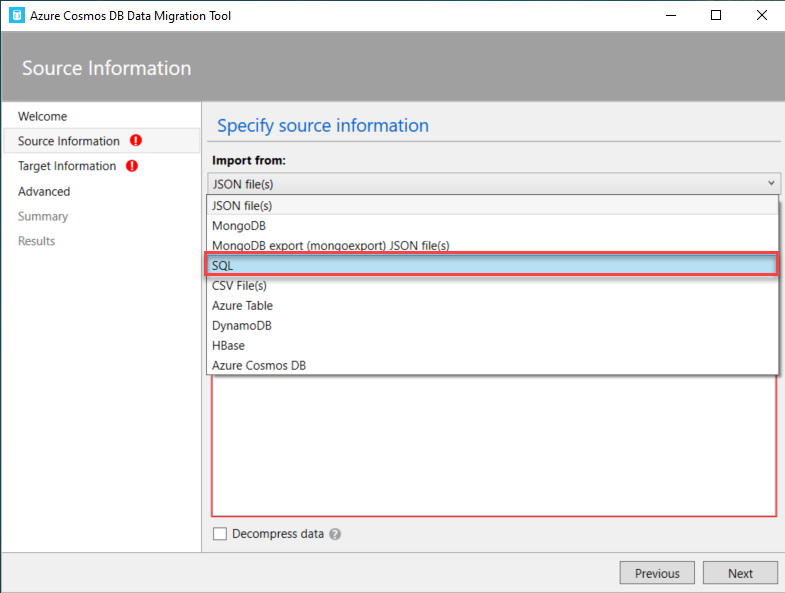
The Data Migration tool can be used to import data into your Cosmos DB container, from different data sources. This includes importing data from JSON files, MongoDB, SQL Server, CSV files, Azure Table storage, Amazon DynamoDB, and Azure Cosmos DB SQL API containers.
In this demo, we will copy data from a SQL Server instance, by choosing the SQL data source, as shown below:
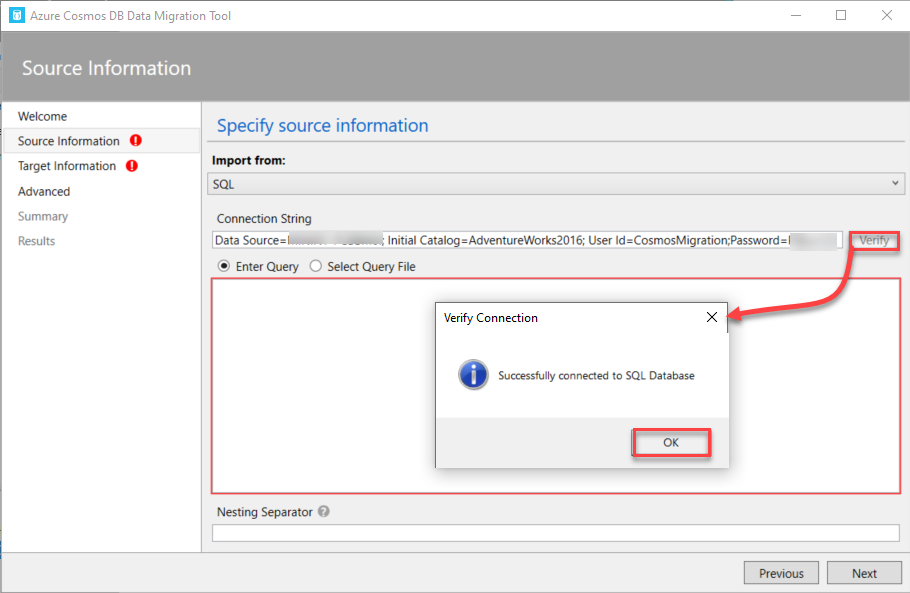
In order to connect to the SQL Server data source, provide the Standard SQL Server connection string that contains the SQL Server name, the database name, and authorized account credentials to connect to that SQL Server instance. Click on the Verify option to validate the connecting string and make sure that the connection is opened to that SQL Server instance, as below:
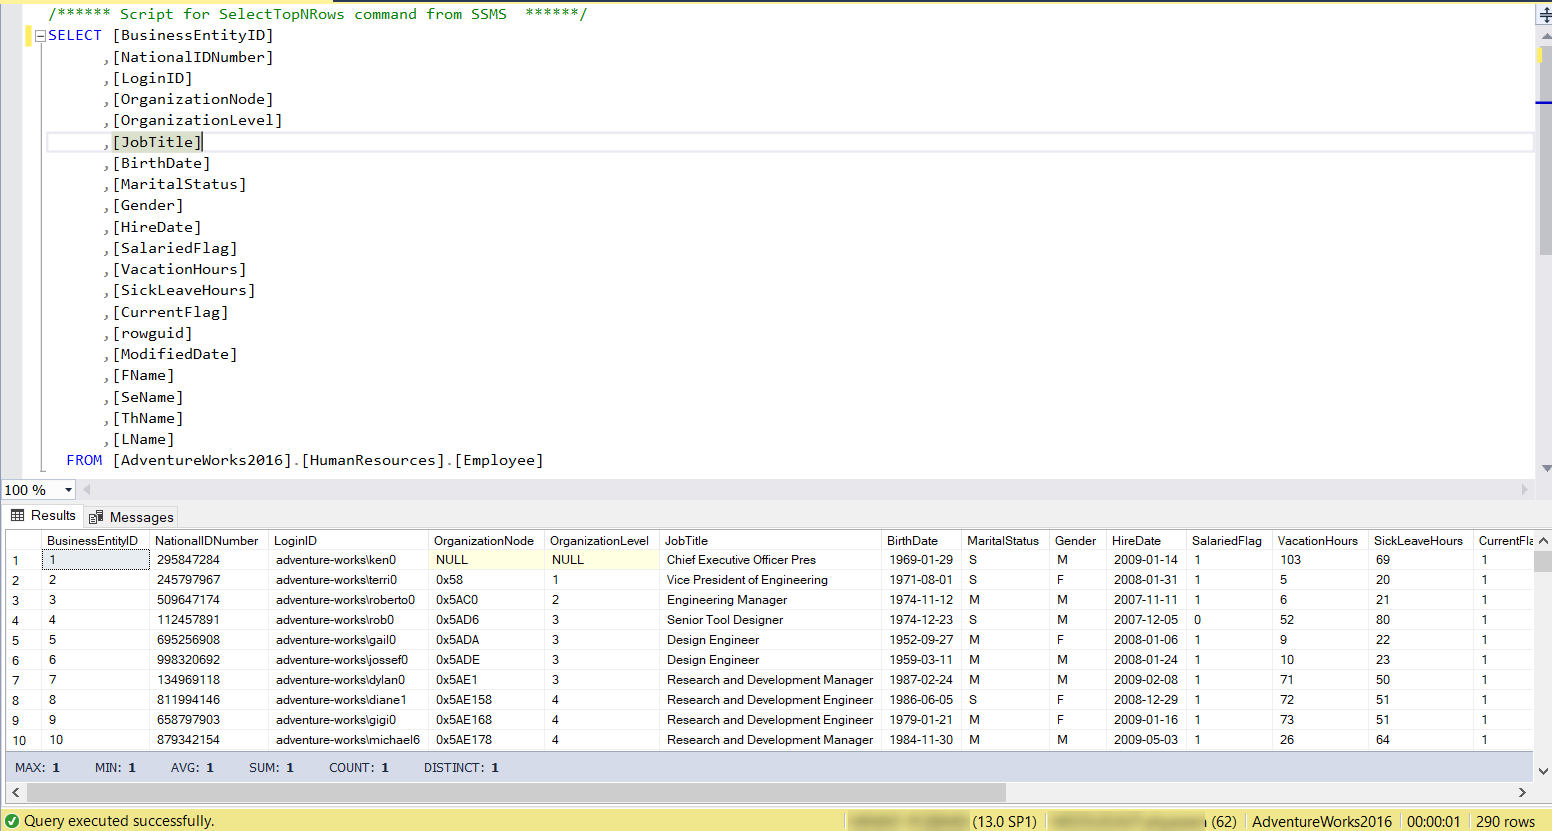
The next step is to provide the T-SQL query that is used to retrieve the data to be migrated from that SQL Server instance. It is recommended to write and tune that T-SQL query first using the SSMS tool, to retrieve only the columns and records that you really need to migrate, in the most optimized way, as shown below:
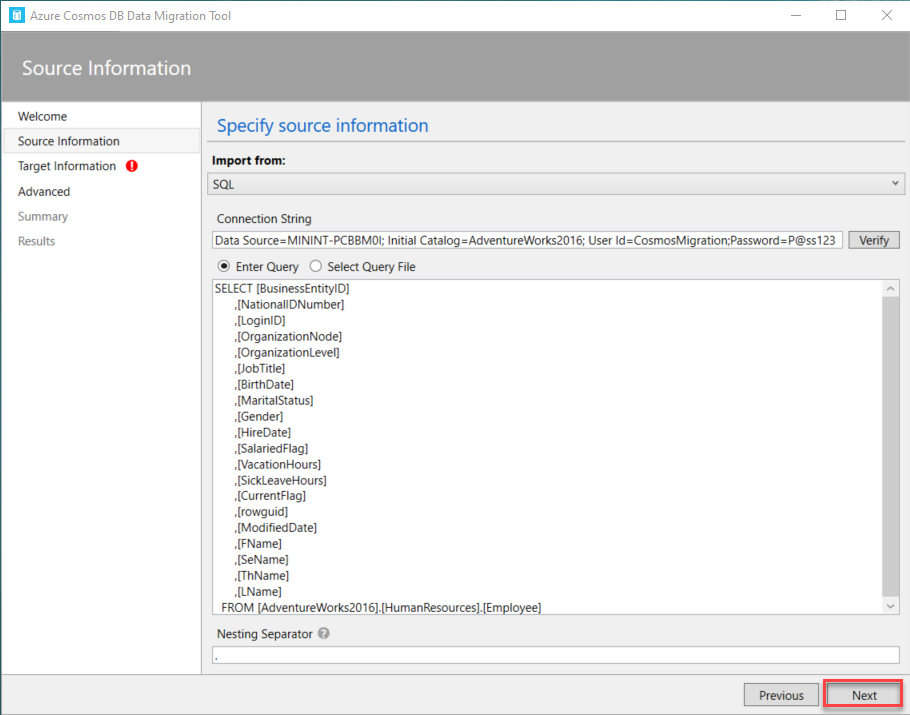
Once the optimal T-SQL query is ready, provide it directly to the Azure Cosmos DB Data Migration tool, or save it as a file and browse that file in the data migration tool.
The Nesting Separator option is used to modify the structure of the generated document by creating hierarchical relationships for the sub-properties, such as the state, country, street and building number of the address, during the data import process, as shown below:
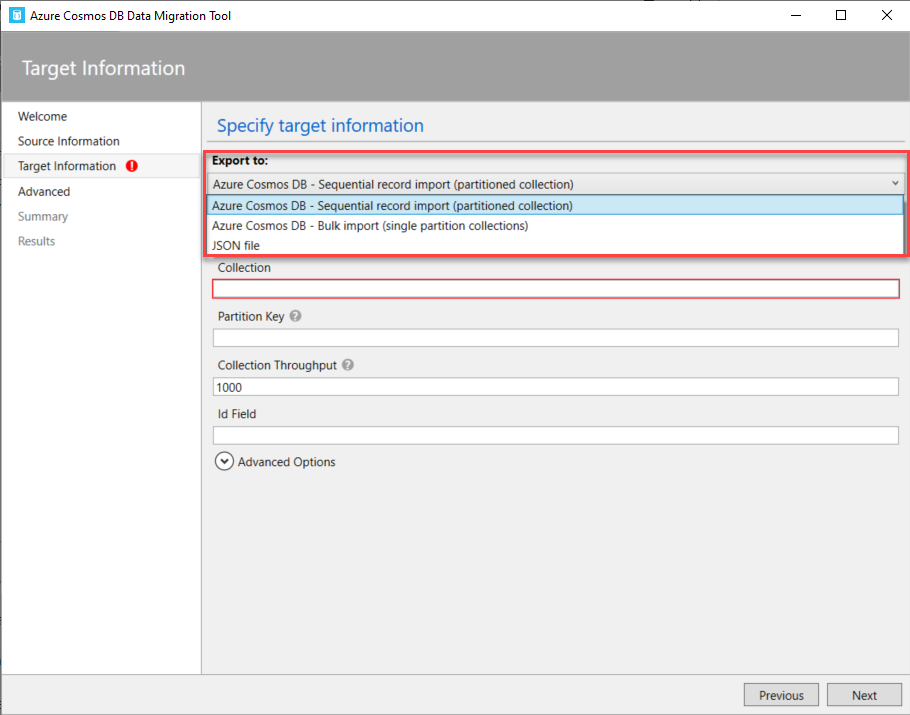
In the Target Information page, specify whether to migrate the data into a JSON file that can be used later, or migrate it directly into an Azure Cosmos DB container using the Sequential or Bulk import method.
The Bulk importer uses the Cosmos DB stored procedure for the copy efficiency, where the stored procedure will be created and executed during the import operation then deleted from the target collection when the import operation completed, with the ability to migrate to a one or more single-partitioned containers.
On the other hand, the sequential importer copies the source records one by one, with the ability to migrate the data to only one container that contains single or multiple partitions.
In this demo, we will use the sequential importer option, as shown below:
Before going through the next steps in the Data Migration tool wizard, make sure that you already have a database created under your Azure Cosmos DB account. If not, you can easily create a new Cosmos DB database, by following the steps below:

Keep the name of the created database as we will use it in the next step.
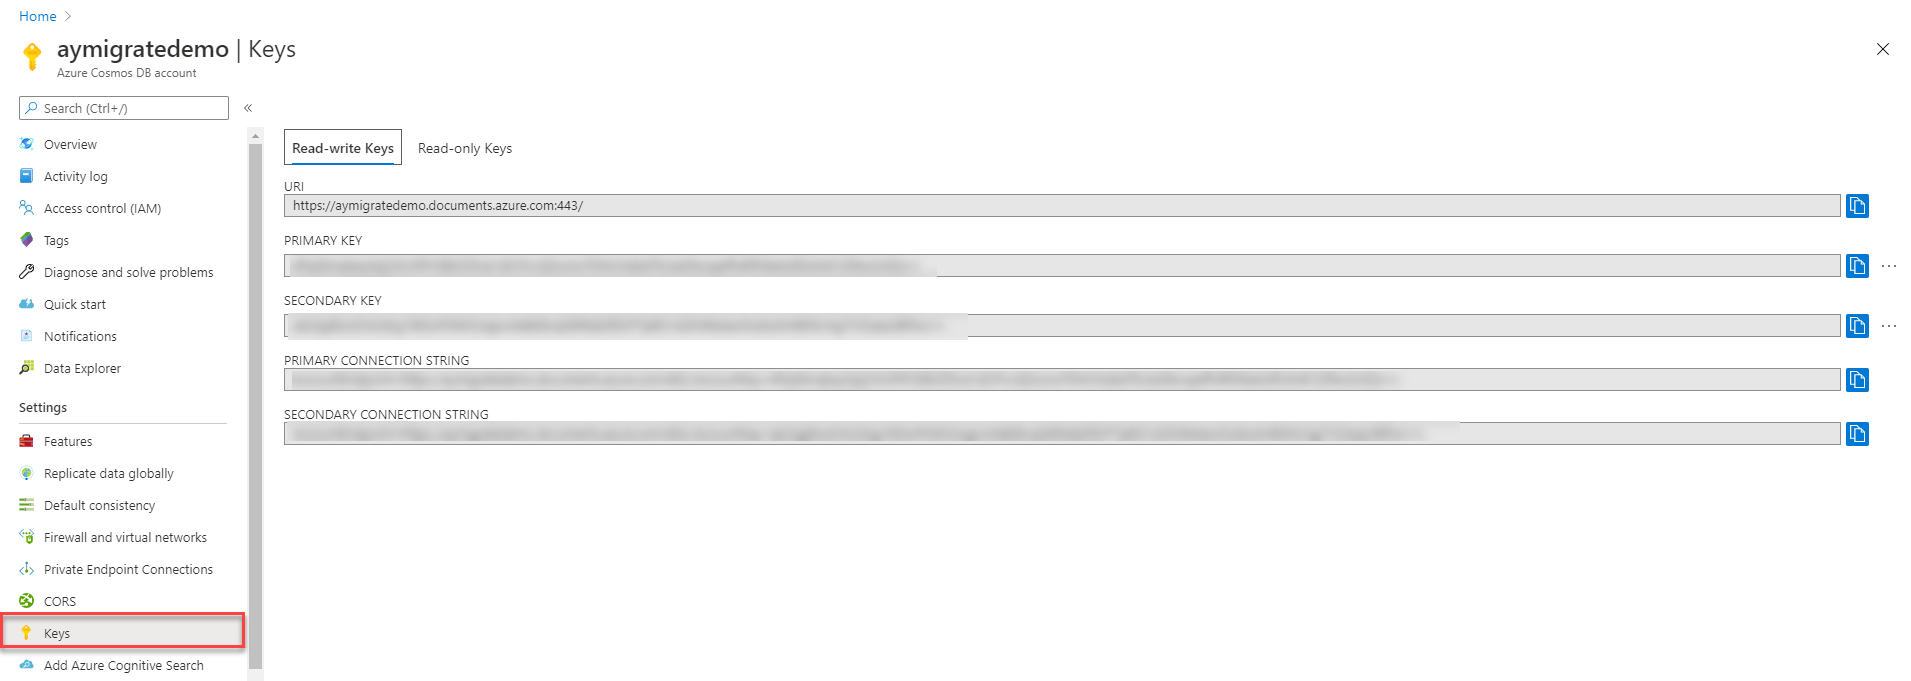
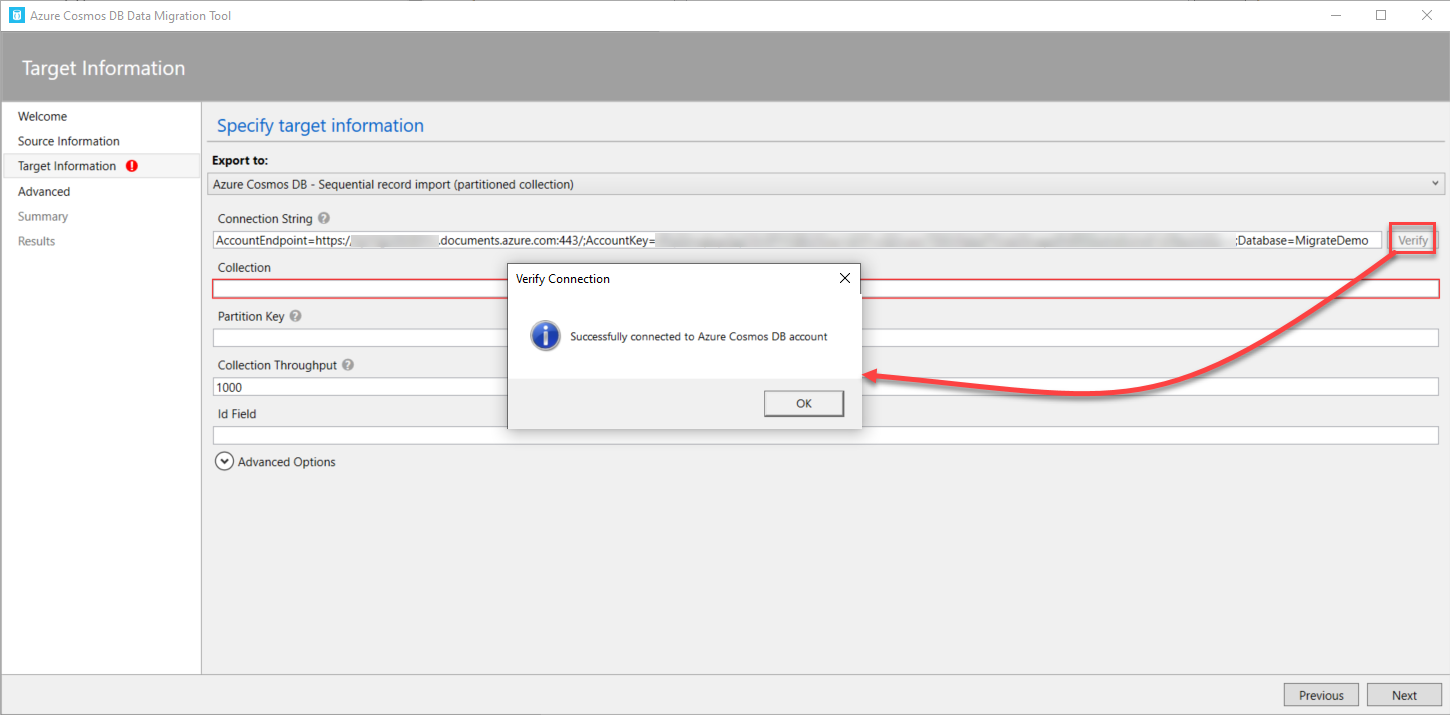
In order to get the connection string of the Azure Cosmos DB account, open the account in the Azure Portal and copy the Primary Connection String under the Keys option, as shown below:
In order to build the Azure Cosmos DB connection string that can be used in the Data Migration tool, we need to append the name of the created database, as Database=<database name>, at the right side of the connection string that is copied from the Cosmos DB keys.
After providing the target connection string, click on the Verify option to validate and test the connection to that account, as shown below:
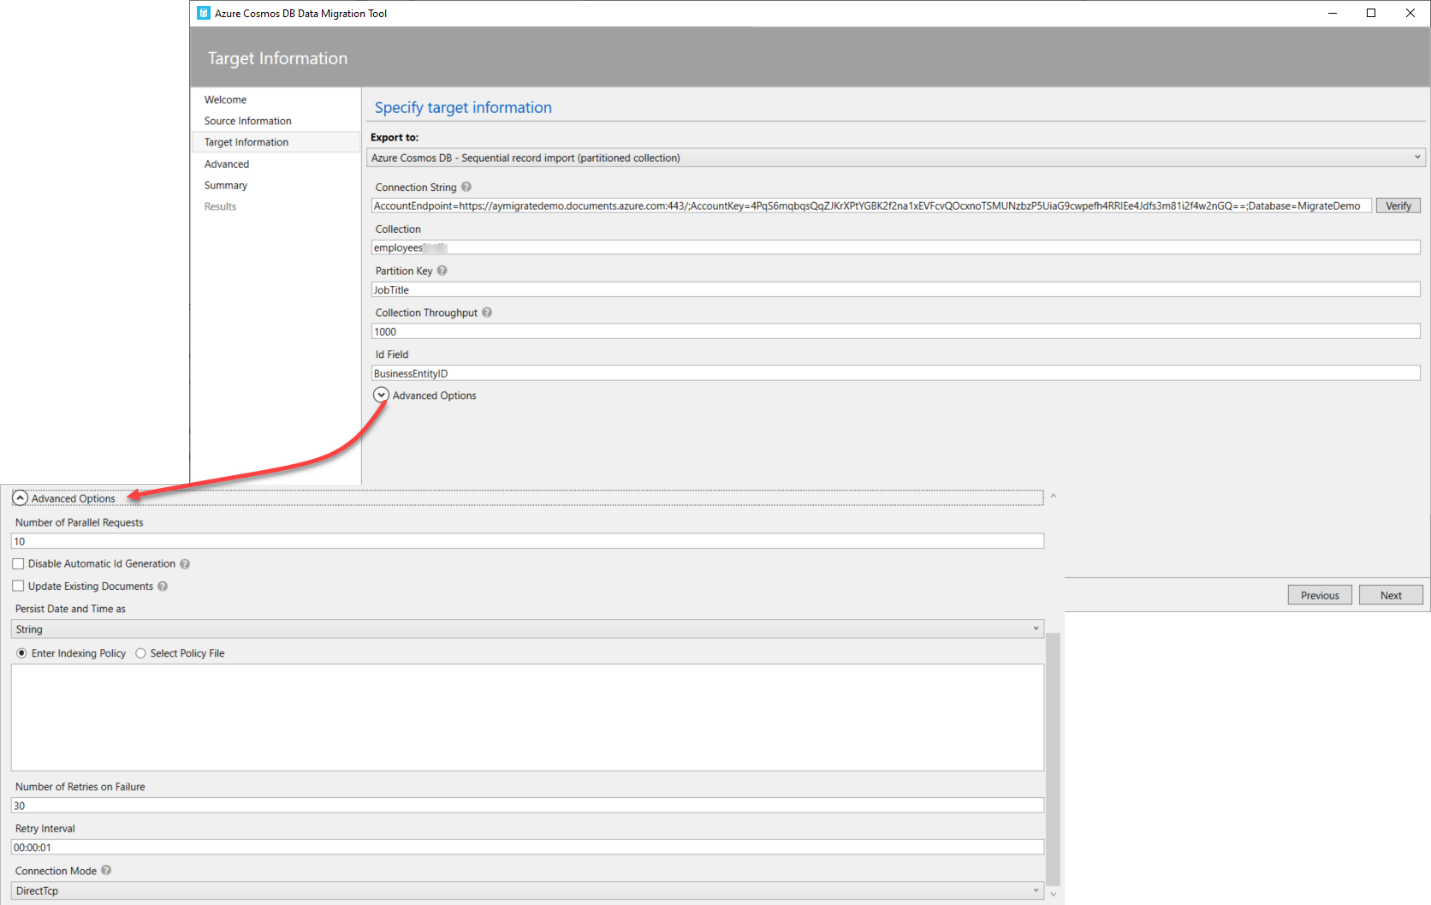
In the Collection field, you need to provide the name of the container to migrate the data into, where we can only create one container for the Sequential importer, with the ability to create multiple partitions on that container using the provided value of the Partition Key. Multiple containers that are supported by the Bulk importer can be created by providing the name of the collection prefix and the range of collections, as [0-n]. In this example, we will create one container, and use the JobTitle column as a partition key, and the BusinessEntityID as the ID field in the collection items.
It is recommended to tune the throughput amount to make the import operation faster. In our example, we will keep it with default value as we will migrate a small number of records to the Azure Cosmos DB database.
You can also configure a number of advanced options, such as the number of parallel requests, whether to disable the automatic Id generation and consider using the imported ID field, updating (overwriting) the existing documents, specifying the number of retries in case of import failure, the interval between retries, the connection mode, including DirectTcp, DirectHttps, and Gateway and finally persisting the data as String, Epoch or Both, as shown below:
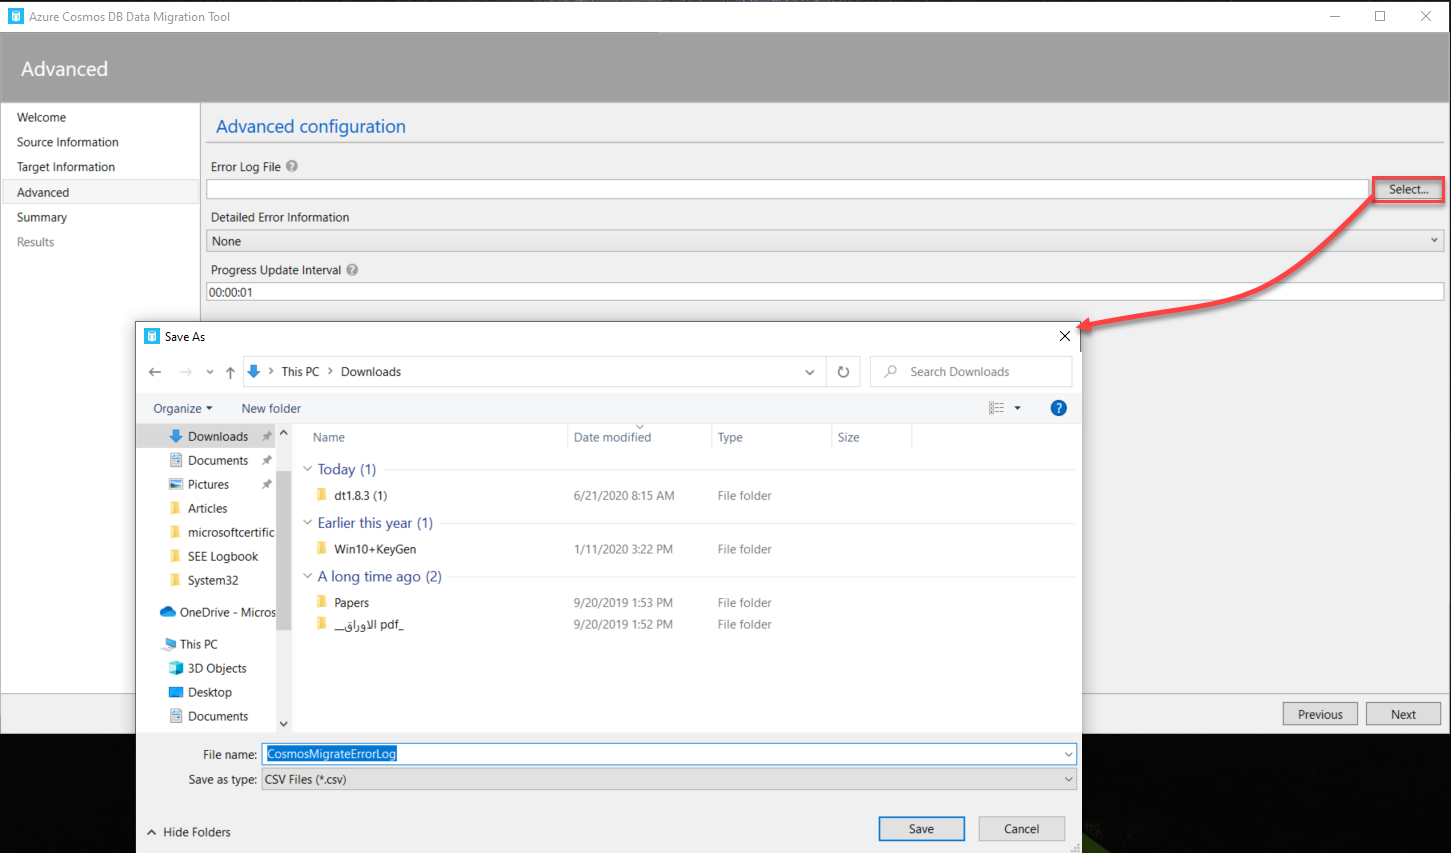
In the Advanced Configuration window, you will be requested to specify the location of the import error log file, the type of errors to write to that log file and the update frequency of the import progress messages, as shown below:
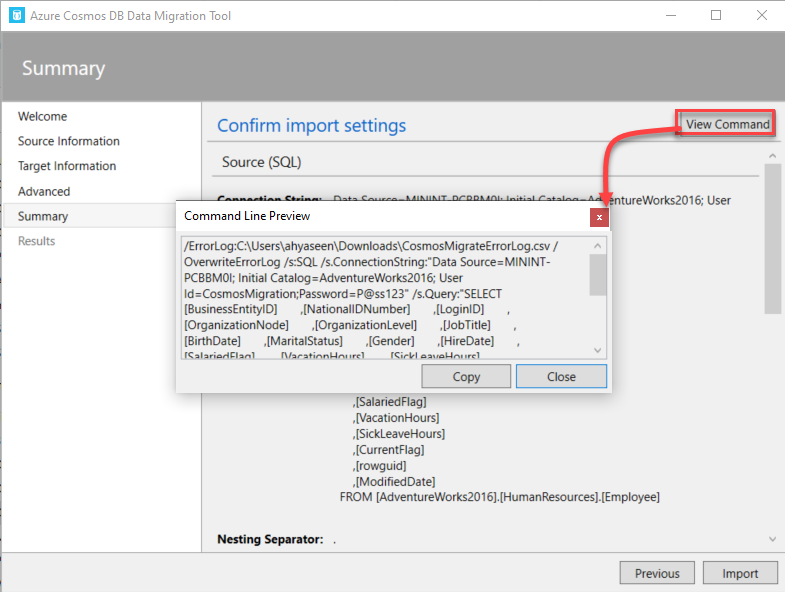
The next window is the Summary window, in which you can review all your selections before proceeding with the import operation, as shown below:
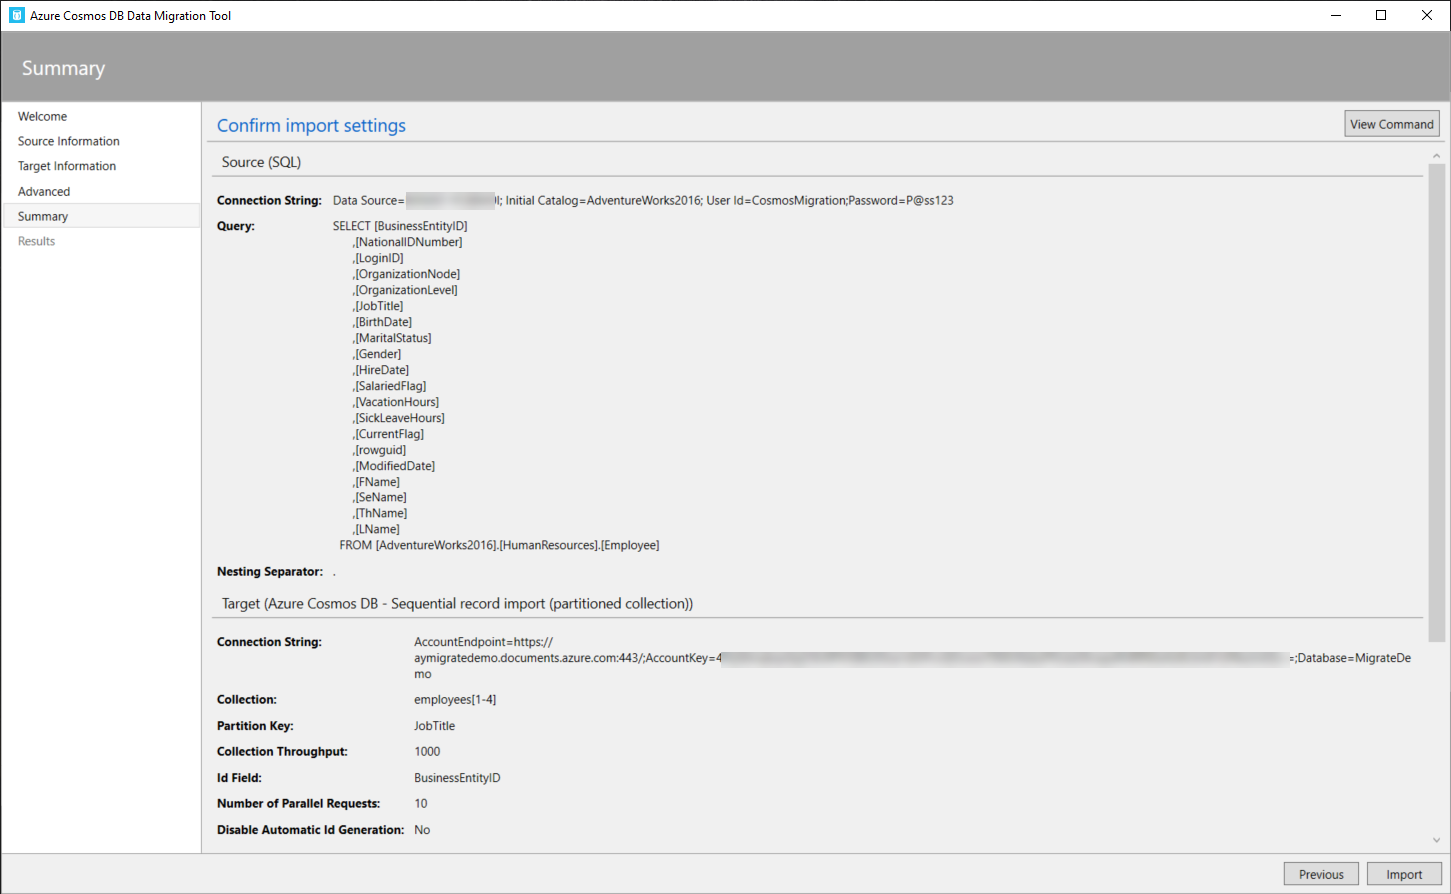
If you manage to perform the import process later or using a command-line tool, the Summary window provides you with the ability to view and copy the command that can be used to import the data based on your choices from the previous steps, as shown below:
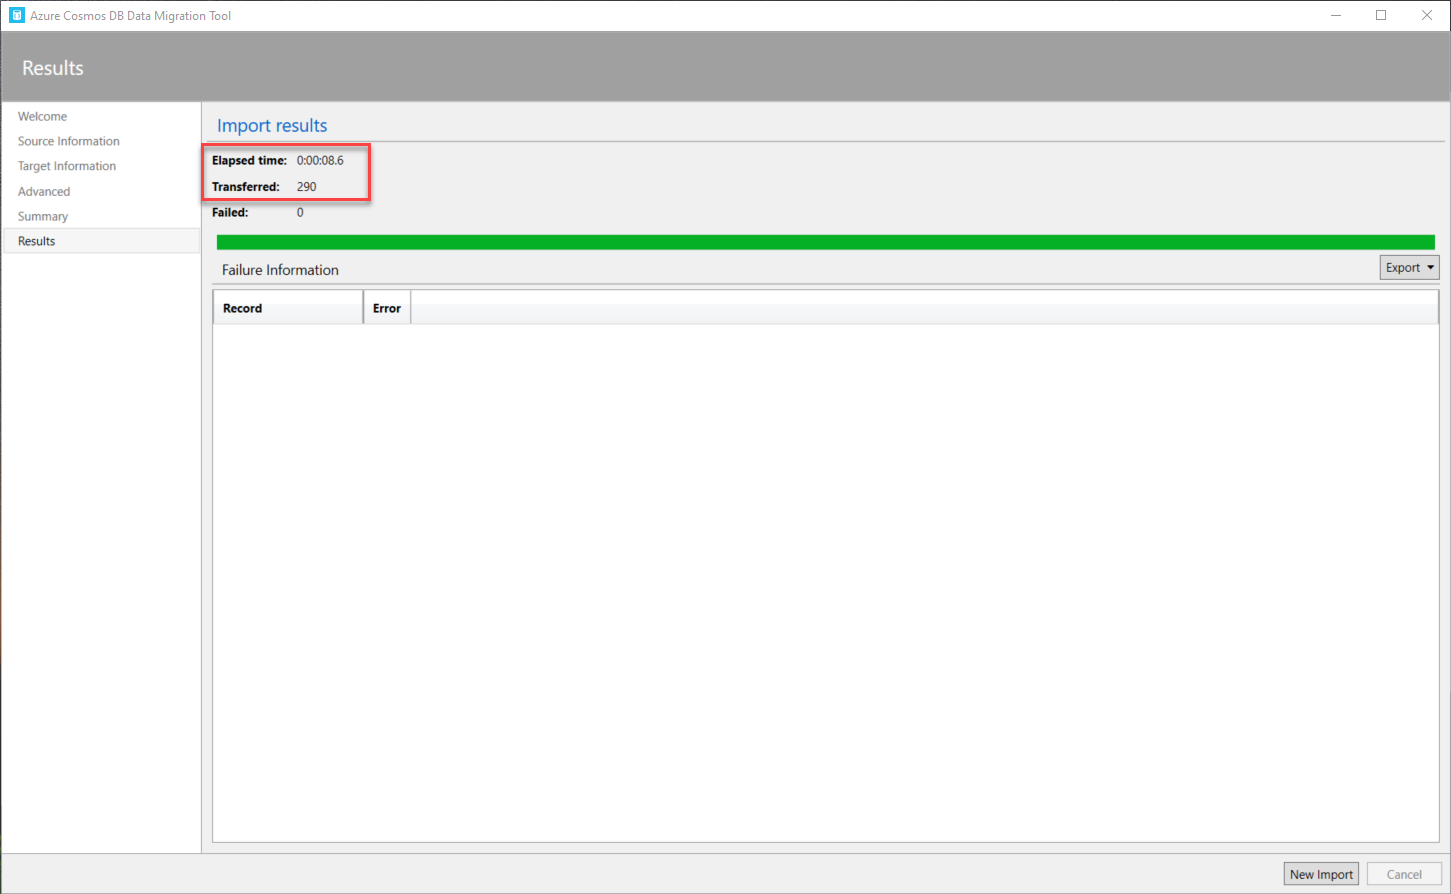
After reviewing all selected options, click on the Import option to start the import operation and monitor the progress of the data migration.
Once the operation completed, the Data Migration tool provides you with the ability to export the failure report or start a new import operation, as shown below:
Query Migrated Data
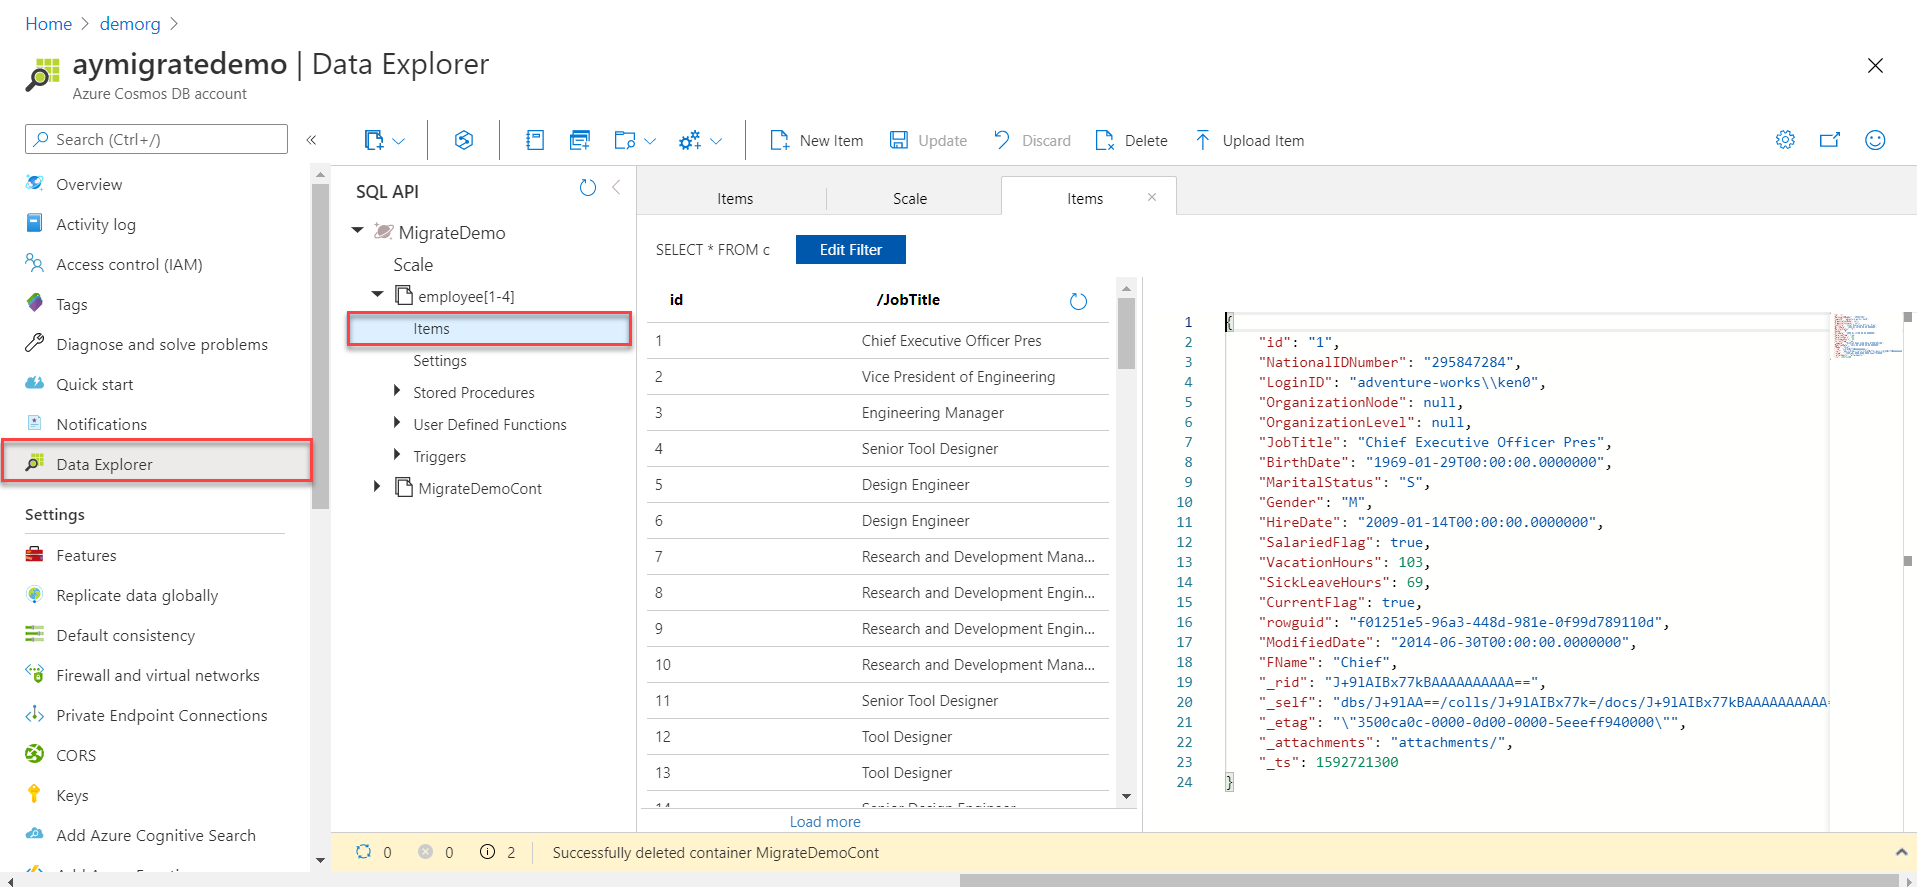
To validate that the data is migrated to the Azure Cosmos DB container, open the Cosmos DB account using the Azure Portal and browse the database container under the Data Explorer, as shown below:
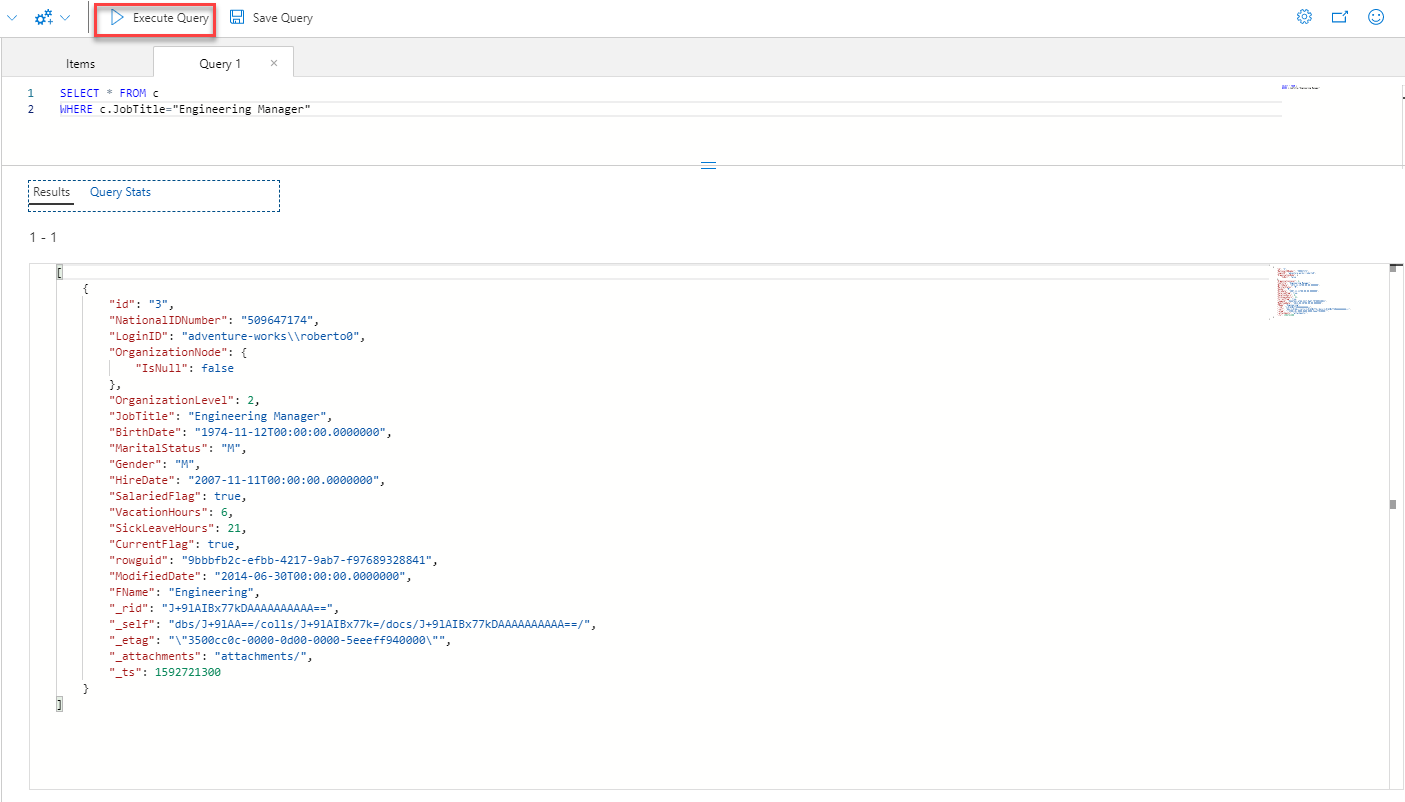
To write your own query, instead of using the default data filter, click on the New SQL Query option, to open the query editor, as shown below:

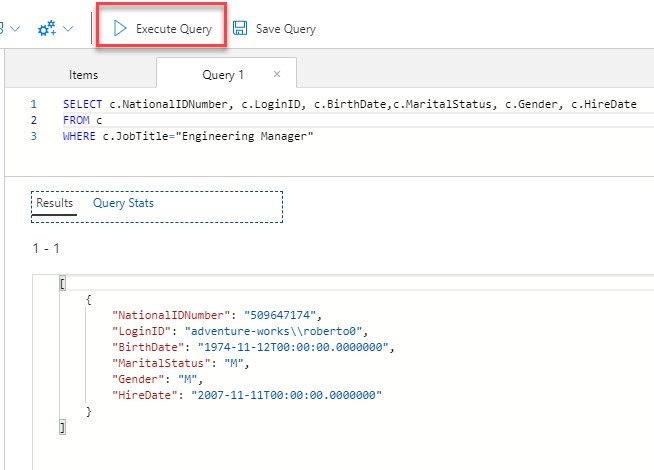
In the query editor window, customize the default SELECT query by proving your T-SQL statement. For example, we will return only the employees with a specific job title, by adding a new filter using the WHERE clause, then execute the query, as shown below:
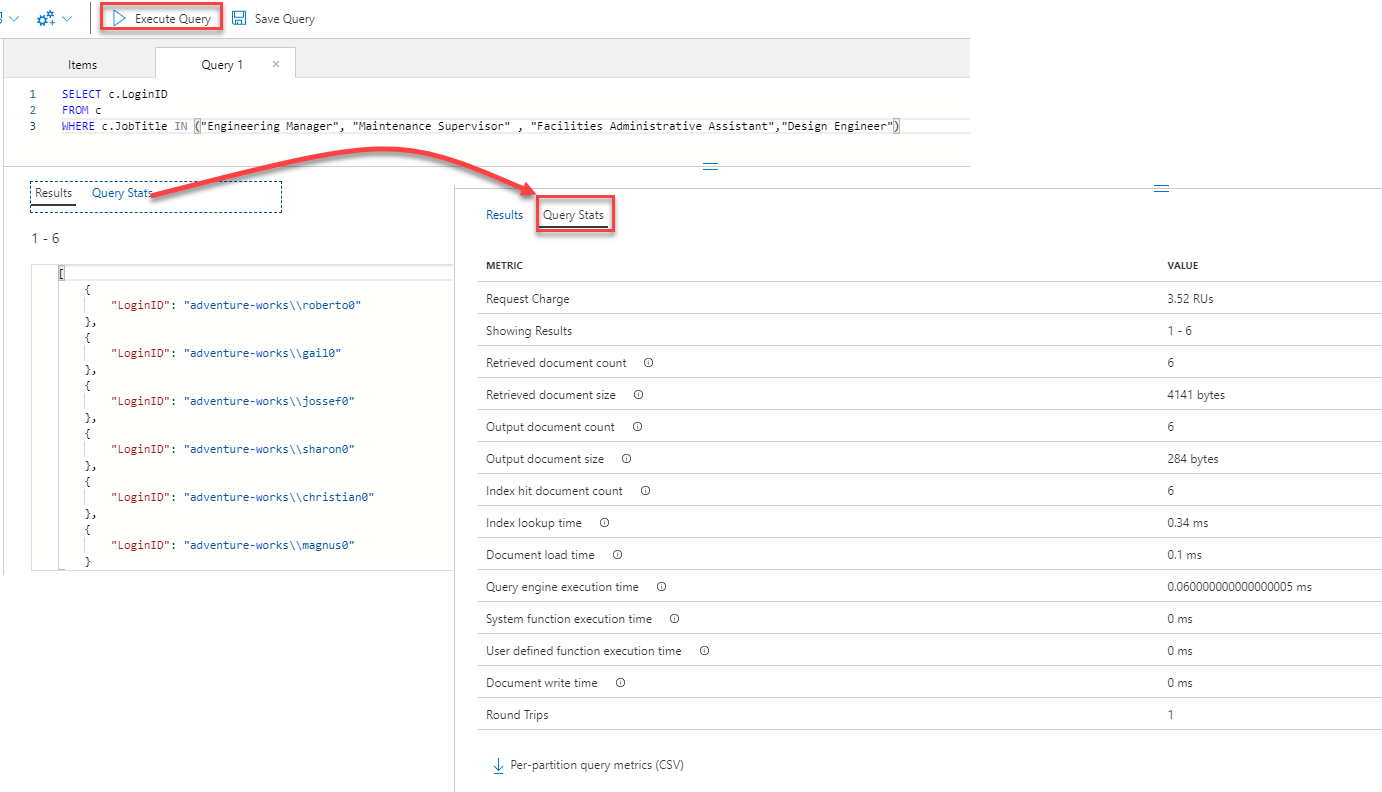
We can customize the T-SQL query by specifying the list of columns that we are interested in, and provide the names of the columns in the SELECT statement, then execute the query, as below:
The query editor provides you also with the ability to write more complex T-SQL queries to retrieve only the data that you are interested in and in the preferred view. But you need to tune the query and make sure that this query is not consuming a lot of Azure Cosmos DB resources. This can be verified by checking the Query Statistics for each query to end up with the best performing one, as shown below:
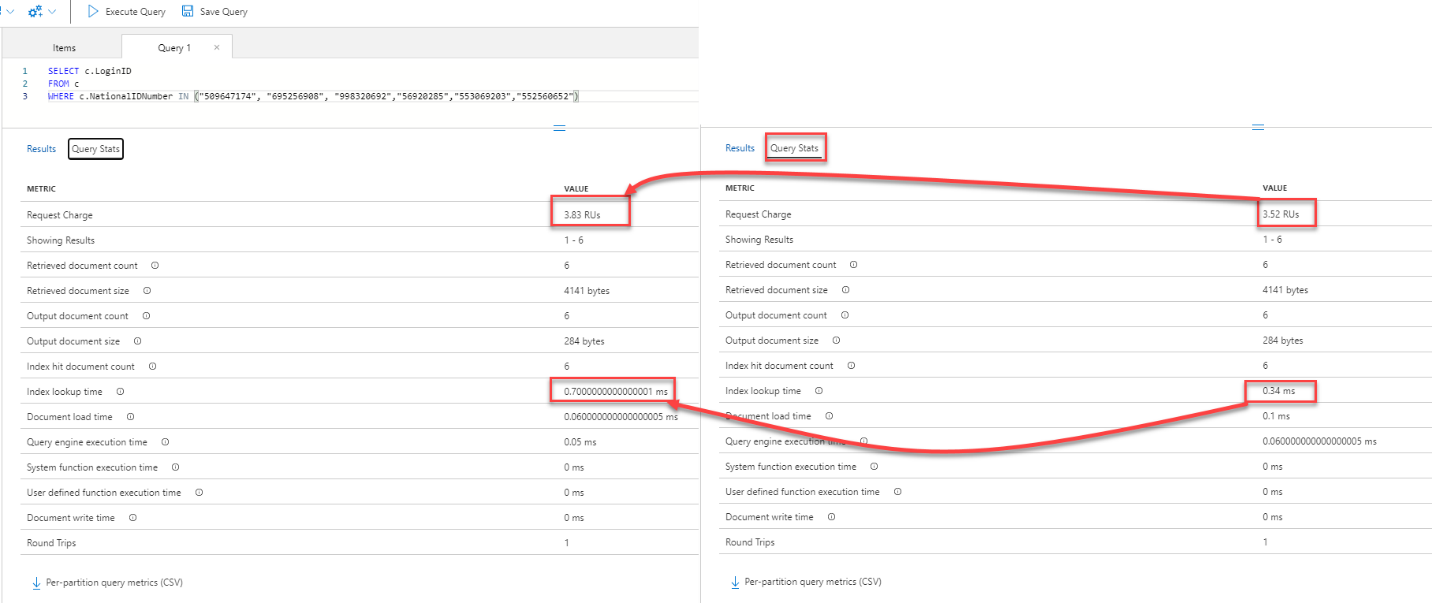
Another thing to consider here is to make sure that you are using the partition key in your query to filter the retrieved data, as the data already stored in the containers based on the partition key column values.
This is clear from the simple example below, where writing a query that filters the data using another column instead of the partition key, as in the left query, will consume extra 8% RUs compared to filtering the data using the partition key, as in the right query, in addition to the 51% extra index lookup time required to query the data based on the non-partition key, as shown below:
Conclusion
In this article, we discussed how to migrate your SQL Server database table’s data into an Azure Cosmos DB container using the Cosmos DB Data Migration tool and querying the data using T-SQL statements. I hope you find it useful.

He is a Microsoft Certified Solution Expert in Data Management and Analytics, Microsoft Certified Solution Associate in SQL Database Administration and Development, Azure Developer Associate and Microsoft Certified Trainer.
Also, he is contributing with his SQL tips in many blogs.
View all posts by Ahmad Yaseen
- Azure Data Factory Interview Questions and Answers - February 11, 2021
- How to monitor Azure Data Factory - January 15, 2021
- Using Source Control in Azure Data Factory - January 12, 2021