
In this article, we will discuss why we need to use Azure Cosmos DB and how to configure it to store and query our data.
Before that, let us differentiate between the relational and non-relational database engines.
Relational vs Non- relational
When working in the database world, you need to distinguish between the relational and non-relational database engines.
In relational database engines, such as Microsoft SQL Server, MySQL, PostgreSQL, and SQLite3, the data will be stored in tables in the shape of columns and rows, with the ability to link data from different tables using foreign key constraints. Besides, the schema of the relational database tables, which defines the name of the columns, the type of data that can be stored in these columns and the constraints on the table columns, should be defined.
In the non-relational database engines, also called NoSQL database engines, such as MongoDB, DocumentDB, Cassandra, Coachbase and HBase, the data will NOT be stored in tables with defined schemas. Instead, the data will be stored in an optimized storage model, such as Key-value stores, Graph stores, stores, and Document stores.
Why Azure Cosmos DB?
Azure Cosmos DB is a Microsoft Azure database service, fastest-growing Azure service that is available in all Azure regions, that fits any web application, mobile application, gaming or IoT application that requires processing, reading and writing a massive amount of data.
Azure Cosmos DB provides the applications with:
- The least possible low latency, less than 10-ms latencies for both reads and writes workloads due to using SSD backed storage and the multi-master replication for your data wherever your users are, allowing the users to connect to the closest replica to them
- The highest possible availability, up to 99.999% high availability of the data stored in the Cosmos DB due to the ability to perform regional failover for your Cosmos DB account databases
- The highest possible throughput
- Variant consistency options, with the five well-defined consistency options, include strong, bounded staleness, session, consistent prefix, and eventual that provides full flexibility and low cost-to-performance ratio
- Advanced security options, where the Cosmos DB data will be encrypted at rest and in motion, in addition to the row-level authorization
- Elastically and globally scalable for the read and write operations, that helps in dealing with unexpected workload spikes, with the ability to modify the current structure anytime by adding or remove any of the Azure regions to your Cosmos account
- Support for multiple APIs to work with your data that is stored in the Cosmos database, such as the SQL Core API, Cassandra, MongoDB, Gremlin and Azure Table Storage, providing you with an easy way to migrate the application to Cosmos DB without the need to perform significant changes. It requires no schema or index management is, as all data will be automatically indexed, and requires no complex multi-datacenter management or database software deployments or upgrade
For now, we are familiar with the Azure Cosmos DB concept and why we need to use it to host the data used by the critical applications. Let us now see how to create a new database account.
Create an Azure Cosmos DB Account
In order to create an Azure Cosmos DB account, you need to have an Azure subscription or create a free Azure Cosmos DB trial account.
When your subscription or free account is ready, open the Azure portal site, https://portal.azure.com/, in your Internet browser and login using the subscription account.
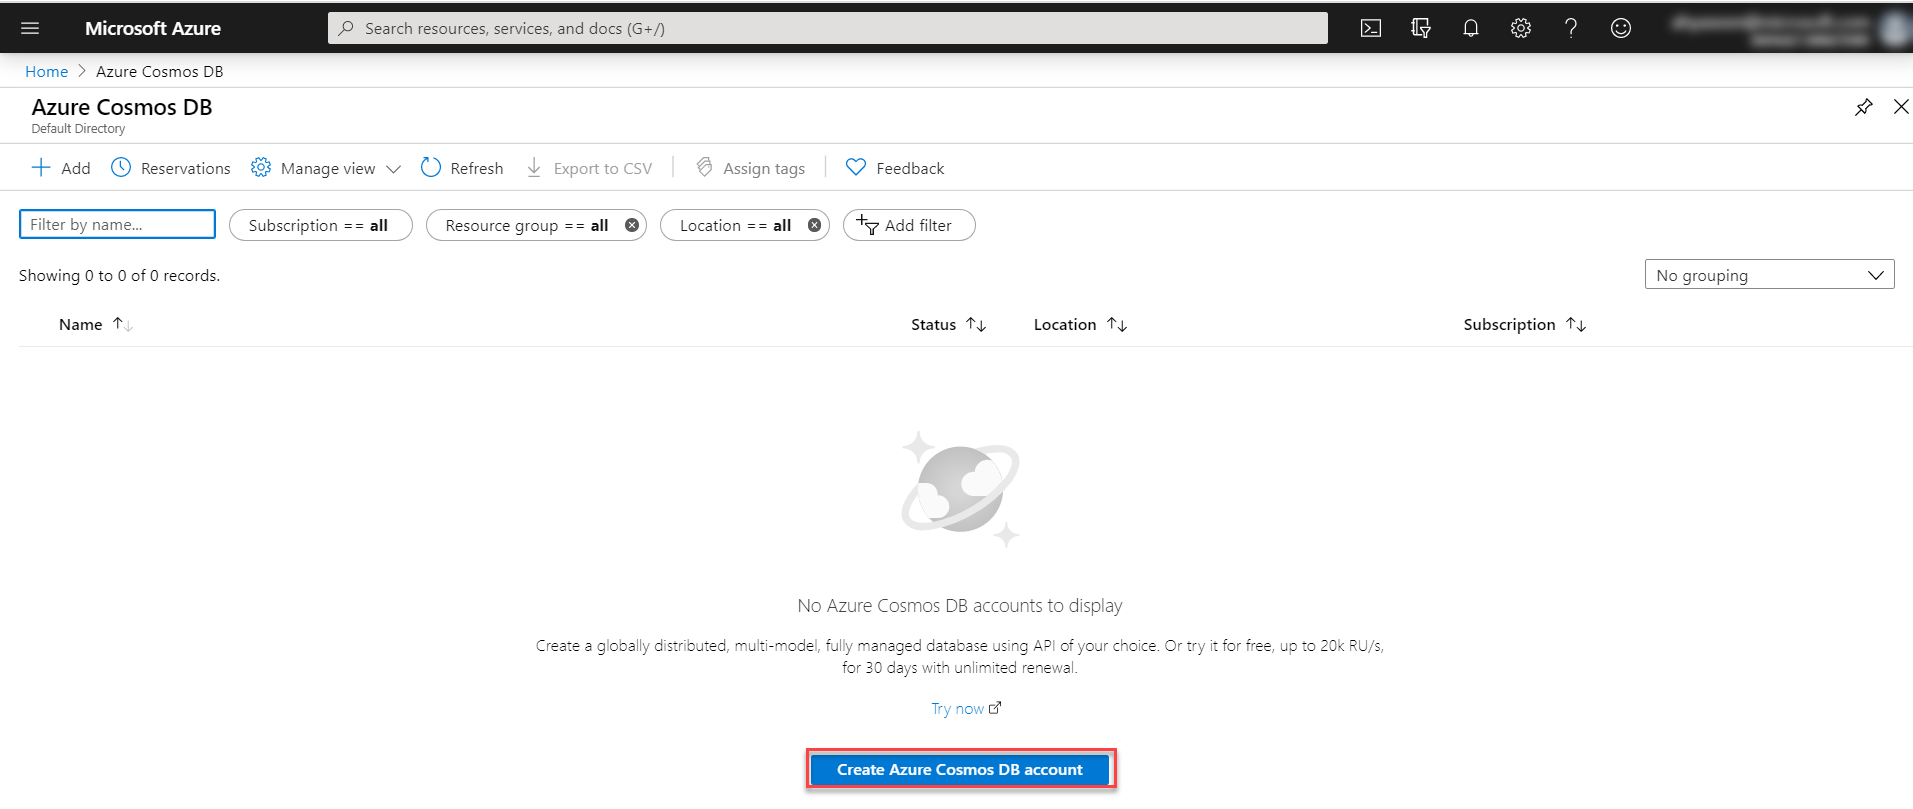
From the Microsoft Azure portal, search for the Azure Cosmos DB server, or click on the icon directly if you can detect it, as below:

In the opened page, click on the Create Azure Cosmos DB account option, to create a new Cosmos DB account, as shown below:
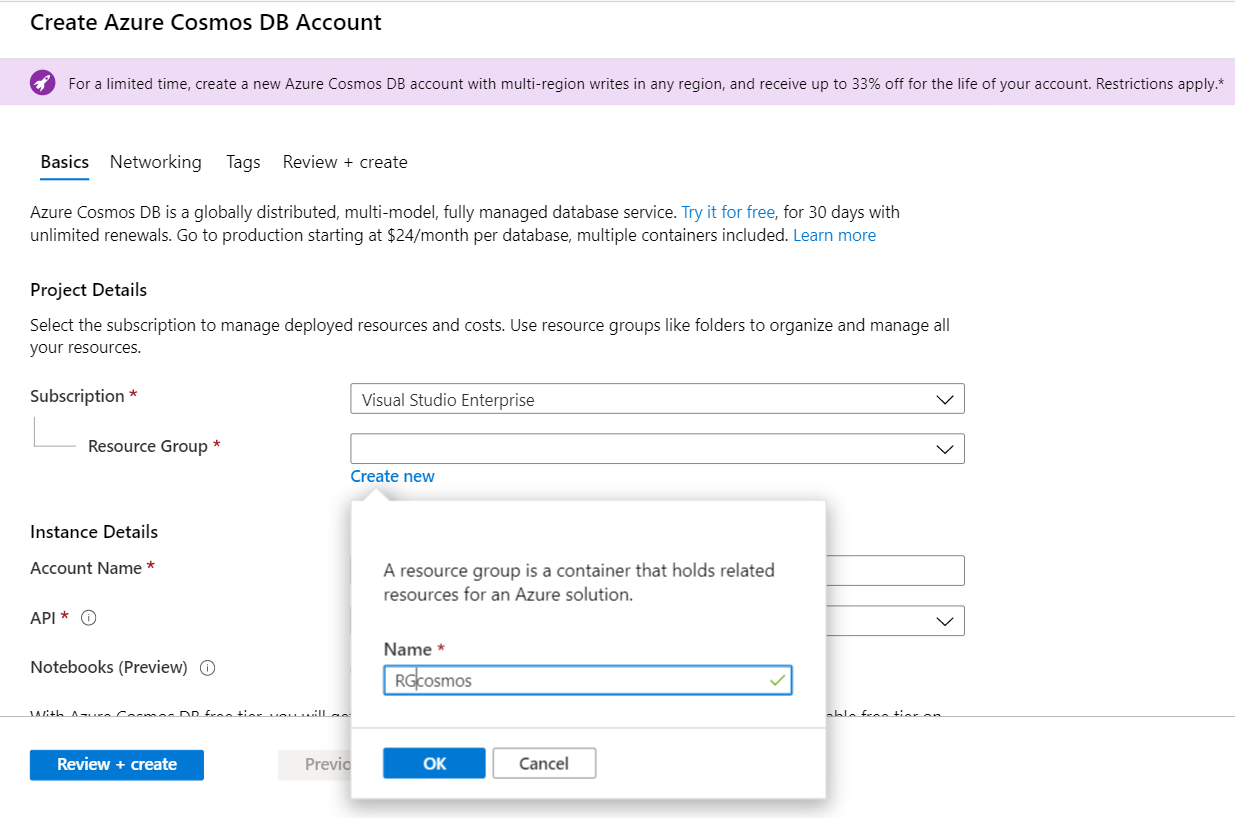
From the Create Azure Cosmos DB Account page, select the Azure subscription under which you plan to create the Cosmos DB account and the resource group, the container of resources for that Azure service that is used to manage all resources, that will be used for the Cosmos DB account. You can use an existing resource group or create a new resource group, as shown below:
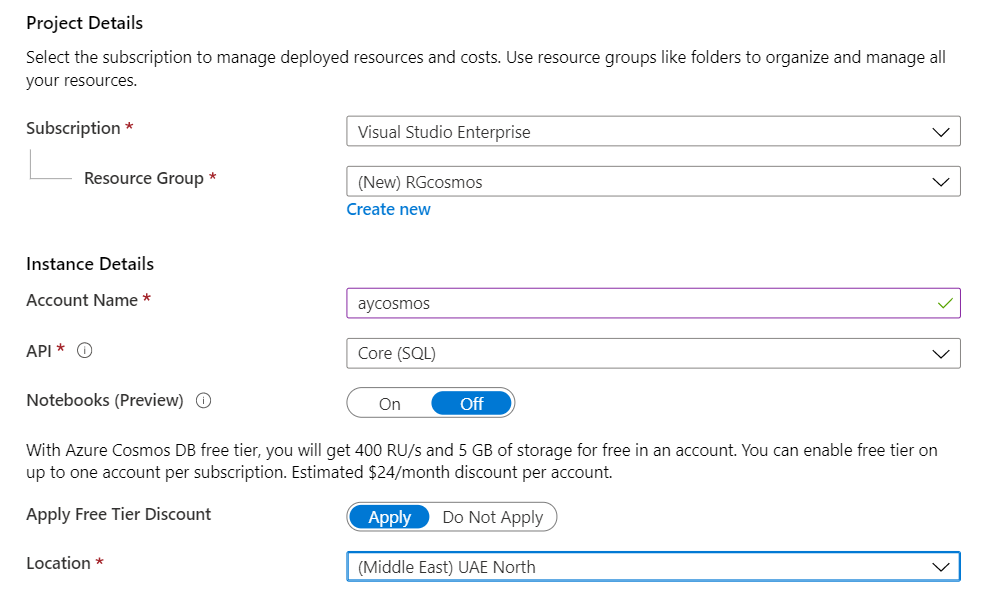
After that, you will be requested to provide all details for the Cosmos DB instance that will be created include a unique Account name that will be used to identify the Azure Cosmos account. You can use only lowercase letters, numbers, and the hyphen character to in the account name.
The API is the type of database account that will be created. You can choose from the previously mentioned five API supported by the Cosmos DB. In this demo, we will use the Core (SQL) API.
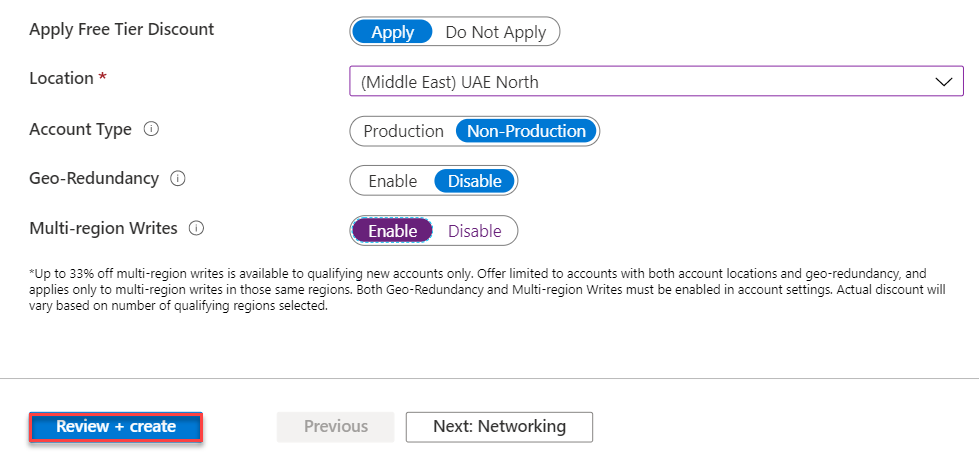
You need also to provide the Location, which describes the nearest datacenter to your current location in order to provide the fastest access to the data.
You can also enable the Multi-region write option to replicate your data to multiple selected regions. For now, we can create it in one region and add more regions later.
After providing your selections click on Review + Create option as below:
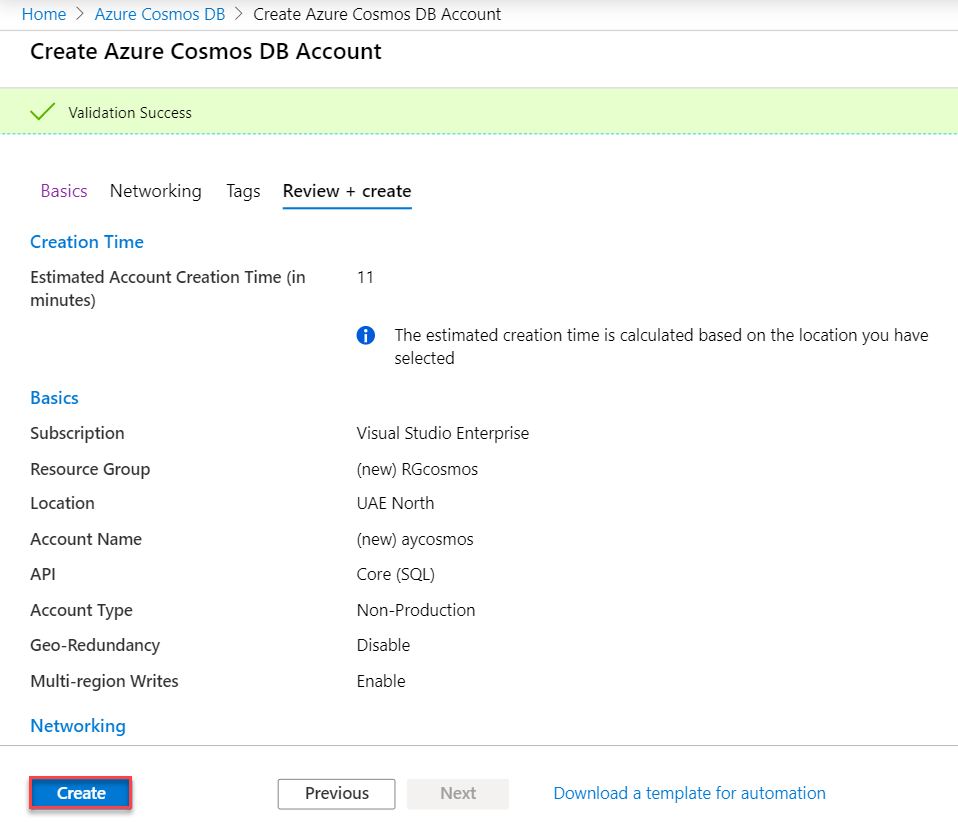
In the Review + Create page, review all the selections then click on the Create option to create your Azure Cosmos DB account, as shown below:
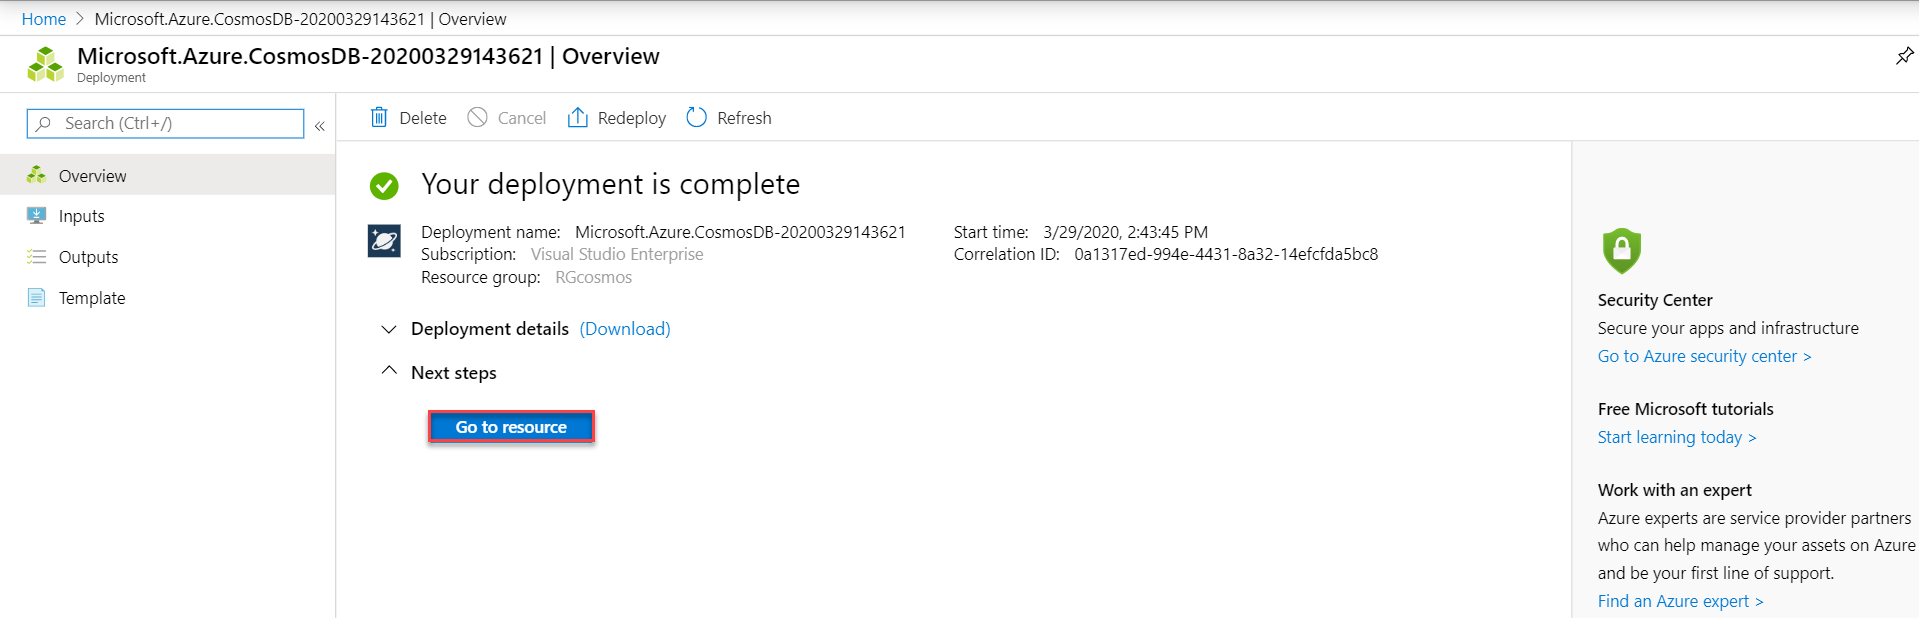
After a few minutes, the database account will be created and deployed completely. Click on the Go to resource option to start working in the database account, as shown below:
The first opened page is the Quickstart page that allows you to select from the available platforms and the next step to proceed with the Azure Cosmos DB account. Click on the Overview page from the below:
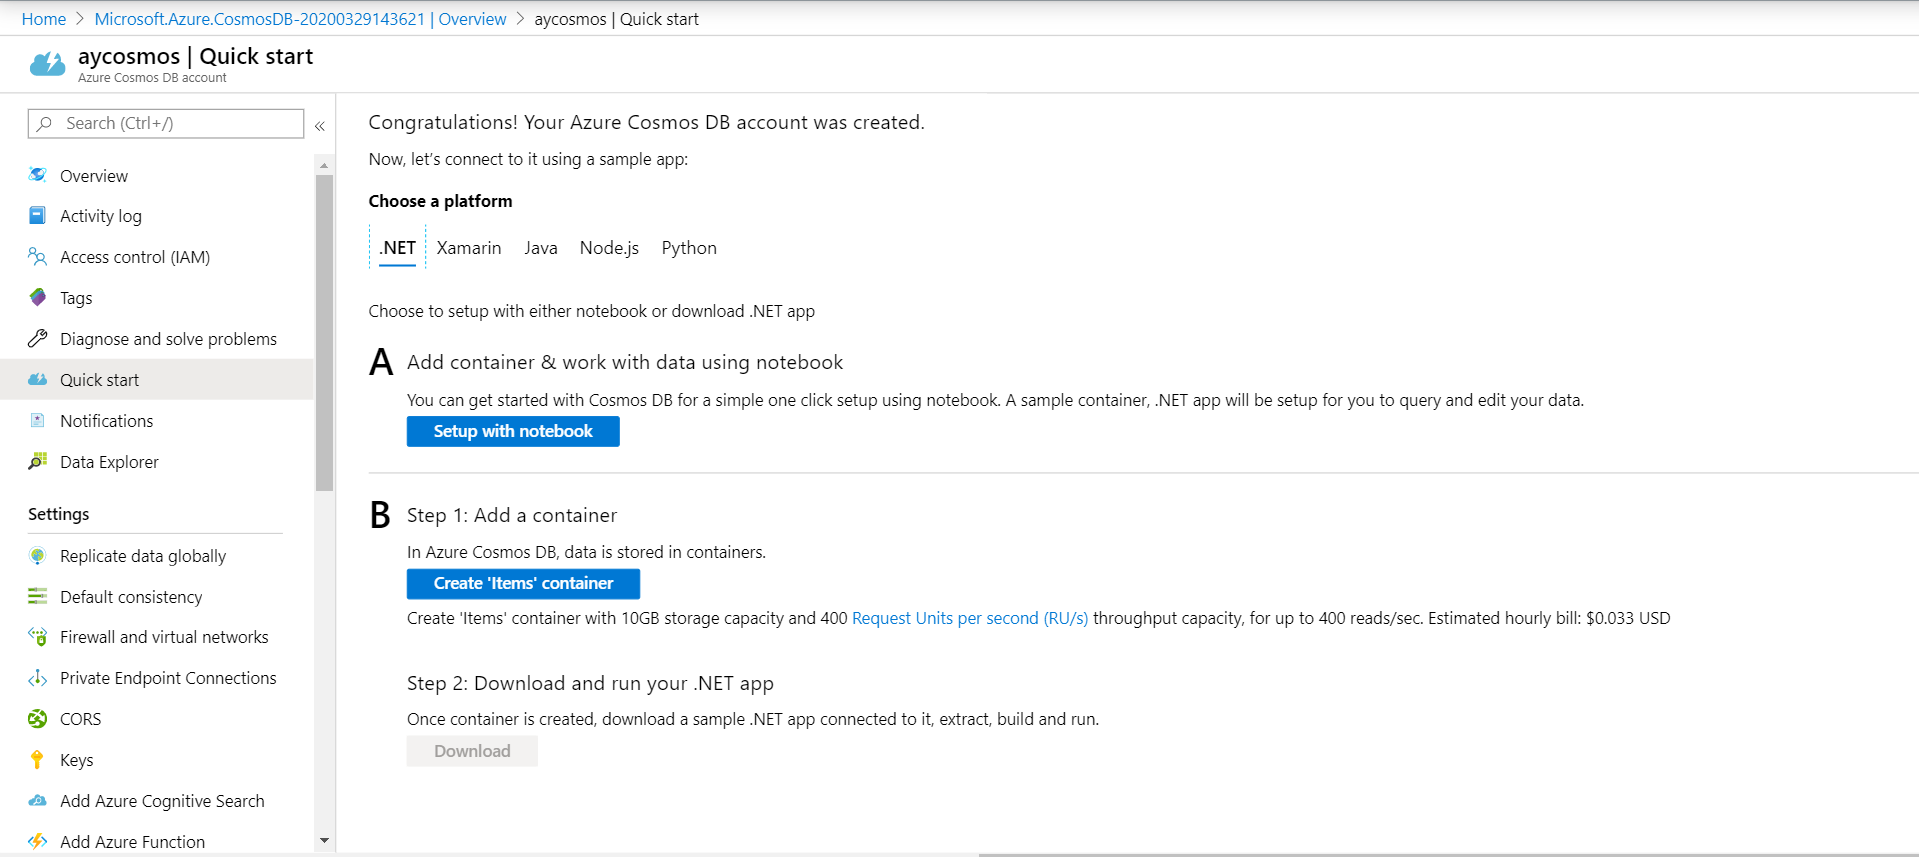
The Overview page shows the general information about the database account, the list of containers available under the database account and finally the monitoring dashboard for the Azure Cosmos DB account.
You can see the URL that is used to connect to the database account will be like https://aycosmos.documents.azure.com:443/
As it is clear below:

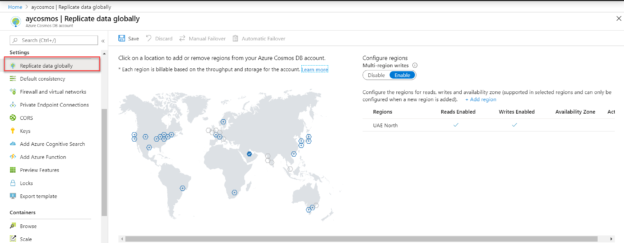
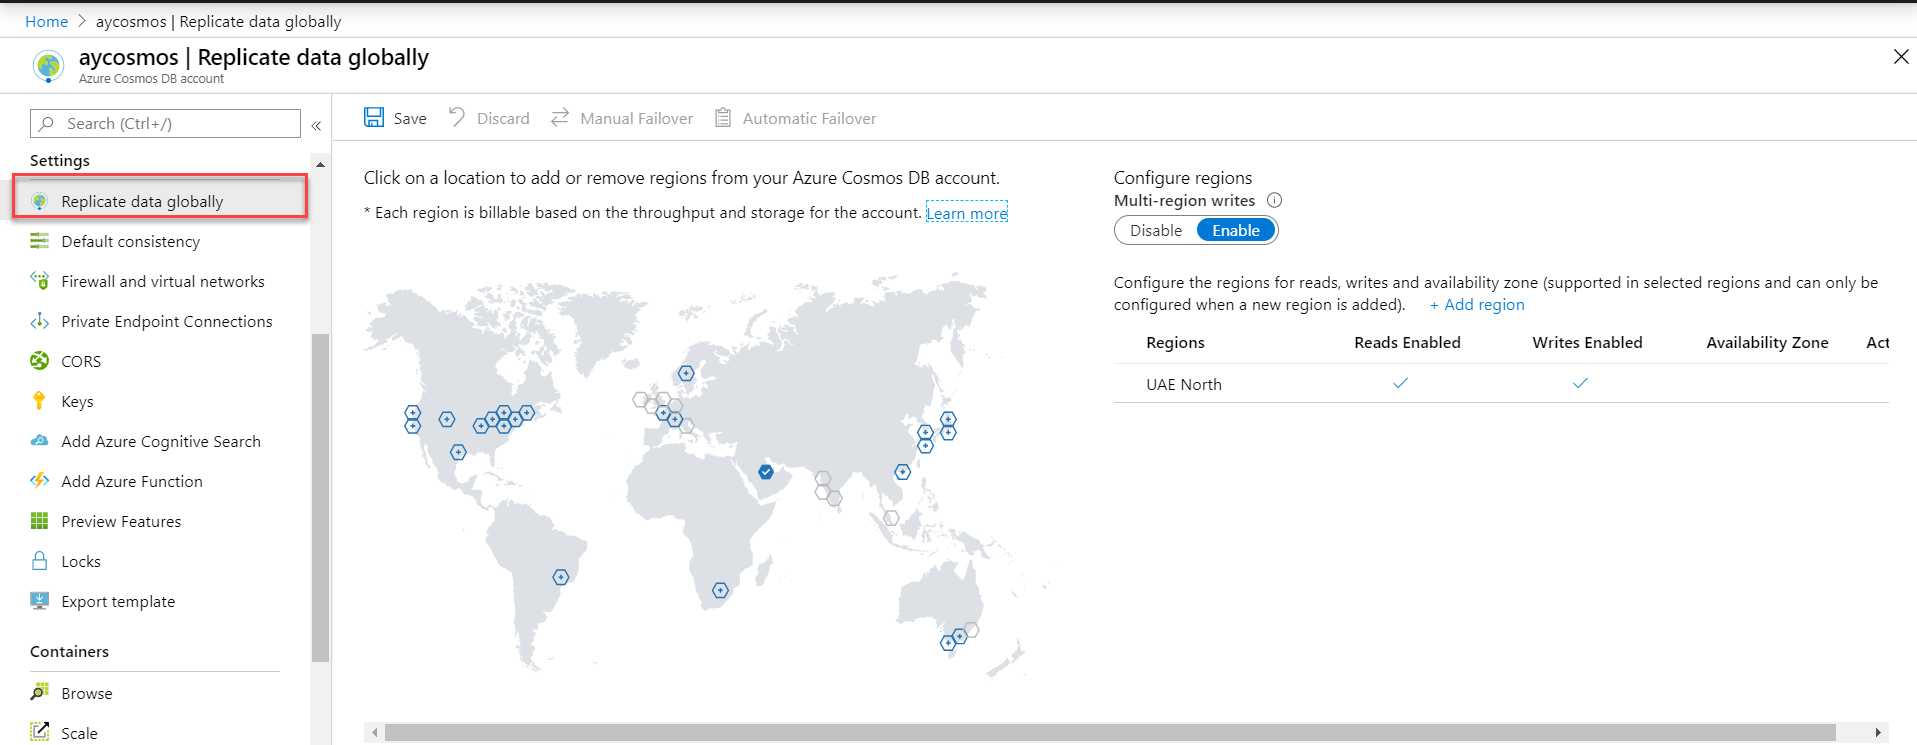
If you enable the Multi-region option, you can easily move to the Replicate data globally page and select the regions that you plan to replicate your data to, in order to provide faster access to the data to your global customers, as below:
Create New Container
Now the Azure Cosmos DB account is ready, and we can create a database under that account and add data containers.
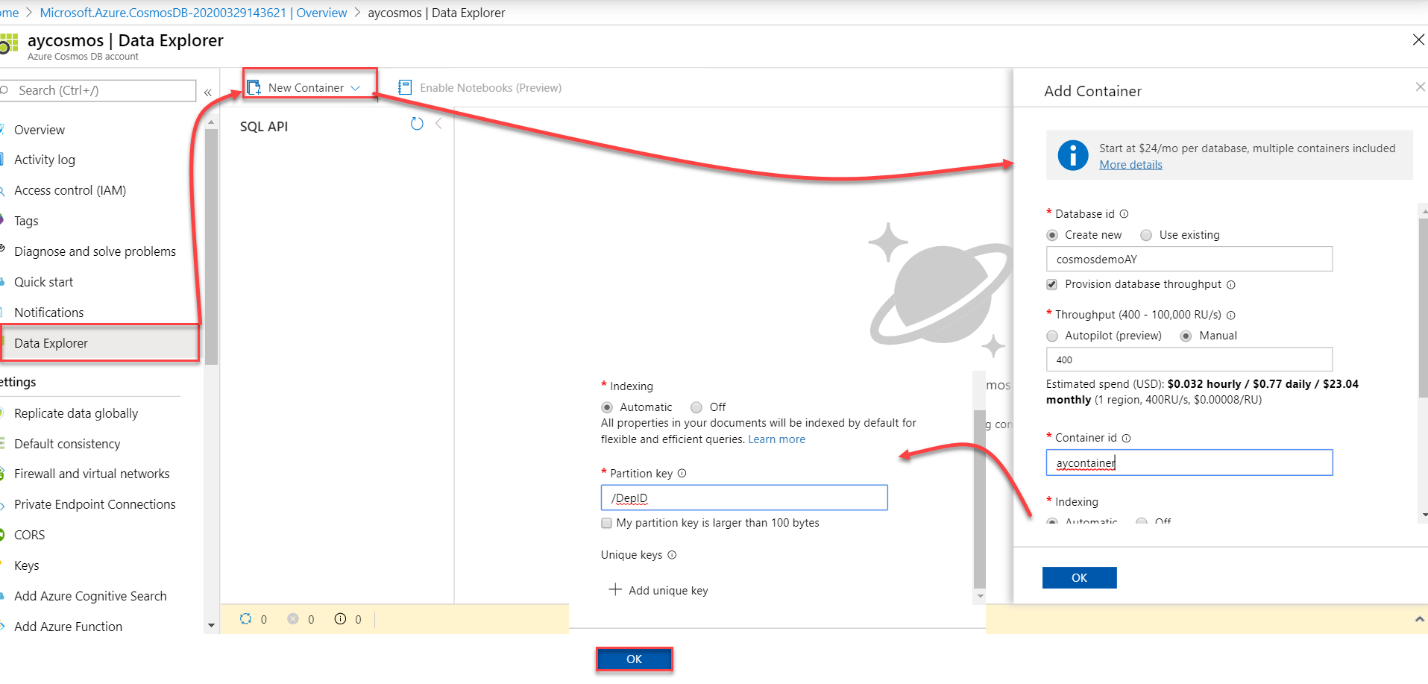
To achieve that, move to the Data Explorer page and click on the New Container option.
In the Add Container page, provide the name of the database under which the container will be created, with the ability to create more than one container per database, or select an existing database if available, with the ability to share the throughput provisioned to the database across all the containers within the database, to save the cost.
In this demo, we will keep the throughput value at 400 request units per second (RU/s).
Also, provide a unique name for that container, whether to automatically index all data to gain the best data access performance and the partition key that will be used for dividing the data into logical partitions within the same container, then click OK to create the database and the container as shown below:
Add New Item
To add a new data item to your container, move to the Data Explorer page, expand the database and browse for the container under which you want to add the data.
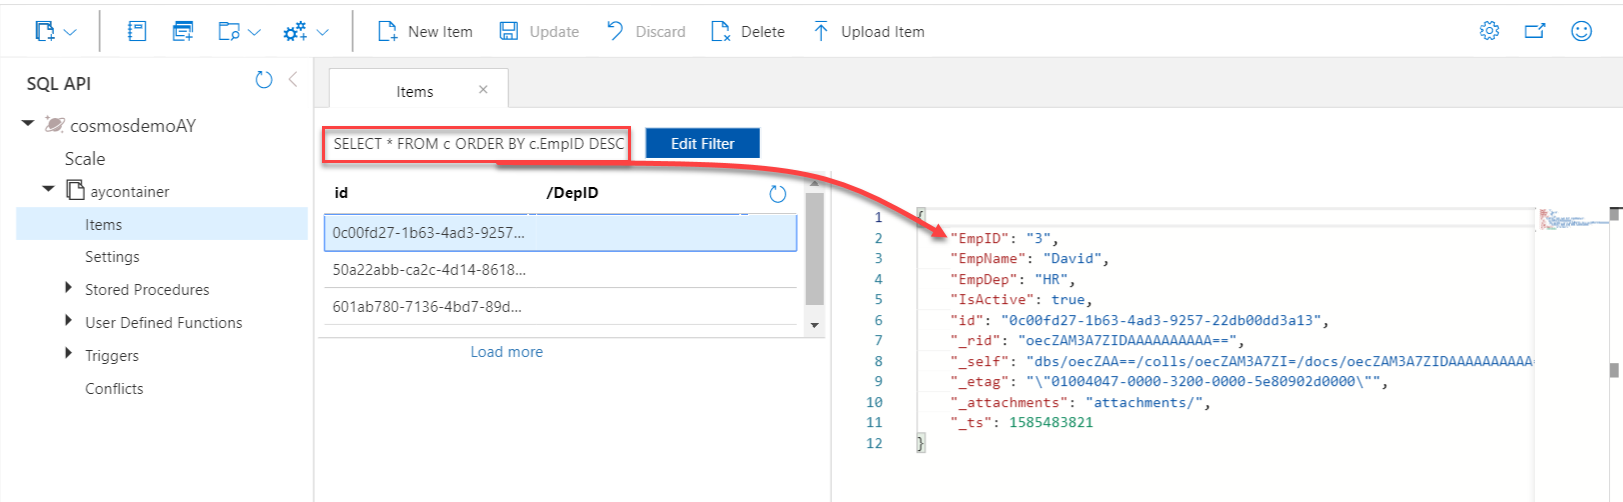
Under your container, click on Items then choose New Item option to add a new employee data. After adding the EmpID, EmpName, EmpDep and IsActive columns values, click on Save, where new six metadata fields will be added to the item, as shown below:

In this demo, we will repeat this process three times to add new items.
Query Data
To query the inserted data, you can easily click on the Edit Filter option in the Items page, where you can edit the existing query by adding a filter or order the data in a specific order. In this example, we will sort the items based on the employee ID, as shown below:
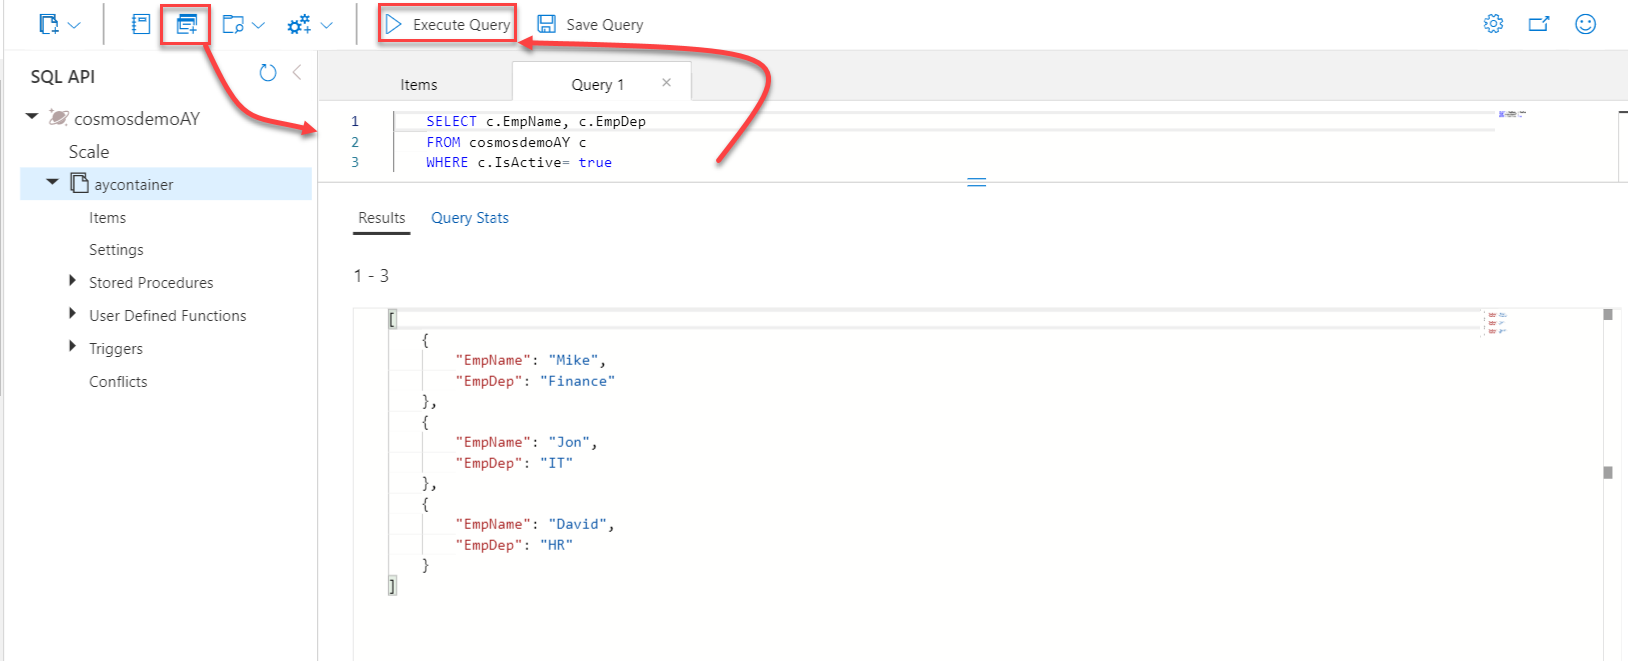
A more flexible option is to open a query window and write your SQL query to select specific columns and retrieve the items that meet the provided condition.
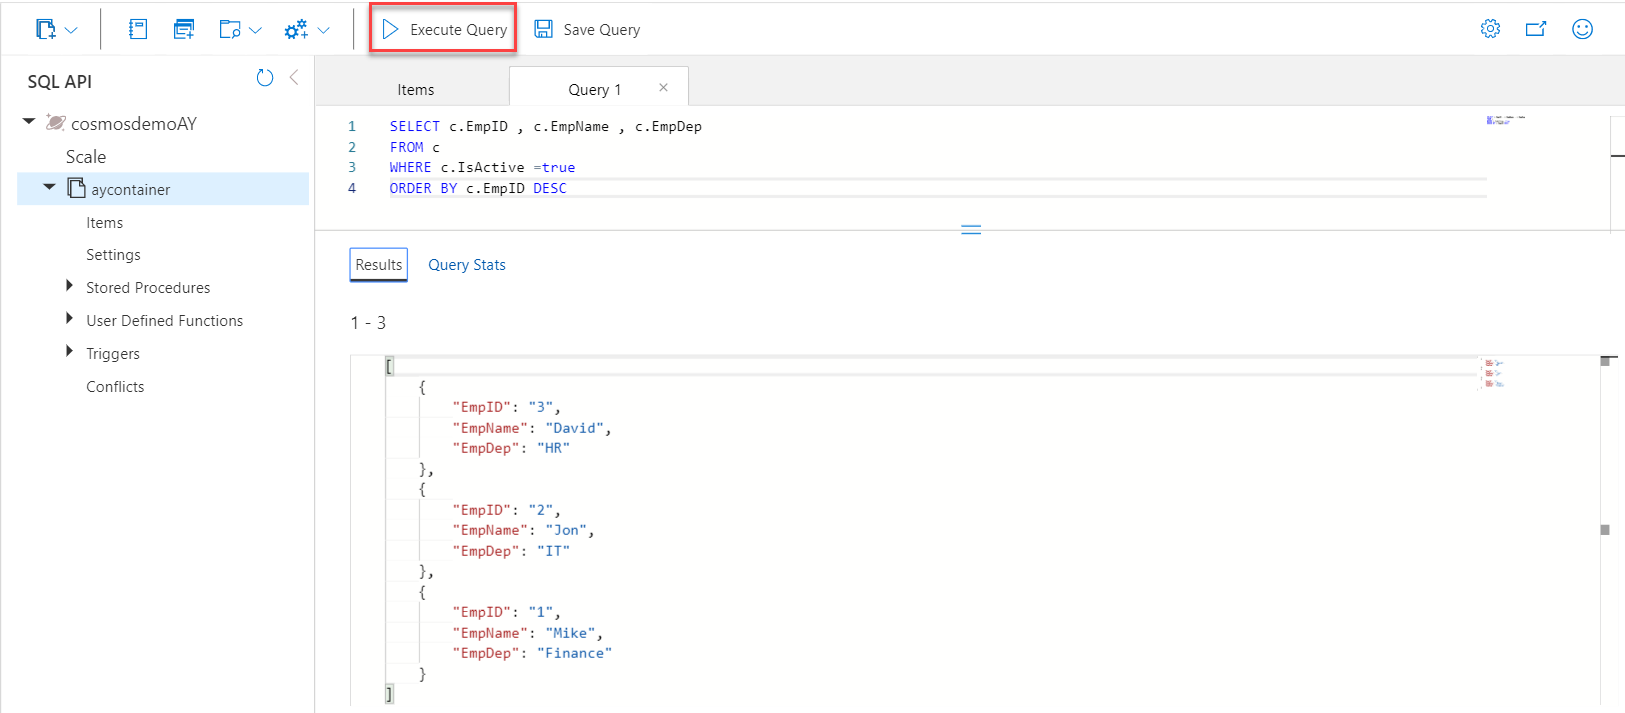
In the below example, we will use the SQL query below to retrieve the name and department for the active employees. After writing the query, click on Execute Query button, and the result will be displayed, as shown below:
You can use your SQL development skills to write more complex queries, such as selecting specific columns, provide a condition to filter the data in WHERE clause and sort the data using the ORDER BY clause, as shown below:
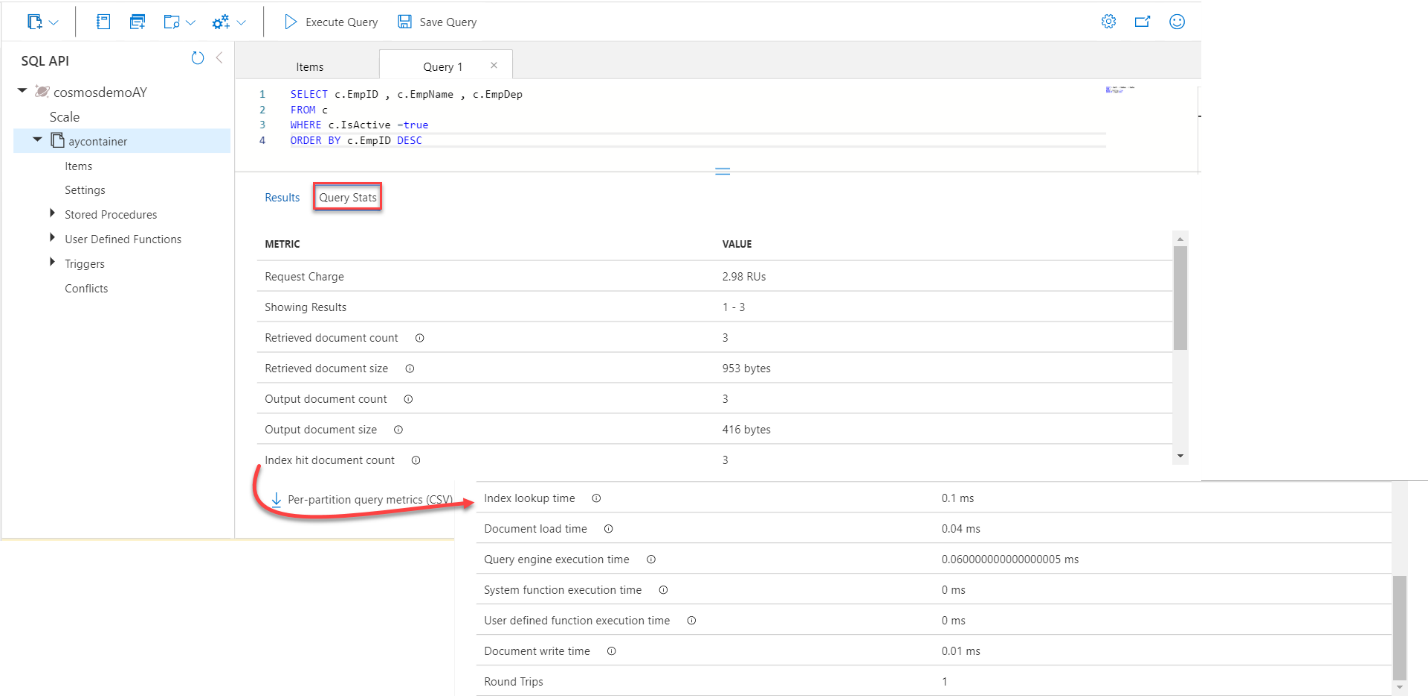
Besides the result of the executed query, you can review the execution performance statistics of that query, such as the number of RU consumed, storage and time, that helps in comparing the different queries and enhance the queries performance, as shown below:
Conclusion
It is clear from the previous examples how easy we can configure and use the Azure Cosmos DB to store and query the data and take advantage of the great performance provided by it in processing and storing your data.

He is a Microsoft Certified Solution Expert in Data Management and Analytics, Microsoft Certified Solution Associate in SQL Database Administration and Development, Azure Developer Associate and Microsoft Certified Trainer.
Also, he is contributing with his SQL tips in many blogs.
View all posts by Ahmad Yaseen
- Azure Data Factory Interview Questions and Answers - February 11, 2021
- How to monitor Azure Data Factory - January 15, 2021
- Using Source Control in Azure Data Factory - January 12, 2021