

In this article, we will learn how to invoke an API and process the data returned by the API using Azure Data Factory.
Introduction
Applications typically host business logic in granular components to service a variety of internal and external needs. These components generally fall in the category of microservices and Application Programming Interfaces also known as APIs. For example, all the major popular e-commerce applications of the likes of Amazon, Walmart, and others offer their services in the form of APIs. They have their own e-commerce portal, but they also offer the usage of their APIs using which subscriber of these APIs can build their own custom applications as well. APIs allow applications to extend and reuse business logic, data, and processes in the form of service.
Data pipelines which are also known in general terms as Extract Transform Load mechanism, often process data using in-house custom-built logic. But when it comes to integrating or processing data from an external data source, often there is a need to use standard or 3rd party data processing logic or use data from 3rd party sources for referential purposes. Generally, as a standard mechanism, 3rd party systems expose their data or business process as a service i.e. in the form of APIs. These APIs can be invoked from data pipelines for the desired purpose of processing data. ETL frameworks like SSIS come ready with controls that support invoking of external APIs. On the Azure cloud platform, Azure Data Factory is the go-to service for building data pipelines. This article will show you how to integrate APIs into data pipelines with Azure Data Factory.
API Prerequisites
Before we start creating a data pipeline that can invoke an API, we need an API that we can invoke. Many services offer free usage of their APIs for a specific time and invoking frequency. Weather data is one such feature where one would want to show weather information on their portal but would not really build infrastructure to capture weather data from across the globe. A general approach would be to source this data from companies that provide this service by subscribing to their APIs. One such provider who provides weather data in the form of APIs is shown below.
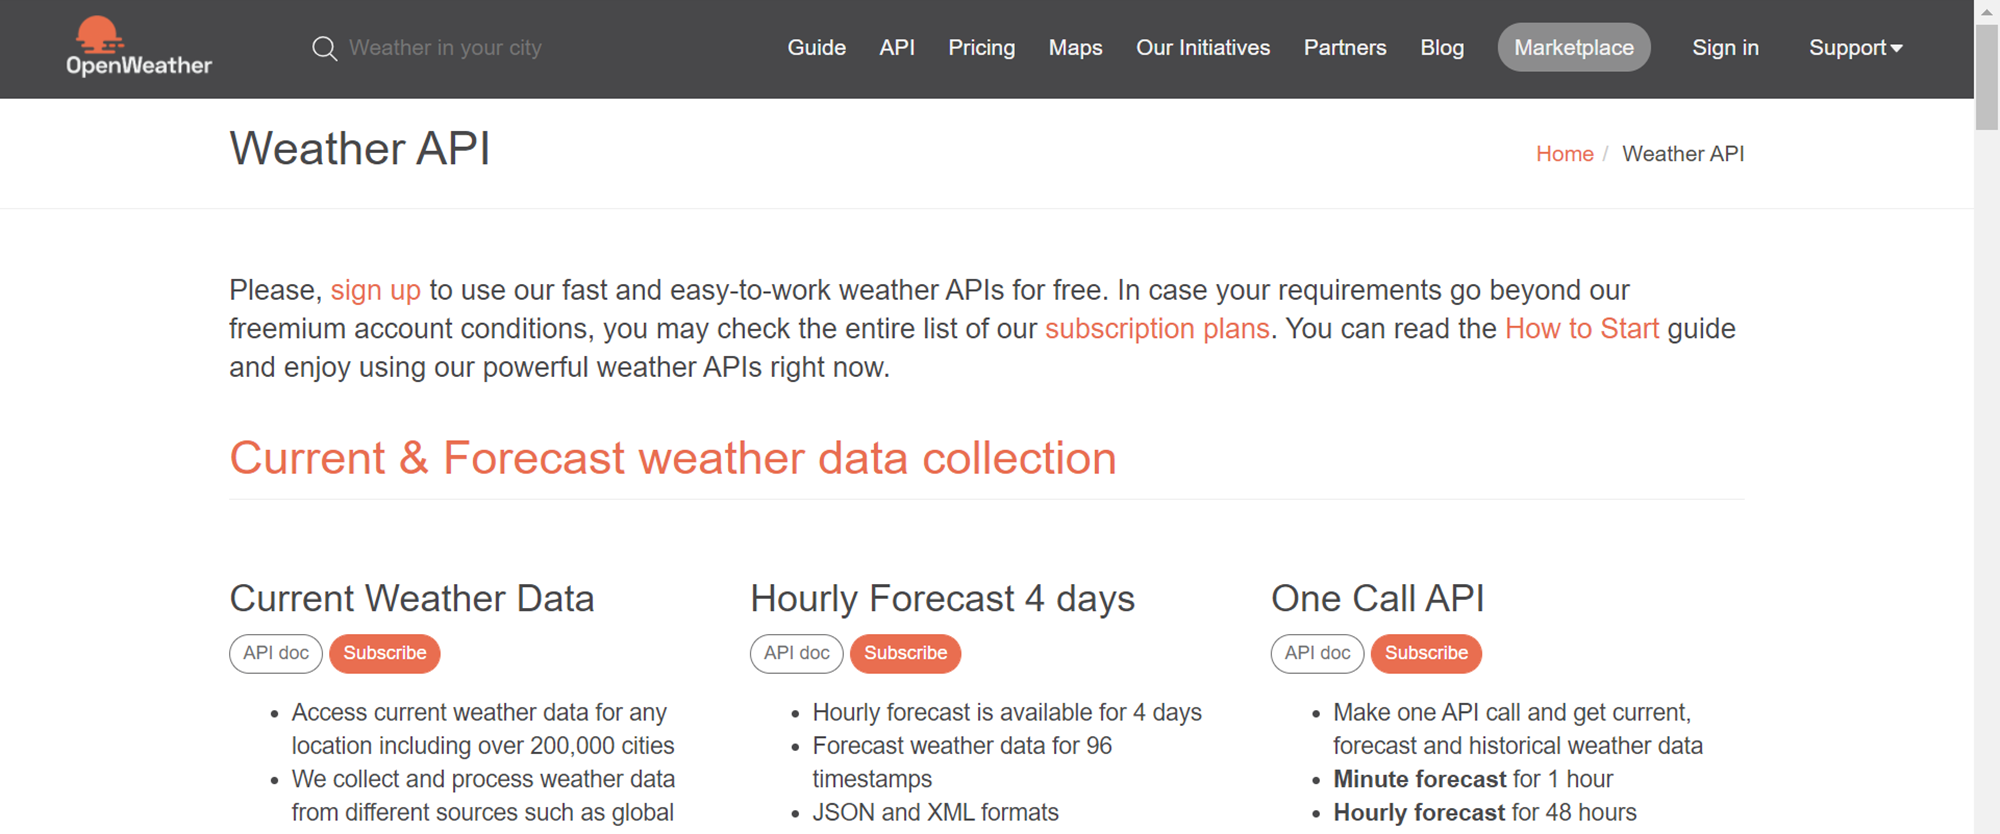
One can subscribe to this service under their free plan to consume their APIs. To access an API, one needs to get authenticated with the provider of the API. There are various means of authentication, one of the most common ones is by using an API Key that is provided to the subscriber by the API Provider. Using the API key one can invoke the API by passing the key as a parameter in the API URL. An example of this is shown below.
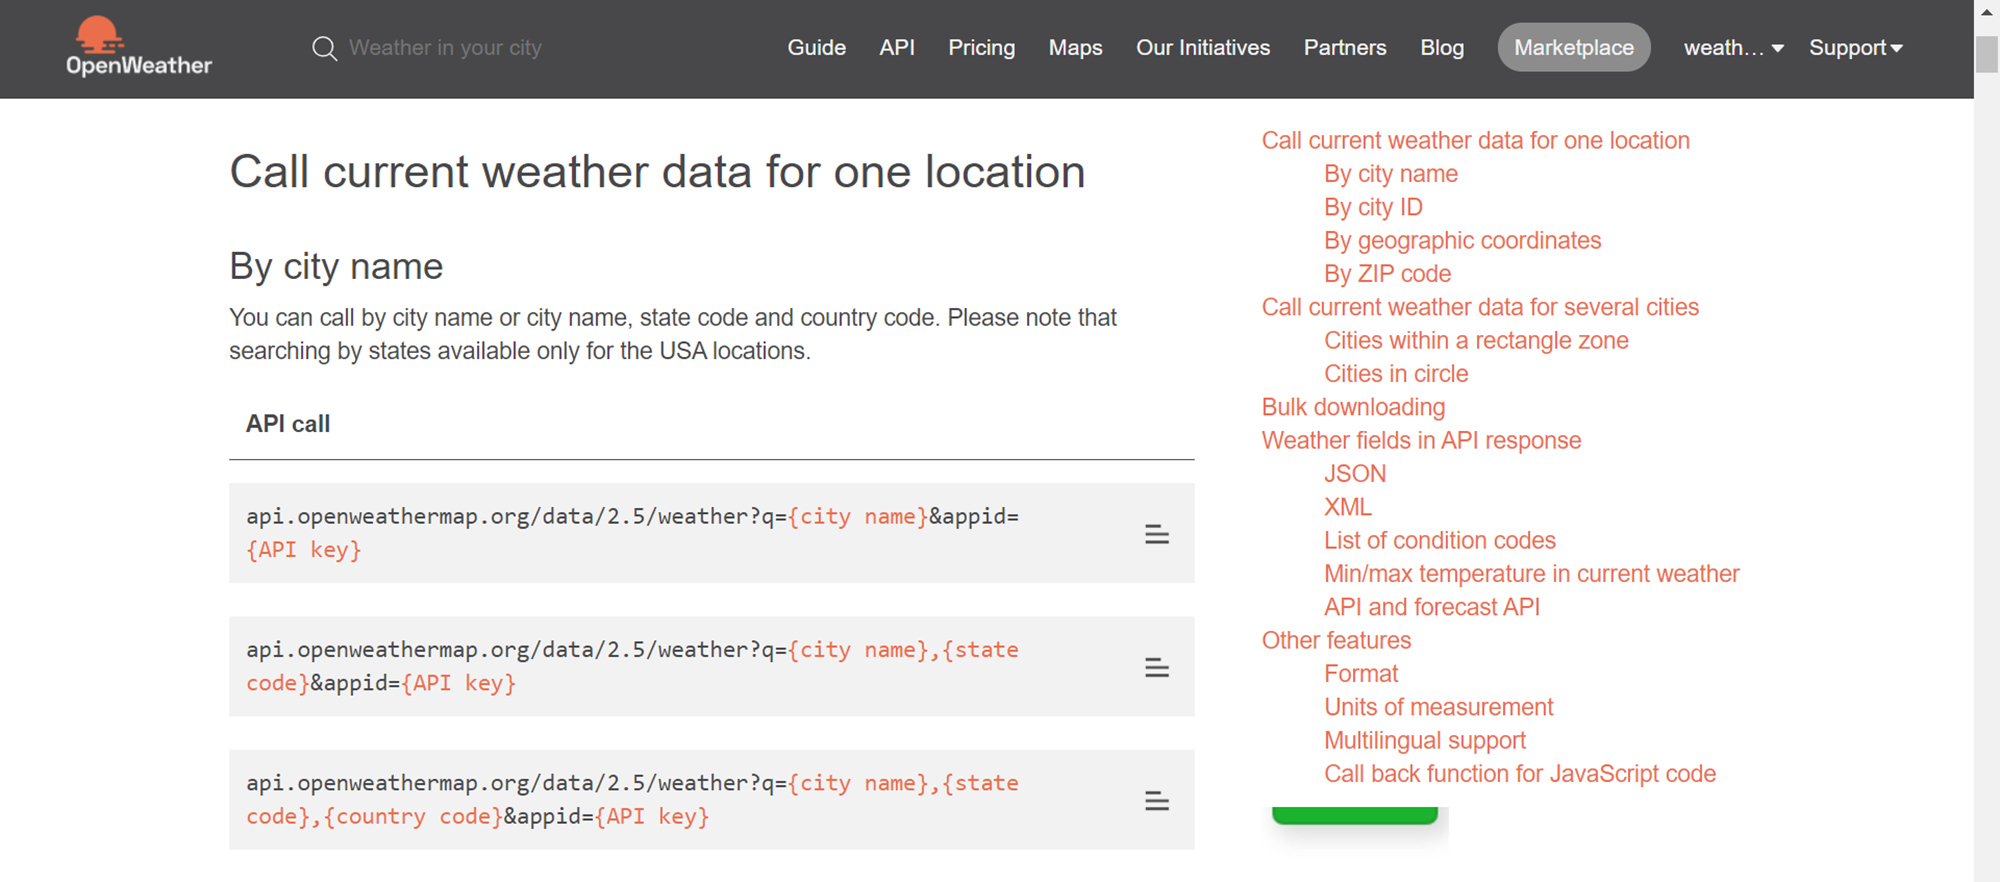
When this API URL is invoked from the browser, it would result in the weather information of the location that is passed as a parameter in the URL. Shown below is the weather data for New York as the location using the API shown above.

All we need is an API with at least one API Key as the credential to invoke an API. Once this prerequisite is met; we can start creating the data pipeline.
Invoking REST API from Azure Data Factory
Representational State Transfer (REST) is one of the most popular architecture standards for implementing APIs that define API interaction. The APIs to which we subscribed above is also a REST API. Now we would start building a data pipeline to invoke this API using Azure Data Factory.
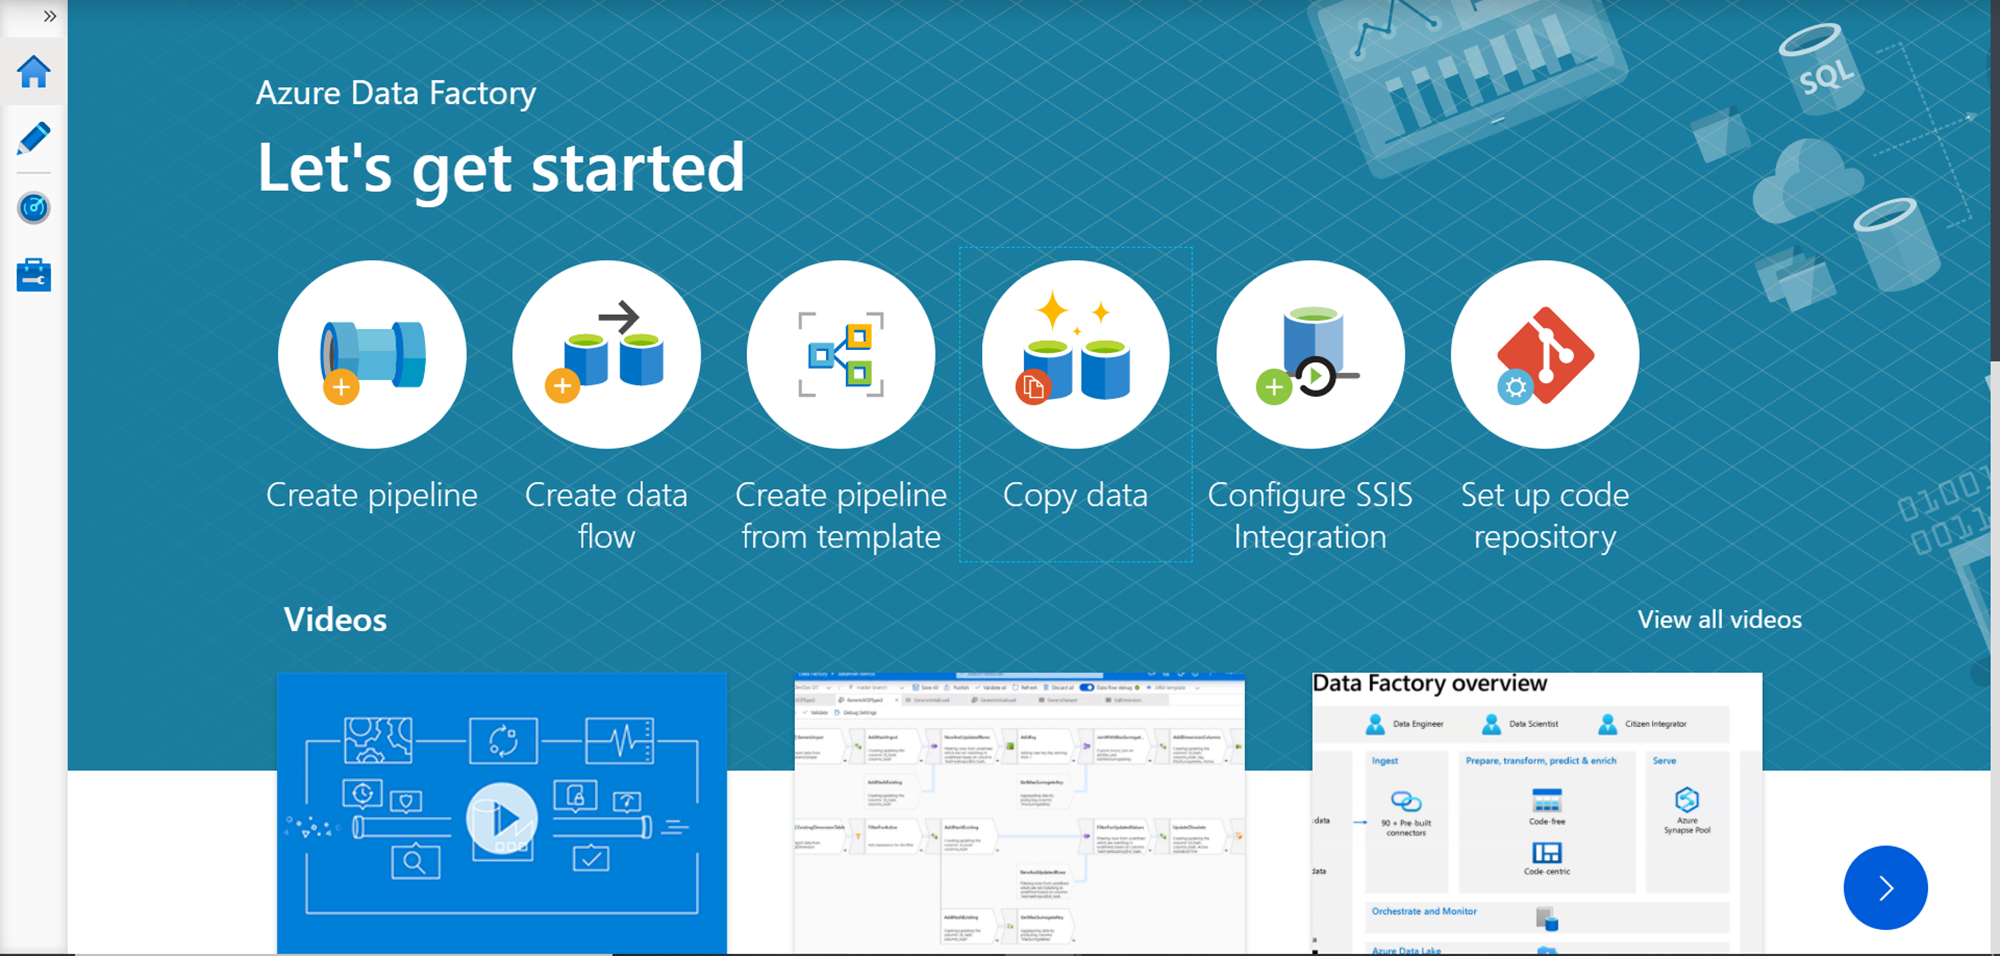
It is assumed that one has required access to Azure Data Factory to work on the below exercise. Navigate to the Azure portal and open the Azure Data Factory service. If it’s the first time you are using it, you may need to create an Azure Data Factory instance. Once that instance is created, open the same and you will be navigated to the dashboard page of that instance. Open the link titled “Author & Monitor” from the dashboard page to open the Azure Data Factory portal as shown below.
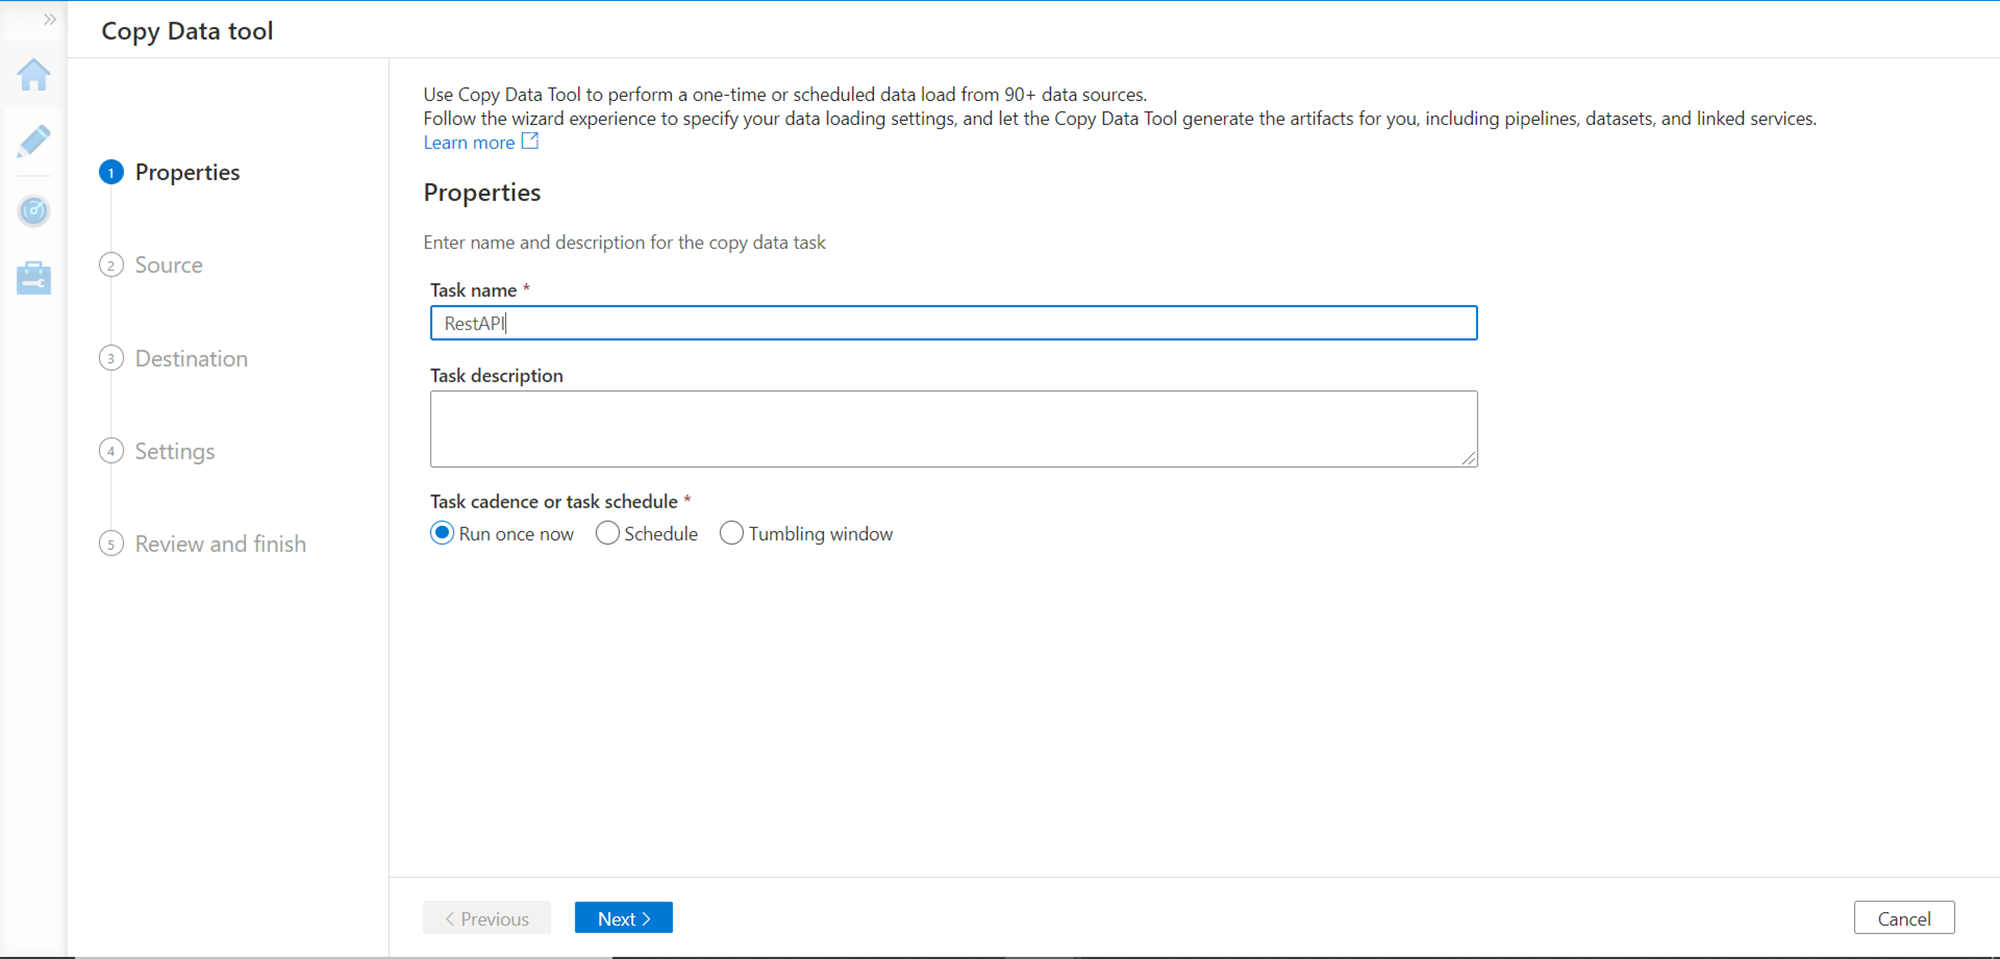
We can build a two-way interaction task that passes a volume of records to the API and collects the processed response from the API. Alternatively, we can also build a one-way API interaction where we pass a fixed parameter to the API and collect the response. Considering the nature of the API that we are going to use; we will be invoking the API in a one-way interaction style where we will pass a static parameter to the API and collect the response. Click on the Copy data icon on the portal, and it will invoke a new wizard as shown below. Provide basic details of the task as shown below and move to the next step.
We need to select a data source in this step. As we are going to invoke a REST API, we need to add a new connection by clicking on the Add New Connection button and select REST as the data source as shown below.
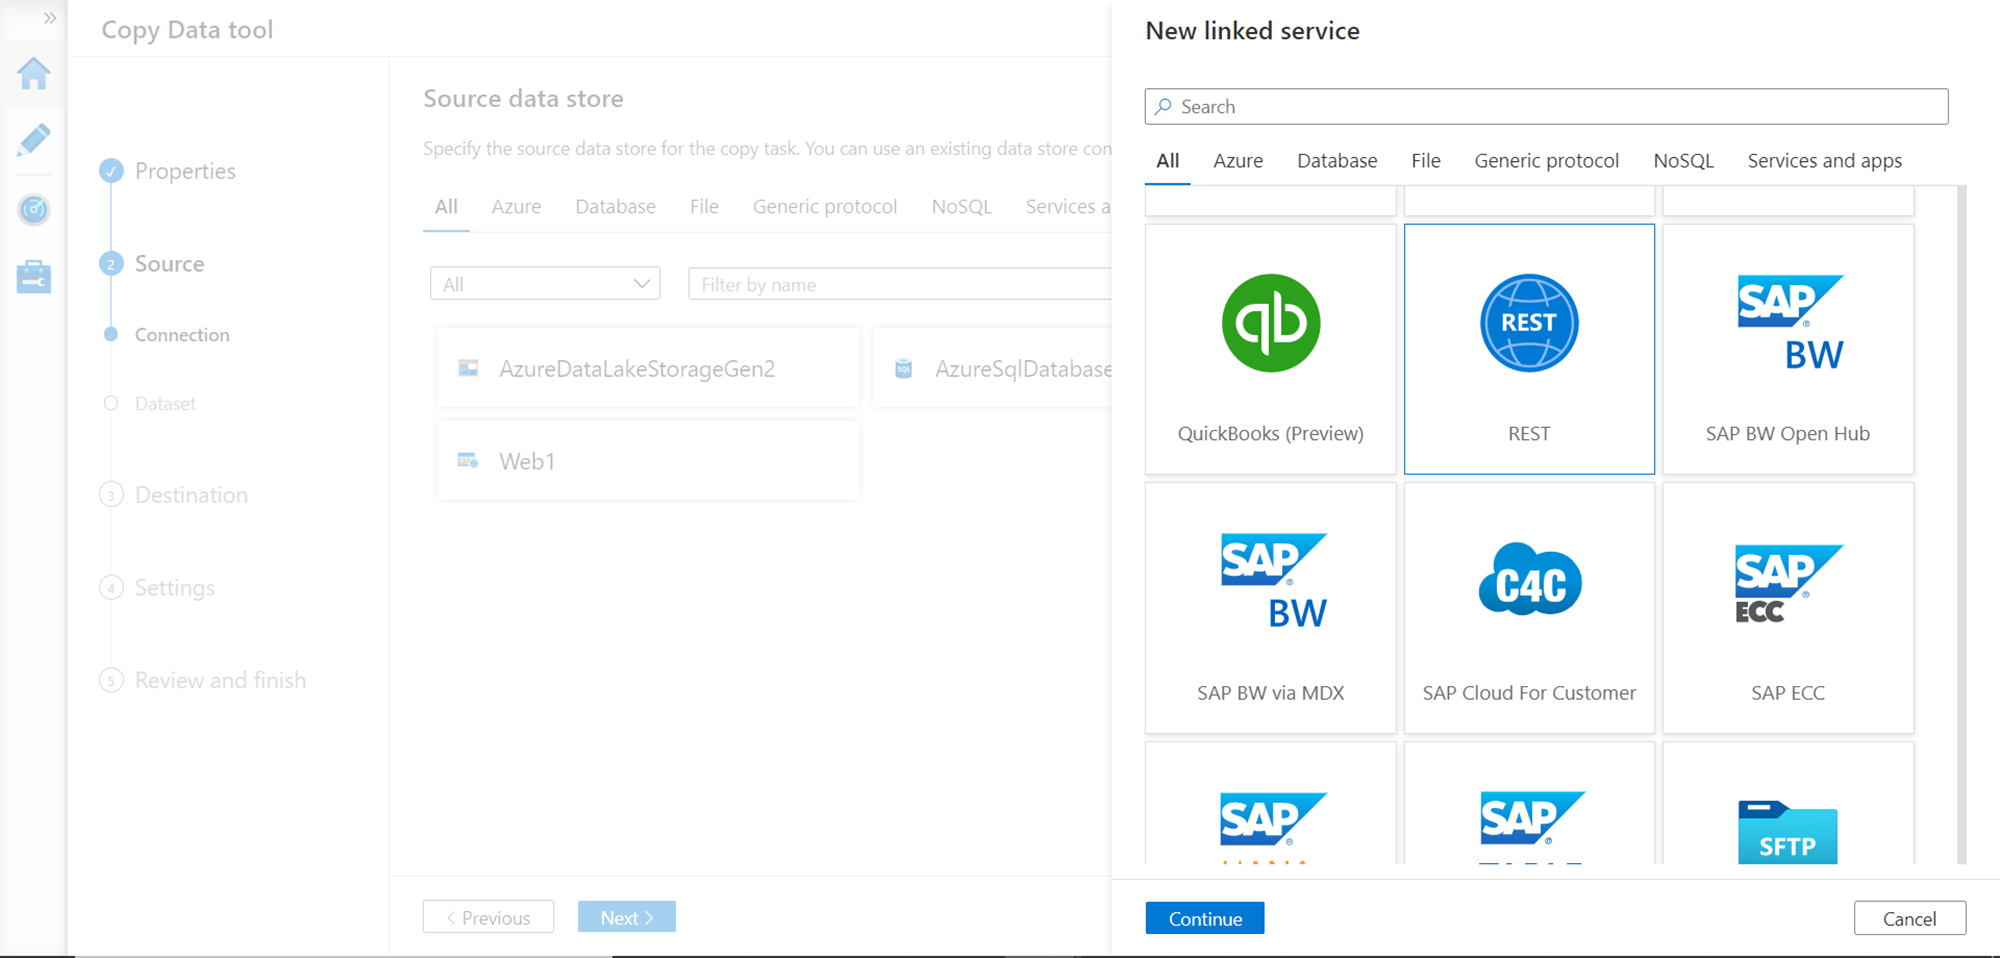
In this step, we need to provide the details of the API. If the API had been hosted on the Azure platform itself, there are multiple authentication mechanisms that we could have used as shown below. The default authentication type is Basic. In our case, we are going to pass the API Key in the URL itself, so we will be using the Anonymous authentication method, though our authentication is not anonymous.
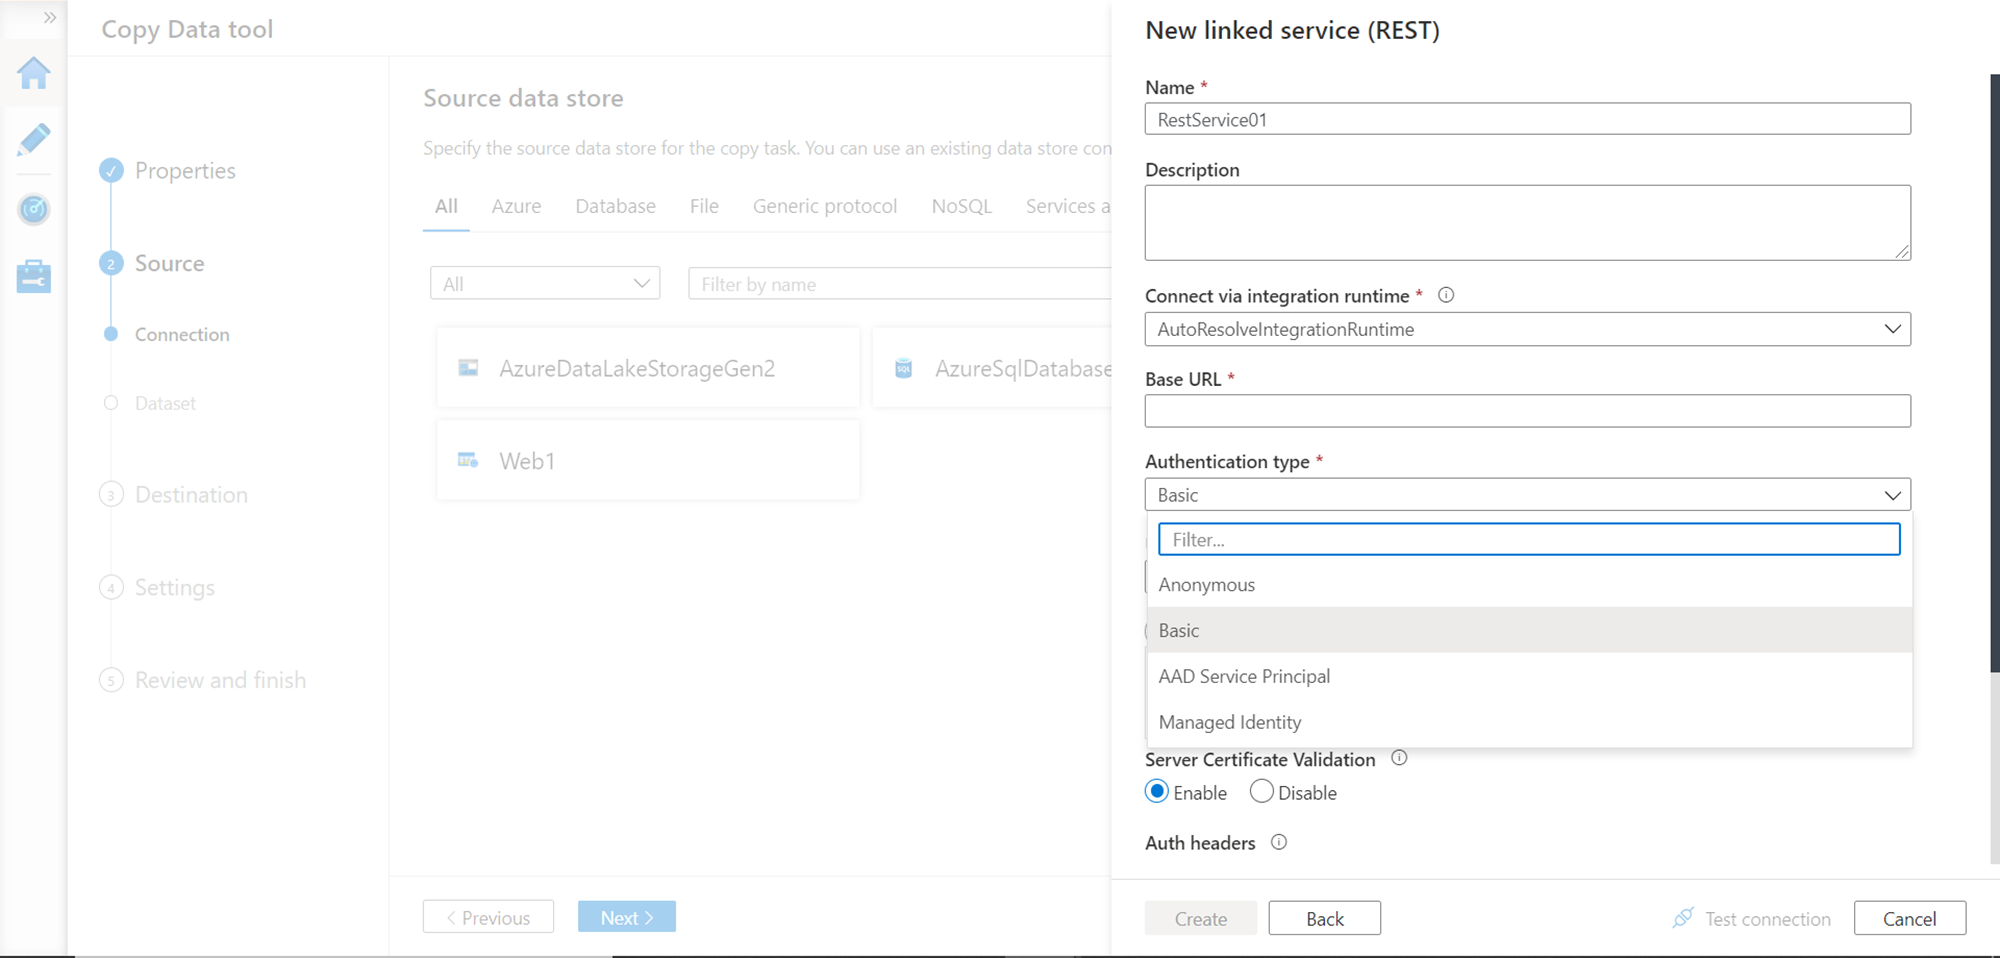
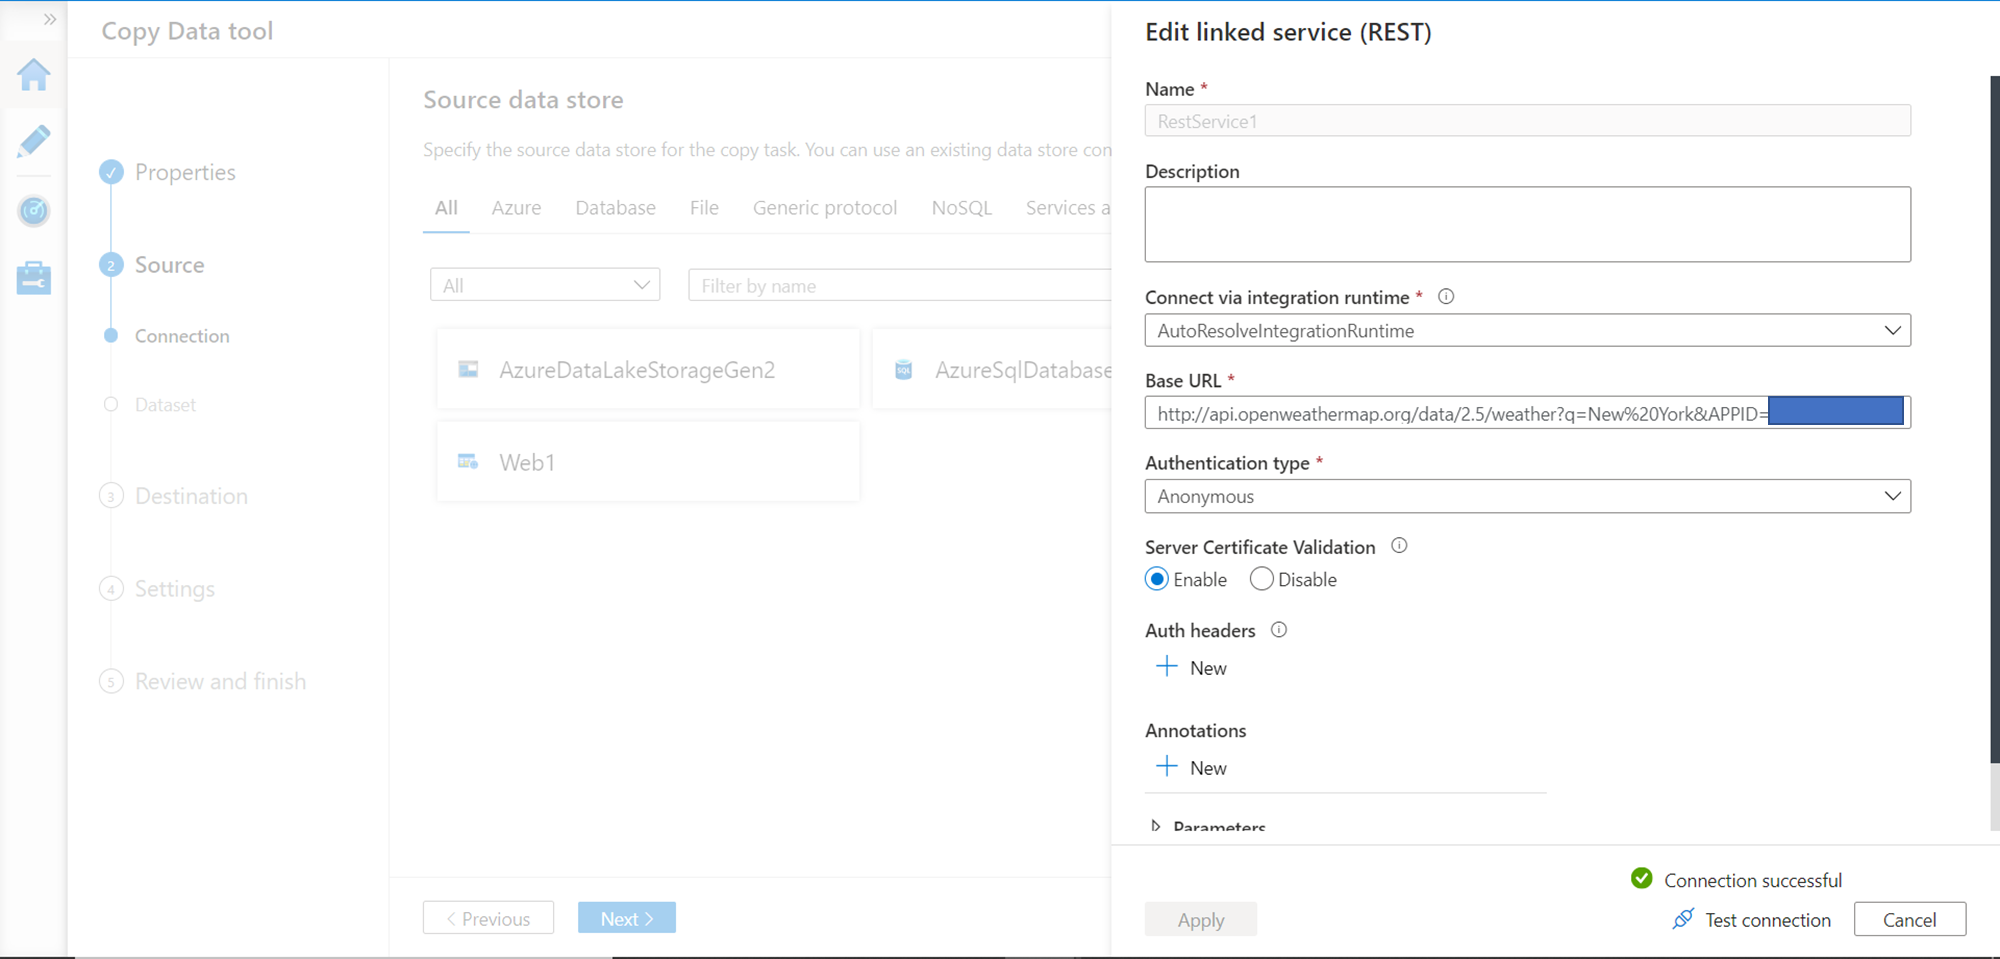
Provide the rest of the API details like the name of the linked service, optional description, the URL of the API as shown in the example earlier and click on the Test Connection button. If everything is in place, the connection would be successful as shown below. Note that we are passing New York as a parameter in the API URL itself.
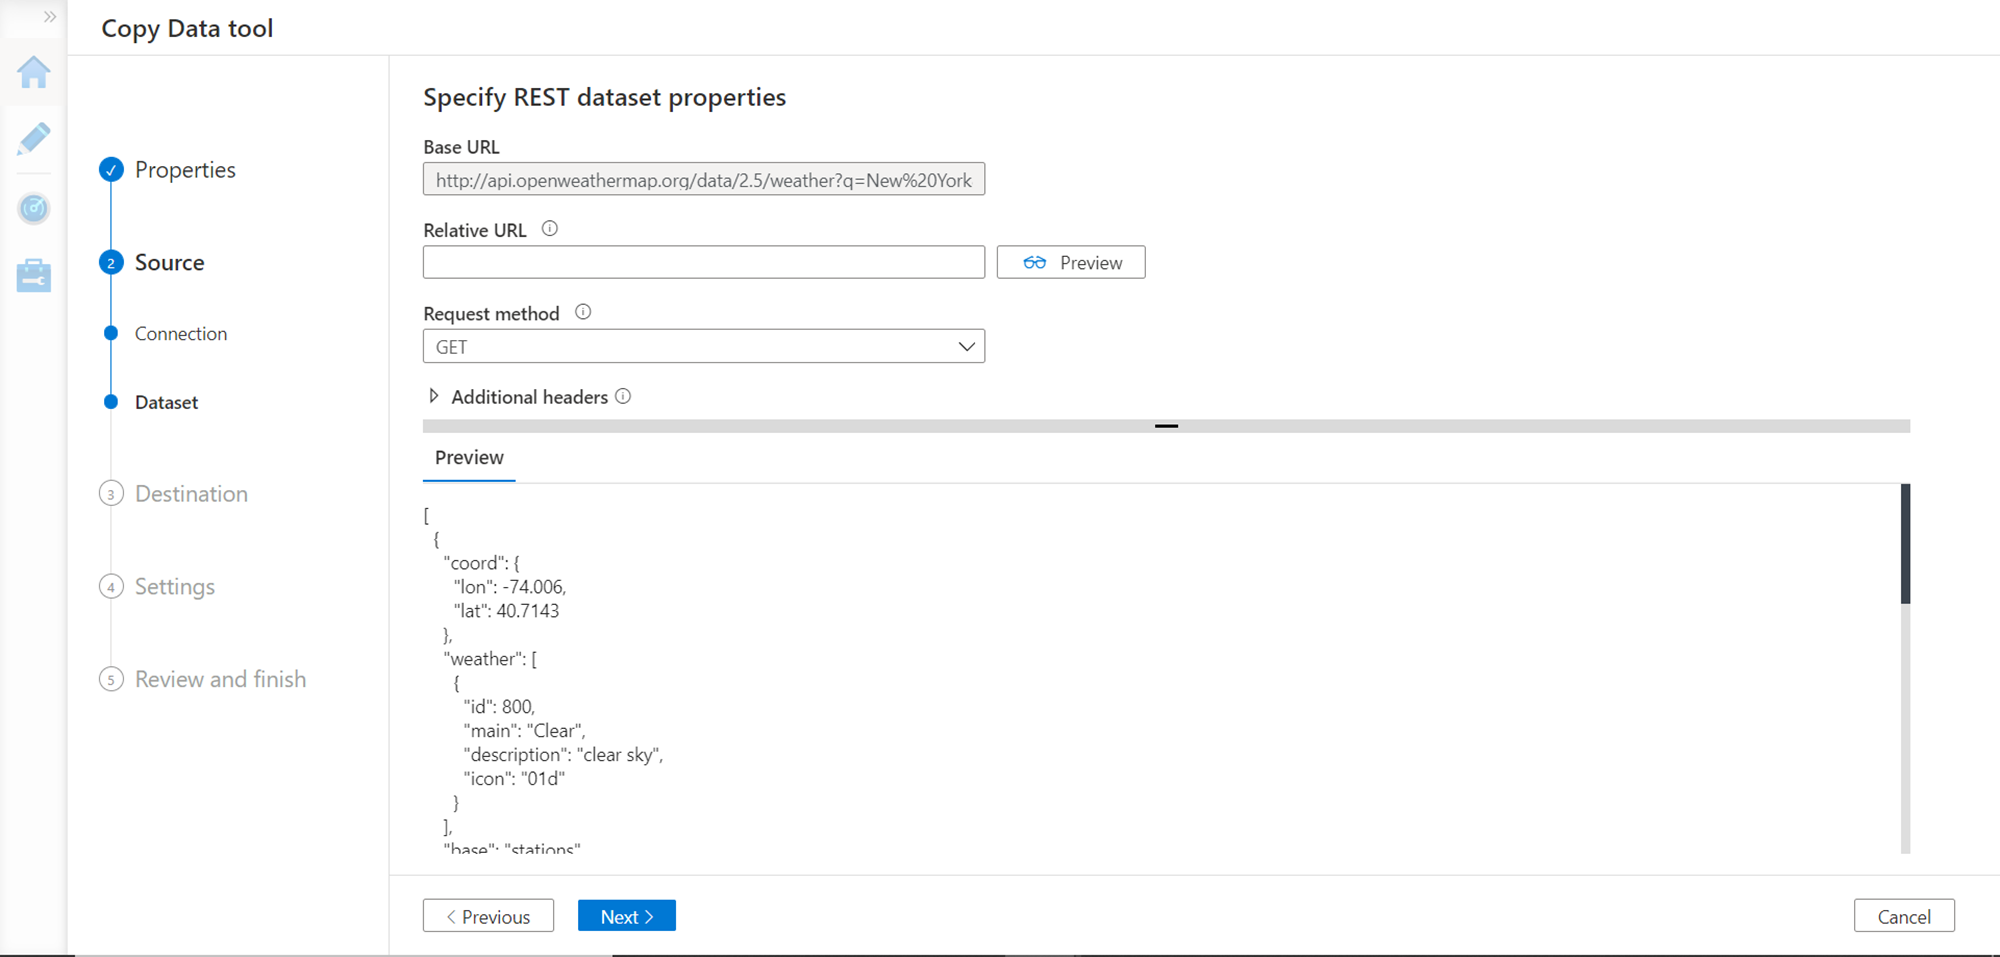
In the next step, we need to specify the REST data properties. We already provided the base URL earlier, so that would be pre-selected. We just need to ensure that the request method is GET by default. This verb is used for reading data, so we will continue with the same. Click on the Preview button and it will show the expected response from the API as shown below.
In the next step, we need to configure the destination where we will write the output of the API response. Using the steps shown earlier, here we will be writing to output to a file that will be stored in the Azure Data Lake Storage account. We need to register this as a source as shown below.
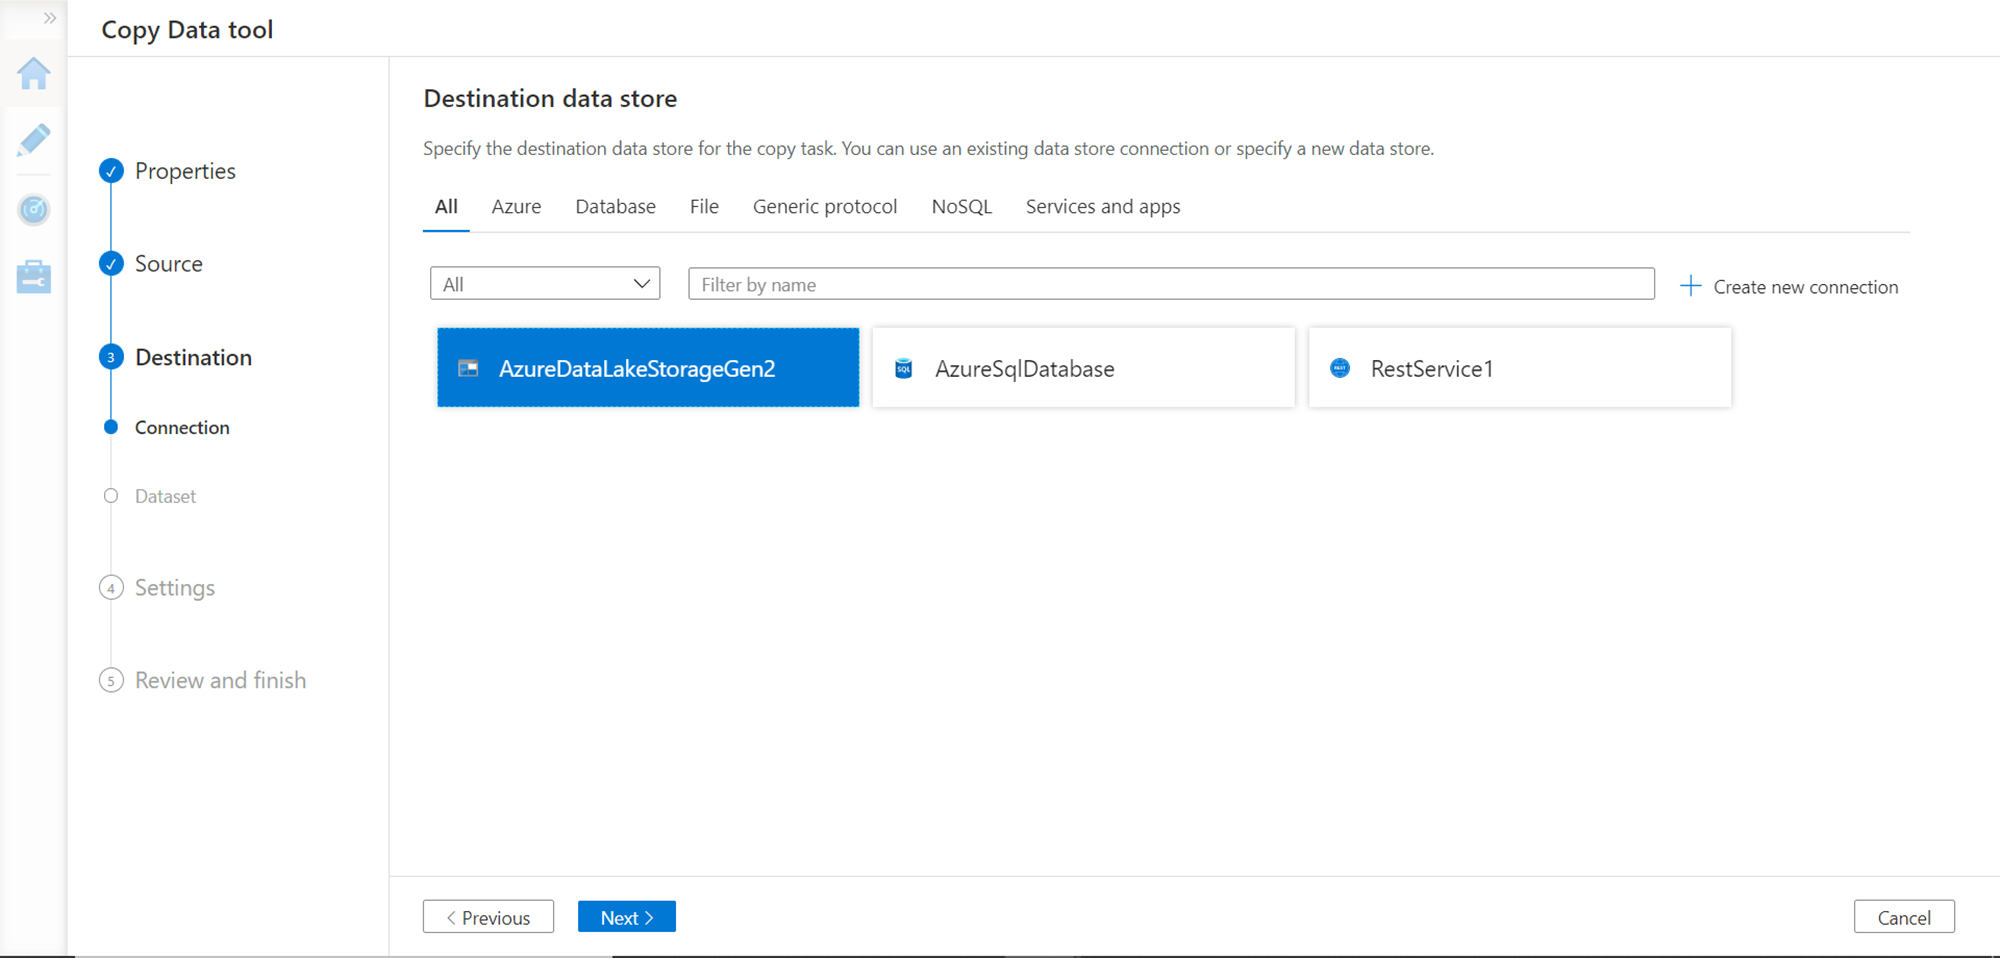
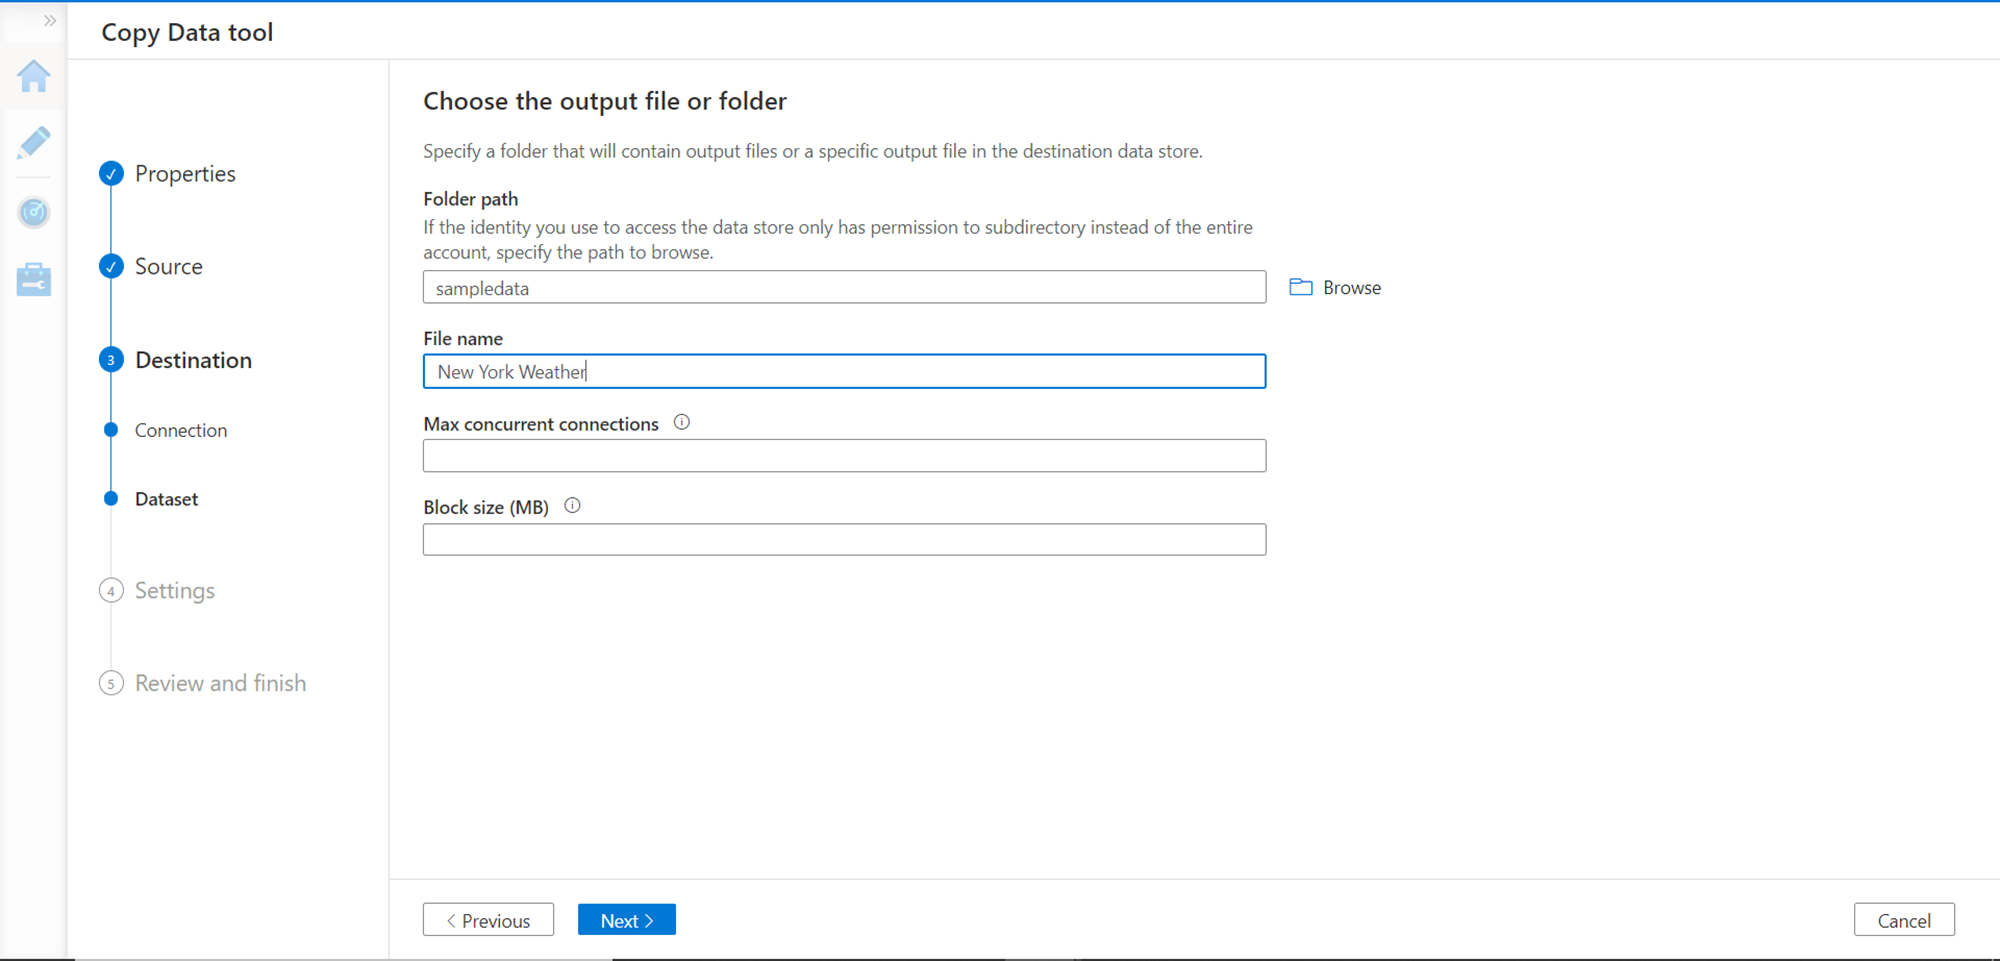
In the next step, we need to specify the exact location on the data lake storage account where we intend to store the output and provide a file name for the output file as well.
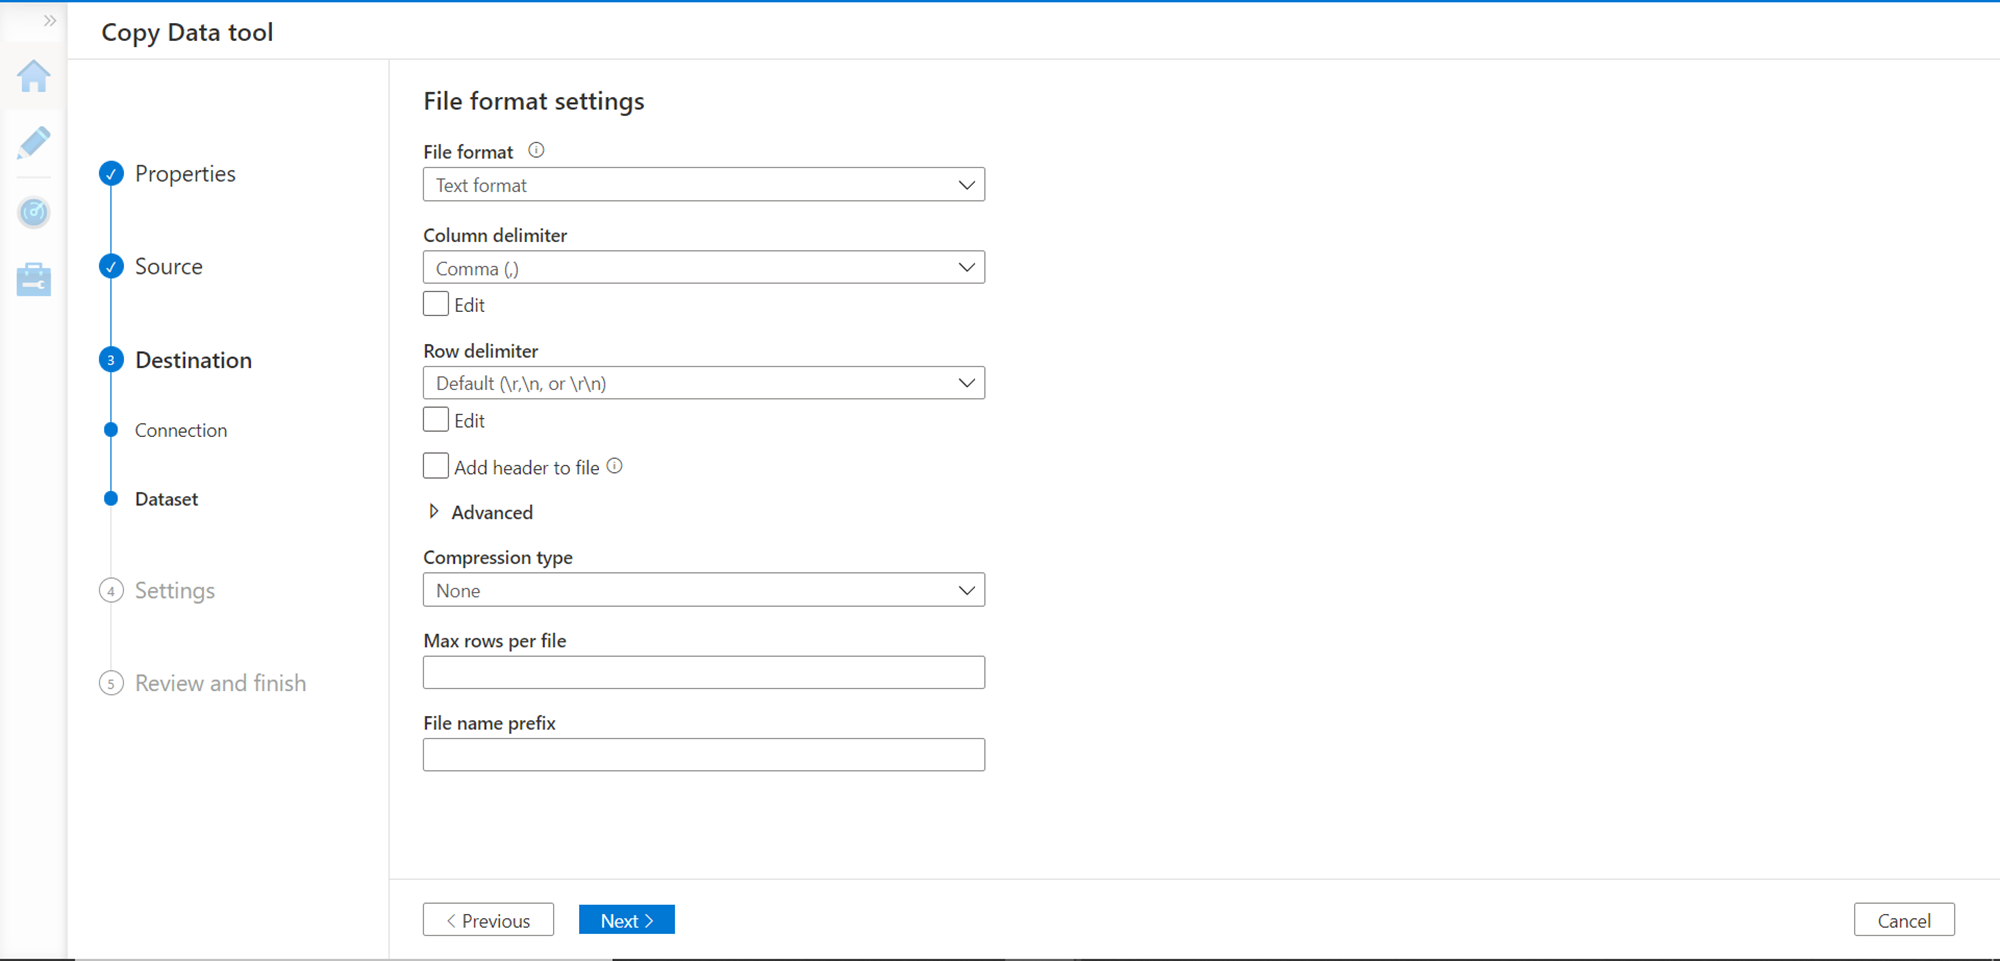
In this step, we need to provide the file format settings. We intend to store only a few attributes, so we will store the data in a text file format with a comma delimiter as shown below.
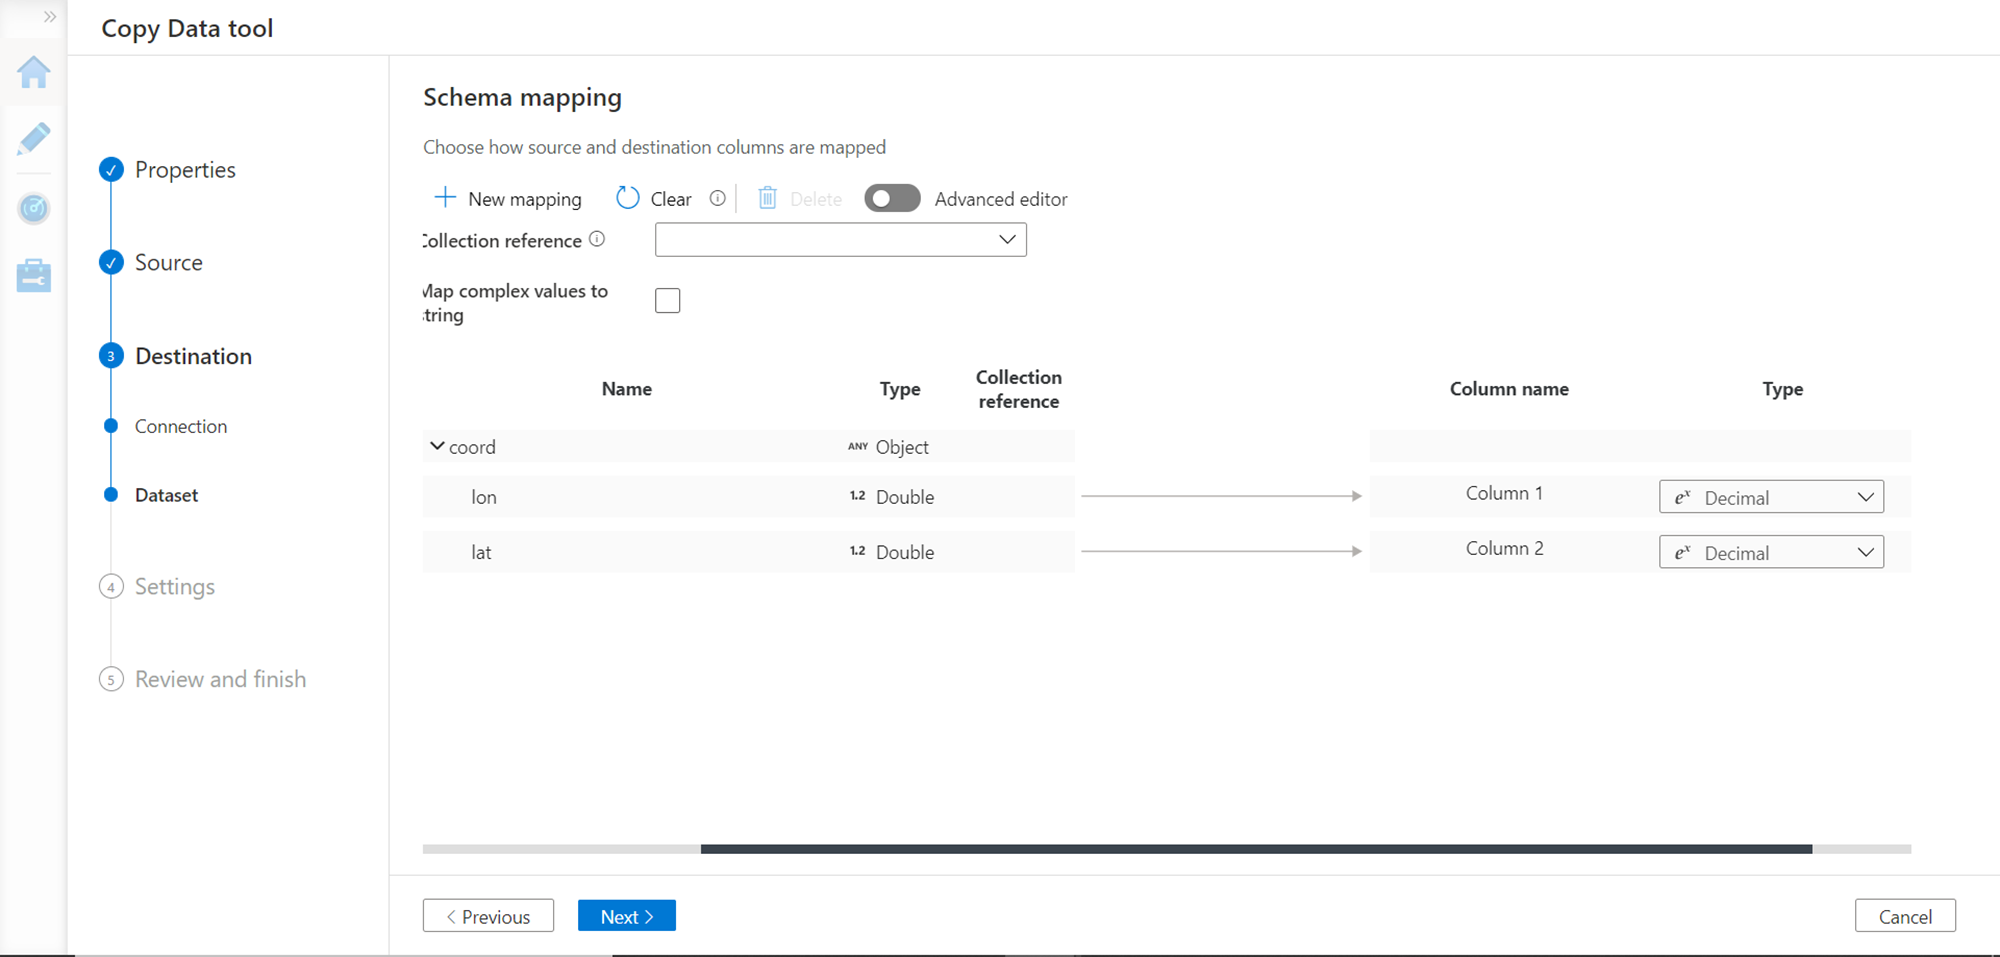
In this step, we need to map the schema of response to the destination schema. As we selected text file format as the output, it adds auto-generated column names. We need to ensure that the right attributes with mapped data types are configured else the task can fail during execution.

For this purpose, to eliminate the complexity, we have removed all the attributes and just kept the latitude and longitude attributes and mapped the data type as decimal for demonstration, as shown below.
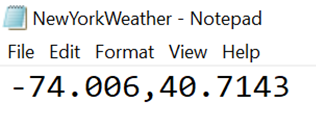
The rest of the steps are just for reviewing and confirming the creation and execution of the task. Once the task has been executed successfully, it will result in an output file that will be generated at the configured location. Navigate to the file location, download, and open the file and it would have the output as shown below.
In this way, we can integrate and invoke REST APIs from Azure Data Factory and build data pipelines that leverage external data services by consuming APIs for data processing.
Conclusion
In this article, we learned the basics of APIs from a data integration perspective in an ETL or data pipeline approach. We created an Azure Data Factory instance, invoked a REST API from a data flow task, and stored the API response in a data file on Azure Data Lake Storage.

She has a deep experience in designing data and analytics solutions and ensuring its stability, reliability, and performance. She is also certified in SQL Server and have passed certifications like 70-463: Implementing Data Warehouses with Microsoft SQL Server.
View all posts by Gauri Mahajan
- Oracle Substring function overview with examples - June 19, 2024
- Introduction to the SQL Standard Deviation function - April 21, 2023
- A quick overview of MySQL foreign key with examples - February 7, 2023