
In this article, we understand the step-by-step installation process of Oracle 19c on Windows Server 2019. The minimum hardware requirement to install an Oracle database server is following:
Server hardware requirements:
- Processor: Intel EM64T or AMD64
- RAM: Minimum 2 GB
- Available Disk space: 12 GB or more
- Swap (Virtual Memory): Same size as the physical memory size (Minimum 2GB)
- Screen Resolution: Minimum screen resolution must be 1024×768
Hard disk requirements:
The oracle recommends installing oracle home on the NTFS file system or ACFS. The amount of space required by the single instance of the oracle database is 12GB or higher. Space includes
- Temp space: 595 MB
- Oracle Home: 6.5 GB
- Oracle inventory files: 53 MB
- Oracle data files (oradata, admin data files, flash_recovery_area): 4.4 GB
The Oracle product family contains the following editions:
- Oracle database standard edition one
- Oracle database standard edition
- Oracle database enterprise edition
- Oracle database express editions
You can read Database Licensing Information User Manual to learn more about the licensing information and list of features supported by the above-listed editions.
Now, let us understand the installation process. For demonstration, I have created a virtual machine and installed Windows Server 2019 on it.
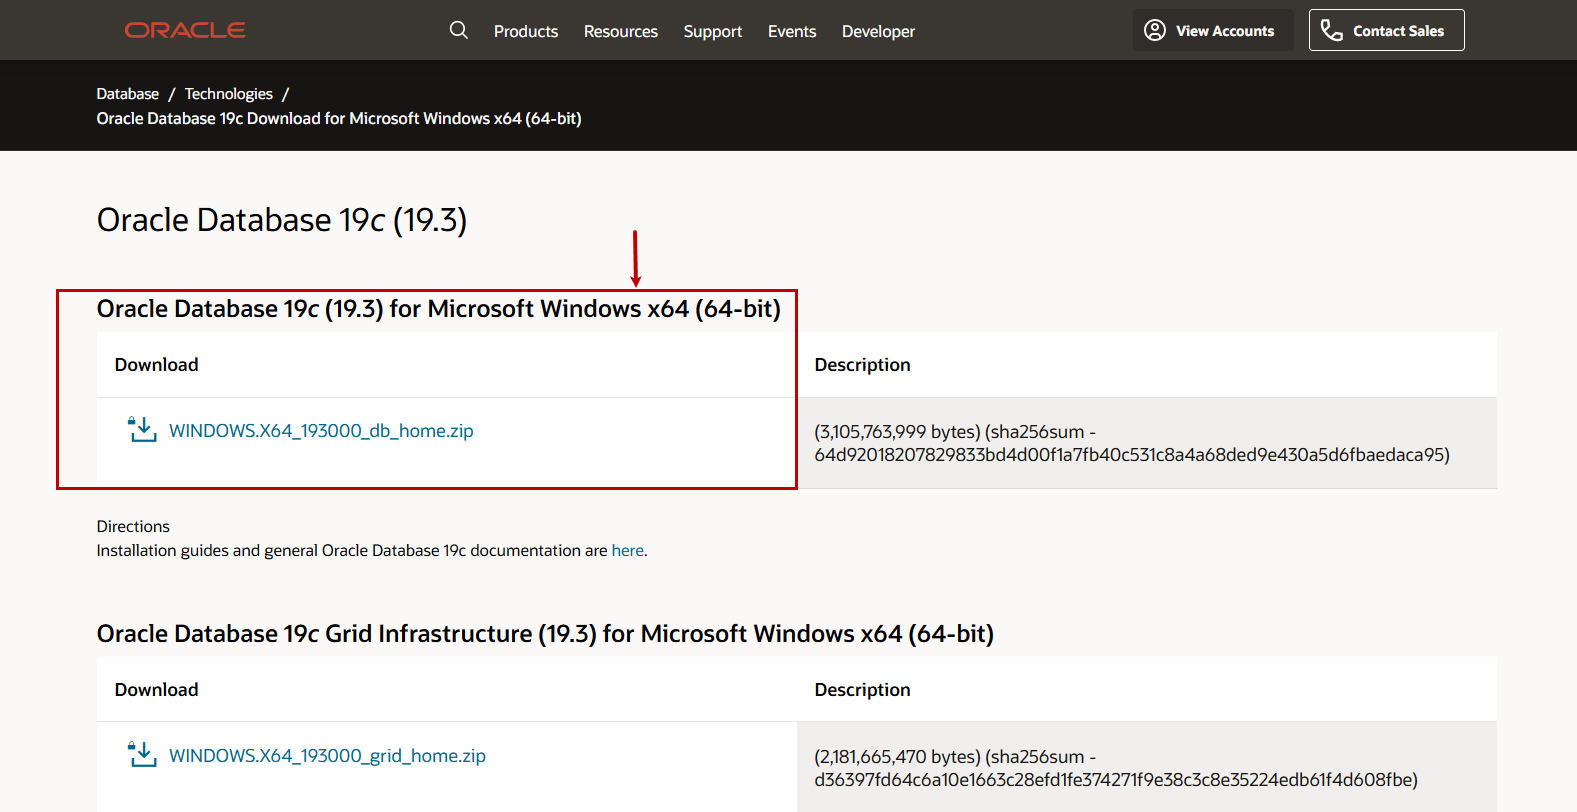
Download oracle database setup files
First, let us download the oracle setup files. The setup files are available on the Oracle download page. On the download page, you can see the various installation packages. We are installing the oracle database only, so click on the link under the Oracle Database 19c (19.3) for Microsoft Windows x64.
Install Oracle software and starter database
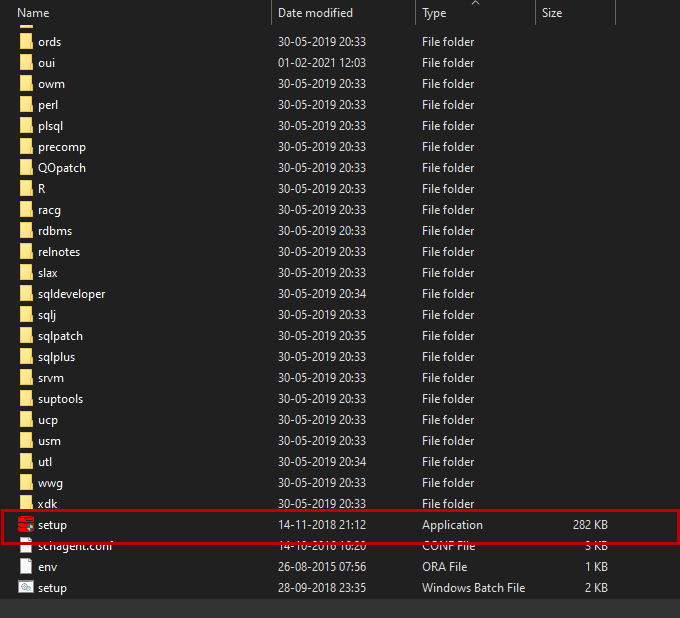
Once installation files are downloaded, copy them to the desired location and unzip the installation files. Once files are extracted, run the Setup.exe file to start the Oracle Universal Installer.
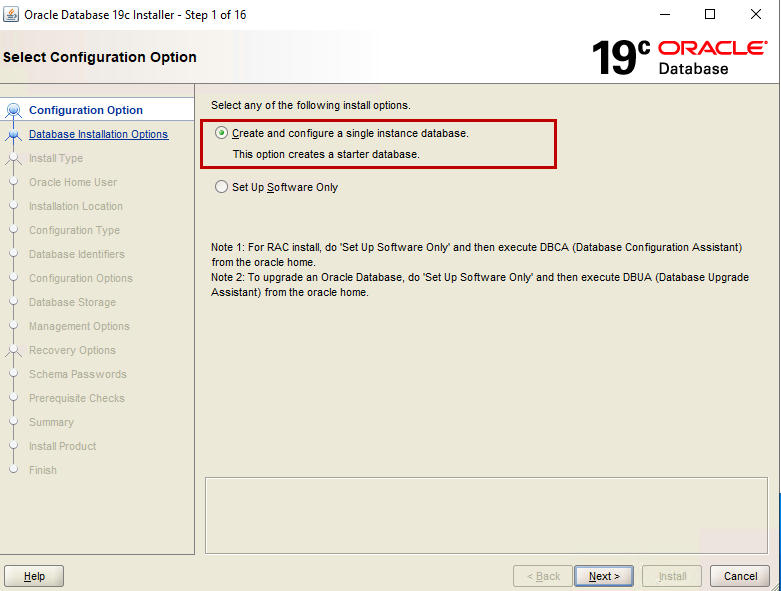
The installation process begins. On the configuration options screen, you can choose any of the following installation options.
- Install oracle software and starter database
- Install oracle software
In our example, we are installing oracle software and starter database; therefore, select Create and configure single instance database option.
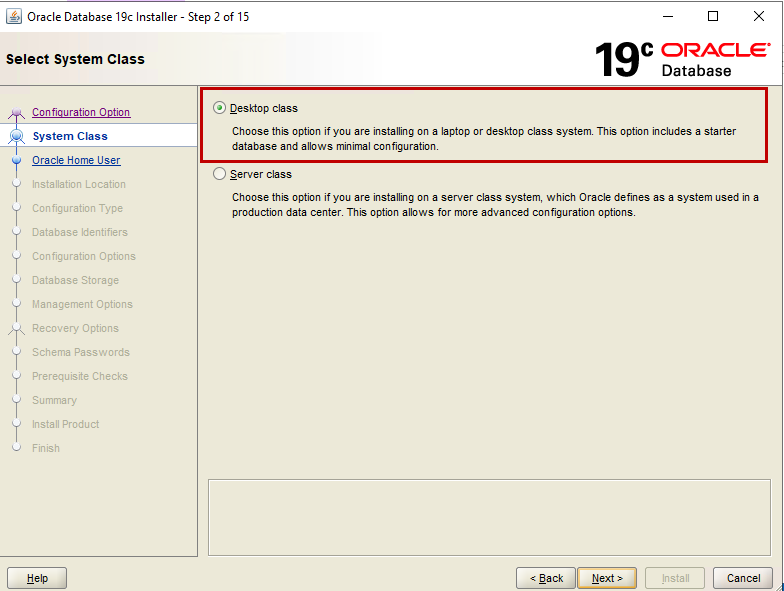
On the Select System Class screen, you can choose the class of machine on which you are installing the oracle database. If you are installing it on the server-class machine, select Server Class, and if you are installing it on the Desktop class machine, choose Desktop class. In our case, we are installing oracle on a workstation, so I have chosen the Desktop class.
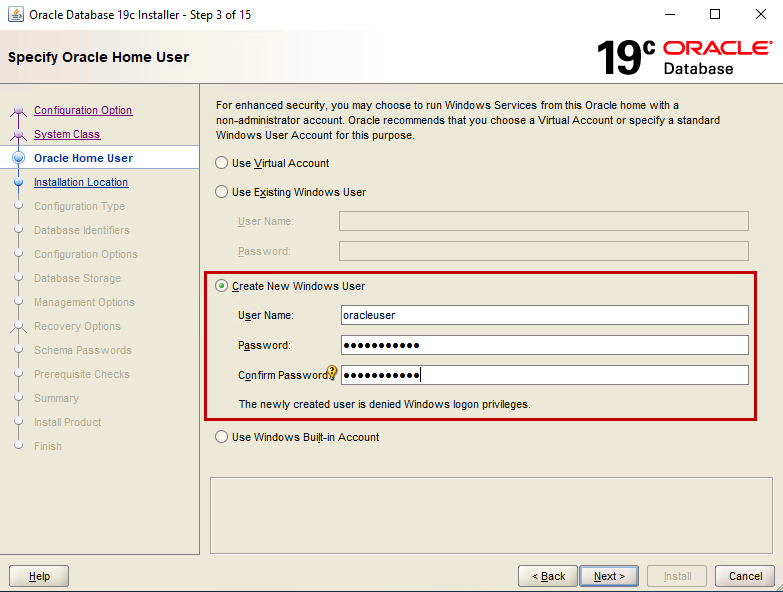
On Specify oracle Home User screen, you can set up an account used to run the oracle services on Windows. You can choose any of the following options:
- Virtual Account: If you do not want to create a separate account for oracle home, you can choose the Virtual account. For enhanced security, Oracle recommends using a Virtual account
- Existing Windows User: If you have created an administrator or non-administrator Windows account and you want to use it, then select the Existing Windows User option. We must specify the username and password of the account
- Create New Windows User: If you want to create a new account, you can choose the Create New Windows User option. The Oracle Universal Installer will create a user. You must specify the desired username and password
- Use Windows Built-In account: If you want to use the account created by the Windows server, you can choose to use Windows built-in account option
In our case, we are creating a separate user for oracle services; then, I have selected Create New Windows User.
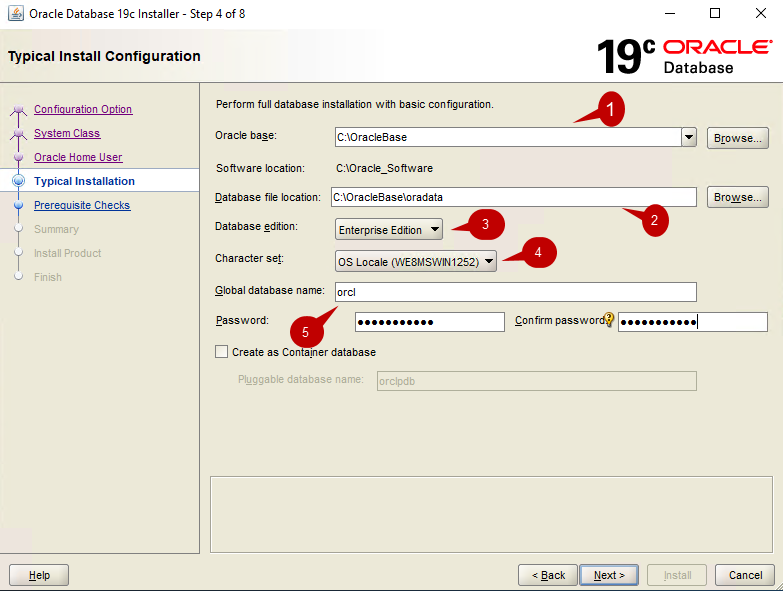
In the Typical install Configuration screen, you can provide the values of the following parameters.
- Oracle base: Specify the location of the Oracle base directory. In our case, the location is C:\OracleBase
- Database file location: Specify the location where you want to keep the database files. In our case, the location is C:\OracleDBFiles
- Database edition: Specify the edition of the oracle software. You can choose Enterprise edition or standard edition. In our case, I have selected Enterprise Edition
- Character set: Specify the character set that you want to use. You can choose UNICODE or OS Locale. I have selected OS Locale
- Global database name: Specify the global database. The default database name is ORCL. I have not changed the global database name
- Password: Specify the password to access the global database
- Create as Container database: If you want to configure the database as a container database, you can enable the Create as Container database option. I have disabled it
Following is the screenshot of the configuration option.
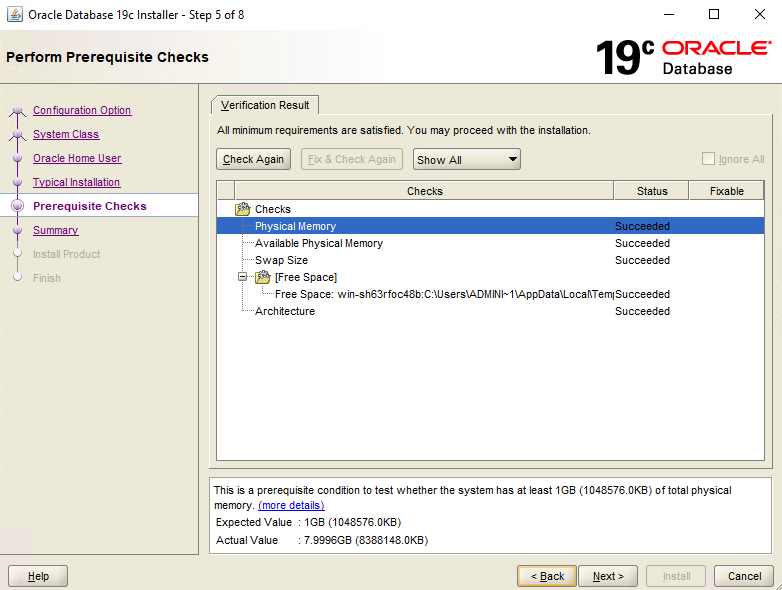
On the performance prerequisite check screen, the wizard verifies minimum prerequisites to install oracle software are fulfilled or not. OUI check following parameters:
- Physical memory
- Available Physical memory
- Swap Size
- Free space on the disk
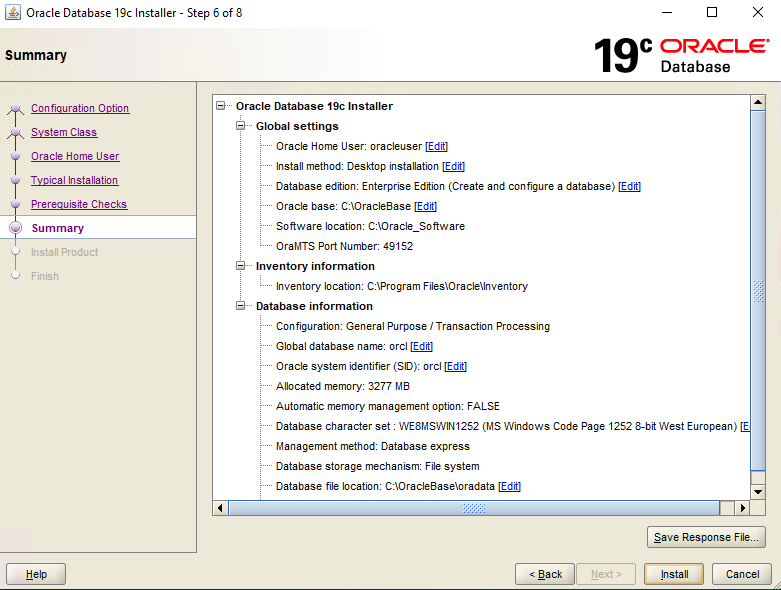
On the Summary screen, you can view the summary of the configuration parameters. You can review the settings and, if required, make changes. Click install to begin the installation process of Oracle 19c.
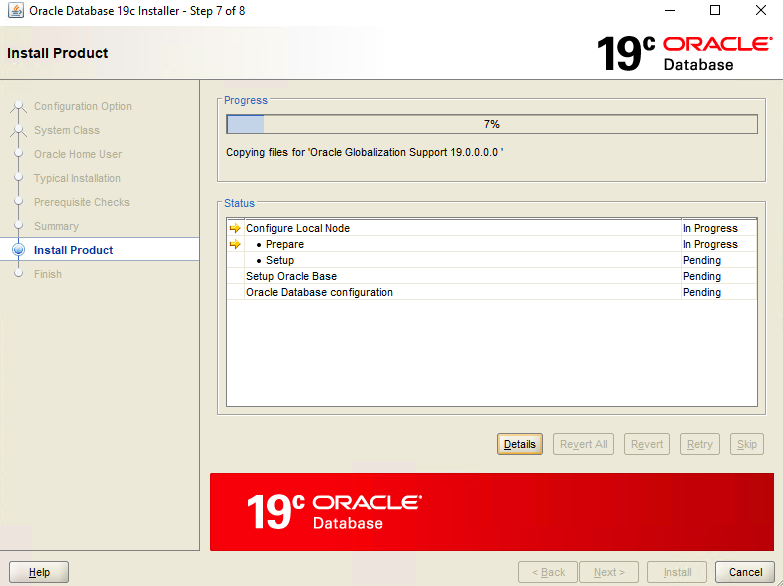
The installation process begins. The time to complete the installation depends on the configuration of the Server/workstation.
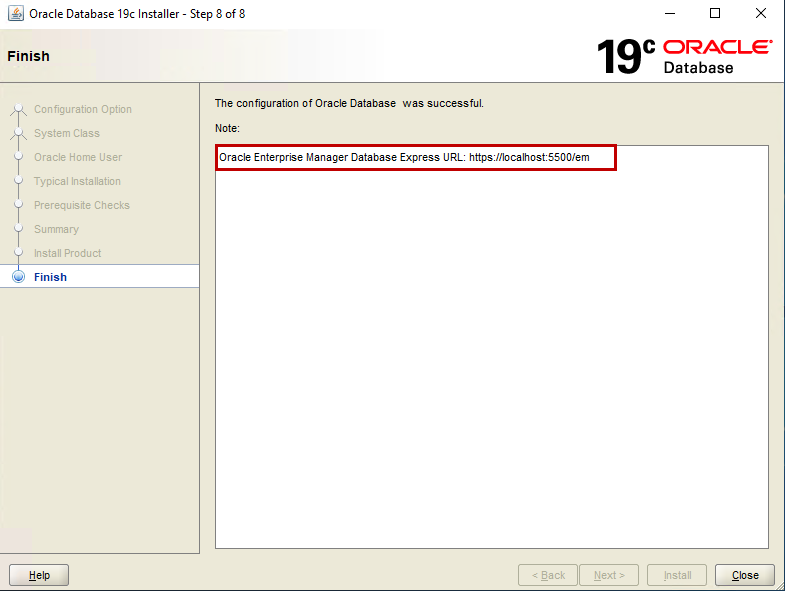
Once installation completes, you can close the installer. The setup installs oracle enterprise manager. It is a web-based tool that is used to monitor and configure the Oracle 19c database.
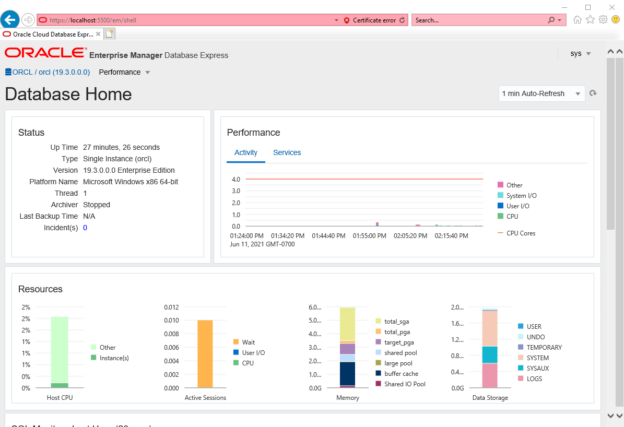
Connect to Oracle 19c Enterprise Manager Database Express
Let us take a quick look at an oracle Enterprise Manager Database express. In our case, we can launch it by accessing the https://localhost:5500/em URL.
First, the enterprise prompts for the username and password. Specify the SYS as username (It is created during the installation of the oracle) and master password used on the Typical Installation screen. Once authenticated, you can view the status of the Oracle services and performance and resource matrix.
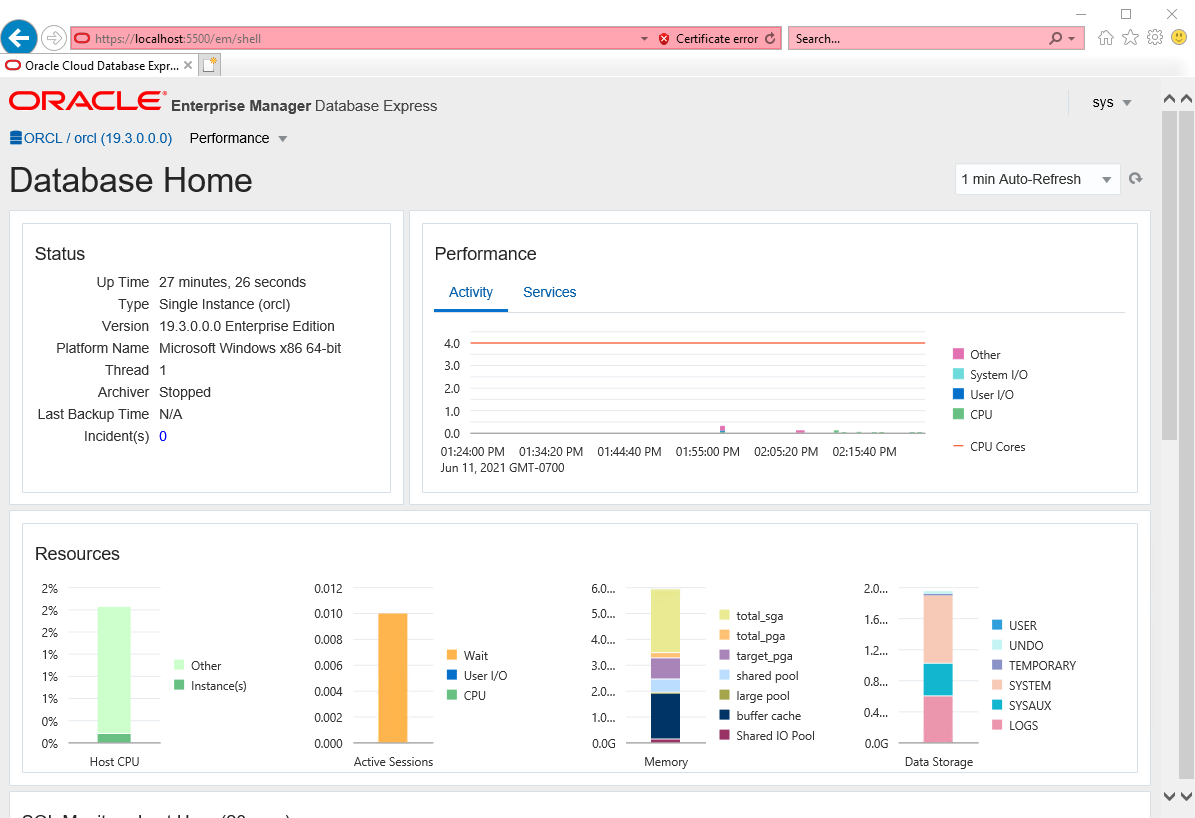
In the SQL monitor Section, you can view the top 20 SQL Queries along with the query execution duration, SQL Plan hash, Username, SQL Text, and IO requests. In our case, you will not see details of the queries because we have not run any query using the SYS account.
Connect to ORACLE using SQL*Plus
SQL*Plus is a command line utility that can run the queries and PL/SQL script on the oracle database. When we install oracle software, the SQL*Plus installs automatically. If you use client tools from a separate machine, you can download and install the SQL*Plus package from the official oracle download page.
When we execute the SQL*Plus utility, it prompts for the username and password. You must specify the appropriate username and password. Suppose we want to connect to the Oracle 19c instance using the sys user. To connect, open SQL*Plus and specify the appropriate username and password.
As you can see, we are connected to the oracle using the sys user. Now, let us run some simple queries.
Enable HR schema and Run basic Queries
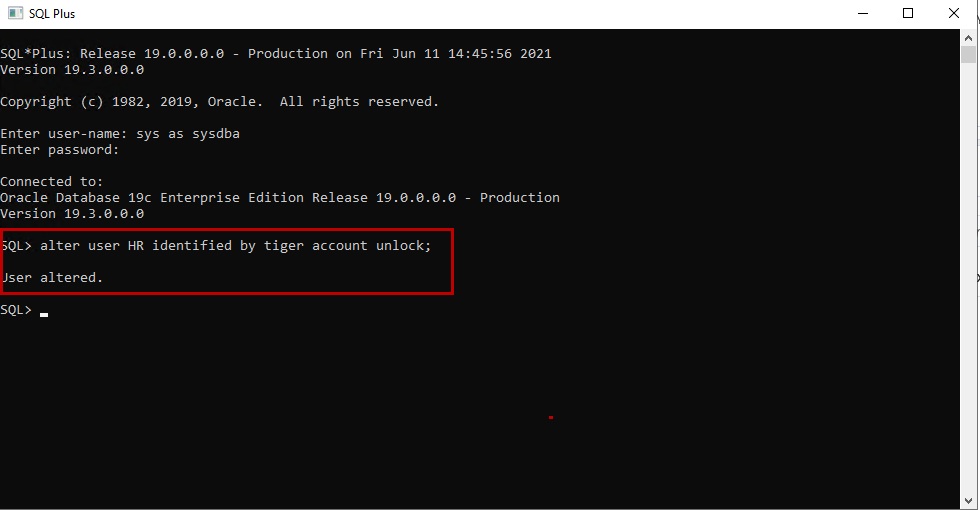
We have installed a starter database, so we can use the HR schema to run a simple query. The HR user is disabled, so we must enable it. To do that, open SQL*Plus and connect to sysdba user.

Once connected, run the following query
SQL> alter user HR identified by tiger account unlock;
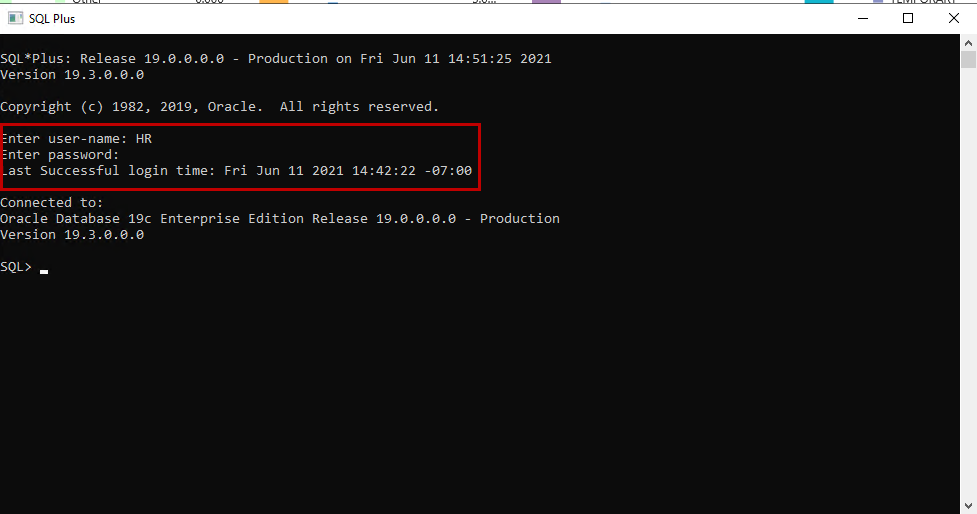
Once the user is enabled, let us view the tables created in the HR schema. First, connect to HR user using SQL*Plus.
To view the tables, we can use user_tables. Run the following query:
SQL> select table_name from user_tables;
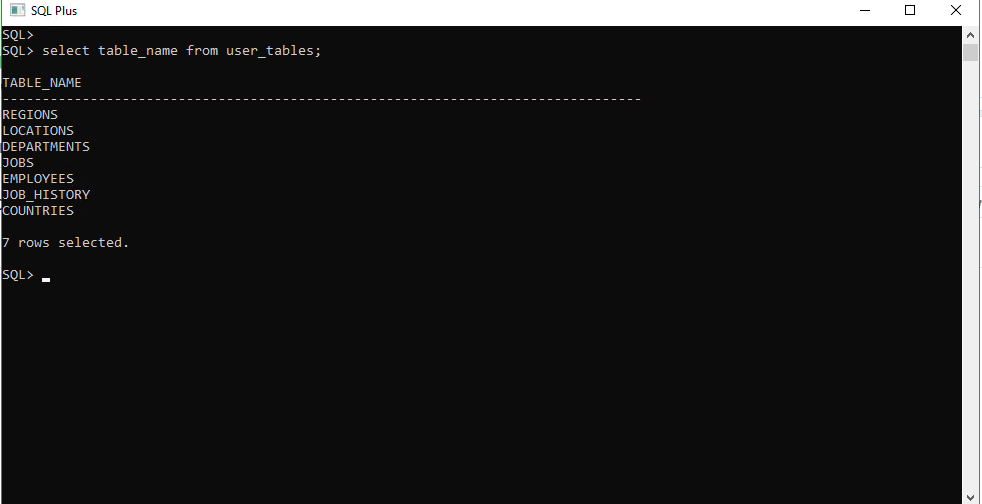
As you can see, the query has returned the list of the tables. Now, let us view the structure of the Employees table. To view the structure of any table in oracle, we can use DESCRIBE command.
Query:
SQL> Describe EMPLOYEES;
Output:
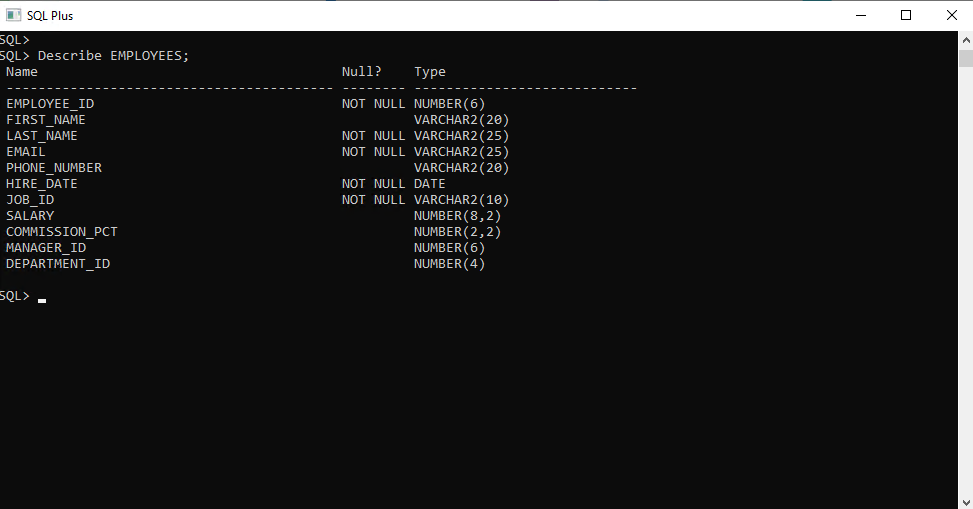
As you can see, the query has returned the structure of the EMPLOYEES table.
Summary
In this article, we learned the step-by-step installation process of the Oracle 19c. This article covers the basic installation process and can be used by junior developers or DBAs who want to kick start their career in oracle. In my upcoming articles, we will learn advanced concepts of administrating the oracle database. Stay Tuned..!!
References
- How to Install Oracle Database 18c on Windows
- Oracle 11g/12c Client Install on Windows: Lightweight and Locked Down

He has expertise in database design, performance tuning, backup and recovery, HA and DR setup, database migrations and upgrades. He has completed the B.Tech from Ganpat University. He can be reached on nisargupadhyay87@outlook.com
- Different ways to identify and change compatibility levels in SQL Server - July 22, 2024
- Copy SQL Databases between Windows 10 and CentOS using SQL Server data tools - October 19, 2022
- Changing the location of FILESTREAM data files in SQL Database - October 14, 2022