

In this article, we will be exploring the process of enabling Windows authentication in AWS RDS SQL Server.
Introduction
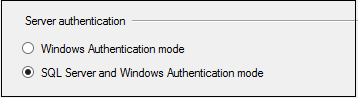
Microsoft SQL Server supports the following server authentication schemes:
- Windows Authentication mode: In this method, we use domain accounts to connect with SQL Server. The user account belongs to an active directory. It enforces an organization policy such as complex password, password expiry, account lockouts. Once SQL Server gets a request to connect using Windows authentication, it authenticates with the AD using SSPI. It is a recommended way of handling user authentication in SQL Server
- SQL Authentication: In this mode, SQL Server handles user authentication. We create SQL login, user, and provide appropriate right. It is not integrated with the organization’s Active directory
You can right-click on SQL instance, go to properties and view the server authentication modes.
Amazon provides a managed database service RDS for SQL Server. It supports multiple several versions and editions of Microsoft SQL Server. You can go through the many useful articles related to AWS RDS SQL Server on SQLShack.
Once we create the AWS RDS SQL Server, it enables SQL authentications. During database creation, it creates an admin account for SQL authentication, and you can log in with that user. Later, we can add multiple users with appropriate permissions.
I will cover the Windows authentication for AWS RDS SQL Server in the two articles.
-
In this first article, we will cover the following topics:
- Configure an AWS Microsoft Active directory
- Create an EC2 instance with Windows operation system and join it in the domain
- Install Active Directory Administration tools on Windows Server 2019
-
In the second part, we will cover the following topics:
- Create active directory users in the domain we created in this article
- Add active directory domain in the RDS instance
- Connect AWS RDS SQL Server using Windows authentication
- Remove domain membership from AWS RDS SQL Server
Let’s get started with the Windows authentication in the AWS RDS SQL Server.
Windows authentication in AWS RDS SQL Server
As you know, for a windows authentication, we require active directory users. SQL instance should be part of an active directory domain.
AWS RDS SQL Server supports mixed-mode authentication for SQL Server. We can use Windows authentication using the AWS managed Microsoft Active Directory service. You can also use your active organization directory, but to use it with RDS, you need to create a forest trust. For my demo instance, I do not have active directory configured, so we use the AWS Managed Microsoft AD for Windows authentication.
Configure an AWS Microsoft Active directory
To configure on active directory, navigate to Services ->Directory Service
It opens the following page that lists the existing Active directory in your accounts, if any.

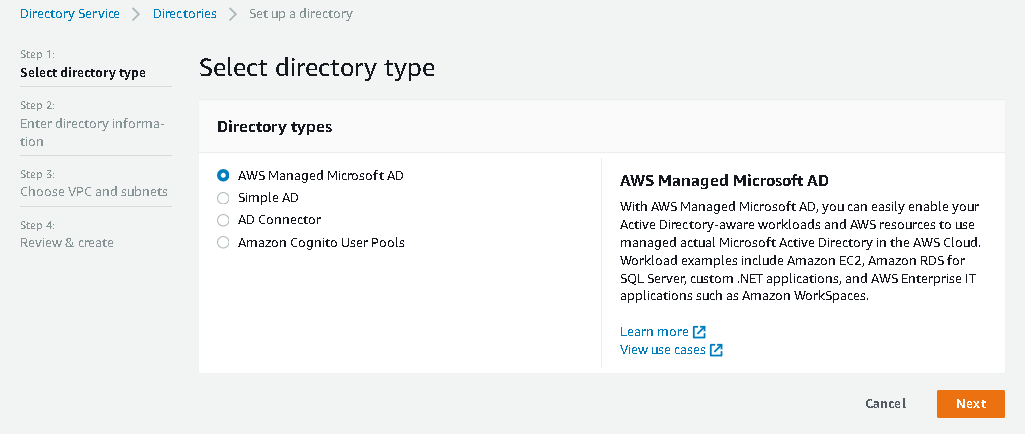
Click on Set up Directory, and you get the page to choose directory services. Select the option – AWS Managed Microsoft AD. We can connect this active directory with AWS resources that require a Microsoft active directory, such as AWS EC2, AWS RDS SQL Server, and AWS IT applications.
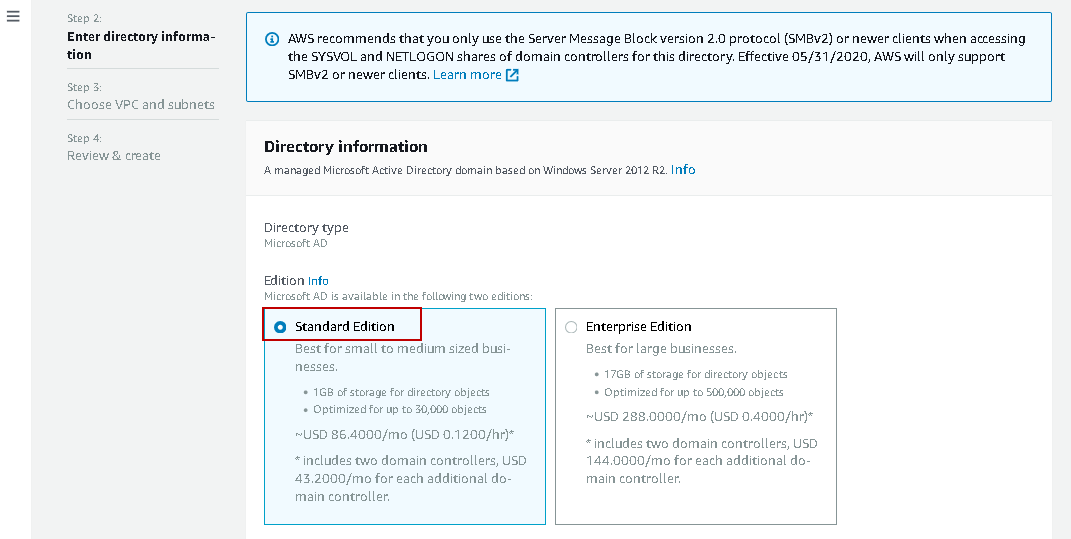
On the next page, we configure the active directory. It first asks for the edition we require for Microsoft Active Directory.
Edition: We can either use the Standard or Enterprise edition for Microsoft AD
- Standard: It is suitable for small businesses and costs USD 0.1200 per hour. Standard edition is suitable for up to 30,000 objects
Enterprise: We can use it for a large business. It is optimized for 5,00,000 objects. It costs USD 0.4000 per hour

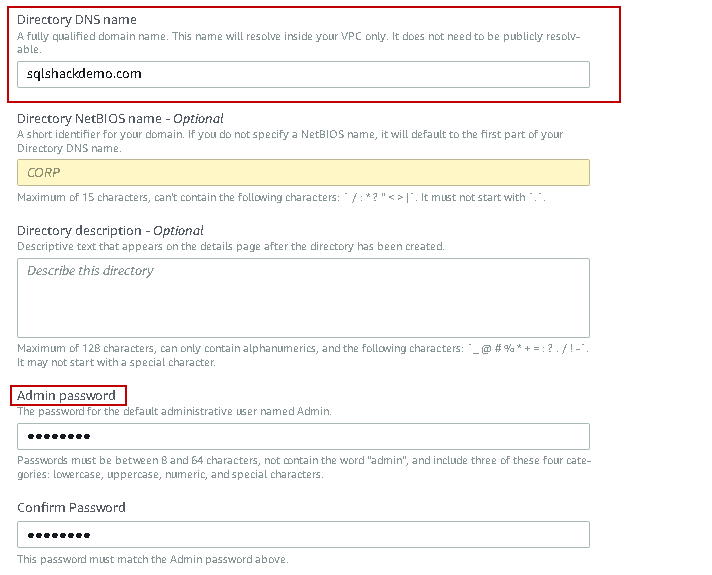
- Directory DNS Name: Specify a unique DNS ( Domain name service) for the directory. It should be a fully qualified name such as sqlshackdemo.com
Admin Password: Specify the password for a default user Admin. We cannot use the word “admin” in the password. It is a case-sensitive password. You can perform the most common activities in the Active directory using this account
- Create, update, remove the users, groups, and computers
- Manage users and groups
- Manage DNS configurations
- View AD logs
- View Security logs
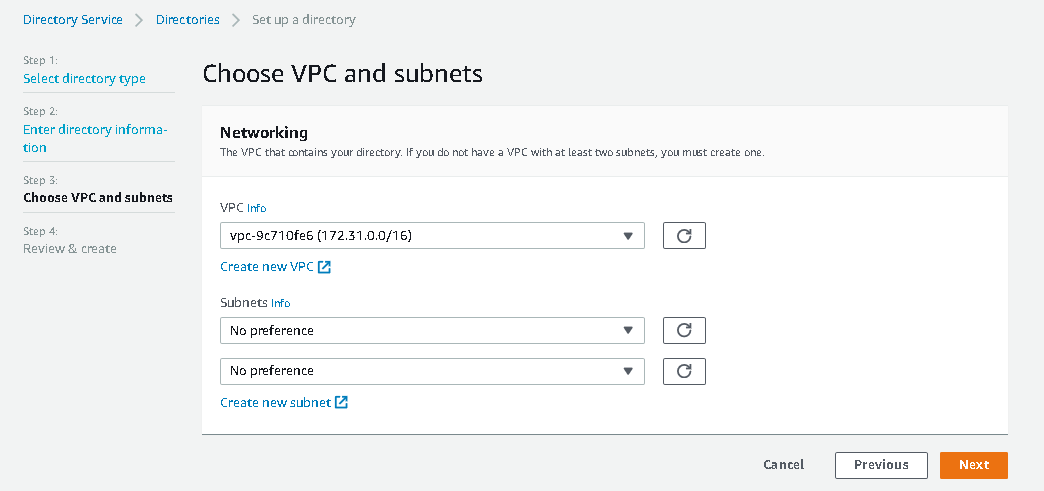
Click Next and select the VPC (Virtual Private Cloud) from the drop-down list. It is a virtual network for the AWS resources in your account. You can understand more about VPC in Amazon Docs.
If you have an existing VPC, select it from the drop-down, or we can create a new VPC using the option Create New VPC. I will go with the default VPC and subnets for this article.
Review your Microsoft Active directory configurations and click on Create directory. You should also review the AD pricing and go back in case of any doubts.

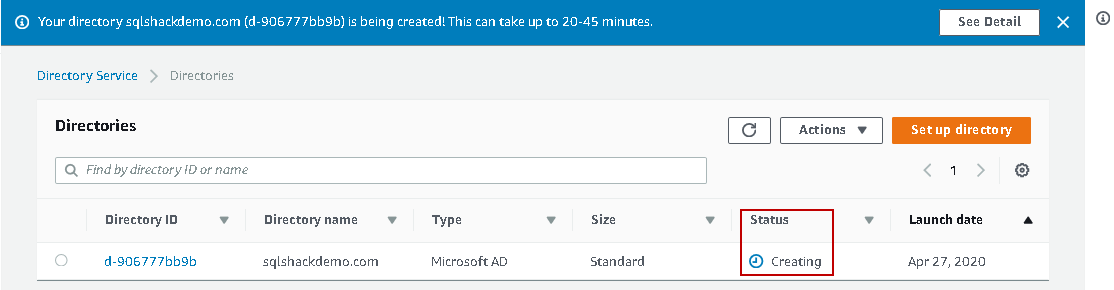
It starts creating the active directory as per your requirement. It takes approximately 30 minutes to create and configure an active directory.
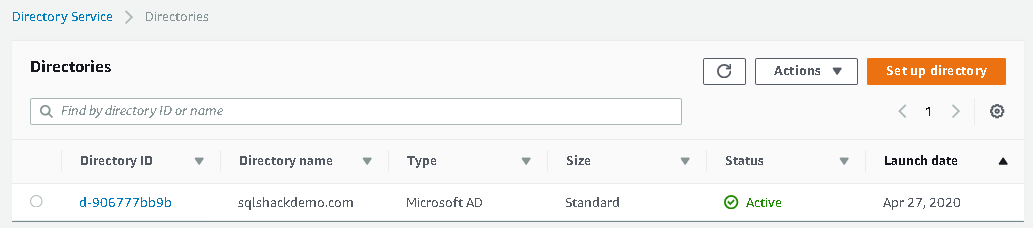
Once the AD configuration completes, its status changes to Active. You can see the directory ID and directory name in the following screenshot.
Create a Windows Server 2019 EC2 instance
We require an AWS EC2 instance with Windows operating system to connect with the AWS RDS SQL Server using SQL Server client tools. We should perform this step after the active directory status is Active.
Navigate to Services -> EC2 and click on Launch Instance.
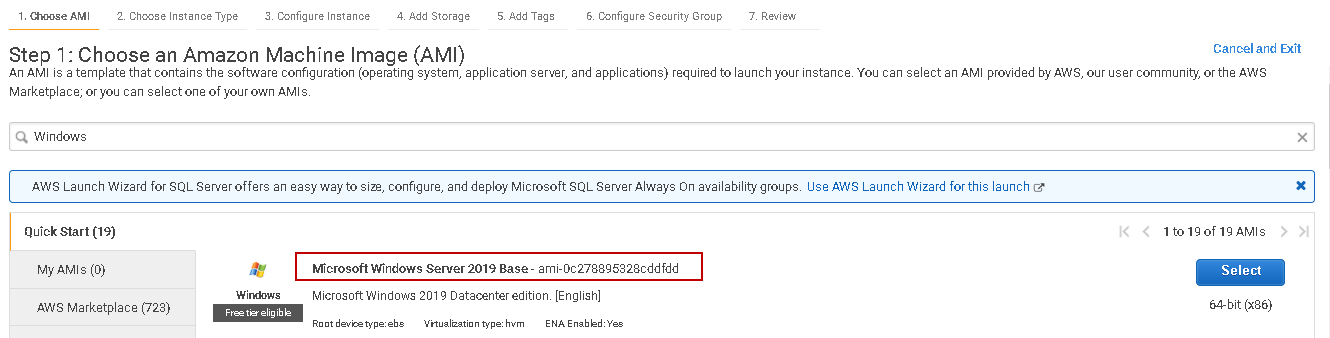
In the first step, choose an Amazon Machine Image (AMI). For this demo, I am selecting the Microsoft Windows Server 2019 Base. You can select AMI as per your need.
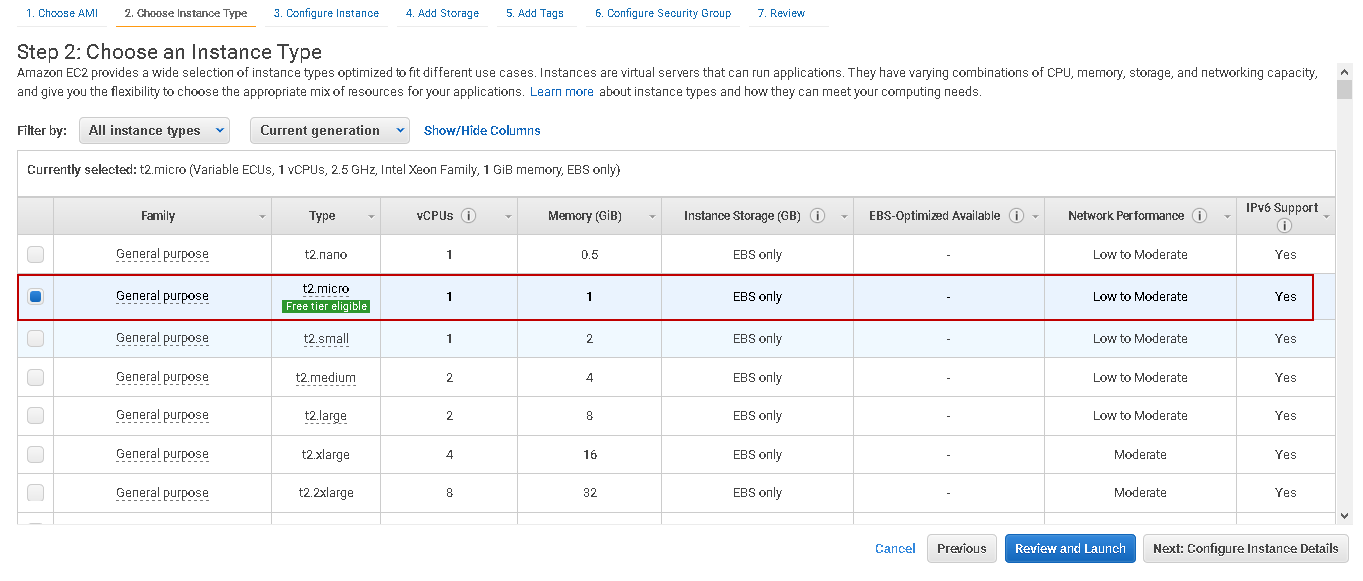
In the next step, choose an instance type depending upon vCPU, Memory requirements. I choose t2.micro EC2 instance category that is eligible for a free-tier account as well.
Click on Next Configure Instance Details. It pre-fills the information for you, but you should verify the VPC. It should be the same VPC you selected in the directory services.
In the Domain join directory, select the active directory we created earlier.

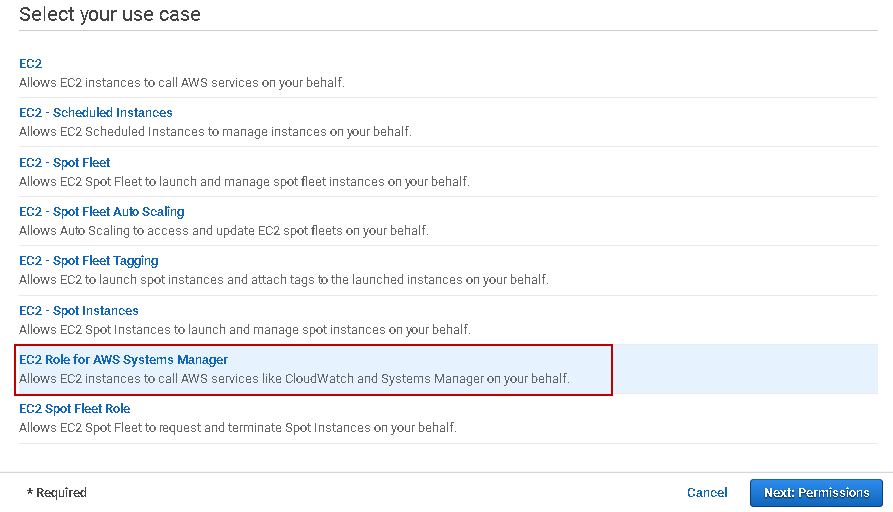
We also need to create an IAM role in the EC2 instance. Click on Create new IAM role. It opens a new browser tab and selects the EC2 role for AWS Systems Manager.
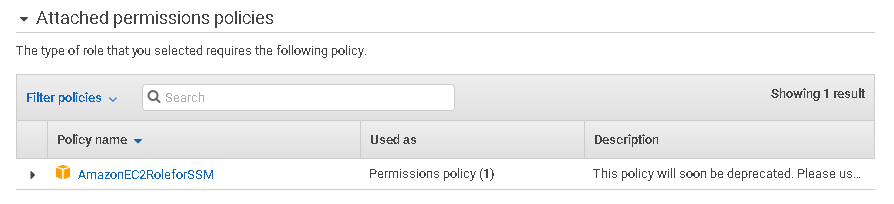
Click on Next: Permissions, and it automatically attaches an AWS policy for you.
In the next step, give a suitable name for this role and click on Create Role
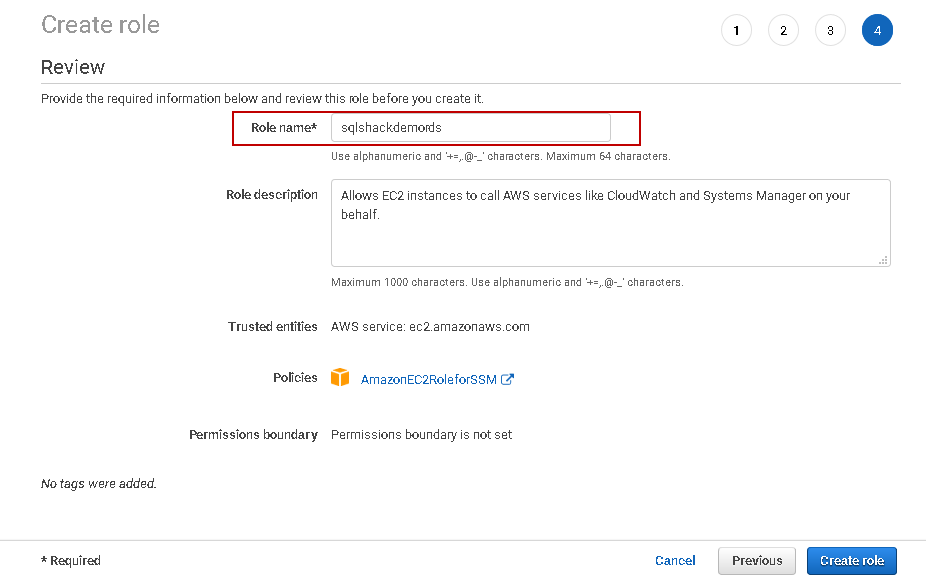
You get the following message once it created the role.

Now, go back to the EC2 instance configure tab and select the role we created above.

Review the storage requirement in the next step. We can go with the default values in this demo.

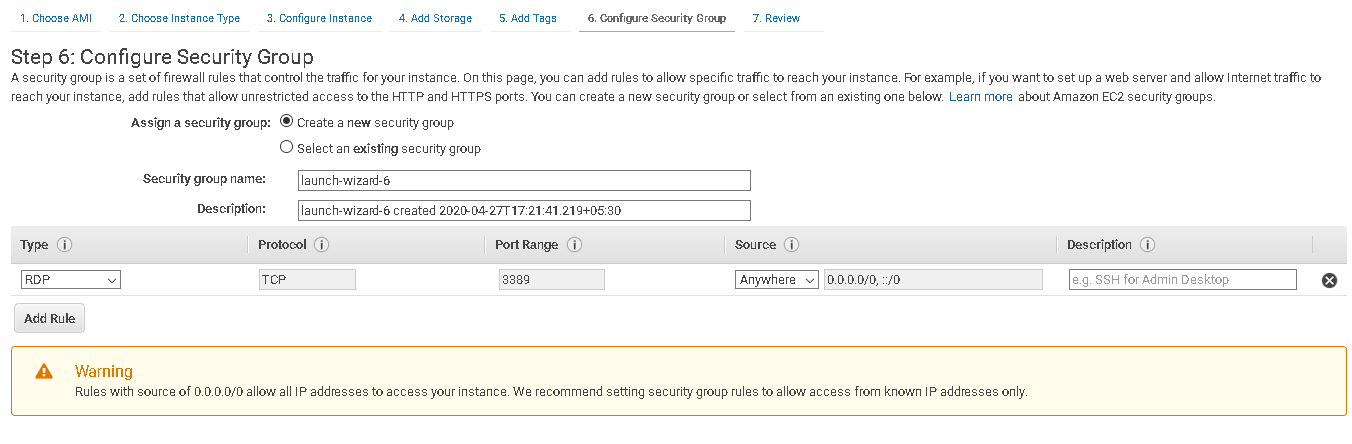
Skip the next step tags. In the security group, allow the RDP connection for port 3389. For my demo instance, I allow users to connect with any IP address. You should restrict the IP range that should connect to EC2 instance in a production environment. If you allow connection from any IP, you get a warning message as well.
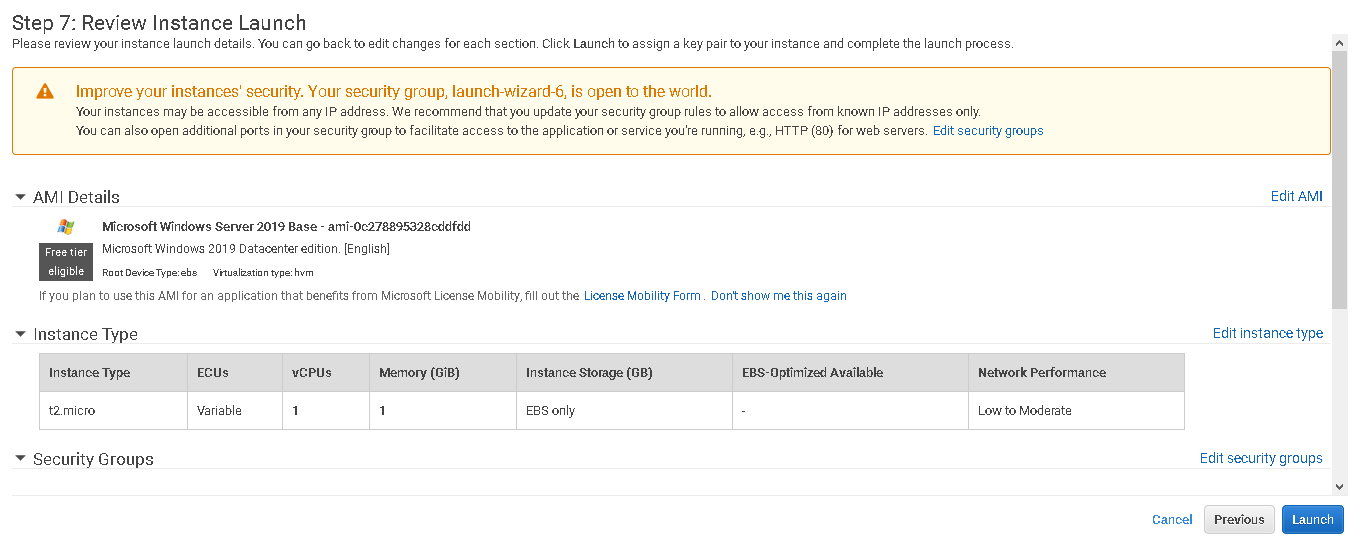
Review your EC2 configuration and click on Launch.
Click on Launch and select an existing key pair or create a new key pair to connect with the EC2 instance. You should save this key pair in a secure and safe location.
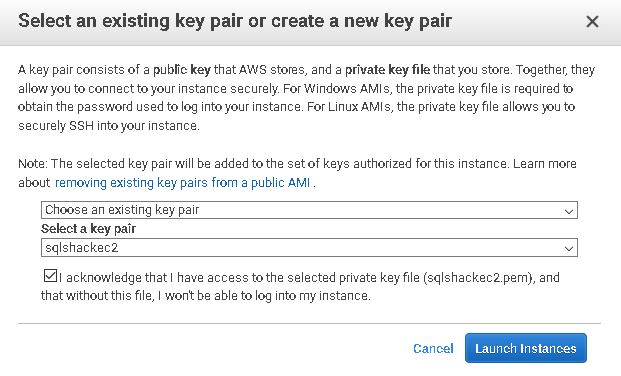
Click on Launch instances. It creates an EC2 instance and joins it in the active directory domain we created earlier.
EC2 instance status should be available along with 22 status checks completed.
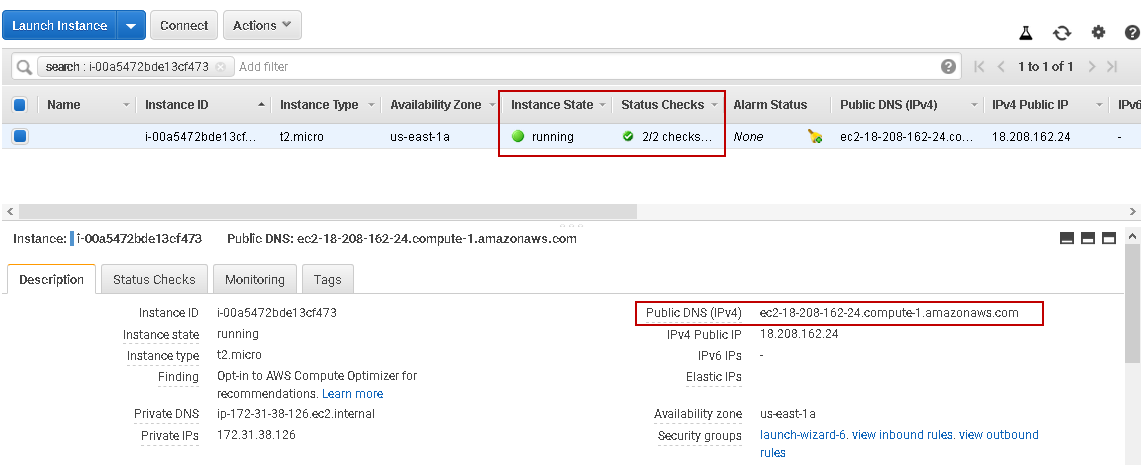
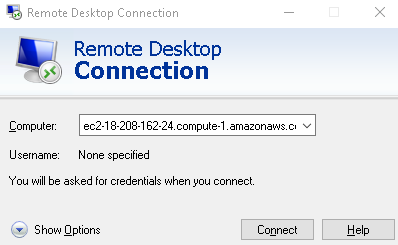
Note-down the public DNS(IP4). Go to Run (shortcut key Windows + R) and type mstsc. It launches the Remote Desktop Connection window. Specify the public DNS of EC2 on the computer, as shown below.
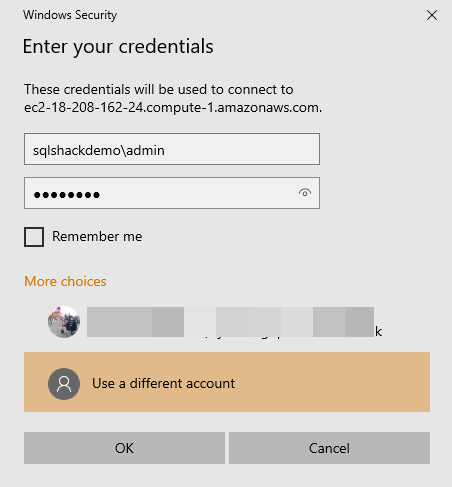
Click on Connect and specify the credentials. We need to use the following credentials to connect with EC2 instance.
- User: sqlshackdemo\admin ( use the domain from the AWS managed directory and the admin account we created earlier)
-
Password: Enter a password for the admin account
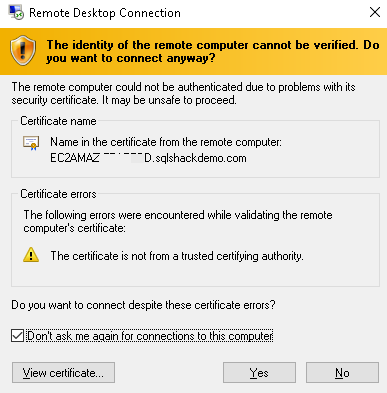
Click on Yes to accept the connection for this computer.
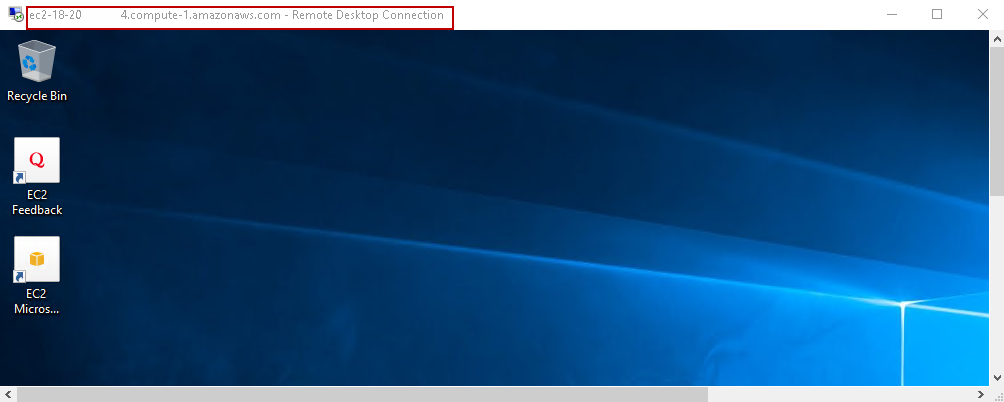
It connects to the AWS EC2 instance with the [sqlshackdemo] domain that we created using the AWS managed AD service shown below.
Installing the Active Directory Administration Tools
We require Active Directory administration tools to create users, groups in the [sqlshackdemo] active directory.
Launch Server Manager in the EC2 instance. In the server manager, navigate to Manage -> Add roles and features wizard.
You get the following wizard with a brief introduction. We can instance Windows roles, services, and features using this wizard.

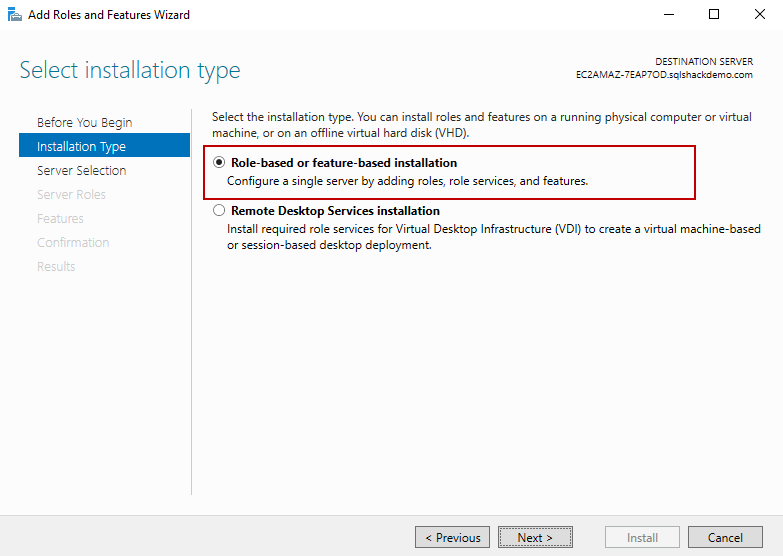
Click on Next. We need to select Role-based or feature-based installation.
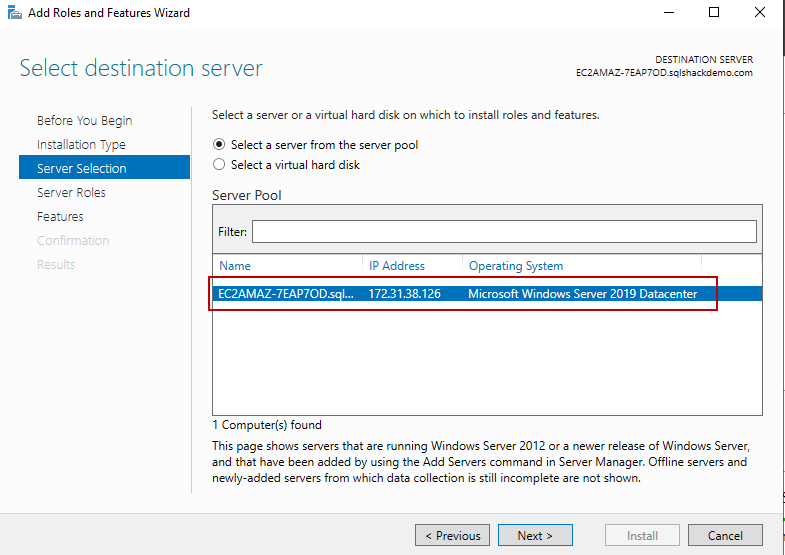
We do not need any change in the next screen. It automatically shows the EC2 instance in the server.
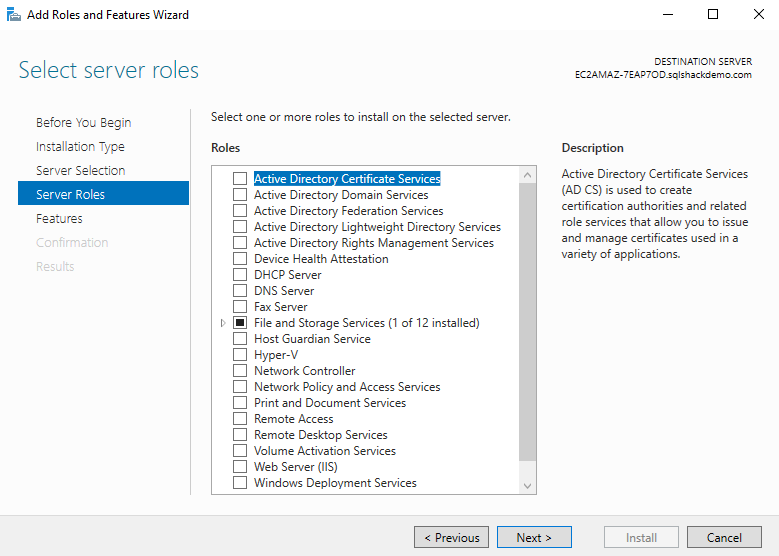
Skip the server roles and move to the next page for feature selection.
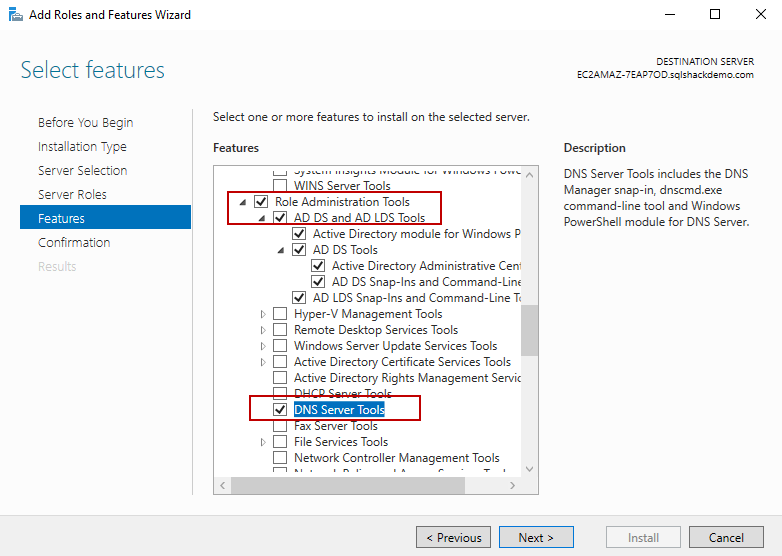
In the feature selection, select the following.
- AD DS and AD LDS Tools under the Remote Server Administration Tools: It provides active directory services along with command-line tools to manage AD
DNS Server tools: It includes DNS command-line tools and snap-ins
On the next page, confirm the feature we wish to install. Click on Install to confirm and begin installations.
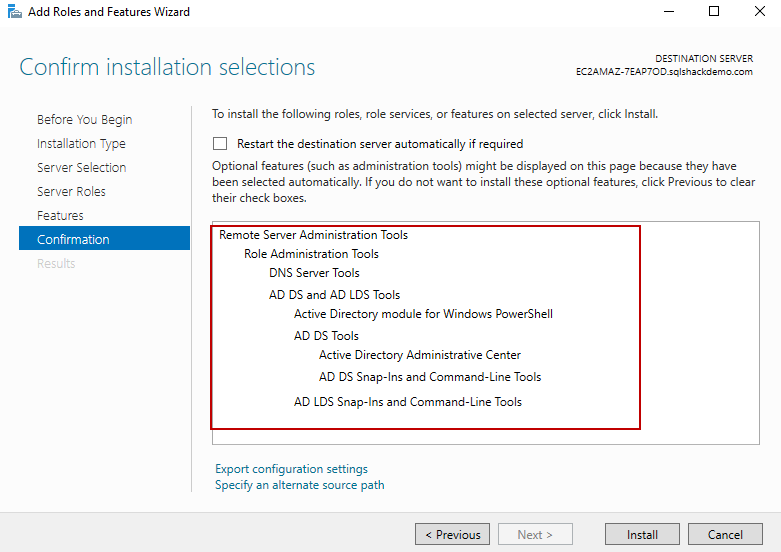
You get the following screen once all features are enabled.

Conclusion
In this article, we learned to create the AWS managed active directory. We further created an AWS EC2 instance in the custom domain [sqlshackdemo]. I plan to cover the below topics in my next article, Advanced Windows Authentication configurations in AWS RDS SQL Server. So stay tuned.
- Create active directory users and groups
- Connect EC2 server with the active directory users
- Configured an AWS RDS SQL Server for Windows authentication
- Connect RDS using windows authentication

I am the author of the book "DP-300 Administering Relational Database on Microsoft Azure". I published more than 650 technical articles on MSSQLTips, SQLShack, Quest, CodingSight, and SeveralNines.
I am the creator of one of the biggest free online collections of articles on a single topic, with his 50-part series on SQL Server Always On Availability Groups.
Based on my contribution to the SQL Server community, I have been recognized as the prestigious Best Author of the Year continuously in 2019, 2020, and 2021 (2nd Rank) at SQLShack and the MSSQLTIPS champions award in 2020.
Personal Blog: https://www.dbblogger.com
I am always interested in new challenges so if you need consulting help, reach me at rajendra.gupta16@gmail.com
View all posts by Rajendra Gupta
- Understanding PostgreSQL SUBSTRING function - September 21, 2024
- How to install PostgreSQL on Ubuntu - July 13, 2023
- How to use the CROSSTAB function in PostgreSQL - February 17, 2023